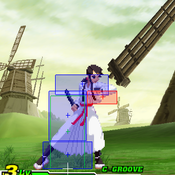
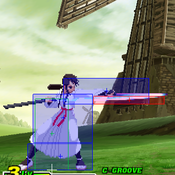
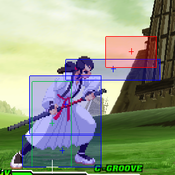
m (→Run Strategies) |
JtheSaltyy (talk | contribs) No edit summary |
||
| (209 intermediate revisions by 14 users not shown) | |||
| Line 1: | Line 1: | ||
= Introduction = | == Introduction == | ||
{{CvS2 Character Subnav|char=Hibiki|short=Hibiki}} | |||
<div> | |||
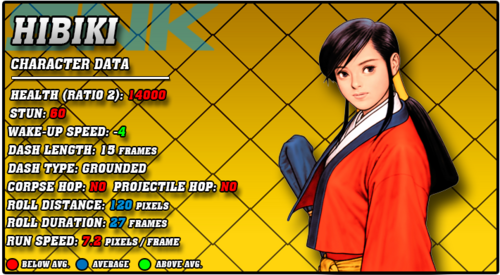
[[File:CVS2_Hibiki_Data.png|right|500px]] | |||
== Story == | |||
'''Hibiki Takane''' (Japanese: 高嶺響, ''Takane Hibiki'') is a character from SNK's The Last Blade fighting game series, first appearing in the 1998 release ''The Last Blade 2''. | |||
A young girl with a calm and shy personality, Hibiki is thrust into a quest for vengeance. Her father, Genzou Takane, was a retired swordsmith. One day, an evil silver-haired man compelled Genzou to fashion a sword against his will. After completing the task, Genzou fell gravely ill, telling Hibiki on his deathbed that this was the silver-haired man's fault. In his last words to his daughter, Genzou said that while he "cannot approve of such actions," Hibiki should "go find that man and the sword. The thing that I saw, what I felt...even you must understand." Hibiki reluctantly heeded her father's final words, packing her sword ''Kodama'' and leaving the family home. | |||
Hibiki uses the Musō Shinden-ryū branch of the Iaido fighting style. Standing with ''Kodama'' sheathed at all times, Hibiki draws it with quick distance slashes, running attacks, and counter-attack techniques. Though a young girl, Hibiki does not shy away from violence when necessary, even going as far as blaming defeated opponents for their own deaths. Despite this, she still has a strong sense of justice, having no qualms of vanquishing evil, particularly in the pursuit of seeking vengeance for her father. | |||
Before her appearance in Capcom vs. SNK 2, Hibiki appeared in two games from The Last Blade series: Her debut in ''The Last Blade 2'' (1998) and ''The Last Blade: Beyond the Destiny'' (2000) for Neo Geo Pocket Color. Both games have since been rereleased to modern consoles. Perhaps as a result of her popularity from CvS2, in 2021 SNK made Hibiki a DLC crossover character for ''Samurai Shodown'' (2019), with her representing The Last Blade series as a whole. She has been thought as a female equivalent of Ukyo Tachiban from the Samurai Shodown series, sharing a similar demeanor and sword-drawing techniques. | |||
== Gameplay == | |||
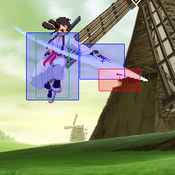
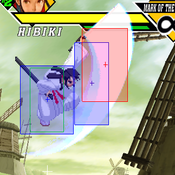
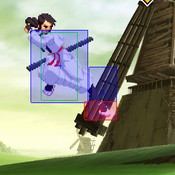
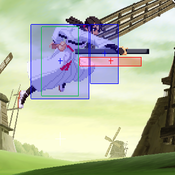
With her far-reaching pokes and special attacks, plus extremely damaging super combo potential, Hibiki is high-tier character. She is primarily a zoner that is at her best at a distance from her opponents, away from the effective range of the majority of the rest of the cast. Coupled with her movement options to help control space, her very strong anti-air attacks, and the threat of her counter, approaching Hibiki can be very difficult. Once zoning dominance has been established, Hibiki can use her quickness and deceptive special moves to approach and attack up close with her BnB combos or confirming into super moves. | |||
== | Hibiki performs very well against much of the top-tier in CvS2. However, her playstyle requires at least some proximity to inflict big damage to opponents. Due to her limited options in that range she will quickly run out of options in prolonged or forced close combat. She can escape situations well with roll cancel Running Slash, which will cross through opponents and quickly go under jumping ones. Without RCs in K-Groove, which is a very popular groove for her, practical escape paths become more risky. | ||
Even so, some of the advantages Hibiki has over the rest of the cast are strong. Hibiki has a special dodge (available to her in all grooves; her dodge has different properties than the S-Groove subsystem Dodge) that also has unique movement options, setting up guaranteed dead body crossups and instant air attacks in the corners. Her jumping HK comes out directly below her and Running Slash attacks can cross up on wakeup, creating ambiguous 50/50 situations. Her mid/upper counter stance ''can juggle into a super'' for free damage. Her primary super combo, a "rave" style super, can be stopped to add extra damage to the end of the rave on hit, or to create mixup options on block. | |||
And she has the coolest super in the game. So there's that. | |||
=== Groove Selection === | |||
'''Best - K/A:''' K-Groove and A-Groove are the two most powerful Grooves in the game, and Hibiki has strong options in both, but sacrifices something in exchange. K-Hibiki is the most popular, as Rage is very beneficial on a character who relies on pokes for damage so much. A solid hit from a Raged K-Hibiki can lead to a Rave Super combo, which does massive damage, and makes her up close game much scarier as well. You lose access to rolls however, which is a big loss for Hibiki who relies on roll cancel for reversal purposes. A-Hibiki gets her highest possible damage with her strong Custom Combo, and access to rolls for RC Running Slash or RC Distance Slash. You lose out on the mobility of K-Groove however, and on the powerful buffs Rage gives her. | |||
'''Useful - N/C/P:''' N-Hibiki gets the mobility of K-Hibiki plus the rolls of A-Hibiki, but has a seriously lower damage ceiling, making her punish game a lot worse. N-Hibiki plays a lot more of a fundamental zoning game than the other two, since her punishes just don't hurt as much. C-Hibiki gets consistent access to her supers for punishes, and a decent level 2 combo, but still doesn't reach the damage of K or A-Groove, and since C-Groove has many similar tools to A-Groove, it just becomes a bit irrelevant to A-Hibiki. P-Hibiki gets surprisingly consistent punishes from parry, and parries in general can be beneficial for a zoner who wants to punish approaches. She never really gets a super to make her damage scary, however. | |||
'''Worst - S:''' S-Hibiki gets very little in comparison. Charging isn't too big of an issue, but it leaves her unsafe and vulnerable in neutral, where she could make much more headway by spamming 5MP or 2MP, or waiting for a chance to anti-air. This makes her much more weak to rushdown as a whole, and while her defense isn't terrible, you would rather keep them under your control. S-Grooves dodge is very redundant, as Hibiki's own dodge special is a much better version of it. Infinite level 1's makes her punishes hurt a bit more, but is otherwise pretty useless, and the lack of any other benefits that can't be found in other Grooves means there's not much reason to play S-Hibiki. | |||
{ | {{StrengthsAndWeaknesses | ||
| | |intro= | ||
--------------------------- | |||
'''Hibiki''' is a powerful zoner with amazing normals and long reach with her sword. She also has stellar up close mixups and high damage, and great defense with her dodge and RC Distance Slashes. She just can't have it all at once. Hibiki's best Grooves are '''K-Groove and A-Groove'''. | |||
= | '''Difficulty''': Hard<br>'''Tier''': A+ | ||
|pros= | |||
* '''Normals:''' Great normals and specials for zoning | |||
* '''Anti-Airs:''' Solid and simple anti-airs | |||
* '''Counters:''' Powerful counters | |||
* '''Supers:''' Damaging and versatile supers | |||
* '''Mixup:''' Solid mix, with a crossup dash and an ambiguous crossup normal | |||
* '''Unique Dodge:''' Dodge special with two movement options for dead body hops or retreats | |||
|cons= | |||
* '''Can't Zone and Mix at the Same Time:''' Has to be close for her best mixups, but struggles to maintain close range | |||
* '''Negative on Hit:''' Her main BNB combo ender, Distance Slashes, can be negative on hit, requiring her to know the matchup and whether they can punish it or not, as well as requiring special timing to make it safe in certain match ups. | |||
* '''Not Groove Friendly:''' Needs Rolls to RC her specials for a real reversal, but her most popular Groove is K-Groove, meaning she usually has to rely on supers which are riskier and more expensive | |||
* '''Just Defend/Parry:''' Many of Hibiki's normal to include anti-airs can be very easy to OS JD or Parry, Distance Slash becomes extremely negative even on JD allowing most to run up and get a combo or knock down | |||
}} | |||
{| | === Players to Watch === | ||
{| class="wikitable" | |||
|- | |- | ||
! Name !! Country !! Groove !! Accounts !! Notes | |||
|- | |- | ||
|<br / | | Rai || Japan || K-Groove || Twitter: @raikapibara || Plays Hibiki aggressively and has a really strong sense of punishes after a JD. <br> [https://youtu.be/t0ksALEdnD0?t=222 Sample Match] | ||
|- | |- | ||
| < | | Kitsune || Japan || K-Groove || Twitter: @cvs2fox || Fundamental heavy, also has great defense and can shoo his opponent away with consistency. <br> [https://youtu.be/f8jIFdEusAE?t=159 Sample Match] | ||
|- | |- | ||
| | | P-Rugal || Japan || P-Groove || Twitter: @oyasuminecalli || Uses his great parry game to maximize P-Hibiki's damage through her quick punishes. <br> [https://youtu.be/UVOlk6UvCcA?t=2457 Sample Match] | ||
|- | |- | ||
|<br/ | | OTK || Japan || K-Groove || Twitter: @Den_ta9 || Oldschool K-Groover. Dominant with all three of his characters, but his Hibiki dominated through JDs and swift punishes. <br> [https://youtu.be/MZh3bHmHtbM Sample Match] | ||
|- | |- | ||
|} | |} | ||
<br><br> | |||
== Moves List == | |||
== System & Subsystem Mechanics == | |||
=== Dashes & Run === | |||
=== Roll === | |||
=== Dodge & Dodge Attacks === | |||
=== Guard Cancel Counter Attack & Movement === | |||
== Throws == | |||
== Far Standing Normals == | |||
<span class="invisible-header">5LP</span> | |||
{{MoveData | |||
| name = Stand Jab | |||
| subtitle = | |||
| input = 5LP / far st.LP<br>{{Icon-Capcom|LP}} | |||
| image = CVS2_Hibiki_5lp.png | |||
| caption = Light Punch | |||
| linkname = 5LP | |||
| data = | |||
{{AttackData-CvS2 | |||
| version = | |||
| subtitle = | |||
| damage = 200 | |||
| stun = _ | |||
| cancel = RF/SP/SU | |||
| guard = H/L | |||
| parry = H/L | |||
| startup = 3 | |||
| active = 4 | |||
| recovery = 8 | |||
| total = 15 | |||
| advHit = +5 | |||
| advBlock = +5 | |||
| invul = | |||
| description = | |||
A quick jab with the elbow. | |||
* Useless as an attack from range, but a very handy check button against potential incoming ranged attacks with leading hurtboxes, such as Blanka Balls. | |||
}} | |||
}} | |||
<span class="invisible-header">5MP</span> | |||
{{MoveData | |||
| name = Stand Strong | |||
| subtitle = | |||
| input = 5MP / far st.MP<br>{{Icon-Capcom|MP}} | |||
| image = CVS2_Hibiki_5mp.png | |||
| caption = Medium Punch | |||
| linkname = 5MP | |||
| data = | |||
{{AttackData-CvS2 | |||
| version = | |||
| subtitle = | |||
| damage = 800 | |||
| stun = _ | |||
| cancel = SU | |||
| guard = H/L | |||
| parry = H | |||
| startup = 6 | |||
| active = 4 | |||
| recovery = 17 | |||
| total = 27 | |||
| advHit = +3 | |||
| advBlock = +3 | |||
| invul = | |||
| description = | |||
Hibiki draws her sword straight out to arm's length. | |||
* Hibiki's most important normal move in the neutral game. It's an incredibly important spacing tool that outreaches many high/top tier character normals, discouraging them from walking, dashing, or small jumping into close range. | |||
* The ideal distance to use this button is as max distance, or just a bit outside of it—as any attacking characters would have to move forward into it—as your hurtbox will be protected by its hitbox. Thankfully the hitbox basically lines up perfectly with the sprite animation, so what you see is what they get hit with. | |||
}} | |||
}} | |||
<span class="invisible-header">5HP</span> | |||
{{MoveData | |||
| name = Stand Fierce | |||
| subtitle = | |||
| input = 5HP / far st.HP<br>{{Icon-Capcom|HP}} | |||
| image = CVS2_Hibiki_5hp.png | |||
| caption = Heavy Punch | |||
| linkname = 5HP | |||
| data = | |||
{{AttackData-CvS2 | |||
| version = | |||
| subtitle = | |||
| damage = 1000 | |||
| stun = _ | |||
| cancel = X | |||
| guard = H/L | |||
| parry = H | |||
| startup = 7 | |||
| active = 4 | |||
| recovery = 41 | |||
| total = 52 | |||
| advHit = -15 | |||
| advBlock = -15 | |||
| invul = | |||
| description = | |||
Hibiki takes a large, arcing swipe in the air in front of and above her head. HK is your de facto anti-air button, although whether you use it standing far, standing close, or crouching will depending on the trajectory of the incoming character. | |||
* Far HK can be a risky anti-air because it relies on the opponent coming in from distance, generally a foolish idea against Hibiki (unless they are in K-Groove and are looking to Just Defend in the air). If they try to anticipate a Distance Slash and jump over nothing, they will generally be in the sweet spot for this button. | |||
* Consider using crouching HK instead, if applicable. It gives you more time to react in the above scenario, and you will avoid close standing HK coming out instead which will make the opponent land much closer to Hibiki. | |||
* Never use this button against a grounded opponent. It will whiff from range! | |||
}} | |||
}} | |||
<span class="invisible-header">5LK</span> | |||
{{MoveData | |||
| name = Stand Short | |||
| subtitle = | |||
| input = 5LK / far st.LK<br>{{Icon-Capcom|LK}} | |||
| image = CVS2_Hibiki_5lk.png | |||
| caption = Light Kick | |||
| linkname = 5LK | |||
| data = | |||
{{AttackData-CvS2 | |||
| version = | |||
| subtitle = | |||
| damage = 300 | |||
| stun = _ | |||
| cancel = SP/SU | |||
| guard = H/L | |||
| parry = H/L | |||
| startup = 5 | |||
| active = 8 | |||
| recovery = 7 | |||
| total = 20 | |||
| advHit = +2 | |||
| advBlock = +2 | |||
| invul = | |||
| description = | |||
A low kick that looks more like a quick step. | |||
* Useless as an attack from range, but a very handy check button against potential incoming low ranged attacks with leading hurtboxes, such as Cannon Spikes. | |||
}} | |||
}} | |||
<span class="invisible-header">5MK</span> | |||
{{MoveData | |||
| name = Stand Forward | |||
| subtitle = | |||
| input = 5MK / far st.MK<br>{{Icon-Capcom|MK}} | |||
| image = CVS2_Hibiki_5mk.png | |||
| caption = Medium Kick | |||
| linkname = 5MK | |||
| data = | |||
{{AttackData-CvS2 | |||
| version = | |||
| subtitle = | |||
| damage = 700 | |||
| stun = _ | |||
| cancel = X | |||
| guard = H/L | |||
| parry = H | |||
| startup = 13 | |||
| active = 3 | |||
| recovery = 28 | |||
| total = 44 | |||
| advHit = Down | |||
| advBlock = -8 | |||
| invul = | |||
| description = | |||
Hibiki pivots on her forward foot, spins around, and steps forward to attack with the butt of her scabbard. | |||
* This is a very useful ranged attack, in spite of its slow windup, causing a knockdown on hit. The distance this covers is surprisingly good, and is safe on block given that Hibiki retreats to her original position away from the opponent. | |||
* The knockback this causes is also good, pushing opponents towards (or into) the corner and giving Hibiki options on how to close (or not) the extra distance created. | |||
* While the startup might take some time, the distance covered while doing so makes this move relatively fast and can be used to Hibiki's advantage. If an opponent is looking to jump over a potential Distance/Running Slash attack and is preparing to act on first movement, this attack will often hit them out of their jump attempt. | |||
}} | |||
}} | |||
<span class="invisible-header">5HK</span> | |||
{{MoveData | |||
| name = Stand Roundhouse | |||
| subtitle = | |||
| input = 5HK / far st.HK<br>{{Icon-Capcom|HK}} | |||
| image = CVS2_Hibiki_5hk.png | |||
| caption = Heavy Kick | |||
| linkname = 5HK | |||
| data = | |||
{{AttackData-CvS2 | |||
| version = | |||
| subtitle = {{Icon-Capcom|HK}} | |||
| damage = 1100 | |||
| stun = _ | |||
| cancel = X | |||
| guard = H/L | |||
| parry = H | |||
| startup = 12 | |||
| active = 4 | |||
| recovery = 40 | |||
| total = 56 | |||
| advHit = -8 | |||
| advBlock = -8 | |||
| invul = | |||
| description = | |||
Hibiki takes a big swing of her sword directly in front of her. | |||
* This is a risky move given that Hibiki must be closer to the opponent to land it, and whiffing it will result in a big punish. At the closest "far" range, it can be unsafe on block. | |||
* For a quick punish at this range, combo crouching LP into Distance Slash instead. | |||
}} | |||
}} | |||
'''close s. | == Close Standing Normals == | ||
<span class="invisible-header">cl5LP</span> | |||
{{MoveData | |||
| name = Close Stand Jab | |||
| subtitle = | |||
| input = cl5LP / cl.st.LP<br>Close {{Icon-Capcom|LP}} | |||
| image = CVS2_Hibiki_CL_5lp.png | |||
| caption = Close Light Punch | |||
| linkname = cl5LP | |||
| data = | |||
{{AttackData-CvS2 | |||
| version = | |||
| subtitle = | |||
| damage = 200 | |||
| stun = _ | |||
| cancel = RF/SP/SU | |||
| guard = H/L | |||
| parry = H/L | |||
| startup = 3 | |||
| active = 4 | |||
| recovery = 8 | |||
| total = 15 | |||
| advHit = +5 | |||
| advBlock = +5 | |||
| invul = | |||
| description = | |||
A quick jab with the elbow. One of your two primary point-blank quick hitters and BnB combo starters, the other being crouching LK. | |||
* Though it has more frame advantage (+2) over crouching LK, it doesn't net you much usefulness outside of general pressure. Still, close LP and crouching LK are generally used interchangeably (and can cancel into each other). | |||
}} | |||
}} | |||
<span class="invisible-header">cl5MP</span> | |||
{{MoveData | |||
| name = Close Stand Strong | |||
| subtitle = | |||
| input = cl5MP / cl.st.MP<br>Close {{Icon-Capcom|MP}} | |||
| image = CVS2_Hibiki_CL_5mp.png | |||
| caption = Medium Punch | |||
| linkname = cl5MP | |||
| data = | |||
{{AttackData-CvS2 | |||
| version = | |||
| subtitle = | |||
| damage = 800 | |||
| stun = _ | |||
| cancel = SP/SU | |||
| guard = H/L | |||
| parry = H | |||
| startup = 4 | |||
| active = 4 | |||
| recovery = 18 | |||
| total = 26 | |||
| advHit = +2 | |||
| advBlock = +2 | |||
| invul = | |||
| description = | |||
Hibiki draws her sword at the hip for a quick slash. | |||
* Primarily used as an opener for a point-blank punish combo into Running Slashes when you have more time than for a BnB, but not enough time to wind up for a full punish off of standing close HK. | |||
* May be useful for frame trap setups if blocked into standing LP or crouching LK, but be quick! | |||
}} | |||
}} | |||
<span class="invisible-header">cl5HP</span> | |||
{{MoveData | |||
| name = Close Stand Fierce | |||
| subtitle = | |||
| input = cl5HP / cl.st.HP<br>Close {{Icon-Capcom|HP}} | |||
| image = CVS2_Hibiki_CL_5hp_1.png | |||
| caption = Heavy Punch | |||
| linkname = cl5HP | |||
| data = | |||
{{AttackData-CvS2 | |||
| version = | |||
| subtitle = | |||
| damage = 1000 | |||
| stun = _ | |||
| cancel = SP*/SU | |||
| guard = H/L | |||
| parry = H | |||
| startup = 3 | |||
| active = 8 | |||
| recovery = 41 | |||
| total = 52 | |||
| advHit = -17 | |||
| advBlock = -17 | |||
| invul = | |||
| description = | |||
Hibiki draws her sword straight up in front of her and over her head. One of the most powerful anti-air normal attacks in CvS2, coming out in only three frames and covering a HUGE area in front of and above Hibiki's hurtbox. It also has a special property that allows Hibiki to continue the attack with a second downward strike. (See the Command Normals section for more info.) | |||
* With few character exceptions, this move (and her other HP anti-airs) will completely shut down any standard jump-in attempts, especially versus C, S, and N-Groove players. | |||
* It is easy to be over-reliant on this button. Watch out for jumping A-Groove activations, K-Groove Just Defends, P-Groove parries, and characters with air-to-ground super moves; they can severely punish Hibiki if they execute well or guess right. | |||
* (*)The recovery of close HP is cancellable into the downward slash or a special move, but only in a small window. You can mitigate some of these anti-anti-air tactics, particularly the K air JDs, by cancelling into Beckoning (Running) Slash or Dodge to get out of the situation before you can be punished. The timing is difficult, however. | |||
}} | |||
}} | |||
<span class="invisible-header">cl5LK</span> | |||
{{MoveData | |||
| name = Close Stand Short | |||
| subtitle = | |||
| input = cl5LK / cl.st.LK<br>Close {{Icon-Capcom|LK}} | |||
| image = CVS2_Hibiki_CL_5lk.png | |||
| caption = Light Kick | |||
| linkname = cl5LK | |||
| data = | |||
{{AttackData-CvS2 | |||
| version = | |||
| subtitle = | |||
| damage = 300 | |||
| stun = _ | |||
| cancel = SP/SU | |||
| guard = H/L | |||
| parry = H/L | |||
| startup = 5 | |||
| active = 8 | |||
| recovery = 7 | |||
| total = 20 | |||
| advHit = +2 | |||
| advBlock = +2 | |||
| invul = | |||
| description = | |||
A low kick that looks more like a quick step. | |||
* Interesting in that it's a standing attack that hits low (but see close HK), yet it's generally useless at close range. You will occasionally do this move accidentally as you confirm/buffer into a rave super off of crouching LKs. | |||
* Because it's a relatively rare move, consider using it in blockstring pressure to set up throws. | |||
}} | |||
}} | |||
<span class="invisible-header">cl5MK</span> | |||
{{MoveData | |||
| name = Close Stand Forward | |||
| subtitle = | |||
| input = cl5MK / cl.st.MK<br>Close {{Icon-Capcom|MK}} | |||
| image = CVS2_Hibiki_CL_5mk.png | |||
| caption = Medium Kick | |||
| linkname = cl5MK | |||
| data = | |||
{{AttackData-CvS2 | |||
| version = | |||
| subtitle = | |||
| damage = 800 | |||
| stun = _ | |||
| cancel = X | |||
| guard = H/L | |||
| parry = H | |||
| startup = 5 | |||
| active = 6 | |||
| recovery = 11 | |||
| total = 22 | |||
| advHit = +6 | |||
| advBlock = +6 | |||
| invul = | |||
| description = | |||
Hibiki shoves her scabbard into the opponent's gut. Her tried and true meaty attack on the opponent's wakeup. | |||
* On hit it can be linked into crouching LKs for Hibiki's BnB (safer) or close MP for a bigger punish. | |||
* On block, it sets up frame trap possibilities into crouching LKs for more pressure, or even close HK if you want to go for something bigger. | |||
}} | |||
}} | |||
<span class="invisible-header">cl5HK</span> | |||
{{MoveData | |||
| name = Close Stand Roundhouse | |||
| subtitle = | |||
| input = cl5HK / cl.st.HK<br>Close {{Icon-Capcom|HK}} | |||
| image = CVS2_Hibiki_CL_5hk.png | |||
| caption = Heavy Kick | |||
| linkname = cl5HK | |||
| data = | |||
{{AttackData-CvS2 | |||
| version = | |||
| subtitle = Close{{Icon-Capcom|HK}} | |||
| damage = 1300 | |||
| stun = _ | |||
| cancel = SP/SU | |||
| guard = L | |||
| parry = L | |||
| startup = 8 | |||
| active = 6 | |||
| recovery = 27 | |||
| total = 41 | |||
| advHit = -9 | |||
| advBlock = -9 | |||
| invul = | |||
| description = | |||
Hibiki draws at the hip, but this time thrusts the sword down at an angle toward the opponent's feet. The main starter for Hibiki's big punishes and can be a useful tool as a part of Hibiki's mixup game. | |||
* Have all day to punish someone? Wind up with this and cancel into Running Slashes or the super of your choice. | |||
* Did they block your rave super? Mix the low-hitting close HK with the similar-looking overhead special move for a quasi 50/50 in the rave chain. (See Super Moves for more info.) | |||
}} | |||
}} | |||
== Crouching Normals == | |||
<span class="invisible-header">2LP</span> | |||
{{MoveData | |||
| name = Crouching Jab | |||
| subtitle = | |||
| input = 2LP / cr.LP<br>{{Motion|2}}{{Icon-Capcom|LP}} | |||
| image = CvS2_Hibiki_2lp.png | |||
| caption = Crouching Light Punch | |||
| linkname = 2LP | |||
| data = | |||
{{AttackData-CvS2 | |||
| version = | |||
| subtitle = | |||
| damage = 400 | |||
| stun = _ | |||
| cancel = SP/SU | |||
| guard = H/L | |||
| parry = H/L | |||
| startup = 4 | |||
| active = 5 | |||
| recovery = 12 | |||
| total = 21 | |||
| advHit = +3 | |||
| advBlock = +3 | |||
| invul = | |||
| description = | |||
Hibiki quickly draws her sword at arm's length while kneeling. The quickest and safest poke from distance in Hibiki's arsenal. | |||
* You will often be cancelling this move into Distance Slash, on hit and block. Raw Distance Slashes are riskier, so confirming into them with this poke is basically free damage and pressure. | |||
* Standing MP reaches a bit farther and will catch out advancing and jumping characters more often, so don't over-rely on crouching LP when working pokes into neutral. | |||
}} | |||
}} | |||
<span class="invisible-header">2MP</span> | |||
{{MoveData | |||
| name = Crouching Strong | |||
| subtitle = | |||
| input = 2MP / cr.MP<br>{{Motion|2}}{{Icon-Capcom|MP}} | |||
| image = CvS2_Hibiki_2mp.png | |||
| caption = Crouching Medium Punch | |||
| linkname = 2MP | |||
| data = | |||
{{AttackData-CvS2 | |||
| version = | |||
| subtitle = | |||
| damage = 700 | |||
| stun = _ | |||
| cancel = SU | |||
| guard = H/L | |||
| parry = H/L | |||
| startup = 5 | |||
| active = 4 | |||
| recovery = 19 | |||
| total = 28 | |||
| advHit = +1 | |||
| advBlock = +1 | |||
| invul = | |||
| description = | |||
Hibiki quickly (but not as quickly as crouching LP) draws her sword at arm's length while kneeling. | |||
* This poke has slightly more range than crouching LP (but not as much as standing MP) yet looks basically the same as it, so it is useful to incorporate it into neutral situations beyond crouching LP's max range to help control spacing. | |||
* May be useful as a quick super confirm from distance, but only in that window of extra range; standing MP is better. | |||
}} | |||
}} | |||
<span class="invisible-header">2HP</span> | |||
{{MoveData | |||
| name = Crouching Fierce | |||
| subtitle = | |||
| input = 2HP / cr.HP<br>{{Motion|2}}{{Icon-Capcom|HP}} | |||
| image = CvS2_Hibiki_2hp.png | |||
| caption = Crouching Heavy Punch | |||
| linkname = 2HP | |||
| data = | |||
{{AttackData-CvS2 | |||
| version = | |||
| subtitle = | |||
| damage = 1100 | |||
| stun = _ | |||
| cancel = X | |||
| guard = H/L | |||
| parry = H/L | |||
| startup = 5 | |||
| active = 4 | |||
| recovery = 32 | |||
| total = 41 | |||
| advHit = -6 | |||
| advBlock = -6 | |||
| invul = | |||
| description = | |||
Hibiki draws her sword low from her knees and takes a big upward slash from the ground to above her head. Her second-best anti-air button after close HP. | |||
* The hitbox of this move extends very far from Hibiki, to the point where this is a good button to use in from extreme distances against grounded opponents in the neutral game! | |||
* Most shallow jump-in attacks will be completely neutralized by this anti-air. You might even be able to catch out shallow small jumps if you're quick to react. | |||
* Opponents neutral jumping outside your normal poke range may sometimes stick out a kick to check against ground advances or to build meter; crouching HP will hit them out of the air from VERY far away as they come back down. | |||
}} | |||
}} | |||
<span class="invisible-header">2LK</span> | |||
{{MoveData | |||
| name = Crouching Short | |||
| subtitle = | |||
| input = 2LK / cr.LK<br>{{Motion|2}}{{Icon-Capcom|LK}} | |||
| image = CvS2_Hibiki_2lk.png | |||
| caption = Crouching Light Kick | |||
| linkname = 2LK | |||
| data = | |||
{{AttackData-CvS2 | |||
| version = | |||
| subtitle = | |||
| damage = 200 | |||
| stun = _ | |||
| cancel = RF/SP/SU | |||
| guard = L | |||
| parry = L | |||
| startup = 3 | |||
| active = 4 | |||
| recovery = 10 | |||
| total = 17 | |||
| advHit = +3 | |||
| advBlock = +3 | |||
| invul = | |||
| description = | |||
Hibiki extends her leg and slides out her foot for a quick grounded kick attack. One of your two primary point-blank quick hitters and BnB combo starters, the other being standing LP. | |||
* Because it hits low, you'll be using this more than any other button to start BnB combos and pressure strings after approaching from neutral. | |||
}} | |||
}} | |||
<span class="invisible-header">2MK</span> | |||
{{MoveData | |||
| name = Crouching Forward | |||
| subtitle = | |||
| input = 2MK / cr.MK<br>{{Motion|2}}{{Icon-Capcom|MK}} | |||
| image = CvS2_Hibiki_2mk.png | |||
| caption = Crouching Medium Kick | |||
| linkname = 2MK | |||
| data = | |||
{{AttackData-CvS2 | |||
| version = | |||
| subtitle = | |||
| damage = 700 | |||
| stun = _ | |||
| cancel = SU | |||
| guard = L | |||
| parry = L | |||
| startup = 5 | |||
| active = 6 | |||
| recovery = 20 | |||
| total = 31 | |||
| advHit = -6 | |||
| advBlock = -6 | |||
| invul = | |||
| description = | |||
Hibiki takes her scabbard and drives it into the ground in front of her. | |||
* Not much usefulness during neutral or as a poke. | |||
* Given the location of its hitbox, it can be useful as a check against anticipated advancing low attacks, particularly a Cannon Drill at the beginning of a round. | |||
}} | |||
}} | |||
<span class="invisible-header">2HK</span> | |||
{{MoveData | |||
| name = Crouching Roundhouse | |||
| subtitle = | |||
| input = 2HK / cr.HK<br>{{Motion|d}}{{Icon-Capcom|HK}} | |||
| image = CvS2_Hibiki_2hk.png | |||
| caption = Crouching Heavy Kick | |||
| linkname = 2HK | |||
| data = | |||
{{AttackData-CvS2 | |||
| version = | |||
| subtitle = | |||
| damage = 1100 | |||
| stun = _ | |||
| cancel = X | |||
| guard = L | |||
| parry = L | |||
| startup = 8 | |||
| active = 4 | |||
| recovery = 34 | |||
| total = 46 | |||
| advHit = Down | |||
| advBlock = -8 | |||
| invul = | |||
| description = | |||
Hibiki sweeps her sword across the ground. | |||
* Poor range for a sweep, especially considering the effectiveness of Hibiki's other attacks from distance. | |||
* Best used in the corners to guarantee a knockdown and set up Hibiki's corner options. | |||
* For other sweep check situations, use crouching HP instead. It doesn't knockdown, but the range is far better and Hibiki has other tools for inducing knockdowns anyway. | |||
}} | |||
}} | |||
'' | == Air Normals == | ||
<span class="invisible-header">8LP</span> | |||
{{MoveData | |||
| name = Jumping Jab | |||
| input = 8LP | |||
| subtitle = {{Motion|ub}},{{Motion|u}},or {{Motion|uf}}+{{Icon-Capcom|LP}} | |||
| image = CvS2_Hibiki_8lp.png | |||
| caption = Jumping Light Punch | |||
| linkname = 8LP | |||
| data = | |||
{{AttackData-CvS2 | |||
| version = | |||
| subtitle = | |||
| damage = 500 | |||
| stun = _ | |||
| cancel = | |||
| guard = H | |||
| parry = H | |||
| startup = 3 | |||
| active = 16 | |||
| recovery = | |||
| total = | |||
| advHit = | |||
| advBlock = | |||
| invul = | |||
| description = | |||
Hibiki draws her sword and swings downward. | |||
* Only useful as a jump-in attack from a distance, given how long it stays out. Jumping MP is otherwise superior. | |||
}} | |||
}} | |||
<span class="invisible-header">8MP</span> | |||
{{MoveData | |||
| name = Jumping Strong | |||
| input = 8MP | |||
| subtitle = {{Motion|ub}},{{Motion|u}},or {{Motion|uf}}+{{Icon-Capcom|MP}} | |||
| image = CvS2_Hibiki_8mp.png | |||
| caption = Medium Punch | |||
| linkname = 8MP | |||
| data = | |||
{{AttackData-CvS2 | |||
| version = | |||
| subtitle = {{Motion|ub}},{{Motion|u}},or {{Motion|uf}}+{{Icon-Capcom|MP}} | |||
| damage = 700 | |||
| stun = _ | |||
| cancel = | |||
| guard = H | |||
| parry = H | |||
| startup = 3 | |||
| active = 8 | |||
| recovery = | |||
| total = | |||
| advHit = | |||
| advBlock = | |||
| invul = | |||
| description = | |||
Hibiki draws her sword and swings further downward. | |||
* Serves as a much better jumping downward poke than jumping LP because of the larger and safer hitbox. | |||
}} | |||
}} | |||
<span class="invisible-header">8HP</span> | |||
{{MoveData | |||
| name = Jumping Fierce | |||
| input = 8HP | |||
| subtitle = {{Motion|ub}},{{Motion|u}},or {{Motion|uf}}+{{Icon-Capcom|HP}} | |||
| image = CvS2_Hibiki_8hp.png | |||
| caption = Heavy Punch | |||
| linkname = 8HP | |||
| data = | |||
{{AttackData-CvS2 | |||
| version = | |||
| subtitle = | |||
| damage = 1200 | |||
| stun = _ | |||
| cancel = | |||
| guard = H | |||
| parry = H | |||
| startup = 5 | |||
| active = 4 | |||
| recovery = | |||
| total = | |||
| advHit = | |||
| advBlock = | |||
| invul = | |||
| description = | |||
Hibiki draws her sword from down low and takes a big swing upwards in front of her. | |||
* Yet another useful anti-air tool in Hibiki's arsenal, this time for catching jump-ins air-to-air. Might be a little slow to come out, but the giant hitbox outside of Hibiki's hurtbox means you can be a bit tardy with this and still get a clean hit. | |||
* This is an excellent button to use with an Essential Crunch hopback to create more space to a jumping opponent and fill that space with a giant sword swipe. (See Special Moves for more info.) | |||
}} | |||
}} | |||
<span class="invisible-header">8LK</span> | |||
{{MoveData | |||
| name = Jumping Short | |||
| input = 8LK | |||
| subtitle = {{Motion|ub}},{{Motion|u}},or {{Motion|uf}}+{{Icon-Capcom|LK}} | |||
| image = CvS2_Hibiki_8lk.png | |||
| caption = Light Kick | |||
| linkname = 8LK | |||
| data = | |||
{{AttackData-CvS2 | |||
| version = | |||
| subtitle = | |||
| damage = 400 | |||
| stun = _ | |||
| cancel = | |||
| guard = H | |||
| parry = H | |||
| startup = 4 | |||
| active = 18 | |||
| recovery = | |||
| total = | |||
| advHit = | |||
| advBlock = | |||
| invul = | |||
| description = | |||
Hibiki angles the tip of her foot down at an angle. | |||
* This is a surprisingly good jump-in attack to get you close, ignoring DPs and anti-air supers. | |||
* The kick stays out for a very long time, letting you protect yourself with a hitbox relatively early in the landing phase of the jump. However, if you hit taller opponents too early, they may recover before you land. Prepare to tech a throw if this happens. | |||
}} | |||
}} | |||
<span class="invisible-header">8MK</span> | |||
{{MoveData | |||
| name = Jumping Forward | |||
| input = 8MK | |||
| subtitle = {{Motion|ub}},{{Motion|u}},or {{Motion|uf}}+{{Icon-Capcom|MK}} | |||
| image = CvS2_Hibiki_8mk.png | |||
| caption = Medium Kick | |||
| linkname = 8MK | |||
| data = | |||
{{AttackData-CvS2 | |||
| version = | |||
| subtitle = | |||
| damage = 700 | |||
| stun = _ | |||
| cancel = | |||
| guard = H | |||
| parry = H | |||
| startup = 5 | |||
| active = 8 | |||
| recovery = | |||
| total = | |||
| advHit = | |||
| advBlock = | |||
| invul = | |||
| description = | |||
Hibiki thrusts her scabbard forward. | |||
* A great air-to-air button that will beat a surprising amount of stuff that is level with Hibiki. | |||
* For attacking while starting a jump or against opponents that are otherwise above you, use jumping HP. | |||
}} | |||
}} | |||
<span class="invisible-header">8HK</span> | |||
{{MoveData | |||
| name = Jumping Roundhouse | |||
| input = 8HK | |||
| subtitle = {{Motion|ub}},{{Motion|u}},or {{Motion|uf}}+{{Icon-Capcom|HK}} | |||
| image = CvS2_Hibiki_8hk.png | |||
| caption = Jumping Heavy Kick | |||
| linkname = 8HK | |||
| data = | |||
{{AttackData-CvS2 | |||
| version = | |||
| subtitle = | |||
| damage = 1100 | |||
| stun = _ | |||
| cancel = | |||
| guard = H | |||
| parry = H | |||
| startup = 9 | |||
| active = 4 | |||
| recovery = | |||
| total = | |||
| advHit = | |||
| advBlock = | |||
| invul = | |||
| description = | |||
Hibiki swings her sword underneath her with enough force to cause her to flip around before landing. This attack is a critical part of her close-up mixup game. | |||
* Given that the hitbox of this attack is directly under Hibiki, it makes crossup attacks very ambiguous and sets up 50/50 blocking situations. | |||
* The ambiguity doesn't stop in the air! Depending on the approach angle and crouching height of the character, there are scenarios where the opponent will be forced to block in the opposite direction due to the crossup, but Hibiki will still land in front of them! Being in a corner isn't a factor for this to happen. | |||
* Take care to not fire off this attack too early in your jump, or else the opponent will recover before you land. | |||
* On the other hand, this can be used as an instant overhead when close off a superjump. Only do this if you're sure the one hit will stun or kill the opponent, however, as it will leave you wide open to punishment otherwise. | |||
* One of the best jumping attacks in the game that beats most non-invincible anti-airs, destroys most strong anti-airs such as Chun-Li's c.rh. | |||
}} | |||
}} | |||
== Command Normals == | |||
{{MoveData | |||
| name = Lead the Way | |||
| input = After close {{Icon-Capcom|HP}},<br> | |||
Hold {{Icon-Capcom|HP}} | |||
| subtitle = | |||
| image = | |||
| caption = LP version | |||
| linkname = HPdslash | |||
| data = | |||
{{AttackData-CvS2 | |||
| version = HP | |||
| subtitle = {{Icon-Capcom|HP}} | |||
| damage = 1000 | |||
| stun = _ | |||
| cancel = | |||
| guard = H/L | |||
| parry = H/L | |||
| startup = 8 | |||
| active = 2 | |||
| recovery = 36 | |||
| total = 46 | |||
| advHit = -8 | |||
| advBlock = -8 | |||
| invul = | |||
| description = | |||
After the upswing off her close HP, Hibiki chops her sword straight down. | |||
* HP does not necessarily need to be held down for this move to come out. As long as an HP (or a special move) is registered from frames 20-27 of the move (16-23 frames after the first active hit frame), the recovery of the first HP will cancel. | |||
* If the first HP makes contact with the opponent, the downwards slash will combo. If blocked, it will keep opponents in blockstun. | |||
* At the the maximum "close" distance for close HP, the downwards slash will sometimes whiff. It is generally safe at that distance, however. | |||
* If using the normal close HP as an anti-air, do not follow through with the downwards slash. Hibiki will take longer to recover. | |||
}} | |||
}} | |||
== Special Moves == | |||
- | ===== <span class="invisible-header">Distance Slash</span> ===== | ||
{{MoveData | |||
| name = Distance Slash | |||
| subtitle = 236+P / qcf+P | |||
| input = {{Motion|236}} + {{Icon-Capcom|P}} | |||
| image = CvS2_Hibiki_lp_distsla.png | |||
| caption = LP version | |||
| image2 = CvS2_Hibiki_mp_distsla.png | |||
| caption2 = MP Version | |||
| image3 = CvS2_Hibiki_hp_distsla.png | |||
| caption3 = HP Version | |||
| linkname = DistSla | |||
| data = | |||
{{AttackData-CvS2 | |||
| version = LP | |||
| subtitle = {{Motion|236}} + {{Icon-Capcom|LP}} | |||
| damage = 1100 | |||
| stun = _ | |||
| cancel = | |||
| guard = H/L | |||
| parry = H | |||
| startup = 6 | |||
| active = 4 | |||
| recovery = 47 | |||
| total = 57 | |||
| advHit = -19 | |||
| advBlock = -19 | |||
| invul = | |||
| description = | |||
Hibiki draws her sword and swings it out at distance. | |||
* Though it comes out the fastest, LP Distance Slash is the least useful of the three because it hits slightly lower and recovers more slowly than the MP version. | |||
}} | |||
{{AttackData-CvS2 | |||
| header = no | |||
| version = MP | |||
| subtitle = {{Motion|236}} + {{Icon-Capcom|MP}} | |||
| damage = 1200 | |||
| stun = _ | |||
| cancel = | |||
| guard = H/L | |||
| parry = H | |||
| startup = 8 | |||
| active = 4 | |||
| recovery = 45 | |||
| total = 57 | |||
| advHit = -17 | |||
| advBlock = -17 | |||
| invul = | |||
| description = | |||
Hibiki draws her sword and swings it out at distance. | |||
* The most useful version of this move and the one you will be using most often. It does the most damage, hits relatively high up, and is the safest of the three. | |||
* Always use the MP version to end Hibiki's BnB combo. | |||
}} | |||
{{AttackData-CvS2 | |||
| header = no | |||
| version = HP | |||
| subtitle = {{Motion|236}} + {{Icon-Capcom|HP}} | |||
| damage = 1100 | |||
| stun = _ | |||
| cancel = | |||
| guard = L | |||
| parry = L | |||
| startup = 14 | |||
| active = 4 | |||
| recovery = 53 | |||
| total = 71 | |||
| advHit = Down | |||
| advBlock = -32 | |||
| invul = | |||
| description = | |||
Hibiki draws her sword and swings it out at a great distance, aiming low against the ground. | |||
* While the HP version doesn't do the most damage, it does knock down. | |||
* Because it hits low from so far out, it can be a threat in the neutral game if opponents do not respect it from distance. Don't overuse it, though, or else they can jump over it and get a free combo on you. | |||
* The HP Distance Slash will cleanly go under air fireballs without needing to roll cancel. The recovery of the move is automatically extended for a few frames for the projectile to pass safely over Hibiki. | |||
* Although it hits low and must be blocked/parried low, the hitbox comes off the ground a bit and in rare circumstaces hit opponents out of the air before landing from a jump or recovering from a special move. This will not cause a knockdown, but an air flipout; be careful of this happening! | |||
'''General Strategies''' | |||
-If you | * Hibiki's Distance Slash is her most important tool for locking down and frustrating opponents, keeping them far outside their effective ranges. As raw attacks they should only be used from medium-far to max distances to keep them safe. NEVER use a LP/MP Distance Slash up close. You WILL get punished! | ||
* In neutral, you will want to use the MP version to fish for free damage and whittle down an opponent's guard meter. The HP version is good for catching out standing opponents to keep them honest. If done effectively, opponents may try to anticipate Distance Slashes with jumps and rolls that you never do, setting up easy anti-airs or free combos for you. | |||
* When poking with crouching LP, you should generally always combo into MP Distance Slash unless you're using it as an opportunity to dash/run in closer for pressure. It will push you back, but that's good for Hibiki and it will at the minimum take a good chunk of guard bar away from the opponent. | |||
''' | '''!! WARNING !!''' | ||
Against some opponents with Level 3 supers ready, '''Distance Slash is NOT SAFE—even on hit at max distance!''' If these opponents are actively threatening a Level 3, you will need to avoid random distance slashes and ending BnB combos with a Distance Slash. Otherwise, you will eat a super! | |||
* Blanka (Direct Lightning) | |||
* Cammy (Spin Drive Special) | |||
* M.Bison/Dictator (Mega Psycho Crusher) | |||
* Rock (Shine Knuckle) | |||
* Balrog/Boxer (Gigaton Blow) | |||
* More TBA | |||
}} | |||
}} | |||
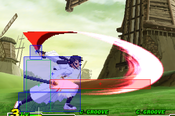
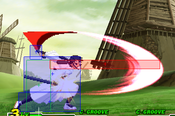
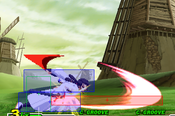
== | ===== <span class="invisible-header">Beckoning (Running) Slash</span> ===== | ||
Hibiki | {{MoveData | ||
| name = Beckoning Slash | |||
| subtitle = aka Running Slash<br>214+P / qcb+P | |||
| input = {{Motion|214}} + {{Icon-Capcom|P}}<br>Hold P to delay attack | |||
| image = CvS2_Hibiki_runsla_1.png | |||
| caption = Running Phase | |||
| image2 = CvS2_Hibiki_runsla_2.png | |||
| caption2 = Slashing Phase | |||
| image3 = CvS2_Hibiki_runsla_xup.png | |||
| caption3 = After a Crossup | |||
| linkname = RunSla | |||
| data = | |||
{{AttackData-CvS2 | |||
| version = LP | |||
| subtitle = {{Motion|214}} + {{Icon-Capcom|LP}} | |||
| damage = 1200 | |||
| stun = _ | |||
| cancel = | |||
| guard = H/L | |||
| parry = H | |||
| startup = 2 + 9 + Hold Time + 4 | |||
| active = 6 | |||
| recovery = 28 | |||
| total = 49 (Minimum) | |||
| advHit = -13 | |||
| advBlock = -13 | |||
| invul = | |||
| description = | |||
}} | |||
{{AttackData-CvS2 | |||
| header = no | |||
| version = MP | |||
| subtitle = {{Motion|214}} + {{Icon-Capcom|MP}} | |||
| damage = 1200 | |||
| stun = _ | |||
| cancel = | |||
| guard = H/L | |||
| parry = H | |||
| startup = 2 + 19 + Hold Time + 4 | |||
| active = 6 | |||
| recovery = 28 | |||
| total = 59 (Minimum) | |||
| advHit = -13 | |||
| advBlock = -13 | |||
| invul = | |||
| description = | |||
}} | |||
{{AttackData-CvS2 | |||
| header = no | |||
| version = HP | |||
| subtitle = {{Motion|214}} + {{Icon-Capcom|HP}} | |||
| damage = 1200 | |||
| stun = _ | |||
| cancel = | |||
| guard = H/L | |||
| parry = H | |||
| startup = 2 + 29 + Hold Time + 4 | |||
| active = 6 | |||
| recovery = 28 | |||
| total = 69 (Minimum) | |||
| advHit = -13 | |||
| advBlock = -13 | |||
| invul = | |||
| description = | |||
}} | |||
{{AttackData-CvS2 | |||
| header = no | |||
| version = Crossup | |||
| subtitle = {{Motion|214}} + {{Icon-Capcom|P}} | |||
| damage = 1000 | |||
| stun = _ | |||
| cancel = | |||
| guard = H/L | |||
| parry = H | |||
| startup = 6 | |||
| active = 4 | |||
| recovery = 47 | |||
| total = 56 | |||
| advHit = -15 | |||
| advBlock = -15 | |||
| invul = | |||
| description = | |||
Hibiki runs at her opponent, drawing her sword and swinging at them from distance. If the sword is drawn when Hibiki is point-blank against the opponent, Hibiki will slash as she runs through and behind them. | |||
* The only difference between the regular versions is the additional "lag" time between executing the special move and when the slash comes out. During this time, the game will check if Hibiki is directly touching her opponent. If she is, the move will execute with Hibiki going through and behind the opponent as she slashes. When close, the LP version executes the fastest but has a smaller base window for this check, whereas the HP version executes the slowest but is most likely to register the passthrough. | |||
* However, all versions can be "charged" by holding down the attack button, which delays the sword slash until the button is released. If using this attack raw from a distance, it really doesn't matter which version you use, but you should probably stick with the LP version since it can come out the quickest if you need it to. | |||
* Be careful when comboing into a Beckoning Slash, particularly when opening with close HK or in the corners. You may get pushed back out of the point-blank range the move requires to cross through the opponent, which may cause Hibiki to execute the attack directly in front of the opponent and open her up for a world of punishment. To avoid this, hold the attack button for a brief moment to ensure Hibiki runs back up to the appropriate distance, but not too long that the opponent exits hitstun and the combo drops. | |||
* Roll cancelling this move is one of Hibiki's best options to escape corner pressure, as it will cross through the opponent and be generally safe, even on block. Reversal RC Beckoning Slash can also get you out of a meaty wakeup situation (such as Blanka Electricity) but the margin for error on execution is razor thin. | |||
* On a successful passthrough hit the move can be cancelled into a Distance Slash (use MP or HP depending on preference) or a Heavenly Spirit of Victory (Dash) super. The timing to crossup and land the follow up attack changes significantly if Hibiki is doing it against a cornered opponent. | |||
''' | '''General Strategies''' | ||
There are four main uses of Beckoning Slash in Hibiki's gameplan: | |||
''' | * '''Aggressive use in neutral for mixups on approach''' | ||
The startup of Beckoning Slash is similar to Hibiki's run (in S, N, and K-Grooves). This can be used to your advantage to try to get in close for BnBs and super attempts. After a few of them from distance, opponents will be trained to wait to block if they see you running up from distance. From there you have an opportunity to surprise the opponent with a regular run-up, potentially leading to a counter hit situation as they react to your deeper approach. With regular mixups of max-distance Beckoning Slashes, run-in pokes, and deeper run-in BnB attempts, Hibiki can control all the space in front of her. | |||
* '''Ambiguous crossups on opponent's wakeup''' | |||
Hibiki becomes extremely dangerous when she scores a knockdown and has room behind the opponent to work with. With the right timing, Beckoning Slash will hit an opponent on the opposite side as they wake up. (When followed up with an HP Distance Slash, Hibiki scores another knockdown and the situation repeats.) With the "wrong" timing, it hits on the expected side. Because the move passes through regardless, this becomes a 50/50 that the opponent has to guess on which side to block. Additionally, you can do a standard run instead of Beckoning Slash to meet the opponent on wakeup and engage in Hibiki's high/low mixup options with her meaty close MK or work in an overhead. When further combined with Essential Crunch, her deadbody crossup, you may able to get several slash/slashback combos in a row from sheer confusion alone. | |||
* '''Punish combos''' | |||
you | When you have all day to attack an opponent, you will generally be using close HK into Beckoning Slash, followed up by either MP or HP Distance Slash on the other side to complete a damaging punish combo. | ||
* '''RC Anti-Air''' | |||
This is Hibiki's safest anti-air and escaped option. It will hit as she crosses up leaving her generally safe from both Parry and Just Defend. It also will go fullscreen away whether it hits or not, making this one of the best cross up and corner escapes vs a jumping opponent. Also useful in anti-air situations in non-RC grooves when close s.fp is Just Defended as you can cancel into it to avoid some punishes. | |||
}} | |||
}} | |||
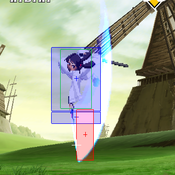
===== <span class="invisible-header">Piercing Moon Pounce (Overhead)</span> ===== | |||
{{MoveData | |||
| name = Piercing Moon Pounce | |||
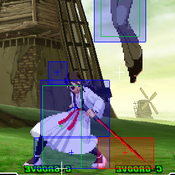
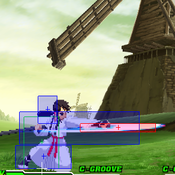
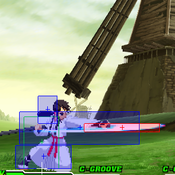
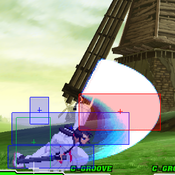
| subtitle = aka Overhead<br>623+K / dp+K | |||
| input = {{Motion|623}} + {{Icon-Capcom|K}} | |||
| image = CvS2_Hibiki_ovrhd.png | |||
| caption = | |||
| linkname = Ovrhd | |||
| data = | |||
{{AttackData-CvS2 | |||
| version = Any K | |||
| subtitle = {{Motion|623}} + {{Icon-Capcom|K}} | |||
| damage = 800 | |||
| stun = _ | |||
| cancel = | |||
| guard = H | |||
| parry = H | |||
| startup = 24 | |||
| active = 4 | |||
| recovery = 31 | |||
| total = 59 | |||
| advHit = -9 | |||
| advBlock = -9 | |||
| invul = | |||
| description = | |||
Hibiki winds up and thrusts the butt of her scabbard upwards into the opponent. Hits as an overhead. | |||
* An important tool in Hibiki's mixup game, preventing opponents from merely low blocking against all of Hibiki's close attacks. | |||
* Cancels into a Distance Slash or Heavenly Spirit of Victory (Dash) super on successful hit only. You should always buffer in at least the Distance Slash when executing this move, as both it or the super will not come out if the attack is blocked. | |||
* Because it leaves Hibiki vulnerable on block, using this move at the furthest distances possible is a good idea. | |||
* The fourth hit of the 1st/2nd chains of Hibiki's Going My Way (Rave) super uses the same animation as this move, but does not hit as an overhead. If the super is blocked, you can interrupt the rave chain and input an actual overhead instead to potentially get in free damage. (See the Going My Way section below for more info.) | |||
}} | |||
}} | |||
===== <span class="invisible-header">Melding Being Blade (Counter)</span> ===== | |||
{{MoveData | |||
| name = Melding Being Blade | |||
| subtitle = aka Counter<br>41236+K / hcf+K | |||
| input = {{Motion|41236}} + {{Icon-Capcom|K}} | |||
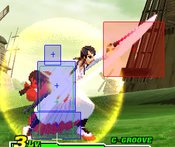
| image = CvS2_Hibiki_cntr.png | |||
| caption = Rightmost hurtbox is counter area | |||
| linkname = Cntr | |||
| data = | |||
{{AttackData-CvS2 | |||
| version = Any K | |||
| subtitle = {{Motion|41236}} + {{Icon-Capcom|K}} | |||
| damage = 600 | |||
| stun = _ | |||
| cancel = | |||
| guard = - | |||
| parry = - | |||
| startup = 4 | |||
| active = 18 | |||
| recovery = 22 | |||
| total = 44 | |||
| advHit = Juggle | |||
| advBlock = - | |||
| invul = | |||
| description = | |||
Hibiki holds up her palm, ready to catch an attacking opponent. Catches mid/high normals, and physical special attacks. | |||
* The counter is the ultimate risk/reward move for Hibiki. Whiffing it leaves you wide open to punishment. Landing it throws the opponent into the air behind Hibiki, in prime position to corner carry and engage in more mixup tactics or land a super for free. | |||
* For corner carries, use Beckoning Slash. | |||
* For mixup tactics, quickly pursue with a jumping MP and hit the opponent low in such a way where Hibiki lands before the opponent does. From here, Hibiki can do a Beckoning Slash crossup for the block 50/50, among her other oki options. | |||
* Any level Heavenly Spirit of Victory (Dash) super will hit the opponent as they fall, but can miss if done way too early, or too late. If Hibiki lands the counter while in the corner, a No Fear Feint (Blackout) super is possible, but requires good timing. No Fear Feints off a counter are possible away from the corner, but require a quick run-up, a delicate super input, and excellent timing to pull off. See [[#No Fear Feint (Blackout)]] for more info. | |||
}} | |||
}} | |||
Hibiki | ===== <span class="invisible-header">Narrow Escape (Dodge)</span> ===== | ||
{{MoveData | |||
| name = Narrow Escape | |||
| subtitle = aka Dodge<br>2/3K | |||
| input = {{Icon-Capcom|K}}{{Icon-Capcom|K}}({{Icon-Capcom|K}}) | |||
| image = CvS2_Hibiki_dodge.png | |||
| caption = Invulnerability on Demand | |||
| linkname = Dodge | |||
| data = | |||
{{AttackData-CvS2 | |||
| version = 2 or 3 kick buttons simultaneously | |||
| subtitle = {{Icon-Capcom|K}}{{Icon-Capcom|K}}({{Icon-Capcom|K}}) | |||
| damage = - | |||
| stun = - | |||
| cancel = - | |||
| guard = - | |||
| parry = - | |||
| startup = 0 | |||
| active = 20 | |||
| recovery = 9 | |||
| total = 29 | |||
| advHit = - | |||
| advBlock = - | |||
| invul = Frames 1-20 | |||
| description = | |||
Hibiki leans back and shields her body with her arm. A fully invincible command dodge. | |||
* Hibiki's special move dodge is available to her in all grooves, and has different properties than the S-Groove subsystem Dodge. (In S-Groove, Hibiki gets her special move dodge and the subsystem Dodge!) Unlike the subsystem Dodge, Hibiki cannot directly attack out of it, cannot cancel the dodge into another dodge, and is vulnerable during its recovery. It also lasts for a shorter period of time in comparison. | |||
* However, Hibiki's dodge has unique movement properties; see Essential Crunch below. | |||
* Like a normal Dodge, Narrow Escape eliminate's Hibiki's hurtboxes and pushbox for the duration of the move. It is also good for avoiding an opponent's far-reaching fierce/roundhouse/sweep attacks, opening up a window for a counterattack, usually crouching LP into MP Distance Slash. | |||
* Because this move is instantly invincible and is a 3K move, it can be used to evade A-Groove activations even if you had stuck out an attack! Due to the generous detection timeframe of 3K, the game often lets you get away with one after you may have pressed one of the Ks (like cr.LK) to attack. If you are caught out by an opponent's A-Groove activation, try to time a 3K (or just mash it) so their first attack—almost always a fierce or roundhouse due to A-Groove damage scaling—will whiff through your surprise dodge. Punish or escape accordingly. | |||
* And she doesn't need 3 kicks to dodge.You can do with 2 kicks. | |||
}} | |||
}} | |||
' | ===== <span class="invisible-header">Essential Crunch</span> ===== | ||
{{MoveData | |||
| name = Essential Crunch | |||
| subtitle = During Narrow Escape,<br>4+K or 6+K<br>b+K or f+K | |||
| input = {{Motion|4}} + {{Icon-Capcom|K}} or {{Motion|6}} + {{Icon-Capcom|K}} | |||
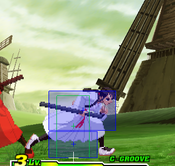
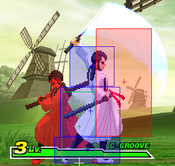
| image = CvS2_Hibiki_ecrunch_run_2.png | |||
| caption = 6+K starts Close the Gap, the Forward Run... | |||
| image2 = CvS2_Hibiki_ecrunch_backhop.png | |||
| caption2 = ...or use 4+K to Take a Break and hop back | |||
| linkname = ECrunch | |||
| data = | |||
{{AttackData-CvS2 | |||
| version = Close the Gap<br>(Forward Run) | |||
| subtitle = {{Motion|6}} + {{Icon-Capcom|K}} | |||
| damage = - | |||
| stun = - | |||
| cancel = - | |||
| guard = - | |||
| parry = - | |||
| startup = 0 | |||
| active = 4 | |||
| recovery = 35 | |||
| total = 39 minimum | |||
| advHit = - | |||
| advBlock = - | |||
| invul = Frames 1-4 | |||
| description = | |||
Hibiki breaks out of her dodge stance and runs towards the opponent. Should Hibiki run directly into the opponent, she will cross through to the other side of them. | |||
* Not only does this move cross through opponents, it also crosses over deadbodies and even is a guaranteed corner crossup! After downing an opponent in the corner, you can use the run to instantly appear on the opposite side of them. From there you can go for a BnB, a punish combo, a hop back overhead attack (see below) or cross over them again with a well-timed Beckoning (Running) Slash. | |||
* The 4 additional frames of invincibility at the start of the run gives you a potential total of 24 frames of invincibility to work with after including the 20 frames from Essential Crunch. It's not recommended to rely on this to run through direct attacks, but it may give you the little bit of extra invul time you need to get out of jail in some situations, like during A-Groove activations. | |||
* After Hibiki passes through the opponent, if you switch input directions back towards them (in the opposite direction you are running) Hibiki will continue to run, until you release the directional input. This trick may be useful to create some extra space after escaping from the corner, if desired. | |||
}} | |||
{{AttackData-CvS2 | |||
| header = no | |||
| version = Take a Break<br>(Back Hop) | |||
| subtitle = {{Motion|4}} + {{Icon-Capcom|K}} | |||
| damage = - | |||
| stun = - | |||
| cancel = - | |||
| guard = - | |||
| parry = - | |||
| startup = 0 | |||
| active = 36 | |||
| recovery = 0 | |||
| total = 36 | |||
| advHit = - | |||
| advBlock = - | |||
| invul = - | |||
| description = | |||
Hibiki breaks out of her dodge stance with a quick backwards hop. | |||
* While airborne during the hop back, Hibiki can throw out any air normal. Normal properties of the moves apply—including meter building on medium and heavy attacks, which is a very fast way of gaining meter. | |||
* If Hibiki is at an uncomfortable middle distance to the opponent during neutrals—the range where a top-tier Small Jump attack can suck you in fast—a quick dodge into hop back can move you to a safer distance without having to risk potentially getting stuffed while attempting a regular backdash. Throwing out an air HP while doing this may net you some free damage. Use frequently to deny the opponent their optimal spacing. | |||
* After an Essential Crunch run crossup in the corner, Hibiki can immediately dodge and hop back into an air HP or HK for a quasi-instant overhead. If timed correctly this can lead into a full punish combo when Hibiki lands. As if the opponent has enough to worry about with a left-right 50/50, now they have to worry about blocking high or low on top of that! | |||
* An advanced application of this move is to dodge an incoming air-to-ground crossup attempt by your opponent, then hop back over them as they land for the same effect as the corner quasi-overhead. Use caution when doing this as most good jumping crossups last a fair bit of time and will not leave much room for error with the 20 frames of invincibility that Essential Crunch provides. | |||
}} | |||
}} | |||
==Supers== | |||
===== <span class="invisible-header">Heavenly Spirit of Victory (Dash)</span> ===== | |||
{{MoveData | |||
| name = Heavenly Spirit of Victory | |||
| subtitle = aka Dash Super | |||
| input = 21416+P / qcb,db,f+P<br>{{Motion|214}}{{Motion|1}}{{Motion|6}} + {{Icon-Capcom|P}} | |||
| image = CvS2_Hibiki_super_dash_lv1.png | |||
| caption = Level 1 Dash Super | |||
| linkname = DashSup | |||
| data = | |||
{{AttackData-CvS2 | |||
| version = Level 1 | |||
| subtitle = {{Motion|214}}{{Motion|1}}{{Motion|6}} + {{Icon-Capcom|LP}} | |||
| damage = 2300 | |||
| stun = 0 | |||
| guard = H/L | |||
| parry = H/L | |||
| startup = 4:4 | |||
| active = 13 | |||
| recovery = 41 | |||
| total = 62 | |||
| advHit = Down | |||
| advBlock = -34 | |||
| invul = 8 Full | |||
}} | |||
{{AttackData-CvS2 | |||
| header = no | |||
| version = Level 2 | |||
| subtitle = {{Motion|214}}{{Motion|1}}{{Motion|6}} + {{Icon-Capcom|MP}} | |||
| damage = 3500 | |||
| stun = 0 | |||
| guard = H/L | |||
| parry = H/L | |||
| startup = 4:4 | |||
| active = 13 | |||
| recovery = 37 | |||
| total = 58 | |||
| advHit = Down | |||
| advBlock = -30 | |||
| invul = 14 Full | |||
}} | |||
{{AttackData-CvS2 | |||
| header = no | |||
| version = Level 3 | |||
| subtitle = {{Motion|214}}{{Motion|1}}{{Motion|6}} + {{Icon-Capcom|HP}} | |||
| damage = 4900 | |||
| stun = 0 | |||
| guard = H/L | |||
| parry = H/L | |||
| startup = 4:4 | |||
| active = 13 | |||
| recovery = 37 | |||
| total = 58 | |||
| advHit = Down | |||
| advBlock = -30 | |||
| invul = 22 Full | |||
| description = | |||
Hibiki quickly dashes forward and passes through the opponent as she slashes, so quickly that the opponent does not feel the affects of the strike until Hibiki sheathes her sword!<br> | |||
This super is commonly input as {{Motion|214}}{{Motion|41236}} + {{Icon-Capcom|P}}. | |||
* The Dash super is Hibiki's basic super and is the only one available to her at Level 1 and Level 2. | |||
* The higher the super level, the further away Hibiki can land the super from. At Level 3, she can go more than half the screen and still connect. (If too far away, Hibiki will stop running without attacking, though it will still cost you the meter!) | |||
* Dash supers can be confirmed into off a BNB sequence (cr.LKs into cr.MP) but you will need to use fewer LKs if using a lower level Dash super to maintain enough proximity. | |||
* Raw Dash supers at Level 2 and 3 can be good anti-airs if the opponent is jumping in at a shallow angle. You can also consider buffering the directional input if you anticipate a Small Jump attack, which when executed will hit them as they are landing. | |||
* The most effective uses of Heavenly Spirit is after a successful overhead, successful counter, or more commonly a successful Beckoning Slash passthrough. | |||
* When executing the super after the Beckoning Slash, you need to wait until you are on the other side of the opponent before doing the input. If done too early, the game will recognize the {{Motion|214}} as a {{Motion|236}} instead. By the time you do the {{Motion|41236}} you will have switched sides with the opponent, flipping the relative direction of the initial input. | |||
}} | |||
}} | |||
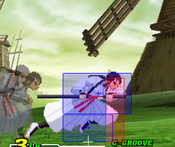
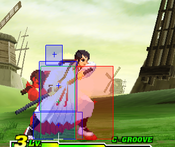
===== <span class="invisible-header">No Fear Feint (Blackout)</span> ===== | |||
{{MoveData | |||
6 | | name = No Fear Feint | ||
4 | | subtitle = aka Blackout Super | ||
| input = 641236+P / hcb,f+P<br>{{Motion|6}}{{Motion|41236}} + {{Icon-Capcom|HP}} | |||
| image = CvS2_Hibiki_super_blackout_1.png | |||
| caption = To hit an airborne opponent, any part of the opponent's hurtbox must be in the sweetspot | |||
| image2 = CvS2_Hibiki_super_blackout_2.png | |||
| caption2 = "Contemplating death feels no different than performing it." | |||
| image3 = CvS2_Hibiki_super_blackout_3.png | |||
| caption3 = | |||
| image4 = CvS2_Hibiki_super_blackout_x.png | |||
| caption4 = (*)If the opponent is too high, the super will hit here instead, doing very small damage | |||
| linkname = SuperBlackout | |||
| data = | |||
{{AttackData-CvS2 | |||
| version = Level 3/MAX Only | |||
| subtitle = {{Motion|6}}{{Motion|41236}} + {{Icon-Capcom|HP}} | |||
| damage = 5500 (*800) | |||
| stun = 0 | |||
| guard = H/L | |||
| parry = H/L | |||
| startup = 4 | |||
| active = 8 | |||
| recovery = 41 | |||
| total = 53 | |||
| advHit = Down (*-21) | |||
| advBlock = -21 | |||
| invul = 22 Full | |||
| description = | |||
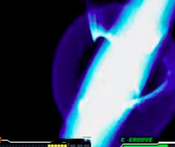
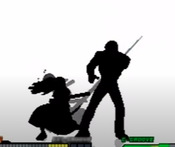
Hibiki draws her sword with a flash so bright it blacks out the screen. Only the sword slash is visible, followed by silhouettes of both characters on a white background. After a moment of silence, the opponent suddenly receives massive damage before Hibiki sheathes her sword. This is arguably the coolest-looking super in CvS2, especially if Hibiki wins a round with it! | |||
* Not only is it flashy, it is the single most damaging hit in Hibiki's arsenal. However, it is not her most potentially damaging super; see Going My Way, below. | |||
* The most effective use of No Fear Feint is after a successful counter. It is easiest to land when the opponent is thrown into the corner. In the open, players must quickly dash or execute a delicate run forward, using the her momentum to put Hibiki into position. To execute this in a run groove, input {{Motion|6}}{{Motion|6}} to start the run, but hold the second {{Motion|6}} for a beat or two until Hibiki and the opponent are in position; then input the {{Motion|41236}} + {{Icon-Capcom|HP}} to finish the job. | |||
* In N-Groove, after a counter you can pop a stock while they are airborne and stil land the super, though only in the corner. | |||
* (*)Hitting an airborne opponent does not completely guarantee a successful super. If they are too high in the air Hibiki will hit them with the tip of her sword, dealing only 800 damage. This is a common mistake with hitting No Fear Feint off a counter in the corner, as is being too late and whiffing the super entirely! | |||
* If Hibiki wins a round with this super, she will go into a special win pose. Her hairbands will break, showing her hair down. As the opponent collapses and Hibiki puts away her sword, she says, "you were the one that started this." | |||
* An unfortunate consequence of this special win pose is a rare bug that makes this super unsafe on hit (?!?) against K-Groove opponents under the right (wrong) circumstances. See [[#No Fear Feint Unsafe on Hit?!?]] for more information. | |||
* Able to combo after a midscreen counter by dashing or running. | |||
}} | |||
}} | |||
===== <span class="invisible-header">Going My Way (Rave)</span> ===== | |||
{{MoveData | |||
| name = Going My Way | |||
| subtitle = aka Rave Super | |||
| input = 632146+K… / hcb,f+K…<br>{{Motion|63214}}{{Motion|6}} + {{Icon-Capcom|HK}}<br>...followed by a Root sequence | |||
| image = CvS2_Hibiki_super_rave_1.png | |||
| caption = The initial run up... | |||
| image2 = CvS2_Hibiki_super_rave_2.png | |||
| caption2 = ...and the first hit | |||
| linkname = SuperRave | |||
| data = | |||
{{AttackData-CvS2 | |||
| version = All versions are Level 3/MAX Only<br>Root 1 | |||
| subtitle = {{Motion|63214}}{{Motion|6}} + {{Icon-Capcom|HK}}, then<br> | |||
{{Icon-Capcom|LP}}{{Icon-Capcom|MP}}{{Icon-Capcom|HP}}{{Icon-Capcom|LP}}....{{Icon-Capcom|MP}}..{{Icon-Capcom|HP}}..{{Icon-Capcom|LP}}{{Icon-Capcom|MP}}{{Motion|236}}+{{Icon-Capcom|HP}} | |||
| damage = 5500 | |||
| stun = 0 | |||
| guard = H/L | |||
| parry = H/L | |||
| startup = 4 + runup + 3 | |||
| active = 4 | |||
| recovery = 45 | |||
| total = 56+ | |||
| advHit = +3 (*Down) | |||
| advBlock = -17 | |||
| invul = 22 Full | |||
| description = | |||
* Basically useless. No real opportunity to interrupt the chain and combo into more damage, and therefore it does the least total potential damage of the three roots. | |||
* Though a sequence of 10 button presses, it will register as an 11 hit combo due to the final attack being a rapid succession of two Distance Slashes. | |||
* Only useful as a show-off combo when assured of a KO and round win... but even then, Root 3 does it better! | |||
}} | |||
{{AttackData-CvS2 | |||
| header = no | |||
| version = Root 2 | |||
| subtitle = {{Motion|63214}}{{Motion|6}} + {{Icon-Capcom|HK}}, then<br> | |||
{{Icon-Capcom|LP}}{{Icon-Capcom|MP}}{{Icon-Capcom|HP}}{{Icon-Capcom|LP}}....{{Icon-Capcom|MP}}..{{Icon-Capcom|HP}}..{{Icon-Capcom|LK}}{{Icon-Capcom|MK}}{{Motion|236}}+{{Icon-Capcom|HK}} | |||
| damage = 5300 | |||
| stun = 0 | |||
| guard = H/L | |||
| parry = H/L | |||
| startup = 4 + runup + 3 | |||
| active = 4 | |||
| recovery = 45 | |||
| total = 56+ | |||
| advHit = +3 (*Down) | |||
| advBlock = -17 | |||
| invul = 22 Full | |||
| description = | |||
* This is the main chain for extracting maximum damage out of the super combo. Always use it, on hit or on block. | |||
* When going through the button sequence, there is a two-beat (approximately!) pause between the 4th and 5th button presses, then briefer pauses after the 5th and 6th buttons. (The execution notation above shows the relative length of these pauses with "...." and "..") The other buttons should be pressed one after the other in steady succession. Once you understand the timing, execution is trivial. | |||
* For maximum damage, '''DO NOT''' finish off Root 1 with {{Motion|236}}+{{Icon-Capcom|HK}} unless you know it will kill and you are going for a flashy/Finest KO | |||
* Always stop the chain after the 8th button (MK). After this hit, Hibiki will be at a significant frame advantage. You will want to use this to add on more damage than what the natural end of the chain would have given you. Pause a brief moment to allow the game to recognize you've stopped the rave (but not too long that the opponent recovers from hitstun) then execute a standard punish combo, close HK into crossthrough Beckoning Slash into MP (for damage/stun) or HP (for knockdown/oki) Distance Slash. | |||
* Or, if you are in S-Groove (with red health) or N-Groove (with your 3rd stock available) you can substitute the Distance Slash with a Heavenly Spirit of Victory super coming back the other way for the fancy "Level 4" super combo worth about 1000 more damage. Always do this in S-Groove if you can; for N-Groove, your current game situation will determine if the extra damage is worth burning your last stock, or if it'd be better to save it to quickly build up to another Level 3 opportunity. | |||
* If the super is blocked, there is still an opportunity for damage. The 4th hit of the chain resembles Hibiki's overhead, although it doesn't need to be blocked high while a part of the rave. However, if you instead input a standard overhead attack (623+K) instead of the next button of the rave chain, you can catch out an opponent's lazy blocking. Should they wise up to this and block high, you can instead hit low, preferably with the similar-animating close HK, and get a consolation combo that way. Note that this mixup is most effective only at this point in the chain because of natural pause in the rave sequence that can disguise an incoming non-rave attack. Trying a similar mixup at any other point will make what you are attempting obvious! | |||
}} | |||
{{AttackData-CvS2 | |||
| header = no | |||
| version = Root 3 | |||
| subtitle = {{Motion|63214}}{{Motion|6}} + {{Icon-Capcom|HK}}, then<br> | |||
{{Icon-Capcom|LP}}{{Icon-Capcom|MP}}{{Icon-Capcom|HP}}{{Icon-Capcom|LK}}{{Icon-Capcom|MK}}{{Icon-Capcom|LK}}{{Icon-Capcom|HK}} | |||
| damage = 4200 | |||
| stun = 0 | |||
| guard = H/L (*L) | |||
| parry = H/L (*L) | |||
| startup = 4 + runup + 3 | |||
| active = 4 | |||
| recovery = 45 | |||
| total = 56+ | |||
| advHit = +3 (*Juggle) | |||
| advBlock = -17 | |||
| invul = 22 Full | |||
| description = | |||
* Purely a show-off chain for ending the round with a flashy KO, given its poor damage in comparison to the other two roots. | |||
* Unlike the other roots, the button input timing does not require any pauses. Just hit the next button in the sequence right away, all the way through. | |||
* The final hit of this shortened chain is a close HP slash that pops the opponent into the air for an additional juggle hit of your choice. C, P, and K-Grooves can only perform a normal or special attack (Beckoning Slash would be the best) to add more damage. However, as with Root 2, S and N-Groove may be able to perform a Level 1 Heavenly Spirit of Victory for an easy-mode "Level 4" super. This does not do more damage than the full Root 2 path, but it's a lot more showoffy! | |||
* Although the initial hits can be blocked high or low, the 6th hit of Root 3 is a low sweep and must be blocked low. This is relatively useless information, as you won't do this chain if they blocked the initial hit, and even if you did there is no reason they wouldn't be crouch blocking. | |||
'''General Information''' | |||
Hibiki charges toward the opponent, unleashing a barrage of rapid attacks. A rave-style super, it requires a button press or command input for each hit of the super combo. Hibiki has three variations, or "roots," of Going My Way, each requiring a different sequence of buttons to perform.<br> | |||
(*) Frame data is for the initial hit of the super only. Noted additional properties are for events during or after the full rave chain as noted. | |||
* This super move is a reference to Hibiki's Speed style chain combos from ''The Last Blade 2''. | |||
* This is the super you want to land, if you can help it. It can do the most damage ''by far'' of all of Hibiki's moves, and is up there with the most damaging regular super combos of the entire game. This is because like other rave supers in CvS2, the sequence can (and should!) be interrupted to tack on additional normal and special attacks. (See Root 2, above.) | |||
* The first hit in the rave sequence (LP in all roots) should be pressed as Hibiki is auto-executing the first automatic hit of the combo (visually, a close HP). There is no need to hold down or re-hit the initial kick button that activated the super. Additional hits will follow in the root path of your choosing and with the proper timing. | |||
* The super can be confirmed into with up to 3 crouching LKs, or using a close HK opener when punishing with it. | |||
* It can be executed just about anywhere on screen. Hibiki will run up to the opponent until making contact with them to start the rave chain. | |||
* You can take advantage of the startup invincibility to run through fireballs or distance attacks after the super flash, though attempt with caution. If they recover before you get there, you may be screwed! | |||
* Should opponents try to roll through the super, jump over it, or are already in the air, Hibiki will automatically execute the first hit once she meets their vertical plane. The super will end after this first hit, as the rave chain can only be executed against grounded opponents. | |||
}} | |||
}} | |||
== Universal Combos == | |||
'''Bread and Butter''' | |||
'' | |||
''' | *'''''c.lk, c.lk, c.lk, c.lp xx MP Distance Slash'''''<br> | ||
Your go to combo. Once of the best BnBs in the game, good damage, easily confirmable, good meter build. It's important to note that this is highly punishable by some characters with meter, some without. If BnB is chained slow, it becomes safe from some punishes, see asterisks (2 asterisks safe with slow chain and Parry or JD, one asterisk safe with slow chain). | |||
M.Bison - HK Knee Press**, Super Psycho Crusher <br> | |||
Chun Li - Lvl 3 kick super<br> | |||
Balrog - Jab rush punch, Lvl 3 Crazy Buffalo*, Gigaton Blow<br> | |||
Cammy - Lvl 3 Drill super<br> | |||
Blanka - Lvl 3 Direct Lightning<br> | |||
Sagat - Lvl 3 High Tiger Cannon*<br> | |||
Rock - Lvl 2 (not safe, but loses damage with slow chain) and 3 Shine Knuckle<br> | |||
Rolento - Lvl 3 Trip Wire<br> | |||
Vice - Sleeve whip<br> | |||
Dhalsim - s.hp<br> | |||
'''close | *'''''close s.mk, c.lk, c.lp xx MP Distance Slash'''''<br> | ||
Quick hit confirm off close s.mk | |||
*'''''close s.hk xx HP Beckoning Slash (slight hold), HP Distance Slash<br> | |||
Your primary no meter punish combo<br> | |||
*'''''Piercing Moon Pounce (Overhead) xx HP Distance Slash''''' | |||
Quick knockdown from her special overhead, can do after a close s.mp cancel or two c.lks <br> | |||
'''====== Universal Metered Combos ======''' <br> | |||
''' | *'''''c.lk, c.lp xx Lvl 1 Heavenly Spirit of Victory (Dash super)'''''<br> | ||
Not generally worth it, will whiff on some standing characters if you do 3 light attacks | |||
*'''''c.lk, c.lk, c.lk, c.lp xx Lvl 3 Heavenly Spirit of Victory (Dash super)'''''<br> | |||
Going into super off you BnB starter for a big chunk of damage | |||
*'''''close s.hk xx No Fear Feint (Black out super)'''''<br> | |||
If you are going for a flashy finish with big damage, this is the combo to do. Going my way (rave super) is generally better. | |||
''' | *'''''counter, dash, No Fear Feint (Black out super)'''''<br> | ||
Your best option for damage off the counter | |||
*'''''counter, Lvl 3 Heavenly Spirit of Victory (Dash super)'''''<br> | |||
Good damage with easier timing than No Fear Feint | |||
== Custom Combos == | == Custom Combos == | ||
Hibiki is one of the better A-Groove characters due to having good damage, true anti-air custom, and being able to CC off a grab while in CC mode or activate after throwing with HK. On top of that she is able to do mix ups if her custom combo is blocked. | |||
* [https://www.youtube.com/watch?v=rX0r8bqSirI Instant Overhead custom combo]<br> | |||
You can use this custom if going for a mix up if they are going to block your CC, example you activate for trip guard custom, but notice during the freeze they were not attacking. Only works on tall crouchers (ex, Geese, Sagat, Gief, Raiden). | |||
* [https://www.youtube.com/watch?v=MBO9MPepIJE Command Hop custom combo] <br> | |||
Use this if your custom is being blocked after a standing roundhouse while crossing up an opponent with a running slash, if they anticipate a overhead and stand the close s.rh with hit them and they will start to be comboed. | |||
* [https://www.youtube.com/watch?v=ytAJszDQ1IQ Command Overhead custom combo] | |||
As with the previous custom, standing up trying to avoid a random overhead while using close s.rh will hit low. | |||
* [https://www.youtube.com/watch?v=9Ehy1r1LNak HK Throw custom combo (while activated)] | |||
Tick throw during CCC or activate and throw to be able to juggle and continue the custom. | |||
* [https://www.youtube.com/watch?v=cQaV5d0yuqE Activating Post Throw] | |||
You can also throw, then activate. | |||
*[https://www.youtube.com/watch?v=NbrJYKZiOdE Hit confirm into CC] | |||
Landing a close s.mk lets you combo into custom | |||
' | * [https://docs.google.com/presentation/d/1JtCYw6fPZ6CSe0-EoSpNO79wE0HwUgLJCe6uI5V98l8/edit#slide=id.g74222b65db_0_0 Gunter's A-Hibiki Custom Combo Collection] | ||
A collection of optimized custom combos for every occasion. | |||
== Colors == | |||
[[File:Hibiki_CvS2_colors.png]] | |||
{{Navbox-CvS2}} | |||
[[Category:Capcom vs SNK 2]] | |||
[[Category:Hibiki]] | |||
Latest revision as of 01:57, 10 July 2023
Introduction
Story
Hibiki Takane (Japanese: 高嶺響, Takane Hibiki) is a character from SNK's The Last Blade fighting game series, first appearing in the 1998 release The Last Blade 2.
A young girl with a calm and shy personality, Hibiki is thrust into a quest for vengeance. Her father, Genzou Takane, was a retired swordsmith. One day, an evil silver-haired man compelled Genzou to fashion a sword against his will. After completing the task, Genzou fell gravely ill, telling Hibiki on his deathbed that this was the silver-haired man's fault. In his last words to his daughter, Genzou said that while he "cannot approve of such actions," Hibiki should "go find that man and the sword. The thing that I saw, what I felt...even you must understand." Hibiki reluctantly heeded her father's final words, packing her sword Kodama and leaving the family home.
Hibiki uses the Musō Shinden-ryū branch of the Iaido fighting style. Standing with Kodama sheathed at all times, Hibiki draws it with quick distance slashes, running attacks, and counter-attack techniques. Though a young girl, Hibiki does not shy away from violence when necessary, even going as far as blaming defeated opponents for their own deaths. Despite this, she still has a strong sense of justice, having no qualms of vanquishing evil, particularly in the pursuit of seeking vengeance for her father.
Before her appearance in Capcom vs. SNK 2, Hibiki appeared in two games from The Last Blade series: Her debut in The Last Blade 2 (1998) and The Last Blade: Beyond the Destiny (2000) for Neo Geo Pocket Color. Both games have since been rereleased to modern consoles. Perhaps as a result of her popularity from CvS2, in 2021 SNK made Hibiki a DLC crossover character for Samurai Shodown (2019), with her representing The Last Blade series as a whole. She has been thought as a female equivalent of Ukyo Tachiban from the Samurai Shodown series, sharing a similar demeanor and sword-drawing techniques.
Gameplay
With her far-reaching pokes and special attacks, plus extremely damaging super combo potential, Hibiki is high-tier character. She is primarily a zoner that is at her best at a distance from her opponents, away from the effective range of the majority of the rest of the cast. Coupled with her movement options to help control space, her very strong anti-air attacks, and the threat of her counter, approaching Hibiki can be very difficult. Once zoning dominance has been established, Hibiki can use her quickness and deceptive special moves to approach and attack up close with her BnB combos or confirming into super moves.
Hibiki performs very well against much of the top-tier in CvS2. However, her playstyle requires at least some proximity to inflict big damage to opponents. Due to her limited options in that range she will quickly run out of options in prolonged or forced close combat. She can escape situations well with roll cancel Running Slash, which will cross through opponents and quickly go under jumping ones. Without RCs in K-Groove, which is a very popular groove for her, practical escape paths become more risky.
Even so, some of the advantages Hibiki has over the rest of the cast are strong. Hibiki has a special dodge (available to her in all grooves; her dodge has different properties than the S-Groove subsystem Dodge) that also has unique movement options, setting up guaranteed dead body crossups and instant air attacks in the corners. Her jumping HK comes out directly below her and Running Slash attacks can cross up on wakeup, creating ambiguous 50/50 situations. Her mid/upper counter stance can juggle into a super for free damage. Her primary super combo, a "rave" style super, can be stopped to add extra damage to the end of the rave on hit, or to create mixup options on block.
And she has the coolest super in the game. So there's that.
Groove Selection
Best - K/A: K-Groove and A-Groove are the two most powerful Grooves in the game, and Hibiki has strong options in both, but sacrifices something in exchange. K-Hibiki is the most popular, as Rage is very beneficial on a character who relies on pokes for damage so much. A solid hit from a Raged K-Hibiki can lead to a Rave Super combo, which does massive damage, and makes her up close game much scarier as well. You lose access to rolls however, which is a big loss for Hibiki who relies on roll cancel for reversal purposes. A-Hibiki gets her highest possible damage with her strong Custom Combo, and access to rolls for RC Running Slash or RC Distance Slash. You lose out on the mobility of K-Groove however, and on the powerful buffs Rage gives her.
Useful - N/C/P: N-Hibiki gets the mobility of K-Hibiki plus the rolls of A-Hibiki, but has a seriously lower damage ceiling, making her punish game a lot worse. N-Hibiki plays a lot more of a fundamental zoning game than the other two, since her punishes just don't hurt as much. C-Hibiki gets consistent access to her supers for punishes, and a decent level 2 combo, but still doesn't reach the damage of K or A-Groove, and since C-Groove has many similar tools to A-Groove, it just becomes a bit irrelevant to A-Hibiki. P-Hibiki gets surprisingly consistent punishes from parry, and parries in general can be beneficial for a zoner who wants to punish approaches. She never really gets a super to make her damage scary, however.
Worst - S: S-Hibiki gets very little in comparison. Charging isn't too big of an issue, but it leaves her unsafe and vulnerable in neutral, where she could make much more headway by spamming 5MP or 2MP, or waiting for a chance to anti-air. This makes her much more weak to rushdown as a whole, and while her defense isn't terrible, you would rather keep them under your control. S-Grooves dodge is very redundant, as Hibiki's own dodge special is a much better version of it. Infinite level 1's makes her punishes hurt a bit more, but is otherwise pretty useless, and the lack of any other benefits that can't be found in other Grooves means there's not much reason to play S-Hibiki.
|
Hibiki is a powerful zoner with amazing normals and long reach with her sword. She also has stellar up close mixups and high damage, and great defense with her dodge and RC Distance Slashes. She just can't have it all at once. Hibiki's best Grooves are K-Groove and A-Groove. Difficulty: HardTier: A+ |
|
| Pros | Cons |
|
|
Players to Watch
| Name | Country | Groove | Accounts | Notes |
|---|---|---|---|---|
| Rai | Japan | K-Groove | Twitter: @raikapibara | Plays Hibiki aggressively and has a really strong sense of punishes after a JD. Sample Match |
| Kitsune | Japan | K-Groove | Twitter: @cvs2fox | Fundamental heavy, also has great defense and can shoo his opponent away with consistency. Sample Match |
| P-Rugal | Japan | P-Groove | Twitter: @oyasuminecalli | Uses his great parry game to maximize P-Hibiki's damage through her quick punishes. Sample Match |
| OTK | Japan | K-Groove | Twitter: @Den_ta9 | Oldschool K-Groover. Dominant with all three of his characters, but his Hibiki dominated through JDs and swift punishes. Sample Match |
Moves List
System & Subsystem Mechanics
Dashes & Run
Roll
Dodge & Dodge Attacks
Guard Cancel Counter Attack & Movement
Throws
Far Standing Normals
5LP
| Damage | Stun | Cancel | Guard | Parry | Startup | Active | Recovery | Total | Adv Hit | Adv Block | Invul |
|---|---|---|---|---|---|---|---|---|---|---|---|
| 200 | _ | RF/SP/SU | H/L | H/L | 3 | 4 | 8 | 15 | +5 | +5 | - |
A quick jab with the elbow.
| |||||||||||
5MP
| Damage | Stun | Cancel | Guard | Parry | Startup | Active | Recovery | Total | Adv Hit | Adv Block | Invul |
|---|---|---|---|---|---|---|---|---|---|---|---|
| 800 | _ | SU | H/L | H | 6 | 4 | 17 | 27 | +3 | +3 | - |
Hibiki draws her sword straight out to arm's length.
| |||||||||||
5HP
| Damage | Stun | Cancel | Guard | Parry | Startup | Active | Recovery | Total | Adv Hit | Adv Block | Invul |
|---|---|---|---|---|---|---|---|---|---|---|---|
| 1000 | _ | X | H/L | H | 7 | 4 | 41 | 52 | -15 | -15 | - |
Hibiki takes a large, arcing swipe in the air in front of and above her head. HK is your de facto anti-air button, although whether you use it standing far, standing close, or crouching will depending on the trajectory of the incoming character.
| |||||||||||
5LK
| Damage | Stun | Cancel | Guard | Parry | Startup | Active | Recovery | Total | Adv Hit | Adv Block | Invul |
|---|---|---|---|---|---|---|---|---|---|---|---|
| 300 | _ | SP/SU | H/L | H/L | 5 | 8 | 7 | 20 | +2 | +2 | - |
A low kick that looks more like a quick step.
| |||||||||||
5MK
| Damage | Stun | Cancel | Guard | Parry | Startup | Active | Recovery | Total | Adv Hit | Adv Block | Invul |
|---|---|---|---|---|---|---|---|---|---|---|---|
| 700 | _ | X | H/L | H | 13 | 3 | 28 | 44 | Down | -8 | - |
Hibiki pivots on her forward foot, spins around, and steps forward to attack with the butt of her scabbard.
| |||||||||||
5HK
| Damage | Stun | Cancel | Guard | Parry | Startup | Active | Recovery | Total | Adv Hit | Adv Block | Invul |
|---|---|---|---|---|---|---|---|---|---|---|---|
| 1100 | _ | X | H/L | H | 12 | 4 | 40 | 56 | -8 | -8 | - |
Hibiki takes a big swing of her sword directly in front of her.
| |||||||||||
Close Standing Normals
cl5LP
| Damage | Stun | Cancel | Guard | Parry | Startup | Active | Recovery | Total | Adv Hit | Adv Block | Invul |
|---|---|---|---|---|---|---|---|---|---|---|---|
| 200 | _ | RF/SP/SU | H/L | H/L | 3 | 4 | 8 | 15 | +5 | +5 | - |
A quick jab with the elbow. One of your two primary point-blank quick hitters and BnB combo starters, the other being crouching LK.
| |||||||||||
cl5MP
| Damage | Stun | Cancel | Guard | Parry | Startup | Active | Recovery | Total | Adv Hit | Adv Block | Invul |
|---|---|---|---|---|---|---|---|---|---|---|---|
| 800 | _ | SP/SU | H/L | H | 4 | 4 | 18 | 26 | +2 | +2 | - |
Hibiki draws her sword at the hip for a quick slash.
| |||||||||||
cl5HP
| Damage | Stun | Cancel | Guard | Parry | Startup | Active | Recovery | Total | Adv Hit | Adv Block | Invul |
|---|---|---|---|---|---|---|---|---|---|---|---|
| 1000 | _ | SP*/SU | H/L | H | 3 | 8 | 41 | 52 | -17 | -17 | - |
Hibiki draws her sword straight up in front of her and over her head. One of the most powerful anti-air normal attacks in CvS2, coming out in only three frames and covering a HUGE area in front of and above Hibiki's hurtbox. It also has a special property that allows Hibiki to continue the attack with a second downward strike. (See the Command Normals section for more info.)
| |||||||||||
cl5LK
| Damage | Stun | Cancel | Guard | Parry | Startup | Active | Recovery | Total | Adv Hit | Adv Block | Invul |
|---|---|---|---|---|---|---|---|---|---|---|---|
| 300 | _ | SP/SU | H/L | H/L | 5 | 8 | 7 | 20 | +2 | +2 | - |
A low kick that looks more like a quick step.
| |||||||||||
cl5MK
| Damage | Stun | Cancel | Guard | Parry | Startup | Active | Recovery | Total | Adv Hit | Adv Block | Invul |
|---|---|---|---|---|---|---|---|---|---|---|---|
| 800 | _ | X | H/L | H | 5 | 6 | 11 | 22 | +6 | +6 | - |
Hibiki shoves her scabbard into the opponent's gut. Her tried and true meaty attack on the opponent's wakeup.
| |||||||||||
cl5HK
| Damage | Stun | Cancel | Guard | Parry | Startup | Active | Recovery | Total | Adv Hit | Adv Block | Invul |
|---|---|---|---|---|---|---|---|---|---|---|---|
| 1300 | _ | SP/SU | L | L | 8 | 6 | 27 | 41 | -9 | -9 | - |
Hibiki draws at the hip, but this time thrusts the sword down at an angle toward the opponent's feet. The main starter for Hibiki's big punishes and can be a useful tool as a part of Hibiki's mixup game.
| |||||||||||
Crouching Normals
2LP
| Damage | Stun | Cancel | Guard | Parry | Startup | Active | Recovery | Total | Adv Hit | Adv Block | Invul |
|---|---|---|---|---|---|---|---|---|---|---|---|
| 400 | _ | SP/SU | H/L | H/L | 4 | 5 | 12 | 21 | +3 | +3 | - |
Hibiki quickly draws her sword at arm's length while kneeling. The quickest and safest poke from distance in Hibiki's arsenal.
| |||||||||||
2MP
| Damage | Stun | Cancel | Guard | Parry | Startup | Active | Recovery | Total | Adv Hit | Adv Block | Invul |
|---|---|---|---|---|---|---|---|---|---|---|---|
| 700 | _ | SU | H/L | H/L | 5 | 4 | 19 | 28 | +1 | +1 | - |
Hibiki quickly (but not as quickly as crouching LP) draws her sword at arm's length while kneeling.
| |||||||||||
2HP
| Damage | Stun | Cancel | Guard | Parry | Startup | Active | Recovery | Total | Adv Hit | Adv Block | Invul |
|---|---|---|---|---|---|---|---|---|---|---|---|
| 1100 | _ | X | H/L | H/L | 5 | 4 | 32 | 41 | -6 | -6 | - |
Hibiki draws her sword low from her knees and takes a big upward slash from the ground to above her head. Her second-best anti-air button after close HP.
| |||||||||||
2LK
| Damage | Stun | Cancel | Guard | Parry | Startup | Active | Recovery | Total | Adv Hit | Adv Block | Invul |
|---|---|---|---|---|---|---|---|---|---|---|---|
| 200 | _ | RF/SP/SU | L | L | 3 | 4 | 10 | 17 | +3 | +3 | - |
Hibiki extends her leg and slides out her foot for a quick grounded kick attack. One of your two primary point-blank quick hitters and BnB combo starters, the other being standing LP.
| |||||||||||
2MK
| Damage | Stun | Cancel | Guard | Parry | Startup | Active | Recovery | Total | Adv Hit | Adv Block | Invul |
|---|---|---|---|---|---|---|---|---|---|---|---|
| 700 | _ | SU | L | L | 5 | 6 | 20 | 31 | -6 | -6 | - |
Hibiki takes her scabbard and drives it into the ground in front of her.
| |||||||||||
2HK
| Damage | Stun | Cancel | Guard | Parry | Startup | Active | Recovery | Total | Adv Hit | Adv Block | Invul |
|---|---|---|---|---|---|---|---|---|---|---|---|
| 1100 | _ | X | L | L | 8 | 4 | 34 | 46 | Down | -8 | - |
Hibiki sweeps her sword across the ground.
| |||||||||||
Air Normals
8LP
| Damage | Stun | Cancel | Guard | Parry | Startup | Active | Recovery | Total | Adv Hit | Adv Block | Invul |
|---|---|---|---|---|---|---|---|---|---|---|---|
| 500 | _ | - | H | H | 3 | 16 | - | - | - | - | - |
Hibiki draws her sword and swings downward.
| |||||||||||
8MP
| Damage | Stun | Cancel | Guard | Parry | Startup | Active | Recovery | Total | Adv Hit | Adv Block | Invul |
|---|---|---|---|---|---|---|---|---|---|---|---|
| 700 | _ | - | H | H | 3 | 8 | - | - | - | - | - |
Hibiki draws her sword and swings further downward.
| |||||||||||
8HP
| Damage | Stun | Cancel | Guard | Parry | Startup | Active | Recovery | Total | Adv Hit | Adv Block | Invul |
|---|---|---|---|---|---|---|---|---|---|---|---|
| 1200 | _ | - | H | H | 5 | 4 | - | - | - | - | - |
Hibiki draws her sword from down low and takes a big swing upwards in front of her.
| |||||||||||
8LK
| Damage | Stun | Cancel | Guard | Parry | Startup | Active | Recovery | Total | Adv Hit | Adv Block | Invul |
|---|---|---|---|---|---|---|---|---|---|---|---|
| 400 | _ | - | H | H | 4 | 18 | - | - | - | - | - |
Hibiki angles the tip of her foot down at an angle.
| |||||||||||
8MK
| Damage | Stun | Cancel | Guard | Parry | Startup | Active | Recovery | Total | Adv Hit | Adv Block | Invul |
|---|---|---|---|---|---|---|---|---|---|---|---|
| 700 | _ | - | H | H | 5 | 8 | - | - | - | - | - |
Hibiki thrusts her scabbard forward.
| |||||||||||
8HK
| Damage | Stun | Cancel | Guard | Parry | Startup | Active | Recovery | Total | Adv Hit | Adv Block | Invul |
|---|---|---|---|---|---|---|---|---|---|---|---|
| 1100 | _ | - | H | H | 9 | 4 | - | - | - | - | - |
Hibiki swings her sword underneath her with enough force to cause her to flip around before landing. This attack is a critical part of her close-up mixup game.
| |||||||||||
Command Normals
Special Moves
Distance Slash
Beckoning (Running) Slash
Piercing Moon Pounce (Overhead)
Melding Being Blade (Counter)
| Version | Damage | Stun | Cancel | Guard | Parry | Startup | Active | Recovery | Total | Adv Hit | Adv Block | Invul |
|---|---|---|---|---|---|---|---|---|---|---|---|---|
| Any K |
600 | _ | - | - | - | 4 | 18 | 22 | 44 | Juggle | - | - |
Hibiki holds up her palm, ready to catch an attacking opponent. Catches mid/high normals, and physical special attacks.
| ||||||||||||
Narrow Escape (Dodge)
Essential Crunch
Supers
Heavenly Spirit of Victory (Dash)
No Fear Feint (Blackout)
| Version | Damage | Stun | Cancel | Guard | Parry | Startup | Active | Recovery | Total | Adv Hit | Adv Block | Invul |
|---|---|---|---|---|---|---|---|---|---|---|---|---|
| Level 3/MAX Only |
5500 (*800) | 0 | - | H/L | H/L | 4 | 8 | 41 | 53 | Down (*-21) | -21 | 22 Full |
Hibiki draws her sword with a flash so bright it blacks out the screen. Only the sword slash is visible, followed by silhouettes of both characters on a white background. After a moment of silence, the opponent suddenly receives massive damage before Hibiki sheathes her sword. This is arguably the coolest-looking super in CvS2, especially if Hibiki wins a round with it!
| ||||||||||||
Going My Way (Rave)
Universal Combos
Bread and Butter
- c.lk, c.lk, c.lk, c.lp xx MP Distance Slash
Your go to combo. Once of the best BnBs in the game, good damage, easily confirmable, good meter build. It's important to note that this is highly punishable by some characters with meter, some without. If BnB is chained slow, it becomes safe from some punishes, see asterisks (2 asterisks safe with slow chain and Parry or JD, one asterisk safe with slow chain).
M.Bison - HK Knee Press**, Super Psycho Crusher
Chun Li - Lvl 3 kick super
Balrog - Jab rush punch, Lvl 3 Crazy Buffalo*, Gigaton Blow
Cammy - Lvl 3 Drill super
Blanka - Lvl 3 Direct Lightning
Sagat - Lvl 3 High Tiger Cannon*
Rock - Lvl 2 (not safe, but loses damage with slow chain) and 3 Shine Knuckle
Rolento - Lvl 3 Trip Wire
Vice - Sleeve whip
Dhalsim - s.hp
- close s.mk, c.lk, c.lp xx MP Distance Slash
Quick hit confirm off close s.mk
- close s.hk xx HP Beckoning Slash (slight hold), HP Distance Slash
Your primary no meter punish combo
- Piercing Moon Pounce (Overhead) xx HP Distance Slash
Quick knockdown from her special overhead, can do after a close s.mp cancel or two c.lks
====== Universal Metered Combos ======
- c.lk, c.lp xx Lvl 1 Heavenly Spirit of Victory (Dash super)
Not generally worth it, will whiff on some standing characters if you do 3 light attacks
- c.lk, c.lk, c.lk, c.lp xx Lvl 3 Heavenly Spirit of Victory (Dash super)
Going into super off you BnB starter for a big chunk of damage
- close s.hk xx No Fear Feint (Black out super)
If you are going for a flashy finish with big damage, this is the combo to do. Going my way (rave super) is generally better.
- counter, dash, No Fear Feint (Black out super)
Your best option for damage off the counter
- counter, Lvl 3 Heavenly Spirit of Victory (Dash super)
Good damage with easier timing than No Fear Feint
Custom Combos
Hibiki is one of the better A-Groove characters due to having good damage, true anti-air custom, and being able to CC off a grab while in CC mode or activate after throwing with HK. On top of that she is able to do mix ups if her custom combo is blocked.
You can use this custom if going for a mix up if they are going to block your CC, example you activate for trip guard custom, but notice during the freeze they were not attacking. Only works on tall crouchers (ex, Geese, Sagat, Gief, Raiden).
Use this if your custom is being blocked after a standing roundhouse while crossing up an opponent with a running slash, if they anticipate a overhead and stand the close s.rh with hit them and they will start to be comboed.
As with the previous custom, standing up trying to avoid a random overhead while using close s.rh will hit low.
Tick throw during CCC or activate and throw to be able to juggle and continue the custom.
You can also throw, then activate.
Landing a close s.mk lets you combo into custom
A collection of optimized custom combos for every occasion.
