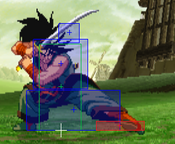
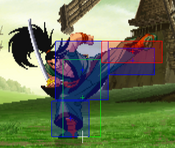
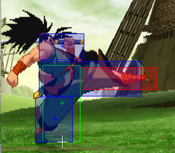
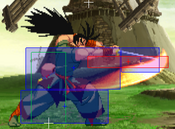
Capcom vs SNK 2/Haohmaru

From SuperCombo Wiki

Introduction

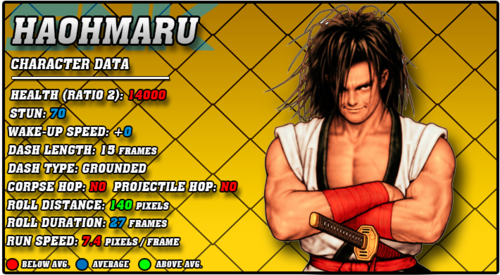
CVS2 Haoh Data.png

Story

Haohmaru is a Ronin from Japan. He's a confident and highly skilled swordsman, and devoutly follows the path of the blade. It's assumed that he's always been like this, as one of the only things known about his early life is his challenge to the incredibly skilled Ronin Jubei Yagyu. Haohmaru lost of course, but Jubei sent him to train under Nicotine Caffeine, another powerful master. There, Haohmaru befriends Genjuro Kibagami, another orphan with a tragic and bloody past. Haohmaru and Genjuro train under Nicotine Caffeine for many years, and become very close friends and training partners. However, Genjuro is a power-hungry man, and Nicotine can see this. To put his students into one final test, Nicotine gives them a challenge to fight against a large group. The reward for whoever won was the legendary and powerful sword Fugudoku. Genjuro shows his true self, and brutally murders each of his opponents, calling them weak. Haohmaru simply fights until they all give up, ending no lives. Haohmaru wins clearly, and Genjuro leaves in a raging fuss, swearing to one day kill both Haohmaru and Nicotine.

Gameplay

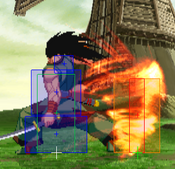
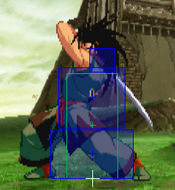
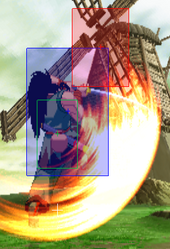
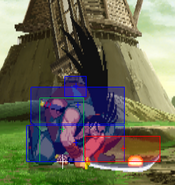
Haohmaru is a simple and straightforward character. In essence, he's just a guy with a sword. He has great normals for poking, solid pressure overall, and a useful fireball that knocks down at all ranges. He can even feint this fireball, a skill unique to him, which allows him to bait opponents jumping or mix how he does blockstrings. While he lacks mixups, he actually does fairly good when it comes to crushing guard bars thanks to his amazing LP normals and fireball feint mixups. While his 623P Kozetsuzan DP series aren't invincible, they still make solid anti-airs and combo enders.

What Haohmaru lacks is consistent defense and consistent damage output. His straightforward gameplan that revolves around simple neutral and fireball mindgames is about all he really has. His DP isn't invincible, he has decent but low reward buttons for mashing, and he has surprisingly low health overall, ranking in the same health tier as Dhalsim and Iori. His damage isn't the best either, as his only meterless combo ender is Kozetsuzan which likes to whiff at long range. He only has two supers as well, with one being a mediocre and level 3 only super, leaving him with a single way to viably spend meter. This too has a range issue, though not as bad, leaving Haohmaru struggling to get high damage from his pokes. If Haohmaru can garner respect from his opponent through solid neutral and smart usage of his fireball and feint, he can be very strong. He just has to get them to respect him first, and has no standout unbelievably strong tool to do so.

Groove Selection

Best - K/N/A: K-Groove is usually the most popular Groove for Haohmaru, and for good reason. JD lets him play a lot more offensively, and Rage ups the damage on his pokes by a huge margin. His level 3 Fujinzan super does notably good damage, which is a great buff for him in general. Hop and run let him play a lot more effective on the offensive as well. N-Haohmaru gets the more effective offense plus a roll on top of it, in exchange for no high damage peaks. Confirms into level 1 Fujinzan just aren't too damaging overall. Max Mode is an expensive but usually worthwhile buff however, as he gains a damage buff and a chance to do level 3 Fujinzan. A-Haohmaru is a popular beginner A-Groove pick, since his natural gameplan is very simple and rewarding in A-Groove. Alpha Counters give him a solid defensive tool, but the real juice is his simple and useful Custom Combo. Putting A-Haohmaru on the point of your A-Groove team isn't a bad idea if you don't want a difficult character on your point slot.

Useful - C: C-Haohmaru plays somewhat weaker than the other viable Grooves. While Haohmaru does have some fun level 2 cancels, they aren't very easy, and simply cancelling into his level 3 would do more damage overall making them less useful. Still, the ability to choose how much meter you spend is useful. C-Haohmaru can be seen as a more stable but less rewarding Groove overall.

Worst - P/S: P-Haohmaru lacks the scary meterless damage to make P-Groove good. A close range parry might get you a cl.HK > 623MP combo, but anything further out and your best punish tends to be just poking them. You'll rarely have a level 3, and even when you do, you likely won't get a chance to punish with it. S-Haohmaru is also fairly weak. Charging can put him in a bad spot, as good players will be looking for Haohmaru to whiff something big or throw a fireball, so leaving yourself open to a poke into super for big damage isn't worth the risk. His level 1 Fujinzan is underwhelming and only really useful for combos as well. S-Haohmaru gets very little overall.


Haohmaru is a swordsman with solid neutral buttons who uses an honest gameplan around his fireball mindgames to win. Relying on strong buttons and not much else, Haohmaru struggles in many other core areas of CvS2. Haohmaru is best in K-Groove, N-Groove, and A-Groove.

Difficulty: Medium
Tier: C
Pros Cons
  • Normals: Haohmaru's sword-based normals are disjointed and far reaching, allowing him to safely poke with things like 5/2LP, 5/2MP, and j.HP in hop Grooves
  • Fireball: Senpuretsuzan is a useful fireball that, although it is quite slow, knocks down from any range on the screen. By inputting 236K, you can even feint this fireball, which plays half the voice line but has very little recovery. This allows Haohmaru to bait and more effectively anti-air jumps, making jumping against his fireball on reaction a bit scarier
  • Guard Crush: Haohmaru's ability to string together normals on block and cancel into Senpuretsuzan for a fireball trap, Feint for a reset, or Resshinzan for a surprisingly fast and somewhat safe overhead makes his guard crush fairly strong overall
  • Simple: Haohmaru is easy and has very few gimmicks for you to learn, and while he is weak, his simplicity helps you learn CvS2 in an honest sense, making him a great beginner character
  • Defense: Without a true reversal, Haohmaru struggles to get out of pressure without spending meter on a guard cancel or reversal super
  • Mixup: While Resshinzan is safe, it is more than reactable, and a simple jab usually beats it. Againts P/K-Groove, they can parry or JD into very big damage as well. Without a threatening low confirm either, Haohmaru's mix is very strike/throw oriented
  • Damage: Unless Haohmaru has a Custom Combo or a level 3 Fujinzan, he lacks a high damage combo ender to make him scary
  • Simple: Once opponents know the few mindgames he can run, Haohmaru has very little in the way of a powerful gimmick or simple, effective tool to beat the opponent out. Haohmaru has to be played very honestly, and as such he leaves himself very open to being bullied by the top tiers who don't know what honesty even looks like


Players to Watch

Name Country Groove Accounts Notes
Zenmai Japan K-Groove N/A Uses K-Haoh with a little more safety and likes to use smaller pokes before leading into large attacks.
Sample Match
Yane Japan K-Groove Twitter: @yanechudan A strong pocket of Yane's, still uses him as good as anyone.
Sample Match


Normal Moves

Far Normals

5LP

Far Jab
Far Light Punch
5LP / Far LP
CVS2 Haoh 5LP.png
Version Damage Stun Cancel Guard Parry Startup Active Recovery Total Adv Hit Adv Block Invul
Far Lp.png 400 4 SP/SU Mid High 3 4 16 23 -3 -3 -

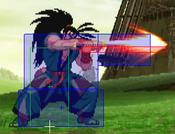
A quick stab of the sword. While it can be useful as an emergency anti-air, it is largely outclassed by 2LP.

5MP

Far Strong
Far Medium Punch
5MP / Far MP
CVS2 Haoh 5MP.png
Version Damage Stun Cancel Guard Parry Startup Active Recovery Total Adv Hit Adv Block Invul
Far Mp.png 1000 10 None Mid High 8 6 22 36 -4 -4 -

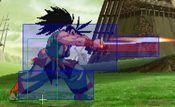
One of your best pokes. It is a long reaching stab that is unpunishable with spacing. It's great to throw out for stopping jumps, interrupting buttons, and for controlling the mid screen space. The main drawback this button has is duration. It has a large 22f recovery, so things like rolls and jumps can punish this attack with ease. If it gets JD'd or parried a similar outcome will happen. You have to use it smartly in order to not get hurt for using this.

5HP

Far Fierce
Far Heavy Punch
5HP / Far HP
CVS2 Haoh 5HP.png
Every Haohmaru player's dopamine rush
Version Damage Stun Cancel Guard Parry Startup Active Recovery Total Adv Hit Adv Block Invul
Far Hp.png 3000 30 None Mid High 18 4 52 74 -10 -24 -

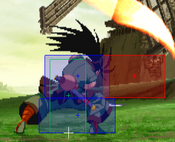
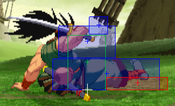
Haohmaru's most famous attack, the "hard slash." A big, sluggish attack that deals by far the highest damage of any normal and even slows down the screen to let you know that the move hurt. Unfortunately, it is also the most unsafe normal in the game. If you space it, most moves in the game can't actually punish Haoh's 5HP on block because his hitbox reels back during his recovery, making most attempted punishes whiff, however instant supers like Gigaton Blow and Mega Psycho Crusher have no problems punishing it on block AND on hit. This will simultaneously win you games and lose you games, so be very careful when you use this attack.

5LK

Far Short
Far Light Kick
5LK / Far LK
CVS2 Haoh 5LK.png
Version Damage Stun Cancel Guard Parry Startup Active Recovery Total Adv Hit Adv Block Invul
Far Lk.png 300 3 SP/SU Mid Low 4 2 13 19 +2 +2 -

A very short ranged kick, it's a pretty useless move, since cr.LP does the exact same things that st.LK does but better. Since it is +2, you can technically frame trap into cr.LP but that's if you for some reason really want to use st.LK.

5MK

Far Forward
Far Medium Kick
5MK / Far MK
CVS2 Haoh 5MK.png
Version Damage Stun Cancel Guard Parry Startup Active Recovery Total Adv Hit Adv Block Invul
Far Mk.png 900 9 SU Mid High 6 6 23 35 -3 -3 -

One of your anti-airs. This is the only anti-air that can hit jumps from further out, mainly at a 45 degree angle. cr.HP and cl.HK will whiff at those ranges, so use st.MK for this anti-air range.

5HK

Far Roundhouse
Far Heavy Kick
5HK / Far HK
CVS2 Haoh 5HK.png
Version Damage Stun Cancel Guard Parry Startup Active Recovery Total Adv Hit Adv Block Invul
Far Hk.png 1200 12 None Mid High 9 3 28 40 -4 -4 -

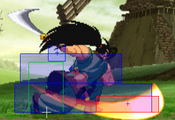
A giant step kick. It does relatively low damage compared to his other heavies, but can work as a counter poke of sorts. It's better to just use st.MP instead.

clMP

Close Strong
cl.MP
CVS2 Haoh clMP.png
Version Damage Stun Cancel Guard Parry Startup Active Recovery Total Adv Hit Adv Block Invul
Close Mp.png 1100 11 SU Mid High 6 4 27 37 -1 -1 -

A decent confirm into your super from up close, but aside from that you won't be using this button much.

clHP

Close Fierce
Close Heavy Punch
cl.HP
CVS2 Haoh clHP.png
Version Damage Stun Cancel Guard Parry Startup Active Recovery Total Adv Hit Adv Block Invul
Close Hp.png 1800 18 None Mid High 11 4 42 57 +2 -12 -

A far less rewarding variant of Haoh's 5HP. Usually comes out when you attempt a punch throw and it doesn't connect. Due to this, it's imperative that you don't misinput this button when doing a throw, and if the uncertainty is there, go for the kick throw, as cl.HK is far safer and catches jumps.

clMK

Close Forward
Close Medium Kick
cl.MK
CVS2 Haoh clMK.png
Version Damage Stun Cancel Guard Parry Startup Active Recovery Total Adv Hit Adv Block Invul
Close Mk.png 800 8 SP/SU Mid High 4 3 23 30 -6 -6 -

A decent confirm into DP, and the more reliable of the two DP confirms between this and cl.HK.

clHK

Close Roundhouse
Close Heavy Kick
cl.HK
CVS2 Haoh clHK.png
Version Damage Stun Cancel Guard Parry Startup Active Recovery Total Adv Hit Adv Block Invul
Close Hk.png 1300 13 SP/SU Mid High 6 7 21 34 -1 -1 -

The highest damage confirm into DP. Aside from that, it is one of Haoh's anti-airs (it is mostly used vs cross-ups) and it's a pretty active close button that can be used as a meaty, due to it only being -1 at worst. If used as a confirm into DP or super, make sure that it is at point blank range,e because the knockback caused from this normal usually leads to the first hit of the special/super to whiff. If you're unsure about the range, just use cl.MK instead. It's less damage, but more consistency.

Crouching Normals

2LP

Crouch Jab
Crouching Light Punch
2LP / cr.LP
CVS2 Haoh 2LP.png
Version Damage Stun Cancel Guard Parry Startup Active Recovery Total Adv Hit Adv Block Invul
D.png+Lp.png 400 4 SP/SU Mid Low 2 4 17 23 0 0 -

A deceptively annoying move. Not only is it one of the very few 2LPs in the game that has a 2-frame startup, it is 0 on contact, so Haoh can repeatedly press 2LP and it will frame trap. Obviously reversals beat it but Haoh can simply block and then the opponent might find themselves eating a 5HP. Up close this is a very annoying tool for the opponent and a very good tool for Haohmaru. Poke and prod with it as much as you can up close.

2MP

Crouch Strong
Crouching Medium Punch
2MP / cr.MP
CVS2 Haoh 2MP.png
Version Damage Stun Cancel Guard Parry Startup Active Recovery Total Adv Hit Adv Block Invul
D.png+Mp.png 1000 10 SU Low Low 6 2 25 33 -1 -1 -

Generally worse compared to 5MP. It hits low, but still suffers from the same problems, and has even less range, so you can't poke the opponent from larger distances while maintaining a generally safe space. Due to it's slightly faster speed (6f compared to 5MP's 8f) it is used at times, but 5MP is usually used over this.

2HP

Crouch Fierce
Crouching Heavy Punch
2HP / cr.HP
CVS2 Haoh 2HP.png
Version Damage Stun Cancel Guard Parry Startup Active Recovery Total Adv Hit Adv Block Invul
D.png+Hp.png 1400,900 14,9 SU, None Mid Low 5 5 46 56 -12 -12 -

One of Haoh's few anti-airs. It hits directly above him, so up close jumps and crossups are weak to this move, however the main drawback is the ridiculously long 46f recovery. Due to it being a single hit, a parry punishes this very hard, JDs not so much but still leaves you disadvantaged. Unfortunately, it's one of your only anti-airs alongside st.MK and cl.HK.

2LK

Crouch Short
Crouching Light Kick
2LK / cr.LK
CVS2 Haoh 2LK.png
Version Damage Stun Cancel Guard Parry Startup Active Recovery Total Adv Hit Adv Block Invul
D.png+Lk.png 300 3 RF/SP/SU Low Low 3 4 8 15 +5 +5 -

Though the data is worse than cr.LP, the fact that this can be rapid fired makes it a good up close tool, and can be combined with cr.LP for good block strings.

2MK

Crouch Forward
Crouching Medium Kick
2MK / cr.MK
CVS2 Haoh 2MK.png
Version Damage Stun Cancel Guard Parry Startup Active Recovery Total Adv Hit Adv Block Invul
D.png+Mk.png 700 7 SP/SU Low Low 4 8 11 23 +3 +3 -

Great meaty button, and a decent melee poke, it fills nicely for the longer ranged buttons that might be a liability when the space begins to close in.

2HK

Crouch Roundhouse
Crouching Heavy Kick
2HK / cr.HK
CVS2 Haoh 2HK.png
Version Damage Stun Cancel Guard Parry Startup Active Recovery Total Adv Hit Adv Block Invul
D.png+Hk.png 1100 11 None Low Low 16 8 25 49 KND -6 -

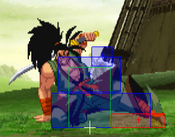
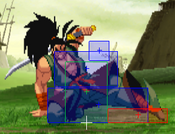
A slow slide kick. It's not a button worth using that much. It can be spaced to be safe, but it is outranged by 5MP and is far more unsafe. The damage is not even that good to warrant the use. Overall, just don't use it. This sucks for Haoh since he struggles to find knockdowns in neutral but it is what it is.

Jumping Normals

j.LP

Jump Jab
Jumping Light Punch
j.LP
CVS2 Haoh jLP.png
Version Damage Stun Cancel Guard Parry Startup Active Recovery Total Adv Hit Adv Block Invul
Ub.png/U.png/Uf.png+Lp.png 600 6 - High High 7 16 - 23 - - -

A poor air to air attack. Don't use.

j.MP

Jump Strong
Jumping Medium Punch
j.MP
CVS2 Haoh jMP.png
Version Damage Stun Cancel Guard Parry Startup Active Recovery Total Adv Hit Adv Block Invul
Ub.png/U.png/Uf.png+Mp.png 1000 10 - High High 4 8 - 12 - - -

A good air-to-air, one of your usual options when meeting an opponent in the air.

j.HP

Jump Fierce
Jumping Heavy Punch
j.HP
CVS2 Haoh jHP.png
Version Damage Stun Cancel Guard Parry Startup Active Recovery Total Adv Hit Adv Block Invul
Ub.png/U.png/Uf.png+Hp.png 1600 16 - High High 9 6 - 15 - - -

A very good button. It has very large range, and deals very high damage. This is a dangerous button with grooves that allow shorthops, as it's a great overhead attack with very nice reward. Overall it is Haoh's best air button.

j.LK

Jump Short
Jumping Light Kick
j.LK
CVS2 Haoh jLK.png
Version Damage Stun Cancel Guard Parry Startup Active Recovery Total Adv Hit Adv Block Invul
Ub.png/U.png/Uf.png+Lk.png 500 5 - High High 5 20 - 25 - - -

A short ranged knee attack, usually it is best to use early when engaging in air to airs, since it is active for a long time. The reward is okay, but not anything to marvel at.

j.MK

Jump Forward
Jumping Medium Kick
j.MK
CVS2 Haoh jMK.png
Version Damage Stun Cancel Guard Parry Startup Active Recovery Total Adv Hit Adv Block Invul
Ub.png/U.png/Uf.png+Mk.png 800 8 - High High 5 12 - 17 - - -

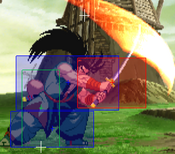
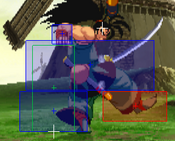
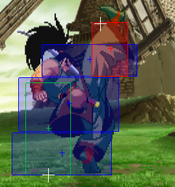
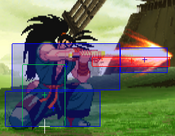
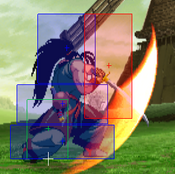
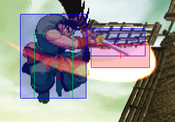
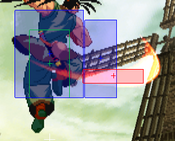
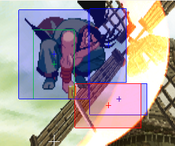
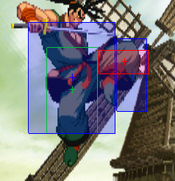
Haoh's cross-up button. As you can see from the hitbox, it has potential to hit very deep, allowing for max damage confirms off of it.

j.HK

Jump Roundhouse
Jumping Heavy Kick
j.HK
CVS2 Haoh jHK.png
Version Damage Stun Cancel Guard Parry Startup Active Recovery Total Adv Hit Adv Block Invul
Ub.png/U.png/Uf.png+Hk.png 1100 11 - High High 6 7 - 13 - - -

A decent damage air-to-air. It is a frame slower than j.MK but has a hitbox that is more suitable to air to airs.

Throws

Shoulder Slam

Shoulder Slam
Punch Throw
Near Opponent, 4/6HP
CVS2 Haoh Pthrow.png
Version Damage Stun Cancel Guard Parry Startup Active Recovery Total Adv Hit Adv Block Invul
Close B.png/F.png+Hp.png 1900 - - - - 3 1 13 17 KND - -

Untechable throw that gives Haohmaru a great knockdown, it can set up either a left right mix or a meaty setup. This is generally his preferred throw, but due to close HP being a super unsafe button, using this button to throw can be pretty risky.

Skull Crusher

Skull Crusher
Kick Throw
Near Opponent, 4/6HK
CVS2 Haoh Kthrow.png
Version Damage Stun Cancel Guard Parry Startup Active Recovery Total Adv Hit Adv Block Invul
Close B.png/F.png+Hk.png 2100 - - - - 5 1 13 19 KND - -

Another untechable throw, however the knockdown is not as good. It only gives Haoh a meaty from the front. The 300 extra damage is nice to have, but punch throw is preferred. Attempting this throw takes less risk compared to punch throw, however, as whiffing that throw gives you close HK, a far safer button that can also catch most close jumps.

Special Moves

Senpuu Retsu Zan
Senpuu Retsu Zan
236+P / QCF+P
Qcf.png + P.png
CVS2 Haoh 236P.png
Version Damage Stun Cancel Guard Parry Startup Active Recovery Total Adv Hit Adv Block Invul
LP
Qcf.png + Lp.png
1000 10 None Mid Mid 27 - 55 82 KND -18 -
MP
Qcf.png + Mp.png
1100 11 None Mid Mid 28 - 55 83 KND -18 -
HP
Qcf.png + Hp.png
1200 12 None Mid Mid 29 - 55 83 KND -18 -

Haohmaru's fireball. It is a bit on the slower side compared to other characters. Unlike those fireballs, it has a nice reward on hit, blasting the opponent into the air. It gives Haohmaru a very good knockdown, so the opponent has to respect it knowing the consequences of them not doing so. In terms of fireball wars, this one usually won't win many. It is mainly used to keep control in neutral from a distance, having something on screen wouldn't hurt, and as said before usually the opponent will take action to try and not get hit by it due to the nice reward. You can juggle this fireball into a super, but the chances of that happening are slim to none in a real match.

Feint Senpuu Retsu Zan
236+K / QCF+K
Qcf.png + K.png
CVS2 Haoh 236K.png
Version Damage Stun Cancel Guard Parry Startup Active Recovery Total Adv Hit Adv Block Invul
LK
Qcf.png + Lk.png
- - - - - 26 - - 26 - - -
MK
Qcf.png + Mk.png
- - - - - 28 - - 28 - - -
HK
Qcf.png + Hk.png
- - - - - 30 - - 30 - - -

A feint of Haohmaru's fireball. He winds back like he is going to do the move, and even says "Senpuu" before interrupting himself. This is a pretty okay tool, the main use is to get the oppoennt to jump expecting a fireball and promptly hitting them with an anti air or air to air in response. Aside from that, it really isn't used for much else.

Kougetsu Zan
Kougetsu Zan
623+P / DP+P
Dp.png + P.png
CVS2 Haoh 623P.png
Version Damage Stun Cancel Guard Parry Startup Active Recovery Total Adv Hit Adv Block Invul
LP
Dp.png + Lp.png
1400 14 None Mid Mid 6 7 [9] 7 45 74 KND -28 -
MP
Dp.png + Mp.png
900+600 9+6 None Mid Mid 6 7 [9] 7 56 85 KND -39 -
HP
Dp.png + Hp.png
1000+600 12 None Mid Mid 6 7 [7] 8 65 93 KND -49 -

Haohmaru's uppercut/DP. The two main uses this move has are that it is his best anti-air, and it is his only good meterless combo ender. The anti-air range of this DP is roughly a 50-60 degree angle jump, not too close but not too far. The hitbox will usually favor it, however this move has no i-frames of any kind, meaning that Haohmaru has no meterless reversal. Aside from those flaws, it is a good special move and one of the core parts of Haoh's kit.

Resshin Zan
Resshin Zan
214+P / QCB+P
Qcb.png + P.png
CVS2 Haoh 214P.png
Version Damage Stun Cancel Guard Parry Startup Active Recovery Total Adv Hit Adv Block Invul
LP
Qcb.png + Lp.png
1200 12 None High High 26 8 22 56 KND -6 -
MP
Qcb.png + Mp.png
1300 13 None High High 32 8 22 62 KND -6 -
HP
Qcb.png + Hp.png
1400 14 None High High 39 8 22 69 KND -6 -

A flying flip ending in a powerful slash. This move causes a knockdown on hit, but it is a quick one and you only get a meaty. This move has 2 main uses: as a surprise mixup tool from a string of light attacks, and as a very niche fireball punish. The mixup can be pretty tricky, as you can go from low to overhead quickly from something like cr.LK or cr.MK, however the opponent can quickly adapt and block it easily the next time, so this should be used sparingly. It is -6 on block, so with spacing, it is hard to punish this move, and if it does get clipped it won't hurt too much. As a fireball punish, it's a read, doing it on reaction leads into the move getting blocked or anti aired entirely, so if you're certain the fireball will come, you can let it rip. Otherwise, just stick to using this move sparingly and catch the opponent off guard.

Super Moves

Tenha Fuujin Zan
Tenha Fuujin Zan
236236+P / QCF,QCF+P
Qcf.pngQcf.png + P.png
CVS2 Haoh 236236P.png
Version Damage Stun Cancel Guard Parry Startup Active Recovery Total Adv Hit Adv Block Invul
LP
Qcf.pngQcf.png + Lp.png
2300 0 None Mid Mid 8 6 [13] 6 [14] 6 [11] 21 54 139 KND -48 8f (Full)
MP
Qcf.pngQcf.png + Mp.png
4400 0 None Mid Mid 8 6 [13] 6 [14] 6 [14] 6 [11] 21 64 169 KND -55 8f (Full)
HP
Qcf.pngQcf.png + Hp.png
5800 0 None Mid Mid 8 6 [13] 6 [14] 6 [14] 6 [14] 6 [11] 21 75 204 KND -65 22f (Full)

Haohmaru's only tiered super. Unfortunately, it is also his only true reversal. This is a very risky move to pull out in those scenarios due to how unsafe it is. This is only really used as a combo ender, since you can bag some nice damage out of those confirms, however be mindful that the first uppercut of the super has shorter range, and whiffing that first part causes the combo to fall out. It is just a very risky super, with just okay reward.

Another important thing to note, do NOT use this as an anti-air or a midscreen juggle. This move does not juggle properly and the opponent falls out of the super, and usually only 2-3 hits connect. On higher levels where Haohmaru spends more time doing uppercuts, he is actually punishable on HIT when connecting as an anti air. Unless you're certain the anti-air super will kill, do not use it against an aerial opponent.

Tenha Senkou Zan
Tenha Senkou Zan
632146+P / HCB,F+P
Hcb.pngF.png + P.png
CVS2 Haoh 632146P.png
Hard Slash on every PED known to man
Damage Stun Cancel Guard Parry Startup Active Recovery Total Adv Hit Adv Block Invul
6700 0 None Mid High 42 2 60 104 KND -34 42f (Full)

Haohmaru's level 3 only super. A gigantic, powerful variant of his 5HP. When landed, this super does a ridiculous 6.7K damage. While that is some nice reward, good luck ever landing this super. It has a 42 frame startup and is easily avoidable. Unless the opponent is dizzied, they can easily escape on reaction. I guess you can punish moves that are -43 or more, but good luck doing that too. Despite the huge damage, it gets outdone by supers like Final Atomic Buster and Shun Goku Satsu, as those deal more damage and connect way more than this does. For as cool as this super is, unfortunately it is pretty useless.

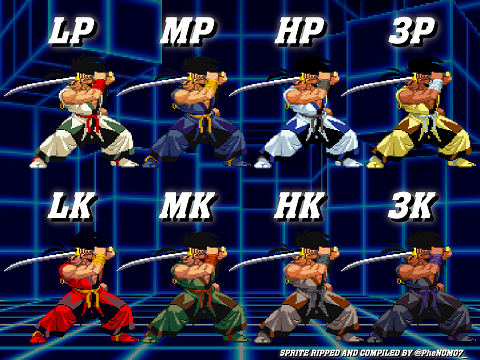
Colors

Haohmaru CvS2 colors.png


CvS2 Wiki Navigation

General
Controls
Notation
HUD
Glossary
System
Roll Cancel
Combo
CvS2 Versions
Netplay/ Training
FAQ
Grooves
Groove Overview
Groove Subsystems
C-Groove
A-Groove
P-Groove
S-Groove
N-Groove
K-Groove
Capcom Characters
Akuma (Gouki)
Balrog (Boxer)
Blanka
Cammy
Chun-Li
Dan
Dhalsim
Eagle
E.Honda
Guile
Ken
Kyosuke
Maki
M. Bison (Dictator)
Morrigan
Rolento
Ryu
Sagat
Sakura
Vega (Claw)
Yun
Zangief
SNK Characters
Athena
Benimaru
Chang
Geese
Haohmaru
Hibiki
Iori
Joe
Kim
King
Kyo
Mai
Nakoruru
Raiden
Rock
Rugal
Ryo
Terry
Todo
Vice
Yamazaki
Yuri
Boss Characters
Shin Akuma
Ultimate Rugal
Evil Ryu
Orochi Iori