Capcom vs SNK 2/Balrog

From SuperCombo Wiki

Introduction

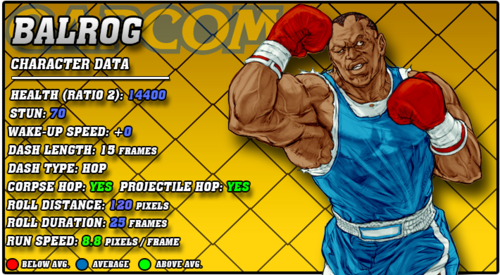
CVS2 Boxer Data.png

Story

Balrog, known as Mike Bison in Japan and Boxer worldwide, is an American boxing legend. Balrog was raised from a childhood of poverty in a criminal area, and made it out by training to become a boxing fighter. He took to it quickly, and was soon called one of the best boxing champions at the time. However, his upbringing made him more relentless and cutthroat, leading him to high violence in the ring and using illegal moves like his Buffalo Headbutt. After accidentally killing one of his opponents, Balrog was banned from any competitive boxing circuits. Still, he had plenty of money and was an amazing fighter. He enjoyed a life of fame and riches, until one day he joined Shadaloo.

He quickly rose the ranks of Shadaloo, and became M. Bison's personal enforcer. Throughout most of the games, Balrog enjoys his high position in Shadaloo, and carries out multiple hits for them alongside directing other grunt work. Not much is known about where Balrog is in the modern time of Street Fighter 3, but we know he lost to Alex in the grand finals of a tournament called Vale Tudo Eternal Fighting prior to the events of Street Fighter III: New Generation/

Gameplay

Balrog is a classic bully character, using his forward moving punches and long reaching normals to bust up opponents in neutral. In other games, especially Street Fighter 2: Super Turbo, Balrog is often considered a high or top tier character for his amazing offense and neutral. Balrog isn't as strong in CvS2 sadly, but is nowhere near weak, usually scoring in the mid tier somewhere. He still has his amazing dash punches, but Dash Straight can be crouched by a majority of the cast, limiting its use heavily. This sorta sucks, because Dash Straight is classically the main one you use in neutral for it's long reach and safety on block. Dash Upper and Dash Ground Upper both suffer this weakness as well, leaving him with only the risky and unsafe Dash Ground Lower, which he never wants to do in neutral except as a surprise tool from Dash Straight. This forces him to play a lot slower, and wait for the opponent to allow an opening.

Balrog comes with plenty of benefits however. He has simple and good combos, Dash Upper is amazing for creating powerful guard crush strings, and his supers are incredibly useful. Crazy Buffalo is a high damage combo ender with good reach and invuln, and the level 2 combo from it is simple and powerful. The real juice is his level 3, Gigaton Blow. Incredibly fast, great range, and high damage makes Gigaton Blow a terrifying punish tool akin to Ken's SAIII in 3rd Strike, but with much scarier damage. Even without a super, Buffalo Headbutt can get Balrog out of a sticky situation, and RC Dash Straight makes opponents think twice about throwing that fireball or standing poke out. Balrog leans a lot more defensively in CvS2 in neutral, as a crouchable Dash Straight removes his most ignorant neutral skip. Once he gets to be aggro, he can overwhelm his opponents, and solid defense gets you there faster than a high risk neutral skip.

Groove Selection

Best - C/K: Balrog's best Grooves are C-Groove and K-Groove. C-Groove gets easy access to a lot of meter for Crazy Buffalo combos or a Gigaton Blow punish with meter, air blocking to make his jumps a lot safer while he charges midair, and his level 2 Crazy Buffalo cancels easily into a Buffalo Headbutt for solid damage with meter. Balrog has a solid roll cancel with RC Dash Straight, and while it can still be crouched, using it as a fireball or standing poke punish makes this less risky. K-Balrog loses that consistent meter and RCs, but what he gets in return is Rage. A raged Balrog is terrifying specifically because he has access to Gigaton Blow and with the mechanic of JDs, Balrog can get rage multiple times. JDs also make moves more punishable, and by that alone Gigaton Blow gets even more threatening. K-Balrog also has a good run (good run pressure) and a really good shorthop. He can open up opponents better than he can in C, but overall the two are relatively even in strength.

Useful - A/N: A-Balrog is right behind C and K. A-Balrog loses the threat of super almost entirely, but makes up for it with his Custom Combo. It's not the highest damage, but it is a very powerful tool, and his CC is actually quite easy to perform. Both A-Balrog and K-Balrog trade off consistent meter threat for these tools however, which is a hefty loss. N-Balrog maintains the threat of a level 1 Crazy Buffalo combo, and gets access to the movement of K-Groove and the rolls of C/A-Groove, but basically never has Gigaton Blow.

Worst - S/P: S-Balrog is a bit of a gimmick, just like any S-Groove character. Infinite level 1 Crazy Buffalo is pretty nice, as it solidifies his punishes a bit more, but he doesn't entirely need it. As a loss, he has to charge meter to have any threat of a super. Having to charge meter removes the threat of dash punches or Buffalo Headbutt in neutral, and leaves him open to punishment. This really sucks for Balrog, who can be a little more than reliant on a good super. Gigaton Blow is even rarer in S-Groove as well. P-Balrog is very hard to use, as you sacrifice charge to parry, meaning he can't get much of a punish. Situationally, you can parry a move and have enough time to charge for a Gigaton Blow punish, but this is rare and about the scariest thing P-Balrog has.


Balrog (Boxer) is a versatile character with good defense and offense, but lacking neutral. If he gets a solid punish on defense, he can go into powerful guard crush strings against his opponent and secure a win. However, if he never gets these, and is forced to play neutral all day, he struggles hard. Balrog is best in C-Groove and K-Groove.

Difficulty: Medium
Tier: B-
Pros Cons
  • Defense: Between two fast punishing supers, Buffalo Headbutt, and RC Dash Straight/Ground Straight, Balrog has plenty of defensive tools
  • Offense: Balrog has good pressure between Dash Straight, whiffed Dash Upper, and his generally plus buttons
  • Supers: Crazy Buffalo is a solid combo ender and punish super, and Gigaton Blow is arguably the best lvl.3 super in the game
  • Damage: You can output quite a lot of damage with Balrog, especially if you have meter
  • Crouch-able Attacks: Balrog's two best pokes, st.HP and Dash Straight, can be crouched under by certain characters. This is a big weakness, as those two attacks are the crux of Balrog's ability to play neutral. Without any guarantee of landing those attacks, Balrog will struggle mightily in those matchups.
  • Neutral: If Dash Straight can be crouched under, Balrog's other options to play neutral are weak
  • Matchup Dependency: This leads back in to his Crouch-able Attacks weakness. In matchups where Balrog can reliably land his Dash Straight, he is either even with or has an advantage against the opponent. In matchups where he can't do that, he has to do a lot more work for noticeable less results.
  • Meter Hungry: Balrog really likes having a super to threaten with. C-Groove and K-Groove are the best grooves because C-Groove gives him reliable access to at least a level 1 while K-Groove always gives Balrog a level 3 once per round


Players to Watch

Name Country Groove Accounts Notes
178 Japan C-Groove Twitter: @chandesogeese Known for using weirder characters, 178 uses Boxer just as well. Also lands tons of high level TAPs.
Sample Match
Kodama Japan K-Groove N/A Uses K-Boxer's terrifying level 3 very well to accrue high damage along with his good short hop and JD game.
Sample Match


Normal Moves

Far Normals

5LP

Far Jab
Far Light Punch
5LP / Far LP
CVS2 Boxer 5LP.PNG
Version Damage Stun Cancel Guard Parry Startup Active Recovery Total Adv Hit Adv Block Invul
Far Lp.png 300 3 RF/SP/SU Mid High 2 4 6 12 +5 +5 None

A quick jab. Simple and standard, with a nice benefit of being 2 frames when most 5LP's are 3 or 4 frames. Decent panic button, but it can be crouched under.

5MP

Far Strong
Far Medium Punch
5MP / Far MP
CVS2 Boxer 5MP.PNG
Version Damage Stun Cancel Guard Parry Startup Active Recovery Total Adv Hit Adv Block Invul
Far Mp.png 1000/800 10/8 SU Mid High 7 3 23 33 -6 -6 None

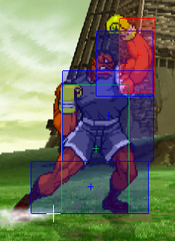
A far reaching uppercut. Surprising horizontal range, you can anti-air with this pretty consistently. You would rather get cl.MP or 2HP for anti-air usually however, or Buffalo Headbutt.

5HP

Far Fierce
Far Heavy Punch
5HP / Far HP
CVS2 Boxer 5HP.PNG
For when you wish Dash Straight would work
Version Damage Stun Cancel Guard Parry Startup Active Recovery Total Adv Hit Adv Block Invul
Far Hp.png 1200 12 SU Mid High 8 6 21 35 -3 -3 None

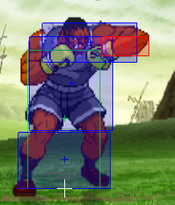
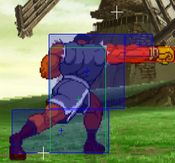
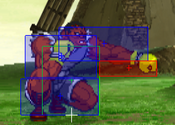
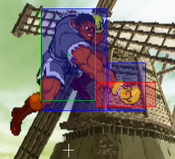
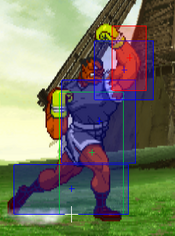
A long reaching straight punch. Crouchable, but by less of the cast than Dash Straight, making it a subpar replacement. You can combo into super if you do this as a punish, and it does massive damage.

5LK

Far Short
Far Light Kick
5LK / Far LK
CVS2 Boxer 5LK.PNG
Version Damage Stun Cancel Guard Parry Startup Active Recovery Total Adv Hit Adv Block Invul
Far Lk.png 500 5 RF/SP/SU Mid High 2 3 5 10 +7 +7 None

High hitting elbows. Superior to 5LP in every way except hitbox. Better overall frame data, +7 instead of +5, and it does 500 damage instead of 300. Like many things in Balrog's kit however, these whiff crouching opponents easily.

5MK

Far Forward
Far Medium Kick
5MK / Far MK
CVS2 Boxer 5MK.PNG
Version Damage Stun Cancel Guard Parry Startup Active Recovery Total Adv Hit Adv Block Invul
Far Mk.png 1000 10 SU Mid High 7 5 17 30 -2 -2 None

A quick gut punch. Low reach, and there is a difference in the close and far versions, so you're much more likely to land the close version than this. That's ok, because the close version is much better in every way. If you do get this, you won't get a special cancel if you buffered for one, but you can still go into a super.

5HK

Far Roundhouse
Far Heavy Kick
5HK / Far HK
CVS2 Boxer 5HK.PNG
Version Damage Stun Cancel Guard Parry Startup Active Recovery Total Adv Hit Adv Block Invul
Far Hk.png 1300 13 None Mid High 8 4 24 36 -4 -4 None

A far reaching hook. One of Balrog's pokes that you can't crouch under, making it instantly very valuable. Sadly, it isn't a great replacement for 5HP/Dash Straight. It only has about half the range of 5HP, and barely a 3rd of the range of Dash Straight. It doesn't cancel, and leaves Balrog -4 so you can't exactly run in and pressure after it. It does do decent damage for a single hit however, and regardless of all the drawbacks, it's a far reaching and uncrouchable poke, making it very important in his kit.

Close Normals

clLP

Close Jab
Close Light Punch
cl.LP / cl5LP
CVS2 Boxer 5LP.PNG
Version Damage Stun Cancel Guard Parry Startup Active Recovery Total Adv Hit Adv Block Invul
Close Lp.png 300 3 RF/SP/SU Mid High 2 4 6 12 +5 +5 None

Identical to 5LP. Still a good panic jab that you can crouch under.

clMP

Close Strong
Close Medium Punch
cl.MP / cl5MP
CVS2 Boxer clMP.PNG
Version Damage Stun Cancel Guard Parry Startup Active Recovery Total Adv Hit Adv Block Invul
Close Mp.png 1000/800 10/8 SU Mid High 5 4 19 28 -3 -3 None

An uppercut at a similar angle to 5MP. A bit better overall, mostly due to the faster startup, but getting 5MP instead of this really isn't too bad anyway. Still mostly for anti-air purposes and the occasional combo into super.

clHP

Close Fierce
Close Heavy Punch
cl.HP / cl5HP
CVS2 Boxer clHP.PNG
Version Damage Stun Cancel Guard Parry Startup Active Recovery Total Adv Hit Adv Block Invul
Close Hp.png 1400 14 SU Mid High 7 4 19 30 +1 +1 None

Another straight punch. Probably the worst overall, though it does very high damage, as it has the highest hitbox. Very easily crouched under. Only really leads to super, and 2HP is a more reliable button for that purpose. Oddly, this move slides Boxer back a little bit, so the +1 on block is a bit hard to abuse.

clLK

Close Short
Close Light Kick
cl.LK / cl5LK
CVS2 Boxer 5LK.PNG
Version Damage Stun Cancel Guard Parry Startup Active Recovery Total Adv Hit Adv Block Invul
Close Lk.png 500 5 RF/SP/SU Mid High 2 3 5 10 +7 +7 None

Identical to 5LK. Still very good jabs as well, and still crouchable unfortunately.

clMK

Close Forward
Close Medium Kick
cl.MK / cl5MK
CVS2 Boxer 5MK.PNG
Version Damage Stun Cancel Guard Parry Startup Active Recovery Total Adv Hit Adv Block Invul
Close Mk.png 1100 11 SP/SU Mid High 5 4 13 22 +3 +3 None

A directly upgraded 5MK. Useful normal for meaties and punishes, as it combos pretty easily into a Ground Straight or a Dash Upper. +3 on block means you can pressure afterwards, though without a little walk there isn't much that will reach well. On counterhit it's a little easier, but still not much will reach.

clHK

Close Roundhouse
Close Heavy Kick
cl.HK / cl5HK
CVS2 Boxer 5MK.PNG
Version Damage Stun Cancel Guard Parry Startup Active Recovery Total Adv Hit Adv Block Invul
Close Hk.png 1500 15 SU Mid High 6 7 15 28 +2 +2 None

Another gut punch. Your highest damage normal, and a very high damage cancel into super, although the situations you can punish with this into super are a bit rare. The difficulty lies in not getting a throw while you buffer for the super. Still, if you get it consistently, this is your max damage super cancel.

Crouching Normals

2LP

Crouch Jab
Crouching Light Punch
2LP / cr.LP
CVS2 Boxer 2LP.PNG
Version Damage Stun Cancel Guard Parry Startup Active Recovery Total Adv Hit Adv Block Invul
D.png+Lp.png 200 2 RF/SP/SU Mid Mid 3 4 7 14 +4 +4 None

A simple 2LP for mashing and pressure. Links into itself so you can build charge, and on counterhit it can link into stronger moves. Standard but useful overall.

2MP

Crouch Strong
Crouching Medium Punch
2MP / cr.MP
CVS2 Boxer 2MP.PNG
Version Damage Stun Cancel Guard Parry Startup Active Recovery Total Adv Hit Adv Block Invul
D.png+Mp.png 1000 10 SP/SU Mid Low 4 4 13 21 +4 +4 None

A strong low punch. Useful for meaties and close range poking, and on counterhit it links into itself for big damage super confirms. Decent as a defensive option as well to stop them moving in on you.

2HP

Crouch Fierce
Crouching Heavy Punch
2HP / cr.HP
CVS2 Boxer 2HP.PNG
Version Damage Stun Cancel Guard Parry Startup Active Recovery Total Adv Hit Adv Block Invul
D.png+Hp.png 1300/800 13/8 SU Mid High 5 6 23 44 -5 -5 None

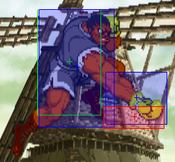
A high reaching uppercut punch. Your go-to anti-air and super confirm in most situations. Fast, decent hitbox, and good damage make it a very rewarding option in both of those scenarios. -5 on block, no special cancel, and hefty endlag make it a worse option in neutral however. Save it for anti-airs and confirms.

2LK

Crouch Short
Crouching Light Kick
2LK / cr.LK
CVS2 Boxer 2LK.PNG
Version Damage Stun Cancel Guard Parry Startup Active Recovery Total Adv Hit Adv Block Invul
D.png+Lk.png 300 3 SP/SU Low Low 3 4 7 14 +4 +4 None

A quick jab aimed at the feet, and Boxer's main low route. To confirm with this, you have to hit a 1 frame link into 2LP, which is as hard as it sounds. Without doing that, you can't confirm off of 2LK and have to cancel immediately. Learning the 1 frame into 2LP gives you a solid combo with 2LK, 2LP > [2]8HP, so try to lab that out in order to make Balrog's mixup just a little bit scarier.

2MK

Crouch Forward
Crouching Medium Kick
2MK / cr.MK
CVS2 Boxer 2MK.PNG
Version Damage Stun Cancel Guard Parry Startup Active Recovery Total Adv Hit Adv Block Invul
D.png+Mk.png 900 9 SU Low Low 7 2 15 24 +3 +3 None

Another low hitting punch. Not as useful as a poke, which is rough since Balrog would really like this to be a good poke. Instead, this is mostly a whiff punish into super or a link from a counterhit cl.MK, and doesn't see purpose anywhere else much.

2HK

Crouch Roundhouse
Crouching Heavy Kick
2HK / cr.HK
CVS2 Boxer 2HK.PNG
Version Damage Stun Cancel Guard Parry Startup Active Recovery Total Adv Hit Adv Block Invul
D.png+Hk.png 1300 13 SU Low Low 7 4 23 34 -DWN -3 None

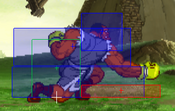
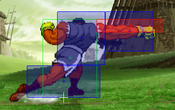
A heavy punch that resembles a Dash Ground Straight. Very solid sweep, gives a good knockdown and can confirm into Gigaton Blow from pretty far out. For the Gigaton Blow confirm, don't cancel 2HK, and instead link into the super. Hits low and has good range, and not as much whiff recovery as other sweeps, but still a pretty risky button in comparison to things like 2LP.

Jumping Normals

jLP

Jump Jab
Jumping Light Punch
j.LP
CVS2 Boxer jLK.PNG
Neutral Jump
CVS2 Boxer jLP.PNG
Diagonal Jump
Version Damage Stun Cancel Guard Parry Startup Active Recovery Total Adv Hit Adv Block Invul
Ub.png/U.png/Uf.png+Lp.png 600 6 None High High 3 22 0 25 Varies Varies None

Useful jabs for interrupting air movement, though they tend to lose out and aren't very high reward. Try to hit them as you rise up, best used from a backwards jump.

jMP

Jump Strong
Jumping Medium Punch
j.MP
CVS2 Boxer njMP.png
Neutral Jump
CVS2 Boxer jMP.png
Diagonal Jump
Version Damage Stun Cancel Guard Parry Startup Active Recovery Total Adv Hit Adv Block Invul
U.png+Mp.png 1000 10 None High High 5 10 0 15 Varies Varies None
Version Damage Stun Cancel Guard Parry Startup Active Recovery Total Adv Hit Adv Block Invul
Ub.png/Uf.png+Mp.png 900 9 None High High 6 6 0 12 Varies Varies None

Diagonal jump strong is a hook similar to dj.LP, but with much less active frames. Not much use. Neutral jump strong is a decent air-to-air, but you won't use it often since air-to-air is worse than just doing 2HP or 5MP.

jHP

Jump Fierce
Jumping Heavy Punch
j.HP
CVS2 Boxer njHP.PNG
Neutral Jump
CVS2 Boxer jHP.PNG
Diagonal Jump
Version Damage Stun Cancel Guard Parry Startup Active Recovery Total Adv Hit Adv Block Invul
U.png+Hp.png 1200 12 None High High 9 8 0 17 Varies Varies None
Version Damage Stun Cancel Guard Parry Startup Active Recovery Total Adv Hit Adv Block Invul
Ub.png/Uf.png+Hp.png 1300 13 None High High 7 8 0 15 Varies Varies None

Diagonal jump fierce is your main jump-in normal for damage, and has a solid hitbox below Balrog. Neutral jump fierce is a unique move. While nj.HP is active, Balrog can move a little to the left or right by holding 4 or 6. This is a little niche, but allows you to neutral jump over fireballs and still approach forward, or escape to bait an anti-air. Lower risk way to move forward over projectiles, but not super notable otherwise.

jLK

Jump Short
Jumping Light Kick
j.LK
CVS2 Boxer jLK.PNG
Version Damage Stun Cancel Guard Parry Startup Active Recovery Total Adv Hit Adv Block Invul
Ub.png/U.png/Uf.png+Lk.png 600 6 None High High 4 22 0 26 Varies Varies None

Similar air punches to j.LP, with fast startup and high active frames. Outside of one extra frame of startup, this is identical overall to j.LP, so technically there's no real reason to ever use this. This would matter a lot if j.LP was an important air-to-air, but it isn't, so it really doesn't matter much.

jMK

Jump Forward
Jumping Medium Kick
j.MK
CVS2 Boxer jLK.PNG
Version Damage Stun Cancel Guard Parry Startup Active Recovery Total Adv Hit Adv Block Invul
U.png+Mk.png 900 9 None High High 6 9 0 15 Varies Varies None
Version Damage Stun Cancel Guard Parry Startup Active Recovery Total Adv Hit Adv Block Invul
Ub.png/Uf.png+Mk.png 900 9 None High High 7 6 0 13 Varies Varies None

Jumping punches that are identical in animation to j.LP. Not much purpose for these overall really, they aren't great air-to-airs or great jump-ins. The neutral jump and diagonal jump versions are identical except for different frame data, which is not something that will affect you often.

jHK

Jump Roundhouse
Jumping Heavy Kick
j.HK
CVS2 Boxer jHK.png
Version Damage Stun Cancel Guard Parry Startup Active Recovery Total Adv Hit Adv Block Invul
U.png+Hk.png 1300 13 None High High 8 10 0 18 Varies Varies None
Version Damage Stun Cancel Guard Parry Startup Active Recovery Total Adv Hit Adv Block Invul
Ub.png/Uf.png+Hk.png 1300 13 None High High 7 8 0 15 Varies Varies None

Heavy jump ins. Neutral jump version has a bit of extra active frames but you won't use it much. The diagonal version is exactly the same as diagonal j.HP, you can use them both in the same situations.

Throws

Head Bomber

Lever Break
Punch Throw
Near Opponent, 4/6HP
CVS2 Boxer PThrow.PNG
Version Damage Stun Cancel Guard Parry Startup Active Recovery Total Adv Hit Adv Block Invul
Close B.png/F.png+Hp.png 1900 0 None Grab Grab 3 1 13 17 -DWN Grab None

A quick liver blow. Not a mash throw like in other SF titles. Faster and lower damage of his two throws. You can still get solid oki from this since Balrog can walk up as the opponent flies away.

Dirty Bomber

Kiss Your Grave
Kick Throw
Near Opponent, 4/6HK
CVS2 Boxer KThrow.PNG
Version Damage Stun Cancel Guard Parry Startup Active Recovery Total Adv Hit Adv Block Invul
Close B.png/F.png+Hk.png 2200 0 None Grab Grab 5 1 13 19 -DWN Grab None

Balrog slams his opponent into the ground. Higher damage but slower startup. One of your best up close knockdowns, right next to Balrog.

Special Moves

Dash Straight

Dash Straight
Dash Punch
[4]6P
CVS2 Boxer 46P.PNG
Your favorite move on about half the cast, and an instant death button on the other half
Version Damage Stun Cancel Guard Parry Startup Active Recovery Total Adv Hit Adv Block Invul
Charge B.png,F.png+Lp.png 1100 11 None Mid High 5~14 4 17 26~35 -1 -1 None
Charge B.png,F.png+Mp.png 1200 12 None Mid High 6~22 4 18 28~44 -2 -2 None
Charge B.png,F.png+Hp.png 1300 13 None Mid High 6~30 4 19 29~53 -3 -3 None

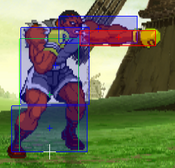
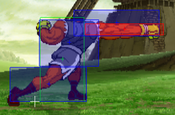
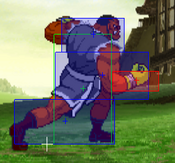
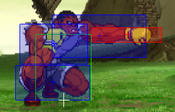
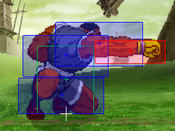
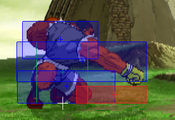
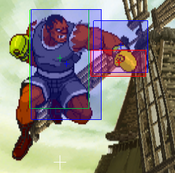
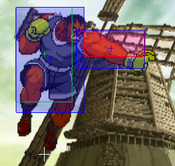
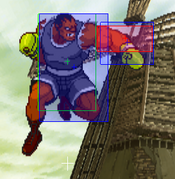
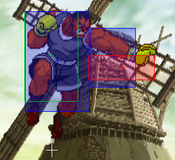
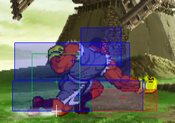
Balrog's signature Dash Straight, and one of the saddest balance mistakes in CvS2. The listed startup is minimum and maximum travel time, these will activate as soon as they reach the opponent or when they reach the maximum slide distance. These are amazing neutral winning tools with massive reach, great forward movement, and great on block values. However, they have a massive caveat: about two/thirds of the cast can crouch under these. On the characters that can't crouch under them, these are oppressive and define neutral. They're fast and insanely far reaching, they can stuff most anything. Your opponent has to move around them, JD them, parry them, or do something invincible through them. Solid spacing on these makes them incredibly hard to interrupt or properly punish, and they also act as useful combo enders since Balrog can get a scary standing mixup on them. On the characters that can crouch under these, they become essentially useless.

Characters who can't crouch under Dash Straight:

  • Raiden
  • Geese
  • Chang
  • Zangief
  • Sagat
  • Eagle
  • Rugal
  • Yamazaki
  • Benimaru
  • E.Honda
  • Dhalsim
  • Terry
  • Kyo
  • Joe


Characters who can crouch under Dash Straight:

  • Guile
  • Boxer
  • Blanka
  • Dictator
  • Kyosuke
  • Todo
  • Ryo
  • Ryu
  • Ken
  • Akuma
  • Dan
  • Rolento
  • Haohmaru
  • Claw
  • Cammy
  • Morrigan
  • Yun
  • Chun-Li
  • Sakura
  • Mai
  • Kim
  • Vice
  • Yuri
  • Nakoruru
  • Rock
  • Hibiki
  • Maki
  • Iori
  • Athena

Dash Uppercut

Dash Uppercut
Dash Upper
[4]6K
CVS2 Boxer 46K.PNG
Version Damage Stun Cancel Guard Parry Startup Active Recovery Total Adv Hit Adv Block Invul
Charge B.png,F.png+Lk.png 1200 12 None Mid High 4~11 4 15 23~30 +1 +1 None
Charge B.png,F.png+Mk.png 1300 13 None Mid High 5~20 4 15 24~39 +1 +1 None
Charge B.png,F.png+Hk.png 1400 14 None Mid High 6~29 4 15 25~48 +1 +1 None

A dashing uppercut. Mostly, this is used to anti-air opponents trying to jump over Dash Straight. By design, every character in the game can crouch under these, which makes them even worse for neutral than Dash Straight. However, against the matchups where you get to use Dash Straight, this is a good way to snipe opponents trying to neutral jump or backward jump away from it. They're also +1, so if an opponent is stand blocking in fear of a Dash Ground Straight or a 2HK, you can safely reset pressure.

Dash Ground Straight

Dash Ground Straight
Dash Lower
[4]3P
CVS2 Boxer 43P.PNG
Version Damage Stun Cancel Guard Parry Startup Active Recovery Total Adv Hit Adv Block Invul
Charge B.png,Df.png+Lp.png 1000 10 None Low Low 6~14 4 28 38~46 -DWN -10 None
Charge B.png,Df.png+Mp.png 1100 11 None Low Low 7~23 4 25 36~52 -DWN -10 None
Charge B.png,Df.png+Hp.png 1200 12 None Low Low 8~32 4 26 38~62 -DWN -10 None

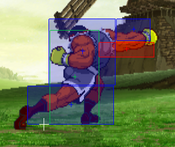
Balrog slides forward like Dash Straight, but punches at their feet with a move that hits low. Normally, this is to punish people trying to walk away from Dash Straight. This still works, but since the answer to Dash Straight is to crouch, these are more often than not blocked in neutral. This sucks, as they're -10 and more than punishable. They make alright punishes and decent combo enders, though their ability to do either of these relies on having close enough proximity for the move to come out fast.

Dash Ground Uppercut

Dash Ground Uppercut
Dash Upper Knockdown
[4]3K
CVS2 Boxer 43K.PNG
Version Damage Stun Cancel Guard Parry Startup Active Recovery Total Adv Hit Adv Block Invul
Charge B.png,Df.png+Lk.png 1100 11 None Mid High 7~14 4 23 34~41 -DWN -7 None
Charge B.png,Df.png+Mk.png 1200 12 None Mid High 8~23 4 23 35~50 -DWN -7 None
Charge B.png,Df.png+Hk.png 1300 13 None Mid High 9~32 4 23 36~59 -DWN -7 None

A move with the exact same animation and hitbox as Dash Uppercut, but it knocks grounded opponents down. Technically does more damage against standing opponents as a combo ender than Dash Ground Straight, but 100 extra damage isn't that worth it overall. Slower minimum startup than the other dash punches and still being crouchable universally means this isn't really a useful tool over a normal Dash Uppercut, and serves essentially the same purpose of anti-airing people jumping over your Dash Straight but with worse damage and startup. Still unsafe on block too, if they do stand block it, but punishing it is hard as it looks nearly identical to Dash Uppercut. The secret is that Balrog's legs are in a different position, and he says a different voiceline. Learn the difference so you can punish these on block, or just crouch and punish both with no effort.

Buffalo Head Butt

Buffalo Head Butt
Headbutt
[2]8P
CVS2 Boxer 28P.PNG
Version Damage Stun Cancel Guard Parry Startup Active Recovery Total Adv Hit Adv Block Invul
Charge D.png,U.png+Lp.png 1400 14 None Mid High 8 11 25 44 -DWN -12 1-8 (Upper)
Charge D.png,U.png+Mp.png 1500 15 None Mid High 9 11 25 45 -DWN -12 1-9 (Upper)
Charge D.png,U.png+Hp.png 1600 16 None Mid High 10 11 25 46 -DWN -12 None

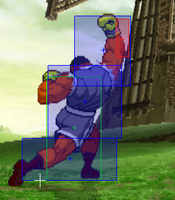
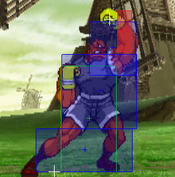
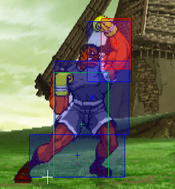
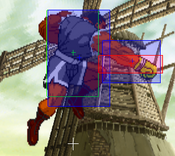
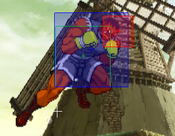
Balrog jumps into the air with a headbutt. The LP and MP versions are useful anti-airs and punish tools, and the HP version is your preferred combo ender but usually requires some close range. No version of this is a true reversal without Roll Cancels. The LP version is also useful in neutral to punish extended hurtboxes, like fireballs or long standing pokes.

Turn Punch

Turn Punch
TAP
Hold PPP or KKK
CVS2 Boxer TAP First.PNG
Windup
CVS2 Boxer TAP.png
Attack
Version Damage Stun Cancel Guard Parry Startup Active Recovery Total Adv Hit Adv Block Invul
Hold 3p.png/3k.png for 1~2 seconds
Level 1
1400 14 None Mid High 41 6 13 60 +2 +2 None
Hold 3p.png/3k.png for 2~4 seconds
Level 2
1600 16 None Mid High 41 7 15 63 +2 +2 None
Hold 3p.png/3k.png for 4~8 seconds
Level 3
1900 19 None Mid High 41 8 17 66 +2 +2 None
Hold 3p.png/3k.png for 8~16 seconds
Level 4
2200 22 None Mid High 41 9 18 68 +2 +2 None
Hold 3p.png/3k.png for 16~24 seconds
Level 5
2600 26 None Mid High 41 10 20 71 +2 +2 None
Hold 3p.png/3k.png for 24~32 seconds
Level 6
2900 29 None Mid High 41 11 22 74 +2 +2 None
Hold 3p.png/3k.png for 32~40 seconds
Level 7
3500 35 None Mid High 41 12 23 76 +2 +2 None
Hold 3p.png/3k.png for 40~48 seconds
Level 8
4000 40 None Mid High 41 13 25 79 +2 +2 None
Hold 3p.png/3k.png for 48~56 seconds
Level 9
4500 45 None Mid High 41 14 27 82 +2 +2 None
Hold 3p.png/3k.png for 56 seconds or more
Level FINAL
5000 50 None Mid High 41 15 28 84 +2 +2 None

Turn Punch, or Turn Around Punch, abbreviated to TAP. Boxer reels back for a long time before lunging forward with a, thankfully uncrouchable, Dash Straight. A move of extreme lows and mediocre highs. Lacks the projectile invuln of other games Turn Punches, meaning the 41 frame startup hurts as much as it sounds like it would. As you charge higher and higher, the damage return becomes much more rewarding, and if you get a stun you can do massive meterless damage assuming you charged high enough. This means you have to sacrifice half of your buttons though, and usually you'll do this with his kicks, meaning no Dash Uppercuts, 2HK, 2LK low route, or anything. In exchange, you get a chance dizzy stun with notably high reward. Often, you'll be better off avoiding this and just using all of Balrog's normals, since he needs them much more than another high damage tool.

Super Moves

Crazy Buffalo

Crazy Buffalo
Punch Super
[4]646P, K for Uppers
CVS2 Boxer 4646P.PNG
Version Damage Stun Cancel Guard Parry Startup Active Recovery Total Adv Hit Adv Block Invul
Charge B.png,F.pngB.pngF.png+Lp.png 2800 0 None Mid High 5:4/7 5(5/8)5(17)6 17 64/70 -DWN -8 1-9 (Full)
Charge B.png,F.pngB.pngF.png+Mp.png 4000 0 SP/SU Mid High 5:4/7 5(5/8)5(5/8)5(17)6 16 73/82 -DWN -7 1-16 (Full)
Charge B.png,F.pngB.pngF.png+Hp.png 5100 0 None Mid High 5:4/7 5(5/8)5(5/8)5(5/8)5(17)6 15 82/94 -DWN -6 1-23 (Full)

Balrog rushes forward with either a series of Dash Straights normally, or a series of Dash Uppers if you mash kicks. Dash Uppers have taller hitboxes but still whiff on crouchers, and are overall slower. There isn't much reason to use them. The second values in the frame data table are with Dash Uppers. These are solid combo enders and punish tools, Balrog can go through fireballs or pokes with them or reversal with them. While they aren't as good at this as Gigaton Blow is, they are cheaper and safer. The level 2 version is especially nice, as it can cancel into HP Headbutt for very respectable 2 bar damage. Sadly, these don't juggle very well, so they aren't great as C-Groove level 2 cancels and can be finicky as A-Groove enders.

Gigaton Blow

Gigaton Blow
Kick Super, Level 3
[4]646K
CVS2 Boxer 4646K.PNG
Really, it was their fault you blocked their move
Version Damage Stun Cancel Guard Parry Startup Active Recovery Total Adv Hit Adv Block Invul
Charge B.png,F.pngB.pngF.png+K.png 6800 0 None Mid High 5:4 20 21 50 -DWN -10 1-23 (Full)

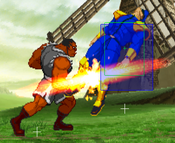
A beastly level 3 super, one of the best in the game. No other super matches the distance it travels and the speed at which it does. If Balrog has enough meter for this, the opponent is in a very tight spot. Balrog can easily punish fireballs, whiffed heavies, and any special with lag with Gigaton Blow. This hits for almost 7000 damage as well. If Balrog gets any solid confirm into this, he reaches ridiculous damage ceilings, and can easily KO most characters. Plus, if you block anything that is -7 or more, this will punish it. Iori rekkas, Hibiki Distance Slashes, Blanka Balls, etc etc. This really hurts the opponent, as they can't whiff heavy buttons or throw projectiles, and if you block anything that would normally be pretty safe, you can punish with a massive damage hit. This super has two downsides however: the expensive cost, and it is punishable on block. Make sure that it'll hit, and be ready to have no meter left afterwards, and this is easily Balrog's most standout tool.

Colors
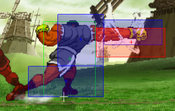
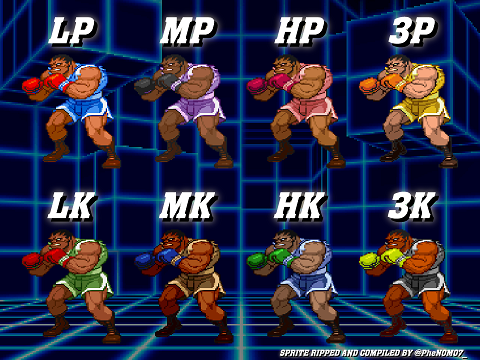
Boxer CvS2 colors.png


CvS2 Wiki Navigation

General
Controls
Notation
HUD
Glossary
System
Roll Cancel
Combo
CvS2 Versions
Netplay/ Training
FAQ
Grooves
Groove Overview
Groove Subsystems
C-Groove
A-Groove
P-Groove
S-Groove
N-Groove
K-Groove
Capcom Characters
Akuma (Gouki)
Balrog (Boxer)
Blanka
Cammy
Chun-Li
Dan
Dhalsim
Eagle
E.Honda
Guile
Ken
Kyosuke
Maki
M. Bison (Dictator)
Morrigan
Rolento
Ryu
Sagat
Sakura
Vega (Claw)
Yun
Zangief
SNK Characters
Athena
Benimaru
Chang
Geese
Haohmaru
Hibiki
Iori
Joe
Kim
King
Kyo
Mai
Nakoruru
Raiden
Rock
Rugal
Ryo
Terry
Todo
Vice
Yamazaki
Yuri
Boss Characters
Shin Akuma
Ultimate Rugal
Evil Ryu
Orochi Iori