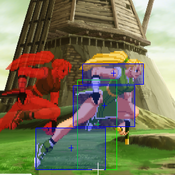
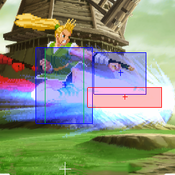
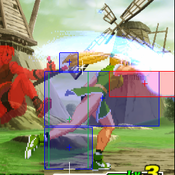
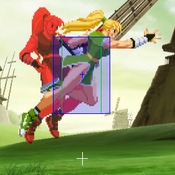
Capcom vs SNK 2/Maki

From SuperCombo Wiki

Introduction

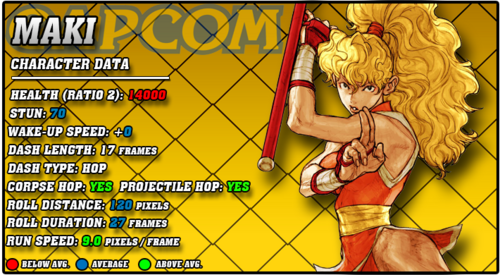
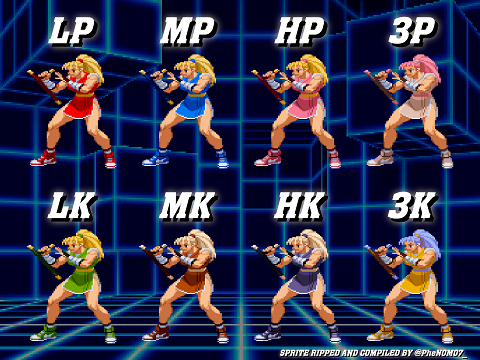
CVS2 Maki Data.png

Story

Maki Genryusai is a character from Capcom's Final Fight series, first appearing in 1993's Final Fight 2.

Maki is a ninja trained in Bushinryu, the same style as the 37th Bushinryu Master Genryusai and Guy, her childhood friend. Genryusai and Maki's sister/Guy's fiancée Rena were kidnapped by Metro City's Mad Gear gang and their leader Retu. Maki teamed up with Haggar and Carlos and searched the world. After defeating Rolento in Italy, he told them that the kidnapped pair were held in Japan. After kicking Retu out a window, seemingly to his death, Genryusai and Rena were rescued. Guy and Rena soon married, turning Guy into Maki's brother-in-law.

Later, after Genryusai's death, Zeku ascended to become the 38th Bushinryu Master. He continued to train Guy, eventually making Guy strong enough to defeat him and watch him become the 39th Bushinryu Master.

This turn of events annoyed Maki, who believed she was stronger than Guy. For several years, Maki searched for Guy to try to take the title of Bushinryu master. When she found him, he was in the middle of dealing with Shadaloo. Seeing her opportunity, the two started to fight. However, the fight was interrupted by the appearance of Shadaloo leader M.Bison. Maki rushed off to fight Bison, but was soon overwhelmed by the full might of Bison's Psycho Power. As he was about to deliver the final blow, Guy intervened and caused to Bison to retreat. Irritated, Maki thanked Guy for saving her and admitted she's not strong enough to become master yet, but says she will defeat Guy the next time they meet.

In addition to Final Fight 2, Maki appears in Street Fighter Alpha 3 Upper for the Game Boy Advance, included as part of a set of characters ported over from CvS2.

Gameplay

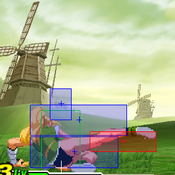
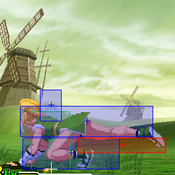
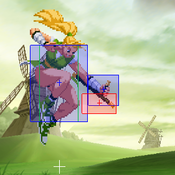
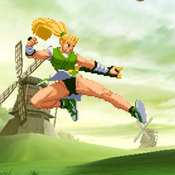
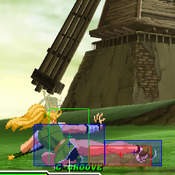
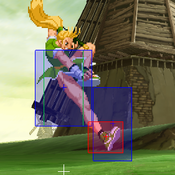
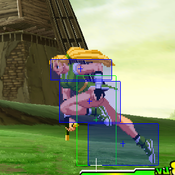
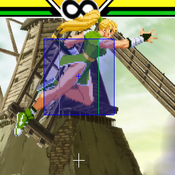
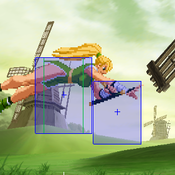
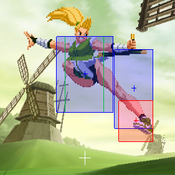
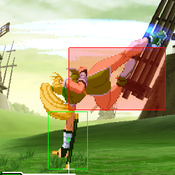
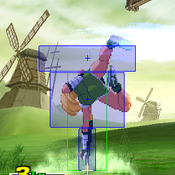
Maki is a specialist mid-tier character that relies on Bushin-style speed and deception to set up most of her attacks. Her array of movement and jumping options on the ground and against the wall can control spacing like few other characters, making it easy to keep away from opponents. Her anti-air attacks are outstanding, including her 3K Suicide Spin special move; it is instantly invincible at what is effectively the press of a button, though it costs a bit of Maki's health to perform.

In close quarters, Maki primarily uses mixups and confuses opponents with frame traps, throws, and the threat of a quick overhead. Maki's punch throw has the second largest range in the game (60px instead of the normal 54px), allowing her to do more with her block strings but still get a tick throw in. Cancelling attacks into her forward (or backward) command run can reset block string pressure, launch Maki into her leaping overhead attack, or even allow you to buffer into her 720 grab super—on the ground or in the air.

Maki's kick super is ridiculously damaging, especially in K-Groove. However, it can be very difficult to confirm into, requiring either a delicate buffer or extremely tight links. In general, this super is used to punish a mistake or bad guess by the opponent, generated by your mixups. Being able to recognize these punish opportunities and then land a quick super cancel off of crouching MK or close/far standing HP is very important to maximize damage potential with Maki. Though a mid-tier character, Maki matches up well against many high-tier characters in CvS2. She usually wins the positioning game in neutral due to her movement options, and can shutdown most top-tier nonsense and even A-Groove activations with selective use of Suicide Spin.

Despite this, Maki struggles on account of having a difficult time converting meter into big damage, especially against experienced players who can react to mixups and 720 setups. Most of the damage she inflicts against opponents will be accumulated from light pokes, heavy single-hit strikes, and throws. Without an easy and reliable super confirm, all the work you do with Maki can be undone by your opponent's easy and reliable super confirm. Additionally, some of Maki's basic pokes and punish buttons can whiff against small crouching characters, reducing her options up close against much of the cast.

Groove Selection

Best - C/N/K: Maki is most effective in C, N, and K-Grooves, though each have pros and cons. In K-Groove, the offensive bonus gained from rage can really add up, though it's giving up roll cancel Genko, which Maki benefits greatly from. That becomes an option in N-Groove, as does the extra damage gained from popping a stock; however, Maki's level 1 720 command grab super is rather useless, as it can be jumped out of after the super flash. This is mitigated in C-Groove, where Level 2 supers and a dead-body hop become available, though at the cost of her regular run which can aid in her deception/mixup game.

Useful - A: A-Maki gets access to Custom Combo, and just like any character, her CC is nothing to scoff at. However, the lacking movement and the fact that you'll basically never use her 720 super make A-Maki a lot more questionable, and her utility with CC isn't quite enough to make up for the loss of movement and supers.

Worst - S/P: Maki is a rushdown character who wants to move around a lot and spend meter on 720 supers. S-Groove wants you to sit still to charge meter, or get hit enough to reach low health. Neither of these are really a good thing with Maki, and she doesn't benefit at all from infinite level 1's since her level 1 720 is jumpable. P-Groove is worse because, without meter, Maki's punishes are inconsistent and weak. While a parry from P-Maki with a level 3 ready can be scary, it isn't much scarier than the P-Groove top tiers, and you might never get a chance do it in the first place.


Maki is a powerful rushdown with great mobility and mixup, but struggles to utilize meter or combo in general. Maki is best in C, N, or K-Groove.

Difficulty: Hard
Tier: C+
Pros Cons
  • Mobile: Fast and varied mobility for good rushdown and retreat
  • Mixups: Good mixup between a fast overhead, lows, plenty of frame traps, and a damaging 720 command grab
  • Great Anti-Air: Solid anti-air, mainly in her Suicide Kick which is fast, invincible, and input with simple button presses
  • Damaging Super: High damage combo ender super
  • Strong Throw: Longer range throw than average
  • Low Combo Potential: No great combo tools, relies a lot on pokes and pressure
  • High Hitting Moves: A lot of tools can be crouched up close
  • Weak Hitconfirms: Super is hard to hitconfirm, and impossible in some situations, lowering her damage output with meter
  • Damage: Low overall damage
  • Not Groove Friendly: No Groove that satisfies all her needs: K gives her Rage and mobility but no roll, N gives her roll and mobility but no level 3 720, and C gives her roll and good supers but low mobility


Players to Watch

Name Country Groove Accounts Notes
kaoruda Japan A-Groove Twitter: @kaoruda Uses a weird team, but his A-Maki is still dangerous by utilizing her many movement tools and striking when the time comes.
Sample Match
Izumi Japan P-Groove Twitter: @IzumiSgroove P-Maki is seen as a weird character, but Izumi makes her look very strong with consistent parry punishes and a dangerous level 3 combo game.
Sample Match
Iyo Japan C/N-Groove N/A Skilled in both C-Groove and N-Groove, Iyo plays with more pokes and footsies, then getting the opponent into a vortex once he gets a knockdown.
N-Groove Sample Match
C-Groove Sample Match


Normal Moves

Far Standing Normals

Far Standing Jab
Far Light Punch
far 5LP / far LP
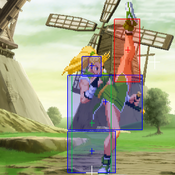
CvS2 Maki 5lp.png
Version Damage Stun Cancel Guard Parry Startup Active Recovery Total Adv Hit Adv Block Invul
Far Lp.png 300 3 RF/SP/SU H/L H/L 3 4 8 15 +3 +3 -

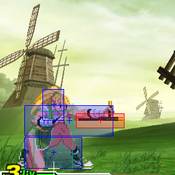
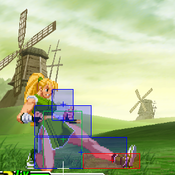
A quick, high poke with Maki's tonfa.

  • Not hitting anyone from distance with this, but it can be useful as a check against incoming attacks with leading hurtboxes like Blanka Balls.

5MP

Far Standing Strong
Far Medium Punch
far 5MP / far MP
CvS2 Maki 5mp.png
Version Damage Stun Cancel Guard Parry Startup Active Recovery Total Adv Hit Adv Block Invul
Far Mp.png 900 9 SU H/L H 6 6 20 32 -4 -4 -

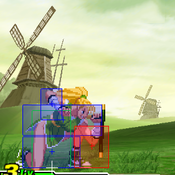
Maki extends her arm at the hip and pokes out the length of her tonfa.

  • A great ranged poke that is quite safe away from point-blank.
  • Consider using this at medium distances to catch out an opponent's neutral pokes that they think are safe.

5HP

Far Standing Fierce
Far Heavy Punch
far 5HP / far HP
CvS2 Maki 5hp.png
Version Damage Stun Cancel Guard Parry Startup Active Recovery Total Adv Hit Adv Block Invul
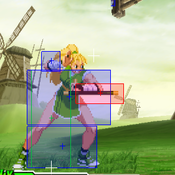
Far Hp.png 1200 12 SU H/L H 6 4 38 48 -14 -14 -

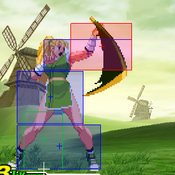
Maki takes a full swing with her tonfa across her body at hip level, reaching a far distance out in front of her.

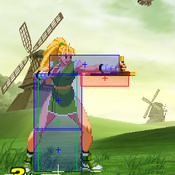
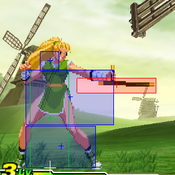
  • Maki's furthest reaching normal attack, by far.
  • Knowing what you can punish with far HP is incredibly important to do well with Maki, since landing it opens up an opportunity to (quickly!) cancel it into the kick super.

5LK

Far Standing Short
Far Light Kick
far 5LK / far LK
CvS2 Maki 5lk.png
Version Damage Stun Cancel Guard Parry Startup Active Recovery Total Adv Hit Adv Block Invul
Far Lk.png 400 4 SU H/L H/L 5 6 8 19 +3 +3 -

Maki swings her leg out in front of her for a low kick.

  • A light poke with good range, it is primarily used for secondary pressure after getting pushed back by point-blank attacks.
  • A go-to check button from distance when anticipating or reacting to incoming low attacks, such as Cannon Spikes or Blanka slides.

5MK

Far Standing Forward
Far Medium Kick
far 5MK / far MK
CvS2 Maki 5mk.png
Version Damage Stun Cancel Guard Parry Startup Active Recovery Total Adv Hit Adv Block Invul
Far Mk.png 800 8 SU H/L H 6 6 16 28 ±0 ±0 -

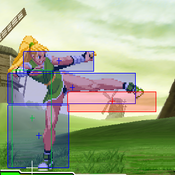
Maki leans back and extends her leg out horizontally, hitting with her foot.

  • One of Maki's great pokes from far distance. Only standing HP reaches further.
  • The ±0 frame advantage at this distance sets up Maki to follow up with other distant pokes, including a repeat MK or a Genko punch that hits them as they try attack or advance.
  • Though it can be cancelled into super, at this range you will always want to use far HP to do that as it comes out just as fast but with better range and damage.

5HK

Far Standing Roundhouse
Far Heavy Kick
far 5HK / far HK
CvS2 Maki 5hk.png
Version Damage Stun Cancel Guard Parry Startup Active Recovery Total Adv Hit Adv Block Invul
Far Hk.png 1100 11 SU H/L H 6 6 21 37 -3 -3 -

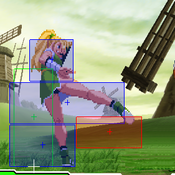
Maki throws up a leg high into the air, kicking the space in front of her head.

  • A good anti-air button for shallow jump-ins.
  • Even at the closest "far" range, this kick can completely whiff against most crouching characters due to how high up it hits.

Close Standing Normals

cl5LP

Close Standing Jab
Close Light Punch
cl5LP / cl.LP
CvS2 Maki CL 5lp.png
Version Damage Stun Cancel Guard Parry Startup Active Recovery Total Adv Hit Adv Block Invul
Close Lp.png 300 3 RF/SP/SU H/L H/L 3 4 8 15 +3 +3 -

A quick, high poke with Maki's tonfa.

  • The best starter poke against standing and large opponents, but be aware that it may whiff entirely against very small crouching opponents!
  • LP is the first hit of Maki's Bushin Chain, which makes it uniquely cancellable into MP.

cl5MP

Close Standing Strong
Close Medium Punch
cl5MP / cl.MP
CvS2 Maki CL 5mp.png
Version Damage Stun Cancel Guard Parry Startup Active Recovery Total Adv Hit Adv Block Invul
Close Mp.png 800 8 SP/SU H/L H 5 6 11 22 +5 +5 -

Maki thrusts her elbow and butt of her tonfa out from her hip.

  • Use this button for meaty attacks on opponent wakeups.
  • MP is Maki's quickest standing punish button for special cancels, always into Genko.

cl5HP

Close Standing Fierce
Close Heavy Punch
cl5HP / cl.HP
CvS2 Maki CL 5hp.png
Version Damage Stun Cancel Guard Parry Startup Active Recovery Total Adv Hit Adv Block Invul
Close Hp.png 1100 11 SP/SU H/L H 6 4 28 38 -8 -8 -

Maki swings upward with her elbow and butt of her tonfa, hitting above the shoulders.

  • The anti-air option to use for opponents that are jumping in deep.
  • Your big meterless punish starter for cancelling into Genko.
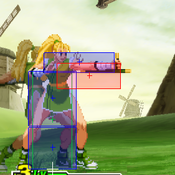
  • It's also great for cancelling into Hayagake runs for mixup pressure, but unfortunately only against girthy characters that are tall when crouching. Due to how high the hitbox is on this, it can whiff against many crouching characters!

cl5LK

Close Standing Short
Close Light Kick
cl5LK / cl.LK
CvS2 Maki CL 5lk.png
Version Damage Stun Cancel Guard Parry Startup Active Recovery Total Adv Hit Adv Block Invul
Close Lk.png 400 4 SU H/L H/L 5 6 8 19 +3 +3 -

Maki kicks her foot out low and to the side.

  • Has the same great properties as the far version but you may be better off initially with rapid-fire jabs, since close LK will push you away from the opponent more.
  • This is the easiest light normal that can cancelled/buffered into a kick super via close-range poke combos.

cl5MK

Close Standing Forward
Close Medium Kick
cl5MK / cl.MK
CvS2 Maki CL 5mk.png
Version Damage Stun Cancel Guard Parry Startup Active Recovery Total Adv Hit Adv Block Invul
Close Mk.png 700 7 SP/SU H/L H 5 4 17 26 -1 -1 -

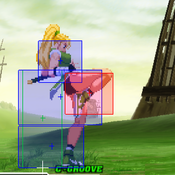
Maki delivers a rising knee to the mid-section.

  • Close MP is better in just about every way. Use that instead.

cl5HK

Close Standing Roundhouse
Close Heavy Kick
cl5HK / cl.HK
CvS2 Maki CL 5hk.png
Version Damage Stun Cancel Guard Parry Startup Active Recovery Total Adv Hit Adv Block Invul
Close Hk.png 1200 12 SU H/L H 5 4 31 40 -11 -11 -

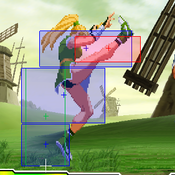
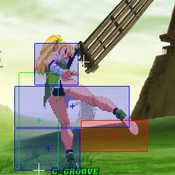
Maki kicks straight up and HIGH into the air, well above her head.

  • This attacks reaches RIDICULOUSLY high, and is all hitbox. This will neutralize basically anything that is above Maki in close range.
  • Its most effective use is a punisher and deterrent against anyone Maki has trapped in the corner. If they try to jump out, hit 'em with this to put them back there.
  • Again, due to the height of the attack, use caution when attacking crouching opponents with close HK.

Crouching Normals

2LP

Crouching Jab
Crouching Light Punch
2LP / cr.LP
CvS2 Maki 2lp.png
Version Damage Stun Cancel Guard Parry Startup Active Recovery Total Adv Hit Adv Block Invul
D.pngLp.png 300 3 RF/SP/SU H/L H/L 3 4 8 15 +3 +3 -

A quick poke with the tip of Maki's tonfa at knee level.

  • Good for rapid-fire quick hit pressure up close.
  • Hitting with two of them in succession will allow you to combo into standing/crouching LK and to a super; or into Maki's Suicide Spin for one of her only true combo strings.

2MP

Crouching Strong
Crouching Medium Punch
2MP / cr.MP
CvS2 Maki 2mp.png
Version Damage Stun Cancel Guard Parry Startup Active Recovery Total Adv Hit Adv Block Invul
D.pngMp.png 900 9 SP/SU L L 6 4 13 23 +7 +7 -

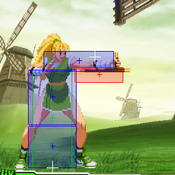
Maki thrusts the butt of her tonfa straight down into the ground in front of her, hitting low.

  • Crouching MP is the only low-hitting normal Maki has that can be cancelled into special attacks.
  • To reliably punish landing opponents, open with this and cancel into Genko.
  • You can also use it (and close HP) as the fastest way to cancel into Hayagake run mixup pressure.
  • The safe hitbox area of the attack is very good against incoming low attacks, such as a start-of-round Cannon Spike or similar.

2HP

Crouching Fierce
Crouching Heavy Punch
2HP / cr.HP
CvS2 Maki 2hp.png
Version Damage Stun Cancel Guard Parry Startup Active Recovery Total Adv Hit Adv Block Invul
D.pngHp.png 1000 10 SU H/L H/L 6 8 19 33 -1 -1 -

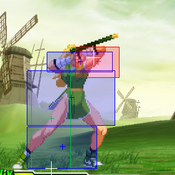
Maki stands up and spins her tonfa around her hand into the air, hitting above and in front of her.

  • Your main anti-air button. Safely covers a wide area in front of and above Maki and will trade with most other things.
  • It's also a great attack to use in neutral and during pressure. Any attempts to jump over Maki's mixups will be immediately swatted down by this. It creates quite a lot of pushback, on block, however.
  • Use it liberally when far from the opponent or during post-KO for fast meter building.

2LK

Crouching Short
Crouching Light Kick
2LK / cr.LK
CvS2 Maki 2lk.png
Version Damage Stun Cancel Guard Parry Startup Active Recovery Total Adv Hit Adv Block Invul
D.pngLk.png 300 3 SP/SU L L 3 4 9 16 +4 +4 -

Maki extends her leg and thrusts her foot out against the ground, kicking low.

  • One of Maki's most important normals, as it is the only one that comes out fast and low. This is problematic for Maki players, as it can only be linked to other normals (including itself) or cancelled into special moves it can't practically combo into.
  • The best use of crouching LK is a starter into Maki's Hayagake command run attacks. Stick it out and launch into an instant overhead, reset pressure with a run stop, or use it to buffer into Maki's 720 grab super.

2MK

Crouching Forward
Crouching Medium Kick
2MK / cr.MK
CvS2 Maki 2mk.png
Version Damage Stun Cancel Guard Parry Startup Active Recovery Total Adv Hit Adv Block Invul
D.pngMk.png 800 8 SU L L 6 6 17 29 ±0 ±0 -

Maki half-swings her leg out low against the ground, hitting at distance.

  • Good for low pokes from medium distance during neutral.
  • Most useful as a punish starter into a super for opponents recovering from missed air attacks or whiffed DPs.

2HK

Crouching Roundhouse
Crouching Heavy Kick
2HK / cr.HK
CvS2 Maki 2hk.png
Version Damage Stun Cancel Guard Parry Startup Active Recovery Total Adv Hit Adv Block Invul
D.pngHk.png 1100 11 SU L L 7 4 27 38 Down -7 -

Maki fully sweeps out her leg low to the ground.

  • OK range for a sweep and safe at distance. Use to fish for knockdowns during neutral or cash in frame traps off of Maki's plus pokes.
  • Despite it being a knockdown sweep, it can be super cancelled... for some reason? None of Maki's supers will connect after a sweep, hit or block. Completely useless unless you know someone in P-Groove is going to parry a sweep and you're buffering in the super to surprise them.

Jumping Normals

8LP

Jumping Jab
Jumping Light Punch
8LP / j.LP
CvS2 Maki 8lp.png
Version Damage Stun Cancel Guard Parry Startup Active Recovery Total Adv Hit Adv Block Invul
U.pngLp.png 600 6 SP/SU H H 4 22 - - - - -

A downward, angled poke with the tip of Maki's tonfa.

  • Best used for a quick poke when dropping down on an opponent, or when they quickly rise up to meet you.

A general note about Maki's air attacks: All of Maki's air normals can be cancelled into a special move (her Tengu Daoshi air throw), super (the air 720), or both. However, given that these are throws, the cancels are basically useless because they cannot be comboed into after a physical attack. You may be able to setup something against P-Groove air parries, however.

8MP

Jumping Strong
Jumping Medium Punch
8MP / j.MP
CvS2 Maki 8mp.png
Version Damage Stun Cancel Guard Parry Startup Active Recovery Total Adv Hit Adv Block Invul
U.pngMp.png 900 9 SP/SU H H 3 8 - - - - -

A downward, angled poke with the tip of Maki's tonfa.

  • This version is better for air-to-air engagements due to its forward-aimed hitbox.

8HP

Jumping Fierce
Jumping Heavy Punch
8HP / j.HP
CvS2 Maki 8hp.png
Version Damage Stun Cancel Guard Parry Startup Active Recovery Total Adv Hit Adv Block Invul
U.pngHp.png 1200 12 SU H H 7 6 - - - - -

Maki swings her tonfa hard and straight down with two hands, hitting with the tip end.

  • Maki's best air-to-ground attack. If you can hit your opponent with its sweet spot, it will cleanly beat a lot of anti-airs and set up follow up attacks after you land.
  • It is also Maki's most damaging air normal, so you'll want to open with it you're jumping in at someone that's wide open for a big punish.
  • In small jump grooves, this is a fantastic option for a small jump attack. When landing, follow it up with a Genko punch to push the opponent back, a Saka Hayagake to retreat immediately, or a 720 super.
  • Because the hitbox extends quite a bit below Maki, take care to not hit this button too early as Maki comes down from a jump, else follow-up attacks on the ground may not combo.

8LK

Jumping Short
Jumping Light Kick
8LK / j.LK
CvS2 Maki 8lk.png
Version Damage Stun Cancel Guard Parry Startup Active Recovery Total Adv Hit Adv Block Invul
U.pngLk.png 500 5 SP/SU H H 4 22 - - - - -

Maki kicks her leg up at a high angle, hitting above her head.

  • A quirky kick that can engage opponents above Maki in air-to-air situations.
  • It is possible to combo into LPs after landing a small jump LK. Because the hitbox is so high up, Maki can basically hit the opponent and land from the small jump at the same time.

8MK

Jumping Forward
Jumping Medium Kick
8MK / j.MK
CvS2 Maki 8mk.png
Version Damage Stun Cancel Guard Parry Startup Active Recovery Total Adv Hit Adv Block Invul
U.pngMk.png 800 8 SU H H 5 8 - - - - -

Maki extends her leg in front of her for a classic jump-in attack.

  • It's a crossup attack and the most important tool in Maki's jumping arsenal.
  • Compared to other crossups, Maki's feels like it has less hitstun (or her hitbox is higher up) than others. This means hitting a normal crossup doesn't always yield a combo when she lands on the other side, and in fact could lead to a reversal or the need to tech a throw!
  • For more reliable crossups in wakeup situations, try to jump behind them as they get up and attack a bit later than you think you should to land a lower, deeper crossup.
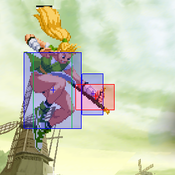
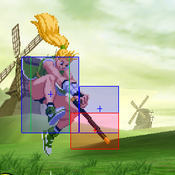
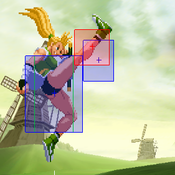
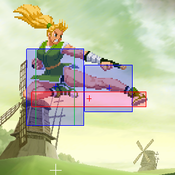
  • Use caution when trying to crossup opponents with DPs, as Maki's hurtbox extends far below her hitbox.

8HK

Jumping Roundhouse
Jumping Heavy Kick
8HK / j.HK
CvS2 Maki 8hk.png
Version Damage Stun Cancel Guard Parry Startup Active Recovery Total Adv Hit Adv Block Invul
U.pngHk.png 1100 11 SU H H 6 6 - - - - -

Maki swings her leg hard, kicking below and in front of her.

  • For jump-in attacks at shallower angles. Otherwise, use jumping HP.

Command Normals

BushinChain

Bushin Chain
The Classic Bushin Combo
LP, MP, HP,
HK or 2HP (d.HP)
Version Damage Stun Cancel Guard Parry Startup Active Recovery Total Adv Hit Adv Block Invul
1st Hit
Lp.png...
300 3 into Mp.png H/L H/L 3 4 8 - +3 +3 -
2nd Hit
...Mp.png...
500 (800 Total) 5 (8 Total) into Hp.png H/L H/L 6 4 27 - +4 +4 -
3rd Hit
...Hp.png...
600 (1400 Total) 6 (14 Total) into Hk.png or
D.pngHp.png
H/L H/L 6 4 27 - -7 -7 -

Maki unleashes a chained series of attacks. The above data indicates situation if the chain is stopped after each hit. (The first hit is a regular close LP and shares the same properties.) To complete the chain, use one of the finishing options below.

  • Variants of the Bushin Chain are used by Bushinryu members in other Capcom fighting games. Specifically, Guy from the Street Fighter Alpha series and Street Fighter IV; and Zeku from Street Fighter V. It is also referred to as the Final Fight chain, as it is where the sequence of attacks originated from. Other Final Fight characters, like Cody, have a similar sequence in some games.
  • To cancel one hit into the next, press the next button of the chain before or during the active frames of the current hit.
  • The Bushin Chain is Maki's best meterless combo off a light attack, one that you will want to try to land often if an easy super isn't on deck.
  • However, it has a big disadvantage. Due to the height of the attacks, they will sometimes whiff against crouching opponents. Starting further away or not executing the chain quickly can also push Maki out of range and the third or fourth hits may miss. Be aware of the crouching height of your opponent ahead of a matchup(*) and use your judgement when starting a chain as to the best way to end it: After MP, with HK, or with the throw.
  • Unfortunately, this problem cannot be mitigated by opening with crouching LP. The first hit must a standing LP!
  • Therefore you'll want to try to land this combo in situations where the opponent would be standing up, most commonly after a crossup.
  • Stopping the chain after the second hit (MP) leaves you plus enough (+4) to set up a frame trap. Stopping here can also yield a tricky setup for a 720 grab super. Buffer the 720 as you chain into the MP, ending the rotation so that you walk forward slightly to get into grab range.
  • If you're not sure the 3rd hit (HP) will land, either due to opponent height or pushback distance, better to not risk whiffing it. Not connecting will leave you wide open to a punish!

(*) Future updates to the wiki will include height data, after which the Maki page will updated with info on which high-hitting normals are safe against which crouching characters.

Version Damage Stun Cancel Guard Parry Startup Active Recovery Total Adv Hit Adv Block Invul
Kick Finisher
...Hk.png
700 (2100 total) 7 (21 total) - H/L H/L 6 6 21 - -3 -3 -

Maki finishes the chain combo with a high-stepping roundhouse kick.

  • If you land the first three hits of the chain and are confident the opponent is in range (and tall enough), HK is the easier and more reliable finisher.
  • Should you whiff the HK, most characters can punish you as they recover from the HP. To avoid this, start the chain at point-blank range or stop it after the MP.
Version Damage Throw Range Startup Active Recovery Total Invul
Throw Finisher
...D.png+Hp.png
1000 (2400 Total) 60px 0 1 13 - -

Maki finishes the chain combo by grabbing the opponent and tossing them up into the air.

  • This is a very finicky and unreliable finish to the chain. Both the timing window and the spacing are very specific. Even if you think you've figured out, slight variations in button timing or spacing along the way will foil you. Though you usually get the grab animation, Maki can be pushed out of range by the first three hits and the throw will whiff. If you land the grab half the time you attempt it, you're doing well!
  • For the most reliable chance at a landing the throw, focus on the timing on the MP and HP to avoid getting pushed back too much, and quickly (but not too quickly!) input the down + HP after the HP 3rd hit lands.
  • Though it can be unreliable, in the long term it's for the best to always go for the throw finisher. It has good followup options, hit or miss, that after the fact can add up to more total damage over all attempts.
  • On a successful throw, the opponent will land at just the right distance where Maki will cross them up after a roll. You can use this unexpected crossup to get in a free confirm into Genko and/or a super. If they know the crossup is coming, take a micro step back before the roll to appear in front of them instead.
  • If the throw whiffs, you will actually be at a frame advantage, as much as +6 depending on how quickly you cancelled into the grab from the HP. This sets up perfectly for you to throw out a far HP (6 frame startup) and catch the opponent into thinking they've got a punish opportunity (or at least think it's "their turn"), including the possibility of cancelling the HP into a kick super!
  • If you are worried about missing the HK due to being pushed out of range of a crouching opponent, whiffing a throw attempt is both safer and potentially more lucrative due to this advantage.

Elbow Drop

Elbow Drop
"The Airbrake"
In air, 2MP / j.d.MP
CvS2 Maki airbrake.png
Version Damage Stun Cancel Guard Parry Startup Active Recovery Total Adv Hit Adv Block Invul
In air, D.png+ Mp.png 800 8 - H H 9 Until landing - - - - -

Maki raises her tonfa in front of her, slowing her forward momentum.

  • Elbow Drop is an incredibly powerful move for Maki, for two reasons.
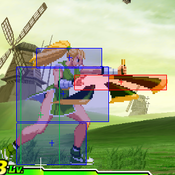
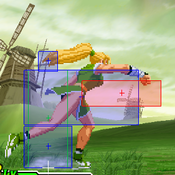
  • The first: Look at that ridiculous hitbox! Maki's tonfa will absorb just about anything that comes into it from straight on, including DPs! As long as the opponent's attack is coming from in front of her more than from below her, she will beat it clean.
  • The second: When this move comes out, it will slow Maki's forward momentum and change the trajectory of her jump so that she lands some distance behind where she would have with a normal jump. (This is another common trait shared by members of the Bushin family.) It is why the move is also called "the airbrake!"
  • The trajectory change is at its most useful when combined with Maki's Hassoukyaku wall jump. At far distances, an opponent looking for a flying jump attack off the wall can be baited to anti-air or DP on reaction. Doing Elbow Drop immediately or early on after the wall jump will make Maki cover only about half the expected horizontal distance, often causing them to whiff their AA attempt. If they DP into nothing you have all day to punish, hopefully with a super.
  • If jumping off the wall from lower heights, the horizontalness of the wall jump and the hitbox of the tonfa will combine to almost act as a shield against shallow anti-air or advancing physical attacks. (You'll still get blown up by projectile supers, so be smart about what you are jumping at.)
  • Remember that Elbow Drop is a bit slow coming out, so don't wait too long into your jumps to use it or else you'll be basically doing a regular jump-in at a predictable (and punishable) angle.

Special Moves

Genko

Genko
Distance Punch
236+P / qcf+P
CvS2 Maki genko.png
Version Damage Stun Cancel Guard Parry Startup Active Recovery Total Adv Hit Adv Block Invul
LP
Qcf.png + Lp.png
1100 11 - H/L H 14 4 33 51 Down -9 -
MP
Qcf.png + Mp.png
1200 12 - H/L H 14 4 33 51 Down -9 -
HP
Qcf.png + Hp.png
1300 13 - H/L H 14 4 33 51 Down -9 -

Maki steps into a far-reaching haymaker punch.

  • The frame data for all three versions is the same; the only difference between attack strengths is damage dealt and range covered. The HP version is the best of both, so use it for everything!
  • In theory, Genko is Maki's way of controlling the space in front of her after running out of pokes and mixups at closer ranges. Once pushed out of range of all but her most far-reaching pokes, using (or threatening with) Genko punches can help Maki keep ownership of the space in front of her and setup more oki situations when landing a hit or more freedom to run up with a Hayagake to reset pressure or launch into an overhead attack.
  • In practice, this is only really possible if Genko is roll cancelled, giving Maki the ability to blow through most physical rebuttals to the space opening up between the players and make the lunging punch truly threatening.
  • Genko is always your best option to cancel into from close normals (MP/cr.MP/HP/MK) for a quick two-hit punish combo.
  • Use it raw to quickly punish an opponent from a distance, such as if they are recovering from a whiffed sweep or DP.

Hayagake

Hayagake
Command Run
236+K, K / qcf+K, K
CvS2 Maki comrun.png
Start the command run...
CvS2 Maki runslide.png
...and attack low with a slide!
CvS2 Maki runoverhead.png
...or surprise with an overhead!
Version Damage Stun Cancel Guard Parry Startup Active Recovery Total Adv Hit Adv Block Invul
Run Starter
Qcf.png + K.png
0 - - - - 0 60 22 82 - - -

Maki begins a forward run, eventually skidding to a stop if no other commands are input.

Hayagake run general information:

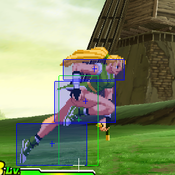
  • Maki's options from her forward Hayagake run form the foundation of her mixup pressures at close range, and a threat or two from distance.
  • The above data is for when the initial run is not cancelled into one of the action buttons below. (You will always cancel it.)
  • The initial run can be cancelled into an action during any of its 60 active frames, including immediately on frame 1.
  • In addition to the three action options, Hayagake can also be directly cancelled into Saka Hayagake to rapidly change direction.
  • Effective use of Hayagake usually involves executing the run start with a kick button, then plinking to (pressing in rapid succession) the kick button strength for the desired action so it comes out as quickly as possible. There will be situations where you will delay the action, but most of the time you'll want an instant cancel.
  • If you roll cancel the startup, the invincibility will continue into any action performed.
  • In running grooves, mixing up a regular run with the Hayagake run gives you more options with approach attacks, including the ability to stop much faster than the command run would allow you to.
Version Damage Stun Cancel Guard Parry Startup Active Recovery Total Adv Hit Adv Block Invul
Run Stop
Qcf.png + K.png, Lk.png
0 - - - - - - 22 - - - -

Maki skids to a complete stop.

  • This is the same skidding animation that happens when the startup run naturally ends, except you execute it on command.
  • In close pressure situations, cancelling into runstop from light pokes and medium meaties at random and unexpected times will go a long way to set up Maki's other fast and deceptive tools, like the overhead.
  • The best normals to cancel into a runstop are crouching MP (everyone) and close HP (everyone standing, or tall crouchers only) Assuming a frame-perfect cancel into the runstop after the run start, these will leave you at about -4. There's also standing MP/MK into runstop, putting you at -7. Though technically punishable with quick jabs from the opponent, the element of surprise and slower human reaction times should cover you as long as you are unpredictable with your approaches.
  • Runstops build meter very quickly in neutral situations. After getting a knockdown, you can do up to two quick runstops for meter before the opponent rises (though watch out for Safe Falls) for a decent chunk of meter in an instant.
  • A critical skill with the runstop is to use it to buffer in the Ajaratengu grab super, continuing past the run start's initial qcf/236 to finish the motion of the 720, executing the super after skidding to a stop.
Version Damage Stun Cancel Guard Parry Startup Active Recovery Total Adv Hit Adv Block Invul
Low Slide
Qcf.png + K.png, Mk.png
1300 13 - L L 12 9 28 49 Down -17 -

Maki slides low to grab the opponent, then picks them up and body slams them back down.

  • Hitting low, this attack out of Maki's command run is primarily used to punish the recovery of distant attacks on block, or surprise standing opponents during neutral. It comes out fast and travels a lot of distance in a hurry.
  • Its speed, range, and low hitbox means it can punish things like Blanka Ball, retreating air Tatsu, M.Bison Devil's Reverse, evasive wall jumps, and other things that opponents use to try and "safely" attack or move around.
  • It is the ultimate Safe Fall check attack. In knockdown situations where the opponent falls far from Maki, immediately following up with a runslide will catch them as they recover. This has the added bonus of putting you in range for an Ajaratengu super throw, for which you can buffer the 720 as you slide and execute it as you both recover.
  • Use an instant slide to catch out a napping opponent at the very start of a round.
  • The slide goes under airborne projectiles, though only later in the move after Maki is low to the ground.
  • Otherwise, the slide is very punishable if blocked by the opponent. There is definitely a risk/reward factor to using the slide in neutral, so use your best judgement if choosing to commit to the low slide in the open.
Version Damage Stun Cancel Guard Parry Startup Active Recovery Total Adv Hit Adv Block Invul
Overhead
Qcf.png + K.png, Hk.png
1600 16 - H H 24 8 20 52 Down -1 -

Maki leaps up and hits the opponent with a high attack, following up with an overhead suplex.

  • The overhead attack of the Hayagake suite, the opponent must be standing to block it correctly.
  • Surprisingly, it is completely safe on block. Use liberally during close single pokes or extended pressure situations to keep the opponent on their toes.
  • If performed too close to an opponent, Maki can jump over them and whiff the attack completely, leaving her open to be punished. Do try to avoid this!
  • The opponent can jab or poke (or super) you out of it during the leap animation, though you will generally have the element of surprise and slow human reaction time on your side.
  • The leap will go over normal air projectiles.
  • It will also catch opponents out of the air, in case they try to jump out of it.
  • A goal with overheads and the run mixups in general is to train the opponent to stand block on reaction to runups to cover potential overhead attacks, opening them up for a special or super from a starting low attack.

SakaHayagake

Saka Hayagake
Command Back Run
214+K, K / qcb+K, K
CvS2 Maki backcomrun.png
...nur dnammoc eht tratS
Version Damage Stun Cancel Guard Parry Startup Active Recovery Total Adv Hit Adv Block Invul
Back Run Starter
Qcb.png + K.png
0 - - - - 0 up to 60 22 up to 82 - - -

Maki begins a backwards run, eventually skidding to a stop if no other commands are input.

Saka Hayagake run general information:

  • If the Hayagake runs are for offensive pressure, the Saka Hayagake backwards runs are for defensive positioning and movement.
  • The above data is for when the initial run is not cancelled into one of the action buttons below. (You will always cancel it.)
  • The initial run can be cancelled into an action during any of its 60 active frames, including immediately on frame 1.
  • In addition to the three action options, Saka Hayagake can also be directly cancelled into Hayagake to rapidly change direction.
  • If you roll cancel the startup, the invincibility will continue into any action performed.
Version Damage Stun Cancel Guard Parry Startup Active Recovery Total Adv Hit Adv Block Invul
Run Stop
Qcb.png + K.png, Lk.png
0 - - - - - - 22 - - - -

Maki skids to a complete stop.

  • This is the same skidding animation that happens when the startup run naturally ends, except you execute it on command.
  • Cancelling into reverse runstop can be used to deliberately open up space in front of the opponent to bait them to advance or attack, after which you can follow up with a roll cancel Genko punch or one of the Hayagake options.
  • In neutral, use the reverse run stop to back off an opponent that's getting a little too close for your liking. If they're really close (Small Jump-into-very-painful-super close), RCing the back run is a free escape.
  • Unlike the forward runstop, the backward runstop or any of the other Saka actions do not gain you any meter.
Version Damage Stun Cancel Guard Parry Startup Active Recovery Total Adv Hit Adv Block Invul
Forward Super Jump
Qcb.png + K.png, Mk.png
- - - - - 9 - - - - - -

Maki quickly changes direction and launches into a forward super jump.

  • Once airborne, all regular super jump properties apply and you are free to attack with any move.
  • If the opponent is near or at their corner, the foward jump will put Maki up against the wall where she can potentially use her wall jump options, especially if there is space between them and the wall.
  • The distance created after Maki punch throws the opponent can set you up for a crossup. After landing the throw, immediately perform a backwards run into an instant forward super jump. Maki will jump to the other side of the opponent as they finish getting up. If you use jumping MK after jumping behind them (this is a bit later than you think you should be hitting it) you will be rewarded with a deep crossup, into the combo of your choice after you land.
  • If trapped in the corner, roll cancelling the backrun into super jump will give you enough invincibility frames to escape any grounded up-close attacks and fly out of danger.
Version Damage Stun Cancel Guard Parry Startup Active Recovery Total Adv Hit Adv Block Invul
Backward Super Jump
Qcb.png + K.png, Hk.png
- - - - - 4 - - - - - -

Maki uses her backwards momentum to super jump away from the opponent.

  • Once airborne, all regular super jump properties apply.
  • When Maki is closer to her corner, you can use the back jump to set up more wall jump options.

TenguDaoshi

Tengu Daoshi
Command Air Throw
in air, 41236+P / hcf+P
CvS2 Maki airthrow.png
Version Damage Throw Range Startup Active Recovery Total Invul
LP
in air, Hcf.png + Lp.png
1900 (500+1400) 56px Horizontal, 70~82px Vertical 4 1 Landing + 1 - -
MP
in air, Hcf.png + Mp.png
2000 (500+1500) 52px Horizontal, 70-82px Vertical 4 1 Landing + 1 - -
HP
in air, Hcf.png + Hp.png
2100 (500+1600) 48px Horizontal, 70-82px Vertical 4 1 Landing + 1 - -

Maki grabs the opponent out of the air, then slams them against the wall and down to the ground.

  • The heavier the strength, the less range the throw has. However, all versions have more range than standard air throw range of 24px so as long as you input the 41236/hcf ahead of time you should win out in any air-to-air throw clash.

Hassoukyaku

Hassoukyaku
Wall Jumps/Attacks
in air, against wall:
214+P or K / qcb+P or K
CvS2 Maki walljump 1.png
Stall with LK, Jump with LP
CvS2 Maki walljump 2.png
Grab a standing opponent with MP/HP
CvS2 Maki walljump 3.png
Hit a crouching opponent with MK/HK
Version Damage Stun Cancel Guard Parry Startup Active Recovery Total Adv Hit Adv Block Invul
Wall Jump
in air, on wall Qcb.png + Lp.png
- - - - - 10 - - - - - -

Maki does a horizontal jump off the wall.

  • After jumping off the wall, normal jump properties apply. Maki can freely attack with a normal, a crossup, a Tengu Daoshi, or an Ajaratengu.
  • The arc of this jump is much more horizontal than vertical.
  • Consider using Elbow Drop to change your jump trajectory and fake out opponents looking to anti-air you.

Hassoukyaku general information:

  • Maki need not be against the stage end walls to perform these actions. Merely being at the edge of the current screen scroll will allow Maki to use any of her six Hassoukyaku options.
  • If an opponent has their back to the wall, performing any Hassoukyaku action will immediately force Maki into the corner. Depending on the action peformed, Maki may stay there or immediately leave it again; see the below options for specific setups and consequences of this.
Version Damage Throw Range Startup Active Recovery Total Invul
Close Grab
in air, on wall Qcb.png + Mp.png
1300 42px Horizontal, 50-70px Vertical 26 Until Landing 21 - -
Far Grab
in air, on wall Qcb.png + Hp.png
1300 42px Horizontal, 50-70px Vertical 26 Until Landing 21 - -

Maki lunges with outstretched arms to grab the opponent and then slams them down with an overhead suplex.

  • A throw that grabs standing opponents only. It will miss if the opponent is attacking low or is crouching; use the wall kicks for those situations instead.
  • In the MP version, Maki aims closer to the wall. Maki jumps further off the wall and targets further away with the HP version.
Version Damage Stun Cancel Guard Parry Startup Active Recovery Total Adv Hit Adv Block Invul
Stall and Drop
in air, on wall Qcb.png + Lk.png
- - - - - 12 Until Landing 5 - - - -

Maki drops straight down from the wall.

  • Maki cannot attack as she falls after stalling. If you want to attack, use a wall kick or a jumping normal instead.
  • Stalling on the wall above the opponent in the corner will cause Maki to drop behind them into the corner herself. In oki situations, Maki will be able to stall against the wall much lower while the opponent is still down or rising, allowing her to land sooner and score a surprise crossup attack or Ajaratengu grab super.
  • For the instant wall stall trick, use the Saka Hayagake backward super jump with your back in the corner and immediately buffer in a wall stall. If done correctly, Maki will cling to the wall just a few pixels from the ground, then immediately land.
Version Damage Stun Cancel Guard Parry Startup Active Recovery Total Adv Hit Adv Block Invul
Close Wall Kick
in air, on wall Qcb.png + Mk.png
1200 12 - - - 14 Until Landing 23 - Down ±0* -
Far Wall Kick
in air, on wall Qcb.png + Hk.png
1200 12 - - - 14 Until Landing 23 - Down ±0* -

Maki jumps down nearer the wall with a downward-angled kick.

  • Use the wall kick against crouching or recovering opponents. If you anticipate them standing to block, use the MP/HP grabs instead.
  • The MK kick comes down off the wall at a sharp, downward angle. The angle of the HK version comes off the wall much further.
  • As with the wall stall, performing the wall kick with the opponent in the corner will immediately put Maki between them and the wall. Unlike the stall, the kick is effectively an instant crossup attack. To use this effectively, always use the MK near kick version, and try to input the wall kick with Maki as low to the ground as possible such as when the opponent is beginning to rise after a knockdown.

(*) This frame advantage assumes the best case scenario of the opponent blocking the kick just as you land from it. The higher up you are when contact is made, the worse the frame disadvantage is. Avoid using the HK version against opponents closer to the wall, as this will hit higher and give them more time to recover from the block before you land.

Reppukyaku

Reppukyaku
"Suicide Spin"
KKK / 3K
CvS2 Maki 3k 1.png
Invincibility on Demand!
CvS2 Maki 3k 2.png
Maki actually spins around...
CvS2 Maki 3k 3.png
...and attacks behind her
Version Damage Stun Cancel Guard Parry Startup Active Recovery Total Adv Hit Adv Block Invul
K.pngK.pngK.png 1200 (-600 to Maki)* 12 - H/L H, H 10 4, then (6i/3a)×3 59 100 Down** -66 11 Full

Maki digs the the tip of her tonfa into the ground, swings her legs up into the air, and pivots around the tonfa with a sustained spinning kick.

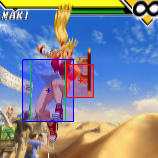
  • Though there are a lot of characters that have quick-attacking special moves with an invincible startup, Maki is unique in that she can execute hers as fast as you can press a button. Without having to input a directional command with a joystick or D-Pad, you have an instant, on-reaction invincible 1-frame reversal at your fingertips!
  • (*)There is a cost for this privledge. Each time Reppukyaku is executed, Maki's health meter is reduced by 600 points (-4.3%).
    • This reduction is a callback to Final Fight 2, where the "Spinning Handstand Kick" is Maki's super move; you lose some of your health for performing it in that game as well.
    • Maki does not need the full 600 health to Reppukyaku. As long as she has 1 or more health, you can do the move without any penalty besides the health reduction. This will, however, reduce your health to zero (you die at negative health) meaning you can be chip killed after that point.
    • If you try to 3K at zero health, the game ignores the input and nothing will happen on-screen.
    • In K-Groove, at zero-health situations you can Just Defend to "recharge" your health meter enough to let you Reppukyaku again if desired.
  • The invincibility starts immediately and continues through to the first active (hitting) frame. This is usually enough to bust through any attack the opponent is doing and knock them back.
    • If that does not happen, for the remaining 3 frames of the initial attack and all frames thereafter, Maki's hurtbox turns back on and she is subject to trades or getting beat cleanly like any other attack.
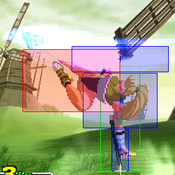
    • Due to how the hit & hurtboxes are positioned, Reppukyaku is surprisingly useless against good crossup attacks. By the time the opponent comes down close enough for the attack to be in range, they are usually already above or behind the hitbox and within Maki's hurtbox. If you have time, use one of Maki's excellent anti-air normals; otherwise, just block!
  • Reppukyaku has four active hit windows, alternating in front of and behind Maki as she spins. It will only hit the opponent once before they are knocked back, but will need to be blocked, parried, or Just Defended twice (on one side).
    • If the opponent tries to roll through it, it will usually hit them as they come out of the roll. However, this is dependent on their roll recovery and whether they come out on the side that is active or inactive so it's not guaranteed.
  • Reppukyaku may completely whiff some smaller crouching characters, continuing a common theme with Maki.
  • (**)Though it knocks down, Reppukyaku can be extremely unsafe on hit against characters in safe fall grooves with fast-moving specials and supers, even moreso if the opponent's knockback is cut short by the corner. Moreso than that if it is blocked, where the opponent has more than a full second to respond.
    • In the recovery phase, Maki will slow her spin, leap back, and land on her feet. Once the leap begins she is considered airborne for 23 frames, then on the ground for the final 17 recovery frames. If the opponent has a chance to punish, you may luck out and avoid big damage or any at all if they mistime their attacks to your recovery.
  • On the flipside, Reppukyaku can completely neuter the startup of A-Groove custom combos... even if you have been caught poking when they randomly activate! There is a small window between activation and their first attack, long enough to cancel your poke into a 3K, completely blowing up their custom before it even starts.
  • Against regular jump-in attacks, virtually nothing will beat Reppukyaku. However, you shouldn't (and can't) use it as a general anti-air attack since you'll be down to 50-75% health before you know it.
    • The trick is to learn to use it situationally. Against opponents using top-tier characters and abusing very "safe" attacks like small jump roundhouses, 3King them away from you a few times in a row will force them to reevaluate how they approach you.
    • But even this is dependent on how much health Maki has. If you are ahead in the round by a comfortable margin, you can afford to 3K more liberally. If you have less than 25% health? Not so much. Still, don't be afraid to use it at low health levels. Just be more picky with your opportunities.
    • Against K-Groove and P-Groove, Reppukyaku offers an extra level of protection as an anti-air because of Maki spinning around to hit twice on either side, forcing opposing players using those grooves to know to parry/JD twice and with the correct timing.

Supers

BushinGouraiha

Bushin Gouraiha
The Punch Super
236236+P / qcf,qcf+P
CvS2 Maki psuper.png
First hit of the super
Version Damage Stun Cancel Guard Parry Startup Active Recovery Total Adv Hit Adv Block Invul
Level 1
Qcf.pngQcf.png + Lp.png
2400 0 - H/L (*H/L) H 5:4 - 39 - Down -26 9 Full
Level 2
Qcf.pngQcf.png + Mp.png
3200 0 - H/L H 5:4 - 49 - Down -37 15 Full
Level 3
Qcf.pngQcf.png + Hp.png
5600 0 - H/L H 5:4 - 58 - Down -47 23 Full

Maki unleashes a series of rapid attacks, ending with a upward kick.

  • You'll always want to use the punch super to punish up-close if you only have a Level 1 available, since it does more damage. In all other scenarios, including Level 1 from greater distances, use the kick super instead.
  • (*)If the Level 1 version is blocked, there will be a brief moment before the finishing kick of the sequence where the opponent is out of blockstun. If the opponent is napping, they may eat the last kick if they aren't still blocking. If the opponent is on top of things, they can do a flashy reversal DP or super before the finisher. This phenomenon does not happen in the Level 2 or Level 3 versions.

Tesshinhou

Tesshinhou
The Kick Super
236236+K, then K /
qcf,qcf+K, then K
CvS2 Maki ksuper 1.png
It's like the Command Run, so...
CvS2 Maki ksuper 2.png
...press any K again to fire away...
CvS2 Maki ksuper 3.png
... and finish them off!
Version Damage Stun Cancel Guard Parry Startup Active Recovery Total Adv Hit Adv Block Invul
Run Startup
Qcf.pngQcf.png + K.png
0 - - - - 4:4 60 25 93 - - Varies by Level
Level 1
Qcf.pngQcf.png + Lk.png, then K.png
2200 0 - H/L H/L 8 19 29 56 Down -6 8 Full (from Startup)
Level 2
Qcf.pngQcf.png + Mk.png, then K.png
3600 0 - H/L H/L 8 19 29 56 Down -6 14 Full (from Startup)
Level 3
Qcf.pngQcf.png + Hk.png, then K.png
6600 0 - H/L (H)* H/L (H)* 8 19 48 75 Down -28 22 Full (from Startup)

Maki runs forward then leaps forward with a sustained kick attack. At Level 3, she finishes the attack with a haymaker punch.

  • Tesshinhou, the kick super, is Maki's moneymaker. The Level 3 version is a top 10 most damaging super in CvS2. Punishing with or confirm into this is a critical skill that all Maki players must learn to be successful with the character at higher levels or play. With the exception of close Level 1 punishes (use Bushin Gouraiha for more damage), you should be looking to land the kick super whenever possible.
  • Like the Hayagake runs, the initial input of the super, 236+K/qcf+K, only starts Maki into a run. To actually execute the super, you must press K again after the run starts. You can do this from the very first frame, up to the 60th. The Run Startup data above is for when you do not cancel the run into the actual super. (You will always cancel it.)
  • The invincibility of the super begins on the first frame of the run startup and will continue into the attack portion if it is started during that period.
  • For confirming off light attacks or up-close punishes, you will need to cancel the run immediately. To do this, cancel into the super off your normals, then after the super flash you can piano across the kick buttons to increase the liklihood of the attack coming out within a frame or two of it being able to.
  • When punishing off far HP, you should NOT immediately cancel the startup run. If you do, the super will not fully connect due to the distance Maki needs to make up. Instead, you need to let Maki take a step forward during the startup run so she get in range to land the full super. While you shouldn't be hasty doing this, you have more time than you think due to the large amount of hitstun far HP does. At extreme distances, you will need that time!
  • (*)The Level 3 version of Tesshinhou ends with a Genko-like haymaker punch. This punch hits as an overhead, requiring the opponent block it high.
  • If the super is going to be blocked, consider playing games with the run startup phase. If you delay firing off the attack while running up against the opponent, there is a chance you could catch them hitting a button.
  • Maki doesn't run particularly fast during the startup run, but you can still use the higher-level invincibility to run through projectiles and land the super on a distant opponent if both the projectile and they aren't too far away. If you do this but see the opponent recovering soon with some distance that Maki still needs to cover, don't be afraid to cancel the run into the attack phase early; some hits are better than none!

Ajaratengu

Ajaratengu
"The 720"
(in air) 720+P
CvS2 Maki 720.png
Version Damage Throw Range Startup Active Recovery Total Invul
Level 1
360.png360.png + Lp.png
2900 58px 4:4 1 24 33 5 Full
Level 2
360.png360.png + Mp.png
4100 58px 4:4 1 24 33 14 Full
Level 3
360.png360.png + Hp.png
5900 58px 4:4 1 24 33 22 Full

Maki grabs the opponent, jumps into the air, and slams them from wall to wall before ending with a suplex to the ground.

  • Having a grab super gives Maki an unexpected threat and the big payoff to her mixup game. The various strings of run-ups, reset run-ins, and overheads you do over the course of a set will hopefully train the opponent to stand still long enough for you to hit them with a 720 out of nowhere!
  • There are the usual ways to input the 720—jump-in, buffering off a meaty whiff, etc.— but the method to master with Maki is to buffer the 720 while performing a Hayagake run. To do this, after the initial Qcf.png for the command run, continue the input around into 360.png360.png. As you hit LK to execute the runstop, you should be finishing up the 720 motion, after which you can hit a punch button to execute the super. If done correctly, the super should come out as soon as Maki recovers from the stop skid.
  • Some 720 setups outside of the runstop include:
    • Small jump HP/HK into 720 when you land,
    • Hayagake low slide after a knockdown as a Safe Fall check, then 720 as you recover and they wake up,
    • A tick setup after the second hit (the MP) of the Bushin Chain, buffering the 720 during the chain. You will need to end the 720 in the forward direction so you can take a little step towards the opponent to move Maki into range to land the super.
  • If the opponent jumps out of the grab, Maki will recover quickly enough to usually be able to punish with an anti-air, like crouching HP.
  • WARNING! Opponents can jump out of the Level 1 grab after the super flash! Level 1 supers invalidate opponent inputs for 3 frames, but there are 4 frames of startup post-flash before Maki grabs them. This is enough time for them to escape if they were blocking before the flash. For the Level 2 and Level 3 versions, they will need to have jumped before the super flash.
Version Damage Throw Range Startup Active Recovery Total Invul
Air Level 1
in air, 360.png360.png + Lp.png
3200 56px Horizontal, 70~82px Vertical 4:4 1 Landing + 1 - 5 Full
Air Level 2
in air, 360.png360.png + Mp.png
4500 52px Horizontal, 70~82px Vertical 4:4 1 Landing + 1 - 14 Full
Air Level 3
in air, 360.png360.png + Hp.png
6300 48px Horizontal, 70~82px Vertical 4:4 1 Landing + 1 - 22 Full

Maki grabs the opponent out of the air and slams them from wall to wall before ending with a suplex to the ground.

  • Ajaratengu can also be performed in the air against airborne opponents for a spectacular air-to-air grab super! Simply do a 720 while you are in the air and the opponent is in range to land it.
  • Except... not so simple! The air version of the 720 is practically impossible to set up, and you're not going to 720 quickly enough to reliably execute it on reaction. (No wonder the air versions do more damage than the ground versions.) Your best hope for landing Ajaratengu in the air on reaction is to buffer the 720 motion on most of your own jumps and hitting punch on reaction to an opponent's jump or airborne attack. However, it is a low percentage play and you're better off trying to hit the kick super or a ground 720.
  • When you do miss it, Maki only has 1 frame of recovery on the ground after she lands. Unless the opponent is leading with a low meaty, you are relatively safe from punishment. Suicide Spin if you sense them winding up for something!
  • For an instant air 720, perform a Saka Hayagake back run into an immediate forward super jump (MK), buffering the 720 input in the same way you would with the grounded Hayagake runstop 720. Just continue the input rotation after the command run, then execute the super after you finish the 720 motion and leave the ground. You can perform the 720 more slowly or delay the punch button to execute the super if you would like to have the super come out higher up off the ground.
  • Although you can never be sure when the opponent will jump, there are situations where they are more likely to jump than not, potentially giving you an air Ajaratengu chance. Two of these include:
    • If the opponent sees you coming in for a regular ground 720 and it's likely they will jump out of it, jump up after them and 720 them out of the air instead!
    • Opponents that abuse their air superiority, like Dictator, Claw, Chun-Li, etc.; or P- and K-Groove players fishing for parries/JDs may jump in frequently, and therefore predictably. You may be able to exploit that if a pattern emerges.

Colors
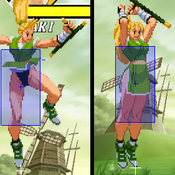
Maki CvS2 colors.png


CvS2 Wiki Navigation

General
Controls
Notation
HUD
Glossary
System
Roll Cancel
Combo
CvS2 Versions
Netplay/ Training
FAQ
Grooves
Groove Overview
Groove Subsystems
C-Groove
A-Groove
P-Groove
S-Groove
N-Groove
K-Groove
Capcom Characters
Akuma (Gouki)
Balrog (Boxer)
Blanka
Cammy
Chun-Li
Dan
Dhalsim
Eagle
E.Honda
Guile
Ken
Kyosuke
Maki
M. Bison (Dictator)
Morrigan
Rolento
Ryu
Sagat
Sakura
Vega (Claw)
Yun
Zangief
SNK Characters
Athena
Benimaru
Chang
Geese
Haohmaru
Hibiki
Iori
Joe
Kim
King
Kyo
Mai
Nakoruru
Raiden
Rock
Rugal
Ryo
Terry
Todo
Vice
Yamazaki
Yuri
Boss Characters
Shin Akuma
Ultimate Rugal
Evil Ryu
Orochi Iori