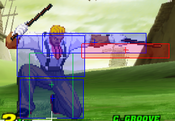
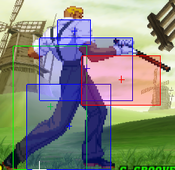
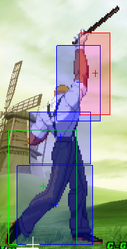
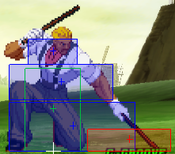
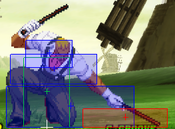
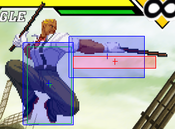
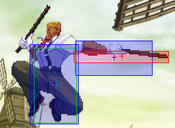
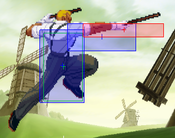
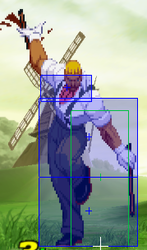
Capcom vs SNK 2/Eagle

From SuperCombo Wiki

Introduction

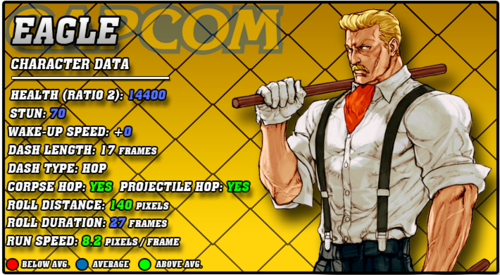
CVS2 Eagle Data.png

Story

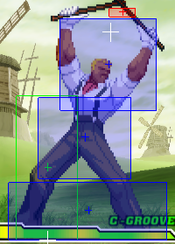
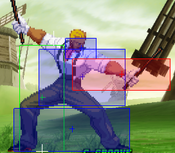
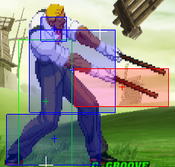
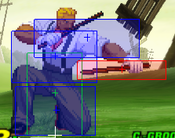
Eagle is a British Bojutsu fighter who works as a bouncer at a bar. He was one of the original enemies Ryu fought in Street Fighter 1, and was one of the most powerful of them. He was hired as a hitman to kill Sagat, thought he sadly failed. He returned home a living legend for his fighting however. Alpha 3 and its stories are questionably canon, but during the events of Alpha 3, Eagle started travelling to perfect his Bojutsu martial art style. He challenged anyone he thought was strong, most notably Guile, who Eagle beats. Guile shares that he's on a mission to stop Shadaloo and fight M. Bison, and also sharing that Sagat is there as well. Eagle follows, eager to fight his previous rival. Upon seeing Sagat, Eagle is disappointed that he's just become a lackey of Shadaloo. They fight, and Eagle wins. M. Bison is impressed, and fights Eagle himself, also being defeated by the Bojutsu master. They rescue Charlie and destroy the Psycho Driver, and Eagle thanks Guile for one last romp on the battlefield.

Gameplay

Eagle is mostly a poking character with solid anti-airs, simple combos, good roll cancels, and effective supers. He can be quite simple to play, relying mostly on using his sticks to beat out opponents buttons on the ground and comboing into his Oxford Red stick rush special. Hitconfirming into his supers is fairly easy as well, and he has a versatile combo ending super in Union Jack Platinum. While his best anti-air special requires a roll cancel to be effective, roll cancelling does make it VERY effective. Overall, Eagle is just a simple poking and hitconfirming character.

He does have his weaknesses however. His main meterless combo ender, while it does good damage, doesn't give any knockdown. His anti-air special also requires roll cancelling to make it effective, and RC Sticks is a powerful fireball punish, limiting his use in non-roll Grooves heavily. He lacks any sort of zoning tools outside of his normals, and his mixups aren't the best without run/hop Grooves. Not having a reliable reversal (his lariet trades or loses quite a bit) also hurts, since it means he has to commit to something like a super to wake up with something invincible. If you want a poking character with good and fun hitconfirms, Eagle is your guy.

Groove Selection

Best - C/A: C-Eagle is a powerful defensive character that can hitconfirm into a level 2 Union Jack Platinum for great damage. While his Alpha Counter isn't the greatest, it's a useful defensive tool, and one that Eagle heavily appreciates. He can roll cancel Lariats for a more reliable anti-air, and his dash is very good, being not only very fast but can also hop over lows and ground fireballs. He also has great oki after a punch throw as he can dash over the opponent and meaty for a left-right mix and use instant overhead j.MK (one of the best IOHs in the game) for a surprisingly effective high low mix, essentially giving him a 4-way mix, albeit slightly reactable but still really strong. Overall, C-Eagle is a reliable and footsies-based Eagle playstyle, great for fundamentally sound players. A-Eagle is similar to C-Eagle, but sacrifices any threat of a hitconfirmed super in exchange for Custom Combos. Eagle's CC is fairly damaging and overall good, though usually not as scary as a level 2 or 3 Union Jack Platinum. What Eagle loses in damage he gains as versatility. Eagle is able to combo into CC off light confirms or 2MK or build meter post CC. Raw custom does big damage and he gains a true anti-air custom, comboing into CC off lights does roughly the same as a level 2 C-cancel. Both are really good picks for Eagle.

Useful - K/N/P: K-Eagle is the antithesis to the footsies based Eagle in C and A. He makes an immediate major sacrifice by losing RC Lariat and RC Sticks, but gains a few big things in return. Run and hop make his rushdown a lot scarier, and he can be surprisingly good at it too. Rage lets him hitconfirm into a level 3 Union Jack Platinum for great damage, and since he has great range, JD is a reliable defensive tool for him. K-Eagle is a more rushdown focused Eagle with a decent comeback factor. Although his mixup game isn't nearly as strong as in dash grooves, he still has access to things like IOH j.MK and a short hop to create a crossover hop. The reason why he cannot produce the same success as he can in C and A is merely because of his lack of roll and not having his incredible dash. N-Eagle is a bit of a mix between C-Eagle and K-Eagle. You get the mobility of K and the reliable supers and rolls of C, but you sacrifice a lot of potential damage (lvl.2 Union Jack and multiple lvl.3 Union Jacks), making him a bit less scary overall. N-Eagle is good for a more simple style. P-Eagle gets parries, which are alright for him as he has decent ranged punishes and damage. While it is rare, a parry from P-Eagle into 5MK > Level 3 Union Jack Platinum does massive damage and is very scary.

Worst - S: S-Eagle needs to use S-Groove's subsystems effectively in order to succeed. Due to how he spaces the opponent, he can charge meter efficiently, but the subsystems in place are not as strong as other grooves, which automatically makes S-Eagle not that strong compared to the other grooves he can be in. At low health, he can be very dangerous, but that also comes with trying to not die since you're at low health. Dodge is okay, but his dodge attacks carry risk from them. Overall, he requires a lot of game knowledge and great use of S-Groove's given mechanics to win, and that is easier said than done.


Eagle is a poking and punishing character with lots of good normals and hitconfirms. He doesn't get consistent knockdowns without meter, and his best anti-air requires you to roll cancel it, but otherwise he's a very solid neutral-oriented character. Eagle is best in C-Groove and A-Groove

Difficulty: Medium
Tier: B
Pros Cons
  • Normals: Thanks to the long reach of his sticks, Eagle has solid normals for keeping the opponent at range or to confirm into Union Jack and Sticks
  • Super: Union Jack Platinum is a great and damaging combo ending super that lets Eagle melt the opponent with Level 2 cancels or Raged level 3's, level 3 Manchester Gold (lariat super) is one of the best wake moves in the game being -1 on block.
  • Roll Cancels: RC Lariat is a fairly annoying roll cancel that works as a great anti-air, and RC LK Sticks is fairly safe on wake up (-2 on block), with MK and HK variants being great anti-fireball tools.
  • Offense: Not only can his normals be oppressive with the right timing and usage, but his hop and dash can make his rushdown intimidating as well.
  • Comeback Factor: Eagle is very solid at keeping out, but getting in can be a struggle against many top tiers as he is better at zoning when low on health
  • Meterless Combos: While his meterless combos are still damaging, Eagle can struggle to secure a knockdown without spending meter, and his main BnB leaves him at -2. To make it even worse he requires a link into 2MP or 5MK to combo into his Oxford Red (Sticks), which is punishable on block if not executed correctly
  • Reliance on Roll: Eagle's best anti-air special has to be roll cancelled, since it only has upper body invuln on the startup and doesn't go into the first active frame
  • Defense: Eagle has no true meterless reversal, so he is forced to either hold pressure on any far knockdowns or spend meter on an unsafe reversal. He certainly has the normals to prevent rushdown but can be opened up due to the commitment of some of his defensive options
  • Run: Eagle having a top tier dash means that he sacrifices a lot if he is in the SNK grooves. His run is okay, but not at the same level of offensive potency as his dash.
  • 5HP/2HK: Eagle has some of the farthest reaching buttons in the game, but at the cost of being really punishable if not used correctly. If an opponent jumps or rolls past these normals, you will get punished hard. Using his 5HP and 2HK must be done with caution. Both buttons are also very vulnerable to parries and JDs


Players to Watch

Name Country Groove Accounts Notes
Kaoruda Japan C/A-Groove Twitter: @kaoruda The only Eagle user from Japan. Plays Eagle with careful precision and only moves in when necessary.
C-Groove Sample Match
A-Groove Sample Match
Combofiend USA A-Groove Twitter: @TheComboFiend Old Eagle player. Stopped playing CvS2 a while ago but did very well in tournaments with Eagle on his team.
Sample Match


Normal Moves

Far Normals

5LP

Far Jab
Far Light Punch
5LP / Far LP
CVS2 Eagle 5LP.png
Version Damage Stun Cancel Guard Parry Startup Active Recovery Total Adv Hit Adv Block Invul
Far Lp.png 300 3 SP/SU Mid High 3 4 5 12 +7 +7 None

A quick standing punch.

  • Though a nice normal to have for panic anti-airs, it's crouchable and hits a lower than most other standing jabs, 2LP is better against grounded opponents.

5MP

Far Strong
Far Medium Punch
5MP / Far MP
CVS2 Eagle 5MP1.png
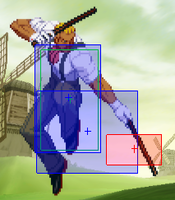
First Hitbox
CVS2 Eagle 5MP2.png
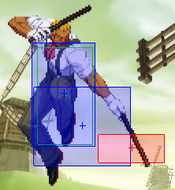
Second Hitbox
Version Damage Stun Cancel Guard Parry Startup Active Recovery Total Adv Hit Adv Block Invul
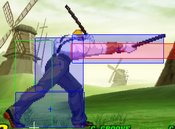
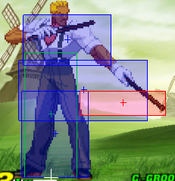
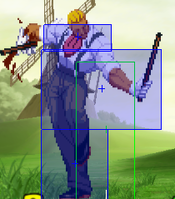
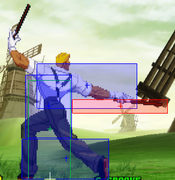
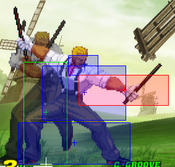
Far Mp.png 400+800 4+8 SP/SU (first hit) Mid High 4 2 [5] 7 17 35 -1 -1 None

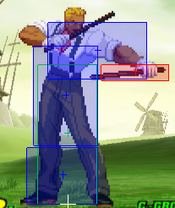
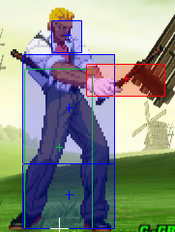
Eagle does a double swipe of the sticks.

  • One of Eagle's main anti-airs. The disjoint on the second hitbox usually means it will beat out a good amount of jump-ins. Timing the anti-air to have the second hitbox be the one hitting is key to using this button effectively.

5HP

Far Fierce
Far Heavy Punch
5HP / Far HP
CVS2 Eagle 5HP.png
Version Damage Stun Cancel Guard Parry Startup Active Recovery Total Adv Hit Adv Block Invul
Far Hp.png 1300 13 None Mid High 8 3 38 49 -17 -17 None

Eagle does a huge haymaker swing with one of his sticks.

  • One of Eagle's main normals at a distance. If used effectively, you can frustrate your opponent by badgering them and getting in free damage and guard bar.
  • Has huge recovery, so if whiffed, you will be punished. Reversal rolls and jumps will beat this normal hard, so don't use it predictably.
  • Some reversal supers can punish this normal hard on block, and even worse, on hit.
  • Great for whiff punishes and poking, but the many flaws will make this button difficult yet rewarding to use.

5LK

Far Short
Far Light Kick
5LK / Far LK
CVS2 Eagle 5LK.png
Version Damage Stun Cancel Guard Parry Startup Active Recovery Total Adv Hit Adv Block Invul
Far Lk.png 500 5 SP/SU Mid High 4 4 11 19 +2 +2 None

Eagle does a lower hitting swipe from his stick.

  • Can be used against P-Groove opponents on wake-up, but it really doesn't do anything exceptional by itself.

5MK

Far Forward
Far Medium Kick
5MK / Far MK
CVS2 Eagle 5MK.png
Version Damage Stun Cancel Guard Parry Startup Active Recovery Total Adv Hit Adv Block Invul
Far Mk.png 900 9 SP/SU Mid High 4 6 16 26 0 0 None

A quick midsection stab from the stick.

  • One of your main confirms into Union Jack Platinum and Oxford Red/Sticks (43216K). Good damage and a key element in Eagle's combo game.
  • Can be used in neutral to beat out certain anticipated pokes and counterpokes. It has great disjoint and priority, and due to it's relatively fast speed, whiff punishing this normal is not really a situation you will find yourself in.

5HK

Far Roundhouse
Far Heavy Kick
5HK / Far HK
CVS2 Eagle 5HK.png
Version Damage Stun Cancel Guard Parry Startup Active Recovery Total Adv Hit Adv Block Invul
Far Hk.png 1300 13 SU Mid High 7 3 32 42 -11 -11 None

A quick roundabout swing from the stick.

  • Trades range for safety. 5HP has insane range but is very unsafe, and while 5HK is also unsafe, it's still a nice whiff punish and can cancel into super, while risking less.

clHP

Close Fierce
Close Heavy Punch
cl.HP
CVS2 Eagle clHP1.png
First Hitbox
CVS2 Eagle clHP2.png
Second Hitbox
Version Damage Stun Cancel Guard Parry Startup Active Recovery Total Adv Hit Adv Block Invul
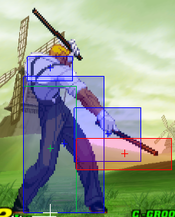
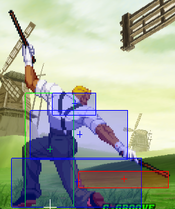
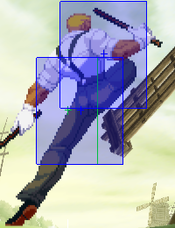
Close Hp.png 1100,1300 11,13 SU Mid High 5 8 26 39 -2 -2 None

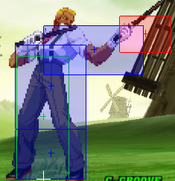
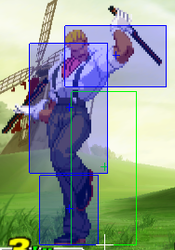
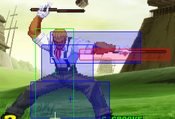
Eagle does a downwards strike with the sticks.

  • One of Eagle's main anti-crossup tools and anti-airs. Due to the really small first hitbox (the one that will anti-air) it may be difficult to use it at first but timing will be key, and knowing when to use it when there are variable jump times between characters is key to not getting opened up by constant jump-ins and crossups. Usually one of Eagle's preferred options if RC Lariat is not available to him.
  • Vulnerable to jump-in parries and to a lesser extent JDs, due to Eagle's lack of a special cancel on this button he may just have to mash lights or hope to get a lariat out in time before the punish.
  • Good and damaging confirm into Union Jack, but cannot confirm into specials.

clHK

Close Roundhouse
Close Heavy Kick
cl.HK
CVS2 Eagle clHK.png
Version Damage Stun Cancel Guard Parry Startup Active Recovery Total Adv Hit Adv Block Invul
Close Hk.png 1400 14 None Mid High 8 9 17 34 +2 +2 None

A quick double swing from the sticks.

  • Great meaty normal. It is +2 but does have above average startup.
  • Good guard pressure filler. Since it is a heavy it does nice guard bar damage and isn't unsafe.

Crouching Normals

2LP

Crouch Jab
Crouching Light Punch
2LP / cr.LP
CVS2 Eagle 2LP.png
Version Damage Stun Cancel Guard Parry Startup Active Recovery Total Adv Hit Adv Block Invul
D.png+Lp.png 300 3 SP/SU Mid Low 3 4 6 13 +7 +7 None

A quick low jab

  • Average low jab. As per usual with most other characters, this button is Eagle's main combo starter and is very plus. It can also be used as a last minute defensive option to get an aggressive opponent off of you.
  • Optimal links from 2LP are 5MK (3f link), 2MP (3f link), and 2MK (2f link). These are all really simple and easy links and are key to getting Eagle's optimal special/super confirms.

2MP

Crouch Strong
Crouching Medium Punch
2MP / cr.MP
CVS2 Eagle 2MP1.png
First Hitbox
CVS2 Eagle 2MP2.png
Second Hitbox
Version Damage Stun Cancel Guard Parry Startup Active Recovery Total Adv Hit Adv Block Invul
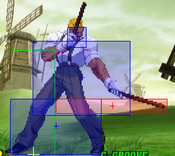
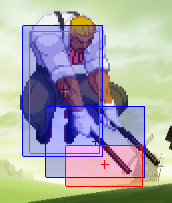
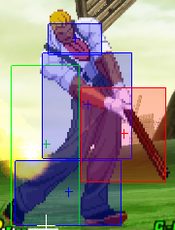
D.png+Mp.png 400+800 4+8 SP/SU (first hit) Mid Low 4 2 [6] 4 22 38 -2 -2 None

A double hitting swing from the sticks.

  • While it can confirm into super, it's mainly used for being a more reliable but less damaging confirm into Sticks. The first hit is cancellable and does good hitstun, but the very weak 400 damage means it essentially is slightly more damaging than a triple light normal confirm. It has a lot more range than 5MK though, so confirms won't fall out as much with this button. Essentially you're trading 500 damage for near 100% consistent confirms, it just depends on the spacing that 2LP/2MK hits at.
  • Due to the spacing that both hits leave the opponent, it's basically impossible to punish on block, so it's a nice poke on the ground with long reach. However, like 5HP, rolls and jumps can beat this normal easily, so you can't spam it too much as there is a risk involved when whiffing this button.

2HP

Crouch Fierce
Crouching Heavy Punch
2HP / cr.HP
CVS2 Eagle 2HP1.png
First Hitbox
CVS2 Eagle 2HP2.png
Second Hitbox
Version Damage Stun Cancel Guard Parry Startup Active Recovery Total Adv Hit Adv Block Invul
D.png+Hp.png 1200,1000 12,11 SP (first hit), SU Mid High 5 9 29 43 -14 -14 None

A big upward swing from the stick.

  • Very similar in animation to a shoto 2HP. It is also one of Eagle's anti-airs, but hits more close to him than other ones. Mostly used as an anti-crossup tool since the space is mostly controlled around Eagle's head.
  • Max damage confirm into Sticks from 2LP, just note that if this ends up whiffing, you are getting punished. It is a 2f link, so it's not too difficult to execute but the risk of the button potentially falling out usually means that 5MK and 2MP are the preferred combo routes.

2LK

Crouch Short
Crouching Light Kick
2LK / cr.LK
CVS2 Eagle 2LK.png
Version Damage Stun Cancel Guard Parry Startup Active Recovery Total Adv Hit Adv Block Invul
D.png+Lk.png 400 4 SP/SU Low Low 3 4 8 15 +2 +2 None

A quick low hitting swipe from the stick.

  • While 2LP is generally better in terms of pressuring and comboing, this is a good button to use for mixups, since 2LP is a mid. At 3 frames this is Eagle's fastest low, and can link into 2LP to combo off of said low.

2MK

Crouch Forward
Crouching Medium Kick
2MK / cr.MK
CVS2 Eagle 2MK.png
Version Damage Stun Cancel Guard Parry Startup Active Recovery Total Adv Hit Adv Block Invul
D.png+Mk.png 800 8 SU Low Low 5 6 11 22 +6 +6 None

A slower low hitting swipe from the stick.

  • A very low committing move to control space and check buttons with. Has good speed and priority, and unlike 2MP, it's a poke that you can whiff pretty safely for the most part. It's not exactly great meterbuild but it's something Eagle can throw out to control the space with. It's similar to Dictator's 2MK, albeit less threatening due to the lack of a special cancel, but both like to occasionally throw it out there in neutral to maintain space control.
  • Due to being +6, it's one of Eagle's main moves to pressure with, it can link into itself and 5MK among other things.
  • One of Eagle's go-to cancels into Union Jack. The fact that it is +6 means that confirming on reaction is really easy.

2HK

Crouch Roundhouse
Crouching Heavy Kick
2HK / cr.HK
CVS2 Eagle 2HK.png
Version Damage Stun Cancel Guard Parry Startup Active Recovery Total Adv Hit Adv Block Invul
D.png+Hk.png 1200 12 None Low Low 11 4 29 44 HKND -9 None

Eagle lunges forward and does a two-handed sweep with the sticks.

  • Like 5HP, this is a button with many gives and takes. While the range is crazy and can check opponents from wonky distances, Eagle risks a lot by using this button in neutral.
  • Rolls and jumps can beat this move hard if the opponent knows it's coming. Using sweep as a blockstring ender from 2MK isn't bad but it also leaves a big gap for a roll or a jump. If you know the opponent will try to psychic jump a 2HK, you can get a free anti-air in.
  • Has less recovery than 5HP, but also has longer startup. At max range, landing this move usually leads to no okizeme since the opponent is very far away from Eagle. If spaced, it's actually really difficult to punish on block as it is -9, although reversal supers like Dictator's Super Psycho Crusher and Boxer's Gigaton Blow will do the job fine, but again the main risk is the move whiffing altogether, so use this button sparingly, as excessive use can lead to some very undesirable outcomes.

Jumping Normals

j.LP

Jump Jab
Jumping Light Punch
j.LP
CVS2 Eagle jLP.png
Version Damage Stun Cancel Guard Parry Startup Active Recovery Total Adv Hit Adv Block Invul
Ub.png/U.png/Uf.png+Lp.png 600 6 None High High 3 20 - 23 - - None

A quick outward stab from the stick.

  • Though it is a very good air-to-air, it is largely outclassed by j.MP, which has the same startup and more damage but less active frames.

j.MP

Jump Strong
Jumping Medium Punch
j.MP
CVS2 Eagle jMP.png
Version Damage Stun Cancel Guard Parry Startup Active Recovery Total Adv Hit Adv Block Invul
Ub.png/U.png/Uf.png+Mp.png 1000 10 None High High 3 10 - 13 - - None

A slower outward stab from the stick.

  • Great air-to-air with long reach. Can beat out a decent chunk of aerial moves if done early, the disjoint makes it favorably trade or outright win in most of those interactions.

j.HP

Jump Fierce
Jumping Heavy Punch
j.HP
CVS2 Eagle jHP.png
Version Damage Stun Cancel Guard Parry Startup Active Recovery Total Adv Hit Adv Block Invul
Ub.png/U.png/Uf.png+Hp.png 1300 13 None High High 7 6 - 13 - - None

A large aerial swing from the stick.

  • Has 4 frames more startup than j.MP, but it adds on an extra 300 damage and even more range and disjoint. If done as an early air-to-air, it's a really strong tool, and wins in a lot of aerial interactions.
  • The fairly low 6 active frames means that timing the air-to-air is much more strict compared to other air-to-airs in Eagle's arsenal.

j.LK

Jump Short
Jumping Light Kick
j.LK
CVS2 Eagle jLK.png
Version Damage Stun Cancel Guard Parry Startup Active Recovery Total Adv Hit Adv Block Invul
Ub.png/U.png/Uf.png+Lk.png 500 5 None High High 3 20 - 23 - - None

A quick downward swipe from the stick.

  • Outclassed by j.MK. It has a smaller hitbox and does less damage. The large active frames is something but Eagle prefers to do these 3-frame air normals late anyways. Just use j.MK.

j.MK

Jump Forward
Jumping Medium Kick
j.MK
CVS2 Eagle jMK.png
Version Damage Stun Cancel Guard Parry Startup Active Recovery Total Adv Hit Adv Block Invul
Ub.png/U.png/Uf.png+Mk.png 900 9 None High High 3 10 - 13 - - None

A slower downward swipe from the stick.

  • A stellar air normal overall. 3-frame startup, decent active frames and can function as both an air-to-air and a jump-in. As an air-to-air, it has great disjoint and usually comes out way before the opponent's aerial move as it has 3 frames of startup, and as a jump-in it hits very low, so it usually carries that hitstun into a combo starter.
  • Great low-jump button in hop grooves as well. Since it hits very low, Eagle's low jump can be very hard to react to when he uses low jump j.MK in conjunction with something like 2LK or 2MK. The threat of that high-low mixup can definitely be effective.
  • Also one of the most consistent IOHs in the game. Using this button as an instant overhead gives Eagle another dimension of mixup, even if the returns on hit aren't as great, but this mix can be scary if the round is coming to a close and the opponent is one hit away from death. Easier to land in hop grooves but can still be done in non-hop grooves as well.

j.HK

Jump Roundhouse
Jumping Heavy Kick
j.HK
CVS2 Eagle jHK.png
Version Damage Stun Cancel Guard Parry Startup Active Recovery Total Adv Hit Adv Block Invul
Ub.png/U.png/Uf.png+Hk.png 1200 12 None High High 8 7 - 15 - - None

Eagle does a downward swing with the sticks.

  • Eagle's main jump-in by design. Does great damage and has tons of hitstun allowing easy jump-in confirms. While the 8-frame startup is the slowest of Eagle's air normals, it's still effective with good timing. Against big characters this button has cross-up potential but it very inconsistent in that department.
  • As a low-jump normal it can still be good, it deals more damage than j.MK but j.MK is much more difficult of a button to react to, so it just depends on the spacing.

Throws

Pile of Fools

Pile of Fools
Punch Throw
Near Opponent, 4/6HP
CVS2 Eagle Rangethrow.png
Throw Range
CVS2 Eagle Pthrow.png
Pile of Fools
Version Damage Stun Cancel Guard Parry Startup Active Recovery Total Adv Hit Adv Block Invul
Close B.png/F.png+Hp.png 1900 - - - - 3 1 21 25 - - None

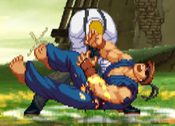
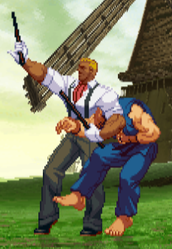
Eagle knocks his opponent down and drives his sticks into their stomach.

  • One of the better throws in the game due to the fact that it is untechable and puts Eagle right next to the opponent. Definitely the go-to throw.
  • After the throw, Eagle has many options. He can dash (or short hop) over the opponent to get them to block the opposite way, or he can stay on the same side. He could do an IOH j.MK, or hit a meaty 2MK to create a good high low mix, or for parry-happy opponents he can hit a meaty 5MK/5HK and pressure afterward. After the meaty he can push more pressure and potentially another throw. This mixup is really strong and one Eagle really likes for the sake of damage and pressure.

Fool Percussion

Fool Percussion
Kick Throw
Near Opponent, 4/6HK
CVS2 Eagle Rangethrow.png
Throw Range
CVS2 Eagle Kthrow.png
Fool Percussion
Version Damage Stun Cancel Guard Parry Startup Active Recovery Total Adv Hit Adv Block Invul
Close B.png/F.png+Hk.png 2100 21 None - - 5 1 21 27 - - None

Eagle puts the opponent in a headlock and then jabs them with his stick.

  • While a funny-looking throw, it is far outclassed by his punch throw, so if you want to throw your opponent use the punch one.

Special Moves

Canterbury Blue
Canterbury Blue
236+P / QCF+P
Qcf.png + P.png
CVS2 Eagle 236LPhold.png
LP version (hold)
CVS2 Eagle 236LPrelease.png
LP version (release)
CVS2 Eagle 236MPhold.png
MP version (hold)
CVS2 Eagle 236MPrelease.png
MP version (release)
CVS2 Eagle 236HPhold.png
HP version (hold)
CVS2 Eagle 236HPrelease.png
HP version (release)
Version Damage Stun Cancel Guard Parry Startup Active Recovery Total Adv Hit Adv Block Invul
LP
Qcf.png + Lp.png
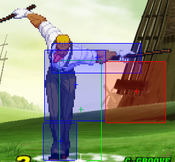
1100 11 None Mid High 3 (beginning startup), 13~73 (hold time), 5 (release startup) 12 34 Variable HKND -14 None

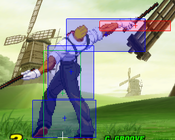
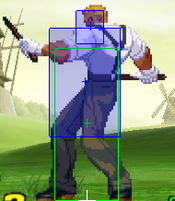
Eagle spins his sticks and takes a counter pose, then does a quick upward swing.

  • By holding the punch, Eagle stays in an autoguard state for about a second until he swings his stick. He can release it prematurely by simply not holding punch, although the startup is still beefy as he needs to hold for at least 13 frames before attacking. Without holding the startup is 21 frames, which is huge and makes it's use as an anti-air/counterpoke/anti-fireball very difficult.
  • Has autoguard frames against high hitting attacks.
  • The only version that knocks down, although it's obviously far too slow to be comboed into.
  • Can absorb multiple normal and special move hits, it can even block projectiles. Supers cannot be absorbed.
  • Can be an anti-air against jump-ins but note that the lack of invincibility means it can't be used as a reversal. As well the aforementioned 21 frame startup means it has to be done anticipating a jump.
  • The way the autoguard works is an invisible box is used for the autoguard, and if the opponent's hitbox strikes that area, it will be absorbed.
MP
Qcf.png + Mp.png
1000 10 None Mid High 3 (beginning startup), 13~73 (hold time), 5 (release startup) 12 30 Variable -10 -10 None

Eagle spins his sticks and takes a counter pose, then does a quick midsection swing.

  • Has autoguard frames against mid hitting attacks.
  • Has the same absorbing properties as LP and HP.
  • Generally the most versatile of the three, as the pose and the swing itself can catch most pokes in neutral, however this move is very slow to recover so don't fish for this move in neutral.
  • The autoguard box is at Eagle's midsection, so jump-ins and lows can hit Eagle out of the counter.
HP
Qcf.png + Hp.png
1200 12 None Mid High 3 (beginning startup), 13~73 (hold time), 5 (release startup) 12 30 Variable -10 -10 None

Eagle spins his sticks and takes a counter pose, then does a quick downward swing.

  • Has autoguard frames against low hitting attacks.
  • Same absorption properties as LP and MP.
  • Can absorb low projectiles like Reppukens, but due to it's slow speed it's not worth going for in neutral since Eagle has better anti-fireball tools.
  • The autoguard box is at Eagle's legs, so most crouching moves will get caught but mid pokes and jump-ins still beat this counter.
Saint Andrew's Green
623+P / DP+P
Dp.png + P.png
CVS2 Eagle 623P1.png
Stick Hitbox
CVS2 Eagle 623P2.png
Fireball Hitbox
Version Damage Stun Cancel Guard Parry Startup Active Recovery Total Adv Hit Adv Block Invul
LP
Dp.png + Lp.png
1200 12 None Mid High 14 5 49 68 HKND -30 None

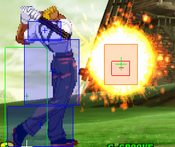
Eagle does a golf swing with his sticks.

  • All versions have the same frame data and damage, but the main difference is where the reflected fireball goes.
  • Serves as a fireball reflector, as the hitbox will send the fireball right back to the opponent. Works on every special fireball in the game, however super fireballs will not work.
  • LP sends the fireball back horizontally. Travels really fast.
  • Knocks the opponent unusually high, however the large recovery means that Eagle cannot juggle off of it if he was in A-Groove and wanted to activate CC.
  • Very punishable on block, do not use any variant of this special as a raw hit.
MP
Dp.png + Mp.png
1200 12 None Mid High 14 5 49 68 HKND -30 None

Eagle does a golf swing with his sticks.

  • MP sends the fireball at around a 30 degree angle upwards. Not much use against grounded or aerial fireballs.
HP
Dp.png + Hp.png
1200 12 None Mid High 14 5 49 68 HKND -30 None

Eagle does a golf swing with his sticks.

  • Sends the fireball at around a 45 degree angle upwards.
  • Can work as a tool to counter Akuma's Zanku Hadoken and Geese's Shippuken, although the big startup means you are probably doing it anticipating the fireballs, and if they end up just doing a regular jump-in, you will get punished.
Manchester Black
Manchester Black
aka Lariat
214+P / QCB+P

Qcb.png + P.png
CVS2 Eagle 214P1.png
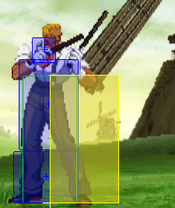
Startup (Lower Body Invul)
CVS2 Eagle 214P2.png
Startup Hitbox
CVS2 Eagle 214P3.png
Back Hitbox
CVS2 Eagle 214P4.png
Front Hitbox
Version Damage Stun Cancel Guard Parry Startup Active Recovery Total Adv Hit Adv Block Invul
LP
Qcb.png + Lp.png
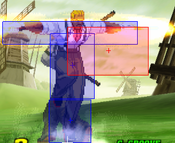
1200 12 None Mid High 4 5 [6] 6 [6] 2 18 47 HKND -28 4 Frames (Lower Body)

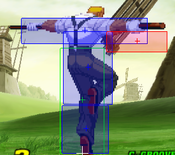
Eagle holds his sticks out and spins rapidly.

  • Eagle's preferred anti-air of choice, however it's effectiveness lies in the roll cancel. If RC'd, lariat becomes a great consistent anti-air and anti-crossup. The multiple hits makes parrying and JDing the special difficult, so it's easier to beat out those empty jump options that Eagle's single hit anti-airs struggle against.
  • RC version can also blow through faster fireballs similar to Zangief, but Eagle has better options for anti-fireballs.
  • Besides anti-airing, this special can't do much. It can avoid lows, but it hits too high to punish those lows, so it can't do anything much outside of anti-airs.
MP
Qcb.png + Mp.png
1300 13 None Mid High 5 5 [6] 6 [6] 2 [1] 3 [5] 6 [6] 2 18 71 HKND -52 5 Frames (Lower Body)

Eagle holds his sticks out and spins rapidly.

  • Also a good anti-air if RC'd, however is punishable in the corner against safe-falling grooves.
HP
Qcb.png + Hp.png
1200 12 None Mid High 6 5 [6] 6 [6] 2 [1] 3 [5] 6 [6] 2 [1] 3 [6] 6 [5] 2 18 95 HKND -76 6 Frames (Lower Body)

Eagle holds his sticks out and spins rapidly.

  • If you want damage over safety, use this variant. It deals a nice 1200 damage as an RC anti-air, but due to the fact that it lasts for a long time, it's very punishable. Like MP, against safe falling grooves in the corner it can get punished on hit as well, so use this variant with caution. Sometimes it's better to just lose 200 damage to be completely safe with the anti-air.
Oxford Red
Oxford Red
aka Sticks/Rush
43216+K / HCF+K

+ K.png
CVS2 Eagle 43216K.png
Version Damage Stun Cancel Guard Parry Startup Active Recovery Total Adv Hit Adv Block Invul
LK
+ Lk.png
300+200x4 11 None Mid High 16 2 [18] 4 [4] 4 [4] 4 [4] 4 28 92 -2 -2 None

Eagle dashes forward and performs a barrage of pokes from the sticks.

  • Not really useful compared to MK, but it is -2 on block so it is safe if something went wrong in Eagle's combos.
  • Distance is rather short and the damage is okay.
MK
+ Mk.png
300+200x6 15 None Mid High 17 2 [18] 4 [4] 4 [4] 4 [4] 4 [8] 4 [8] 4 28 117 -2 -29 None

Eagle dashes forward and performs a barrage of pokes from the sticks.

  • Eagle's main BnB ender, usually cancelled into from 2MP or 5MK.
  • Terrible on block and filled with a big gap at the start. Do not end blockstrings with this special.
  • Good damage and meterbuild but the main weakness is the fact that it does not knockdown and is minus on hit. This means that Eagle's meterless combos don't give him oki or any additional pressure afterwards, but it's still the only real meterless combo option Eagle has.
  • Can be used as an RC to get past fireballs but HK is better at that.
HK
+ Hk.png
300+200x8 19 None Mid High 25 2 [18] 4 [4] 4 [4] 4 [4] 4 [4] 4 [4] 4 [4] 4 [4] 4 28 113 -2 -41 None

Eagle dashes forward and performs a barrage of pokes from the sticks.

  • Mainly used as an RC to get past fireballs, making Eagle's anti-zoning game pretty good. It cannot land properly from fullscreen but at mid screen ranges it can work just fine.
  • Too slow to combo off of any cancellable normals, MK is the best option for that.
  • Not a good option to secure a chip kill because of the fact that there is a very big 18 frame gap between the initial strike and the followup sticks. This gap can get rolled past or get hit by an invincible reversal.
Liverpool White
Liverpool White
214+K / QCB+K
Qcb.png + K.png
CVS2 Eagle 214K1.png
Jump hitbox
CVS2 Eagle 214K2.png
Land hitbox
Version Damage Stun Cancel Guard Parry Startup Active Recovery Total Adv Hit Adv Block Invul
LK
Qcb.png + Lk.png
1300 13 None High High 36 4 34 74 HKND -14 None
MK
Qcb.png + Mk.png
1400 14 None High High 38 4 34 76 HKND -14 None
HK
Qcb.png + Hk.png
1500 15 None High High 41 4 34 79 HKND -14 None

Eagle leaps forward and swings his stick downward.

  • Easily Eagle's worst special. It is an overhead, but it's really slow, really reactable, and also really minus. It knocks down but the fact that the opponent will most likely not get hit by this special makes it unusable in most situations.
  • Can hop over fireballs, but superjumping over them works just as well. Just don't use this special.

Super Moves

Union Jack Platinum

Union Jack Platinum
236236+P / QCF,QCF+P
Qcf.pngQcf.png+P.png
CVS2 Eagle 236236P.png
Version Damage Stun Cancel Guard Parry Startup Active Recovery Total Adv Hit Adv Block Invul
Qcf.pngQcf.png+Lp.png 2800 0 None Mid High 8 3 [12] 5 [10] 1 [19] 2 [10] 4 [4] 4 [4] 4 [4] 12 [10] 20 28 164 HKND -22 8 (Full)

Eagle does a short flurry of attacks ending in an Oxford Red.

  • Great combo ender, does really nice damage for little cost. In grooves like C with great meterbuild this combo ender is efficient and synergizes well with Eagle's generally good meterbuild in his combos.
  • Unsafe on block, not a good move to end strings with. The lack of a gap means it can chip pretty well but if it doesn't kill then expect a punish.
  • Unlike the other levels, this one usually never falls out at longer ranges, making it the most consistent of Eagle's super combo enders.
Qcf.pngQcf.png+Mp.png 4800 0 SP/SU Mid High 8 3 [12] 5 [9] 2 [18] 1 [19] 2 [10] 4 [4] 4 [4] 4 [4] 4 [4] 4 [4] 12 [10] 20 28 199 HKND -22 14 (Full)

Eagle does a flurry of attacks ending in an Oxford Red.

  • Eagle's main level 2. The most optimal confirm is into an MK Oxford Red on the last hit before Eagle knocks the opponent away. The cancel does not knockdown but does do great damage.
  • If you want the most damage from this super, then don't do a cancel at all and let it play out, although cancelling into MK Sticks gives good meter back and sacrificing the damage for the meter is a fair tradeoff.
  • The last hit still falls out at max range
  • If you want a close knockdown, some meter AND more damage you can cancel into Saint Andrews Green (the reflector move) after the last hit in the corner. It doesn't matter which version you cancel into, although the light version does give you the most time to do whatever on oki.
Qcf.pngQcf.png+Hp.png 6000 0 None Mid High 8 3 [12] 5 [7] 1 [21] 2 [17] 1 [19] 2 [8] 3 [2] 3 [2] 3 [2] 3 [2] 3 [2] 3 [2] 3 [2] 3 [2] 3 [2] 12 [10] 20 28 221 HKND -22 23 (Full)

Eagle does a long flurry of attacks ending in an Oxford Red.

  • A really damaging level 3. When confirmed into, this combo will hurt. It is still very unsafe on block, but it knocks the opponent far away, so don't expect max damage combos as punishes but they will most likely hit you with something afterwards. Still a really good option to spend all your resources on.
  • At max range the last hit of this move can whiff, causing Eagle to be left wide open to a free punish. This is mentioned in the other two levels but here it is very much emphasized since you are spending all of your meter on this combo ender. It's good to know when you are too far out to use this move or not.
  • Because of the lack of any noticeable or exploitable gaps, this move can be used to secure a round winning chip kill, as this move specifically has great chip damage. In grooves that have uncontrollable meter like K, this is definitely a good thing to spend that meter on, but for more meter conservative grooves it's best to not go all out on a level 3 to chip kill unless it wins the entire match.

Manchester Gold

Manchester Gold
aka Lariat Super
214214+P / QCB,QCB+P

Qcb.pngQcb.png+P.png
CVS2 Eagle 214214P.png
Version Damage Stun Cancel Guard Parry Startup Active Recovery Total Adv Hit Adv Block Invul
Qcb.pngQcb.png+Lp.png 2600 0 None Mid High 8 4 [4] 4 [4] 4 [4] 4 [4] 4 [4] 4 [2] 2 34 88 HKND -12 8 (Full)

Eagle holds his sticks out and spins rapidly.

  • Essentially RC Lariat but without the RC. It is a reversal and does have full startup invul, but as an anti air the damage is very weak, as it will most likely hit the opponent once since it doesn't juggle properly.
  • Far inferior to Union Jack in terms of usefulness and what to spend meter on.
Qcb.pngQcb.png+Mp.png 3900 0 SP/SU Mid High 8 4 [4] 4 [4] 4 [4] 4 [4] 4 [4] 4 [4] 4 [4] 4 [2] 2 34 106 HKND -12 14 (Full)

Eagle holds his sticks out and spins rapidly.

  • Still far inferior to Union Jack, can't be comboed into and doesn't do much damage as an anti-air.
  • Level 2 cancels can sometimes leave Eagle facing the wrong direction. Just don't use this level.
Qcb.pngQcb.png+Hp.png 5500 0 None Mid High 8 4 [4] 4 [4] 4 [4] 4 [4] 4 [4] 4 [4] 4 [4] 4 [4] 4 [4] 4 [4] 3 [8] 4 21 120 HKND -1 22 (Full)

Eagle holds his sticks out and spins rapidly, then ends with an uppercut.

  • Unlike the previous two levels, this one has a use. It's one of the strongest wake-up reversals in the game, as it is only -1 if it gets blocked. Combined with the fact that it pushes the opponent far away it means that Eagle is left completely safe. Sure, it is an expensive option, but you won't get killed for doing it.
  • Also has the unblockable startup frames property. If the opponent was not blocking during the startup freeze they will get hit, even if they hold back during the super freeze when they weren't before the freeze. This can catch the opponent off guard and since it is -1 it's not that bad of an bad idea to try but if you want to save meter then this is something you do very infrequently.

Colors
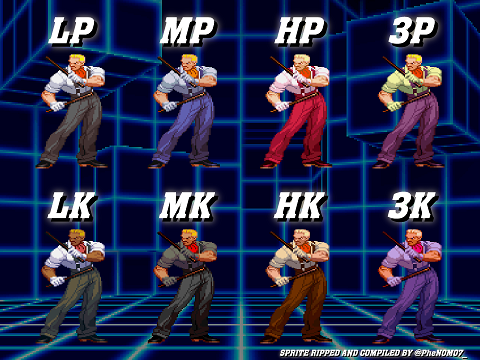
Eagle CvS2 colors.png


CvS2 Wiki Navigation

General
Controls
Notation
HUD
Glossary
System
Roll Cancel
Combo
CvS2 Versions
Netplay/ Training
FAQ
Grooves
Groove Overview
Groove Subsystems
C-Groove
A-Groove
P-Groove
S-Groove
N-Groove
K-Groove
Capcom Characters
Akuma (Gouki)
Balrog (Boxer)
Blanka
Cammy
Chun-Li
Dan
Dhalsim
Eagle
E.Honda
Guile
Ken
Kyosuke
Maki
M. Bison (Dictator)
Morrigan
Rolento
Ryu
Sagat
Sakura
Vega (Claw)
Yun
Zangief
SNK Characters
Athena
Benimaru
Chang
Geese
Haohmaru
Hibiki
Iori
Joe
Kim
King
Kyo
Mai
Nakoruru
Raiden
Rock
Rugal
Ryo
Terry
Todo
Vice
Yamazaki
Yuri
Boss Characters
Shin Akuma
Ultimate Rugal
Evil Ryu
Orochi Iori