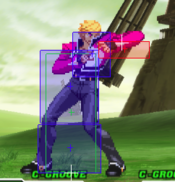
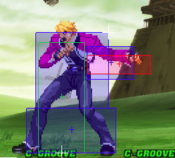
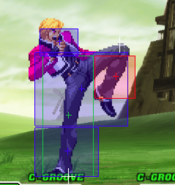
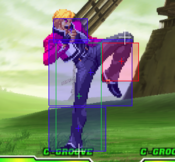
Capcom vs SNK 2/Rock

From SuperCombo Wiki

Introduction

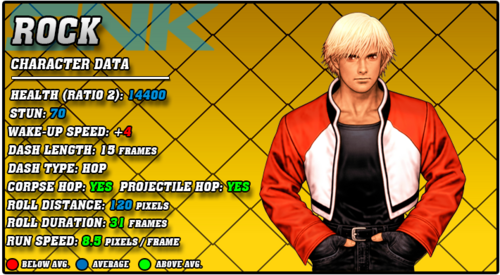
CVS2 Rock Data.png

Story

Rock Howard is the biological son of Geese Howard. Geese didn't help raise Rock at all, leaving Rock's mother Marie to care for him. They lived a fairly modest and simple life, and while Rock knew of his father and who he was, he never met him. When Rock was seven years old, his mother contracted a very serious illness. He tried to nurse her back to health, but being a young child, there wasn't much he could do. In a last-ditch attempt to save her, he went to Geese Tower to confront his father. Despite Geese's immense wealth and Rock's begging and pleading, Geese sent him away, wanting nothing to do with it. When Rock returned home, his mother had passed away. Rock would never forgive Geese for this, holding a permanent grudge against his father ever since.

Rock isn't the only person with a grudge against Geese however. While he was still fairly young, Terry would send Geese flying from the top of his tower and to his death. Rock, still a young child, felt a strange mixture of feelings. He felt joyed that a horrible man had met a deserved fate, but he felt lonely, now truly orphaned. He would attend Terry's street fights from then on. Eventually, Rock would let his anger get the best of him, and charged Terry down. Terry, the kind man he is, wouldn't try to hurt Rock at all. After Rock got his feelings out, Terry and him talked a lot, and Rock would become Terry's pupil and eventually adopted son. Rock would grow into a formidable fighter in his teenage years, combining the fighting styles of Geese and Terry, and improving on their moves a lot as well. Rock would end up competing in the King of Fighters tournament held in Second South Town, and would find that it was a ploy by his uncle Kain R. Heinlein to get Rock close to him. They agreed to work together, Kain wanting the secrets of Geese's will and also promising to tell Rock things about his mothers family, and saying she was possibly still alive.

Gameplay

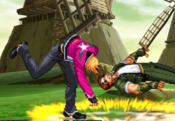
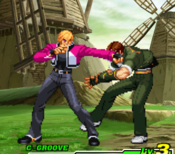
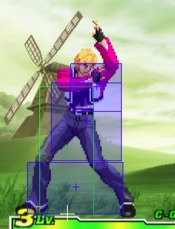
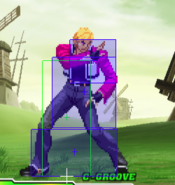
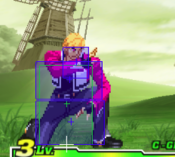
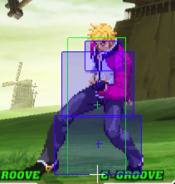
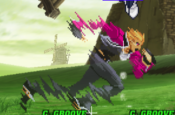
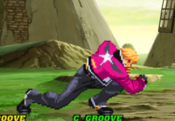
Rock is the epitome of an all-rounder, thanks in no small part to his mixed moveset from both Geese and Terry. Rock has great buttons for neutral, like his 2MK, 2HK, 5HP, 5MP, 2MP, and j.HK. He has various specials with great uses both in neutral and offense, like his 236P Reppuken fireballs, his 214P Hard Edge specials, his various 236K Crack Counters for calling out bad pokes, and even a 214K command run with various followups to mix the opponent up with. He even has a 360P Shinkuu Nage command grab that he can cancel with PPP for extended combos from it, or hold PPP to shoot out a blast of energy with Rasetsu. Rising Tackle is a charge move sadly, limiting it's usage, but if Rock has the charge for it, it's a great reversal and anti-air.

Rock's supers match up in their versatility as well, with 236236K Shine Knuckle being a great combo ender, 236236P Raging Storm making a useful and damaging anti-air and reversal, and his 632146K Deadly Rave level 3 giving him massive damage potential. What holds Rock back from top tier status is not excelling in any specific category, and having lackluster and committal tools in comparison to the top tiers. Rock has to play a bit more honest, for lack of a better word, and struggles against the powerful and high damage pokes that the top tiers have. Rock is plenty powerful, and if he gets to play his game, he shines with the best of them. He just doesn't get to play the easy and straightforward style of many of the top tiers.

Groove Selection

Best - K: Rock is very comfortable playing in K-Groove, as it gives him all he wants. Run and hop make his mixup potential a lot scarier than it already is, and h.HK is a beast of a button that can be hard to properly challenge. He has plenty of use for Just Defend into punishes thanks to 214HP Hard Edge being a very consistent hard knockdown ender. Rage makes him a damage beast, and he can do Deadly Rave combos like Geese for massive damage, or save for a confirm into level 3 Shine Knuckle or an anti-air with level 3 Raging Storm. What K-Rock lacks is a roll, which isn't too bad since his roll isn't the best, but it does mean he can't roll cancel specials. Some of his specials do work well with RC, like 236HP Double Reppuken, or his various 214K command runs. Still, this isn't a huge downside, and the rest of the benefits make K-Rock the best rock.

Useful - N/C/P/A: Rock has uses in a majority of the other Grooves too, though they don't give him as much as K-Groove does. N-Rock gets a lot of what K-Rock gets, but also gains a roll in exchange for sacrificing the damage of Rage. Rock doesn't have a great roll, but being able to RC various specials makes his neutral a lot scarier, and gives him the ability to reversal without charge or meter. C-Rock gets more access to his supers, namely Shine Knuckle, allowing him to end combos in bigger damage. Level 2 Raging Storm is a cheaper version that still is a true reversal, and he can confirm it into a Hard Edge or a level 1 Shine Knuckle for worthwhile damage increases. P-Rock has very consistent punishes after a parry, making him a rewarding P-Groove character. He also maintains hop for h.HK. The sacrifice here is that you won't usually have meter, but when you do, a single parry hurts a lot with a Deadly Rave combo. A-Rock has a damaging Custom Combo, and CC in general is a great utility. Rock has a lot of utility with CC as well, letting him use it in a variety of situations. The sacrifice is never using his supers really, and no hop/run.

Worst - S: S-Rock has very little worth using. While Rock can perform without meter fine, his supers are great, and having meter to use them is a big buff to Rock's gameplan and damage. The level 1 versions of his supers aren't the greatest, doing lackluster damage and not being reversals, so having infinite level 1's isn't a huge deal. Having to charge for meter is very risky as well for an aggressive character like Rock. Run and hop are also in K-Groove and N-Groove, two of Rock's best Grooves. You would be better off picking any of the other Grooves for Rock.


Rock is a strong all-rounder with great aggressive mixup, solid neutral buttons, and some decent zoning. He doesn't excel at much of anything besides offense, and can lose to the more degenerate tools of the top tiers, but he has every tool to succeed, especially in K-Groove. Rock is best in K-Groove.

Difficulty: Pretty Hard
Tier: A
Pros Cons
  • Versatile: Rock has a bit of everything in him, from a fireball, a reversal, a command run, a command grab, and a very reliable combo ender
  • Mixup: Between his great low confirm, plus on block 6MK overhead, hop HK being a dominant jump-in, and Shinkuu Nage command grabs, Rock has plenty of ways to mix an opponent
  • Damage: Thanks to his solid combo enders in 214HP Hard Edge and 236236K Shine Knuckle, Rock can consistently convert into solid damage and a knockdown
  • Neutral: With plenty of solid buttons, a useful fireball for cancels, and a few different forward moving specials, Rock has great ways to play and win in neutral
  • Supers: Rock has 3 great supers, with a consistent combo ender and punish in Shine Knuckle, an anti-air and reversal with Raging Storm, and an expensive but damaging combo ender in Deadly Rave
  • Counters: 236K Crack Counters allow Rock to call out repetitive pressure strings or consistent poke timings and score a knockdown
  • Top Tier Matchups: Rock struggles to deal with the overpowering tools of the top tiers, namely the amazing buttons many of them have
  • Defense: Rock's only meterless reversal requires charge, and his roll is bad, limiting how he can escape pressure
  • Zoned Out: Rock is susceptible to being zoned out, and while a level 3 Shine Knuckle may make them rethink that fireball, it's an expensive answer
  • Slow Mixup: While Rock has a solid mixup game, all of his options are fairly slow and reactable, and he lacks a crossup to make jump-ins hard to predict, making his great mixups shine only from conditioning the opponent


Players to Watch

Name Country Groove Accounts Notes
Tsugunosuke Japan N-Groove N/A Very strong player, has a very good Rock.
Sample Match
GAO Japan K-Groove N/A Runs Rock at anchor, but he is also the best Rock player in the world so that alleviates the issue.
Sample Match
OTK Japan K-Groove Twitter: @den_ta9 Once the best Rock in the world, he plays with a lot of aggression and reads to create his quick and dangerous offense.
Sample Match


Normal Moves

Far Normals

5LP

Far Jab
Far Light Punch
5LP / Far LP
CVS2 Rock 5LP.PNG
Version Damage Stun Cancel Guard Parry Startup Active Recovery Total Adv Hit Adv Block Invul
Far Lp.png 300 3 RF/SP/SU Mid Mid 3 7 4 14 +4 +4 None

Rock quickly punches the opponent in the face. Pretty standard jab all around, crouchable but fast so it makes for a solid panic button or fast last minute anti-air. Rock's has a bit more active frames than the average jab, which makes it a bit more likely to interrupt the opponent.

5MP

Far Strong
Far Medium Punch
5MP / Far MP
CVS2 Rock 5MP.PNG
Version Damage Stun Cancel Guard Parry Startup Active Recovery Total Adv Hit Adv Block Invul
Far Mp.png 800 8 SU Mid High 5 7 17 29 -1 -1 None

A beefier jab that can't be crouched. Decent button to stuff the opponent out with, thanks to the fast 5 frame startup and decent reach. Low reward, but -1 isn't punishable so it isn't really in desperate need of a cancel. If you want to whiff punish, use 2MK or 2HK instead.

5HP

Far Fierce
Far Heavy Punch
5HP / Far HP
CVS2 Rock 5HP.PNG
Version Damage Stun Cancel Guard Parry Startup Active Recovery Total Adv Hit Adv Block Invul
Far Hp.png 1300 13 SU Mid High 7 3 33 43 -12 -12 None

A beefy hook from above. Not much use really, as it's very slow and -12 on hit/block. If you have a super however, it makes for a very high damage cancel into Shine Knuckle or Deadly Rave.

5LK

Far Short
Far Light Kick
5LK / Far LK
CVS2 Rock 5LK.PNG
Version Damage Stun Cancel Guard Parry Startup Active Recovery Total Adv Hit Adv Block Invul
Far Lk.png 400 4 SU Mid Mid 5 7 9 21 +1 +1 None

A kick to the shins. Decent reach and speed, so it can work as a check in close range, but without a special cancel or any link options after it isn't very rewarding. If you have a super, it can be used for easier super confirms or fast a fast punish into super, but 2MK works better for this same thing a bit better.

5MK

Far Forward
Far Medium Kick
5MK / Far MK
CVS2 Rock 5MK.PNG
Version Damage Stun Cancel Guard Parry Startup Active Recovery Total Adv Hit Adv Block Invul
Far Mk.png 700 7 None Mid High 8 6 15 29 +1 +1 None

Rock kicks out in front of him. Useful poke to stop forward movement, and Rock's lower hurtbox recesses pretty far, letting it avoid some lows. No cancel, but it is +1, so Rock gets advantage after it.

5HK

Far Roundhouse
Far Heavy Kick
5HK / Far HK
CVS2 Rock 5HK.PNG
Version Damage Stun Cancel Guard Parry Startup Active Recovery Total Adv Hit Adv Block Invul
Far Hk.png 1300 13 None Mid High 8 9 19 36 -2 -2 None

A beefy roundhouse kick. Stellar anti-air from far away, making it very useful in conjunction with 2MP. Whiffs on crouchers, so it isn't a great neutral poke, but Rock doesn't really need this to be a good poke. No cancel means that if they whiff something, you would probably rather punish with a 2MK > 214HP/Shine Knuckle/Deadly Rave for the knockdown and better damage.

Close Standing Normals

clLP

Close Jab
Close Light Punch
cl.LP
CVS2 Rock clLP.PNG
Version Damage Stun Cancel Guard Parry Startup Active Recovery Total Adv Hit Adv Block Invul
Close Lp.png 400 4 RF/SP/SU Mid Mid 3 4 8 15 +5 +5 None

A fast elbow. Has some pros and some cons over the far version, with the pros being higher damage and being +5, but the cons being that isn't faster than 5LP and has much less active frames. Still crouchable as well, so you really just won't need this often.

clMP

Close Strong
Close Medium Punch
cl.MP
CVS2 Rock clMP.PNG
Version Damage Stun Cancel Guard Parry Startup Active Recovery Total Adv Hit Adv Block Invul
Close Mp.png 700 7 SP/SU Mid High 3 5 13 21 +4 +4 None

An elbow just like cl.LP. Sadly, this means it is still crouchable, which really sucks cuz this is otherwise a great medium normal. 3 frame startup and +4 on hit/block is very useful, and this would be great for frametraps and counterhit fishing. If it wasn't crouchable, it would be great, but because it is you won't use it often.

clHP

Close Fierce
Close Heavy Punch
cl.HP
CVS2 Rock clHP.PNG
Version Damage Stun Cancel Guard Parry Startup Active Recovery Total Adv Hit Adv Block Invul
Close Hp.png 1100 11 SP/SU Mid High 4 3 31 38 -10 -10 None

A swinging hook punch. Generally the close heavy you'll use more, though cl.HK is superior. This is because of cl.HK being crouchable, while this isn't. You'll often link into this or punish with it, and cancel into 214HP for a knockdown or Shine Knuckle/Deadly Rave for a super. Make sure to always cancel this if you can, as it is very negative both on hit and on block, which will get you punished vs a knowledgeable opponent and end your offense always.

clLK

Close Short
Close Light Kick
cl.LK
CVS2 Rock clLK.PNG
Version Damage Stun Cancel Guard Parry Startup Active Recovery Total Adv Hit Adv Block Invul
Close Lk.png 500 5 SP/SU Mid Mid 2 6 9 17 +2 +2 None

Rock knees the opponent in the chest. Your fastest normal, making it great to interrupt strings, and also your highest damage light. It pays for this by having no realistic meterless combo potential at all. +2 means it's good to start offense but won't link into anything, and the light hitstun isn't enough for anything besides Rising Tackle, Shine Knuckle, and Deadly Rave to combo.

clMK

Close Forward
Close Medium Kick
cl.MK
CVS2 Rock clMK.PNG
Version Damage Stun Cancel Guard Parry Startup Active Recovery Total Adv Hit Adv Block Invul
Close Mk.png 800 8 SP/SU Mid High 2 9 16 27 -3 -3 None

The much more interesting twin of cl.LK. It keeps the 2 frame startup, but is a medium normal instead, allowing it to combo into 214HP. This makes it a GREAT button to mash up close, aided a lot by the high active frame count. You can't link from it, but you can very easily link into it from a light hit for an easier link than 2MK. This is range specific however.

clHK

Close Roundhouse
Close Heavy Kick
cl.HK
CVS2 Rock clHK.PNG
Version Damage Stun Cancel Guard Parry Startup Active Recovery Total Adv Hit Adv Block Invul
Close Hk.png 1200 12 SP/SU Mid High 4 8 20 32 -2 -2 None

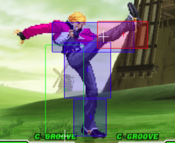
A big ol' swingin kick. Would be your preferred close normal, but it can be crouched under. This makes it sorta situational: if you get a punish on something like a DP or super it's best to start with this, but confirming it from a link isn't so consistent. Can also be used as a decent close anti-air.

Crouching Normals

2LP

Crouch Jab
Crouching Light Punch
2LP / cr.LP
CVS2 Rock 2LP.PNG
Version Damage Stun Cancel Guard Parry Startup Active Recovery Total Adv Hit Adv Block Invul
D.png+Lp.png 300 3 RF/SP/SU Mid Mid 4 3 6 13 +6 +6 None

Rock jabs at the opponents legs. Standard 2LP for mashing and pressure, but it's outshined heavily by 2LK, though it does do more damage. This means you can usually go into this rather than a repeated 2LK for a slight damage increase, although this has to be done as a link, making it a bit harder.

2MP

Crouch Strong
Crouching Medium Punch
2MP / cr.MP
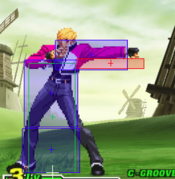
CVS2 Rock 2MP First.PNG
First Hitbox
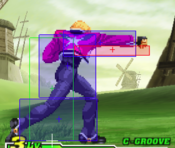
CVS2 Rock 2MP Second.PNG
Version Damage Stun Cancel Guard Parry Startup Active Recovery Total Adv Hit Adv Block Invul
D.png+Mp.png 700,600 7,6 SP*/SU Mid High 3 6 25 44 -11 -11 None

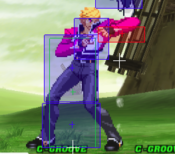
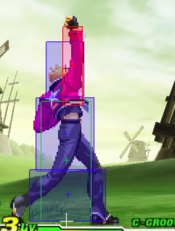
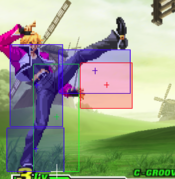
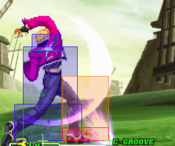
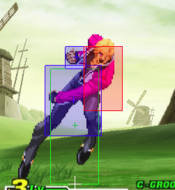
Rock uppercuts in the air. The main normal to use for anti-airs, as it reaches very high into the air and starts very fast. The first hitbox cancels into specials, so if you catch the jump deep, you can toss an MP Reppuken for them to land on. Not as useful on the ground due to pretty short horizontal reach, and for punishes you can get cl.MK at the same range for a frame less startup and 100 more damage.

2HP

Crouch Fierce
Crouching Heavy Punch
2HP / cr.HP
CVS2 Rock 2HP.PNG
Version Damage Stun Cancel Guard Parry Startup Active Recovery Total Adv Hit Adv Block Invul
D.png+Hp.png 1200 12 None Mid High 8 10 22 40 -4 -4 None

Rock steps forward and elbows the opponents stomach. Can be a decent poke or punish thanks to the forward movement, but -4 on block really limits your pressure after. No cancel options either really hurts. Alright to use every now and again, but not anything core to Rock's gameplan.

2LK

Crouch Short
Crouching Light Kick
2LK / cr.LK
CVS2 Rock 2LK.PNG
Version Damage Stun Cancel Guard Parry Startup Active Recovery Total Adv Hit Adv Block Invul
D.png+Lk.png 200 2 RF/SP/SU Low Low 4 4 7 21 +6 +6 None

A very useful low kick. +6 on block lets Rock run pressure even if these get blocked, and gives him great link options afterwards. 2LK > 2LK, 2MK is an obvious and easy 2 frame that gives great damage and an easy knockdown. Running in and repeatedly doing these can be oppressive, especially against Grooves without rolls, and mixing in hop j.HK or 6MK for surprise overheads or Shinkuu Nage for a grab can be a very simple and useful mixup. The only downside to this move is the very low damage, but this isn't too much of a dealbreaker thanks to the other strengths.

2MK

Crouch Forward
Crouching Medium Kick
2MK / cr.MK
CVS2 Rock 2MK.PNG
Version Damage Stun Cancel Guard Parry Startup Active Recovery Total Adv Hit Adv Block Invul
D.png+Mk.png 800 8 SP/SU Low Low 4 8 20 32 -6 -6 None

A great low kick for linking into, or whiff punishing into a special/super for knockdown. While it can combo into 214HP, it is an unreliable cancel at range and can fall out, however it works consistently point blank. If you don't cancel, it is -6 on block, which isn't great but it can be made safe at range. You cannot whiff this normal as safe in neutral as others as it's duration is quite lengthy.

2HK

Crouch Roundhouse
Crouching Heavy Kick
2HK / cr.HK
CVS2 Rock 2HK.PNG
Version Damage Stun Cancel Guard Parry Startup Active Recovery Total Adv Hit Adv Block Invul
D.png+Hk.png 1200 12 SU Low Low 5 3 30 38 DWN -9 None

A fairly good sweep. Great reach and very fast startup make it a very useful whiff punish into a knockdown. It doesn't have a very long total duration for a sweep, so it isn't a huge risk, and is only -9 making it pretty safe when spaced. Without a cancel however, it's a bit more committal than you might want, though the reward is very worth it. You can easily set up a hop mixup from this.

Jumping Normals

j.LP

Jump Jab
Jumping Light Punch
j.LP
CVS2 Rock jLP.PNG
Version Damage Stun Cancel Guard Parry Startup Active Recovery Total Adv Hit Adv Block Invul
Ub.png/U.png/Uf.png+Lp.png 500 5 None High High 4 20 0 24 Varies Varies None

Pretty basic j.LP with fast startup and lots of active frames. Useful for knocking opponents out of the air from a backward jump, or from a hop to stuff slower anti-airs.

j.MP

Jump Strong
Jumping Medium Punch
j.MP
CVS2 Rock jMP.PNG
Version Damage Stun Cancel Guard Parry Startup Active Recovery Total Adv Hit Adv Block Invul
Ub.png/U.png/Uf.png+Mp.png 800 8 None High High 4 8 0 12 Varies Varies None

A quick punch downward. A bit faster than Rock's faster jump-ins, so if you're getting hit out of a j.HK a lot, try using this to be a bit faster.

j.HP

Jump Fierce
Jumping Heavy Punch
j.HP
CVS2 Rock jHP.PNG
Version Damage Stun Cancel Guard Parry Startup Active Recovery Total Adv Hit Adv Block Invul
Ub.png/U.png/Uf.png+Hp.png 1100 11 None High High 6 6 0 12 Varies Varies None

A decent j.HP that is entirely outshined by Rock's strong j.HK. It has one frame faster startup, but this isn't much faster, so if j.HK is getting beaten this probably will too. The hitbox is a bit fatter and closer to Rock, but this is only really impactful when doing deep jump-ins, and the longer reach of j.HK is usually more useful.

j.LK

Jump Short
Jumping Light Kick
j.LK
CVS2 Rock jLK.PNG
Version Damage Stun Cancel Guard Parry Startup Active Recovery Total Adv Hit Adv Block Invul
Ub.png/U.png/Uf.png+Lk.png 600 6 None High High 5 19 0 24 Varies Varies None

A reaching kick. Similar to j.LP, but trades 1 frame slower startup and 1 frame less active for better damage and reach. This is usually worth it, and makes an alright air-to-air.

j.MK

Jump Forward
Jumping Medium Kick
j.MK
CVS2 Rock jMK.PNG
Version Damage Stun Cancel Guard Parry Startup Active Recovery Total Adv Hit Adv Block Invul
Ub.png/U.png/Uf.png+Mk.png 900 9 None High High 5 13 9=0 18 Varies Varies None

A kick very similar to j.LK, but a bit less active in exchange for even better damage. This is also a pretty worthwhile trade, and for opponents that aren't below you, this is your best air-to-air.

j.HK

Jump Roundhouse
Jumping Heavy Kick
j.HK
CVS2 Rock jHK.PNG
Version Damage Stun Cancel Guard Parry Startup Active Recovery Total Adv Hit Adv Block Invul
Ub.png/U.png/Uf.png+Hk.png 1200 12 None High High 7 8 0 15 Varies Varies None

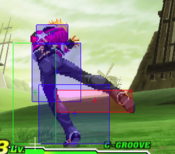
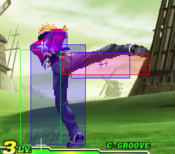
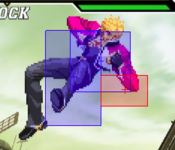
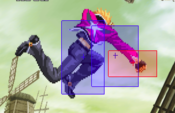
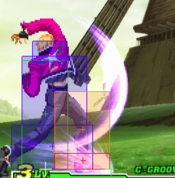
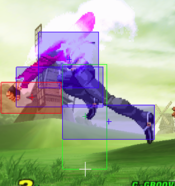
Rock kicks down fast below him. Very useful and strong all-purpose air normal, thanks in no small part to the hitbox reaching far away and below Rock. This tends to beat out normal anti-airs cleanly because of this, and score Rock a pretty high damage hit. Works as an instant overhead on a majority of the cast as well, and off a backwards hop, this is pretty safe. If Rock had better meterless combo options after his hop, this would be stellar, but instead it works on its own just as an overhead mixup and combos when done very deep or off a normal jump.

Command Normals

Parabola Kick

Parabola Kick
Overhead
6MK
CVS2 Rock 6MK.PNG
Version Damage Stun Cancel Guard Parry Startup Active Recovery Total Adv Hit Adv Block Invul
F.png+Mk.png 900 9 None High High 27 3 18 48 +2 +2 None

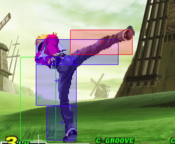
Rock winds up a big arcing kick. Fairly slow, but hits overhead, and unlike a lot of other command normal overheads, leaves Rock +2. This means Rock can have this hit or be blocked and still threaten more pressure, like a 2MK that leaves only a 3 frame gap, or call out mashing with Crack Counters or reversals by blocking. The slow startup makes this hard to do in a blockstring, but it can be easily done meaty, which is a pretty solid mixup.

Throws

Kokusen

Kokusen
Punch Throw
Near Opponent, 4/6HP
CVS2 Rock PThrow.PNG
Version Damage Stun Cancel Guard Parry Startup Active Recovery Total Adv Hit Adv Block Invul
Close B.png/F.png+Hp.png 1800 0 None Grab Grab 3 1 13 17 DWN Grab None

Rock flips the opponent over his shoulder and slams them, bouncing them away. You can easily get oki from this with a superjump j.HK, and it can be a safejump with a slight delay depending on wakeup time. Standard punch throw with 3 frame startup and lower damage.

Grappling Upper

Grappling Upper
Kick Throw
Near Opponent, 4/6HK
CVS2 Rock KThrow.PNG
Version Damage Stun Cancel Guard Parry Startup Active Recovery Total Adv Hit Adv Block Invul
Close B.png/F.png+Hk.png 2000 0 None Grab Grab 5 1 10 16 DWN Grab None

Rock grabs the opponent before uppercutting them away. Higher damage but slower startup, standard kick throw. For some reason, only has 10 frames of recovery on whiff where most throws have 13, but this only happens in the extremely rare situations where throw whiffs even happen, so don't worry about it too much. To get oki from this, whiff 214MP to get close.

Specials

Reppuken

Reppuken
Fireball
236LP/MP
CVS2 Rock 236P.PNG
Version Damage Stun Cancel Guard Parry Startup Active Recovery Total Adv Hit Adv Block Invul
Qcf.png+Lp.png 800 8 None Mid Mid 14 Traveling 45 59 -12 -12 None
Qcf.png+Mp.png 900 9 None Mid Mid 15 Traveling 45 60 -12 -12 None

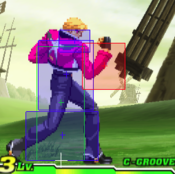
Rock tosses out the iconic Reppuken. Solid fireballs, but held back as zoning tools due to being grounded. Grounded fireballs are more easily avoided by things like hops or low invulnerable moves, which are more common than moves that naturally avoid high flying fireballs. Still, these aren't necessarily bad for throwing out at fullscreen. Where they really shine is in pressure. Cancelling into them, tossing them out at spacings where it's hard to escape Rock's pressure, or timing them to land meaty. They aren't plus, but they do make for reliable and safe blockstring enders, which Rock lacks otherwise.

Double Reppuken

Double Reppuken
Double Fireball
236HP
CVS2 Rock 236HP First.PNG
Windup Hitbox
CVS2 Rock 236HP Second.PNG
Traveling Hitbox
Version Damage Stun Cancel Guard Parry Startup Active Recovery Total Adv Hit Adv Block Invul
Qcf.png+Hp.png 500+900 5+9 None Mid Mid 17 23, Trav. 37 77 -4 -4 None

Rock winds up a Reppuken before tossing it out. The first half, where Rock is holding the energy near him, will delete projectiles. This allows Rock to delete a projectile and toss one of his own. It can be used this way as a counter for zoning, but the commitment of it overall makes it a bit risky. It can also be used in pressure like normal Reppuken as a greedy alternative for better frame advantage. This also makes for one of Rock's best roll cancels. RC Double Reppuken is a great anti-air and reversal, and is very safe as well.

Rising Tackle

Rising Tackle
Charge DP
[2]8P
CVS2 Rock 28P First.PNG
Invincible Startup
CVS2 Rock 28P Second.PNG
HP version invincible till active frames
Version Damage Stun Cancel Guard Parry Startup Active Recovery Total Adv Hit Adv Block Invul
Charge D.png,U.png+Lp.png 1000+200x2 10+2x2 None Mid Mid 6 2(6)3,9 32 58 DWN -28 1~6 (Full), 7~12 (Lower)
Charge D.png,U.png+Mp.png 1000+200x3 10+2x3 None Mid Mid 6 2(6)3,3,11 38 69 DWN -39 1~6 (Full), 7~8 (Upper), 9~12 (Lower)
Charge D.png,U.png+Hp.png 1000+200x4 10+2x4 None Mid Mid 6 2(6)3,3,3,13 44 80 DWN -50 1~8 (Full), 9~12 (Air Guard)

Rock imitates Terry's Rising Tackle. These make for solid anti-airs, and the HP version is a reversal, however they have one major drawback. They require charge. This means that you can't always have them, and more often than not you'll rely on normal anti-airs like 2MP and 5HK. Having the charge for a reversal HP Rising Tackle isn't hard however, and makes for a solid high-risk high-reward defensive tool.

Crack Counter

Crack Counter
Counters
236K
CVS2 Rock 236LK.PNG
High
CVS2 Rock 236MK.PNG
Mid
CVS2 Rock 236HK.PNG
Low
Version Damage Stun Cancel Guard Parry Startup Active Recovery Total Adv Hit Adv Block Invul
Qcf.png+Lk.png 1500 15 None None None 3 23 12 35 DWN None 3~17 (Counters High)
Qcf.png+Mk.png 1800 18 None None None 3 23 12 35 DWN None 3~17 (Counters Mid)
Qcf.png+Hk.png 1600 16 None None None 3 23 12 35 DWN None 3~17 (Counters Low)

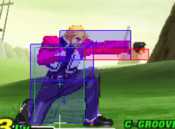
Rock positions his hands to catch the opponents attack, and if he does, he quickly retaliates with a Crack Shot to knock them down. Useful but notably not frame 1 counters for calling out pressure and repetitive neutral. If an opponent is constantly poking you at a specific range, doing the same blockstring over and over, or always jumping in with a button out, use one of these and make them rethink that linear style. Not being frame 1 is a bit hard, since that means they can't be reversals. It also means they can't call out all forms of pressure, as a 2 frame gap will still hit them. You can use the LK version as an anti-air, but this isn't as reliable as a DP or normal, since a simple empty jump will beat it cleanly. Use these as prediction based callout tools, and don't overuse them, since you'll definitely be punished for that.

Hard Edge

Hard Edge
Elbow
214P
CVS2 Rock 214P.PNG
Version Damage Stun Cancel Guard Parry Startup Active Recovery Total Adv Hit Adv Block Invul
Qcb.png+Lp.png 1200 12 None Mid High 16 8 26 50 DWN -10 13~24 (Airborne)
Qcb.png+Mp.png 1300 13 None Mid High 16 12 26 54 DWN -14 13~28 (Airborne)
Qcb.png+Hp.png 1000+500 10+5 None Mid High 16 18 26 60 DWN -28 13~34 (Airborne)

Rock flies forward with his elbow, knocking the opponent down if it hits. The LP and MP versions are useful forward-moving specials that you can use to force your way in at some risk. The HP version has an additional hit for more damage, though it is much less safe, so use it as a combo ender instead. You can roll cancel these to fly through fireballs and punish them, though this is still technically punishable. Notably, the MP version gives a much better knockdown, so you might want to end in the MP version for better overall reward in some matchups.

Rage Run

Rage Run
Command Run
214K
CVS2 Rock 214LK.PNG
Type: Dunk
CVS2 Rock 214MK.PNG
Type: Save
CVS2 Rock 214HK.PNG
Type: Shift
Version Damage Stun Cancel Guard Parry Startup Active Recovery Total Adv Hit Adv Block Invul
Qcb.png+Lk.png
Type: Dunk
1000 10 None High High 14~22, 21 5 31/34 53/74~82 DWN -21 0~26 (Airborne)
Qcb.png+Mk.png
Type: Save
0 0 None None None 13~22 0 28 41~50 None None None
Qcb.png+Hk.png
Type: Shift
0 0 360P (30~43) None None 2~32 43 31 76~106 None None 1~12 (Full, During Shift)

Rock's various command runs. Depending on the button strength used, you'll get one of three very different tools. The command run itself is nothing special, and while it can be used to close distance, so can Rock's less committal movement options. All of these can be cancelled into to reset pressure and go for another mixup, though this is never safe and repeated usage of it will get you killed. All of his run followups will only activate within proximity of the opponent, and if they don't reach that proximity, Rock will go into a short endlag animation.

  • Type: Dunk is an overhead that is off the ground on the first active frame. This allows it to go over lows that would normally poke you out of the run, and is also throw invulnerable. As an overhead mixup, it isn't horrible. It gives an immediate knockdown, which Rock can work well off of, and a decent bit of damage. It is very high risk however. It's -21 on block, more than punishable by every character, and it is somewhat reactable.
  • Type: Save is a run-stop style move. Rock will run until he is close to the opponent and stop. This is a risky but useful pressure reset against opponents. It leaves a wide gap when cancelled into, regardless of what move you used before, so if your opponent is wary they will punish with a poke into super. If your opponent knows you're gonna do it, you'll get hit with something even harder.
  • Type: Shift is a unique move where Rock will phase through his opponents. This has partial invincibility during the startup of the shift, allowing it to pass through pokes. The last bit of endlag can be cancelled into Shinkuu Nage as well, allowing for a faster command grab mixup, making the opponent respect a possible strike more. This would be the most useful pressure reset tool, since timing the mash on it is hard, but forcing a sideswap is questionable. This does make it a solid corner escape tool however, and you can use it after a knockdown to quickly sideswap if needed.

Shinkuu Nage/Rasetsu

Shinkuu Nage
Command Grab
360P
CVS2 Rock 360P.PNG
Command Grab
CVS2 Rock PPP.PNG
Rasetsu
Version Damage Stun Cancel Guard Parry Startup Active Recovery Total Adv Hit Adv Block Invul
360.png+P.png 1200 0 3P, Rasetsu Grab Grab 6 1 35 42 DWN Grab None
Hold 3p.png
Rasetsu
800 8 None Mid High 4, 5~172 12 23 44~211 DWN -11 None

Rock does a quick grab at the opponents feet and tosses them away. This is a relatively useful command grab, though it sadly switches sides. This is made up for by the ability to Break it, usually just called cancelling, by tapping PPP. This allows you to either get a juggle, or run up for much better okizeme. You can run all the way up and do Rage Run Type: Shift to regain your side, though this still tosses them away from the corner. If you want a juggle, all you get midscreen really is one hit of 214HP. In the corner you can get a juggle into Raging Storm. A-Rock can activate and Custom Combo from this anywhere.

Rasetsu is done by holding PPP instead of just tapping. Rock shoots a massive blast of energy from his hand. You have to hold for a specific amount of time, but it isn't very hard to land the timing. Doing the 214HP juggle gives better damage, but it is pretty hard to use the knockdown, while Rasetsu has a bit of a better knockdown. Still, you usually won't use this often, and will either just stick to breaking the grab and going for oki or juggling afterwards for more damage.

Supers

Raging Storm

Raging Storm
Storm Super
236236P
CVS2 Rock 236236P.PNG
Version Damage Stun Cancel Guard Parry Startup Active Recovery Total Adv Hit Adv Block Invul
Qcf.pngQcf.png+Lp.png 2400 0 None Mid Mid 4:6 9(3)9(3)9 30 73 DWN -7 1~6 (Full)
Qcf.pngQcf.png+Mp.png 3600 0 SP/SU Mid Mid 4:8 9(3)9(3)9(3)9 30 87 DWN -7 1~14 (Full)
Qcf.pngQcf.png+Hp.png 5000 0 None Mid Mid 4:10 9(3)9(3)9(3)9(3)9 30 101 DWN -7 1~22 (Full)

Rock sends up a massive storm of energy, mimicking Geese's Raging Storm. Useful anti-airs and reversals, though not entirely the best due to the slower startup speed. These can also be used in juggles better than Shine Knuckle, though Shine Knuckle is better for longer grounded confirms overall. The level 2 and 3 versions are true reversals, and are fairly safe thanks to pushback, making for great utilities.

Shine Knuckle

Shine Knuckle
Punch Super, Rush Super
236236K
CVS2 Rock 236236K.PNG
Version Damage Stun Cancel Guard Parry Startup Active Recovery Total Adv Hit Adv Block Invul
Qcf.pngQcf.png+Lk.png 2400 0 None Mid High 5:6 12 36 59 DWN -25 1~8 (Full)
Qcf.pngQcf.png+Mk.png 4000 0 SP/SU Mid High 5:6 18 36 65 DWN -27 1~15
Qcf.pngQcf.png+Hk.png 5400 0 None Mid High 5:6 22 36 69 DWN -43 1~23 (Full)

Rock covers himself in light before flying forward. The LP and MP versions just hit multiple times, but the HP version will cause a short autocombo. These are very useful punish supers thanks to the fast forward movement, and also act as your preferred confirm super. You can go through pokes and fireballs to score a punish. The HP version autocombo is very high damage, but it tends to be outclassed by Deadly Rave NEO, so you won't use it very often.

Deadly Rave NEO

Deadly Rave NEO
Rave Super
632146K...
CVS2 Rock 632146K.PNG
Version Damage Stun Cancel Guard Parry Startup Active Recovery Total Adv Hit Adv Block Invul
Hcb.pngF.png+K.png,Lp.png,Lp.png,Lk.png,Lk.png,Mp.png,Mk.png,Hp.png,Hk.png,Qcb.png+Hp.png 6300 0 None Mid High 4:4 40 32 80 DWN -13 1~22 (Full)

Rock does a long string of attacks, ending in a unique cinematic where Rock hits with a multi-hitting wave of energy. Similar to the original Deadly Rave, this is a massive damage combo ender with great forward movement to go through fireballs or pokes. Rock can end after the HK in the input string and link into another combo for enhanced damage. This is very combo friendly, even after long confirms, making it possible for Rock to hit 9k damage in a single combo or more. Level 3 only limits the usage of it, but K-Rock gets to combo into this frequently for massive damage potential.

Colors
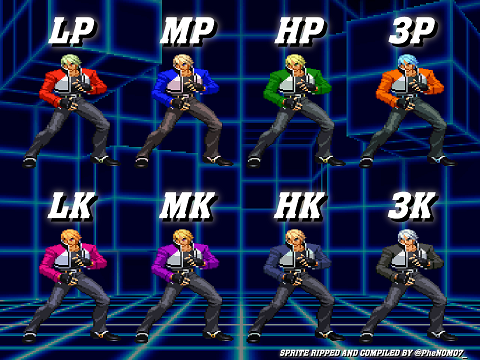
Rock CvS2 colors.png


CvS2 Wiki Navigation

General
Controls
Notation
HUD
Glossary
System
Roll Cancel
Combo
CvS2 Versions
Netplay/ Training
FAQ
Grooves
Groove Overview
Groove Subsystems
C-Groove
A-Groove
P-Groove
S-Groove
N-Groove
K-Groove
Capcom Characters
Akuma (Gouki)
Balrog (Boxer)
Blanka
Cammy
Chun-Li
Dan
Dhalsim
Eagle
E.Honda
Guile
Ken
Kyosuke
Maki
M. Bison (Dictator)
Morrigan
Rolento
Ryu
Sagat
Sakura
Vega (Claw)
Yun
Zangief
SNK Characters
Athena
Benimaru
Chang
Geese
Haohmaru
Hibiki
Iori
Joe
Kim
King
Kyo
Mai
Nakoruru
Raiden
Rock
Rugal
Ryo
Terry
Todo
Vice
Yamazaki
Yuri
Boss Characters
Shin Akuma
Ultimate Rugal
Evil Ryu
Orochi Iori