Capcom vs SNK 2/Iori: Difference between revisions

From SuperCombo Wiki
 
(30 intermediate revisions by 9 users not shown)
Line 1: Line 1:
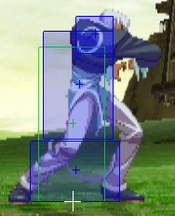
[[Image:Ioristance.gif|right]]
{{TOClimit|3}}
= Introduction =
== Introduction ==
{{CvS2 Character Subnav|char=Iori|short=Iori}}
<div>
[[File:CVS2_Iori_Data.png|right|500px]]
== Story ==
Iori Yagami (Japanese: 八神 庵, Hepburn: Yagami Iori) is a character from SNK's The King of Fighters video game series. The character first appeared in The King of Fighters '95 as the leader of the Rivals Team, as the initial enemy and later rival of Kyo Kusanagi. Iori is the heir of the Yagami clan, who use pyrokinetic powers and sealed the Orochi devil along with the Kusanagi and Yata clans. Iori suffers from a curse – "The Riot of the Blood" (血の暴走, Chi no Bōso) – under which he becomes faster, stronger and wilder, exhibiting a deadly tendency to indiscriminately attack everyone in close proximity. In this state, Iori is commonly called "Wild Iori" or "Orochi Iori" (月の夜大蛇の血に狂う庵, Tsuki no Yoru Orochi no Chi ni Kuruu Iori, lit. Insane Iori with Blood of Orochi Under the Night of the Moon).[3] Aside from the main series, Iori appears in several other media series, including spin-offs, crossover video games and comic adaptations of the series.


Line 6: Line 10:


Video game journalists have praised Iori Yagami as one of the most powerful characters in the series. Reviewers have also cited Iori as one of the best characters from the games, labeling him as a veteran character and praising his appearance as one of SNK's best creations. "Miss X", Iori's crossdressing form from SNK Gals' Fighters and the additional female one of SNK Heroines: Tag Team Frenzy, also received attention for its humor. A series of collectible items based on Iori's likeness, including key chains and figurines, have been manufactured.
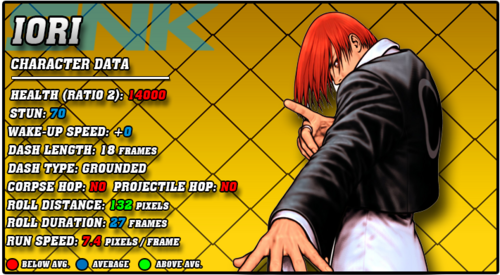
== Data ==
{| class="wikitable"
|-
| Health || 14000||  || Just Below Average
|-
| Stun || 70|| || Average
|-
| Stun Duration || +60f || || Poor
|-
| Guard Guage Recovery Rate || Fast Type || || Best
|-
| Dash Length || 102 pixels|| ||
|-
|  Dash Duration|| || ||
|-
|  Dash Height|| 0|| || Grounded
|-
| Run Speed || 7.4|| || Average
|-
| Roll Distance || 132 pixels || ||
|-
| Roll Duration || 27f || ||
|-
| Roll Recovery Frames || 3f ||  || Best
|-
| Wakeup Speed compared to Ryu || 0f ||  || Average
|}


== CvS2 Gameplay Overview & General Gameplan ==
== Gameplay ==
Iori is a very versatile character whose moveset lends him to a rush-down/mixup style with damage mainly coming from his Rekka combos. Coupled with that, he has very serviceable pokes, good anti air, and a good reversal DP for use in defense and neutral situations.  He also has one of the best poke RCs in the game with his Rekka, is the shortest character in the game, and has the best roll in the game.  


Line 61: Line 37:
Since 1) is hard to do on a good opponent and the distance for 2) can be difficult to establish, Iori spends most of his time doing 3).


= Normal Moves =
=== Groove Selection ===
'''Best - N/C:''' N-Groove is Iori's best Groove for a few reasons. Iori has one of the best rolls in the game, and a great special to roll cancel with his rekkas. N-Groove gives him run and hop to aid his mixup and rushdown, and while the meter isn't great, level 1 Maiden Masher is an easy and simple confirm for a damage increase anyway. C-Groove is only a little behind, as while he gives up run and hop, he gets a very damaging level 2 combo in exchange that can be easily combo'd into. Air block and Alpha Counters are also helpful in a lot of situations.
 
'''Useful - A/K:''' A-Groove is a little behind, and Iori is usually ran on point. Custom Combo is powerful and useful, and Iori has a decent one. Lack of run or hop hurts his offense a bit, but it isn't a huge tradeoff, and he still has roll. K-Iori is a higher risk Iori, with a major downside in the missing roll. Rage makes him scary though, as one good hit confirms into level 3 Maiden Masher for big damage, and he can usually punish something after a JD.
 
'''Worst - P/S:''' P-Iori isn't bad, he gets good meterless reward after all. However, just like K-Iori, the missing roll is very hard to deal with as it's important to his gameplan. S-Groove isn't that bad for Iori, but it does make him lose his much needed roll and Level 3 super confirms for damage because of the constant need for charge, while he has the basics in run, hop, and dodge. Just that you will almost never have meter for a Level 3 Maiden Masher, but still; even getting a Level 1 Maiden Masher from any hitconfirm can be nice while Iori is in desperation mode.
 
{{StrengthsAndWeaknesses
|intro=
---------------------------
'''Iori''' is a powerful rushdown vortex character, with great mixups from his hard knockdown rekkas. His neutral is also solid, with good pokes and one of the best RC specials in rekkas. He just has to be in range to utilize them. Iori is best in '''N-Groove''' and '''C-Groove'''.
 
'''Difficulty''': Medium<br>'''Tier''': A+
|pros=
* '''Vortex:''' Amazing rushdown and mixup, with overheads, a command grab, a great low confirm, and a dedicated crossup command normal that all lead into a hard knockdown and another mixup
* '''Pressure:''' Great pressure with his very useful jabs and mixing up with his rekkas
* '''Strong Fireball:''' The best grounded fireball, as it recovers quite fast making it useful for pressure
* '''Top Tier Roll:''' A stellar roll that recovers very very fast, allowing even for ambiguous crossups after some knockdowns, alongside an amazing roll cancel with RC rekkas
* '''Simple:''' Easy to learn and a simple gameplan
|cons=
* '''Risk/Reward:''' Iori has to win neutral and begin his offense to secure the round, forcing him to play either patient and hunt for a hit or very risky to try and force the hit
* '''Low Damage Super:''' Maiden Masher is easy to combo into but tends to do less damage than other supers of it's kind
* '''Situational Pokes:''' His main poke, 5HK, can be ducked or low profiled, forcing him to rely on riskier or worse normals
}}
 
=== Players to Watch ===
{| class="wikitable"
|-
! Name !! Country !! Groove !! Accounts !! Notes
|-
| GAO || Japan || C-Groove || N/A || One of the best players in the world. His Iori isn't insanely nuts like his Ryu, but he consistently closes games with him easily. <br> [https://youtu.be/yqYmRUZRnys?t=83 Sample Match]
|-
| UWB || Japan || C-Groove || N/A || Fundamentally sound and never makes a big mistake. <br> [https://youtu.be/U5leNkllmKQ Sample Match]
|-
| GAN || Japan || A-Groove || N/A || A player who even gives BAS a run for his money. Lands Iori's customs like it's no challenge at all. Evo Japan 2019 Champion. <br> [https://youtu.be/irMShwUkLUI Sample Match]
|-
| Gene Wong || USA || A-Groove || Twitter: @genexiii <br> Discord: + 𝔇𝔢𝔩𝔭𝔥𝔦𝔫𝔬 +#1838 || Once a prodigy of the game taught by John Choi. His execution makes you think that there might be robots living in our world. <br> [https://youtu.be/ZwOQSRt2vEE Sample Match]
|-
| Izumi || Japan || P-Groove || Twitter: @IzumiSgroove || Izumi uses P-Iori with extremely strong fundamentals despite no roll. Has a threatening shorthop game and strong parry punishes. <br> [https://youtu.be/6ROyIkPZpTs Sample Match]
|-
| Tsugunosuke || Japan || N-Groove || N/A || The best N-Groover in Japan with a dominant Iori to match. Plays very aggressively. <br> [https://youtu.be/PQyzhC8mRNc Sample Match]
|-
| Buktooth || USA || N-Groove || Discord: buktooth#8799 || Old school player, one of the OGs. Wrote the original CvS2 FAQs. <br> [https://youtu.be/dOkWrLKTeB0 Sample Match]
|-
| Yane || Japan || K-Groove || Twitter: @yanechudan || A secret weapon of his. Though Iori is not a consistent mainstay on his team, he still uses K-Iori extremely well. <br> [https://youtu.be/mBrxMUIUlpE?t=430 Sample Match]
|-
|}
 
<br><br>
 
== Normal Moves ==
=== Far Standing Normals ===
<span class="invisible-header">5LP</span>
=== <span class="invisible-header">5LP</span> ===
{{MoveData
{{MoveData
| name    = Stand Jab  
| name    = Stand Jab  
| input    = 5LP
| input    = 5LP / Far LP
| subtitle = {{Icon-Capcom|LP}}
| subtitle = Far Light Punch
| image    = CVS2_Iori_5lp.png
| image    = CVS2_Iori_5lp.png
| caption  = Light Punch
| caption  =  
| linkname = 5LP
| linkname = 5LP
| data  =  
| data  =  
  {{AttackData-CvS2
  {{AttackData-CvS2
   | version    =  
   | version    = Far {{Icon-Capcom|LP}}
  | subtitle    =  {{Icon-Capcom|LP}}
  | subtitle    = 
   | damage      = 300
   | damage      = 300
   | stun        = 4
   | stun        = 4
   | cancel      = RF/SP/SU
   | cancel      = RF/SP/SU
   | guard      = H/L
   | guard      = Mid
   | parry      = H/L
   | parry      = Mid
   | startup    = 2
   | startup    = 2
   | active      = 4
   | active      = 4
Line 86: Line 112:
   | advHit      = +5
   | advHit      = +5
   | advBlock    = +5
   | advBlock    = +5
   | invul      =
   | invul      = None
   | description =  
   | description =  
* While sharing almost the exact same traits as the close jab, the standing jab doesn't have that many tactical uses; You're too far away to tick into throws, and Iori's walking speed is too slow for repeated walk up jabs to set up anything threatening. If you're at this range hit low strong instead.
While sharing almost the exact same traits as the close jab, the standing jab doesn't have that many tactical uses; You're too far away to tick into throws, and Iori's walking speed is too slow for repeated walk up jabs to set up anything threatening. If you're at this range hit low strong instead.
  }}
  }}
}}
}}


<span class="invisible-header">5MP</span>  
=== <span class="invisible-header">5MP</span> ===
{{MoveData
{{MoveData
| name    = Stand Strong
| name    = Stand Strong
| input    = 5MP
| input    = 5MP / Far MP
| subtitle = {{Icon-Capcom|MP}}
| subtitle = Far Medium Punch
| image    = CVS2_Iori_5mp.png
| image    = CVS2_Iori_5mp.png
| caption  = Medium Punch
| caption  =  
| linkname = 5MP
| linkname = 5MP
| data  =  
| data  =  
  {{AttackData-CvS2
  {{AttackData-CvS2
   | version    =  
   | version    = Far {{Icon-Capcom|MP}}
  | subtitle    =  {{Icon-Capcom|MP}}
  | subtitle    =
   | damage      = 800
   | damage      = 800
   | stun        = 8
   | stun        = 8
   | cancel      = SP/SU
   | cancel      = SP/SU
   | guard      = H/L
   | guard      = Mid
   | parry      = H
   | parry      = High
   | startup    = 7
   | startup    = 7
   | active      = 3
   | active      = 3
Line 115: Line 141:
   | advHit      = -5
   | advHit      = -5
   | advBlock    = -5
   | advBlock    = -5
   | invul      =
   | invul      = None
   | description =  
   | description =  
*This move has the special property of being able to chain into Iori's f+strong. There's only one instance in which I use this move, and that's to combo after a connected Scum Gale. Even though it's a far reaching bufferable move, buffering into fireballs is not safe, and the move itself leaves much to be desired in terms of priority and speed. It reaches farther than the f+strong, but at that distance a fierce rekka ken will completely miss. Needless to say, a whiffed rekka ken will lead to a lot of hurt.
This move has the special property of being able to chain into Iori's f+strong. There's only one instance in which I use this move, and that's to combo after a connected Scum Gale. Even though it's a far reaching bufferable move, buffering into fireballs is not safe, and the move itself leaves much to be desired in terms of priority and speed. It reaches farther than the f+strong, but at that distance a fierce rekka ken will completely miss. Needless to say, a whiffed rekka ken will lead to a lot of hurt.
  }}
  }}
}}
}}


<span class="invisible-header">5HP</span>
=== <span class="invisible-header">5HP</span> ===
{{MoveData
{{MoveData
| name    = Stand Fierce  
| name    = Stand Fierce  
| input    = 5HP
| input    = 5HP / Far HP
| subtitle = {{Icon-Capcom|HP}}
| subtitle = Far Heavy Punch
| image    = CVS2_Iori_5hp.png
| image    = CVS2_Iori_5hp.png
| caption  = Heavy Punch
| caption  =  
| image2   = CVS2_Iori_5hp_1.png
| image2   = CVS2_Iori_5hp_1.png
| caption2 = Heavy Punch
| caption2 =  
| linkname = 5HP
| linkname = 5HP
| data  =  
| data  =  
  {{AttackData-CvS2
  {{AttackData-CvS2
   | version    =  
   | version    = Far {{Icon-Capcom|HP}}
  | subtitle    =  {{Icon-Capcom|HP}}
  | subtitle    =
   | damage      = 1300/1400
   | damage      = 1300/1400
   | stun        = 13/14
   | stun        = 13/14
   | cancel      = SP/SU (1st part only)
   | cancel      = SP/SU (1st part only)
   | guard      = H/L
   | guard      = Mid
   | parry      = H
   | parry      = High
   | startup    = 7
   | startup    = 7
   | active      = 5
   | active      = 5
Line 154: Line 180:
}}
}}


<span class="invisible-header">5LK</span>
=== <span class="invisible-header">5LK</span> ===
{{MoveData
{{MoveData
| name    = Stand Short  
| name    = Stand Short  
| input    = 5LK
| input    = 5LK / Far LK
| subtitle = {{Icon-Capcom|LK}}
| subtitle = Far Light Kick
| image    = CVS2_Iori_5lk.png
| image    = CVS2_Iori_5lk.png
| caption  = Light Kick
| caption  =  
| linkname = 5LK
| linkname = 5LK
| data  =  
| data  =  
  {{AttackData-CvS2
  {{AttackData-CvS2
   | version    =  
   | version    = Far {{Icon-Capcom|LK}}
  | subtitle    =  {{Icon-Capcom|LK}}
  | subtitle    =
   | damage      = 500
   | damage      = 500
   | stun        = 5
   | stun        = 5
   | cancel      = SU
   | cancel      = SU
   | guard      = H/L
   | guard      = Mid
   | parry      = H/L
   | parry      = Mid
   | startup    = 6
   | startup    = 6
   | active      = 6
   | active      = 6
Line 177: Line 203:
   | advHit      = +3
   | advHit      = +3
   | advBlock    = +3
   | advBlock    = +3
   | invul      =
   | invul      = None
   | description =  
   | description =  
* AKA "kickin 'em to da curb". Other than randomly whiffing it every now and then as a fake fireball, the only use for this move I have is for combos. See combo section.  
AKA "kickin 'em to da curb". Other than randomly whiffing it every now and then as a fake fireball, the only use for this move I have is for combos. See combo section.  
  }}
  }}
}}
}}
   
   
<span class="invisible-header">5MK</span>
=== <span class="invisible-header">5MK</span> ===
{{MoveData
{{MoveData
| name    = Stand Forward  
| name    = Stand Forward  
| input    = 5MK
| input    = 5MK / Far MK
| subtitle = {{Icon-Capcom|MK}}
| subtitle = Far Medium Kick
| image    = CVS2_Iori_5mk.png
| image    = CVS2_Iori_5mk.png
| caption  = Medium Kick
| caption  =  
| linkname = 5MK
| linkname = 5MK
| data  =  
| data  =  
  {{AttackData-CvS2
  {{AttackData-CvS2
   | version    =  
   | version    = Far {{Icon-Capcom|MK}}
  | subtitle    =  {{Icon-Capcom|MK}}
  | subtitle    =
   | damage      = 1000
   | damage      = 1000
   | stun        = 10
   | stun        = 10
   | cancel      = SU
   | cancel      = SU
   | guard      = H/L
   | guard      = Mid
   | parry      = H/L
   | parry      = Mid
   | startup    = 6
   | startup    = 6
   | active      = 3
   | active      = 3
Line 208: Line 234:
   | invul      =
   | invul      =
   | description =  
   | description =  
* I probably don't use this move as much as I should. It's quick, has surprising range, and even more surprising priority. I'd use it against characters that can crouch the standing roundhouse if you can get into the range to use it.
I probably don't use this move as much as I should. It's quick, has surprising range, and even more surprising priority. I'd use it against characters that can crouch the standing roundhouse if you can get into the range to use it.


6/13/03 - Some Japanese players like to punish whiffs with s.forward into super, but I find that whenever I bait a whiff I'm too far away to hit with a s.forward. I just do a low/standing roundhouse instead. I also noticed that Japanese players have set-ups for COUNTER HIT s.forward and buffer the super on reaction, but to me that's in-humanly difficult (the window to buffer is 3 frames long, 1/20th of a second). That super isn't one that you want to have blocked.  }}
6/13/03 - Some Japanese players like to punish whiffs with s.forward into super, but I find that whenever I bait a whiff I'm too far away to hit with a s.forward. I just do a low/standing roundhouse instead. I also noticed that Japanese players have set-ups for COUNTER HIT s.forward and buffer the super on reaction, but to me that's in-humanly difficult (the window to buffer is 3 frames long, 1/20th of a second). That super isn't one that you want to have blocked.  
  }}
}}
}}


<span class="invisible-header">5HK</span>
=== <span class="invisible-header">5HK</span> ===
{{MoveData
{{MoveData
| name    = Stand Roundhouse
| name    = Stand Roundhouse
| input    = 5HK  
| input    = 5HK / Far HK
| subtitle = {{Icon-Capcom|HK}}
| subtitle = Far Heavy Kick
| image    = CVS2_Iori_5hk_1.png
| image    = CVS2_Iori_5hk_1.png
| caption  = Heavy Kick
| caption  =  
| image2  = CVS2_Iori_5hk_2.png
| image2  = CVS2_Iori_5hk_2.png
| caption2 = Heavy Kick
| caption2 =  
| linkname = 5HK
| linkname = 5HK
| data  =  
| data  =  
  {{AttackData-CvS2
  {{AttackData-CvS2
   | version    =  
   | version    = Far {{Icon-Capcom|HK}}
  | subtitle    =  {{Icon-Capcom|HK}}
  | subtitle    =
   | damage      = 1300
   | damage      = 1300
   | stun        = 13
   | stun        = 13
   | cancel      = X
   | cancel      = None
   | guard      = H/L
   | guard      = Mid
   | parry      = H/L
   | parry      = Mid
   | startup    = 9
   | startup    = 9
   | active      = 7
   | active      = 7
Line 241: Line 268:
   | invul      =
   | invul      =
   | description =  
   | description =  
* Iori's best poke by far, despite having the distinction of being one of Iori's two crouchable moves. Any character bigger than a shoto is fair game, however. You can use it fairly liberally against the characters that cannot crouch it to slowly drain their guard meter and entice them into making a mistake that will get you the all-important knockdown Iori needs to get in. Be aware, though, that the move is not safe against a fast roll and that Sagat can punish you hard with a standing fierce into super if you whiff it.  
Iori's best poke by far, despite having the distinction of being one of Iori's two crouchable moves. Any character bigger than a shoto is fair game, however. You can use it fairly liberally against the characters that cannot crouch it to slowly drain their guard meter and entice them into making a mistake that will get you the all-important knockdown Iori needs to get in. Be aware, though, that the move is not safe against a fast roll and that Sagat can punish you hard with a standing fierce into super if you whiff it.  
* Crouchable by half the cast (every female character, Ryo, shotos, Rolento, Haohmaru, Vega, Yun, Kim, Rock, Iori)
 
Treat this move like a budget Sakura or Yamazaki stand RH (yama speed/damage, but -2 instead of +2 on block)
Crouchable by half the cast (every female character, Ryo, shotos, Rolento, Haohmaru, Vega, Yun, Kim, Rock, Iori)
Treat this move like a budget Sakura or Yamazaki stand RH (yama speed/damage, but -2 instead of +2 on block)
  }}
  }}
}}
}}


=== Close Standing Normals ===  
<span class="invisible-header">cl5LP</span>
=== <span class="invisible-header">cl5LP</span> ===
{{MoveData
{{MoveData
| name    = Close Stand Jab  
| name    = Close Stand Jab  
| input    = cl5LP   
| input    = cl.LP / cl5LP   
| subtitle = Close {{Icon-Capcom|LP}}
| subtitle = Close Light Punch
| image    = CVS2_Iori_CL_5lp.png
| image    = CVS2_Iori_CL_5lp.png
| caption  = Close Light Punch
| caption  =  
| linkname = cl5LP
| linkname = cl5LP
| data  =  
| data  =  
  {{AttackData-CvS2
  {{AttackData-CvS2
   | version    =  
   | version    = Close {{Icon-Capcom|LP}}
  | subtitle    =  Close{{Icon-Capcom|LP}}
  | subtitle    =
   | damage      = 400
   | damage      = 400
   | stun        = 4
   | stun        = 4
   | cancel      = RF,SP,SU
   | cancel      = RF/SP/SU
   | guard      = H/L
   | guard      = Mid
   | parry      = H/L
   | parry      = Mid
   | startup    = 2
   | startup    = 2
   | active      = 4
   | active      = 4
Line 271: Line 299:
   | advHit      = +7
   | advHit      = +7
   | advBlock    = +7
   | advBlock    = +7
   | invul      =
   | invul      = None
   | description =  
   | description =  
*
Iori's close jab is very useful for many reasons:  
#) Comes out in 2 frames, making it Iori's fastest move. 2 frames are as fast as moves get in CvS2 with the exception of Zangief's SPD, which is the only 1 frame move in the game. So what does this mean? Whenever you're in a situation where you have to mash a move, such as trying to avoid a throw, this is the move to mash.
#) +7 advantage, also the most out of any of Iori's moves. 7 frames is a fairly huge advantage as far as CvS2 goes, meaning most links afterwards are brain-dead easy if the jab hits, and if blocked you have ample time to set up stuff safely like walk up to your opponent again and get another close jab. A perfectly timed close jab tick into Scum Gale (8 frames) is very difficult to reverse by jabs or throws. All tick throws can be escaped by jumps, however.  
#) At 400 damage, it's the most damaging out of all of Iori's weak attacks that can be chained together.
  }}
  }}
}}
}}


<span class="invisible-header">cl5MP</span>
=== <span class="invisible-header">cl5MP</span> ===
{{MoveData
{{MoveData
| name    = Close Stand Strong
| name    = Close Stand Strong
| input    = cl5MP   
| input    = cl.MP / cl5MP   
| subtitle = Close {{Icon-Capcom|MP}}
| subtitle = Close Medium Punch
| image    = CVS2_Iori_CL_5mp.png
| image    = CVS2_Iori_CL_5mp.png
| caption  = Medium Punch
| caption  =  
| linkname = cl5MP
| linkname = cl5MP
| data  =  
| data  =  
  {{AttackData-CvS2
  {{AttackData-CvS2
   | version    =  
   | version    = Close {{Icon-Capcom|MP}}
  | subtitle    =  Close{{Icon-Capcom|MP}}
  | subtitle    =
   | damage      =  
   | damage      = 800
   | stun        =  
   | stun        = 8
   | cancel      =  
   | cancel      = SP/SU
   | guard      =  
   | guard      = Mid
   | parry      =  
   | parry      = High
   | startup    =  
   | startup    = 7
   | active      =  
   | active      = 3
   | recovery    =  
   | recovery    = 25
   | total      =  
   | total      = 35
   | advHit      =  
   | advHit      = -5
   | advBlock    =  
   | advBlock    = -5
   | invul      =
   | invul      = None
   | description =  
   | description =  
* Lorem ipsum dolor sit amet, consectetur adipiscing elit, sed do eiusmod tempor incididunt ut labore et dolore magna aliqua.  
Identical to 5MP. Can be a useful punish normal when used this close, but you would rather use cl.HP.
  }}
  }}
}}
}}


  <span class="invisible-header">cl5HP</span>   
=== <span class="invisible-header">cl5HP</span> ===  
{{MoveData
{{MoveData
| name    = Close Stand Fierce  
| name    = Close Stand Fierce  
| input    = cl5HP   
| input    = cl.HP / cl5HP   
| subtitle = Close {{Icon-Capcom|HP}}
| subtitle = Close Heavy Punch
| image    = CVS2_Iori_CL_5hp_1.png
| image    = CVS2_Iori_CL_5hp_1.png
| caption  = Heavy Punch
| caption  =  
| image2   = CVS2_Iori_CL_5hp_2.png
| image2   = CVS2_Iori_CL_5hp_2.png
| caption2 = Heavy Punch
| caption2 =  
 
| linkname = cl5HP
| linkname = cl5HP
| data  =  
| data  =  
  {{AttackData-CvS2
  {{AttackData-CvS2
   | version    =  
   | version    = Close {{Icon-Capcom|HP}}
  | subtitle    =  Close{{Icon-Capcom|HP}}
  | subtitle    =
   | damage      = 1200, 1100
   | damage      = 1200, 1100
   | stun        = 12, 11
   | stun        = 12, 11
   | cancel      = SP/SU, SU
   | cancel      = SP/SU*
   | guard      = H/L
   | guard      = Mid
   | parry      = H
   | parry      = High
   | startup    = 3
   | startup    = 3
   | active      = 6
   | active      = 6
Line 337: Line 362:
   | advHit      = 0
   | advHit      = 0
   | advBlock    = 0
   | advBlock    = 0
   | invul      =
   | invul      = None
   | description =  
   | description =  
For the commas above, the reading on the left refers to the first portion of the fierce, where Iori's fist is around his waist level. The second reading refers to when Iori's fist is over his head.


Outside of combos, the main use for this move is for anti-cross ups. Close roundhouse is your main anti-cross up, but you'll want to use close fierce against characters with bigger jumps like Blanka.
Line 345: Line 370:
}}
}}


<span class="invisible-header">cl5LK</span>
=== <span class="invisible-header">cl5LK</span> ===
{{MoveData
{{MoveData
| name    = Close Stand Short  
| name    = Close Stand Short  
| input    = cl5LK   
| input    = cl.LK / cl5LK   
| subtitle = Close {{Icon-Capcom|LK}}
| subtitle = Close Light Kick
| image    = CVS2_Iori_CL_5lk.png
| image    = CVS2_Iori_CL_5lk.png
| caption  = Light Kick
| caption  =  
| linkname = cl5LK
| linkname = cl5LK
| data  =  
| data  =  
  {{AttackData-CvS2
  {{AttackData-CvS2
   | version    =  
   | version    = Close {{Icon-Capcom|LK}}
  | subtitle    =  Close{{Icon-Capcom|LK}}
  | subtitle    =
   | damage      =  
   | damage      = 500
   | stun        =  
   | stun        = 5
   | cancel      =  
   | cancel      = SP/SU
   | guard      =  
   | guard      = Low
   | parry      =  
   | parry      = Low
   | startup    =  
   | startup    = 3
   | active      =  
   | active      = 4
   | recovery    =  
   | recovery    = 10
   | total      =  
   | total      = 17
   | advHit      =  
   | advHit      = +3
   | advBlock    =  
   | advBlock    = +3
   | invul      =
   | invul      = None
   | description =  
   | description =  
* Lorem ipsum dolor sit amet, consectetur adipiscing elit, sed do eiusmod tempor incididunt ut labore et dolore magna aliqua.  
Iori sticks out his leg at the opponents feet. Standing low, making it useful for mixups, and Iori's highest damage light, though it pays for these strengths by not being mashable.
  }}
  }}
}}
}}


<span class="invisible-header">cl5MK</span>
=== <span class="invisible-header">cl5MK</span> ===
{{MoveData
{{MoveData
| name    = Close Stand Forward  
| name    = Close Stand Forward  
| input    = cl5MK   
| input    = cl.MK / cl5MK   
| subtitle = Close{{Icon-Capcom|MK}}
| subtitle = Close Medium Kick
| image    = CVS2_Iori_CL_5mk.png
| image    = CVS2_Iori_CL_5mk.png
| caption  = Medium Kick
| caption  =  
| linkname = cl5MK
| linkname = cl5MK
| data  =  
| data  =  
  {{AttackData-CvS2
  {{AttackData-CvS2
   | version    =  
   | version    = Close {{Icon-Capcom|MK}}
  | subtitle    =  Close{{Icon-Capcom|MK}}
  | subtitle    =
   | damage      =  
   | damage      = 1000
   | stun        =  
   | stun        = 10
   | cancel      =  
   | cancel      = SU
   | guard      =  
   | guard      = Mid
   | parry      =  
   | parry      = High
   | startup    =  
   | startup    = 6
   | active      =  
   | active      = 3
   | recovery    =  
   | recovery    = 26
   | total      =  
   | total      = 35
   | advHit      =  
   | advHit      = -6
   | advBlock    =  
   | advBlock    = -6
   | invul      =
   | invul      = None
   | description =  
   | description =  
* Lorem ipsum dolor sit amet, consectetur adipiscing elit, sed do eiusmod tempor incididunt ut labore et dolore magna aliqua.  }}
Identical to 5MK.  
  }}
}}
}}


<span class="invisible-header">cl5HK</span>
=== <span class="invisible-header">cl5HK</span> ===
{{MoveData
{{MoveData
| name    = Close Stand Roundhouse
| name    = Close Stand Roundhouse
| input    = cl5HK  
| input    = cl.HK / cl5HK  
| subtitle = Close{{Icon-Capcom|HK}}
| subtitle = Close Heavy Kick
| image    = CVS2_Iori_CL_5hk.png
| image    = CVS2_Iori_CL_5hk.png
| caption  = Heavy Kick
| caption  =  
| linkname = cl5HK
| linkname = cl5HK
| data  =  
| data  =  
  {{AttackData-CvS2
  {{AttackData-CvS2
   | version    =  
   | version    = Close {{Icon-Capcom|HK}}
  | subtitle    =  Close{{Icon-Capcom|HK}}
  | subtitle    =
   | damage      = 1400
   | damage      = 1400
   | stun        = 14
   | stun        = 14
   | cancel      = SU
   | cancel      = SU
   | guard      = H/L
   | guard      = Mid
   | parry      = H
   | parry      = High
   | startup    = 6
   | startup    = 6
   | active      = 3
   | active      = 3
Line 425: Line 451:
   | advHit      = 3
   | advHit      = 3
   | advBlock    = 3
   | advBlock    = 3
   | invul      = N/A
   | invul      = None
   | description =  
   | description =  
* Best used as an anti-cross up, only a few characters can get over this move that I can think of (Blanka and Chun Li). Also has the distinction of being Iori's most damaging move that can be buffered into a super. The link from a
Best used as an anti-cross up, only a few characters can get over this move that I can think of (Blanka and Chun Li). Also has the distinction of being Iori's most damaging move that can be buffered into a super. The link from a close jab is a one frame link though, meaning it's a little too difficult to do really consistently. How does Iori manage to kick so high with that funky little cord tying his legs together?
close jab is a one frame link though, meaning it's a little too difficult to do really consistently. How does Iori manage to kick so high with that funky little cord tying his legs together?
 
  }}
  }}
}}
}}


=== Crouching Normals ===
  <span class="invisible-header">2LP</span>
=== <span class="invisible-header">2LP</span> ===
{{MoveData
{{MoveData
| name    = Crouching Jab  
| name    = Crouching Jab  
| input    = 2LP   
| input    = 2LP   
| subtitle = {{Motion|d}}{{Icon-Capcom|LP}}
| subtitle = Crouching Light Punch
| image    = CVS2_Iori_2lp.png
| image    = CVS2_Iori_2lp.png
| caption  = Crouching Light Punch
| caption  =  
| linkname = 2LP
| linkname = 2LP
| data  =  
| data  =  
  {{AttackData-CvS2
  {{AttackData-CvS2
   | version    =  
   | version    = {{Motion|d}}+{{Icon-Capcom|LP}}
   | subtitle    =   
   | subtitle    =   
   | damage      =  
   | damage      = 300
   | stun        =  
   | stun        = 3
   | cancel      =  
   | cancel      = RF/SP/SU
   | guard      =  
   | guard      = Mid
   | parry      =  
   | parry      = Mid
   | startup    =  
   | startup    = 3
   | active      =  
   | active      = 4
   | recovery    =  
   | recovery    = 8
   | total      =  
   | total      = 15
   | advHit      =  
   | advHit      = +3
   | advBlock    =  
   | advBlock    = +3
   | invul      =
   | invul      = None
   | description =  
   | description =  
* Because this version is 1 hit and has a lot of lower invincibility (not to mention lower recovery), it's best used in the neutral game or when the opponent is far from Iori.
Decent 2LP, but it is entirely outshined by Iori's cracked cl.LP and 2MP. Since he has those two moves, you'll only really use this when mashing on defense if you don't want to stop blocking low.
  }}
  }}
}}
}}


<span class="invisible-header">2MP</span>   
=== <span class="invisible-header">2MP</span> ===  
{{MoveData
{{MoveData
| name    = Crouching Strong
| name    = Crouching Strong
| input    = 2MP   
| input    = 2MP   
| subtitle = {{Motion|d}}{{Icon-Capcom|MP}}
| subtitle = Crouching Medium Punch
| image    = CVS2_Iori_2mp.png
| image    = CVS2_Iori_2mp.png
| caption  = Medium Punch
| caption  =  
| linkname = 2MP
| linkname = 2MP
| data  =  
| data  =  
  {{AttackData-CvS2
  {{AttackData-CvS2
   | version    =  
   | version    = {{Motion|d}}+{{Icon-Capcom|MP}}
   | subtitle    =   
   | subtitle    =   
   | damage      = 900
   | damage      = 900
   | stun        = 9
   | stun        = 9
   | cancel      = SP, SU
   | cancel      = SP/SU
   | guard      = H/L
   | guard      = Mid
   | parry      = H/L
   | parry      = Mid
   | startup    = 4
   | startup    = 4
   | active      = 6
   | active      = 6
Line 486: Line 510:
   | advHit      = 5
   | advHit      = 5
   | advBlock    = 5
   | advBlock    = 5
   | invul      = N/A
   | invul      = None
   | description =  
   | description =  
* A great move to throw out every now and then or to build meter, as it has high priority and recovers fast enough to be nearly impossible to punish on  reaction. As the frame data shows, this move links into itself. Although it's a one frame link, 2 low strongs into fierce rekka kens does a whopping 4000  damage without a power up. That's clearly enough damage to be an incentive to go for the combo when the opportunity arises... particularly situations where you can throw out the low strong meaty, therefore making the link much easier in the process. Also, the +5 frame advantage basically insures the next move you throw out will not get beaten by your opponent and will actually produce a lot of counter hits. This makes guard crush strings like low strong, low strong, standing roundhouse possible.  
A great move to throw out every now and then or to build meter, as it has high priority and recovers fast enough to be nearly impossible to punish on  reaction. As the frame data shows, this move links into itself. Although it's a one frame link, 2 low strongs into fierce rekka kens does a whopping 4000  damage without a power up. That's clearly enough damage to be an incentive to go for the combo when the opportunity arises... particularly situations where you can throw out the low strong meaty, therefore making the link much easier in the process. Also, the +5 frame advantage basically insures the next move you throw out will not get beaten by your opponent and will actually produce a lot of counter hits. This makes guard crush strings like low strong, low strong, standing roundhouse possible.  


The basic rule of thumb is if you're close but not within point blank range, hit low strong. It will beat most anything, and if blocked you can immediately do a standing roundhouse after for a nice big chunk of guard bar.  
Line 501: Line 525:
}}
}}


<span class="invisible-header">2HP</span>
=== <span class="invisible-header">2HP</span> ===
{{MoveData
{{MoveData
| name    = Crouching Fierce  
| name    = Crouching Fierce  
| input    = 2HP   
| input    = 2HP   
| subtitle = {{Motion|d}}{{Icon-Capcom|HP}}
| subtitle = Crouching Heavy Punch
| image    = CVS2_Iori_2hp.png
| image    = CVS2_Iori_2hp.png
| caption  = Heavy Punch
| caption  =  
| linkname = 2HP
| linkname = 2HP
| data  =  
| data  =  
  {{AttackData-CvS2
  {{AttackData-CvS2
   | version    =  
   | version    = {{Motion|d}}+{{Icon-Capcom|HP}}
   | subtitle    =   
   | subtitle    =   
   | damage      = 1100
   | damage      = 1100
   | stun        = 11
   | stun        = 11
   | cancel      = SP/SU
   | cancel      = SP/SU
   | guard      = H/L
   | guard      = Mid
   | parry      = H/L
   | parry      = Mid
   | startup    = 4
   | startup    = 4
   | active      = 5
   | active      = 5
Line 524: Line 548:
   | advHit      = -1
   | advHit      = -1
   | advBlock    = -1
   | advBlock    = -1
   | invul      = N/A
   | invul      = None
   | description =  
   | description =  
*
Iori's other crouchable move. It doesn't really matter, though, since you'll probably never use this move as anything except as an anti-air at the 45 degree angle. It works fairly well as anti-air as long as you stick it out early enough, but it does tend to trade with the really high priority jump ins. When you use it as anti air you can buffer it into a fierce fireball to make your opponent land on it, but I would recommend throwing a jab fireball instead so that you can run after it and use it as cover to attempt to get in.


Line 532: Line 555:
}}
}}


<span class="invisible-header">2LK</span>
=== <span class="invisible-header">2LK</span> ===
{{MoveData
{{MoveData
| name    = Crouching Short  
| name    = Crouching Short  
| input    = 2LK   
| input    = 2LK   
| subtitle = {{Motion|d}}{{Icon-Capcom|LK}}
| subtitle = Crouching Light Kick
| image    = CVS2_Iori_2lk.png
| image    = CVS2_Iori_2lk.png
| caption  = Crouching Light Kick
| caption  =  
| linkname = 2LK
| linkname = 2LK
| data  =  
| data  =  
  {{AttackData-CvS2
  {{AttackData-CvS2
   | version    =  
   | version    = {{Motion|d}}+{{Icon-Capcom|LK}}
   | subtitle    =  
   | subtitle    =  
   | damage      = 200
   | damage      = 200
   | stun        = 2
   | stun        = 2
   | cancel      = RF/SP/SU
   | cancel      = RF/SP/SU
   | guard      = L
   | guard      = Low
   | parry      = L
   | parry      = Low
   | startup    = 4
   | startup    = 4
   | active      = 4
   | active      = 4
Line 555: Line 578:
   | advHit      = 5
   | advHit      = 5
   | advBlock    = 5
   | advBlock    = 5
   | invul      =N/A
   | invul      = None
   | description =  
   | description =  
* Used mainly as your low combo starter and as a roll punisher, this move is pretty self-explanatory. Low shorts x3 into rekkas whenever the opportunity arises. The +5 frame advantage also lends this move into being another good Scum Gale tick, with the added advantage that people tend to sit and block after blocking one low short... they expect two more. The main weakness of this move is its relatively slow speed at 4 frames. When situations arise where you need a fast move, mash on standing/low jab (depending on distance) instead.
Used mainly as your low combo starter and as a roll punisher, this move is pretty self-explanatory. Low shorts x3 into rekkas whenever the opportunity arises. The +5 frame advantage also lends this move into being another good Scum Gale tick, with the added advantage that people tend to sit and block after blocking one low short... they expect two more. The main weakness of this move is its relatively slow speed at 4 frames. When situations arise where you need a fast move, mash on standing/low jab (depending on distance) instead.
}}
}}


}}
}}


  <span class="invisible-header">2MK</span>
=== <span class="invisible-header">2MK</span> ===
{{MoveData
{{MoveData
| name    = Crouching Forward  
| name    = Crouching Forward  
| input    = 2MK   
| input    = 2MK   
| subtitle = {{Motion|d}}{{Icon-Capcom|MK}}
| subtitle = Crouching Medium Kick
| image    = CVS2_Iori_2mk.png
| image    = CVS2_Iori_2mk.png
| caption  = Crouching Medium Kick
| caption  =  
| linkname = 2MK
| linkname = 2MK
| data  =  
| data  =  
  {{AttackData-CvS2
  {{AttackData-CvS2
   | version    =  
   | version    = {{Motion|d}}+{{Icon-Capcom|MK}}
   | subtitle    =   
   | subtitle    =   
   | damage      = 800
   | damage      = 800
   | stun        = 8
   | stun        = 8
   | cancel      = SU
   | cancel      = SU
   | guard      = L
   | guard      = Low
   | parry      = L
   | parry      = Low
   | startup    = 5
   | startup    = 5
   | active      = 4
   | active      = 4
Line 585: Line 608:
   | advHit      = -2
   | advHit      = -2
   | advBlock    = -2
   | advBlock    = -2
   | invul      =N/A
   | invul      = None
   | description =  
   | description =  
*
I hardly ever use this move since low strong is just better all around. Also, the animation of this move is very misleading. Iori's entire foot doesn't have an active hitbox on it, making the move a lot shorter than it looks. Its actual range is nearly identical to Iori's low short, which is a lot better move to use in more situations.
However, the move can only be canceled into supers, so if you're having a tough time landing B&B's into maiden masher due to accidental moves coming out, this could certainly help you out. You can also toss the move out and empty buffer the super behind it ala Chun in 3rd strike, but the hitbox on the move isn't THAT good.
Line 593: Line 615:
}}
}}


<span class="invisible-header">2HK</span>
=== <span class="invisible-header">2HK</span> ===
{{MoveData
{{MoveData
| name    = Crouching Roundhouse
| name    = Crouching Roundhouse
| input    = 2HK  
| input    = 2HK  
| subtitle = {{Motion|d}}{{Icon-Capcom|HK}}
| subtitle = Crouching Heavy Kick
| image    = CVS2_Iori_2hk.png
| image    = CVS2_Iori_2hk.png
| caption  = Crouching Heavy Kick
| caption  =  
| linkname = 2HK
| linkname = 2HK
| data  =  
| data  =  
  {{AttackData-CvS2
  {{AttackData-CvS2
   | version    =  
   | version    = {{Motion|d}}+{{Icon-Capcom|HK}}
   | subtitle    = sweep
   | subtitle    =  
   | damage      = 1300
   | damage      = 1300
   | stun        = 13
   | stun        = 13
Line 618: Line 640:
   | invul      = N/A
   | invul      = N/A
   | description =  
   | description =  
* In my opinion, use of the low roundhouse is what makes or breaks an Iori user.
In my opinion, use of the low roundhouse is what makes or breaks an Iori user.


The move is usually essential to get in against an opponent with good defense since you can't always rely on low jumping, rolling, or guard crushing your way in. How is the move used? Well the best application of the move would be to punish a whiffed move that you baited out. The less recommended use would be to catch somebody standing from roughly 1/3rds screen distance away. This works most often against footsie-reliant characters like Chun Li or Cammy since they're generally never crouching unless you're right next to them.  
Line 633: Line 655:


=== Air Normals ===
=== Air Normals ===
  <span class="invisible-header">8LP</span>
=== <span class="invisible-header">8LP</span> ===
{{MoveData
{{MoveData
| name    = Jumping Jab  
| name    = Jumping Jab  
| input    = 8LP  
| input    = j.LP  
| subtitle = {{Motion|ub}},{{Motion|u}},or {{Motion|uf}}+{{Icon-Capcom|LP}}
| subtitle = Jumping Light Punch
| image    = CVS2_Iori_8lp.png
| image    = CVS2_Iori_8lp.png
| caption  = Jumping Light Punch
| caption  =  
| linkname = 8LP
| linkname = j.LP
| data  =  
| data  =  
  {{AttackData-CvS2
  {{AttackData-CvS2
   | version    =  
   | version    = {{Motion|ub}}/{{Motion|u}}/{{Motion|uf}}+{{Icon-Capcom|LP}}
   | subtitle    =   
   | subtitle    =   
   | damage      = 600
   | damage      = 600
   | stun        = 6
   | stun        = 6
   | cancel      =  
   | cancel      = None
   | guard      = H
   | guard      = High
   | parry      = H
   | parry      = High
   | startup    = 3
   | startup    = 3
   | active      = 22
   | active      = 22
   | recovery    =  
   | recovery    = 0
   | total      =  
   | total      = 27
   | advHit      =  
   | advHit      = Varies
   | advBlock    =  
   | advBlock    = Varies
   | invul      =
   | invul      = None
   | description =  
   | description =  
* NOTE: All of Iori's straight up jump moves are the same as his jumping forward/backwards moves.
I don't use this personally, but I've seen many good Iori users use this as their preferred jump in. It has pretty good priority and sticks out for a long time, too. Low jumping and immediately pressing jab is an overhead on every character in the game, but you might as well use jumping strong if you're gonna do that.


Line 666: Line 686:
}}
}}


<span class="invisible-header">8MP</span>
=== <span class="invisible-header">8MP</span> ===
{{MoveData
{{MoveData
| name    = Jumping Strong
| name    = Jumping Strong
| input    = 8MP  
| input    = j.MP  
| subtitle = {{Motion|ub}},{{Motion|u}},or {{Motion|uf}}+{{Icon-Capcom|MP}}
| subtitle = Jumping Medium Punch
| image    = CVS2_Iori_8mp.png
| image    = CVS2_Iori_8mp.png
| caption  = Medium Punch
| caption  =  
| linkname = 8MP
| linkname = 8MP
| data  =  
| data  =  
  {{AttackData-CvS2
  {{AttackData-CvS2
   | version    =  
   | version    = {{Motion|ub}}/{{Motion|u}}/{{Motion|uf}}+{{Icon-Capcom|MP}}
  | subtitle    =  {{Motion|ub}},{{Motion|u}},or {{Motion|uf}}+{{Icon-Capcom|MP}}
  | subtitle    =
   | damage      = 900
   | damage      = 900
   | stun        = 9
   | stun        = 9
   | cancel      =  
   | cancel      = None
   | guard      = H
   | guard      = High
   | parry      = H
   | parry      = High
   | startup    = 4
   | startup    = 4
   | active      = 7
   | active      = 7
   | recovery    =  
   | recovery    = 0
   | total      =  
   | total      = 11
   | advHit      =  
   | advHit      = Varies
   | advBlock    =  
   | advBlock    = Varies
   | invul      =
   | invul      = None
   | description =  
   | description =  
* Probably Iori's highest priority jump in, also a decent air to air due to its high speed. Range is a little lacking, though. Low jumping and immediately pressing strong is also an instant overhead on every character in the game. Do it while jumping backwards to make it safer. Low jumping forward and hitting strong gives the overhead surprising range, though; you can still connect it after doing three low shorts.
Probably Iori's highest priority jump in, also a decent air to air due to its high speed. Range is a little lacking, though. Low jumping and immediately pressing strong is also an instant overhead on every character in the game. Do it while jumping backwards to make it safer. Low jumping forward and hitting strong gives the overhead surprising range, though; you can still connect it after doing three low shorts.


6/13/03 - Dunno why I didn't add this before, but low jumping BACKWARDS and doing overhead strong still works, and is a whole lot safer. You do have to be quite a bit closer, though. It works after doing one jab/short.
Line 697: Line 717:
}}
}}


<span class="invisible-header">8HP</span>
=== <span class="invisible-header">8HP</span> ===
{{MoveData
{{MoveData
| name    = Jumping Fierce  
| name    = Jumping Fierce  
| input    = 8HP   
| input    = 8HP   
| subtitle = {{Motion|ub}},{{Motion|u}},or {{Motion|uf}}+{{Icon-Capcom|HP}}
| subtitle = Jumping Heavy Punch
| image    = CVS2_Iori_8hp.png
| image    = CVS2_Iori_8hp.png
| caption  = Heavy Punch
| caption  =  
| linkname = 8HP
| linkname = 8HP
| data  =  
| data  =  
  {{AttackData-CvS2
  {{AttackData-CvS2
   | version    =  
   | version    = {{Motion|ub}}/{{Motion|u}}/{{Motion|uf}}+{{Icon-Capcom|HP}}
   | subtitle    =   
   | subtitle    =   
   | damage      = 1300
   | damage      = 1300
   | stun        = 13
   | stun        = 13
   | cancel      =  
   | cancel      = None
   | guard      = H
   | guard      = High
   | parry      = H
   | parry      = High
   | startup    = 11
   | startup    = 11
   | active      = 3
   | active      = 3
   | recovery    =  
   | recovery    = 0
   | total      =  
   | total      = 14
   | advHit      =  
   | advHit      = Varies
   | advBlock    =  
   | advBlock    = Varies
   | invul      =
   | invul      = None
   | description =  
   | description =  
* Iori's highest damage jump in, so this is the one to use when your opponent is dizzy. It comes out painfully slow, but not slow enough so that you can use it for fakes to land a Scum Gale.   
Iori's highest damage jump in, so this is the one to use when your opponent is dizzy. It comes out painfully slow, but not slow enough so that you can use it for fakes to land a Scum Gale.   
  }}
  }}
}}
}}


<span class="invisible-header">8LK</span>
=== <span class="invisible-header">8LK</span> ===
{{MoveData
{{MoveData
| name    = Jumping Short  
| name    = Jumping Short  
| input    = 8LK   
| input    = 8LK   
| subtitle = {{Motion|ub}},{{Motion|u}},or {{Motion|uf}}+{{Icon-Capcom|LK}}
| subtitle = Jumping Light Kick
| image    = CVS2_Iori_8lk.png
| image    = CVS2_Iori_8lk.png
| caption  = Light Kick
| caption  =  
| linkname = 8LK
| linkname = 8LK
| data  =  
| data  =  
  {{AttackData-CvS2
  {{AttackData-CvS2
   | version    =  
   | version    = {{Motion|ub}}/{{Motion|u}}/{{Motion|uf}}+{{Icon-Capcom|LK}}
   | subtitle    =  
   | subtitle    =  
   | damage      =  
   | damage      = 500
   | stun        =  
   | stun        = 5
   | cancel      =  
   | cancel      = None
   | guard      =  
   | guard      = High
   | parry      =  
   | parry      = High
   | startup    =  
   | startup    = 4
   | active      =  
   | active      = 22
   | recovery    =  
   | recovery    = 0
   | total      =  
   | total      = 26
   | advHit      =  
   | advHit      = Varies
   | advBlock    =  
   | advBlock    = Varies
   | invul      =
   | invul      = None
   | description =  
   | description =  
* Lorem ipsum dolor sit amet, consectetur adipiscing elit, sed do eiusmod tempor incididunt ut labore et dolore magna aliqua.
Solid reach and lots of active frames make this a decent air-to-air, but it sees no real use otherwise
  }}
  }}
}}
}}


<span class="invisible-header">8MK</span>
=== <span class="invisible-header">8MK</span> ===
{{MoveData
{{MoveData
| name    = Jumping Forward  
| name    = Jumping Forward  
| input    = 8MK   
| input    = 8MK   
| subtitle = {{Motion|ub}},{{Motion|u}},or {{Motion|uf}}+{{Icon-Capcom|MK}}
| subtitle = Jumping Medium Kick
| image    = CVS2_Iori_8mk.png
| image    = CVS2_Iori_8mk.png
| caption  = Medium Kick
| caption  =  
| linkname = 8MK
| linkname = 8MK
| data  =  
| data  =  
  {{AttackData-CvS2
  {{AttackData-CvS2
   | version    =  
   | version    = {{Motion|ub}}/{{Motion|u}}/{{Motion|uf}}+{{Icon-Capcom|MK}}
   | subtitle    =   
   | subtitle    =   
   | damage      =  
   | damage      = 900
   | stun        =  
   | stun        = 9
   | cancel      =  
   | cancel      = None
   | guard      =  
   | guard      = High
   | parry      =  
   | parry      = High
   | startup    =  
   | startup    = 5
   | active      =  
   | active      = 10
   | recovery    =  
   | recovery    = 0
   | total      =  
   | total      = 15
   | advHit      =  
   | advHit      = Varies
   | advBlock    =  
   | advBlock    = Varies
   | invul      =
   | invul      = None
   | description =  
   | description =  
* Lorem ipsum dolor sit amet, consectetur adipiscing elit, sed do eiusmod tempor incididunt ut labore et dolore magna aliqua.  }}
Similar kick to j.LK, but trades high active frames for damage. Same as a good air-to-air, and also sees very little use otherwise.  
  }}
}}
}}


<span class="invisible-header">8HK</span>
=== <span class="invisible-header">8HK</span> ===
{{MoveData
{{MoveData
| name    = Jumping Roundhouse
| name    = Jumping Roundhouse
| input    = 8HK  
| input    = 8HK  
| subtitle = {{Motion|ub}},{{Motion|u}},or {{Motion|uf}}+{{Icon-Capcom|HK}}
| subtitle = Jumping Heavy Kick
| image    = CVS2_Iori_8hk.png
| image    = CVS2_Iori_8hk.png
| caption  = Jumping Heavy Kick
| caption  =  
| linkname = 8HK
| linkname = 8HK
| data  =  
| data  =  
  {{AttackData-CvS2
  {{AttackData-CvS2
   | version    =  
   | version    = {{Motion|ub}}/{{Motion|u}}/{{Motion|uf}}+{{Icon-Capcom|HK}}
   | subtitle    =   
   | subtitle    =   
   | damage      =  
   | damage      = 1200
   | stun        =  
   | stun        = 12
   | cancel      =  
   | cancel      = None
   | guard      =  
   | guard      = High
   | parry      =  
   | parry      = High
   | startup    =  
   | startup    = 7
   | active      =  
   | active      = 8
   | recovery    =  
   | recovery    = 0
   | total      =  
   | total      = 15
   | advHit      =  
   | advHit      = Varies
   | advBlock    =  
   | advBlock    = Varies
   | invul      =
   | invul      = None
   | description =  
   | description =  
* Lorem ipsum dolor sit amet, consectetur adipiscing elit, sed do eiusmod tempor incididunt ut labore et dolore magna aliqua.  
Iori's furthest reaching jump-in. Useful for when you jump over fireballs to ensure you reach, or just for air poking in general. Makes a decent air-to-air just like his other jump kicks.
  }}
  }}
}}
}}


=== Command Normals ===
== Throws ==
=== <span class="invisible-header">Sakahagi (Punch)</span> ===
{{MoveData
| name    = Sakahagi
| input    = Near Opponent, 4/6HP
| subtitle = Punch Throw
| image    = CVS2_Iori_Throw.PNG
| caption  =
| linkname = Sakahagi (Punch)
| data  =
{{AttackData-CvS2
  | version    = Close {{Motion|b}}/{{Motion|f}}+{{Icon-Capcom|HP}}
  | subtitle    =
  | damage      = 1800
  | stun        = 0
  | cancel      = None
  | guard      = Grab
  | parry      = Grab
  | startup    = 3
  | active      = 1
  | recovery    = 13
  | total      = 17
  | advHit      = DWN
  | advBlock    = Grab
  | invul      = None
  | description = Iori grabs the opponent and tosses them away with a quick scratch. Standard punch throw, 3 frame startup makes it useful for punishing tight gaps and moves that are only slightly negative, but it does lower damage than his slower kick throw.
}}
}}


= Universal Mechanics =
=== <span class="invisible-header">Sakahagi (Kick)</span> ===
=== Throws ===
{{MoveData
=== Roll ===
| name    = Sakahagi
=== Counter Attack ===
| input    = Near Opponent, 4/6HK
=== Guard Cancel Movement===  
| subtitle = Kick Throw
=== Dodge Attacks ===
| image    = CVS2_Iori_Throw.PNG
=== Small Jump ===
| caption  = Wait, why does he have this twice!?
=== Dash ===
| linkname = Sakahagi (Kick)
=== Run ===
| data  =
{{AttackData-CvS2
  | version    = Close {{Motion|b}}/{{Motion|f}}+{{Icon-Capcom|HK}}
  | subtitle    =
  | damage      = 2000
  | stun        = 0
  | cancel      = None
  | guard      = Grab
  | parry      = Grab
  | startup    = 5
  | active      = 1
  | recovery    = 13
  | total      = 19
  | advHit      = DWN
  | advBlock    = Grab
  | invul      = None
  | description = Iori does a throw exactly like his punch throw. Despite being the same animation and sharing a name, this does have the standard kick throw difference of being slower but higher damage. Useful for throw mixups, but since Iori has a very rewarding command grab, you'll usually only go for this when you can't do the input for command grab fast enough.
}}
}}
 
== Command Normals ==
=== <span class="invisible-header">Ge Shiki: Yumebiki</span> ===
{{MoveData
| name    = Ge Shiki: Yumebiki
| input    = 6MP
| subtitle = Lunge Punch
| image    = CVS2_Iori_6MP.PNG
| caption  =  
| linkname = 6MP
| data  =  
{{AttackData-CvS2
  | version    = {{Motion|f}}+{{Icon-Capcom|MP}}
  | subtitle    =
  | damage      = 800
  | stun        = 8
  | cancel      = SP/SU
  | guard      = Mid
  | parry      = High
  | startup    = 8
  | active      = 7
  | recovery    = 24
  | total      = 39
  | advHit      = -8
  | advBlock    = -8
  | invul      = None
  | description = Iori reaches forward for a punch. On it's own, not a bad whiff punish thanks to the forward movement and cancel. You can easily cancel this into 214HP Rekka for a combo or a blockstring. This also is a Target Combo from 5MP, which would be awesome for confirms if 5MP was a move you used for confirms often. This means it's mostly used raw as a whiff punish. Make sure you always cancel into either a rekka or a fireball, as you leave yourself -8 if not.
}}
}}
 
=== <span class="invisible-header">Ge Shiki: Gofu-in 'Shinigami'</span> ===
{{MoveData
| name    = Ge Shiki: Gofu-in 'Shinigami'
| input    = 6MK
| subtitle = Overhead
| image    = CVS2 Iori 5f+mk.png
| caption  =  
| linkname = 6MK
| data  =  
{{AttackData-CvS2
  | version    = {{Motion|f}}+{{Icon-Capcom|MK}}
  | subtitle    =
  | damage      = 1000
  | stun        = 10
  | cancel      = None
  | guard      = High
  | parry      = High
  | startup    = 33
  | active      = 3
  | recovery    = 17
  | total      = 53
  | advHit      = 0
  | advBlock    = 0
  | invul      = None
  | description = Iori winds up before dropping an axe kick on the opponent. Sadly slow overhead, but still useful as a meaty since it's 0 on block while most overheads tend to be slightly negative. Used from neutral however, it's more than likely that your opponent will reversal through this, mash out, or just escape the situation, none of which are good for Iori. This risk makes the 1000 damage reward pretty low, so outside of a meaty overhead mixup, you won't use this much.
}}
}}


= Special Moves =
=== <span class="invisible-header">Ge Shiki: Yurioki</span> ===
===== <span class="invisible-header">Rekka Kens</span> =====
{{MoveData
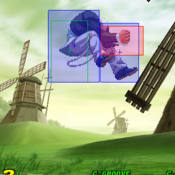
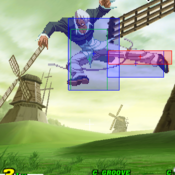
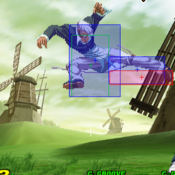
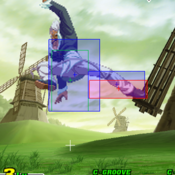
| name    = Ge Shiki: Yurioki
| input    = j.4LK
| subtitle = Crossup
| image    = CVS2 Iori 8 4lk.png
| caption  =
| linkname = j.4LK
| data  =
{{AttackData-CvS2
  | version    = In Air {{Motion|b}}+{{Icon-Capcom|LK}}
  | subtitle    =
  | damage      = 500
  | stun        = 5
  | cancel      = None
  | guard      = High
  | parry      = High
  | startup    = 5
  | active      = 12
  | recovery    = 0
  | total      = 17
  | advHit      = Varies
  | advBlock    = Varies
  | invul      = None
  | description = Iori sticks his leg out behind him. Stellar crossup, and a key part of Iori's signature vortex. Unlike the KOF games, your input is actually reversed when jumping over the opponent, so you will always do this as j.4LK on both sides. Since it's a light hit, combos from it require a pretty deep connect. Usually you'll get cl.LP, cl.HP > Rekkas, which is more than enough of a reward, but if you hit them around head height it won't combo to much of anything.
}}
}}
 
== Special Moves ==
=== <span class="invisible-header">Rekka Kens</span> ===
{{MoveData
{{MoveData
| name    = Deadly Flower / "Hyakunijuunanashiki Aoihana "
| name    = Deadly Flower / "Hyakunijuunanashiki Aoihana "
Line 839: Line 990:
| data  =  
| data  =  
  {{AttackData-CvS2
  {{AttackData-CvS2
   | version    = 1st rekka
   | version    = {{Motion|214}} + {{Icon-Capcom|P}}
  | subtitle    = {{Motion|214}} + {{Icon-Capcom|P}}
  | subtitle    = 1st Rekka
   | damage      = 400/500/600
   | damage      = 400/500/600
   | stun        = 2
   | stun        = 2
Line 853: Line 1,004:
   | advBlock    = -5
   | advBlock    = -5
   | invul      = N/A
   | invul      = N/A
  | description =
  }}
  }}
  {{AttackData-CvS2
  {{AttackData-CvS2
   | version    = 2nd rekka
   | header      = no
   | subtitle    = {{Motion|214}} + {{Icon-Capcom|P}}
   | version    = {{Motion|214}} + {{Icon-Capcom|P}}
  | subtitle    = 2nd Rekka
   | damage      = 400/500/600
   | damage      = 400/500/600
   | stun        = 2
   | stun        = 2
Line 871: Line 1,021:
   | advBlock    = -13
   | advBlock    = -13
   | invul      = N/A
   | invul      = N/A
  | description =
  }}
  }}
  {{AttackData-CvS2
  {{AttackData-CvS2
   | version    = 3rd rekka
   | header      = no
   | subtitle    = {{Motion|214}} + {{Icon-Capcom|P}}
   | version    = {{Motion|214}} + {{Icon-Capcom|P}}
  | subtitle    = 3rd Rekka
   | damage      = 800/900/1000
   | damage      = 800/900/1000
   | stun        = 5
   | stun        = 5
Line 890: Line 1,039:
   | invul      = N/A
   | invul      = N/A
   | description =  
   | description =  
*    THere's a 25 frame window to cancel the first rekka into the second rekka. From the second to third hit there's a 27 frame window to cancel. The different damage numbers correspond to different button strengths.
There's a 25 frame window to cancel the first rekka into the second rekka. From the second to third hit there's a 27 frame window to cancel. The different damage numbers correspond to different button strengths.


Outside of its obvious use in combos, the rekka ken doesn't have much use. Start RCing it, though, and you have a different beast entirely. The result is a high priority (invincible, even), high damage (2200 if you get all 3), long range (Iori's longest ranged move, farther than his standing/low roundhouses) poke that enables Iori to compete with the Sagats and Cammys of the world.


The catch? The move carries a ton of risk behind it. As much as a fireball, even. The move is most easily punished by either a straight up jump (which results in a full jump in combo since Iori conveniently moves right under them) or a well timed roll. The move can also be baited into whiffing and then easily punished also. As if that weren't enough, the move isn't even totally safe if blocked! As you can see from the data above, the move carries a -5 frame disadvantage, enough for a few characters to get a low forward combo in. However, the move is mostly safe if blocked around max distance, though. You can actually punish attempts to hit a well-ranged RC rekka ken with... another RC rekka ken! DO NOT fall into the habit of doing RC rekka ken, then another RC rekka ken, though. It's killed me more times than I care to remember.  
The catch? The move carries a ton of risk behind it. As much as a fireball, even. The move is most easily punished by either a straight up jump (which results in a full jump in combo since Iori conveniently moves right under them) or a well timed roll. The move can also be baited into whiffing and then easily punished also, this can be negated by completing the entire rekka set and leaving you far from your opponent, hard to punish if they are ready for it. As if that weren't enough, the move isn't even totally safe if blocked! As you can see from the data above, the move carries a -5 frame disadvantage, enough for a few characters to get a low forward combo in. However, the move is mostly safe if blocked around max distance, though. You can actually punish attempts to hit a well-ranged RC rekka ken with... another RC rekka ken! DO NOT fall into the habit of doing RC rekka ken, then another RC rekka ken, though. It's killed me more times than I care to remember.  


If your rekka ken is rolled through, try to get away from the opponent by doing the second and third rekkas. This works well if you're in the middle of field, but if you're opponent was in the corner you're not going anywhere.
Line 916: Line 1,065:


Man. That's a lot written about one move. It's a necessary move, though. It's like Iori's missing link.
  }}
  }}
}}
}}


===== <span class="invisible-header">Dragon Punch</span> =====
=== <span class="invisible-header">Dragon Punch</span> ===
{{MoveData
{{MoveData
| name    = Fire Ball / "Hyakushiki Oniyaki"
| name    = Fire Ball / "Hyakushiki Oniyaki"
Line 935: Line 1,082:
| data  =  
| data  =  
  {{AttackData-CvS2
  {{AttackData-CvS2
   | version    = LP
   | version    = {{Motion|623}} + {{Icon-Capcom|LP}}
  | subtitle    = {{Motion|623}} + {{Icon-Capcom|LP}}
  | subtitle    =
   | damage      = 1700
   | damage      = 1700
   | stun        = 17
   | stun        = 17
Line 954: Line 1,101:
  {{AttackData-CvS2
  {{AttackData-CvS2
   | header      = no
   | header      = no
   | version    = MP
   | version    = {{Motion|623}} + {{Icon-Capcom|MP}}
  | subtitle    = {{Motion|623}} + {{Icon-Capcom|MP}}
  | subtitle    =
   | damage      = 700+1100
   | damage      = 700+1100
   | stun        = 7+11
   | stun        = 7+11
Line 973: Line 1,120:
  {{AttackData-CvS2
  {{AttackData-CvS2
   | header      = no
   | header      = no
   | version    = HP
   | version    = {{Motion|623}} + {{Icon-Capcom|HP}}
  | subtitle    = {{Motion|623}} + {{Icon-Capcom|HP}}
  | subtitle    =
   | damage      = 400+600+1000
   | damage      = 400+600+1000
   | stun        = 4+6+10
   | stun        = 4+6+10
Line 992: Line 1,139:
}}
}}


===== <span class="invisible-header">Fireball</span> =====
=== <span class="invisible-header">Fireball</span> ===
{{MoveData
{{MoveData
| name    = Dark Thrust / "Hyakuhachishiki Yamibarai "
| name    = Dark Thrust / "Hyakuhachishiki Yamibarai "
Line 1,004: Line 1,151:
| data  =  
| data  =  
  {{AttackData-CvS2
  {{AttackData-CvS2
   | version    = LP
   | version    = {{Motion|236}} + {{Icon-Capcom|LP}}
  | subtitle    = {{Motion|236}} + {{Icon-Capcom|LP}}
  | subtitle    =
   | damage      = 800
   | damage      = 800
   | stun        = 8
   | stun        = 8
Line 1,018: Line 1,165:
   | advBlock    = -12
   | advBlock    = -12
   | invul      = N/A
   | invul      = N/A
  | description =
  }}
  }}
  {{AttackData-CvS2
  {{AttackData-CvS2
   | header      = no
   | header      = no
   | version    = MP
   | version    = {{Motion|236}} + {{Icon-Capcom|MP}}
  | subtitle    = {{Motion|236}} + {{Icon-Capcom|MP}}
  | subtitle    =
   | damage      = 900
   | damage      = 900
   | stun        = 9
   | stun        = 9
Line 1,030: Line 1,175:
   | guard      = Mid
   | guard      = Mid
   | parry      = Mid
   | parry      = Mid
   | startup    = 4
   | startup    = 12
   | active      = [3/9]
   | active      = -
   | recovery    = 48
   | recovery    = 45
   | total      = 64
   | total      = 57
   | advHit      = DWN
   | advHit      = DWN
   | advBlock    = -42
   | advBlock    = -12
   | invul      = 7 full/ 9 lower
   | invul      = None
  | description =
  }}
  }}
  {{AttackData-CvS2
  {{AttackData-CvS2
   | header      = no
   | header      = no
   | version    = HP
   | version    = {{Motion|236}} + {{Icon-Capcom|HP}}
  | subtitle    = {{Motion|236}} + {{Icon-Capcom|HP}}
  | subtitle    =
   | damage      = 1000
   | damage      = 1000
   | stun        = 4+6+10
   | stun        = 4+6+10
Line 1,057: Line 1,200:
   | invul      = N/A
   | invul      = N/A
   | description =   
   | description =   
As far as ground fireballs go, Iori's is the second best in the game. That's not really saying much, though, since ground fireballs as a whole really suck and are vastly inferior to conventional air-based fireballs.  


Unfortunately, Iori's fireball is a very necessary tool for him, both as a  footsie tool and as a means to get in. 3/4ths to full screen away throw a jab fireball and run after it to get in. 2/5ths to half screen away use it as a  footsie tool. Any closer and you should never use it. NEVER buffer a fireball off of a normal move. Your opponent can easily roll on reaction and kill you. Also, since varying ground fireball speeds really doesn't get you anywhere, always throw jab fireballs since those you can follow easily. The other two speeds are unnecessary to the way Iori plays.
Line 1,064: Line 1,207:


The fact that the fireball is so essential to Iori and that it's a ground fireball is really bad. Characters that can easily punish ground fireballs like Bison, Blanka or Honda all give Iori a really hard time. RCing the fireball doesn't really make a difference either, since you never want to do the fireball up close, and if you RC it from far away the invincibility is gone by the time your opponent reaches you with a Psycho Crusher or Blanka Ball or whatever. Bleh.
  }}
  }}
}}
}}


=== <span class="invisible-header">Running Grab</span> ===
===== <span class="invisible-header">Running Grab</span> =====
{{MoveData
{{MoveData
| name    = 212 Shiki: Kototsuki In / "Nihyakujuunishiki Kototsuki In "
| name    = 212 Shiki: Kototsuki In / "Nihyakujuunishiki Kototsuki In "
| input    = 236+
| input    = 63214+K
| subtitle = Running Grab
| subtitle = Running Grab
| image    = CVS2 Iori running hit grab 1.png
| image    = CVS2 Iori running hit grab 1.png
Line 1,081: Line 1,222:
| data  =  
| data  =  
  {{AttackData-CvS2
  {{AttackData-CvS2
   | version    = LP
   | version    = {{Motion|hcb}} + {{Icon-Capcom|LK}}
  | subtitle    = {{Motion|hcb}} + {{Icon-Capcom|LK}}
  | subtitle    =
   | damage      = 1800
   | damage      = 1800
   | stun        = 0
   | stun        = 0
Line 1,095: Line 1,236:
   | advBlock    = -18
   | advBlock    = -18
   | invul      = N/A
   | invul      = N/A
  | description =
  }}
  }}
  {{AttackData-CvS2
  {{AttackData-CvS2
   | header      = no
   | header      = no
   | version    = MP
   | version    = {{Motion|hcb}} + {{Icon-Capcom|MK}}
  | subtitle    = {{Motion|hcb}} + {{Icon-Capcom|MK}}
  | subtitle    =
   | damage      = 1900
   | damage      = 1900
   | stun        = 0
   | stun        = 0
Line 1,114: Line 1,253:
   | advBlock    = -18
   | advBlock    = -18
   | invul      = N/A
   | invul      = N/A
  | description =
  }}
  }}
  {{AttackData-CvS2
  {{AttackData-CvS2
   | header      = no
   | header      = no
   | version    = HK
   | version    = {{Motion|hcb}} + {{Icon-Capcom|HK}}
  | subtitle    = {{Motion|hcb}} + {{Icon-Capcom|HK}}
  | subtitle    =
   | damage      = 2000
   | damage      = 2000
   | stun        = 0
   | stun        = 0
Line 1,134: Line 1,271:
   | invul      = N/A
   | invul      = N/A
   | description =   
   | description =   
*    The above frame data for the three button strengths represent what happens if Iori never makes contact with the enemy. For example, a roundhouse whiffed Running Grab has 5 frames start up, runs for 64 frames, then has 12 frame recovery. If at any time during those 64 frames of running Iori makes contact with his opponent, he then takes 4 frames for his arm to whip around, which has an active hitbox for 5 frames, and has a 29 frame recovery. Whew! Writing and explaining frame data isn't easy!
The above frame data for the three button strengths represent what happens if Iori never makes contact with the enemy. For example, a roundhouse whiffed Running Grab has 5 frames start up, runs for 64 frames, then has 12 frame recovery. If at any time during those 64 frames of running Iori makes contact with his opponent, he then takes 4 frames for his arm to whip around, which has an active hitbox for 5 frames, and has a 29 frame recovery. Whew! Writing and explaining frame data isn't easy!


Most of the time I wish this move simply didn't exist, since 90% of the times I use it is totally on accident screwing up the command for RC rekka kens. As the -18 frame disadvantage tells you, this move isn't anywhere near safe if blocked. It's also very vulnerable if the move whiffs completely also, unlike Kyo's.  
Line 1,141: Line 1,278:
Another use for this move is to chip somebody to death. If you're not within fierce uppercut range to chip somebody (fierce uppercut does 325 points of chip damage), the next best option is to f+strong into Running Grab, as that does 300 chip damage. 2 Rekka kens only do 200 damage, and a fireball does 100. 300 damage from the running grab is enough to insure that you never fall victim to the "Magic Pixel" that has claimed many a player.
RCing the move can be useful from time to time, like when you REALLY need that chip damage to kill the opponent but can't find a way to f+strong them, or to punish somebody buffering moves into a fireball. You could theoretically use an RC Running Grab as an anti-air from afar, but I wouldn't recommend it since the move comes out pretty slow.
}}
}}


=== <span class="invisible-header">Scum Gale</span> ===
{{MoveData
| name    = Kukukaze
| input    = 632146+P
| subtitle = Scum Gale
| image    = CVS2_Iori_632146Pwhiff.png
| caption  = Whiffed
| image2  = CVS2_Iori_632146Phit.png
| caption2 = Landed
| linkname = ScumGale
| data  =
{{AttackData-CvS2
  | subtitle    =
  | damage      = 0
  | stun        = 0
  | cancel      = None
  | guard      = N/A
  | parry      = N/A
  | startup    = 8
  | active      = 1
  | recovery    = 32
  | total      = 41
  | advHit      = +12
  | advBlock    = N/A
  | invul      = N/A
  | description = 
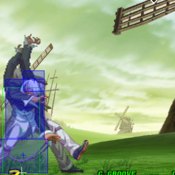
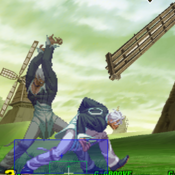
Iori's famous side-switching command grab. This special is what makes Iori's offense so deadly. It's not only an unblockable command grab, but the opponent is stuck in hit stun after the grab, allowing you to combo off of it. This move is deadly because Iori has a very rewarding strike/throw mixup, as both lead to a good knockdown and damage. Mix that up with his crazy good jab and his roll and this move becomes very powerful. The only weakness this move has outside of having fairly lengthy startup for a command grab (8F) is that it switches sides, so you give up the corner for a mixup. It's still around 3.7K damage you're getting so it's not too bad. You can even try to command grab them again after they recover from the hitstun of the previous command grab, although in most contexts you just want to get the damage.
There are usually two main follow-ups from the command grab, a max damage one and a safe fall bait one.
'''Max Damage Route''': (Grab), 5MP > 6MP xx Rekkas / Ranbu <br>
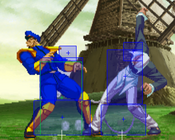
This is the optimal damage follow-up on a command grab, utilizing Iori's 5MP > 6MP target combo. It's really easy as well. If you have the resources, you can also combo into Iori's ranbu super off of this.
'''Safe Fall Bait Route''': (Grab), Microwalk 5MP xx LP DP, 2HK if opponent safe falls <br>
This is a route that's usually done to specifically kill safe falls. LP DP gives Iori enough time to walk forward and do a sweep if the opponent safe falls, but of course in the corner he gets a better punish. Against non safe-fall grooves always go for optimal damage, but even in the case of safe fall grooves this should only be used if the opponent is just spamming safe falls.
  }}
  }}
}}
}}


== Super Moves ==
== Super Moves ==
===== <span class="invisible-header">Maiden Masher</span> =====
=== <span class="invisible-header">Maiden Masher</span> ===
{{MoveData
{{MoveData
| name    = Maiden Masher / "Sansennihyakujuuichishiki Yaotome  "
| name    = Maiden Masher / "Sansennihyakujuuichishiki Yaotome  "
Line 1,160: Line 1,334:
| data  =  
| data  =  
  {{AttackData-CvS2
  {{AttackData-CvS2
   | version    = Level 1
   | version    = {{Motion|236}}{{Motion|hcb}} + {{Icon-Capcom|LP}}
  | subtitle    =  {{Motion|236}}{{Motion|hcb}} + {{Icon-Capcom|LP}}
  | subtitle    =
   | damage      = 2200
   | damage      = 2200
   | stun        = 0
   | stun        = 0
Line 1,174: Line 1,348:
   | advBlock    = -10
   | advBlock    = -10
   | invul      = 8full/12upper
   | invul      = 8full/12upper
  | description =
  }}
  }}
  {{AttackData-CvS2
  {{AttackData-CvS2
   | header      = no
   | header      = no
   | version    = Level 2
   | version    = {{Motion|236}}{{Motion|hcb}} + {{Icon-Capcom|MP}}
  | subtitle    = {{Motion|236}}{{Motion|hcb}} + {{Icon-Capcom|MP}}
  | subtitle    =
   | damage      = 3700
   | damage      = 3700
   | stun        = 0
   | stun        = 0
Line 1,193: Line 1,365:
   | advBlock    = -10
   | advBlock    = -10
   | invul      = 14 full/ 22 upper
   | invul      = 14 full/ 22 upper
  | description =
  }}
  }}
  {{AttackData-CvS2
  {{AttackData-CvS2
   | header      = no
   | header      = no
   | version    = HP
   | version    = {{Motion|236}}{{Motion|hcb}}  + {{Icon-Capcom|HP}}
  | subtitle    = {{Motion|236}}{{Motion|hcb}}  + {{Icon-Capcom|HP}}
  | subtitle    =
   | damage      = 5000
   | damage      = 5000
   | stun        = 0
   | stun        = 0
Line 1,213: Line 1,383:
   | invul      = 22full/ 30 upper
   | invul      = 22full/ 30 upper
   | description =   
   | description =   
Your basic all-purpose super; functions as anti-air, anti-fireball, anti-poke,
works in combos. There's a few unique things about it, though: the upper body
invincibility granted to the move give it the ability to punish fireballs from
Line 1,230: Line 1,400:


Unfortunately, hitting with a level 3 doesn't set up much of anything since your opponent is thrown really far away and Iori doesn't recover until the opponent is almost fully standing. Just throw a jab fireball as they're getting up and run after it.
}}
}}


=== <span class="invisible-header">"One-For-The-Road" Blast</span> ===
{{MoveData
| name    = "One-For-The-Road" Blast
| input    = 21441236+P 
| subtitle = Pillar Super
| image    = CVS2 Iori Lvl 1 wine cups hold.png
| caption  = Charging
| image2  = CVS2 Iori Lvl 1 wine cups release 2.png
| caption2 = Traveling Hitbox
| linkname = PS
| data  =
{{AttackData-CvS2
  | version    = {{Motion|214}}{{Motion|hcf}}  + {{Icon-Capcom|LP}}
  | subtitle    =
  | damage      = 1400
  | stun        = 0
  | cancel      = Non
  | guard      = Mid
  | parry      = High
  | startup    = 5:1~60, 21
  | active      = Traveling
  | recovery    = 50
  | total      = 77~136
  | advHit      = Freeze
  | advBlock    = -15
  | invul      = 1~9 (Full)
}}
{{AttackData-CvS2
  | header      = no
  | version    = {{Motion|214}}{{Motion|hcf}} + {{Icon-Capcom|MP}}
  | subtitle    =
  | damage      = 1600
  | stun        = 0
  | cancel      = SP/SU
  | guard      = Mid
  | parry      = High
  | startup    = 5:1~60, 21
  | active      = Traveling
  | recovery    = 50
  | total      = 77~136
  | advHit      = Freeze
  | advBlock    = +29
  | invul      = 1~15 (Full)
}}
{{AttackData-CvS2
  | header      = no
  | version    = {{Motion|214}}{{Motion|hcf}}  + {{Icon-Capcom|HP}}
  | subtitle    =
  | damage      = 1800
  | stun        = 0
  | cancel      = None
  | guard      = Mid
  | parry      = High
  | startup    = 5:1~60, 21
  | active      = Traveling
  | recovery    = 50
  | total      = 77~136
  | advHit      = Freeze
  | advBlock    = +29
  | invul      = 1~23 (Full)
  | description = 
Iori tosses a fireball that then explodes into pillars. Each level gets more pillars, with level 1 only getting one and not traveling far, level 2 getting 4 and traveling a little over a third of the screen, and level 3 getting 8 pillars and traveling well beyond fullscreen. On hit, these cause a unique flame freeze effect. The opponent will be coated in Iori's signature purple fire, and will slowly take hits of damage. The level 1 version hits 4 times before knocking down, the level 2 version hits 5 times, and the level 3 version hits 6 times. During this frozen time, Iori can hit with any move, though this will instantly end the freeze. You always want to wait a few hits to maximize the damage, preferably until the last hit that doesn't knock down. This super can also be charged, hence the double value on the startup time. However, regardless of minimal charge or not, comboing into this is impossible in most situations outside A-Groove. It lacks much neutral utility outside of gimmicky callouts, and the cost is fairly high. Maiden Masher is overall a MUCH more useful super in almost every situation, and you would almost always rather save the meter for that than spend it on this.


Note: The opponent can mash to leave the freeze state faster, you can't get a jump in combo on a level 1 grounded freeze if mashed.
  }}
  }}
}}
}}


= Combos =
=== Colors ===
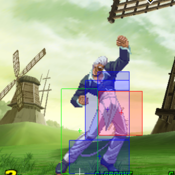
 
=== Meterless combos: ===
 
 
==== Low Hit Confirm ====
cr.short x 3 X qcb + fierce x 3
 
{{Motion|2}}+{{Icon-Capcom|lk}},{{Motion|2}}+{{Icon-Capcom|lk}},{{Motion|2}}+{{Icon-Capcom|lk}} x {{Motion|QCB}}+{{Icon-Capcom|hp}} x {{Motion|QCB}}+{{Icon-Capcom|hp}} x {{Motion|QCB}}+{{Icon-Capcom|hp}}
 
==== Fast Hit Confirm ====
s.jab x 3, qcb + fierce x 3
 
{{Icon-Capcom|lp}},{{Icon-Capcom|lp}},{{Icon-Capcom|lp}}x {{Motion|QCB}}+{{Icon-Capcom|hp}} x {{Motion|QCB}}+{{Icon-Capcom|hp}} x {{Motion|QCB}}+{{Icon-Capcom|hp}}
 
==== Frame Trap Hit Confirm ====
s.jab, s.fierce, qcb + fierce x 3
 
CL{{Icon-Capcom|lp}}, CL{{Icon-Capcom|hp}} x {{Motion|QCB}}+{{Icon-Capcom|hp}} x {{Motion|QCB}}+{{Icon-Capcom|hp}} x {{Motion|QCB}}+{{Icon-Capcom|hp}}
 
s.short, s.jab, s.short, qcb + fierce x 3
cr.strong x 2, qcb + fierce x 3
cr.short x 2, cr.strong, qcb + fierce x 3
 
Non Hit Confirms (punish combos)
s.fierce, qcb + fierce x 3
close s.fierce, hcb + roundhouse
close s.fierce xx Fierce DP
s.strong, twd.strong, qcb + fierce x 3
 
jump fierce, Cl. Fierce, DP+Fierce (optimal stun damage)
 
Low Jump strong/roundhouse-> DP+Jab
 
-cross-up-
 
b+short, s.jab, s.fierce, qcb + fierce x 3
 
Almost any Iori B&B combo can be started with hcb-twd + punch (Scum Gale).
 
=== Super Combos: ===
 
cr.short x 3, qcf-hcb + punch (any level)
 
s.strong, twd.strong, qcf-hcb + punch (any level)
S.jab, S.Fierce, qcf-hcb + punch (any level) (max damage)
 
C.forward kick xx qcf-hcb + punch (any level) (c.mk is super cancel only, easy to do)
 
= Advanced Strategy =
 
 
== <big>'''Grooves & Groove specific strategy'''</big> ==
 
 
[[File:Cvs2 C-Groove Label.png|frameless|left]]
[[File:CVS2 CGrooveBar.png|frameless|right]]
----
 
 
<big>'''C-Groove Level 2 Cancel Combos'''</big>
----
 
Iori uses level 2 cancels pretty well. After his maiden masher is complete, Iori can cancel into any of his specials. The foremost being his Dragon Punch.
Since maiden masher at level 3 only does 5000 damage, The cancels give Iori a much better damage/meter ratio, and allows him to use a meter for defensive purposes or be ready for another level 2 in a very short time.
 
Since Maiden masher is so easy to combo into, you'll get a lot of opportunities to land this.
 
 
Level 2 Maiden Masher
 
Cancel into
 
-Level 1 Maiden Masher (most damage, no tech roll)
 
-Fierce DP (1000 less damage, saves a level and 20 more stun)
-Jab/Strong DP (even less damage, more time to setup or punish tech roll)
-Level 1 wine cups, then Jump HP, HP, HP DP (Full combo can instant stun characters, cancel maiden masher early if combo will stun for more damage on post dizzy combo)
 
<big>'''Anti C-Groove'''</big> 
----
 
 
[[File:Cvs2 A-Groove Label.png|frameless|left]][[File:CVS2 AGrooveBar.png|frameless|right]]
----
 
https://tinyurl.com/IoriCCs
 
<big>'''Ground Customs'''</big> 
 
<big>'''Anti-Air Customs'''</big> 
 
<big>'''Blocked Customs'''</big> 
 
<big>'''Other Customs'''</big> 
 
<big>'''Anti A-Groove'''</big> 
----
 
[[File:Cvs2 P-Groove Label.png|frameless|left]]
[[File:CVS2 PGrooveBar.png|frameless|right]]
----
 
If you're a P-groove player before anything else, Iori is a great fit on a P-Groove team.
He's:
* all around solid, doesn't *NEED* parry offensively or defensively
* great B&B damage without meter to capitalize off successful parries
* decent low jump game
* good option select parry/throw tech button (stand fierce)
* really great parry bait. Blocked rekka is -5, but you can parry to make it -4. Also spaced properly, no high only parry should be able to hit you there.
 
The only downside is that Iori doesn't utilize a full meter well, it doesn't do a whole lot of damage, and he can't land it off big pokes like Cammy or Sagat.
 
However, If you're an Iori player first and foremost, P-Groove does not have roll, and subsequently, Roll Cancel. You're going to want to look elsewhere.
 
*CvS2 EO Update* In CvS2 EO (or EX Grooves on console versions), Iori can do all three rekkas and cancel into Maiden Masher. This is obviously stupid, but also incredible.
 
 
<big>'''Anti P-Groove'''</big> 
----
N-Iori vs P-Groove
 
I have VERY little experience against P Groove as there isn't a single P-Groove specialist in my area. Most of the following is pure theory-fighter but it makes pretty good sense in my head. -_-
 
* Wake-up Parries:
 
Self explantory.
 
Adjustments Needed:
 
1) This is a guessing game that's totally in your favor. Just mix up standing jab (which has to be parried high) with low shorts and Scum Gales. Grabbing a P-Groove opponent as he's getting up works especially well, since most P-Players that I've seen can't resist going for a parry of some sort. Also, I'd recommend doing standing jab more often then low short since players tend to try to parry down a lot more often than parrying forward.
 
* Jump-in Parries:
 
We've all seen this a million times...empty jump in, try to parry something, mash on throw when you land. Fortunately for Iori, throws aren't instant in this game like they are in Third Strike so you can actually make them block something when they land without getting thrown.
 
Adjustments Needed:
 
1) Run under them: One of the things that makes me happy that I still play this antiquated groove, running under your opponent and hitting them out of the air from behind is by far the best option. It's parryable, but your opponent has to parry the other way and I have yet to see somebody do that yet. Also, even if the move is parried your opponent is still facing the wrong direction and usually cannot punish you.
 
2) Wait until the last second, mix-up when they land: If you don't have time to run under your opponent this is the next best option. Block high until your opponent is so close to the ground they can't possibly stick out a move before reaching the ground, then commit to standing jab/low short/Scum Gale mix up.
If you want to Scum Gale your opponent immediately when he lands without getting grabbed yourself you'll have to do the grab when the opponent is a little in the air. Standing jab is the most consistent option, since by jumping in and blocking your jab your opponent is pretty much voluntarily giving you a free mix up.
 
The weakness to this strategy is if your opponent actually did a jumping attack you'll have to block it and deal with whatever guard crush string or mix up he does next.
 
3) Test your opponent's parrying skills: I would almost never recommend doing this, but most of us just can't resist. Including me. :P Rather the usual jab into uppercut or air-to-air attacks that I'm sure any good P-Player is used to, I'd recommend low fierce at the tip (which is a good anti-air anyway) into jab uppercut. The parry timing for the uppercut is a lot slower than it looks so it should catch your opponent at least the first two or three times you try it.
 
4) Roll!: Yes, it's a pretty easy solution, but it's pretty much 100% safe.
After rolling you can immediately jump and go for a b+short cross up (watch out for parries!) or just play normally until your opponent jumps again. Hopefully you'll be able to run under it and counter it.
 
* Ground Parries:
 
Besides jumping up and down, ground parries are P-Groove's only defense against Iori's RC rekkas. Since it's really hard to parry RC rekkas on reaction, P-players will probably be looking for the only real "set-up" for an RC rekka:
... a blocked RC rekka. Besides that, the other main instance a P-Groove player goes for a ground parry is after he whiffs a move.
 
Adjustments Needed:
 
1) Mix it up: while this should go without saying, mixing up your moves and timing is the best way to throw off ground parries. For example, your opponent blocks an RC rekka and is expecting another one. You can do a whole bunch of things that would never work against any other groove (other than K) like run up and grab afterwards, sweep, roll, etc. Take advantage of the fact that both Iori's run and roll look similar to his rekkas.
 
2) After a whiffed move: Ideally you should be able to punish the whiff every time with a low roundhouse or something, but not all of us are fast enough to able to do that every single time. Just mixing up standing/low roundhouse after a whiffed move works well enough, and it's also a good opportunity to low jump roundhouse in since they usually aren't looking for it.
 
*Low Jumps:
 
 
Definitely something to get used to... but for the most part easily dealt with after some practice.
 
Adjustments Needed:
 
1) Actively look for low jumps: While some people have fast enough reflexes to be able to easily uppercut low jumps on reaction, most of the time I'm not one of them. However, once you've trained yourself to fight on the ground without having to think about it much, you can actively look for low jumps to uppercut without hurting your overall gameplay too much. The good part is, Iori's uppercut has a lot of horizontal range so the low jump attack/empty low jump mix ups are a little less effective on him.
 
Some days your reflexes are exceptionally slow... you can be looking for nothing but low jumps and STILL not be able to uppercut them on time. In this case I would recommend hitting standing roundhouse a lot more than normal if your opponent can't crouch it. If they do happen to randomly low jump it'll probably get stopped by your boot. This also applies to low jumps that are usually just too fast to hit on reaction like Blanka's, Vega's and Mai's.
 
If you're having a bad reflex day AND your opponent can crouch your standing roundhouse, I would recommend going all out and trying to attack them instead.
Rather than unsuccessfully trying to anti-air low jumps and taking hits, put your life bar to better use by sacrificing it trying to get in and score a knockdown. You're much more likely to win that way.
 
[[File:Cvs2 S-Groove Label.png|frameless|left]]
[[File:CVS2 SGrooveBar.png|frameless|right]]
----
 
<big>'''Anti S-Groove'''</big> 
----
 
[[File:Cvs2 N-Groove Label.png|frameless|left]]
[[File:CVS2 NGroovebar.png|frameless|right]]
----
 
<big>'''Anti N-Groove'''</big> 
----
 
[[File:Cvs2 K-Groove Label.png|frameless|left]]
[[File:CVS2 KGrooveBar.png|frameless|right]]
----
 
 
<big>'''Anti K-Groove'''</big>
----
 
== Matchups ==
Check here for matchup analysis, notes, and errata.
Could be as simple as optimal punishes, safe jump setups, and effective counter pokes.
{| class="wikitable"
|+ Iori Matchups Guide
|-
| [[#Sagat]] || [[#Blanka]] || [[#M.Bison]] || [[#Cammy]] || [[#Vega]] || [[#Hibiki]] || [[#Chun-Li]]|| [[#Guile]]
|-
| [[#E.Honda]] || [[#Geese]]|| [[#Rolento]]|| [[#Ken]] || [[#Rock]] || [[#Kyo]] || [[#Sakura]]|| [[#Iori]]
 
|-
| [[#Yamazaki]] || [[#Rugal]] || [[#Kim]] || [[#Eagle]] || [[#Morrigan]] || [[#Ryu]] || [[#Mai]]|| [[#Vice]]
 
|-
| [[#Akuma]] || [[#Nakoruru]] || [[#Todo]] || [[#Maki]]  || [[#Athena]] || [[#Raiden]] || [[#Terry]]|| [[#Ryo]]
|-
| [[#Balrog]] || [[#Benimaru]] || [[#Joe]] || [[#Chang]]  || [[#Evil Ryu]] || [[#Orochi Iori]] || [[#God Rugal]]|| [[#Shin Akuma]]
|-
| [[#Dhalsim]] || [[#Haohmaru]] || [[#Zangief]] || [[#Yuri]]  || [[#Kyosuke]] || [[#Yun]] || [[#King]]|| [[#Dan]]
|}
 
For example:
 
<span id=" Blanka"><big>'''Blanka'''</big> </span>
----
 
Blanka ball punishes- Any level Maiden Masher, run a little and sweep (low HK), A groove activate sweep custom.
 
 
N-Iori Vs Any groove Blanka
4:6 (changed from 3:7)
 
Another tough match, played almost exactly the same as Bison's. Blanka doesn't have the luxury of being able to roll through Iori's rekkas or scissor kick into custom, though, so it's a bit more do-able.
 
Blanka's straight up jumping roundhouse is one of the hardest for Iori to stop.
It's fast enough that supering it is difficult, and standing roundhouse definitely doesn't work. Low fierce hits Blanka's roundhouse decently if you hit it really early, but it tends to trade a lot more often than I would like.
Most often the best thing to do is make Blanka block a standing roundhouse when he lands from the jump. In fact, standing roundhouse is 90% of this match for Iori since he really can't do much else. RC rekkas work well if you can get Blanka to stop jumping up and down, but if he's jumping up and down a LOT then you can probably throw a fireball and run after it. However, Blanka will usually have his charge immediately after blocking the fireball so he'll be able to ball right through your RC rekka after the fireball's stun is gone. Of course you can bait it out by blocking it the Ball and punishing it with a run up low roundhouse, but to do that you will have to WALK up to Blanka so that you'll be able to block in time.
 
Actually, running at Blanka is hardly ever a good idea. Blanka can just do a Ball to counter your run and there isn't much you can do about it. You can't block, obviously, and attempts to avoid the Ball with a roll or RC rekka ken will work but Blanka will go right through either move, leaving him unscathed all the way at the other end of the screen.
 
Since the vogue thing with Blanka nowadays is to show off how good you are with RC electricity, landing a Scum Gale on Blanka's wake up can be quite easy.
Another Blanka-specific grab set up is after blocking a Blanka Ball. Instead of doing the normal run up and low roundhouse, sometimes you can run all the way up to Blanka and grab him while he's still expecting to be swept. Not the safest thing to do, but it might be good to try in a pinch.
 
In all, the best thing to do against Blanka is just standing roundhouse him every chance you get. Blanka can easily punish a whiffed standing roundhouse with his low fierce, but Blanka isn't played to bait whiffs. If the Blanka player is getting low fierce-happy, just get inside the range of his low fierce and repeatedly whiff low strongs... you'll beat it clean. As an added bonus you'll also beat any random slides with low strong also. Iori also crouches Blanka's low strong so the only long range move Blanka has left to use is his low roundhouse which can be low jumped or rolled through with some anticipation. Blanka's sweep will generally lose to standing roundhouse anyway so it's better to just stick with that instead of trying all kinds of fancy stuff.
 
-added 7/5/03 - Even though it looks like it isn't possible, a whiffed Blanka low fierce is easily punishable by an Iori low roundhouse. Even though it appears that you're out of range to hit him, hitting Blanka's still-extended arm is fairly easy on reaction.
 
Iori's jumping strong seems to work wonders in this fight, and as long as you hit it early enough it seems to beat Blanka's infamous straight up jump fierce with pretty good frequency.
 
<span id=" Sagat"><big>'''Sagat'''</big></span>
----
-----------------
N-Iori Vs C-Sagat
5:5
 
 
On the ground Iori actually has the advantage in this match up. With standing roundhouse and RC rekka ken to work with, all Sagat can do is try to make you whiff your moves and standing fierce them. RC rekkas against Sagat are VERY risky, though, since Sagat tends to be jumping up and down a lot in this fight.
If he jumps when you rekka, prepare to eat a nice jumping roundhouse, standing fierce into super combo. Also, Iori can't anti-air Sagat's straight up jump roundhouse with his own standing roundhouse; he has to either use his supers or or make Sagat block a standing roundhouse when he lands. Of course, Sagat can counter your standing roundhouse when he lands with an uppercut or (more likely) a roll. Watch out for those and punish accordingly.
 
Trying to go all out and attack Sagat is generally a lost cause. You can't jump at him obviously, and his ultra-annoying standing shorts will stop almost anything you try to do to get in. Again, running up to him and RC rekka ken'ing isn't advised since Sagat tends to jump up and and down a lot in this match.
Just push Sagat to the corner with the standing roundhouses. From there Iori is in complete control of the match. Work the guard bar faster from there with repeated standing roundhouses, counter whatever Sagat does on reaction.
 
REMINDER: If Sagat (or any other character, really) buffers a move into a super such as low forward into low tiger super, Iori can easily counter roll on reaction after the super flash animation and get a big free combo.
 
6/13/03 - Iori's footsie range in this fight is well outside Sagat's low fierce and low forward range. If he whiffs either of these moves, low roundhouse him if you are confident, standing roundhouse if not. At this range the only moves Sagat can do are his standing short, standing forward, standing fierce, and fireballs.
 
Iori's standing roundhouse and Sagat's low fierce have roughly the same priority; whoever presses it first usually wins. However, since you're hanging around well outside the range of his fierce Sagat can't randomly press it or else you can easily punish his whiff with a standing/low roundhouse.
 
Smart Sagats will do nothing but standing shorts and jump up and down randomly, since Sagat's standing short is arguably the best normal move in the game; it's nearly impossible to punish if whiffed and has insane range/speed/priority.
It's not damaging on its own but it all but shuts down his opponent's offense and sets up the opponent to make mistakes which will all lead to huge damage.
 
Standing forward isn't generally a good idea for Sagat but most will still throw it out every now and then. It's his longest ranged normal and has good priority, but its recovery time is similar to Hibiki's slash. Iori MIGHT be able to block it and level 3 super him for free. I'll have to test it before my next revision. Anyway, if Sagat does standing forward and Iori does ANY of his attack mix ups (RC rekka, roll, jump, etc.), Iori gets a free combo plus knockdown.
 
Sagat's standing fierce has a lot of range and players who aren't careful tend to walk into them a lot. However, Iori can crouch it and easily punish it on sight with a low roundhouse.
 
Sagat really doesn't want to throw fireballs either, for the same reason as the standing forward. Moreover, Iori players can usually roll through fireballs and punish on reaction.
 
-7/5/03 - The key things to think about in this match are to stay out of Sagat's range so you can punish his whiffs, and to find a way to stop Sagat from jumping up and down. Making him block a standing roundhouse when he lands is usually good enough... but again, be aware of rolls and uppercuts when he lands. The guessing game is totally in your favor, though.
 
<span id=" M.Bison"><big>'''M.Bison'''</big></span>
----
 
N-Iori Vs A-Bison
2:8
 
Ouch. This match is bad. REALLY bad. You can't ever throw a fireball unless Bison lost his charge, which he'll probably never do. If Bison has his CC meter, then you DEFINITELY can't ever throw a fireball. You can't jump or low jump at Bison because he can standing fierce or low fierce, respectively.
RC rekkas to get in are also bad since Bison can punish you HARD with a jump up roundhouse, standing strong into scissor kicks (into custom) or simply a roll into custom. Bison's straight up jump roundhouse also beats Iori's standing roundhouse.
 
So what do you have left? Well, against his straight up jump roundhouse low fierce works pretty well... just hit his leg. Try to keep him on the ground and push him to the corner with standing roundhouses while working his guard bar. A good Bison will punish a whiffed standing roundhouse with a slide, a scissor kick (into custom), or even activate custom and slide on reaction. It sucks. If you do manage to get Bison in the corner, Bison can simply opt to pay 1300 life and RC psycho crusher out of the corner. Sure, you get a free sweep, but Bison tech rolls your sweep and you're all the way across the screen again.
 
Running at Bison generally isn't recommended since Bison can easily counter your run with a psycho crusher. If you expect this to happen you can attempt to counter the psycho crusher with an RC rekka... your fist will hit Bison's feet and knock him down right next to you. If Bison RCs his psycho crushers, you're pretty much screwed. No running for you. This is especially frustrating since Bison tends to sit at the other side of the screen and build meter, while you're almost powerless to do anything about it except WALK up to him and try to roundhouse him.
 
Here's a list of things you can do to counter Bison:
 
* -Blocked psycho crusher - low roundhouse
* -Blocked (2 hit) scissor kick - low short into rekkas
* -Devil's Reverse - RC Running Grab or fireball
* -Straight up jumping roundhouse - Low fierce, super, RC Running Grab, make him  land on a jab fireball
* -Whiffed ground moves - low roundhouse if you're confident, standing roundhouse otherwise
* -(added 7/5/03) Blocked scissor kick super (usually during a blocked Custom  Combo) - Counter Roll as early as possible, run up behind Bison and combo him
 
This match more than any other depends on Iori getting the knockdown and successfully mixing it up to win. Unfortunately, since it's very hard to attack Bison more often than not you'll have to keep walking up to Bison and hope he makes a mistake you can punish. Otherwise you'll just have to roundhouse away and hope for the best. Bleh.
 
-added 7/5/03 - Your standing roundhouse DOES outrange Bison's moves on the ground, so RANDOMLY roundhouse (so you don't get RC psycho crusher'ed) every now and then to whittle his guard bar. If Bison has close to a full meter he'll probably just block the roundhouses and let his guard bar go down in exchange for meter.
If he doesn't have that much meter he'll probably opt to try to fight you on the ground instead. This is where you have a chance to win the fight. If he has no meter and is trying to fight with you on the ground he's probably lost his charge. You can now fight him as a normal opponent without fear of RC Psycho Crusher and random Customs. Better make it count before he gets his meter again.
 
-added 7/5/03 - Something everybody should practice, when you block a Psycho Crusher and have a level 3 ready, super him in the back! It's really pretty easy to do as long as you wait until Bison is all the way past you before you start inputting the motions.
 
Iori's low roundhouse will trade 99% of the time with Bison's jumping straight up roundhouse. A good trade if you ask me, since you just knocked Bison down and get to cross him up.
 
<span id=" Cammy"><big>'''Cammy'''</big></span>
----
N-Iori Vs C-Cammy
6.5:3.5
 
Even though Cammy is a short character, I believe Iori wins this match mainly because he can bully Cammy around with RC rekkas and ground fireballs. Cammy has a really tough time fighting RC rekkas; she doesn't have any good RC moves herself to fight it with.
Her roll is so slow, Iori can punish HER for rolling through a rekka ken. Her straight up jump moves to counter a rekka ken aren't very good either, Iori can counter them easily with a standing roundhouse.
 
Getting into rekka ken range can sometimes be a problem, though, since it's within Cammy's standing roundhouse range. You can try matching her roundhouses with RC rekkas but I wouldn't advise that since at that range she can easily bait you into whiffing them. If you're out of rekka range throw fireballs instead. Cammy can't drill through them, and even if she RCs the drill she still gets caught by the tail end of the fireball. She can try dashing over the fireballs but almost every player I've seen (even the Japanese) can't do it consistently and end up landing on the fireball and getting knocked down.
Bonus! Cammy's jump is also fairly slow; you can punish most attempts to jump over your fireballs unless she jumps EXACTLY when you threw the fireball.
That's basically a guess, so throw plenty of fakes along with your fireballs to mess her up. If she blocks one of your fireballs, throw another jab one and run after it since you've just created the ideal distance for yourself.
 
Most Cammy players will get baited at least a few times by whiffing something and then immediately rolling. Whiff a low strong, Cammy sticks out her standing roundhouse, you roll through it and beat her up.
 
Added 7/5/03 - Iori has two major advantages against "walk back" characters like Cammy, Vega and Chun. By "walk back" characters, I mean one of their most effective traits is their incredible backwards walking speed; you can almost never cross them up without knocking them down first since they walk backwards faster than your jump and just stay in front of you.
They bait whiffs very well by dancing in and out of your effective footsie range, then easily punish a whiff with an easy one button long range move (i.e. Cammy standing roundhouse, Vega low strong). Running at them trying to get in generally doesn't work either, since their backwards walk is just slightly slower than you RUNNING forward. They can easily stick out a move while walking backwards that you'll run into, or you'll stick out a move that you THINK should hit, but your opponent will just walk backwards out of range and punish you for it.
 
Anyway, Iori has two major advantages on these types of characters. First, his ability to run after a fireball. When the fireball is on the screen, the opponent can't walk back! Unlike other recent games like Alpha 3, CvS2 will make your opponent go into his blocking animation if you ever hold back on the stick while there's something to block on the screen (the fireball). The result? Your opponent is stuck in place while you're running right at them, and the strategies for that are all listed in the '3/4ths - full screen distance' section of the Strategy chapter.
 
The weakness to this strategy is that it works best when the opponent is at 3/4ths to full screen, and any good player will not easily let you establish that distance. So how do you get that far away? Well, sometimes it's just given to you after certain knockdown moves that knock you far away.
Just get up and throw a fireball and run after it. The simplest way for YOU to earn that distance is to jump/dash back and throw a fireball. This is painfully obvious, however, and you'll probably get punish hard for it eventually. It could lead to baited opponent jump-ins, though...
 
The safest way to get far away from your opponent is to use your fireball as a footsie tool. RC fierce fireball as a poke or after your opponent whiffs a move. If your opponent blocks it he'll be pushed out to roughly 3/4ths distance where you can throw another jab fireball and run after it.
 
Iori's other tool against "walk back" characters is his low roundhouse. His sweep has incredible range and of course, hits low. 'Walk back'-types generally never block low unless you're really close so they can make your moves whiff.
Roundhouses from far away will catch them standing (or rather, walking back) really often. If your opponent catches on and crouch blocks sooner so that he doesn't get caught by a low roundhouse, that's good also since you now can run up to your opponent easier without him walking back to keep the distance.
 
As a final note, with the exception of Chun Li "walk back" characters hardly do any damage; they let the damage add up over time since they're usually in control of the match. This tips the risk/reward ratio of random rolls, jumps and low jumps more in Iori's favor. Go for broke and attack when the opportunity presents itself.
 
<span id=" Vega">Vega</span>
----
 
<span id=" Hibiki">Hibiki</span>
----
 
<span id=" Chun-Li">Chun-Li</span>
----
 
<span id=" Guile">Guile</span>
----
 
<span id=" E.Honda">E.Honda</span>
----
 
<span id=" Geese">Geese</span>
----
 
<span id=" Rolento"><big>'''Rolento'''</big></span>
----
N-Iori vs C-Rolento
7:3
(added 6/13/03)
 
This match is both fun and annoying at the same time. On one hand, you can bully Rolento fairly well with low jump roundhouse and RC rekkas. He has a hard time stopping the jumping roundhouse on the ground, and most of his air attacks lose to it as well (except for jumping jab, but who cares about that).
Your jumping roundhouse will be air-blocked pretty frequently, but that's okay too since air-blocked moves do much more guard damage and have the added benefit of pushing your opponent to the corner.
 
On the other hand, it's annoying since you're chasing Rolento the whole entire match. When you do manage to get in, most of the time you get alpha countered (Rolento is tied for best alpha counter in the game. +10 frame advantage if blocked!) and then you have chase him some more.
 
For the most part, though, Iori totally dictates the match. Throw a fireball and run after it, counter what Rolento does. A lot of times Rolento will jump off the wall and run away, and you just throw a jab fireball and run after it AGAIN. When you get within half screen and Rolento isn't running around, just low jump roundhouse away. You might take a jumping jab or a standing strong here and there, but it'll take like twenty of those to kill you. If he alpha counters you and you block it, just alpha counter him back and he's on the ground with hardly any guard bar left.
 
A few things to remember:
 
-Rolento can wake up with RC pogo jump. Be especially aware of this when you have him in the corner, since he can RC pogo jump backwards and come down with a jumping strong combo. Uppercut it! If you're mid-screen, just be safe and do a normal throw (into totally ambiguous roll cross up). Trying to Scum Gale Rolento out of a RC pogo jump is really difficult.
 
-Rolento's jumping strong beats any normal move anti-air you have. You HAVE to uppercut, and you have to do it earlier than you think.
 
-When running at Rolento without the cover of a fireball, Rolento can easily standing forward -> tripwire you.
 
-When Rolento is crossing you up, just roll. Don't try to counter it or block it. Rolento has the Cross Up From Hell: ambiguous cross ups in several NON knock-down situations.
 
-When blocking a Patriot Circle, wait until he cannot do a 2nd or 3rd twirl and THEN hit him with f+strong into rekkas. Don't get caught by delayed patriot circles! Also, Rolento moves REALLY far forward when he does the circles, so you often can't punish him when you counter roll it.
 
-(added 7/5/03) A high percentage of Rolento's Alpha Counters are blocked.
Again, it's safe and gives Rolento a +10 advantage. However, you can quickly turn the momentum back into your favor by Alpha Countering his Alpha Counter!
Puts him on his back for a free mix up AND he probably has hardly any guard bar left also.
 
-------------------
N-Iori vs A-Rolento
7:3
-------------------
(added 6/13/03)
 
Back in CvS2's infancy, A-Rolento was one of the most used characters in the game. If you used A-Groove, you used A-Rolento. Now, he's been mostly replaced by A-Sak/Bison/Blanka teams, and is generally inferior to his C-Groove version. Why? Air blocking and (plentiful) alpha counters supplement Rolento's game much better than his Custom Combo.
 
Anyway, the fight is basically exactly the same as vs C-Rolento except without the two obvious things: Alpha counters and air blocking. This makes it much easier for you to get in and stay in. The only thing you have to worry about is Rolento's Custom Combo, which really isn't THAT much of a threat since he doesn't have any (useful) ways to land it guaranteed. He has to do it randomly and hope you stuck out something. While it does good damage if he does land it, you can bait it out of him the same as you can against any other A-Groove character.
 
 
<span id=" Sakura"><big>'''Sakura'''</big></span>
----
 
N-Iori vs A-Sakura
5:5
 
FUNKY QUIRK: Iori cannot do the normal strong into f+strong chain after a connected Scum Gale on Sakura. The f+strong whiffs! (thanks Crowbait!)
 
-added 7/5/03 - This is played somewhat similar to other "walk back" characters. When Sakura doesn't have a full CC ready there isn't a whole lot of risk to jumping at her. She also has a small problem with Iori's low jump roundhouse when it's mixed up with an empty low jump. Against low jump she has to do either early standing roundhouses, which is difficult on reaction, or RC hurricane kicks. The hurricane kick will only hit once for piddly damage so it's nothing to worry about. It does knock you down, though.
 
Haphazardly rolling at Sakura isn't recommended, though. Her basic combo not only does really good damage, it also gives Sakura a ton of meter as well. Even if she throws you out of the roll, her punch throw sets up a whole mess of different things, all of them scary, all of them damaging.
 
The main move that will give Iori problems in this match is Sakura's standing roundhouse. It has incredibly fast recovery, so countering it with rolls or jumps isn't an option; you have to either RC rekka it or low roundhouse it when she whiffs it. Neither of these options are easy to accomplish (particularly the latter) or safe since Sakura can punish these moves hard if whiffed.
Iori also can't match her roundhouse with his own standing roundhouse since Sakura can easily crouch it; you'll have to use RC rekka as your main ground move in this fight, and that's really risky since Sakura has an above average roll to work with as well.
 
On the flipside, Sakura can't really attack Iori all that well either. Her fearsome RC roundhouse hurricane kick can be easily crouched on the 2nd hit and punished, so she has to resort to her inferior (but still powerful) RC forward hurricane kick. This leaves her at a -1 disadvantage on block, so as long as you have good timing you should win any priority battles afterwards with standing jab. If you don't want to risk that, Alpha Countering the hurricane kick works beautifully and will either get you a free mix up or a free low roundhouse if Sakura tech rolls. If she's trying to use RC forward hurricane kick as a ground move, its inferior range makes her use it a lot closer than the Sakura player would like. That's good for Iori. Also, the move is rather easy to roll through on reaction which will usually earn you at least a free low roundhouse depending on distance.
 
Her other dominant special move against other characters, her dive kick, is also rendered somewhat useless against Iori. The huge horizontal range on Iori's uppercut will easily scoop up Sakura's dive kick if it gets anywhere remotely near Iori, neutering most of Sakura's whiff dive kick patterns severely. The move is still unreasonably hard to stop as a meter building tool from afar, so my advice would be to either try to get her to land on a fireball or to use the opportunity to establish full screen distance and run after a jab fireball.


As long as you stay out of the corner (where EVERY character dies to Sakura) you should at least be very competetive in this match. Like many other matches, the deciding factor will usually be how well you use Iori's low roundhouse and how well you made your mix up opportunities count.
[[File:Iori CvS2 colors.png]]


== Videos ==
== Colors ==
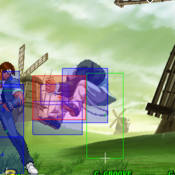
[[File:CvS2 Iori color selections.png|frame|Iori Color Selections]]


== External Links ==
{{Navbox-CvS2}}
{{Navbox-CvS2}}
[[Category:Capcom vs. SNK 2]]
[[Category:Capcom vs. SNK 2]]
[[Category:Iori]]

Latest revision as of 01:45, 9 September 2023

Introduction

CVS2 Iori Data.png

Story

Iori Yagami (Japanese: 八神 庵, Hepburn: Yagami Iori) is a character from SNK's The King of Fighters video game series. The character first appeared in The King of Fighters '95 as the leader of the Rivals Team, as the initial enemy and later rival of Kyo Kusanagi. Iori is the heir of the Yagami clan, who use pyrokinetic powers and sealed the Orochi devil along with the Kusanagi and Yata clans. Iori suffers from a curse – "The Riot of the Blood" (血の暴走, Chi no Bōso) – under which he becomes faster, stronger and wilder, exhibiting a deadly tendency to indiscriminately attack everyone in close proximity. In this state, Iori is commonly called "Wild Iori" or "Orochi Iori" (月の夜大蛇の血に狂う庵, Tsuki no Yoru Orochi no Chi ni Kuruu Iori, lit. Insane Iori with Blood of Orochi Under the Night of the Moon).[3] Aside from the main series, Iori appears in several other media series, including spin-offs, crossover video games and comic adaptations of the series.

Iori was created as Kyo's rival; his name and abilities were designed to relate him with the legend of Yamata no Orochi. The designers ended up liking him so much they are careful of the character's development as the series expands. As a result, Iori sometimes helps Kyo to have the opportunity to fight him. Finding his design appealing, new outfits presented the SNK staff with difficulties as they devised new appearances for the character that would retain his popularity.

Video game journalists have praised Iori Yagami as one of the most powerful characters in the series. Reviewers have also cited Iori as one of the best characters from the games, labeling him as a veteran character and praising his appearance as one of SNK's best creations. "Miss X", Iori's crossdressing form from SNK Gals' Fighters and the additional female one of SNK Heroines: Tag Team Frenzy, also received attention for its humor. A series of collectible items based on Iori's likeness, including key chains and figurines, have been manufactured.

Gameplay

Iori is a very versatile character whose moveset lends him to a rush-down/mixup style with damage mainly coming from his Rekka combos. Coupled with that, he has very serviceable pokes, good anti air, and a good reversal DP for use in defense and neutral situations. He also has one of the best poke RCs in the game with his Rekka, is the shortest character in the game, and has the best roll in the game.

His drawbacks are getting in against dominant "big button" characters (Sagat, Blanka, Cammy, etc), a relatively low ceiling of one shot burst damage (his supers aren't very strong), and characters who duck and outpoke his Stand Roundhouse.

In CvS2, he is often considered a "high" tier character, just below the established top tiers. He is a staple on N groove teams, as well as one of the Best SNK characters in the game. Conventional wisdom is that he is one of the easiest characters to use, and recent Japanese tourney play features him on two of the best players' teams. In C and A grooves, even.

Iori's what? Since people play better and more focused when they have a set goal in mind rather than "uh...imma just hit guy and win! And do combos!", it's good to know what your character's main objective is before playing. A kind of a fighting game thesis, if you will.

Iori's objective is to get within point blank range of his opponent.

(Simple, right? It's supposed to be)

Why?

Simple. When you're up close you have the threat of the Scum Gale grab, which lends itself to high damage 50/50 mix ups, all of which knock down the opponent and set up another mix up.

How is this objective accomplished? In order of best method to worst method: 1) Knocking the opponent down 2) Getting 3/4ths to full screen, throwing a jab fireball and running after it 3) Establishing Iori's strong mid-range ground game, which drains the opponent's guard bar. The draining of your opponent's guard bar entices him to make mistakes that enable you to achieve method 1). 4) By trying to roll through or jump/low jump over your opponent's moves.

Since 1) is hard to do on a good opponent and the distance for 2) can be difficult to establish, Iori spends most of his time doing 3).

Groove Selection

Best - N/C: N-Groove is Iori's best Groove for a few reasons. Iori has one of the best rolls in the game, and a great special to roll cancel with his rekkas. N-Groove gives him run and hop to aid his mixup and rushdown, and while the meter isn't great, level 1 Maiden Masher is an easy and simple confirm for a damage increase anyway. C-Groove is only a little behind, as while he gives up run and hop, he gets a very damaging level 2 combo in exchange that can be easily combo'd into. Air block and Alpha Counters are also helpful in a lot of situations.

Useful - A/K: A-Groove is a little behind, and Iori is usually ran on point. Custom Combo is powerful and useful, and Iori has a decent one. Lack of run or hop hurts his offense a bit, but it isn't a huge tradeoff, and he still has roll. K-Iori is a higher risk Iori, with a major downside in the missing roll. Rage makes him scary though, as one good hit confirms into level 3 Maiden Masher for big damage, and he can usually punish something after a JD.

Worst - P/S: P-Iori isn't bad, he gets good meterless reward after all. However, just like K-Iori, the missing roll is very hard to deal with as it's important to his gameplan. S-Groove isn't that bad for Iori, but it does make him lose his much needed roll and Level 3 super confirms for damage because of the constant need for charge, while he has the basics in run, hop, and dodge. Just that you will almost never have meter for a Level 3 Maiden Masher, but still; even getting a Level 1 Maiden Masher from any hitconfirm can be nice while Iori is in desperation mode.


Iori is a powerful rushdown vortex character, with great mixups from his hard knockdown rekkas. His neutral is also solid, with good pokes and one of the best RC specials in rekkas. He just has to be in range to utilize them. Iori is best in N-Groove and C-Groove.

Difficulty: Medium
Tier: A+
Pros Cons
  • Vortex: Amazing rushdown and mixup, with overheads, a command grab, a great low confirm, and a dedicated crossup command normal that all lead into a hard knockdown and another mixup
  • Pressure: Great pressure with his very useful jabs and mixing up with his rekkas
  • Strong Fireball: The best grounded fireball, as it recovers quite fast making it useful for pressure
  • Top Tier Roll: A stellar roll that recovers very very fast, allowing even for ambiguous crossups after some knockdowns, alongside an amazing roll cancel with RC rekkas
  • Simple: Easy to learn and a simple gameplan
  • Risk/Reward: Iori has to win neutral and begin his offense to secure the round, forcing him to play either patient and hunt for a hit or very risky to try and force the hit
  • Low Damage Super: Maiden Masher is easy to combo into but tends to do less damage than other supers of it's kind
  • Situational Pokes: His main poke, 5HK, can be ducked or low profiled, forcing him to rely on riskier or worse normals


Players to Watch

Name Country Groove Accounts Notes
GAO Japan C-Groove N/A One of the best players in the world. His Iori isn't insanely nuts like his Ryu, but he consistently closes games with him easily.
Sample Match
UWB Japan C-Groove N/A Fundamentally sound and never makes a big mistake.
Sample Match
GAN Japan A-Groove N/A A player who even gives BAS a run for his money. Lands Iori's customs like it's no challenge at all. Evo Japan 2019 Champion.
Sample Match
Gene Wong USA A-Groove Twitter: @genexiii
Discord: + 𝔇𝔢𝔩𝔭𝔥𝔦𝔫𝔬 +#1838
Once a prodigy of the game taught by John Choi. His execution makes you think that there might be robots living in our world.
Sample Match
Izumi Japan P-Groove Twitter: @IzumiSgroove Izumi uses P-Iori with extremely strong fundamentals despite no roll. Has a threatening shorthop game and strong parry punishes.
Sample Match
Tsugunosuke Japan N-Groove N/A The best N-Groover in Japan with a dominant Iori to match. Plays very aggressively.
Sample Match
Buktooth USA N-Groove Discord: buktooth#8799 Old school player, one of the OGs. Wrote the original CvS2 FAQs.
Sample Match
Yane Japan K-Groove Twitter: @yanechudan A secret weapon of his. Though Iori is not a consistent mainstay on his team, he still uses K-Iori extremely well.
Sample Match


Normal Moves

Far Standing Normals

5LP

Stand Jab
Far Light Punch
5LP / Far LP
CVS2 Iori 5lp.png
Version Damage Stun Cancel Guard Parry Startup Active Recovery Total Adv Hit Adv Block Invul
Far Lp.png 300 4 RF/SP/SU Mid Mid 2 4 8 14 +5 +5 None

While sharing almost the exact same traits as the close jab, the standing jab doesn't have that many tactical uses; You're too far away to tick into throws, and Iori's walking speed is too slow for repeated walk up jabs to set up anything threatening. If you're at this range hit low strong instead.

5MP

Stand Strong
Far Medium Punch
5MP / Far MP
CVS2 Iori 5mp.png
Version Damage Stun Cancel Guard Parry Startup Active Recovery Total Adv Hit Adv Block Invul
Far Mp.png 800 8 SP/SU Mid High 7 3 25 35 -5 -5 None

This move has the special property of being able to chain into Iori's f+strong. There's only one instance in which I use this move, and that's to combo after a connected Scum Gale. Even though it's a far reaching bufferable move, buffering into fireballs is not safe, and the move itself leaves much to be desired in terms of priority and speed. It reaches farther than the f+strong, but at that distance a fierce rekka ken will completely miss. Needless to say, a whiffed rekka ken will lead to a lot of hurt.

5HP

Stand Fierce
Far Heavy Punch
5HP / Far HP
CVS2 Iori 5hp.png
CVS2 Iori 5hp 1.png
Version Damage Stun Cancel Guard Parry Startup Active Recovery Total Adv Hit Adv Block Invul
Far Hp.png 1300/1400 13/14 SP/SU (1st part only) Mid High 7 5 26 38 -5 -5 -
  • Reading on the left of the commas refer to when Iori's head is going OUT. Reading on the right refers to when Iori's head is going UP.

This move doesn't really have much tactical use since the distance to get the bufferable version of the fierce is really specific. However, the bufferable version happens to be Iori's most damaging bufferable move, and there's ONE useful set up to get it shown below (see Running Grab).

5LK

Stand Short
Far Light Kick
5LK / Far LK
CVS2 Iori 5lk.png
Version Damage Stun Cancel Guard Parry Startup Active Recovery Total Adv Hit Adv Block Invul
Far Lk.png 500 5 SU Mid Mid 6 6 8 20 +3 +3 None

AKA "kickin 'em to da curb". Other than randomly whiffing it every now and then as a fake fireball, the only use for this move I have is for combos. See combo section.

5MK

Stand Forward
Far Medium Kick
5MK / Far MK
CVS2 Iori 5mk.png
Version Damage Stun Cancel Guard Parry Startup Active Recovery Total Adv Hit Adv Block Invul
Far Mk.png 1000 10 SU Mid Mid 6 3 26 35 -6 -6 -

I probably don't use this move as much as I should. It's quick, has surprising range, and even more surprising priority. I'd use it against characters that can crouch the standing roundhouse if you can get into the range to use it.

6/13/03 - Some Japanese players like to punish whiffs with s.forward into super, but I find that whenever I bait a whiff I'm too far away to hit with a s.forward. I just do a low/standing roundhouse instead. I also noticed that Japanese players have set-ups for COUNTER HIT s.forward and buffer the super on reaction, but to me that's in-humanly difficult (the window to buffer is 3 frames long, 1/20th of a second). That super isn't one that you want to have blocked.


5HK

Stand Roundhouse
Far Heavy Kick
5HK / Far HK
CVS2 Iori 5hk 1.png
CVS2 Iori 5hk 2.png
Version Damage Stun Cancel Guard Parry Startup Active Recovery Total Adv Hit Adv Block Invul
Far Hk.png 1300 13 None Mid Mid 9 7 22 38 -2 -2 -

Iori's best poke by far, despite having the distinction of being one of Iori's two crouchable moves. Any character bigger than a shoto is fair game, however. You can use it fairly liberally against the characters that cannot crouch it to slowly drain their guard meter and entice them into making a mistake that will get you the all-important knockdown Iori needs to get in. Be aware, though, that the move is not safe against a fast roll and that Sagat can punish you hard with a standing fierce into super if you whiff it.

Crouchable by half the cast (every female character, Ryo, shotos, Rolento, Haohmaru, Vega, Yun, Kim, Rock, Iori) Treat this move like a budget Sakura or Yamazaki stand RH (yama speed/damage, but -2 instead of +2 on block)

Close Standing Normals

cl5LP

Close Stand Jab
Close Light Punch
cl.LP / cl5LP
CVS2 Iori CL 5lp.png
Version Damage Stun Cancel Guard Parry Startup Active Recovery Total Adv Hit Adv Block Invul
Close Lp.png 400 4 RF/SP/SU Mid Mid 2 4 6 12 +7 +7 None

Iori's close jab is very useful for many reasons:

  1. ) Comes out in 2 frames, making it Iori's fastest move. 2 frames are as fast as moves get in CvS2 with the exception of Zangief's SPD, which is the only 1 frame move in the game. So what does this mean? Whenever you're in a situation where you have to mash a move, such as trying to avoid a throw, this is the move to mash.
  2. ) +7 advantage, also the most out of any of Iori's moves. 7 frames is a fairly huge advantage as far as CvS2 goes, meaning most links afterwards are brain-dead easy if the jab hits, and if blocked you have ample time to set up stuff safely like walk up to your opponent again and get another close jab. A perfectly timed close jab tick into Scum Gale (8 frames) is very difficult to reverse by jabs or throws. All tick throws can be escaped by jumps, however.
  3. ) At 400 damage, it's the most damaging out of all of Iori's weak attacks that can be chained together.

cl5MP

Close Stand Strong
Close Medium Punch
cl.MP / cl5MP
CVS2 Iori CL 5mp.png
Version Damage Stun Cancel Guard Parry Startup Active Recovery Total Adv Hit Adv Block Invul
Close Mp.png 800 8 SP/SU Mid High 7 3 25 35 -5 -5 None

Identical to 5MP. Can be a useful punish normal when used this close, but you would rather use cl.HP.

cl5HP

Close Stand Fierce
Close Heavy Punch
cl.HP / cl5HP
CVS2 Iori CL 5hp 1.png
CVS2 Iori CL 5hp 2.png
Version Damage Stun Cancel Guard Parry Startup Active Recovery Total Adv Hit Adv Block Invul
Close Hp.png 1200, 1100 12, 11 SP/SU* Mid High 3 6 24 33 0 0 None

For the commas above, the reading on the left refers to the first portion of the fierce, where Iori's fist is around his waist level. The second reading refers to when Iori's fist is over his head.

Outside of combos, the main use for this move is for anti-cross ups. Close roundhouse is your main anti-cross up, but you'll want to use close fierce against characters with bigger jumps like Blanka.

cl5LK

Close Stand Short
Close Light Kick
cl.LK / cl5LK
CVS2 Iori CL 5lk.png
Version Damage Stun Cancel Guard Parry Startup Active Recovery Total Adv Hit Adv Block Invul
Close Lk.png 500 5 SP/SU Low Low 3 4 10 17 +3 +3 None

Iori sticks out his leg at the opponents feet. Standing low, making it useful for mixups, and Iori's highest damage light, though it pays for these strengths by not being mashable.

cl5MK

Close Stand Forward
Close Medium Kick
cl.MK / cl5MK
CVS2 Iori CL 5mk.png
Version Damage Stun Cancel Guard Parry Startup Active Recovery Total Adv Hit Adv Block Invul
Close Mk.png 1000 10 SU Mid High 6 3 26 35 -6 -6 None

Identical to 5MK.

cl5HK

Close Stand Roundhouse
Close Heavy Kick
cl.HK / cl5HK
CVS2 Iori CL 5hk.png
Version Damage Stun Cancel Guard Parry Startup Active Recovery Total Adv Hit Adv Block Invul
Close Hk.png 1400 14 SU Mid High 6 3 21 30 3 3 None

Best used as an anti-cross up, only a few characters can get over this move that I can think of (Blanka and Chun Li). Also has the distinction of being Iori's most damaging move that can be buffered into a super. The link from a close jab is a one frame link though, meaning it's a little too difficult to do really consistently. How does Iori manage to kick so high with that funky little cord tying his legs together?

Crouching Normals

2LP

Crouching Jab
Crouching Light Punch
2LP
CVS2 Iori 2lp.png
Version Damage Stun Cancel Guard Parry Startup Active Recovery Total Adv Hit Adv Block Invul
D.png+Lp.png 300 3 RF/SP/SU Mid Mid 3 4 8 15 +3 +3 None

Decent 2LP, but it is entirely outshined by Iori's cracked cl.LP and 2MP. Since he has those two moves, you'll only really use this when mashing on defense if you don't want to stop blocking low.

2MP

Crouching Strong
Crouching Medium Punch
2MP
CVS2 Iori 2mp.png
Version Damage Stun Cancel Guard Parry Startup Active Recovery Total Adv Hit Adv Block Invul
D.png+Mp.png 900 9 SP/SU Mid Mid 4 6 9 19 5 5 None

A great move to throw out every now and then or to build meter, as it has high priority and recovers fast enough to be nearly impossible to punish on reaction. As the frame data shows, this move links into itself. Although it's a one frame link, 2 low strongs into fierce rekka kens does a whopping 4000 damage without a power up. That's clearly enough damage to be an incentive to go for the combo when the opportunity arises... particularly situations where you can throw out the low strong meaty, therefore making the link much easier in the process. Also, the +5 frame advantage basically insures the next move you throw out will not get beaten by your opponent and will actually produce a lot of counter hits. This makes guard crush strings like low strong, low strong, standing roundhouse possible.

The basic rule of thumb is if you're close but not within point blank range, hit low strong. It will beat most anything, and if blocked you can immediately do a standing roundhouse after for a nice big chunk of guard bar.

Whiffing it intentionally can also be pretty good against certain characters, as it tends to beat a lot of long range moves... especially the low ones. Blanka's low fierce and slide, Dhalsim's limbs, shotos' low forwards... they all get beat cleanly by this move.

6/13/03 - the move also makes for Iori's best and safest meter builder in a pinch. I really wouldn't make turtling and building meter a core strategy with Iori, though, since he builds meter so much faster just by playing normally. However, if you're a few slivers away from having that 2nd meter, by all means mash on low strong.

6/13/03 - Sometimes your opponent will randomly be able to block a rekka ken after a max range low strong. Even worse, sometimes it whiffs completely for no apparent reason. 99% of the time it works fine, but sometimes the low strong x2 combo goes awry.

2HP

Crouching Fierce
Crouching Heavy Punch
2HP
CVS2 Iori 2hp.png
Version Damage Stun Cancel Guard Parry Startup Active Recovery Total Adv Hit Adv Block Invul
D.png+Hp.png 1100 11 SP/SU Mid Mid 4 5 20 29 -1 -1 None

Iori's other crouchable move. It doesn't really matter, though, since you'll probably never use this move as anything except as an anti-air at the 45 degree angle. It works fairly well as anti-air as long as you stick it out early enough, but it does tend to trade with the really high priority jump ins. When you use it as anti air you can buffer it into a fierce fireball to make your opponent land on it, but I would recommend throwing a jab fireball instead so that you can run after it and use it as cover to attempt to get in.

2LK

Crouching Short
Crouching Light Kick
2LK
CVS2 Iori 2lk.png
Version Damage Stun Cancel Guard Parry Startup Active Recovery Total Adv Hit Adv Block Invul
D.png+Lk.png 200 2 RF/SP/SU Low Low 4 4 8 16 5 5 None

Used mainly as your low combo starter and as a roll punisher, this move is pretty self-explanatory. Low shorts x3 into rekkas whenever the opportunity arises. The +5 frame advantage also lends this move into being another good Scum Gale tick, with the added advantage that people tend to sit and block after blocking one low short... they expect two more. The main weakness of this move is its relatively slow speed at 4 frames. When situations arise where you need a fast move, mash on standing/low jab (depending on distance) instead.

2MK

Crouching Forward
Crouching Medium Kick
2MK
CVS2 Iori 2mk.png
Version Damage Stun Cancel Guard Parry Startup Active Recovery Total Adv Hit Adv Block Invul
D.png+Mk.png 800 8 SU Low Low 5 4 20 29 -2 -2 None

I hardly ever use this move since low strong is just better all around. Also, the animation of this move is very misleading. Iori's entire foot doesn't have an active hitbox on it, making the move a lot shorter than it looks. Its actual range is nearly identical to Iori's low short, which is a lot better move to use in more situations. However, the move can only be canceled into supers, so if you're having a tough time landing B&B's into maiden masher due to accidental moves coming out, this could certainly help you out. You can also toss the move out and empty buffer the super behind it ala Chun in 3rd strike, but the hitbox on the move isn't THAT good.

2HK

Crouching Roundhouse
Crouching Heavy Kick
2HK
CVS2 Iori 2hk.png
Version Damage Stun Cancel Guard Parry Startup Active Recovery Total Adv Hit Adv Block Invul
D.png+Hk.png 1300 13 N/A Low Low 9 4 36 49 DWN -16 N/A

In my opinion, use of the low roundhouse is what makes or breaks an Iori user.

The move is usually essential to get in against an opponent with good defense since you can't always rely on low jumping, rolling, or guard crushing your way in. How is the move used? Well the best application of the move would be to punish a whiffed move that you baited out. The less recommended use would be to catch somebody standing from roughly 1/3rds screen distance away. This works most often against footsie-reliant characters like Chun Li or Cammy since they're generally never crouching unless you're right next to them.

The move has tremendous recovery, meaning throwing it out without being SURE it's going to hit will certainly be the death of you. At max distance it's generally safe if blocked, but most any level 3 super will punish it fairly easily. If it's whiffed, well... you're gonna get hurt. Bad.

A connected roundhouse rewards you with the all-important knockdown that insures Iori's way in. After a successful low roundhouse you can either walk forward a bit and go for cross up/non-cross up roll mix ups, or run forward a bit and go for a jumping cross up. An opponent that tech rolls the low roundhouse is impossible to punish, unfortunately, so the best thing to do if this happens is to throw a jab fireball and run after it.

7/5/03 - SOMETIMES you can punish a tech-rolled low roundhouse with another run-up low roundhouse. Doesn't really work if the first low roundhouse was at the absolute max distance, though, and it works a lot better on big characters.

Try to low roundhouse tech rolls on reaction, rather than guessing. However, of all the times that I've whiffed a low roundhouse against an opponent who didn't tech roll, I don't recall being punished for it once. In fact, I've hit several uppercuts on people who've tried to punish it. Hrmm... to be safe, though, I'd recommend RC rekka'ing instead of doing uppercuts after the whiffed low roundhouse.

Air Normals

8LP

Jumping Jab
Jumping Light Punch
j.LP
CVS2 Iori 8lp.png
Version Damage Stun Cancel Guard Parry Startup Active Recovery Total Adv Hit Adv Block Invul
Ub.png/U.png/Uf.png+Lp.png 600 6 None High High 3 22 0 27 Varies Varies None

I don't use this personally, but I've seen many good Iori users use this as their preferred jump in. It has pretty good priority and sticks out for a long time, too. Low jumping and immediately pressing jab is an overhead on every character in the game, but you might as well use jumping strong if you're gonna do that.

7/5/03 - This probably Iori's best option if you want to jump directly on top of your opponent's head. Jumping roundhouse and strong also work well for that purpose, but I've noticed that this move beats a lot of anti-airs meant to hit directly above the opponent's head. Use this when jumping on an opponent in the corner.

8MP

Jumping Strong
Jumping Medium Punch
j.MP
CVS2 Iori 8mp.png
Version Damage Stun Cancel Guard Parry Startup Active Recovery Total Adv Hit Adv Block Invul
Ub.png/U.png/Uf.png+Mp.png 900 9 None High High 4 7 0 11 Varies Varies None

Probably Iori's highest priority jump in, also a decent air to air due to its high speed. Range is a little lacking, though. Low jumping and immediately pressing strong is also an instant overhead on every character in the game. Do it while jumping backwards to make it safer. Low jumping forward and hitting strong gives the overhead surprising range, though; you can still connect it after doing three low shorts.

6/13/03 - Dunno why I didn't add this before, but low jumping BACKWARDS and doing overhead strong still works, and is a whole lot safer. You do have to be quite a bit closer, though. It works after doing one jab/short.

8HP

Jumping Fierce
Jumping Heavy Punch
8HP
CVS2 Iori 8hp.png
Version Damage Stun Cancel Guard Parry Startup Active Recovery Total Adv Hit Adv Block Invul
Ub.png/U.png/Uf.png+Hp.png 1300 13 None High High 11 3 0 14 Varies Varies None

Iori's highest damage jump in, so this is the one to use when your opponent is dizzy. It comes out painfully slow, but not slow enough so that you can use it for fakes to land a Scum Gale.

8LK

Jumping Short
Jumping Light Kick
8LK
CVS2 Iori 8lk.png
Version Damage Stun Cancel Guard Parry Startup Active Recovery Total Adv Hit Adv Block Invul
Ub.png/U.png/Uf.png+Lk.png 500 5 None High High 4 22 0 26 Varies Varies None

Solid reach and lots of active frames make this a decent air-to-air, but it sees no real use otherwise

8MK

Jumping Forward
Jumping Medium Kick
8MK
CVS2 Iori 8mk.png
Version Damage Stun Cancel Guard Parry Startup Active Recovery Total Adv Hit Adv Block Invul
Ub.png/U.png/Uf.png+Mk.png 900 9 None High High 5 10 0 15 Varies Varies None

Similar kick to j.LK, but trades high active frames for damage. Same as a good air-to-air, and also sees very little use otherwise.

8HK

Jumping Roundhouse
Jumping Heavy Kick
8HK
CVS2 Iori 8hk.png
Version Damage Stun Cancel Guard Parry Startup Active Recovery Total Adv Hit Adv Block Invul
Ub.png/U.png/Uf.png+Hk.png 1200 12 None High High 7 8 0 15 Varies Varies None

Iori's furthest reaching jump-in. Useful for when you jump over fireballs to ensure you reach, or just for air poking in general. Makes a decent air-to-air just like his other jump kicks.

Throws

Sakahagi (Punch)

Sakahagi
Punch Throw
Near Opponent, 4/6HP
CVS2 Iori Throw.PNG
Version Damage Stun Cancel Guard Parry Startup Active Recovery Total Adv Hit Adv Block Invul
Close B.png/F.png+Hp.png 1800 0 None Grab Grab 3 1 13 17 DWN Grab None

Iori grabs the opponent and tosses them away with a quick scratch. Standard punch throw, 3 frame startup makes it useful for punishing tight gaps and moves that are only slightly negative, but it does lower damage than his slower kick throw.

Sakahagi (Kick)

Sakahagi
Kick Throw
Near Opponent, 4/6HK
CVS2 Iori Throw.PNG
Wait, why does he have this twice!?
Version Damage Stun Cancel Guard Parry Startup Active Recovery Total Adv Hit Adv Block Invul
Close B.png/F.png+Hk.png 2000 0 None Grab Grab 5 1 13 19 DWN Grab None

Iori does a throw exactly like his punch throw. Despite being the same animation and sharing a name, this does have the standard kick throw difference of being slower but higher damage. Useful for throw mixups, but since Iori has a very rewarding command grab, you'll usually only go for this when you can't do the input for command grab fast enough.

Command Normals

Ge Shiki: Yumebiki

Ge Shiki: Yumebiki
Lunge Punch
6MP
Version Damage Stun Cancel Guard Parry Startup Active Recovery Total Adv Hit Adv Block Invul
F.png+Mp.png 800 8 SP/SU Mid High 8 7 24 39 -8 -8 None

Iori reaches forward for a punch. On it's own, not a bad whiff punish thanks to the forward movement and cancel. You can easily cancel this into 214HP Rekka for a combo or a blockstring. This also is a Target Combo from 5MP, which would be awesome for confirms if 5MP was a move you used for confirms often. This means it's mostly used raw as a whiff punish. Make sure you always cancel into either a rekka or a fireball, as you leave yourself -8 if not.

Ge Shiki: Gofu-in 'Shinigami'

Ge Shiki: Gofu-in 'Shinigami'
Overhead
6MK
CVS2 Iori 5f+mk.png
Version Damage Stun Cancel Guard Parry Startup Active Recovery Total Adv Hit Adv Block Invul
F.png+Mk.png 1000 10 None High High 33 3 17 53 0 0 None

Iori winds up before dropping an axe kick on the opponent. Sadly slow overhead, but still useful as a meaty since it's 0 on block while most overheads tend to be slightly negative. Used from neutral however, it's more than likely that your opponent will reversal through this, mash out, or just escape the situation, none of which are good for Iori. This risk makes the 1000 damage reward pretty low, so outside of a meaty overhead mixup, you won't use this much.

Ge Shiki: Yurioki

Ge Shiki: Yurioki
Crossup
j.4LK
CVS2 Iori 8 4lk.png
Version Damage Stun Cancel Guard Parry Startup Active Recovery Total Adv Hit Adv Block Invul
In Air B.png+Lk.png 500 5 None High High 5 12 0 17 Varies Varies None

Iori sticks his leg out behind him. Stellar crossup, and a key part of Iori's signature vortex. Unlike the KOF games, your input is actually reversed when jumping over the opponent, so you will always do this as j.4LK on both sides. Since it's a light hit, combos from it require a pretty deep connect. Usually you'll get cl.LP, cl.HP > Rekkas, which is more than enough of a reward, but if you hit them around head height it won't combo to much of anything.

Special Moves

Rekka Kens

Deadly Flower / "Hyakunijuunanashiki Aoihana "
Rekka
214+P
CVS2 Iori rekka 1.png
CVS2 Iori rekka 2.png
CVS2 Iori rekka 3.png
Version Damage Stun Cancel Guard Parry Startup Active Recovery Total Adv Hit Adv Block Invul
Qcb.png + P.png
1st Rekka
400/500/600 2 None Mid Mid 12 4 29 45 -5 -5 N/A
Qcb.png + P.png
2nd Rekka
400/500/600 2 None Mid Mid 12 4 37 53 -DWN -13 N/A
Qcb.png + P.png
3rd Rekka
800/900/1000 5 None High High 16 8 40 64 -DWN -13 N/A

There's a 25 frame window to cancel the first rekka into the second rekka. From the second to third hit there's a 27 frame window to cancel. The different damage numbers correspond to different button strengths.

Outside of its obvious use in combos, the rekka ken doesn't have much use. Start RCing it, though, and you have a different beast entirely. The result is a high priority (invincible, even), high damage (2200 if you get all 3), long range (Iori's longest ranged move, farther than his standing/low roundhouses) poke that enables Iori to compete with the Sagats and Cammys of the world.

The catch? The move carries a ton of risk behind it. As much as a fireball, even. The move is most easily punished by either a straight up jump (which results in a full jump in combo since Iori conveniently moves right under them) or a well timed roll. The move can also be baited into whiffing and then easily punished also, this can be negated by completing the entire rekka set and leaving you far from your opponent, hard to punish if they are ready for it. As if that weren't enough, the move isn't even totally safe if blocked! As you can see from the data above, the move carries a -5 frame disadvantage, enough for a few characters to get a low forward combo in. However, the move is mostly safe if blocked around max distance, though. You can actually punish attempts to hit a well-ranged RC rekka ken with... another RC rekka ken! DO NOT fall into the habit of doing RC rekka ken, then another RC rekka ken, though. It's killed me more times than I care to remember.

If your rekka ken is rolled through, try to get away from the opponent by doing the second and third rekkas. This works well if you're in the middle of field, but if you're opponent was in the corner you're not going anywhere.

So given all those ways to punish the move, how does Iori go about using the RC rekka without getting killed? The first step is to punish your opponents attempts to stop the rekka ken; anti-airing straight up jumps with either standing roundhouse or a super, punishing rolls with Iori's easy assortment of damaging rekka ken combos. The second step is to try to not fall into patterns; even if you punish every single random straight up jump or roll that your opponent does you will still get killed if you fall into the habit of RC rekka ken'ing in the same situations every time. Once you've got your opponent grounded and playing the ground game with you, THEN you can throw in the RC rekka kens every now and then.

The second and third rekka kens are obviously very unsafe, so do not continue the series unless you SEE the first one hit. Luckily doing the first rekka ken and then reacting to whether it was blocked or not is pretty easy, just watch your opponent's sprite and then continue if you see the sprite flinch.

Aside from its usefulness as a powerful footsie tool, I also use the RC rekka ken to pressure fallen opponents in the corner, since you cannot cross them up with your rolls or jumps like you normally can. Meaty RC rekka ken (done from a good distance) is almost totally safe for the most part. If the opponent wakes up and does anything besides block he gets hit. This conditions the opponent to not wake up with uppercuts or supers, which in turn lets you do Iori's powerful mix ups on rising opponents.

You can punish an opponent tech rolling rekka kens by running forward a bit and doing f+strong into rekka kens. It's great when you get it but it's a little difficult. People who get hit by that usually never tech hit again, though. Heh.

After knocking an opponent down with the rekka kens you can either run forward a bit and superjump for the b+forward cross up, or run forward a bit and roll to cross up. For the most part the second option is better since it's really dificult for your opponent to wake up with an uppercut since the cross up happens so fast. However, doing a super jump cross up every now and then is recommended to keep your opponent on his toes with some cross up b+short into Scum Gale set ups.

6/13/03 - Unlike most cross-up setups, since Iori's rekkas have a good deal of recovery, the cross up b+short after a connected rekka series isn't meaty. In fact, your opponent has time to jump before you hit the b+short. C-Groove can air block it and land safely far enough away to be out of Iori's mix up range, but other grooves take the hit and bounce, allowing you to throw a meaty jab fireball they have to land on which also covers your run-in. That's even worse than blocking the cross up, so most non-C-Groove players will just get up and block the cross up. If you are playing against C-Groove, just do the roll mix-ups. Another thing to add about the b+short cross up on wake up, it's a lot more difficult to uppercut than other cross ups. Since Iori crosses you up late you cannot do the normal f,df,d,db method for cross up uppercuts. You have to actually wait till the last second and input the uppercut command in the other direction.

6/13/03 - Something to keep in mind: If you roll after knocking the opponent down with rekka kens and end up in FRONT of your opponent, you have a slight advantage since your roll ended just before your opponent gets up. However, if the roll ends up BEHIND the opponent, the opponent can actually throw you for free since it takes a bit longer to get to that distance. Mix it up. If you end up in front of your opponent and he's mashing on throw, you can easily get counter hit jabs/shorts into a combo.

6/13/03 - Something I forgot to add. Iori's rekkas (as well as Kyo's) do very little stun damage. A full triple-hit series gets you 2200 damage, but only does 9 stun damage on the opponent. This is one of the few moves that is the exception to CvS2's "stun = damage/100" rule.

Man. That's a lot written about one move. It's a necessary move, though. It's like Iori's missing link.

Dragon Punch

Fire Ball / "Hyakushiki Oniyaki"
Uppercut
623+P
CVS2 Iori hp dp 1.png
HP version
CVS2 Iori hp dp 2.png
HP Version
CVS2 Iori hp dp 3.png
HP Version
Version Damage Stun Cancel Guard Parry Startup Active Recovery Total Adv Hit Adv Block Invul
Dp.png + Lp.png 1700 17 None Mid Mid 4 10 38 52 DWN -33 4 (full), 10(lower)

Footsies DP

  • Because this version is 1 hit and has a lot of lower invincibility (not to mention lower recovery), it's best used in the neutral game or when the opponent is far from Iori.
Dp.png + Mp.png 700+1100 7+11 None Mid Mid 4 [3/9] 48 64 DWN -42 7 full/ 9 lower

Best DP

  • This version has the highest amount of total invulnerability, so it's the best wakeup reversal and anti air. Make sure to hit the opponent deep to get both hits, otherwise you're missing out on damage compared to LP.
Dp.png + Hp.png 400+600+1000 4+6+10 None Mid Mid 4 [2/2/5] 59 72 DWN -51 6 full/ 7 lower

Most Damage DP

  • This is the damage DP. Perfectly usable as anti air or reversals, but only when the opponent is point blank. Also the recovery is so bad, Iori loses okizeme opportunities by using it.

Fireball

Dark Thrust / "Hyakuhachishiki Yamibarai "
Fireball
236+P
CVS2 Iori fireball 1.png
CVS2 Iori fireball 2.png
Version Damage Stun Cancel Guard Parry Startup Active Recovery Total Adv Hit Adv Block Invul
Qcf.png + Lp.png 800 8 None Mid Mid 12 - 45 57 -12 -12 N/A
Qcf.png + Mp.png 900 9 None Mid Mid 12 - 45 57 DWN -12 None
Qcf.png + Hp.png 1000 4+6+10 None Mid Mid 12 - 45 57 -12 -12 N/A

As far as ground fireballs go, Iori's is the second best in the game. That's not really saying much, though, since ground fireballs as a whole really suck and are vastly inferior to conventional air-based fireballs.

Unfortunately, Iori's fireball is a very necessary tool for him, both as a footsie tool and as a means to get in. 3/4ths to full screen away throw a jab fireball and run after it to get in. 2/5ths to half screen away use it as a footsie tool. Any closer and you should never use it. NEVER buffer a fireball off of a normal move. Your opponent can easily roll on reaction and kill you. Also, since varying ground fireball speeds really doesn't get you anywhere, always throw jab fireballs since those you can follow easily. The other two speeds are unnecessary to the way Iori plays.

One of the main reasons that Iori is dependant on his fireball is because CvS2 is a game where you cannot walk backwards if there is something on the screen you can block. Meaning, if Iori throws his fireball and runs after it, his opponent cannot keep his distance by walking backwards as he will go into his blocking animation. This is a very handy tool, especially when fighting characters who walk backwards stupidly fast like Vega, Cammy and Chun Li.

The fact that the fireball is so essential to Iori and that it's a ground fireball is really bad. Characters that can easily punish ground fireballs like Bison, Blanka or Honda all give Iori a really hard time. RCing the fireball doesn't really make a difference either, since you never want to do the fireball up close, and if you RC it from far away the invincibility is gone by the time your opponent reaches you with a Psycho Crusher or Blanka Ball or whatever. Bleh.

Running Grab

212 Shiki: Kototsuki In / "Nihyakujuunishiki Kototsuki In "
Running Grab
63214+K
CVS2 Iori running hit grab 1.png
CVS2 Iori running hit grab 2.png
Version Damage Stun Cancel Guard Parry Startup Active Recovery Total Adv Hit Adv Block Invul
Hcb.png + Lk.png 1800 0 None Mid Mid 5 32 12 49 DWN -18 N/A
Hcb.png + Mk.png 1900 0 None Mid Mid 5 48 12 65 DWN -18 N/A
Hcb.png + Hk.png 2000 0 None Mid Mid 5 64 12 81 DWN -18 N/A

The above frame data for the three button strengths represent what happens if Iori never makes contact with the enemy. For example, a roundhouse whiffed Running Grab has 5 frames start up, runs for 64 frames, then has 12 frame recovery. If at any time during those 64 frames of running Iori makes contact with his opponent, he then takes 4 frames for his arm to whip around, which has an active hitbox for 5 frames, and has a 29 frame recovery. Whew! Writing and explaining frame data isn't easy!

Most of the time I wish this move simply didn't exist, since 90% of the times I use it is totally on accident screwing up the command for RC rekka kens. As the -18 frame disadvantage tells you, this move isn't anywhere near safe if blocked. It's also very vulnerable if the move whiffs completely also, unlike Kyo's.

It does have its tactical uses, though. As stated above, the move does almost the exact same amount of guard bar damage as a jab uppercut (if you don't know, that's a lot), so if your opponent's guard bar is flashing and you can't get close enough to do a fierce into jab uppercut to guard break you can do f+strong into Running Grab instead. And again, guard breaking with a Running Grab just happens to leave you at the perfect distance to get a damaging far fierce into rekka kens. Another use for this move is to chip somebody to death. If you're not within fierce uppercut range to chip somebody (fierce uppercut does 325 points of chip damage), the next best option is to f+strong into Running Grab, as that does 300 chip damage. 2 Rekka kens only do 200 damage, and a fireball does 100. 300 damage from the running grab is enough to insure that you never fall victim to the "Magic Pixel" that has claimed many a player. RCing the move can be useful from time to time, like when you REALLY need that chip damage to kill the opponent but can't find a way to f+strong them, or to punish somebody buffering moves into a fireball. You could theoretically use an RC Running Grab as an anti-air from afar, but I wouldn't recommend it since the move comes out pretty slow.

Scum Gale

Kukukaze
Scum Gale
632146+P
CVS2 Iori 632146Pwhiff.png
Whiffed
CVS2 Iori 632146Phit.png
Landed
Damage Stun Cancel Guard Parry Startup Active Recovery Total Adv Hit Adv Block Invul
0 0 None N/A N/A 8 1 32 41 +12 N/A N/A

Iori's famous side-switching command grab. This special is what makes Iori's offense so deadly. It's not only an unblockable command grab, but the opponent is stuck in hit stun after the grab, allowing you to combo off of it. This move is deadly because Iori has a very rewarding strike/throw mixup, as both lead to a good knockdown and damage. Mix that up with his crazy good jab and his roll and this move becomes very powerful. The only weakness this move has outside of having fairly lengthy startup for a command grab (8F) is that it switches sides, so you give up the corner for a mixup. It's still around 3.7K damage you're getting so it's not too bad. You can even try to command grab them again after they recover from the hitstun of the previous command grab, although in most contexts you just want to get the damage.

There are usually two main follow-ups from the command grab, a max damage one and a safe fall bait one.

Max Damage Route: (Grab), 5MP > 6MP xx Rekkas / Ranbu
This is the optimal damage follow-up on a command grab, utilizing Iori's 5MP > 6MP target combo. It's really easy as well. If you have the resources, you can also combo into Iori's ranbu super off of this.

Safe Fall Bait Route: (Grab), Microwalk 5MP xx LP DP, 2HK if opponent safe falls
This is a route that's usually done to specifically kill safe falls. LP DP gives Iori enough time to walk forward and do a sweep if the opponent safe falls, but of course in the corner he gets a better punish. Against non safe-fall grooves always go for optimal damage, but even in the case of safe fall grooves this should only be used if the opponent is just spamming safe falls.

Super Moves

Maiden Masher

Maiden Masher / "Sansennihyakujuuichishiki Yaotome "
Rush Super
23663214+P
CVS2 Iori Lvl 1 maiden masher.png
CVS2 Iori Lvl 1 maiden masher 2.png
CVS2 Iori Lvl 1 maiden masher 3.png
Version Damage Stun Cancel Guard Parry Startup Active Recovery Total Adv Hit Adv Block Invul
Qcf.pngHcb.png + Lp.png 2200 0 None Mid Mid 4:8 8 33 53 DWN -10 8full/12upper
Qcf.pngHcb.png + Mp.png 3700 0 SP/SU Mid Mid 4:8 24 33 69 DWN -10 14 full/ 22 upper
Qcf.pngHcb.png + Hp.png 5000 0 None Mid Mid 4:8 24 33 69 DWN -10 22full/ 30 upper

Your basic all-purpose super; functions as anti-air, anti-fireball, anti-poke, works in combos. There's a few unique things about it, though: the upper body invincibility granted to the move give it the ability to punish fireballs from much farther away. Other supers run out of invincibility if you do it too early, and if you wait long enough to go through the fireball the opponent has usually recovered already. The upper body invincibility also makes ths move great for punishing straight up jumps, even at level 1.

6/13/03 - If you try to anti-air with the super and your opponent didn't press anything they will be able to land and block it every time. Fortunately most people never jump up and down without pressing anything, and if they do you can just standing roundhouse them instead. Something to think about vs P and K grooves, though.

On the down side, the super's damage is pretty low. Level 1 damage is the same as a set of fierce rekka kens, so you should only use level 1's as straight up jump anti-air. Level 3 damage is a below-average 5000. Not earth shattering, but still enough to warrant its use. One should note that a connected level 3 super switches sides with the opponent also.

The range on the level 1 version of the super isn't nearly as long as you'd think it is. It's roughly the same range as a fierce rekka. Luckily, that's well within the range to hit Sagats, Blankas and Bisons jumping up and down.

The range on the level 3 is obviously a lot better, and it has an added benefit: When you're throwing fireballs as a footsie tool and your opponent jumps straight up over it, sometimes when you try to anti-air their straight up jump with a level 3 they get pushed BACK into the fireball they just jumped over. This not only makes the super safe, it gives you frame advantage AND puts you right into point blank range for a free mix-up. Doesn't happen EVERY time your opponent jumps over your fireball, though. It's kinda random. =/

Whenever you hit with the level 1 super you get a free roll cross-up that's one of the most ambiguous out of all of Iori's set ups. Also, your opponent can't tech roll to safety since you can't tech roll supers. Run forward about half a second and roll. TOTALLY ambiguous. Makes up for the measly 2200 damage pretty well... justifying the use of a meter. Iori gets meter fast anyway.

Unfortunately, hitting with a level 3 doesn't set up much of anything since your opponent is thrown really far away and Iori doesn't recover until the opponent is almost fully standing. Just throw a jab fireball as they're getting up and run after it.

"One-For-The-Road" Blast

"One-For-The-Road" Blast
Pillar Super
21441236+P
CVS2 Iori Lvl 1 wine cups hold.png
Charging
CVS2 Iori Lvl 1 wine cups release 2.png
Traveling Hitbox
Version Damage Stun Cancel Guard Parry Startup Active Recovery Total Adv Hit Adv Block Invul
Qcb.pngHcf.png + Lp.png 1400 0 Non Mid High 5:1~60, 21 Traveling 50 77~136 Freeze -15 1~9 (Full)
Qcb.pngHcf.png + Mp.png 1600 0 SP/SU Mid High 5:1~60, 21 Traveling 50 77~136 Freeze +29 1~15 (Full)
Qcb.pngHcf.png + Hp.png 1800 0 None Mid High 5:1~60, 21 Traveling 50 77~136 Freeze +29 1~23 (Full)

Iori tosses a fireball that then explodes into pillars. Each level gets more pillars, with level 1 only getting one and not traveling far, level 2 getting 4 and traveling a little over a third of the screen, and level 3 getting 8 pillars and traveling well beyond fullscreen. On hit, these cause a unique flame freeze effect. The opponent will be coated in Iori's signature purple fire, and will slowly take hits of damage. The level 1 version hits 4 times before knocking down, the level 2 version hits 5 times, and the level 3 version hits 6 times. During this frozen time, Iori can hit with any move, though this will instantly end the freeze. You always want to wait a few hits to maximize the damage, preferably until the last hit that doesn't knock down. This super can also be charged, hence the double value on the startup time. However, regardless of minimal charge or not, comboing into this is impossible in most situations outside A-Groove. It lacks much neutral utility outside of gimmicky callouts, and the cost is fairly high. Maiden Masher is overall a MUCH more useful super in almost every situation, and you would almost always rather save the meter for that than spend it on this.

Note: The opponent can mash to leave the freeze state faster, you can't get a jump in combo on a level 1 grounded freeze if mashed.

Colors
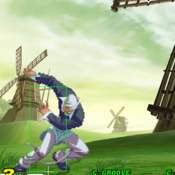
Iori CvS2 colors.png


CvS2 Wiki Navigation

General
Controls
Notation
HUD
Glossary
System
Roll Cancel
Combo
CvS2 Versions
Netplay/ Training
FAQ
Grooves
Groove Overview
Groove Subsystems
C-Groove
A-Groove
P-Groove
S-Groove
N-Groove
K-Groove
Capcom Characters
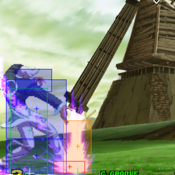
Akuma (Gouki)
Balrog (Boxer)
Blanka
Cammy
Chun-Li
Dan
Dhalsim
Eagle
E.Honda
Guile
Ken
Kyosuke
Maki
M. Bison (Dictator)
Morrigan
Rolento
Ryu
Sagat
Sakura
Vega (Claw)
Yun
Zangief
SNK Characters
Athena
Benimaru
Chang
Geese
Haohmaru
Hibiki
Iori
Joe
Kim
King
Kyo
Mai
Nakoruru
Raiden
Rock
Rugal
Ryo
Terry
Todo
Vice
Yamazaki
Yuri
Boss Characters
Shin Akuma
Ultimate Rugal
Evil Ryu
Orochi Iori