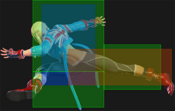
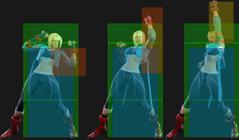
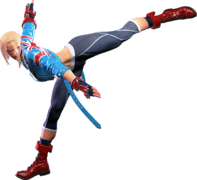
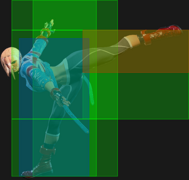
| Early game information
This game is relatively new, and its pages are still being written. Some information may be mildly inaccurate or missing altogether. You can join the SF6 Resource Hub for more info on editing and other ways you can potentially help with this resource. |
Introduction
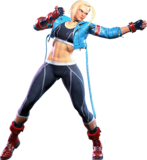
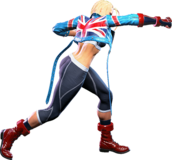
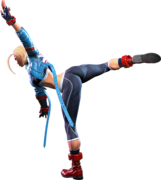
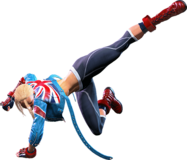
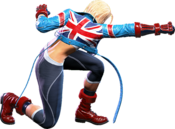
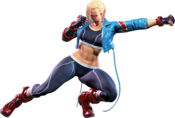
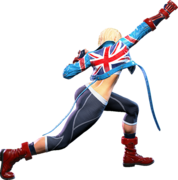
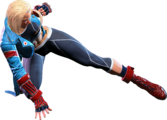
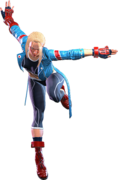
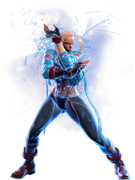
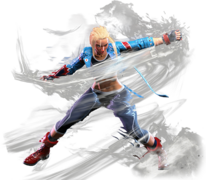
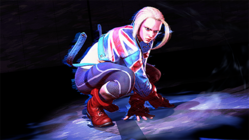
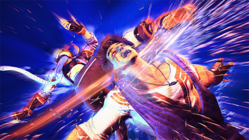
Member of British special forces unit Delta Red. Distinguished herself in the operation against Shadaloo, with which she shares a fated connection. Hyper-competent but somewhat moody. Currently working at HQ.
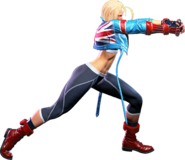
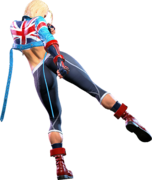
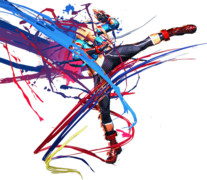
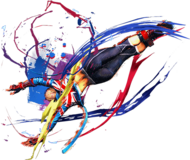
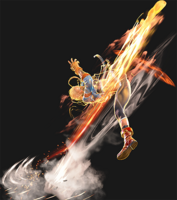
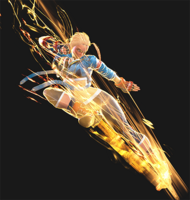
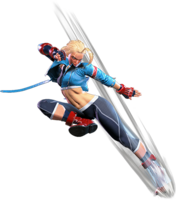
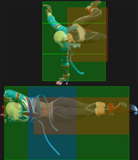
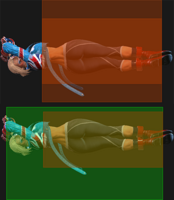
Cammy specializes in quick attacks and movement, closing the gap with her walkspeed and moves to run a high-pressure, close-range offense with the ability to whiff punish careless opponents for overstepping. Cammy can easily evade and counterhit careless attacks from the opponent, which lets her get in and start laying down rushdown pressure to keep the opponent locked down.
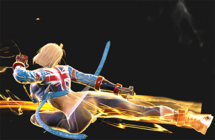
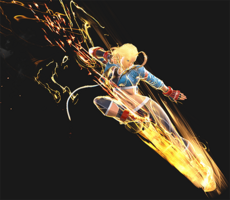
To that end, 5LP, 2LP, and 5LK are her main pressure tools up close or from walking in that allow her to confirm into Spiral Arrow for knockdowns and corner carry. 5MK, 2MP, and 2MK are especially good at mid-range poking, counterpoking, and punishing; 5HP, 2HP, and 5HK are built for punish countering big moves and giving Cammy room to advance on the opponent in various ways, whether they be links, hard knockdowns, target combos, or Drive Rush Cancels. Her special moves also do a great job at letting her close the gap between her and the opponent to keep things pushing when they really overextend. Spiral Arrow can clip opponents from much farther away than even her longest normals, and her Cannon Strike is a divekick that crushes low attacks and lets her confirm into combos when spaced correctly. Cannon Spike is a DP that rounds out the anti-air options provided by 4MP, 4HK, and her air throw, and Quick Spin Knuckle plays double duty as a gap-closing complement to Spiral Arrow that lets her skip through projectiles with the MP, HP, and Overdrive versions.
Once she's in and on top of the opponent, or has pushed them to the corner, Cammy can utilize her normals alongside other system mechanics to enforce a powerful strike/throw game or set up for oppressive okizeme tactics with her light punches, 5MP, and 2HP. One of her strongest tools once she's gotten into the opponent's head at close-mid range is Hooligan Combination, an advancing attack with three separate jump arcs and five separate follow-ups; combined with her other buttons, this lets her run a terrifying set of mixups if prepared correctly. Cammy often needs to sacrifice meter for an OD move or a Drive Rush connection to make Hooligan setups work, but once she's paid the price, she gains access to an extremely versatile mixup tool that has excellent payout regardless of the option she picks.
Cammy can also charge up the heavy versions of her Spiral Arrow, Cannon Spike, and Hooligan Combination, increasing their startup time but gaining most of the properties of their Overdrive equivalents in exchange. While these require a bit more setup to use, they can also let her get the benefits of the Overdrive versions at no cost to her Drive Meter, which lets her preserve it for other uses.
In exchange for Cammy being so dangerous once she's managed to close the gap, she does not have a fireball to help her control space, nor a grounded overhead to assist her with strike/throw mix. Many of her gap-closing and offensive options are also easily called out if the opponent makes the right read (particularly things like badly spaced Spiral Arrows, Spin Knuckles, and raw Hooligans), which brings an element of risk to Cammy's gameplay that requires having a good sense of timing and being willing to commit to potentially dangerous options in order to get a potential payoff. If you enjoy a character that strikes an even balance between rushdown, pressure, and precision counterpoking, then accept the mission of infiltrating your opponent's defenses with Cammy.
| Pick if you like: | Avoid if you dislike: |
|---|---|
|
|
Classic & Modern Versions Comparison
| Missing Normals |
|
|---|---|
| Missing Command Normals |
|
| Shortcut-Only Specials |
|
| Miscellaneous Changes |
|
| Cammy | |
|---|---|
| Vitals | |
| Life Points | 10000 |
| Ground Movement | |
| Forward Walk Speed | 0.0505 |
| Backward Walk Speed | 0.033 |
| Forward Dash Speed | 18 |
| Backward Dash Speed | 23 |
| Forward Dash Distance | 1.32 |
| Backward Dash Distance | 1.002 |
| Drive Rush Min. Distance (Throw) | 0.603 |
| Drive Rush Min. Distance (Block) | 2.027 |
| Drive Rush Max Distance | 2.796 |
| Jumping | |
| Jump Speed | 4+38+3 |
| Jump Apex | 2.115 |
| Forward Jump Distance | 1.90 |
| Backward Jump Distance | 1.52 |
| Throws | |
| Throw Range | 0.8 |
| Throw Hurtbox | 0.33 |
| Frame Data Glossary - SF6 | |
|---|---|
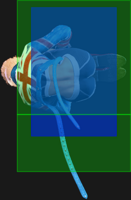
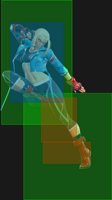
| Hitbox Images |
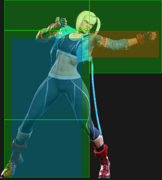
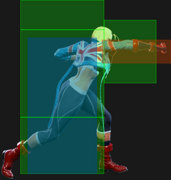
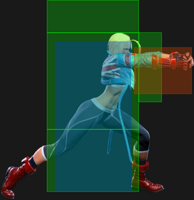
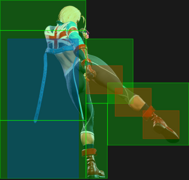
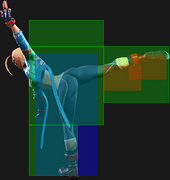
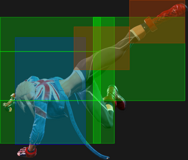
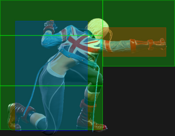
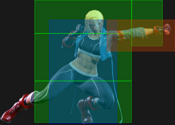
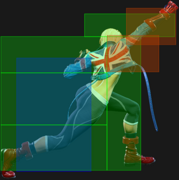
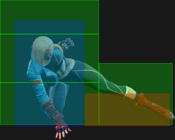
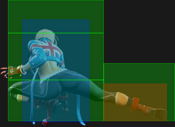
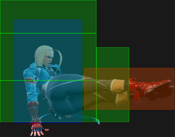
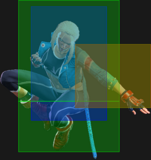
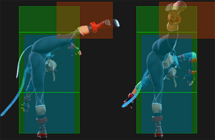
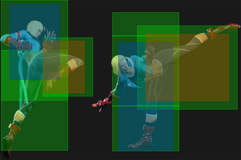
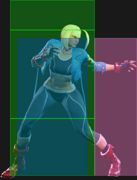
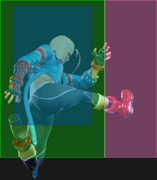
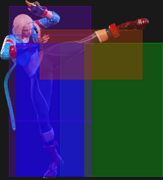
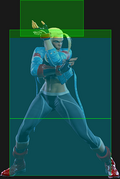
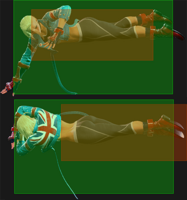
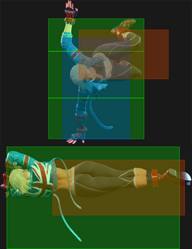
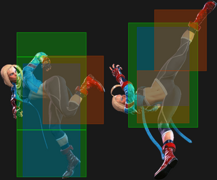
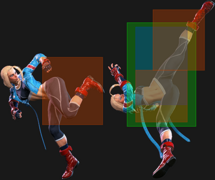
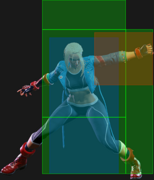
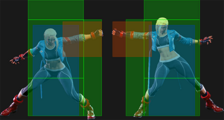
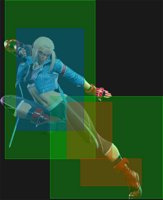
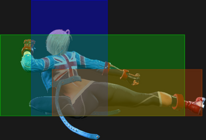
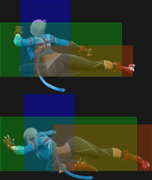
🟥 (Red): Attack hitbox
🟩 (Green): Vulnerable hurtbox that can be hit by strikes/projectiles
🟦 (Blue): Vulnerable throw hurtbox
|
| Active |
How many frames a move remains active (can hurt opponents) for. For projectiles with a maximum active period, a value may be listed in [brackets], but this number is not factored into the move's total frame count.
|
| Cancel |
Available options for canceling one move into another move.
|
| Cancel Hitconfirm Windows |
Hitconfirm reaction windows into Special Moves, Target Combos, and Super Arts.
|
| Damage |
Attack damage on hit. Multi-hit moves may have the damage listed for individual hits as X,Y (or sometimes X*Y). Sometimes a move's damage changes depending on which active frame connects, or on cinematic vs. non-cinematic hits; in this case, multiple values may be listed, and it will be clarified in the move description.
|
| Damage Scaling |
Some moves cause additional damage scaling in combos. Refer to Game Data page for a more detailed breakdown. Scaling Types:
|
| Drive Rush Cancel Advantage |
Refers to the frame advantage when canceling a normal, command normal, or Target Combo into Drive Rush on hit or block (abbreviated as DRC for Drive Rush Cancel). This is calculated at the moment a follow-up attack can be input, not at the moment the character can block or perform movement options. An attack that with DRC +8 on Hit can link into an 8-frame attack, and DRC +4 on Block can create a true blockstring into a 4-frame attack. Note that any DRC on Block worse than +4 cannot form a true blockstring, allowing the opponent to interrupt with an invincible reversal. Most light normals are slightly negative after a DRC on block, meaning the opponent can mash their fastest normal to guarantee a counter-hit (though this requires fast reactions). The attacking character could punish this with Light > DRC into an immediate invincible attack, but this would be an incredibly expensive and high-risk gambit.
|
| Forced Knockdown |
Most airborne command normals, special moves, and Super Arts put the user in a "Forced Knockdown" state. While in this state, an air knockdown will occur when being hit by any attack, even if it would otherwise cause an air reset. As an example, Ryu's 2HP causes an air reset when used as an anti-air. Against a move like Cammy's Hooligan Combination, however, the 2HP puts her into an air knockdown state. This allows Ryu to successfully cancel 2HP into Shoryuken for a juggle, similar to how a Drive Impact wall splat works. Taking advantage of Forced Knockdown juggles is important for dealing with moves like Ken's Dragonlash, Dhalsim's Air Teleport, or Kimberly's 6HK~Hop sequence. Moves that already cause an air knockdown, like most j.MP air-to-airs, will not display the "Forced Knockdown" message.
|
| Guard |
Refers to the direction an attack must be blocked. L is for Low attacks (must be blocked crouching), H is for High attacks/overheads (must be blocked standing), LH is for attacks that can be blocked crouching or standing. T is for Throw attacks which cannot be blocked.
|
| Juggles |
When a character is put into an Air Knockdown state, it is often possible to follow up with a Juggle attack before they hit the ground. In the simplest terms, there are 2 main juggle states:
The following is a more detailed overview of the SF6 juggle system:
Juggle Start (JS): When starting a juggle, the opponent's JC will be set to this value. May be different vs. standing and airborne opponents.
Juggle Increase (JI): When opponent is already in a juggle state, attacks will increase the opponent's JC by this amount.
Juggle Limit (JL): Property of an attack hitbox that determines whether it connects on a juggled opponent. The JL must be ≥ the opponent's JC to hit successfully.
An example to tie everything together:
Drive Rush notes:
|
| On Hit/Block |
These are frame advantage values when the attack hits or is blocked. If the number is positive, then the move will recover before the defender can act again. If the number is negative, the defender will be able to act before the attacker and maybe even punish. KD refers to knockdown on hit, and the listed KD Advantage refers to how many frames the attacker can act before the defender finishes their wakeup animation.
|
| Recovery |
How many frames it takes for a move to finish after the active frames have finished. For projectiles, recovery is considered to begin after the first active frame.
|
| Startup |
How many frames it takes before the move becomes 'active' or have a hit box. The last startup frame and the first active frame are the same frame, meaning all values are written as Startup + 1.
|
Normals
Standing Normals
5LP
| Startup | Active | Recovery | Cancel | Damage | Guard | On Hit | On Block |
|---|---|---|---|---|---|---|---|
| 4 | 3 | 7 | Chn Sp SA | 300 | LH | +5 | -2 |
- Chains into 5LP/2LP/2LK
- Cancel reaction window: 13f
- Extended hurtbox appears 2f before active frames
Basic and dependable pressure tool. Functionally interchangeable with 2LP, the main difference between them being the height that they connect at. 5LP also has one more active frame, making it marginally better as a meaty attack; with a perfect setup, it can be +7 on hit and 0 on block.
5MP
| Startup | Active | Recovery | Cancel | Damage | Guard | On Hit | On Block |
|---|---|---|---|---|---|---|---|
| 6 | 4 | 13 | - | 600 | LH | +6 | -1 |
- High active frame count (up to +9/+2)
- Extended hurtbox remains 4f after active frames
Cammy's 5MP is a good short-range pressure starter, especially with meaty timing. On a normal hit, it can link to 4MP~HK from point blank, or into 5LK > 236MK from a bit farther out. It can also link to itself, though it cannot cancel into anything afterwards. On Counterhit, it links into 5HP for a rewarding confirm.
5MP pairs well with Drive Rush; the forward momentum allows DR~5MP, 5MP to act as a frame trap, with either hit converting into a full combo on reaction. Using a Drive Rush light normal into 5MP can set up trade combos that are similarly rewarding, though the exact frame advantage depends on which normal you trade with.
The fast startup, quick recovery, and hitbox priority makes it possible to use 5MP as a counterpoke, though it lacks any real ranged conversions.
5HP
| Startup | Active | Recovery | Cancel | Damage | Guard | On Hit | On Block |
|---|---|---|---|---|---|---|---|
| 8 | 3 | 20 | Sp SA TC | 800 | LH | +2 | -3 |
- Cancel reaction window: 17f (special/TC)
5HP is a fast cancellable button with great hitbox priority, making it excellent in neutral as a counterpoke or as a single-hit confirm tool. Cammy moves forward during the animation giving it deceptive range, though this also makes her more vulnerable if she whiffs. Confirming this button into 236HK or her 5HP~HK Target Combo lets her reach the corner quickly, where she excels.
Cammy cannot link naturally into 5HP, but it can easily be set up with a Counterhit 5MP/2HP or from various Drive Rush or Punish Counter routes. It has enough hitstun to combo into the charged 623[HK], but requires a Punish Counter to combo into charged 236[HK]. 5HP is safe but negative on block; if the opponent is predictable with their button presses on block, a cancel into 214LP will frame trap any opposing normal for a small Counterhit confirm.
5LK
| Startup | Active | Recovery | Cancel | Damage | Guard | On Hit | On Block |
|---|---|---|---|---|---|---|---|
| 5 | 3 | 10 | Sp SA | 300 | LH | +2 | -3 |
- Cancel reaction window: 13f
- Extended hurtbox appears 2f before active frames
5LK has great range for a 5-frame button, making it great for punishing (on block or whiff), checking dashes, and safely buffering Drive Rush in neutral. The most consistent ender is 236MK, especially at max range, but as a Punish Counter it can combo into the HK or OD version of the move as well. After a successful Drive Rush cancel, 5LK can link into 5LP, 5HP for some extra damage and corner carry.
Note that Cammy's other light normals do not chain into 5LK, so it must be linked; on block, there is a large enough frame gap to be interrupted. If the opponent likes to mash light normals during blockstrings, stick to a tighter sequence like 2LK, 2LP, 5LP at close range.
5MK
| Startup | Active | Recovery | Cancel | Damage | Guard | On Hit | On Block |
|---|---|---|---|---|---|---|---|
| 8 | 3 | 18 | - | 700 | LH | +3 | -4 |
- Extended hurtbox remains 7f after active frames (more whiff punishable)
A quick poke to harass the opponent at mid range. The pushback ensures that 5MK should never be punished on block when used at its appropriate range. It is not cancellable, so it can lose to a predictive Drive Impact, but the recovery is short enough that Cammy may recover in time to block or counter the DI. While not the most rewarding button, it is a relatively safe way to whittle down the opponent's Drive Gauge to force a response.
5HK
| Startup | Active | Recovery | Cancel | Damage | Guard | On Hit | On Block |
|---|---|---|---|---|---|---|---|
| 11 | 3 | 19(21) | - | 900 | LH | +2 | -3 |
- Punish Counter: KD +44 (no juggle followup)
- Has juggle potential (causes air reset)
- Extended hurtbox appears 1f before active frames
A much beefier neutral button than 5MK, but comes with additional risk against Drive Impact, jump-ins, and whiff punishes. The range on 5HK is incredible, and it drains 60% of a Drive bar just from being blocked once. If you manage to score a Punish Counter, the opponent goes flying, allowing Cammy to greatly improve her screen position. It is somewhat slow, and the early hurtbox makes it interruptible by counterpokes, so you don't want to be too predictable with this attack.
In some cases, 5HK can serve as a long range anti-air, though it's safer to stick with 623HK for this purpose.
Crouching Normals
2LP
| Startup | Active | Recovery | Cancel | Damage | Guard | On Hit | On Block |
|---|---|---|---|---|---|---|---|
| 4 | 2 | 8 | Chn Sp SA | 300 | LH | +5 | -2 |
- Chains into 5LP/2LP/2LK
- Cancel reaction window: 12f
- Extended hurtbox appears 2f before active frames
Functionally, 2LP is nearly identical to 5LP except that it hits lower to the ground. The range and pushback are identical, so use whichever feels better. The only real difference is that 2LP has one less active frame, making it slightly harder to time as a meaty attack.
2MP
| Startup | Active | Recovery | Cancel | Damage | Guard | On Hit | On Block |
|---|---|---|---|---|---|---|---|
| 7 | 3 | 14 | Sp SA | 600 | LH | +5 | -2 |
- Cancel reaction window: 15f
- Extended hurtbox remains 5f after active frames
Decent reach and special cancellable, making it a good counterpoke and combo filler. It can link directly from 2HP, or after Counterhit 5LP, 2LP, or 5MP. It is usually cancelled into 236HK for corner carry and a knockdown, but it can also link into 5LK.
In punish scenarios where you're uncertain about range, PC 2MP can link directly into Lv.3 Super, giving plenty of time for a max range hitconfirm.
2HP
| Startup | Active | Recovery | Cancel | Damage | Guard | On Hit | On Block |
|---|---|---|---|---|---|---|---|
| 10 | 4 | 15 | - | 700 | LH | +7 | +1 |
- Forces Stand
- Extended hurtbox appears 2f before active frames
Cammy's most advantageous normal, and the only one that's plus on block while naturally linking into 2MP. It's a bit slow, making it hard to use out of Drive Rush or pressure strings, but with 4 active frames it's easy to set up on the opponent's wakeup. After 236HK + Forward Dash, 2HP hits meaty enough to combo directly into 5HP even without a Counterhit.
2HP can be situationally used as an anti-air; for example, it reaches high enough to hit E. Honda's Sumo Smash out of the air. Most of the time, however, it's better to stick with 623K for this purpose.
The Force Stand property ensures that any link to 4HK will hit properly, so it should always be used after Drive Rush cancels from medium or heavy pokes.
2LK
| Startup | Active | Recovery | Cancel | Damage | Guard | On Hit | On Block |
|---|---|---|---|---|---|---|---|
| 5 | 3 | 7 | Chn | 200 | L | +3 | -2 |
- Chains into 5LP/2LP/2LK
- Extended hurtbox appears 2f before active frames, remains 5f after active
Cammy's fastest low starter. When chained, it can work in any 3-hit light confirm, as long as it starts point blank and 2LK is used only once in the string. A sequence like 2LP, 2LK, 2LP works well in this context to catch opponents that walk back or backdash after their first blocked normal.
From longer ranges, 2LK is fairly useless as it cannot cancel into specials nor link to her light normals; in these situations, use 2MK instead.
2MK
| Startup | Active | Recovery | Cancel | Damage | Guard | On Hit | On Block |
|---|---|---|---|---|---|---|---|
| 8 | 3 | 18 | Sp SA | 500 | L | +1 | -5 |
- Cancel reaction window: 13f
- Extended hurtbox appears 1f before active frames, remains 6f after active
- Applies a 20% damage scaling penalty to the next hit when used as a combo starter (100/80/70/60...)
With its great range, 2MK is one of Cammy's most important tools. It can be buffered into 236HK in neutral for a quick meterless reward, but this is not hitconfirmable for most mere mortals. For 3 bars, 2MK > Drive Rush is a great way to break the opponent's guard while remaining safe on block. On hit, Cammy can link directly to 2HP for her optimal combo routes, but on block she is only +4; to ensure the opponent can't Parry or Reversal, it's safest to end with 2LP/5LP on block for a true blockstring.
In some ranged Counterhit/Punish Counter scenarios where 5HP doesn't quite reach, 2MK can often pick up these conversions for a bit less damage.
2HK
| Startup | Active | Recovery | Cancel | Damage | Guard | On Hit | On Block |
|---|---|---|---|---|---|---|---|
| 9 | 3 | 24 | - | 900 | L | HKD +31 | -10 |
- Counterhit/Punish Counter: +43 HKD
- Has juggle potential
- Extended hurtbox remains 6f after active frames
Cammy's 2HK has a great disjointed hitbox, allowing it to cleanly counterpoke through most neutral buttons. It also has some limited juggle potential, though this is rarely useful compared to other routes. Unfortunately, at -10 this sweep is easily punished by many characters. It may be worth considering against characters with weak punish options.
Jumping Normals
j.LP
| Startup | Active | Recovery | Cancel | Damage | Guard | On Hit | On Block |
|---|---|---|---|---|---|---|---|
| 4 | 10 | 3 land | - | 300 | H | - | - |
j.MP
| Startup | Active | Recovery | Cancel | Damage | Guard | On Hit | On Block |
|---|---|---|---|---|---|---|---|
| 6 | 8 | 3 land | Sp SA2 | 600 | H | - | - |
Heavily used in Cammy's launcher combos to squeeze out more damage before extending into Cannon Strike (her divekick).
j.HP
| Startup | Active | Recovery | Cancel | Damage | Guard | On Hit | On Block |
|---|---|---|---|---|---|---|---|
| 8 | 5 | 3 land | - | 800 | H | - | - |
Has some juggle potential and gives Cammy better okizeme than Cannon Strike when it hits an airborne opponent.
j.LK
| Startup | Active | Recovery | Cancel | Damage | Guard | On Hit | On Block |
|---|---|---|---|---|---|---|---|
| 4 | 10 | 3 land | - | 300 | H | - | - |
j.MK
| Startup | Active | Recovery | Cancel | Damage | Guard | On Hit | On Block |
|---|---|---|---|---|---|---|---|
| 7 | 6 | 3 land | - | 600 | H | - | - |
j.HK
| Startup | Active | Recovery | Cancel | Damage | Guard | On Hit | On Block |
|---|---|---|---|---|---|---|---|
| 10 | 6 | 3 land | - | 800 | H | - | - |
Command Normals
4MP
| Startup | Active | Recovery | Cancel | Damage | Guard | On Hit | On Block |
|---|---|---|---|---|---|---|---|
| 5 | 5 | 12 | Sp SA TC | 500 | LH | +4 | -1 |
Incredibly fast uppercut that leads into a target combo. Low reward when used as an anti-air, but is a lot less risky to whiff than something like Cannon Spike.
6HK
| Startup | Active | Recovery | Cancel | Damage | Guard | On Hit | On Block |
|---|---|---|---|---|---|---|---|
| 18 | 3 | 25 | Sp SA | 800 | LH | KD +26 | -12 |
Cammy does a small sway into a straight kick. The sway moves her hitbox backward a significant amount, allowing her to evade incoming moves, but she doesn't stay back for a long period of time, so while it can dodge moves with smaller hitboxes, she's more likely to get hit by moves that cover the space that she returns to on the way forward. If it makes contact, it can be canceled into specials and Super Arts.
4HK
| Startup | Active | Recovery | Cancel | Damage | Guard | On Hit | On Block |
|---|---|---|---|---|---|---|---|
| 9 | 3 | 18 | Sp SA Jmp | 800 | LH | KD +54 | -7 |
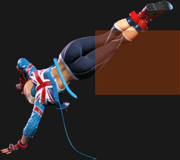
Functionally a launcher, similar to ones in Marvel vs. Capcom games. It's jump cancelable on hit, which routes nicely into a Cannon Strike ender (ideally following jumping Medium Punch) for good screen carry and okizeme. Alternatively, to get a knockdown with more frame advantage, Cammy can do a delayed Drive Rush 5LP > LK/MK Spiral Arrow.
Target Combos
4MP~HK
| Startup | Active | Recovery | Cancel | Damage | Guard | On Hit | On Block |
|---|---|---|---|---|---|---|---|
| 9 | 3 | 23 | Sp SA Jmp | 600 | LH | KD +49 | -12(-19) |
Functionally the same as 4HK and has the same properties (including being jump cancelable), but routes directly from 4MP. Because 4MP is so fast, Cammy can get launcher combos off things like her light and medium punches so long as she's close enough.
5HP~HK
| Startup | Active | Recovery | Cancel | Damage | Guard | On Hit | On Block |
|---|---|---|---|---|---|---|---|
| 13 | 4(12)3 | 29 | Sp SA | 400,400 | LH | KD +26 | -12 |
- Only 1st hit of HK is cancellable into air specials/super
- Applies an additional 5% damage scaling penalty when cancelled
- 9f blockstring gap between the hits of HK, or between HK > j.214K
- When not cancelled, being struck between the second and third hits results in a Punish Counter
A Target Combo extension from 5HP. The HK hits twice and is unsafe on block, but the first hit can be cancelled into air moves. A Divekick cancelled in this way becomes 0 on block while an OD Divekick is +2. However, the opponent can interrupt the HK regardless of whether or not she cancels it; even in Burnout, the gap is 5f allowing for a light normal interruption. Keep in mind that air special moves result in a Forced Knockdown state when counterhit, which adds significant risk.
On hit, cancelling into j.214K will spike the opponent down for an immediate knockdown, while j.214KK puts them into a juggle state. In general, Cammy can get more damage by cancelling 5HP directly into a special move instead of this Target Combo, in both meterless and 2-bar routes. One advantage to this TC, however, is that the juggle into j.214KK > 236MK gives good corner carry without swapping sides, unlike a cancel into 236KK. It also sets up decent Hooligan oki that beats wakeup buttons while allowing a feint to bait reversals. Finally, for some players, hitconfirming the TC may be easier than hitconfirming directly into a special move since it requires only a single button press.
Throws
Forward Throw (LPLK)
| Startup | Active | Recovery | Cancel | Damage | Guard | On Hit | On Block |
|---|---|---|---|---|---|---|---|
| 5 | 3 | 23 | - | 1200 (2040) | T | KD +17 | - |
Back Throw (4LPLK)
| Startup | Active | Recovery | Cancel | Damage | Guard | On Hit | On Block |
|---|---|---|---|---|---|---|---|
| 5 | 3 | 23 | - | 1200 (2040) | T | KD +14 | - |
Air Throw (LPLK Air)
| Startup | Active | Recovery | Cancel | Damage | Guard | On Hit | On Block |
|---|---|---|---|---|---|---|---|
| 5 | 3 | 3 land | - | 1200 (2040) | T | KD +22 | - |
Drive System
Drive Impact (HPHK)
| Startup | Active | Recovery | Cancel | Damage | Guard | On Hit | On Block |
|---|---|---|---|---|---|---|---|
| 26 | 2 | 35 | - | 800 | LH | KD +35 / Wall Splat KD +65 | -3 / Wall Splat HKD +72 |
See Drive Impact
When cancelled from a normal, these are the important blockstring gaps; a gap of N will trade with an N-frame startup attack; [] = Burnout
- -
- Note: A gap ≥ 6f can be thrown, and a gap ≥ 9f can be jumped out of by most characters
Drive Reversal (6HPHK)
| Startup | Active | Recovery | Cancel | Damage | Guard | On Hit | On Block |
|---|---|---|---|---|---|---|---|
| 20 | 3 | 26(31) | - | 500 recoverable | LH | KD +23 | -6 |
See Drive Reversal
- Full Invuln: 1-22f; Armor Break
Drive Parry (MPMK)
| Startup | Active | Recovery | Cancel | Damage | Guard | On Hit | On Block |
|---|---|---|---|---|---|---|---|
| 1 | 12 or until released | 33(1)(11) | - | - | - | - | - |
See Drive Parry
- Perfect Parry has only 1f recovery, and disables the opponent from canceling their attack
- Perfect Parry vs. projectiles puts you into a fixed 11f recovery
Drive Rush (66)
No results
See Drive Rush. Frame data shown in (parentheses) refers to the version used after Parry.
- Notable Drive Rush cancel combo routes:
- Notable Drive Rush cancel blockstring gaps:
Special Moves
Spiral Arrow (236K)
| Startup | Active | Recovery | Cancel | Damage | Guard | On Hit | On Block |
|---|---|---|---|---|---|---|---|
| 9 | 13 | 21 | - | 800 | LH | KD +26(+48) | -12(0) |
- 1 hit.
| Startup | Active | Recovery | Cancel | Damage | Guard | On Hit | On Block |
|---|---|---|---|---|---|---|---|
| 9 | 15 | 21 | - | 900 | LH | KD +26(+48) | -14(0) |
- 1 hit.
Even though MK Spiral Arrow is the same speed as LK Spiral Arrow, it covers much more distance. This means it will connect from max range light attacks where LK Spiral Arrow will not.
| Startup | Active | Recovery | Cancel | Damage | Guard | On Hit | On Block |
|---|---|---|---|---|---|---|---|
| 15 | 3(1)12 | 21 | SA3 (1st) | 300,700 | LH | KD +29(+48) | -12(-1) |
- 2 hits.
| Startup | Active | Recovery | Cancel | Damage | Guard | On Hit | On Block |
|---|---|---|---|---|---|---|---|
| 27(25) | 3(1)12 | 20 | SA3 (4th) | 150x4,200 | LH | KD +47 Launch | -14 |
- 5 hits.
- Can be partially charged.
| Startup | Active | Recovery | Cancel | Damage | Guard | On Hit | On Block |
|---|---|---|---|---|---|---|---|
| 13 | 3(1)12 | 20 | SA2 SA3 | 150x4,200 | LH | KD +47 Launch | -14 |
- 5 hits.
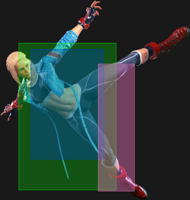
Cammy flings herself foot-first at the opponent. LK travels the shortest distance, while HK goes the farthest; the OD and [HK] versions go even farther and will hit once from fullscreen.
Spiral Arrow is a common combo tool for pushing the opponent toward the corner, and 236MK is the preferred version to use in most combos; LK Arrow tends to whiff at the max range for most of Cammy's cancelable normals, and HK Arrow's startup is too slow to guarantee a hit from Cammy's faster normals in most situations.
A successful hit with a Spiral Arrow gives Cammy good positioning for oki and/or chasing opponents down, and on their own, Spiral Arrows make great whiff punish tools because of their speed and range. However, it can be a little dangerous to just throw Spiral Arrows out in neutral without knowing how to space them. LK and MK Arrow, at max range, are even on block, and HK Arrow is -1 on block at its max range; up close they're all extremely unsafe and easy to punish.
The OD and [HK] versions have similar damage and behavior to each other, save that the OD version starts up faster and is easier to work into combos off of stray hits. Both the OD and [HK] versions cross through the opponent. If all 5 hits of the OD or [HK] version land, the opponent is put into a limited juggle; Cammy can choose to follow up with a Cannon Spike as a link (but must be inputted in the opposite direction due to the side switch). Alternatively, she can directly cancel into SA2 on the fourth hit of OD Arrow, or SA3 on the fourth hit of OD or [HK] Arrow.
Cannon Spike (623K)
| Startup | Active | Recovery | Cancel | Damage | Guard | On Hit | On Block |
|---|---|---|---|---|---|---|---|
| 5 | 12 | 24+16 Land | SA3 | 900(800) | LH | KD +20 | -36 |
- Anti-Air Invuln: 1-14f; Airborne 7-40f (Forced Knockdown state)
- Reduced damage on active frames 3-12
| Startup | Active | Recovery | Cancel | Damage | Guard | On Hit | On Block |
|---|---|---|---|---|---|---|---|
| 6 | 12 | 25+16 Land | SA3 | 1000(800) | LH | KD +21 | -36 |
- Anti-Air Invuln: 1-9f; Airborne 8-42f (Forced Knockdown state)
- Reduced damage on active frames 3-12
| Startup | Active | Recovery | Cancel | Damage | Guard | On Hit | On Block |
|---|---|---|---|---|---|---|---|
| 7 | 12 | 28+16 Land | SA3 | 1200(800) | LH | KD +22 | -36 |
- Anti-Air Invuln: 1-8f; Airborne 9-46f (Forced Knockdown state)
- Reduced damage on active frames 3-12
| Startup | Active | Recovery | Cancel | Damage | Guard | On Hit | On Block |
|---|---|---|---|---|---|---|---|
| 24(22) | 12 | 29+16 Land | SA3 | 1100,100x4 (900) | LH | KD +16 | -40 |
- Anti-Air Invuln: 1-7f; Full Invuln: 20-25f; Airborne 26-64f (Forced Knockdown state)
- Reduced damage on active frames 5-12 (becomes 1-hit version)
| Startup | Active | Recovery | Cancel | Damage | Guard | On Hit | On Block |
|---|---|---|---|---|---|---|---|
| 6 | 12 | 30+16 Land | - | 1100,100x4 (900) | LH | KD +16 | -40 |
- Full Invuln: 1-7f; Airborne 8-47f (Forced Knockdown state)
- Reduced damage on active frames 5-12 (becomes 1-hit version)
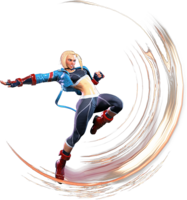
Cammy kicks upward to knock the opponent out of the air. The stronger the button used, the higher and farther she travels.
Cannon Spike is similar to the Shoryuken and other DP-like moves, but has a diagonal velocity instead. It's most effective as an anti-air when used as late as possible against jumping opponents, as most of its damage is concentrated in its initial frames. Its trajectory means that an opponent can jump past it a bit more easily than most DPs if they're close enough, so it must be used cautiously in these situations. It also serves as the "damage" ender to most of Cammy's juggle combos, at the cost of less flexible oki afterward unless she's near the corner when she does it.
The [HK] and OD versions are very similar to each other in terms of hits and damage, and both cross through the opponent.
Quick Spin Knuckle (214P)
| Startup | Active | Recovery | Cancel | Damage | Guard | On Hit | On Block |
|---|---|---|---|---|---|---|---|
| 21 | 4 | 16 | SA3 | 800 | LH | +2 | -3 |
- Useful when the opponent is in Burnout as it's relatively quick and becomes +1 on block.
| Startup | Active | Recovery | Cancel | Damage | Guard | On Hit | On Block |
|---|---|---|---|---|---|---|---|
| 24 | 4 | 16 | SA3 | 800 | LH | +3 | -2 |
- Projectile invulnerable between frames 6-20.
| Startup | Active | Recovery | Cancel | Damage | Guard | On Hit | On Block |
|---|---|---|---|---|---|---|---|
| 28 | 4 | 17 | SA3 | 800 | LH | +5 | +3 |
- Projectile invulnerable between frames 6-24.
| Startup | Active | Recovery | Cancel | Damage | Guard | On Hit | On Block |
|---|---|---|---|---|---|---|---|
| 25(28) | 4 | 17 | SA2 SA3 | 800 | LH | +7 | -2 |
- Projectile invulnerable between frames 3-24.
Cammy twirls forward and strikes with a backfist. Stronger versions cause her to move farther forward before swinging her fist.
Spin Knuckle is commonly used as a gap-closer in situations where a Spiral Arrow might be risky if blocked. Unlike Spiral Arrow, it doesn't have to be spaced to get better frame data on block, but it's more difficult to use in blockstrings because it leaves a fairly big gap to exploit. On hit, Cammy is fairly plus, with the HP and OD versions allowing for links into other normals without requiring a counterhit.
The MP, HP, and OD versions are also Cammy's primary anti-projectile tools outside of using SA3, as they have projectile invulnerability for most of while Cammy is moving forward; of the three versions, OD Spin Knuckle has the most and starts its invulnerable window the earliest. OD Spin Knuckle is even more unique in that if Cammy is close enough to the opponent when she uses it, she'll switch sides with them; this allows her to go for cheeky crossups and still stay relatively safe if the move is blocked. However, it should be noted that the crossup isn't instant, so if the opponent is anticipating it, it's possible for them to either jab Cammy out of it or call it out with something that has strike invul.
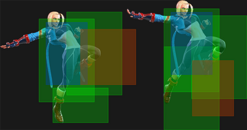
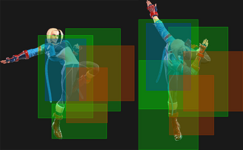
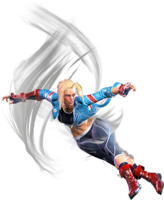
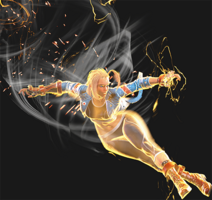
Cannon Strike (j.214K)
No results
No results No results
| Startup | Active | Recovery | Cancel | Damage | Guard | On Hit | On Block |
|---|---|---|---|---|---|---|---|
| 13 | 12 (until land) | 12 land | SA2 | 800 | LH | 0(+9) | -4(+5) |
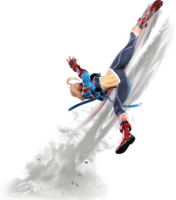
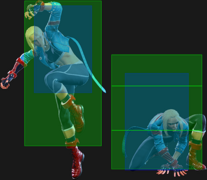
Cammy does a diving kick attack from the air. Only usable during forward jumps. The strength of the button changes the angle of descent: LK is narrowest, HK is widest, and OD is about the same angle as HK.
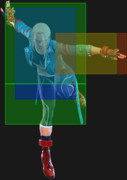
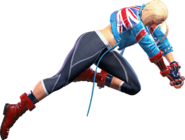
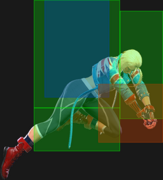
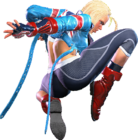
Cannon Strike tends to be used in two particular ways: either as a callout against low attacks or grounded anti-airs that allows Cammy to counterhit and combo afterward, or as a surprise advancing tool to catch the opponent unaware and begin running offensive pressure. Cannon Strike is most effective if it manages to hit below the opponent's waist; it can be up to +8 on hit and ranges from negligibly minus on block to plus on block (up to +3, with correct spacing) if it manages to hit their feet. If Cannon Strike hits at or above waist height, Cammy is usually too high up to follow up effectively, and some characters may even be able to punish a blocked Cannon Strike if they have a fast enough normal and Cannon Strike doesn't hit below the waist.
Cannon Strike can also be used after j.MP hits during a forward jump, bringing the opponent back down to earth with Cammy.
When Cannon Strike hits a grounded opponent, it's most common to link one or two 2LPs after it to fish for a hitconfirm into MK Spiral Arrow; on a deeper hit, 2MP is an acceptable substitute.
OD Cannon Strike causes Cammy to descend a lot faster, making it easier to link beefier buttons if she manages to hit at the right height. If used on an opponent in the air, OD Strike will cause the opponent to float a bit after they're hit with it, allowing for various juggle options. Alternatively, Cammy can cancel OD Cannon Strike directly into her SA2, which will create different opportunities for her depending on if the opponent is on the ground or in the air when Cannon Strike hits them.
Both normal and OD Cannon Strike can be input with a Tiger Knee motion (2149K) to increase the likelihood of a low hit.
Hooligan Combination (236P)
| Startup | Active | Recovery | Cancel | Damage | Guard | On Hit | On Block |
|---|---|---|---|---|---|---|---|
| 20(40) | - | - | - | - | - | - | - |
- Lower Body Projectile Invuln: 7-40f; Airborne 7-40f
- Trajectory depends on button strength
- LP/MP can cross over a close standing/crouching opponent
- HP can cross over a close crouching opponent
| Startup | Active | Recovery | Cancel | Damage | Guard | On Hit | On Block |
|---|---|---|---|---|---|---|---|
| 40(60) | - | - | - | - | - | - | - |
- Lower Body Projectile Invuln: 27-60f; Airborne 27-60f
- Keeps HP trajectory, but followups gain properties of OD versions (except Lv.2 Super cancel)
- Holding HP for 18-19f allows full charge up to 2f earlier
| Startup | Active | Recovery | Cancel | Damage | Guard | On Hit | On Block |
|---|---|---|---|---|---|---|---|
| 20(40) | - | - | - | - | - | - | - |
- Lower Body Projectile Invuln: 7-40f; Airborne 7-40f
- Button combination affects trajectory (LP+MP=LP, LP+HP=MP, MP+HP=HP)
- Followups gain enhanced properties
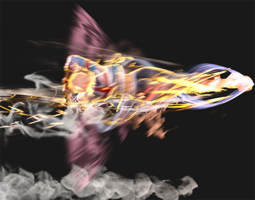
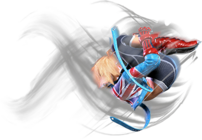
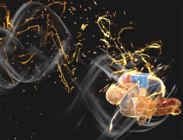
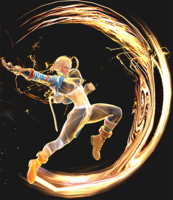
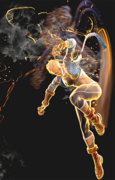
Cammy somersaults forward and curls into a spinning ball. The stronger the button, the farther she goes and the lower the arc of the somersault is. For OD Hooligan, the two punch buttons used will determine its trajectory with a bit more speed than their equivalent regular versions. Hooligan has some minor tracking, allowing Cammy to keep approaching her oppnent unless they jump. If the opponent crouches while Cammy is performing this special, she will swap sides with them.
Hooligan is a variable-angle approach tool that allows Cammy another way of closing gaps. With five different followups, each with their own separate uses, as well as different ways to either set up or fake crossups, Hooligan is an excellent tool for confusing the opponent and mixing up Cammy's approaches, especially after hard knockdowns. However, it is a big commitment to use and shouldn't be thrown out wildly, as the slow speed of Cammy's descent means that she can be knocked down with a well-timed anti-air or DP.
Cammy does have a few ways to naturally set up into a perfectly meaty Hooligan. 4MP~4HK Target Combo, 4HK > OD Divekick, 5HP~5HK > OD Divekick, and 4HK > DR 4HK > Charged HK Spiral Arrow are some of the major ways in which Cammy can set up meaty Hooligan followups. While these trade off immediate damage and require some kind of Drive spending, they all lead into excellent autotimed followups, many of which beat reversal attempts and leave Cammy safe or plus.
Razor's Edge Slicer (236P~No Input)
| Startup | Active | Recovery | Cancel | Damage | Guard | On Hit | On Block |
|---|---|---|---|---|---|---|---|
| 50 | 9 | 13 | SA3 | 1000 | L | KD +48 | +2 |
| Startup | Active | Recovery | Cancel | Damage | Guard | On Hit | On Block |
|---|---|---|---|---|---|---|---|
| 70 | 9(10)5 | 17 | SA3 | 800,400 | L,L | KD +48 | +2 |
- Only comes out if [HP] Hooligan Combination is used.
| Startup | Active | Recovery | Cancel | Damage | Guard | On Hit | On Block |
|---|---|---|---|---|---|---|---|
| 50 | 9(10)5 | 17 | SA2 SA3 | 800,400 | L,L | KD +48 | +2 |
Cammy slides along the ground and kicks the opponent.
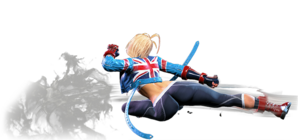
This move brings Cammy very low to the ground, allowing her to slip under high-profile moves and hit the opponent. It's relatively safe when blocked, and on hit, Cammy can do a linked Cannon Spike juggle--MK, HK, or OD Spike are ideal for this, as their initial forward velocity makes them less likely to whiff--or go for a super cancel into SA3.
During an OD or [HP] Hooligan Combination, this move consists of two kicks instead of one. The second kick will also float the opponent in a manner similar to [HK] or OD Spiral Arrow, and similarly to OD Spiral Arrow, Cammy can cancel into SA2 or SA3 from an OD Razor's Edge Slicer; an [HP] Razor's Edge Slicer is only cancelable into SA3.
Hooligan Cannon Strike (236P~K)
| Startup | Active | Recovery | Cancel | Damage | Guard | On Hit | On Block |
|---|---|---|---|---|---|---|---|
| 20+13 | until land | 12 land | - | 600 | LH | -1(+9) | -7(+3) |
| Startup | Active | Recovery | Cancel | Damage | Guard | On Hit | On Block |
|---|---|---|---|---|---|---|---|
| 40+13 | until land | 12 land | - | 800 | LH | -1(+9) | 0(+5) |
- Only comes out if [HP] Hooligan Combination is used.
| Startup | Active | Recovery | Cancel | Damage | Guard | On Hit | On Block |
|---|---|---|---|---|---|---|---|
| 20+13 | until land | 12 land | SA2 | 800 | LH | -1(+9) | 0(+5) |
Hooligan Cannon Strike is largely similar to its regular version, with the added benefit of auto-correcting its facing if Hooligan Combination crosses up. This means that pretty much all the rules that apply to using normal Cannon Strike are applicable to Hooligan Cannon Strike, just with slightly easier control over the horizontal spacing thanks to Hooligan controlling Cammy's horizontal movement.
Reverse Edge (236P~2K)
| Startup | Active | Recovery | Cancel | Damage | Guard | On Hit | On Block |
|---|---|---|---|---|---|---|---|
| 20+18 | 4 | 13 land | - | 800 | H | +5(+9) | -5(-1) |
| Startup | Active | Recovery | Cancel | Damage | Guard | On Hit | On Block |
|---|---|---|---|---|---|---|---|
| 40+18 | 4(14)4 | 13 land | - | 600x2 | H,H | +8 | -2 |
- Only comes out if [HP] Hooligan Combination is used.
| Startup | Active | Recovery | Cancel | Damage | Guard | On Hit | On Block |
|---|---|---|---|---|---|---|---|
| 20+18 | 4(14)4 | 13 land | SA2 | 600x2 | H,H | +8 | -2 |
Unlike Hooligan Cannon Strike, this move doesn't auto-correct its facing if Cammy crosses over the opponent with Hooligan Combination. However, it is an overhead, which Cannon Strike is not, and on hit, it's plus enough to link a variety of normals afterward, making it a great tool for cracking open opponents that are blocking low.
Both the OD version and [HP] Hooligan version of this move do two kicks instead of one, but only the OD version can be canceled into SA2 on the second hit.
Fatal Leg Twister (236P~LPLK)
| Startup | Active | Recovery | Cancel | Damage | Guard | On Hit | On Block |
|---|---|---|---|---|---|---|---|
| 20+10 | 3 | 30 land | - | 1800 (2070) | T | HKD +18 | - |
| Startup | Active | Recovery | Cancel | Damage | Guard | On Hit | On Block |
|---|---|---|---|---|---|---|---|
| 40+10 | 3 | 30 land | - | 1000 (1150) | T | HKD +60 Launch | - |
- Only comes out if [HP] Hooligan Combination is used.
| Startup | Active | Recovery | Cancel | Damage | Guard | On Hit | On Block |
|---|---|---|---|---|---|---|---|
| 20+10 | 3 | 30 land | - | 1000 (1150) | T | HKD +60 Launch | - |
Cammy grabs the opponent by the neck with her legs and flings them to the ground. This throw only works on grounded opponents, but is a great option to use during Hooligan if your opponent has gotten used to blocking Reverse Edge or Cannon Strike.
When used after an [HP] or OD Hooligan, the throw will toss the opponent into the air for juggles.
Silent Step (236P~P)
| Startup | Active | Recovery | Cancel | Damage | Guard | On Hit | On Block |
|---|---|---|---|---|---|---|---|
| 20~ | - | 4(12)+10 land | - | - | - | - | - |
| Startup | Active | Recovery | Cancel | Damage | Guard | On Hit | On Block |
|---|---|---|---|---|---|---|---|
| 40~ | - | 4(7)+10 land | - | - | - | - | - |
- Only comes out if [HP] Hooligan Combination is used.
| Startup | Active | Recovery | Cancel | Damage | Guard | On Hit | On Block |
|---|---|---|---|---|---|---|---|
| 20~ | - | 4(9)+10 land | - | - | - | - | - |
Cammy drops straight down from Hooligan Combination and lands on the ground.
The main use of Silent Step is for stopping a Hooligan approach early to bait out anti-airs. Cammy will recover faster the closer she is to the ground when using this move, and from an [HP] or OD Hooligan she falls a bit faster.
Super Arts
Level 1 Super (236236K)
| Startup | Active | Recovery | Cancel | Damage | Guard | On Hit | On Block |
|---|---|---|---|---|---|---|---|
| 9 | 3(1)12 | 38 | - | 2000 | LH | KD +10 | -24(-22) |
- Strike/Throw Invuln: 1-11f
- Depletes 1/2 Drive bar from opponent on hit
Cammy spins into a Spiral Arrow, and on hit, transitions to a modified Cannon Spike to finish the opponent off.
SA1 has good horizontal range, and even combos from cancelable lights, making it a good whiff punish option as well as a way to squeeze out extra damage from stray hits. It can also be a juggle cashout option if Cammy doesn't have the meter for SA2, though this requires a high float from something like OD Cannon Strike or Lift Combination to pull off. However, much like Cannon Spike or a badly-spaced Spiral Arrow, it's extremely unsafe on block.
Level 2 Super (214214K)
No results
No results
- Depletes 1 Drive bar from opponent on hit
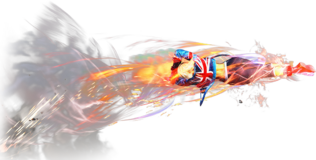
Cammy does a stronger version of a Cannon Strike to hit the opponent. Depending on the state they're in when she hits them, one of two things happen:
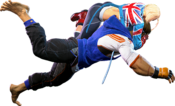
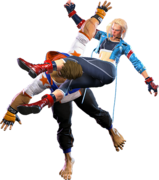
- If the opponent is on the ground, a cinematic begins. Cammy spins around on their shoulders and flips around to press her feet into their ankles, forcing them to crumble.
- If the opponent is in the air, no cinematic triggers, and she continues diving through them until landing. The opponent will be launched even higher into the air.
The aerial version can only be used during a forward jump.
The variable nature of SA2 means that it can either secure a round from various OD moves on the ground or in the air, or act as a callout to low attacks similar to Cannon Strike. The juggle state that comes from hitting an aerial opponent with SA2 is exceptionally high and floaty, allowing for a variety of moves to finish the juggle.
When it hits an opponent in the air, Killer Bee Spin's damage will change slightly based on how high they are. A high-hitting super will score seven hits, while a lower one will score five or six.
Level 3 Super (236236P)
| Startup | Active | Recovery | Cancel | Damage | Guard | On Hit | On Block |
|---|---|---|---|---|---|---|---|
| 9 | 15 | 38 | - | 4000 | LH | HKD +17 | -33(-23) |
| Startup | Active | Recovery | Cancel | Damage | Guard | On Hit | On Block |
|---|---|---|---|---|---|---|---|
| 9 | 15 | 38 | - | 4500 | LH | HKD +22 | -33(-23) |
- Full Invuln: 1-13f
- Depletes 1.5 Drive bar from opponent on hit
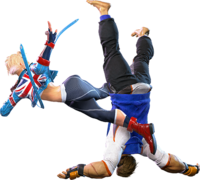
Cammy does a full-screen Spiral Arrow and goes into the full cinematic on hit, crumbling the opponent with several more Spiral Arrows before finishing them with a final kick that cuts across their neck.
SA3 is pretty much Cammy's go-to option for punishing projectiles or other attacks if a regular Spiral Arrow won't reach--not even projectiles will protect the opponent if SA3 is timed correctly. However, this requires careful spacing checks, and can still lose to things like Guile's Solid Puncher or projectiles that persist for longer than the invul period lasts. Despite its range and speed, its hitbox is not very tall vertically, which mostly limits its supercancels to things like Spin Knuckle, the first hit of HK Spiral Arrow, the first hit of [HK] Cannon Spike, or the fourth hit of [HK] and OD Spiral Arrow. It can also be a juggle ender for high float moves if the extra damage is needed.
Taunts
Neutral Taunt (5PPPKKK)
| Startup | Active | Recovery | Cancel | Damage | Guard | On Hit | On Block |
|---|---|---|---|---|---|---|---|
| 335 (total) | - | - | - | - | - | - | - |
Forward Taunt (6PPPKKK)
| Startup | Active | Recovery | Cancel | Damage | Guard | On Hit | On Block |
|---|---|---|---|---|---|---|---|
| 255 (total) | - | - | - | - | - | - | - |
Back Taunt (4PPPKKK)
| Startup | Active | Recovery | Cancel | Damage | Guard | On Hit | On Block |
|---|---|---|---|---|---|---|---|
| 340 (total) | - | - | - | - | - | - | - |

