| Early game information
This game is relatively new, and its pages are still being written. Some information may be mildly inaccurate or missing altogether. You can join the SF6 Resource Hub for more info on editing and other ways you can potentially help with this resource. |
Introduction
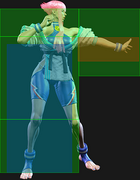
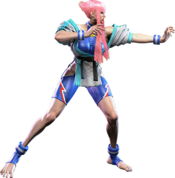
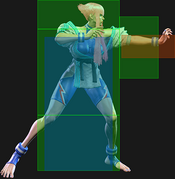
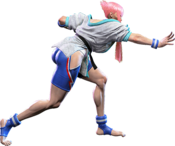
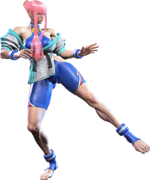
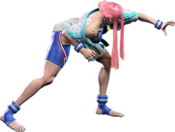
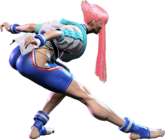
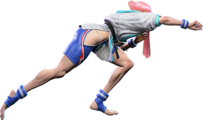
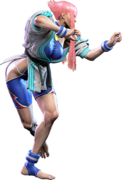
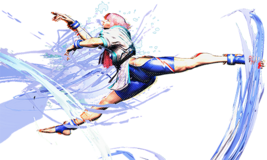
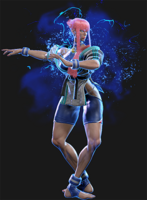
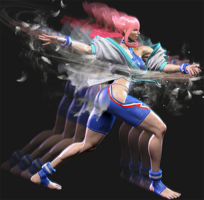
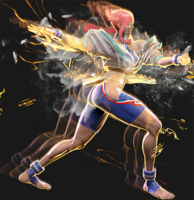
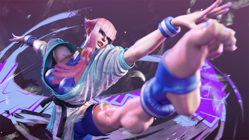
A super model and world champion judoka, Manon is an idealist, forever seeking self-improvement in the pursuit of beauty. She struts the catwalk of street fighting to become the world's strongest model.
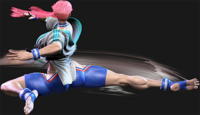
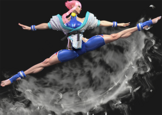
Manon's distinct playstyle features center around long, far reaching normals that control the opponent's position and enhance her strike/throw game, mixed with command throws that scale up in damage every time she manages to hit with them, which gives her a lot of power once she has the momentum.
The centerpoint of Manon's gameplan is based on medals. Landing her Manège Doré command throw or her Renversé hitgrab will grant her an additional medal, up to a maximum of 5. Each medal gained increases the damage of both these moves by a notable amount; Manège Doré itself becomes one of the strongest command grabs in the game if Manon manages to hit 5 medals. Additionally, these medals are carried over between rounds, giving Manon incredible potential to mount powerful comebacks and dominate a match-point game with a well-placed Manège Doré; this is especially dangerous when Manon has enough Drive Meter to go for a Drive Rush Manège Doré, as its effective range increases drastically when used this way.
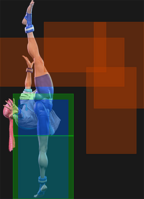
To complement these two moves and her medal system, Manon's long limbs let her play a strong mid-range game to poke and prod the opponent, with quite a few of her grounded and jumping normals having long reach, and several moves having target combo follow-ups that pull the opponent in or otherwise reposition them for Manon to throw them. Many of her special moves and even a few of her Super Arts are also built for callouts or helping Manon to maneuver past tricky situations; Renversé can be feinted for projectile invulnerability, or canceled into a fairly far reaching kick that retains a little of that invulnerability too. She can also use Dégagé to either duck under attacks with the light version, use the medium version punish opponents at long range or end combos, or go for an advancing overhead with the heavy and Overdrive versions. Her 2HP is one of her moves with a target combo follow-up, allowing her to turn anti-air situations to her advantage by dropping the opponent right in front of her, and both her Level 1 and Level 2 Super Arts (Arabesque and Étoile) function as powerful reversals for the ground and against air attacks respectively.
Manon mainly struggles if she lacks Drive Meter, as many of her strongest conversions and pokes or oki setups may require her to Drive Rush Cancel her normals in order to be a threat. Some of her neutral tools also have noticeable recovery windows in exchange for their speed and reach, meaning that a wary opponent can punish her for them if they make the right call on what she's going to do; this is especially true when trying to land Manège Doré, as it has a notable recovery time on whiff. If you like to dance around opponents and see them fly through the sky, then pirouette into place with Manon.
| Pick if you like: | Avoid if you dislike: |
|---|---|
|
|
Classic & Modern Versions Comparison
| Missing Normals |
|
|---|---|
| Missing Command Normals |
|
| Shortcut-Only Specials |
|
| Miscellaneous Changes |
|
| Manon | |
|---|---|
| Vitals | |
| Life Points | 10000 |
| Ground Movement | |
| Forward Walk Speed | 0.0452 |
| Backward Walk Speed | 0.031 |
| Forward Dash Speed | 21 |
| Backward Dash Speed | 25 |
| Forward Dash Distance | 1.499 |
| Backward Dash Distance | 1.254 |
| Drive Rush Min. Distance (Throw) | 0.506 |
| Drive Rush Min. Distance (Block) | 1.417 |
| Drive Rush Max Distance | 2.347 |
| Jumping | |
| Jump Speed | 4+38+3 |
| Jump Apex | 2.115 |
| Forward Jump Distance | 1.90 |
| Backward Jump Distance | 1.52 |
| Throws | |
| Throw Range | 0.8 |
| Throw Hurtbox | 0.33 |
| Frame Data Glossary - SF6 | |
|---|---|
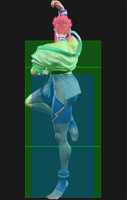
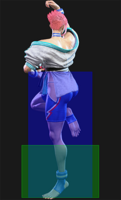
| Hitbox Images |
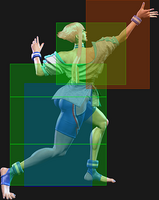
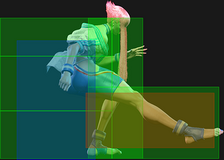
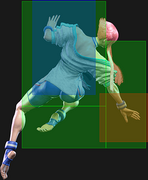
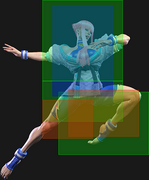
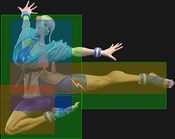
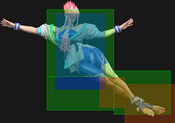
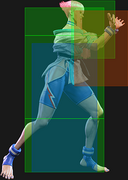
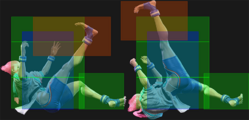
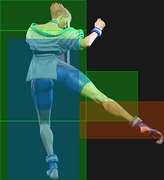
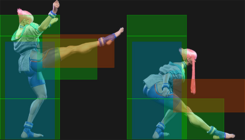
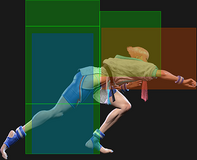
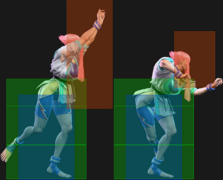
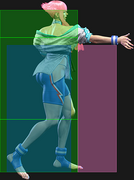
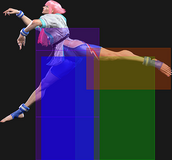
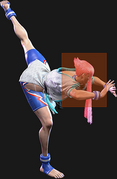
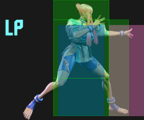
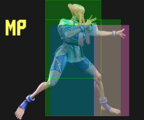
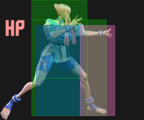
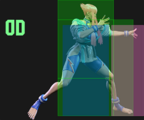
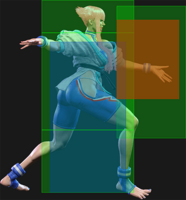
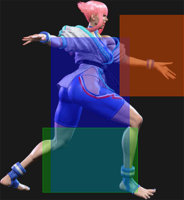
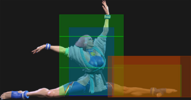
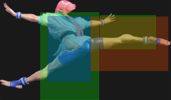
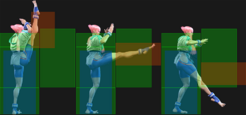
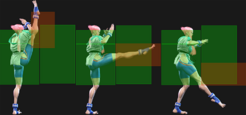
🟥 (Red): Attack hitbox
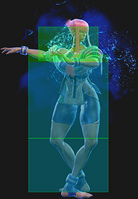
🟩 (Green): Vulnerable hurtbox that can be hit by strikes/projectiles
🟦 (Blue): Vulnerable throw hurtbox
|
| Active |
How many frames a move remains active (can hurt opponents) for. For projectiles with a maximum active period, a value may be listed in [brackets], but this number is not factored into the move's total frame count.
|
| Cancel |
Available options for canceling one move into another move.
|
| Cancel Hitconfirm Windows |
Hitconfirm reaction windows into Special Moves, Target Combos, and Super Arts.
|
| Damage |
Attack damage on hit. Multi-hit moves may have the damage listed for individual hits as X,Y (or sometimes X*Y). Sometimes a move's damage changes depending on which active frame connects, or on cinematic vs. non-cinematic hits; in this case, multiple values may be listed, and it will be clarified in the move description.
|
| Damage Scaling |
Some moves cause additional damage scaling in combos. Refer to Game Data page for a more detailed breakdown. Scaling Types:
|
| Drive Rush Cancel Advantage |
Refers to the frame advantage when canceling a normal, command normal, or Target Combo into Drive Rush on hit or block (abbreviated as DRC for Drive Rush Cancel). This is calculated at the moment a follow-up attack can be input, not at the moment the character can block or perform movement options. An attack that with DRC +8 on Hit can link into an 8-frame attack, and DRC +4 on Block can create a true blockstring into a 4-frame attack. Note that any DRC on Block worse than +4 cannot form a true blockstring, allowing the opponent to interrupt with an invincible reversal. Most light normals are slightly negative after a DRC on block, meaning the opponent can mash their fastest normal to guarantee a counter-hit (though this requires fast reactions). The attacking character could punish this with Light > DRC into an immediate invincible attack, but this would be an incredibly expensive and high-risk gambit.
|
| Forced Knockdown |
Most airborne command normals, special moves, and Super Arts put the user in a "Forced Knockdown" state. While in this state, an air knockdown will occur when being hit by any attack, even if it would otherwise cause an air reset. As an example, Ryu's 2HP causes an air reset when used as an anti-air. Against a move like Cammy's Hooligan Combination, however, the 2HP puts her into an air knockdown state. This allows Ryu to successfully cancel 2HP into Shoryuken for a juggle, similar to how a Drive Impact wall splat works. Taking advantage of Forced Knockdown juggles is important for dealing with moves like Ken's Dragonlash, Dhalsim's Air Teleport, or Kimberly's 6HK~Hop sequence. Moves that already cause an air knockdown, like most j.MP air-to-airs, will not display the "Forced Knockdown" message.
|
| Guard |
Refers to the direction an attack must be blocked. L is for Low attacks (must be blocked crouching), H is for High attacks/overheads (must be blocked standing), LH is for attacks that can be blocked crouching or standing. T is for Throw attacks which cannot be blocked.
|
| Juggles |
When a character is put into an Air Knockdown state, it is often possible to follow up with a Juggle attack before they hit the ground. In the simplest terms, there are 2 main juggle states:
The following is a more detailed overview of the SF6 juggle system:
Juggle Start (JS): When starting a juggle, the opponent's JC will be set to this value. May be different vs. standing and airborne opponents.
Juggle Increase (JI): When opponent is already in a juggle state, attacks will increase the opponent's JC by this amount.
Juggle Limit (JL): Property of an attack hitbox that determines whether it connects on a juggled opponent. The JL must be ≥ the opponent's JC to hit successfully.
An example to tie everything together:
Drive Rush notes:
|
| On Hit/Block |
These are frame advantage values when the attack hits or is blocked. If the number is positive, then the move will recover before the defender can act again. If the number is negative, the defender will be able to act before the attacker and maybe even punish. KD refers to knockdown on hit, and the listed KD Advantage refers to how many frames the attacker can act before the defender finishes their wakeup animation.
|
| Recovery |
How many frames it takes for a move to finish after the active frames have finished. For projectiles, recovery is considered to begin after the first active frame.
|
| Startup |
How many frames it takes before the move becomes 'active' or have a hit box. The last startup frame and the first active frame are the same frame, meaning all values are written as Startup + 1.
|
Normals
Standing Normals
5LP
| Startup | Active | Recovery | Cancel | Damage | Guard | On Hit | On Block |
|---|---|---|---|---|---|---|---|
| 4 | 3 | 10 | Chn Sp SA | 300 | LH | +4 | -1 |
- Chains into 5LP/2LP/2LK
- Cancel Hitconfirm Window: 13f
- DR cancel is delayed until after active frames
- Drive Rush cancel advantage: +5 oH / 0 oB
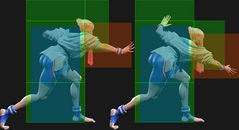
Higher-hitting cousin to 2LP. Often used as combo filler during Drive Rush routes, where it links into 4HP for a Renversé medal. Its high hitstun makes it the only light normal that can combo naturally into either 214LK or 214MK.
5MP
| Startup | Active | Recovery | Cancel | Damage | Guard | On Hit | On Block |
|---|---|---|---|---|---|---|---|
| 7 | 4 | 14 | Sp SA TC | 600 | LH | +2 | -1 |
- Cancel Hitconfirm Window: 16f / 19f (TC)
- Drive Rush cancel advantage: +10 oH / +7 oB
- Applies 10% damage scaling to next hit when beginning a combo (100/90/80...)
A strong poking normal that advances slightly forwards. Very effective as a reactive check outside jab range, and a strong meaty option due to its high active frame count. Combos into 236LP on Punish Counter, but only if canceled immediately. Comes with a semi-confirmable Target Combo (5MP~MK) that also works well as a whiff punish to pull opponents back into command grab range.
This normal deserves special mention in Burnout as it becomes particularly brutal. The bonus frame advantage makes it +3 on block, and when combined with its forwards momentum and 7f startup, it will trade with 4f buttons and frame trap everything else. Combined with Manon's excellent throw game, it's vaguely reminiscent of a recently redesigned Arc System Works slugger. Repeated 5MPs can scare the opponent into sitting still, which Manon can greatly take advantage of as +3 is enough frame advantage for an un-mashable normal throw or 63214HP.
5HP
| Startup | Active | Recovery | Cancel | Damage | Guard | On Hit | On Block |
|---|---|---|---|---|---|---|---|
| 10 | 4 | 20 | SA TC | 800 | LH | 0 | -3 |
- Puts airborne opponents into limited juggle state
- Cancel Hitconfirm Window: 18f (Super) / 29f (TC)
Manon's go-to neutral tool and a strong meaty option after a Drive Rush. Being only -3 on block, this normal is quite safe to throw out. It also comes with a confirmable Target Combo follow-up that pulls opponents back to Manon for a mixup. Additionally, it makes for a strong ranged punish as it is super cancelable and will almost always connect into her SA1.
Manon will recover slightly farther forward if any input is given immediately after the recovery frames of this move. Providing no input at all after a blocked standing heavy punch can often leave Manon out of range of her opponent's light and medium buttons (at max range, even moves like Ken's standing heavy kick will miss), providing a set-up for easy whiff punishes.
5LK
| Startup | Active | Recovery | Cancel | Damage | Guard | On Hit | On Block |
|---|---|---|---|---|---|---|---|
| 5 | 2 | 12 | Sp SA | 300 | LH | +2 | -2 |
- Cancel Hitconfirm Window: 12f
- Drive Rush cancel advantage: +6 oH / +2 oB
- Applies 10% damage scaling to next hit when beginning a combo (100/90/80...)
Manon's farthest reaching special cancelable light normal, which allows her to link out of moves like 2MP and 214KK when her other cancelable light normals would whiff completely. However, her cancel options are limited after a hitconfirm, as 214LP/214MK are too slow to combo naturally.
Important for punishing some -5 or -6 attacks with high pushback; the extra Punish Counter advantage also allows stronger combo enders for improved corner carry and oki.
5MK
| Startup | Active | Recovery | Cancel | Damage | Guard | On Hit | On Block |
|---|---|---|---|---|---|---|---|
| 10 | 3 | 18 | Sp SA | 600 | LH | -2 | -5 |
- Front leg hurtbox is raised on frames 9-12 (better vs. low pokes)
- Cancel Hitconfirm Window: 18f
- DR cancel is delayed until after active frames
- Drive Rush cancel advantage: +7 oH / +4 oB
Excellent low counterpoke with slightly more reach than 5MP. A little on the slower side, but hits at the right height to whiff punish things like shoto 2MKs which would normally be a little more difficult for Manon due to her tall frame.
5HK
| Startup | Active | Recovery | Cancel | Damage | Guard | On Hit | On Block |
|---|---|---|---|---|---|---|---|
| 15 | 3 | 26 | - | 900 | LH | -2 | -6 |
- Punish Counter: +17 Stagger (ground), spinning free juggle state (air)
- Extends a hurtbox 1f before active that is vulnerable to projectiles
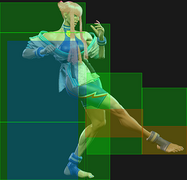
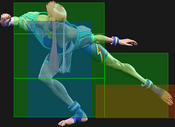
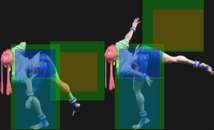
Manon's farthest reaching poke, great for harassing mid-range opponents where it becomes impossible for most characters to punish. The slow startup and recovery makes it susceptible to Drive Impact if overused.
A Punish Counter can convert into a 214LK or 214MK knockdown even from max range. From point blank, a microwalk also barely allows a link into 4MK or 4HP, significantly improving Manon's punish damage.
Crouching Normals
2LP
| Startup | Active | Recovery | Cancel | Damage | Guard | On Hit | On Block |
|---|---|---|---|---|---|---|---|
| 4 | 2 | 11 | Chn Sp SA | 300 | LH | +2 | -2 |
- Chains into 5LP/2LP/2LK (true blockstring into 5LP/2LP)
- Cancel Hitconfirm Window: 12f
- Drive Rush cancel advantage: +5 oH / +1 oB
- Applies 10% damage scaling to next hit when beginning a combo (100/90/80...)
Manon's main pressure tool, and a more reliable 3-light confirm than 5LP due to its longer range. Can frame traps into itself if the chain is slightly delayed, which can punish opponents who try to jump or backdash out of Manon's throw mixups.
2MP
| Startup | Active | Recovery | Cancel | Damage | Guard | On Hit | On Block |
|---|---|---|---|---|---|---|---|
| 7 | 3 | 11(13) | Sp SA | 600 | LH | +6 | -1 |
- 2f extra recovery on whiff
- Cancel Hitconfirm Window: 15f
- Drive Rush cancel advantage: +10 oH / +3 oB
Manon's best link starter and combo filler. Has the same startup as 5MP with much better hit advantage, it's much more commonly used in Drive Rush combos as a way to link into 4HP. Has incredibly fast recovery for a medium button, making it a useful counterpoke despite its 2 extra whiff recovery frames.
2HP
| Startup | Active | Recovery | Cancel | Damage | Guard | On Hit | On Block |
|---|---|---|---|---|---|---|---|
| 10 | 5 | 21 | TC | 600 | LH | -2 | -8 |
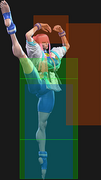
- Anti-Air Invuln (Arm/Head): 7-34f; strong anti-air but cannot hit cross-up
- Puts airborne opponents into limited juggle state
- Cancel Hitconfirm Window: 23f (TC)
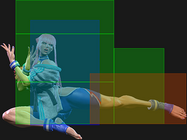
Incredibly potent anti-air. Hits high above and in front of Manon while remaining in a crouching state; combined with the anti-air invincibility frames, it will beat almost any jump-in cleanly as long as the opponent doesn't cross over. Also leads to above average reward with a Target Combo follow-up, giving Manon point blank oki. While easier to land in a pinch, 2HP can't lead to Medals or corner carry like a 236K anti-air.
Outside of the Target Combo, the juggle state vs. airborne opponents is not very useful, as it has incredibly high Juggle Start and Juggle Increase values preventing a follow-up.
2LK
| Startup | Active | Recovery | Cancel | Damage | Guard | On Hit | On Block |
|---|---|---|---|---|---|---|---|
| 5 | 2 | 13 | Chn | 200 | L | -1 | -5 |
- Chains into 5LP/2LP/2LK
- Applies 10% damage scaling to next hit when beginning a combo (100/90/80...)
Manon's fastest low, chaining into 2LP for a knockdown conversion. The pushback is quite high, preventing a 3-hit light confirm without Drive Rush momentum.
Keep in mind that this is a 5-frame normal, and will trade with 4f lights when Manon is +1 (a common situation after Drive Rush 5HP/4HP/4MK on block).
2MK
| Startup | Active | Recovery | Cancel | Damage | Guard | On Hit | On Block |
|---|---|---|---|---|---|---|---|
| 8 | 4 | 16 | - | 600 | L | +2 | -2 |
- High pushback on hit and block
Uncancelable low poke, but comes with good reward when used out of a Drive Rush. A respectable normal overall but somewhat outshined by her other pressure and neutral options.
2HK
| Startup | Active | Recovery | Cancel | Damage | Guard | On Hit | On Block |
|---|---|---|---|---|---|---|---|
| 11 | 2 | 27 | - | 900 | L | HKD +29 | -12 |
- Counter-hit/Punish Counter: HKD +44
- Has juggle potential; not a Hard Knockdown when juggled into
Moves Manon forward, giving it good range but making it consistently punishable on block. Provides good okizeme on hit, leaving Manon +8 after a Forward Dash to threaten with either 4HP or 63214LP.
Jumping Normals
j.LP
| Startup | Active | Recovery | Cancel | Damage | Guard | On Hit | On Block |
|---|---|---|---|---|---|---|---|
| 5 | 10 | 3 land | - | 300 | H | - | - |
Manon's fastest but least rewarding air-to-air, useful for very close jumps where 236K and 2HP are unreliable.
j.MP
| Startup | Active | Recovery | Cancel | Damage | Guard | On Hit | On Block |
|---|---|---|---|---|---|---|---|
| 8 | 4 | 3 land | - | 700 | H | - | - |
- Lower Body Projectile Invuln: 8-22f
- Puts airborne opponents into limited juggle state
- Shifts Manon's hurtbox upward during startup
An air-to-air with a strong disjointed horizontal hitbox. Depending on the air-to-air timing, Manon can land and juggle with Renversé or Rond-point; if this is not possible, she can still get good oki afterwards. When used in the middle of a juggle combo, the high juggle increase value prevents further follow-ups from connecting.
The lower body projectile invincibility can save Manon from landing on a fireball, as long as the projectile hitbox moves past her before she actually hits the ground.
j.HP
| Startup | Active | Recovery | Cancel | Damage | Guard | On Hit | On Block |
|---|---|---|---|---|---|---|---|
| 9 | 4 | 3 land | - | 800 | H | - | - |
- Spike knockdown vs. airborne opponents
Weaker as a jump-in than j.HK and generally a worse air-to-air than j.MP. Has a niche use against close range opponents trying to walk under Manon's jump, as j.HK may occasionally reach too far forward.
j.LK
| Startup | Active | Recovery | Cancel | Damage | Guard | On Hit | On Block |
|---|---|---|---|---|---|---|---|
| 6 | 9 | 3 land | - | 300 | H | - | - |
- Can hit cross-up
- Can be used as a fuzzy instant overhead (requires perfect safe jump timing)
A weaker cross-up than j.MK, but useful for setting up a surprise tick throw with its low blockstun. The instant overhead property is rarely useful due to its high risk and low reward, especially since Manon already has other high/low mixup options.
j.MK
| Startup | Active | Recovery | Cancel | Damage | Guard | On Hit | On Block |
|---|---|---|---|---|---|---|---|
| 7 | 6 | 3 land | - | 500 | H | - | - |
- Can hit cross-up
- Shifts Manon's hurtbox upward during startup
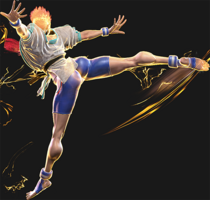
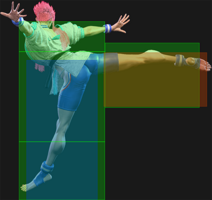
Your preferred cross-up, and also good for air-to-airs thanks to it good horizontal range.
j.HK
| Startup | Active | Recovery | Cancel | Damage | Guard | On Hit | On Block |
|---|---|---|---|---|---|---|---|
| 11 | 5 | 3 land | - | 800 | H | - | - |
Manon's primary jump-in as it hits very deep and deals good damage.
Command Normals
4MK
| Startup | Active | Recovery | Cancel | Damage | Guard | On Hit | On Block |
|---|---|---|---|---|---|---|---|
| 10 | 4 | 19 | TC | 600 | LH | -1 | -3 |
- Decent anti-air hitbox but cannot hit cross-up
- Puts airborne opponents into limited juggle state
- Cancel Hitconfirm Window: 28f (TC, only combos up to 20f)
A relatively unassuming normal at first, 4MK is a surprisingly strong mixup tool. Manon can use the attached Target Combo (4MK~MK) as a frame trap, or start from Drive Rush to make 4MK plus enough for a mixup on block. Opponents expecting the Target Combo may try to Parry in response, so this can lead to a "fake" tick throw with 63214P.
While 2HP is a better all around anti-air, 4MK can lead to greater reward. The Target Combo extension can continue the juggle, or Manon can juggle directly into 236KK/SA1/SA2 on a high juggle connect.
4HP
| Startup | Active | Recovery | Cancel | Damage | Guard | On Hit | On Block |
|---|---|---|---|---|---|---|---|
| 8 | 6 | 17 | Sp SA | 800 | LH | +3 | -3 |
- Puts airborne opponents into limited juggle state
- Cancel Hitconfirm Window: 22f
- Drive Rush cancel advantage: +16 oH / +10 oB
A short-ranged button used mostly as a punish starter or combo filler, particularly in Drive Rush routes that allow Manon to increase her Medal Level with 236MP.
4HP is a strong meaty option with its high active frame count, reaching up to +2 on block and +8 on hit for followup links or pressure. The hitconfirm window is lenient, but late cancels into 236P, 214HK, or 214KK can fail to combo. It is also useful in some juggle routes since it maintains the opponent's juggle state, allowing a juggle into any version of 236P (though slower versions require a higher juggle height).
3HK
| Startup | Active | Recovery | Cancel | Damage | Guard | On Hit | On Block |
|---|---|---|---|---|---|---|---|
| 11 | 9 | 32 | - | 1000 | LH | KD +26 | -23 |
- Anti-Air Invuln (Leg): 9-19f (can hit cross-up); side switch vs. airborne
- Puts opponent into limited juggle state
- Punish Counter: HKD +36, side switch
- Only 1st active frame can hit grounded; active frames 2-9 hit airborne
A strange command normal that looks like a sweep but is primarily used for repositioning in juggles with its side switch. A Punish Counter also switches sides even on a grounded opponent, and the Hard Knockdown gives her significantly better follow-up oki.
After a Drive Impact crumple, Manon can get decent damage and a side switch with nj.HK into 3HK.
Target Combos
5MP~MK
| Startup | Active | Recovery | Cancel | Damage | Guard | On Hit | On Block |
|---|---|---|---|---|---|---|---|
| 10 | 2 | 17 | - | 500 | LH | +2 | -5 |
- Always a true blockstring from 5MP even at max delay
A vacuuming TC that pulls the opponent in after 5MP on hit or block. Primarily used as a whiff punish tool to set up a mixup between light normals or a command throw. Can also be confirmed directly from 5MP with good reactions.
4MK~MK
| Startup | Active | Recovery | Cancel | Damage | Guard | On Hit | On Block |
|---|---|---|---|---|---|---|---|
| 14 | 5 | 21 | Sp SA | 500 | H | -3 | -11 |
- Puts airborne opponents into limited juggle state
- Forces Crouch on hit
- 2f blockstring gap after 4MK (larger gap if delayed)
- Cancel Hitconfirm Window: 17f (single hit) / 49f (full TC)
- Special/DR cancel is delayed until after 3rd active frame
- Drive Rush cancel advantage: +11 oH / +3 oB
A fast overhead follow-up after 4MK that can be special canceled. Especially powerful after DR~4MK, as Manon can threaten with this overhead, a command throw, or light normals as a frame trap. While Manon has a lenient cancel window from 4MK, delaying too long will cause the TC to drop in combos.
By forcing the opponent to crouch on hit, Manon gains access to her damaging 214KK combo routes.
The TC itself is quite unsafe on block, so Manon has to bail out with a 3-bar Drive Rush cancel if the opponent blocks. Other special cancel options are either very unsafe or interruptible on startup.
5HP~HP
| Startup | Active | Recovery | Cancel | Damage | Guard | On Hit | On Block |
|---|---|---|---|---|---|---|---|
| 5 | 2 | 20(22) | - | 600 | LH | +3 | -8 |
- 2f extra recovery on block
- Always a true blockstring from 5HP even at max delay
Another vacuuming Target Combo, this one is much easier to hitconfirm due to 5HP's enormous cancel window. Sets up a close range strike/throw mixup on hit, but can be heavily punished on block. It's possible for the 2nd hit to drop if Manon hits an extended limb hurtbox, but otherwise it's reliable.
If used in a juggle, the opponent is air reset instead but still lands directly in front of Manon.
2HP~HP
| Startup | Active | Recovery | Cancel | Damage | Guard | On Hit | On Block |
|---|---|---|---|---|---|---|---|
| 4 | 4 | 26 | - | 500 | LH | +1 (KD +17~19) | -10 |
- Spike knockdown vs. airborne opponents
- Slightly high KD advantage on high juggled opponents
Fairly useless on the ground, but excellent as a follow-up to Manon's powerful 2HP anti-air. The opponent is dropped directly in front of Manon for point blank oki.
Throws
Forward Throw (LPLK)
| Startup | Active | Recovery | Cancel | Damage | Guard | On Hit | On Block |
|---|---|---|---|---|---|---|---|
| 5 | 3 | 23 | - | 1200 (2040) | T | KD +16 | - |
- Punish Counter: HKD +16
- Applies 20% immediate damage scaling when comboed into (e.g. after Crumple)
Manon is left close to the opponent after a corner throw, allowing for a manually timed throw loop. She can also Drive Rush into an auto-timed throw mixed with 2MP or 4HP to present a bigger threat; however, the opponent can react to the Drive Rush freeze with an invincible reversal. While it may be tempting to use only command throws for the damage and medals, Manon's normal throw allows her to stay safe against opponents that try to jump out of command throws often.
Back Throw (4LPLK)
| Startup | Active | Recovery | Cancel | Damage | Guard | On Hit | On Block |
|---|---|---|---|---|---|---|---|
| 5 | 3 | 23 | - | 1200 (2040) | T | KD +18 | - |
- Side switch
- Punish Counter: HKD +18
- Applies 20% immediate damage scaling when comboed into (e.g. after Crumple)
Manon can force a strike/throw mixup after throwing the opponent back into the corner. Midscreen, she can chase down a Back Rise with a button like 5MP for meaty pressure; she can also Drive Rush into a mixup between a strike or an auto-timed 63214LP.
Drive System
Drive Impact (HPHK)
| Startup | Active | Recovery | Cancel | Damage | Guard | On Hit | On Block |
|---|---|---|---|---|---|---|---|
| 26 | 2 | 35 | - | 800 | LH | KD +35 / Wall Splat KD +65 | -3 / Wall Splat HKD +72 |
- Armor (2-hit): 1-27f
- Applies 20% damage scaling to next hit when beginning a combo (including Wall Splat on block)
- Combos when canceled from Punish Counter 4HP (no corner wallsplat)
- Useful for draining opponent's Drive gauge, especially after Perfect Parry
See Drive Impact on the Gauges page for more details.
When canceled from a normal, these are the important blockstring gaps; a gap of N will trade with an N-frame startup attack; [] = Burnout
- 4HP: 7[3]
- 5MP: 10[6]
- 5MK: 11[7]
- 2MP, 4MK~MK: 14[10]
- Note: A gap ≥ 6f can be thrown, and a gap ≥ 9f can be jumped out of by most characters
Against the following characters in Burnout:
- JP (22K), frame 3 counter
- Marisa (214K), frame 3 armor
- Zangief (5[HP]), frame 4 armor
It's important to use a blockstring that cannot be absorbed by their armor/counter moves. Ideally, the string should also not be a true combo, or it will cause a Lock and prevent Stun. Note that if the opponent mashes buttons on wakeup, the counter-hit will cause DI to Lock.
- 4HP > DI: 3f blockstring gap will work vs. Zangief 5[HP]
- DR~5MP > DI: 2f blockstring gap prevents opponent from absorbing the hit
- DR~5MK > DI: 3f blockstring gap will work vs. Zangief 5[HP]
Drive Reversal (6HPHK)
| Startup | Active | Recovery | Cancel | Damage | Guard | On Hit | On Block |
|---|---|---|---|---|---|---|---|
| 20 | 3 | 26(31) | - | 500 recoverable | LH | KD +23 | -8 |
- Full Invuln: 1-22f; Armor Break
- 5f extra recovery on hit
See Drive Reversal on the Gauges page for more details.
Drive Parry (MPMK)
| Startup | Active | Recovery | Cancel | Damage | Guard | On Hit | On Block |
|---|---|---|---|---|---|---|---|
| 1 | 8 or until released | 29(1)(11) | - | - | - | - | - |
See Drive Parry on the Gauges page for more details.
- Perfect Parry:
- Applies a 50% damage scaling multiplier to any punish afterwards
- vs. strikes, has only 1f recovery and prevents the opponent from canceling their attack
- vs. projectiles, puts you into a fixed 11f recovery
Drive Rush (66)
| Startup | Active | Recovery | Cancel | Damage | Guard | On Hit | On Block |
|---|---|---|---|---|---|---|---|
| 9(11) | 45(46) | 24(23) | - | - | - | - | - |
- Applies 15% damage scaling multiplier to any follow-up hits when used mid-combo
- Only applies scaling once per combo; does not apply when an enhanced Drive Rush attack starts the combo
See Drive Rush on the Gauges page for more details. Frame data shown in (parentheses) refers to Parry Drive Rush.
- Distance:
- 0.506 (min, cancel into immediate Throw)
- 1.417 (min, earliest blocking/movement frame)
- 2.347 (max, final DR frame)
- See Strategy page for Blockstring Gaps and Combo Routes
Special Moves
Manège Doré (63214P)
| Startup | Active | Recovery | Cancel | Damage | Guard | On Hit | On Block |
|---|---|---|---|---|---|---|---|
| 10 | 2 | 49 | - | 2000~3700 | T | HKD +19 | - |
- Range: 1.53
| Startup | Active | Recovery | Cancel | Damage | Guard | On Hit | On Block |
|---|---|---|---|---|---|---|---|
| 8 | 2 | 51 | - | 2000~3700 | T | HKD +19 | - |
- Range: 1.37
| Startup | Active | Recovery | Cancel | Damage | Guard | On Hit | On Block |
|---|---|---|---|---|---|---|---|
| 5 | 2 | 54 | - | 2000~3700 | T | HKD +19 | - |
- Range: 1.14
| Startup | Active | Recovery | Cancel | Damage | Guard | On Hit | On Block |
|---|---|---|---|---|---|---|---|
| 8 | 2 | 51 | - | 2000~3700 | T | HKD +19 | - |
- Range: 1.52
Manon's command grab. LP has the most range and the most startup, HP has the least range and the least startup. Landing Manège Doré increases Manon's Medal Level, which in turn increases the damage of her next Manège Doré or Renversé. Manège Doré starts as one of the weakest command grabs in terms of raw damage, but surpasses even the mighty SPD in terms of damage output by level 4 and becomes the highest damaging non-super command grab at level 5. With Punish Counter, this damage skyrockets even higher.
The OD version has the startup of the MP version, combined with the range of the LP version.
The damage of the command grab is not affected by which version is used, but instead on Manon's Medal level:
- Level 1: 2000 (PC: 2300)
- Level 2: 2300 (PC: 2645)
- Level 3: 2700 (PC: 3105)
- Level 4: 3000 (PC: 3450)
- Level 5: 3700 (PC: 4255)
Renversé (236P)
| Startup | Active | Recovery | Cancel | Damage | Guard | On Hit | On Block |
|---|---|---|---|---|---|---|---|
| 22 | 2 | 37 | SA3 (1st) | 50,(1300~1900) | LH | HKD +15 | -23 |
- Projectile Invuln: 3-21f
- Cancel Hitconfirm Window: 13f (Super)
| Startup | Active | Recovery | Cancel | Damage | Guard | On Hit | On Block |
|---|---|---|---|---|---|---|---|
| 25 | 2 | 34 | SA3 (1st) | 100,(1300~1900) | LH | HKD +15 | -20 |
- Projectile Invuln: 3-24f
- Cancel Hitconfirm Window: 13f (Super)
| Startup | Active | Recovery | Cancel | Damage | Guard | On Hit | On Block |
|---|---|---|---|---|---|---|---|
| 29 | 2 | 30 | SA3 (1st) | 200,(1300~1900) | LH | HKD +15 | -16 |
- Projectile Invuln: 3-28f
- Cancel Hitconfirm Window: 13f (Super)
| Startup | Active | Recovery | Cancel | Damage | Guard | On Hit | On Block |
|---|---|---|---|---|---|---|---|
| 25 | 2 | 34 | - | 200,(1300~1900) | LH | HKD +15 | -20 |
- Projectile Invuln: 3-26f; Upper Body Strike Invuln: 3-26f
The strike complement to Manège Doré. Like Manège Doré, landing Renversé increases Manon's Medal Level (but not if the first hit is canceled), which increases the damage of her next Manège Doré or Renversé. Renversé is, in turn, better suited for ending combos or juggles due to being a strike. However, it is quite slow, limiting Manon's combo opportunities into it. Leaves opponents closer with more medals, but due to the meagre plus frames the oki will always be mediocre.
Alongside projectile invulnerability, OD Renversé has upper-body invulnerability from frame 3 onwards making it a valuable counter to high-hitting attacks like Honda's Sumo Headbutt.
Since airborne opponents become grounded again after the initial hit, the non-OD versions of this move can be used to confirm into Manon's SA3, even after a juggle. However, this will only do the base damage for the version (50/100/200 damage respectively) and forgoes all the additional damage that the actual throw does, as well as not increasing her medal level. Interestingly, an additional 100 damage is added after the super flash that does not increase the combo counter and uses the current scaling value, but has a minimum scaling of 50% just like the super.
Renversé Feint (236[P])
| Startup | Active | Recovery | Cancel | Damage | Guard | On Hit | On Block |
|---|---|---|---|---|---|---|---|
| - | - | 33/34/35 | - | - | - | - | - |
- Projectile Invuln: LP 3-15f / MP 3-16f / HP 3-17f
- Feint Travel Distance: LP 0.85 / MP 1.10 / HP 1.14
| Startup | Active | Recovery | Cancel | Damage | Guard | On Hit | On Block |
|---|---|---|---|---|---|---|---|
| - | - | 34 | - | - | - | - | - |
- Projectile Invuln: 3-16f; Upper Body Strike Invuln: 3-16f
- Feint Travel Distance: 1.23
Holding the Punch button turns Renversé into a graceful twirl. This twirl actually has a decent amount of projectile invulnerability and can be used to bypass projectile zoning if used carefully.
Grand Fouetté (236P~K)
| Startup | Active | Recovery | Cancel | Damage | Guard | On Hit | On Block |
|---|---|---|---|---|---|---|---|
| (16/17/18)+11 | 6 | 22 | SA3 | 800 | LH | KD +51(+56) | -5(0) |
- Cancel Hitconfirm Window: 22f (SA3, no combo unless armor absorbed)
- Applies 10% immediate damage scaling when comboed into
| Startup | Active | Recovery | Cancel | Damage | Guard | On Hit | On Block |
|---|---|---|---|---|---|---|---|
| 15+11 | 6 | 22 | SA2 SA3 | 800 | LH | KD +58(+63) | -12(-7) |
- Cancel Hitconfirm Window: 22f (SA2) (No SA3 combo unless armor absorbed)
- Applies 10% immediate damage scaling when comboed into
Pressing any Kick button during Renversé will transition into Grand Fouetté. Grand Fouetté has a lot more reach than the hitgrab itself while also retaining some of the projectile invulnerability of the twirl. Hitting an opponent with the kick has a very high amount of knockdown advantage, enough time to raw Drive Rush and extend a combo. It is, however, quite slow, limiting it to being used after a Punish Counter 4HP.
When used as a combo starter, the Punish Counter version of 236P~K has better launch properties and puts the opponent in a free juggle state. Additionally, when used mid-combo, it does not increase the juggle count, which allows certain follow-ups that are not possible with the OD version. In comparison, the OD version will always cause a free juggle when used as the first juggle in a combo, but increases the juggle count when used after that.
Both versions of this move also have unique scaling rules that can heavily penalize their usage in combos. Starting a combo with either move causes the next move of the combo to count towards scaling twice, dropping the scaling on the third move to 70%. Using either during a combo will instead cause the move itself to count twice, in addition to losing a flat 10% from its current scaling value (e.g. starter [100%] -> 236P~K [90%] -> follow-up [70%]).
Rond-point (236K)
| Startup | Active | Recovery | Cancel | Damage | Guard | On Hit | On Block |
|---|---|---|---|---|---|---|---|
| 9 | 3(2)2 | 29 | SA3* | 400,500 | LH | KD +31 | -15 |
- Upper Body Anti-Air Invuln: 5-15f
- Cancel Hitconfirm Window: 22f (SA3, no combo unless armor absorbed)
| Startup | Active | Recovery | Cancel | Damage | Guard | On Hit | On Block |
|---|---|---|---|---|---|---|---|
| 11 | 3(3)3 | 27 | SA3* | 400,600 | LH | KD +34 | -14 |
- Upper Body Anti-Air Invuln: 7-19f
- Cancel Hitconfirm Window: 24f (SA3, no combo unless armor absorbed)
| Startup | Active | Recovery | Cancel | Damage | Guard | On Hit | On Block |
|---|---|---|---|---|---|---|---|
| 14 | 3(3)3 | 22(24) | SA3 | 400x2 | LH | KD +37 | -11 |
- Upper Body Anti-Air Invuln: 9-22f
- Cancel Hitconfirm Window: 13f (SA3, 1st hit) / 26f (2nd hit no combo unless armor absorbed)
| Startup | Active | Recovery | Cancel | Damage | Guard | On Hit | On Block |
|---|---|---|---|---|---|---|---|
| 8 | 4(2)3 | 25(30) | SA2 SA3 (2nd) | 400x2 | LH | KD +45 | -19 |
- Anti-Air Invuln: 4-16f
- Cancel Hitconfirm Window: 28f (SA2, 2nd hit only) (No SA3 combo unless armor absorbed)
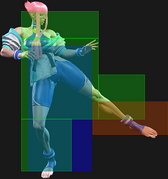
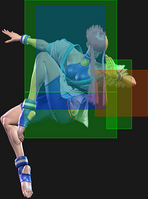
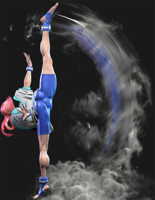
A kick that hits above and in front of Manon. Excellent for ending grounded combos that Renversé would be too slow for. Note that the HK version actually does less damage, making it worse as a combo ender than the LK or MK version. Being the slowest, the HK version is risky as an anti-air, but boasts the greatest reward, allowing for a follow-up into juggled 214MK or even 236P on hit. Because each version moves forward slightly on startup, they're weaker to closer jump-ins where they may whiff entirely.
The OD version launches opponents for a juggle, while the other versions are too slow to combo out of on grounded hit. Even though all four versions are cancelable into SA3, only the HK version is able to combo into it. This causes a bit more scaling than canceling 236P into SA3, so this cancel should primarily be used late in combos that have already reached 50% scaling or below. Both the LK and the MK versions launch on the first hit, while the OD version is only cancelable on the second; these cancels into SA3 can only be useful if you notice the opponent is using an armored move like Drive Impact.
Both the HK and OD versions of this move can have their recoveries canceled early into any additional special move or super on hit; the exact value for each is indicated in (). This allows for more optimal combo routes in the corner, or additional follow-ups midscreen (such as 214MK).
Dégagé (214K)
| Startup | Active | Recovery | Cancel | Damage | Guard | On Hit | On Block |
|---|---|---|---|---|---|---|---|
| 16 | 2(10)4 | 36 | - | 300,700 | L | KD +21 | -24 |
The LK version is two low-hitting kicks. Has huge reach and must be blocked low (and a 15-frame startup makes it impossible to block on reaction), but is a staggering -24 on block to compensate. It's an incredibly high risk move to throw out, but it can catch opponents who aren't expecting to block low in the midrange. It also gives one of Manon's best midscreen knockdowns, so if you can't route into hitgrab or you're already at max medals this will be the ender you want to route into (this is primarily relevant after 5lp).
| Startup | Active | Recovery | Cancel | Damage | Guard | On Hit | On Block |
|---|---|---|---|---|---|---|---|
| 16 | 4(14)6 | 22 land | - | 400,800 | LH | KD +33 | -13 |
- Airborne 15-39f (Forced Knockdown state)
The MK version is a double-hitting hopkick. Combos from Manon's cancelable medium normals and has good corner carry, making it an excellent combo ender. In addition, it keeps the opponent fairly high in the air on airborne connect. This can allow for a juggle into SA2 on cornered opponent, giving her some of her most damaging routes.
| Startup | Active | Recovery | Cancel | Damage | Guard | On Hit | On Block |
|---|---|---|---|---|---|---|---|
| 20(21) | 3 | 24 | - | 1000 | H | +3 | -9 |
- Lower Body Strike Invuln: 9-19f (not actually airborne)
- Forces crouch on hit
- 1st active frame only hits airborne opponents (functionally 21f startup)
| Startup | Active | Recovery | Cancel | Damage | Guard | On Hit | On Block |
|---|---|---|---|---|---|---|---|
| 22(23) | 3 | 22 | - | 800 | H | +6(+7) | -3 |
- Throw Invuln: 11-24f; Airborne 9-21f (Forced Knockdown state)
- 1st active frame cannot hit crouching opponents (functionally 23f as an overhead)
- Also results in 1f better advantage vs. crouching (allows link to 5MP/2MP)
- Blockstun is reduced by 1f on active frames 2-3
- Applies 20% damage scaling to next hit when beginning a combo (100/80/70...)
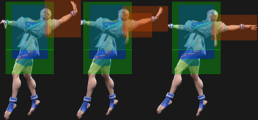
Both the HK and OD versions are a leaping, overhead kick. The HK version is technically unsafe but comes with high pushback, making it generally difficult to punish. Its start up is also technically 1 frame slower, since the first active frame only hits airborne opponents. However, it forces crouch on hit, which can be useful when it hits as a counter. The OD version can be linked out of naturally and gains more advantage and a frame of startup if it hits a crouching opponent, but does not force crouch itself. Unlike the HK version, the OD version is throw invulnerable from frame 11 to the last active frame. When used as a starter, the OD version also counts as two moves for the purposes of scaling. Both versions also spike the opponent towards the ground when used in a juggle.
Super Arts
Level 1 Super (236236K)
| Startup | Active | Recovery | Cancel | Damage | Guard | On Hit | On Block |
|---|---|---|---|---|---|---|---|
| 10 | 4 | 65 | - | 2000 | L | KD +7(+10) | -49(-46) |
- Full Invuln: 1f; Strike/Throw Invuln: 2-13f; Armor Break
- Drive Gauge Depletion: 0.5 bars (hit) / 0.25 bars (block)
- 30% minimum damage scaling
SA1 shoots Manon across the screen quickly with some invincibility, making it a decent reversal option. At 10f startup, some characters can safely pressure Manon with perfect timing, making it a bit less reliable than SA2. While it cannot slide through projectiles, at certain ranges Manon can trade with a fireball for a launch before following up with another juggle option (like a second SA1). This is much easier to do against slow projectiles.
A strong and consistent combo/juggle ender, SA1 will switch sides with the opponent on hit unless it connects at max range or in the corner. For only 1 Super bar, this is a great option for regaining corner control or tacking on extra damage to secure a round.
Level 2 Super (214214K)
| Startup | Active | Recovery | Cancel | Damage | Guard | On Hit | On Block |
|---|---|---|---|---|---|---|---|
| 7 | 3(11)6(45)9 | 38+34 land | - | 2700 | LH | KD +32(+37) | -61(-118) |
- Full Invuln: 1-9f; Armor Break
- Airborne 21-36f, 68-118f (Forced Knockdown state)
- Final hit whiffs on crouch block
- Drive Gauge Depletion: 1 bar (hit) / 0.5 bars (block); up to 0.6 bars on stand block
- 40% minimum damage scaling
Even quicker and more invincible than SA1. Manon's SA2 is an excellent combo ender and good anti-air. Like her SA1, it works after OD Rond-Point, but the timing is a bit trickier. If the opponent manages to fall out of the juggle, their knockdown time is extended to make it harder for the opponent to punish Manon.
Full damage distribution: 450,400,500x2,850
Level 3 Super (236236P)
| Startup | Active | Recovery | Cancel | Damage | Guard | On Hit | On Block |
|---|---|---|---|---|---|---|---|
| 6+1 | 2 | 72 | - | 4000 | T | HKD +16 | - |
- Full Invuln: 1-8f
- Range: 1.46 (2nd active frame: 1.49)
- Drive Gauge Depletion: 1.5 bars (hit)
- Cinematic time regenerates ~2.2 Drive bars for Manon
- 50% minimum damage scaling; applies 5% immediate damage scaling when comboed into
- 15% immediate damage scaling from 236HK (1st hit) only
| Startup | Active | Recovery | Cancel | Damage | Guard | On Hit | On Block |
|---|---|---|---|---|---|---|---|
| 6+1 | 2 | 72 | - | 4500 | T | HKD +16 | - |
- Full Invuln: 1-8f
- Range: 1.46 (2nd active frame: 1.49)
- Available at 25% HP or below
- Drive Gauge Depletion: 2 bars (hit)
- Cinematic time regenerates ~2.4 Drive bars for Manon
- 50% minimum damage scaling; applies 5% immediate damage scaling when comboed into
- 15% immediate damage scaling from 236HK (1st hit) only
Manon's SA3 is an invincible command grab with range slightly below that of her LP Manège Doré. Unlike Zangief's SA3, it can unfortunately be jumped after the Super freeze, making it a much worse defensive option. As a throw, it also loses the ability to deal chip damage to opponents in Burnout. The only advantage to this type of grab super is that it can be comboed into in a practical manner (most notably, a restand with the first hit of 236P).
Pas de Deux can be used as a high-reward callout against a bad Parry attempt, though it does not gain any bonus damage on Punish Counter. SA3 is actually weaker than a Level 5 command throw in this scenario, but it can be worth doing to score big damage at lower Medal levels.
The damage scaling rules are a bit different for Manon than most other characters' Level 3 Supers, which can be positive or negative depending on the situation. Normally, an SA3 would have no extra scaling when comboed from a normal, and an extra 10% immediate scaling when canceled into from a special. Instead, Manon's SA3 receives 5% immediate scaling when comboed into from anything, including normals, Drive Impact, or the first hit of 236P. The only exception is that the first hit of 236HK applies 15% scaling to the SA3, making it a bit weaker as a starter. The first hit of 236P is quite weak to begin with, so this slight reduction in damage scaling only serves to compensate for that lost damage. None of this matters on any extended combo route that reaches 50% damage scaling, which is the minimum that an SA3 can reach.
Taunts
Neutral Taunt (5PPPKKK)
| Startup | Active | Recovery | Cancel | Damage | Guard | On Hit | On Block |
|---|---|---|---|---|---|---|---|
| 252 (total) | - | - | - | - | - | - | - |
Forward Taunt (6PPPKKK)
| Startup | Active | Recovery | Cancel | Damage | Guard | On Hit | On Block |
|---|---|---|---|---|---|---|---|
| 364 (total) | - | - | - | - | - | - | - |
Back Taunt (4PPPKKK)
| Startup | Active | Recovery | Cancel | Damage | Guard | On Hit | On Block |
|---|---|---|---|---|---|---|---|
| 582 (total) | - | - | - | - | - | - | - |
