| Early game information
This game is relatively new, and its pages are still being written. Some information may be mildly inaccurate or missing altogether. You can join the SF6 Resource Hub for more info on editing and other ways you can potentially help with this resource. |
Introduction
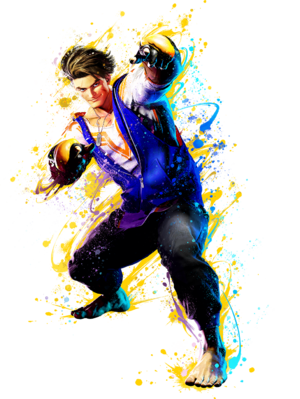
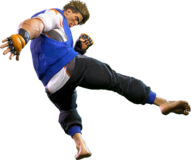
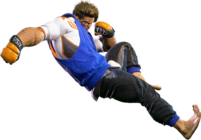
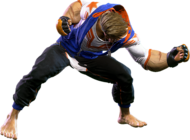
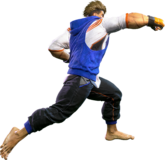
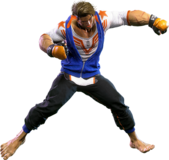
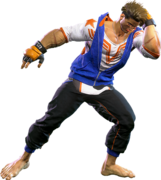
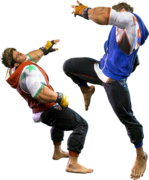
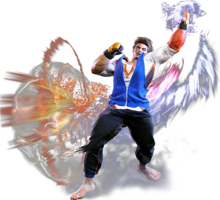
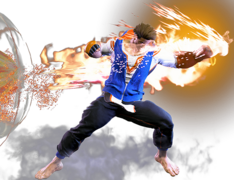
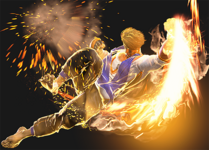
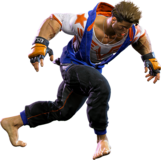
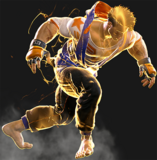
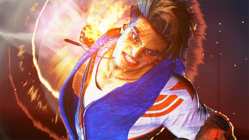
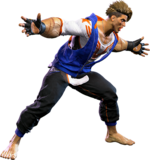
A contractor for a PMC, Luke uses his elite military background to teach mixed martial arts. His days off are spent eating junk food, playing video games, and fighting, but make no mistake—Luke plays to win.
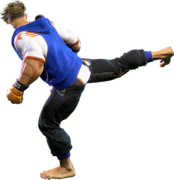
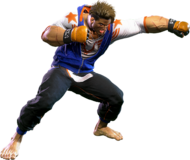
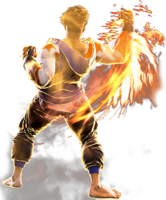
Luke Sullivan is a shotoclone character with an emphasis on a strong midrange pressure and whiff punishing. Luke has most of the standard shoto tools you could want, but puts several unique spins on them to craft his own style. Where Ryu is defensive and neutral-oriented, and Ken is aggression and combo-utility oriented, Luke focuses on a strong midrange that transitions into excellent pressure once he's gotten in.
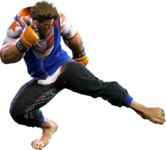
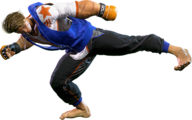
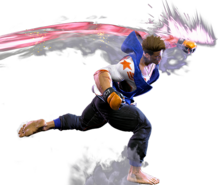
One notable thing about Luke compared to other shotos is his many advancing target combos that let him convert openings into effective punishes and pressure. Luke can use his great 2MP, 5MK and 2MK to push opponents back, or lunge forward for punishes with 5LP, 5MP and 5HP. Complimenting this is his signature Sand Blast fireball, an exceptionally formidable tool for both neutral and pressure. Its extremely high speed allows Luke to use it as an extended poke or blockstring ender while still having good advantage on block at most ranges. If he chooses to spend meter on OD or Drive Rush, then Luke is also capable of dealing monstrous damage and carrying you very deep into the corner.
Once the opponent is in the corner or low on Drive, Luke is extremely formidable at locking the opponent down. Easy throw loops, a fast and safe overhead, a Level 3 Super that gives him oki, along with many ways to be plus or even fully reset pressure. Many of Luke's normals lunge him forward, which synergizes with Drive Rush to create hard-to-escape pressure sequences and surprise whiff punish opportunities. On defense Luke excels at well, with his 2LP being a 4f jab with a great hitbox. He has a great DP with Rising Uppercut and a fantastic anti-air in 2HP.
Perhaps the only things Luke could be considered to struggle with is his approaches, as he doesn't have as many ways to effectively skip neutral and force RPS in neutral the same way other top tiers like Ken and Juri can. He also has a rather poor sweep, but he can make up for this by using 5HP to punish a sweep on block instead of sweeping back. All in all, Luke is a character with few meaningful weaknesses, and can perform well at all levels of play. While his 5LP is on the slower side, this is because it moves him forward for better punishes and pressure and thus exists as a tradeoff rather than a weakness. Sand Blast similarly does not travel fullscreen outside of the OD version, but this is another tradeoff for its powerful speed and frame advantage. None of these differences create meaningful weaknesses in Luke, allowing him to craft a strong and reliable gameplan. If you want a shoto with more of a focus on pressure and playing out the midrange, you should hit the streets with Luke.
| Pick if you like: | Avoid if you dislike: |
|---|---|
|
|
Classic & Modern Versions Comparison
| Missing Normals |
|
|---|---|
| Missing Command Normals |
|
| Shortcut-Only Specials |
|
| Miscellaneous Changes |
|
Most of the tools Luke is missing in Modern are mainly combo tools, namely 5LK in light confirms, j.MP for his only cancelable jumping normal into Aerial Flash Knuckle, and 4HK for his highest damage combo starter/filler.
The most important omissions for neutral are Classic Luke's 5MK (a low-risk ranged poke that pushes opponents out without moving Luke in) and j.HP (a jump-in hitting directly below Luke that is difficult to contest or anti-air). This makes Modern Luke's keepaway slightly worse and his jump-ins slightly easier to beat, though this difference is negligible.
Of the whole cast, Luke is probably the one whose Modern and Classic kits are the most similar, with the added benefit of Modern conveniences (auto hit-confirming low lights, instant supers, etc).
| Luke | |
|---|---|
| Vitals | |
| Life Points | 10000 |
| Ground Movement | |
| Forward Walk Speed | 0.047 |
| Backward Walk Speed | 0.032 |
| Forward Dash Speed | 19 |
| Backward Dash Speed | 23 |
| Forward Dash Distance | 1.467 |
| Backward Dash Distance | 0.751 |
| Drive Rush Min. Distance (Throw) | 0.817 |
| Drive Rush Min. Distance (Block) | 2.499 |
| Drive Rush Max Distance | 3.461 |
| Jumping | |
| Jump Speed | 4+38+3 |
| Jump Apex | 2.115 |
| Forward Jump Distance | 1.90 |
| Backward Jump Distance | 1.52 |
| Throws | |
| Throw Range | 0.8 |
| Throw Hurtbox | 0.33 |
| Frame Data Glossary - SF6 | |
|---|---|
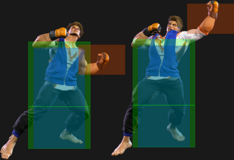
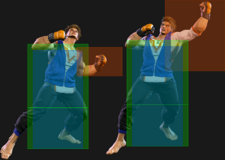
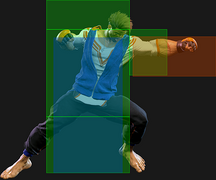
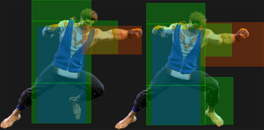
| Hitbox Images |
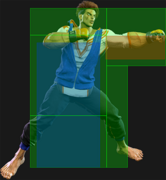
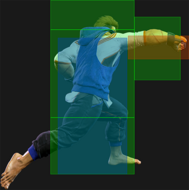
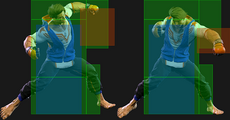
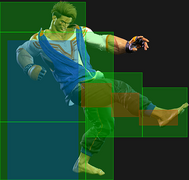
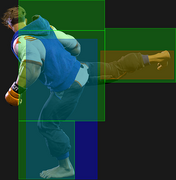
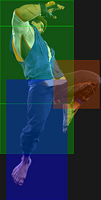
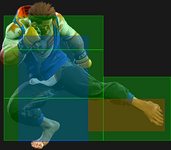
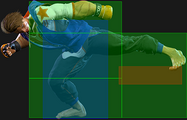
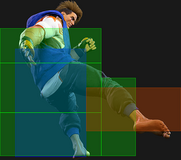
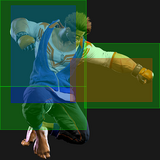
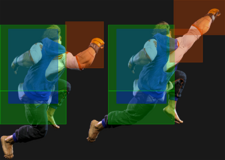
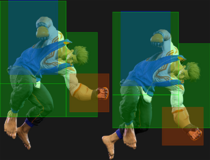
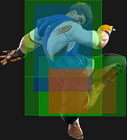
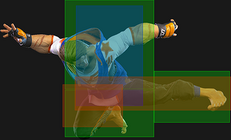
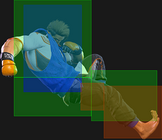
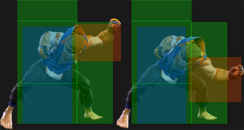
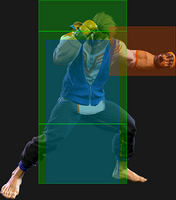
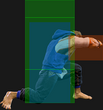
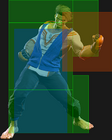
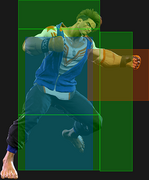
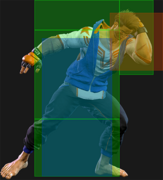
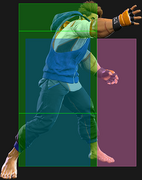
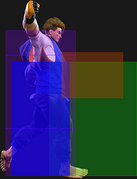
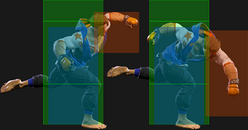
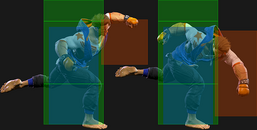
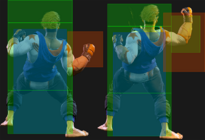
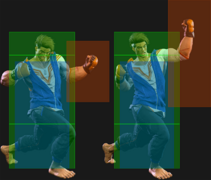
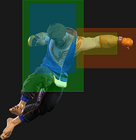
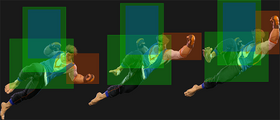
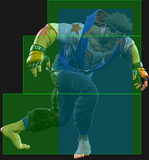
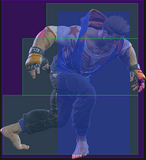
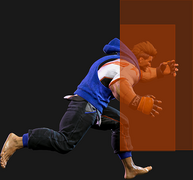
🟥 (Red): Attack hitbox
🟩 (Green): Vulnerable hurtbox that can be hit by strikes/projectiles
🟦 (Blue): Vulnerable throw hurtbox
|
| Active |
How many frames a move remains active (can hurt opponents) for. For projectiles with a maximum active period, a value may be listed in [brackets], but this number is not factored into the move's total frame count.
|
| Cancel |
Available options for canceling one move into another move.
|
| Cancel Hitconfirm Windows |
Hitconfirm reaction windows into Special Moves, Target Combos, and Super Arts.
|
| Damage |
Attack damage on hit. Multi-hit moves may have the damage listed for individual hits as X,Y (or sometimes X*Y). Sometimes a move's damage changes depending on which active frame connects, or on cinematic vs. non-cinematic hits; in this case, multiple values may be listed, and it will be clarified in the move description.
|
| Damage Scaling |
Some moves cause additional damage scaling in combos. Refer to Game Data page for a more detailed breakdown. Scaling Types:
|
| Drive Rush Cancel Advantage |
Refers to the frame advantage when canceling a normal, command normal, or Target Combo into Drive Rush on hit or block (abbreviated as DRC for Drive Rush Cancel). This is calculated at the moment a follow-up attack can be input, not at the moment the character can block or perform movement options. An attack that with DRC +8 on Hit can link into an 8-frame attack, and DRC +4 on Block can create a true blockstring into a 4-frame attack. Note that any DRC on Block worse than +4 cannot form a true blockstring, allowing the opponent to interrupt with an invincible reversal. Most light normals are slightly negative after a DRC on block, meaning the opponent can mash their fastest normal to guarantee a counter-hit (though this requires fast reactions). The attacking character could punish this with Light > DRC into an immediate invincible attack, but this would be an incredibly expensive and high-risk gambit.
|
| Forced Knockdown |
Most airborne command normals, special moves, and Super Arts put the user in a "Forced Knockdown" state. While in this state, an air knockdown will occur when being hit by any attack, even if it would otherwise cause an air reset. As an example, Ryu's 2HP causes an air reset when used as an anti-air. Against a move like Cammy's Hooligan Combination, however, the 2HP puts her into an air knockdown state. This allows Ryu to successfully cancel 2HP into Shoryuken for a juggle, similar to how a Drive Impact wall splat works. Taking advantage of Forced Knockdown juggles is important for dealing with moves like Ken's Dragonlash, Dhalsim's Air Teleport, or Kimberly's 6HK~Hop sequence. Moves that already cause an air knockdown, like most j.MP air-to-airs, will not display the "Forced Knockdown" message.
|
| Guard |
Refers to the direction an attack must be blocked. L is for Low attacks (must be blocked crouching), H is for High attacks/overheads (must be blocked standing), LH is for attacks that can be blocked crouching or standing. T is for Throw attacks which cannot be blocked.
|
| Juggles |
When a character is put into an Air Knockdown state, it is often possible to follow up with a Juggle attack before they hit the ground. In the simplest terms, there are 2 main juggle states:
The following is a more detailed overview of the SF6 juggle system:
Juggle Start (JS): When starting a juggle, the opponent's JC will be set to this value. May be different vs. standing and airborne opponents.
Juggle Increase (JI): When opponent is already in a juggle state, attacks will increase the opponent's JC by this amount.
Juggle Limit (JL): Property of an attack hitbox that determines whether it connects on a juggled opponent. The JL must be ≥ the opponent's JC to hit successfully.
An example to tie everything together:
Drive Rush notes:
|
| On Hit/Block |
These are frame advantage values when the attack hits or is blocked. If the number is positive, then the move will recover before the defender can act again. If the number is negative, the defender will be able to act before the attacker and maybe even punish. KD refers to knockdown on hit, and the listed KD Advantage refers to how many frames the attacker can act before the defender finishes their wakeup animation.
|
| Recovery |
How many frames it takes for a move to finish after the active frames have finished. For projectiles, recovery is considered to begin after the first active frame.
|
| Startup |
How many frames it takes before the move becomes 'active' or have a hit box. The last startup frame and the first active frame are the same frame, meaning all values are written as Startup + 1.
|
Normals
Standing Normals
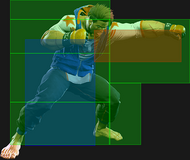
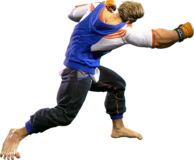
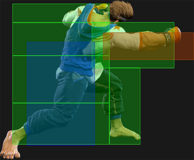
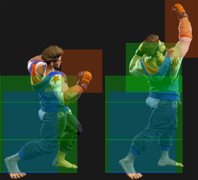
5LP
| Startup | Active | Recovery | Cancel | Damage | Guard | On Hit | On Block |
|---|---|---|---|---|---|---|---|
| 7 | 2 | 11(14) | Sp SA TC | 300 | LH | +2 | -3 |
- 3f extra recovery on whiff
- Greatly extends a hurtbox 3f before active (more susceptible to counterpokes)
- Cancel Hitconfirm Window: 15f / 14f (TC)
- Special/DR cancel is delayed until after active frames
- Drive Rush cancel advantage: +4 oH / -1 oB
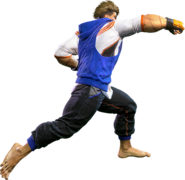
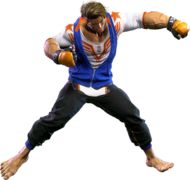
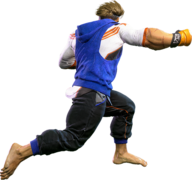
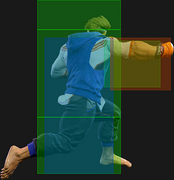
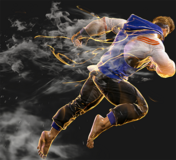
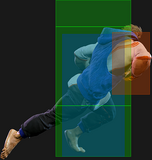
An advancing jab that cancels into a Target Combo or special moves. While slow for a light normal, its range and cancelability makes it very consistent in punishes on block or whiff. It cannot be chained into from other light normals.
While the frame data is below average for a light normal, its forward movement allows it to be used to set up tick throws from surprisingly far. Opponents who don't react quickly or are expecting a 5LP~MP~HP string may not be able to take their turn back before the throw connects.
5MP
| Startup | Active | Recovery | Cancel | Damage | Guard | On Hit | On Block |
|---|---|---|---|---|---|---|---|
| 9 | 4 | 16 | SA TC | 600 | LH | +2 | -3 |
- Can be spaced to hit on 2nd active frame (-2 oB)
- Cancel Hitconfirm Window: 16f (Super) / 17f (TC)
- Applies 10% damage scaling to next hit when beginning a combo (100/90/80...)
Has great forward movement for whiff punishing, but relatively slow startup. Buffering a follow-up MP begins the Snapback Combo TC, which is possible to hitconfirm from the initial hit. It becomes +6 on Punish Counter, giving it a bit more punish utility.
5HP
| Startup | Active | Recovery | Cancel | Damage | Guard | On Hit | On Block |
|---|---|---|---|---|---|---|---|
| 10 | 3 | 23 | Sp SA | 800 | LH | -1 | -6 |
- Cancel Hitconfirm Window: 17f
- Drive Rush cancel advantage: +15 oH / +10 oB
Another long-range punch with forward movement. It is unsafe on block when not canceled, and the long whiff recovery makes it dangerous to use in footsies near max range. 5HP's lunge can be used in conjunction with Luke's other pressure tools in the corner to keep opponents blocking, or used to set up a variety of pressure resets with its special cancel.
5LK
| Startup | Active | Recovery | Cancel | Damage | Guard | On Hit | On Block |
|---|---|---|---|---|---|---|---|
| 5 | 2 | 12 | Sp SA | 300 | LH | +3 | -2 |
- Cancel Hitconfirm Window: 12f
- DR cancel is delayed until after 1st recovery frame
- Drive Rush cancel advantage: +5 oH / 0 oB
- Applies 10% damage scaling to next hit when beginning a combo (100/90/80...)
Solid combo and punish tool that links from 2MP, but cannot be chained into. While the inability to combo from lights sounds like a weakness, Luke already has excellent light confirms with 2LP.
5LK is fairly low risk when buffered in neutral near max range, but it is fairly unrewarding without spending Drive meter. Has a niche use in punishes against -5 attacks with high pushback; otherwise, PC 2LP, 2MP is preferable.
5MK
| Startup | Active | Recovery | Cancel | Damage | Guard | On Hit | On Block |
|---|---|---|---|---|---|---|---|
| 7 | 3 | 17(20) | - | 700 | LH | +1 | -3 |
- 3f extra recovery on whiff
- Leg hurtbox is raised on frames 4-10 (can beat many low pokes)
One of Luke's best mid-range pokes due to its speed and safety on block. Use this to push opponents back instead of his advancing normals.
5HK
| Startup | Active | Recovery | Cancel | Damage | Guard | On Hit | On Block |
|---|---|---|---|---|---|---|---|
| 10 | 6 | 17 | - | 900 | LH | +2(+7) | -5(0) |
- Low Crush 8-15f (not airborne, feet are strike invuln)
- Punish Counter: KD +49~54 Launch (limited juggle state)
- Puts airborne opponents into limited juggle state
- Extends a hurtbox 1f before active that is vulnerable to projectiles
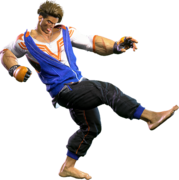
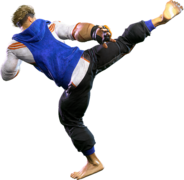
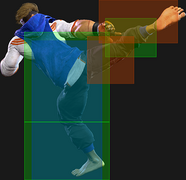
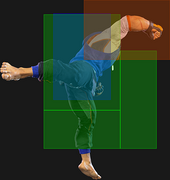
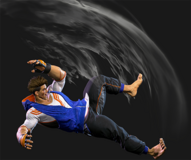
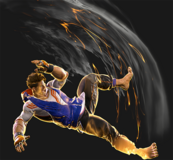
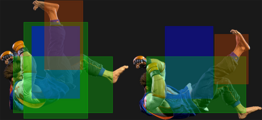
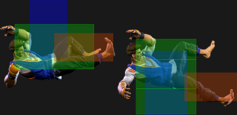
An advancing low crush that can be spaced for advantage as high as +7/+0, making it excellent as an approach or meaty tool. It launches very high on Punish Counter, allowing a follow-up juggle after hopping over the opponent's low poke. It also has a disjointed hitbox on Luke's knee, making it even harder to counterpoke in neutral.
Crouching Normals
2LP
| Startup | Active | Recovery | Cancel | Damage | Guard | On Hit | On Block |
|---|---|---|---|---|---|---|---|
| 4 | 2 | 10 | Chn Sp SA | 300 | LH | +4 | -2 |
- Chains into 2LP/2LK
- Cancel Hitconfirm Window: 13f
- DR cancel is delayed until after 1st recovery frame
- Drive Rush cancel advantage: +4 oH / -2 oB
- Applies 10% damage scaling to next hit when beginning a combo (100/90/80...)
Luke's only 4f normal with exceptional range for a light; only E. Honda and Marisa have a longer cancelable 4f normal. It has a bit more recovery than most jabs, making it more susceptible to strong Perfect Parry punishes.
Useful in 3-hit light strings for easy hitconfirms, it can also link to 2MP on counter-hit to discourage the opponent from mashing defensively. It's also the best light normal to chain against Drive Impact armor, as 2LK chains are slower and not special cancelable.
2MP
| Startup | Active | Recovery | Cancel | Damage | Guard | On Hit | On Block |
|---|---|---|---|---|---|---|---|
| 6 | 2 | 14(17) | Sp SA | 600 | LH | +5 | +1 |
- 3f extra recovery on whiff; all recovery frames extend a widened hurtbox
- Cancel Hitconfirm Window: 16f
- Drive Rush cancel advantage: +11 oH / +7 oB
A jack-of-all-trades button with excellent range, speed, hitbox priority, cancelability, and frame advantage on hit and block. 2MP is one of the best attacks in the game for controlling an opponent's grounded movement; anyone who relies on Drive Rush to approach will have a difficult time making it past this wall.
2MP is not the most rewarding normal on a regular hit, only allowing a 5LK hitconfirm. The reward is massively increased when factoring in its Counter-hit, Punish Counter, and Drive Rush utility, however. Most hitconfirms will involve DR~2MP, 2HP to set up a Perfect Flash Knuckle launch or wall bounce; even if blocked, Luke can easily tick throw or walk forward with staggered 2MP pressure.
2HP
| Startup | Active | Recovery | Cancel | Damage | Guard | On Hit | On Block |
|---|---|---|---|---|---|---|---|
| 7 | 5 | 24 | Sp SA | 800 | LH | +1 | -13 |
- Forces stand on hit
- Only the 1st active frame is cancelable (no useful anti-air cancel)
- Incredible anti-air but cannot hit cross-up
- Cancel Hitconfirm Window: 15f
- Drive Rush cancel advantage: +20 oH / +6 oB
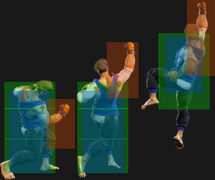
Luke's go to anti-air normal, and an important combo tool. 2HP is capable of anti-airing nearly any jump attack cleanly with its fast startup and disjointed hitbox; only a few trajectory-altering moves can bait the whiff, which can easily be answered with Rising Uppercut. While it technically loses to cross-ups, it can usually hit airborne opponents before they can fully cross behind Luke since he doesn't shift forward during startup.
In combos, the short range limits its use in punish confirms. Drive Rush routes into 2LP, 2MP, or 4HK allow a consistent 2HP link, which in turn lets Luke combo into LP/MP Perfect Flash Knuckle for optimal damage anywhere on the screen.
2LK
| Startup | Active | Recovery | Cancel | Damage | Guard | On Hit | On Block |
|---|---|---|---|---|---|---|---|
| 5 | 3 | 12 | Chn | 200 | L | -1 | -5 |
- Chains into 2LP/2LK
- Applies 10% damage scaling to next hit when beginning a combo (100/90/80...)
A standard, chainable 2LK for close range low-hitting confirms into 2LP.
2MK
| Startup | Active | Recovery | Cancel | Damage | Guard | On Hit | On Block |
|---|---|---|---|---|---|---|---|
| 8 | 3 | 19 | Sp SA TC | 500 | L | -2 | -6 |
- Cancel Hitconfirm Window: 13f / 17f (TC)
- DR cancel is delayed until after active frames
- Drive Rush cancel advantage: +8 oH / +4 oB
- Applies 20% damage scaling to next hit when beginning a combo (100/80/70...)
A cancelable low poke with good range despite its unusual animation. Useful for catching opponents attempting to walk back out of 2MP pressure strings. 2MK~DRC can confirm directly into 2HP, allowing for some powerful combo extensions; just be aware that a blocking opponent can interrupt any DR followup except 2LP.
2MK has a slightly higher vertical hitbox than most similar buttons, occasionally letting it beat some minor low crushes and making it harder to jump over.
2HK
| Startup | Active | Recovery | Cancel | Damage | Guard | On Hit | On Block |
|---|---|---|---|---|---|---|---|
| 10 | 3 | 27(26) | - | 900 | L | HKD +28 | -9 |
- Counter-hit/Punish Counter: HKD +44
- Fixed 26f recovery on block (cannot be made safer with meaty timing)
- Has juggle potential; not a Hard Knockdown when juggled into
One of the slower sweeps in the game, often being unable to punish a 2HK from other characters. It is relatively easy to punish at -9 on block, so should only be used sparingly against characters with weak ranged punishes.
Jumping Normals
j.LP
| Startup | Active | Recovery | Cancel | Damage | Guard | On Hit | On Block |
|---|---|---|---|---|---|---|---|
| 5 | 9 | 3 land | - | 300 | H | - | - |
Luke's fastest air normal, primarily used as a quick air-to-air in when 2HP and 623P are likely to whiff.
j.MP
| Startup | Active | Recovery | Cancel | Damage | Guard | On Hit | On Block |
|---|---|---|---|---|---|---|---|
| 9 | 4 | 3 land | Sp | 700 | H | - | - |
- Puts airborne opponents into limited juggle state
Great air to air, as it can juggle into charged Air Flash Knuckle if timed properly. The j.MP has some juggle potential itself, allowing it to combo after Perfect LP Knuckle. The cancel window is very long, which allows Luke to delay the j.214P; by delaying the cancel and partially charging the j.214P, Luke get his strongest juggles in the corner.
j.HP
| Startup | Active | Recovery | Cancel | Damage | Guard | On Hit | On Block |
|---|---|---|---|---|---|---|---|
| 9 | 6 | 3 land | - | 800 | H | - | - |
- Spike knockdown vs. airborne opponents on Counter-hit/Punish Counter
Reaches far downward but with relatively short horizontal range. Most useful when used early in Luke's jump arc to throw off the opponent's anti-air timing. Some anti-airs are completely incapable of beating this normal without trading, making it especially valuable for closing out a round against low-health opponents.
j.LK
| Startup | Active | Recovery | Cancel | Damage | Guard | On Hit | On Block |
|---|---|---|---|---|---|---|---|
| 6 | 6 | 3 land | - | 300 | H | - | - |
- Can hit Cross-up
Has a narrow cross-up hitbox. This button is most useful when attempting a very quick tick throw after a jump, as the short blockstun may catch the opponent off guard.
j.MK
| Startup | Active | Recovery | Cancel | Damage | Guard | On Hit | On Block |
|---|---|---|---|---|---|---|---|
| 7 | 6 | 3 land | - | 500 | H | - | - |
- Can hit Cross-up
Luke's main cross-up button with a much wider hitbox.
j.HK
| Startup | Active | Recovery | Cancel | Damage | Guard | On Hit | On Block |
|---|---|---|---|---|---|---|---|
| 10 | 6 | 3 land | - | 800 | H | - | - |
Very good horizontal and vertical range for an air normal. An above average jump-in that can beat anti-airs and punish fireballs cleanly.
Command Normals
6MP
| Startup | Active | Recovery | Cancel | Damage | Guard | On Hit | On Block |
|---|---|---|---|---|---|---|---|
| 21 | 2 | 21 | - | 600 | H | +2 | -3 |
- Spike knockdown vs. airborne opponents
- Has some juggle potential
Safe overhead that can link into 2MP when used from Drive Rush. Most useful when done in the middle of pressure strings or at the end of a round.
4HP
| Startup | Active | Recovery | Cancel | Damage | Guard | On Hit | On Block |
|---|---|---|---|---|---|---|---|
| 16 | 3 | 20 | Sp SA | 800 | LH | +3 | -3 |
- Pulls back hurtbox on frames 5-12
- Cancel Hitconfirm Window: 17f
- Drive Rush cancel advantage: +16 oH / +10 oB
An "auto-shimmy" sort of button that quickly shifts Luke's hurtbox back to punish throws, pokes, and strings. Also a great option out of Drive Rush, as many players instinctively hit a delayed jab or throw tech when the opponent gets near them. While a bit slow, 4HP is very rewarding with a link to 2HP on Punish Counter. It's a good punish starter for very unsafe attacks like DPs as well.
4HK
| Startup | Active | Recovery | Cancel | Damage | Guard | On Hit | On Block |
|---|---|---|---|---|---|---|---|
| 12 | 4 | 24 | - | 1000 | LH | +4 | -5 |
- Punish Counter: +19 Stagger
- Puts airborne opponents into spinning limited juggle state
- No head hurtbox during active frames
- Whiffs on crouching opponents at longer ranges
Good poke from longer ranges. Its stagger property on Punish Counter gives it some utility as a whiff punish tool. When used as an anti-air, it can be followed up with a juggle, but the anti-air hitbox is not particularly strong against good jumping normals.
Punish Counter DR~4HK links into another DR~4HK, which is Luke's absolute highest damage starter, capable of dealing almost 7000 Damage with full resources.
6HP
| Startup | Active | Recovery | Cancel | Damage | Guard | On Hit | On Block |
|---|---|---|---|---|---|---|---|
| 16 | 3 | 15(19) | TC | 800 | LH | +3 | -3 |
- 4f extra recovery on whiff
- Cancel Hitconfirm Window: 23f (TC)
- Target Combo follow-up can also come out on whiff
Great pressure tool that advances forward while remaining safe on block. Slow startup and recovery makes it vulnerable to Drive Impact, so it can't be abused mindlessly.
The 6HP Double Impact follow-up is very easy to confirm on hit, and is cancelable into specials. It leaves an interruptible gap on block, however, so you can't rely on the TC special cancel to keep you safe.
Target Combos
5LP~MP~HP
| Startup | Active | Recovery | Cancel | Damage | Guard | On Hit | On Block |
|---|---|---|---|---|---|---|---|
| 8 | 4 | 20 | TC | 400(320) | LH | -2 | -9 |
- Cancel Hitconfirm Window: 36f (TC)
- Applies 10% immediate damage scaling when comboed into (stacks with 10% 5LP scaling)
- () refers to scaled damage from 5LP combo starter
| Startup | Active | Recovery | Cancel | Damage | Guard | On Hit | On Block |
|---|---|---|---|---|---|---|---|
| 10 | 3 | 27 | Sp SA | 600(420) | LH | KD +27 | -14 |
- Puts opponent into limited juggle state
- Cancel Hitconfirm Window: 59f
- Special/DR cancel is delayed until after 2nd active frame
- Drive Rush cancel advantage: KD +46 oH / +5 oB
- () refers to scaled damage from 5LP~MP combo starter
- Notable blockstring gaps when canceled:
- HP Flash Knuckle: 8f (19f charged)
- Charged MP Flash Knuckle: 16f
- LP/MP/HP/OD Sand Blast: 1f/4f/7f/2f
Luke's main way to convert 5LP into damage. The last hit is special cancelable, giving him the opportunity to convert into a damaging knockdown or a safe ender. There is no blockstring gap between the punches, but all safe special cancels leave a gap that can be interrupted. Drive Impact will also punish any of these cancels except for OD Sand Blast.
5MP~MP~MP~MP
| Startup | Active | Recovery | Cancel | Damage | Guard | On Hit | On Block |
|---|---|---|---|---|---|---|---|
| 12 | 2 | 23 | SA | 300 | LH | 0 | -8 |
- Cancel Hitconfirm Window: 39f (Super/TC)
- Super cancel is delayed until after 4th recovery frame
| Startup | Active | Recovery | Cancel | Damage | Guard | On Hit | On Block |
|---|---|---|---|---|---|---|---|
| 11 | 2 | 29 | TC | 300(240) | LH | -6 | -14 |
- Cancel Hitconfirm Window: 60f (TC)
- () refers to scaled damage from 5MP~MP combo starter
| Startup | Active | Recovery | Cancel | Damage | Guard | On Hit | On Block |
|---|---|---|---|---|---|---|---|
| 11 | 2 | 27 | - | 500(350) | LH | KD +33 | -12 |
- () refers to scaled damage from 5MP~MP~MP combo starter
Excellent whiff punish confirm tool from 5MP. The 2nd hit cancels to Super, and the whole sequence leads to a knockdown with good oki. On hit, you can also stop after the 2nd MP for a throw reset to catch an opponent off guard. On block, there is never a gap in the blockstring to catch an opponent mashing, and no way to make any of the follow-ups safe.
6HP~6HP
| Startup | Active | Recovery | Cancel | Damage | Guard | On Hit | On Block |
|---|---|---|---|---|---|---|---|
| 11 | 2 | 34 | Sp SA | 600 | LH | KD +20 | -19 |
- Leaves a 5f blockstring gap between each 6HP
- Cancel Hitconfirm Window: 15f (single hit) / 47f (full TC)
- Drive Rush cancel advantage: KD +46 oH / +7 oB
- Counts as 2 hits for damage scaling when comboed into (applies to next hit)
- No scaling if 2nd hit starts the combo
Very easily hitconfirmable after 6HP, adding extra damage and a knockdown to the already great command normal. The TC extension is very unsafe if blocked, so it should always be canceled into something. The opponent can stuff the 2nd hit of this string with a 4f normal unless they are in Burnout or Luke starts with Drive Rush.
2MK~2HP
| Startup | Active | Recovery | Cancel | Damage | Guard | On Hit | On Block |
|---|---|---|---|---|---|---|---|
| 9 | 3 | 25 | - | 600(480) | LH | +1 | -8 |
This Target Combo is much easier to confirm from 2MK than a special cancel. It is unsafe on block, but leaves Luke +1 at close range on hit. There is no gap in the blockstring in between hits, even if delayed as long as possible.
Throws
Forward Throw (LPLK)
| Startup | Active | Recovery | Cancel | Damage | Guard | On Hit | On Block |
|---|---|---|---|---|---|---|---|
| 5 | 3 | 23 | - | 1200 (2040) | T | KD +19 | - |
- Punish Counter: HKD +19
- Applies 20% immediate damage scaling when comboed into (e.g. after Crumple)
Luke can walk forward for a manually timed corner throw loop. The timing is fairly lenient, giving a 4-frame window to time his follow-up throw while beating reversal 4f normals.
Midscreen, Luke's best option is Drive Rush into a slightly delayed 2MP, which gives great pressure on block and a link to 2HP on hit. For easier timing, an immediate DR~5MP leaves Luke at +1 within throw range, and DR~4HK can set up massive trade combos if the opponent wakes up with a 4f normal. Even without meter, a forward dash leaves Luke at even frame advantage, which can force the opponent to trade with his 2LP; this is especially potent when the opponent is at low health.
Back Throw (4LPLK)
| Startup | Active | Recovery | Cancel | Damage | Guard | On Hit | On Block |
|---|---|---|---|---|---|---|---|
| 5 | 3 | 23 | - | 1200 (2040) | T | KD +14 | - |
- Side switch
- Punish Counter: HKD +14
- Applies 20% immediate damage scaling when comboed into (e.g. after Crumple)
Luke cannot threaten the opponent with true strike/throw oki after a back throw into the corner, but he can still use a ranged meaty normal to start pressure.
Drive System
Drive Impact (HPHK)
| Startup | Active | Recovery | Cancel | Damage | Guard | On Hit | On Block |
|---|---|---|---|---|---|---|---|
| 26 | 2 | 35 | - | 800 | LH | KD +35 / Wall Splat KD +65 | -3 / Wall Splat HKD +72 |
- Armor (2-hit): 1-27f
- Applies 20% damage scaling to next hit when beginning a combo (including Wall Splat on block)
- Combos when canceled from 2HP or Punish Counter 5HP/4HP (no corner wallsplat)
- Useful for draining opponent's Drive gauge, especially after Perfect Parry
See Drive Impact on the Gauges page for more details.
When canceled from a normal, these are the important blockstring gaps; a gap of N will trade with an N-frame startup attack; [] = Burnout
- 5HP, 4HP: 7[3]
- 6HP~6HP: 10[6]
- 2MP, 2MK, 2HP: 11[7]
- 5LP~MP~HP: 12[8]
- Note: A gap ≥ 6f can be thrown, and a gap ≥ 9f can be jumped out of by most characters
Against the following characters in Burnout:
- JP (22K), frame 3 counter
- Marisa (214K), frame 3 armor
- Zangief (5[HP]), frame 4 armor
It's important to use a blockstring that cannot be absorbed by their armor/counter moves. Ideally, the string should also not be a true combo, or it will cause a Lock and prevent Stun. Note that if the opponent mashes buttons on wakeup, the counter-hit will cause DI to Lock.
- 5HP > DI: 3f blockstring gap will work vs. Zangief 5[HP]
- 4HP > DI: 3f blockstring gap will work vs. Zangief 5[HP]
- DR~5HP > delay DI: frame-perfect delay allows a 1f blockstring gap to prevent opponent from absorbing the hit
- DR~4HP > delay DI: frame-perfect delay allows a 1f blockstring gap to prevent opponent from absorbing the hit
- DR~2MP > DI: 3f blockstring gap will work vs. Zangief 5[HP]
- DR~2MK > DI: 3f blockstring gap will work vs. Zangief 5[HP]
- DR~2HP > DI: 3f blockstring gap will work vs. Zangief 5[HP]
Drive Reversal (6HPHK)
| Startup | Active | Recovery | Cancel | Damage | Guard | On Hit | On Block |
|---|---|---|---|---|---|---|---|
| 20 | 3 | 26(31) | - | 500 recoverable | LH | KD +23 | -8 |
- Full Invuln: 1-22f; Armor Break
- 5f extra recovery on hit
See Drive Reversal on the Gauges page for more details.
Drive Parry (MPMK)
| Startup | Active | Recovery | Cancel | Damage | Guard | On Hit | On Block |
|---|---|---|---|---|---|---|---|
| 1 | 8 or until released | 29(1)(11) | - | - | - | - | - |
See Drive Parry on the Gauges page for more details.
- Perfect Parry:
- Applies a 50% damage scaling multiplier to any punish afterwards
- vs. strikes, has only 1f recovery and prevents the opponent from canceling their attack
- vs. projectiles, puts you into a fixed 11f recovery
Drive Rush (66)
| Startup | Active | Recovery | Cancel | Damage | Guard | On Hit | On Block |
|---|---|---|---|---|---|---|---|
| 9(11) | 45(46) | 24(23) | - | - | - | - | - |
- Applies 15% damage scaling multiplier to any follow-up hits when used mid-combo
- Only applies scaling once per combo; does not apply when an enhanced Drive Rush attack starts the combo
See Drive Rush on the Gauges page for more details. Frame data shown in (parentheses) refers to Parry Drive Rush.
- Distance:
- 0.817 (min, cancel into immediate Throw)
- 2.499 (min, earliest blocking/movement frame)
- 3.461 (max, final DR frame)
- See Strategy page for Blockstring Gaps and Combo Routes
Special Moves
Sand Blast (236P)
| Startup | Active | Recovery | Cancel | Damage | Guard | On Hit | On Block |
|---|---|---|---|---|---|---|---|
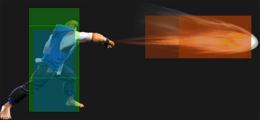
| 14 | [5] | 33 | SA3 | 600 | LH | -3 | -8 |
- 1-hit projectile; ~48% screen distance
- Cancel Hitconfirm Window: 4f (Super)
- Projectile Speed: 0.12 (14-15f) / 0.42 (16-18f)
| Startup | Active | Recovery | Cancel | Damage | Guard | On Hit | On Block |
|---|---|---|---|---|---|---|---|
| 17 | [7] | 30 | SA3 | 600 | LH | 0 | -5 |
- 1-hit projectile; ~66% screen distance; can be slightly plus at max range
- Cancel Hitconfirm Window: 4f (Super)
- Projectile Speed: 0.12 (17-18f) / 0.42 (19-23f)
| Startup | Active | Recovery | Cancel | Damage | Guard | On Hit | On Block |
|---|---|---|---|---|---|---|---|
| 20 | [10] | 27 | SA3 | 600 | LH | +3 | -2 |
- 1-hit projectile; ~91% screen distance; plus on block at mid to long range
- Cancel Hitconfirm Window: 4f (Super)
- Projectile Speed: 0.12 (20-21f) / 0.42 (22-29f)
| Startup | Active | Recovery | Cancel | Damage | Guard | On Hit | On Block |
|---|---|---|---|---|---|---|---|
| 16 | - | 24 | SA2 SA3 | 400x2 | LH | KD +41 | -2 |
- 2-hit OD projectile; covers full screen distance
- Cancel Hitconfirm Window: 8f (Super), 11f (PP Follow-up)
- Projectile Speed: 0.12 (16-17f) / 0.42 (18f~)
- Applies 20% damage scaling to next hit when beginning a combo; counts as 2 hits for damage scaling when comboed into (applies to next hit)
| Startup | Active | Recovery | Cancel | Damage | Guard | On Hit | On Block |
|---|---|---|---|---|---|---|---|
| 12 | - | 42 | - | 750(600) | LH | KD +48 | -21 |
- Costs an extra Drive bar on hit/block/armor for more damage and a better knockdown
- Projectile Speed: 0.2
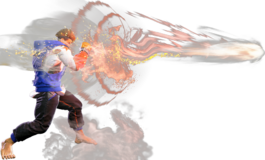
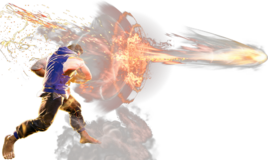
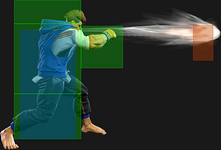
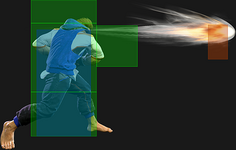
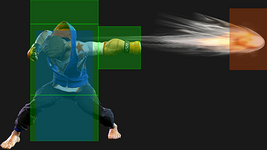
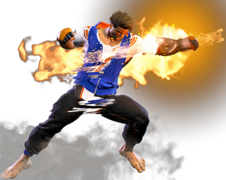
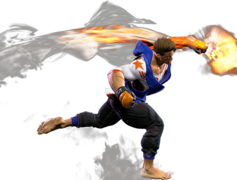
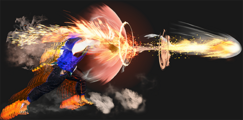
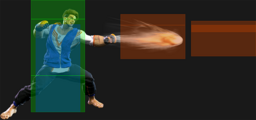
Luke's Sand Blast is a bit different than traditional Street Fighter projectiles. The startup is slower with a more visible windup animation, while the projectile itself travels extremely quickly once active. Higher strength versions are much slower to start up, but have reduced recovery, longer range, and become safer on block to compensate. Higher strengths having slower startup comes with bigger gaps when canceled into, which matters when up close and personal. OD Sand Blast can win any fireball war against non-super projectiles due to its follow-up, granted Luke has meter to spend, which lets him close distance quickly. The OD follow-up is very unsafe when blocked, however.
The active frames listed in [] refer to the number of frames before the hitbox dissipates, and are not included in the move's total frame count.
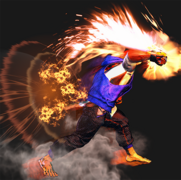
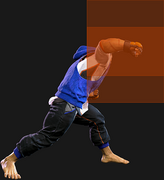
Rising Uppercut (623P)
| Startup | Active | Recovery | Cancel | Damage | Guard | On Hit | On Block |
|---|---|---|---|---|---|---|---|
| 5 | 10 | 22+12 land | SA3 | 900(800) | LH | KD +28 | -27 |
- Anti-Air Invuln: 1-14f (cannot hit cross-up); Airborne 7-36f (Forced Knockdown state)
- 800 damage on active frames 3-10
| Startup | Active | Recovery | Cancel | Damage | Guard | On Hit | On Block |
|---|---|---|---|---|---|---|---|
| 6 | 10 | 24+12 land | SA3 | 1000(800) | LH | KD +28 | -29 |
- Anti-Air Invuln: 1-8f (cannot hit cross-up); Airborne 8-39f (Forced Knockdown state)
- 800 damage on active frames 3-10
| Startup | Active | Recovery | Cancel | Damage | Guard | On Hit | On Block |
|---|---|---|---|---|---|---|---|
| 9 | 10 | 25+15 land | SA3 | 1200(800) | LH | KD +29 | -33 |
- Anti-Air Invuln: 1-9f (cannot hit cross-up); Airborne 11-43f (Forced Knockdown state)
- 800 damage on active frames 2-10
| Startup | Active | Recovery | Cancel | Damage | Guard | On Hit | On Block |
|---|---|---|---|---|---|---|---|
| 6 | 3,7 | 35+15 land | - | 800(600),600 | LH | KD +25 | -40(-43) |
- Full Invuln: 1-10f (cannot hit cross-up); Airborne 8-50f (Forced Knockdown state)
- 600 damage on 3rd active frame of 1st hit (active frame 4~ performs 2nd hit only)
- 2nd hit whiffs on crouch block (reduced Chip/Drive Damage and 3f worse block advantage)
| Startup | Active | Recovery | Cancel | Damage | Guard | On Hit | On Block |
|---|---|---|---|---|---|---|---|
| 16 | 3 | 14+16 land | - | 600 | H | KD +14 | - |
- Costs an extra Drive bar; comes out on hit only
- Can whiff against high juggled opponents
- Counts as a separate combo hit for damage scaling
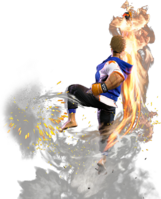
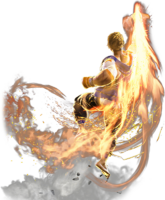
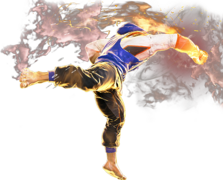
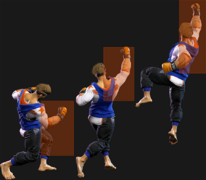
Luke's uppercut is an effective anti-air, and the OD version is a reliable invincible reversal. The horizontal range makes it unreliable in combos at farther ranges, like after a 3-hit light confirm or a max range 5LK punish. While the meterless versions are cancelable into SA3, the juggle will whiff, so this has little utility outside of beating an opponent's armor. The follow-up to the OD version should only be used if the DP connects low to the ground (such as a wakeup reversal), since it has a tendency to miss after a high connect anti-air.
Flash Knuckle (214P)
LP Flash Knuckle (214LP)
(hold OK)
| Startup | Active | Recovery | Cancel | Damage | Guard | On Hit | On Block |
|---|---|---|---|---|---|---|---|
| 13 | 3 | 31 | SA3 | 700 | LH | KD +32 | -18 |
- Puts opponent into limited juggle state
- Cancel Hitconfirm Window: 17f (Super; can cancel up to 19f but SA3 whiffs)
| Startup | Active | Recovery | Cancel | Damage | Guard | On Hit | On Block |
|---|---|---|---|---|---|---|---|
| 26 | 2,2 | 25(26) | SA3 | 600,200 | LH | KD +54 | -8 |
| Startup | Active | Recovery | Cancel | Damage | Guard | On Hit | On Block |
|---|---|---|---|---|---|---|---|
| 26 | 2,2 | 22(23) | SA3 | 700,200 | LH | KD +56 | -8 |
- Puts opponent into limited juggle state (much higher launch)
- Hold 18-20f for Perfect version
- Clashes with single-hit projectiles (clash is Super cancelable)
- Both hits count separately for damage scaling
One of Luke's most important combo tools. The uncharged version is reliable in combos, and gives good oki. Its juggle state does not launch very high, and can generally only followed up with a cancel into SA3 (unless the opponent was already in a high juggle state). If canceled into SA3 on the last 2 possible frames (or on a high juggle connect), the Super will whiff, however.
The charged version allows for consistent follow-up juggles, but it only combos naturally from 2HP. Getting the Perfect timing makes the juggle even higher and deals additional damage, but is not required for combos to work. The projectile clash is not particularly useful in most scenarios. The SA3 will whiff if canceled into, but Luke can easily pick up the juggle without the cancel. As a result, the cancel is only useful if you see the opponent attempting to Drive Impact through your attack.
MP Flash Knuckle (214MP)
(hold OK)
| Startup | Active | Recovery | Cancel | Damage | Guard | On Hit | On Block |
|---|---|---|---|---|---|---|---|
| 19 | 3 | 27 | SA3 | 900 | LH | +3 | -10 |
- Knocks airborne opponents far away into a limited juggle state
- Cancel Hitconfirm Window: 16f (Super)
| Startup | Active | Recovery | Cancel | Damage | Guard | On Hit | On Block |
|---|---|---|---|---|---|---|---|
| 30 | 2,2 | 26(27) | SA3 | 800,200 | LH | KD +54(+67) | -3 |
| Startup | Active | Recovery | Cancel | Damage | Guard | On Hit | On Block |
|---|---|---|---|---|---|---|---|
| 29 | 2,2 | 26(27) | SA3 | 850,250 | LH | KD +53(+66) | -3 |
- Hold 18-20f for Perfect version (required to combo from 2HP)
- Wall bounces on hit; clashes with single-hit projectiles (clash is Super cancelable)
- Cancel Hitconfirm Window: 20f / 18f Perfect (Super)
- Both hits count separately for damage scaling
MP Knuckle is a bit slower than LP Knuckle, only comboing from mediums and heavies. The uncharged version keeps the opponent standing on hit, and puts Luke just outside of throw range; a slight walk allows him to go for a throw reset. When juggled into, it knocks the opponent far away, allowing Luke to switch back to a zoning playstyle. Alternatively, he can Drive Rush in for a potent mixup.
The charged version causes a Wall Bounce that can lead to high juggle damage midscreen. In the corner, the opponent will fly over Luke's head, making it difficult to pick up a juggle, so it's not recommended in that scenario. Perfect charge timing is required to combo from 2HP, making it a bit riskier to attempt compared to the easier LP Knuckle combos. The cancel into SA3 only works in the corner, as the opponent is launched away too quickly for Luke to reach otherwise. Like with Charged LP Knuckle, this cancel is mostly used for reacting to Drive Impact armor.
HP Flash Knuckle (214HP)
(hold OK)
| Startup | Active | Recovery | Cancel | Damage | Guard | On Hit | On Block |
|---|---|---|---|---|---|---|---|
| 22 | 3 | 21 | SA3 | 1000 | LH | KD +42(+31) | -4 |
- Cancel Hitconfirm Window: 19f (Super)
| Startup | Active | Recovery | Cancel | Damage | Guard | On Hit | On Block |
|---|---|---|---|---|---|---|---|
| 33 | 2,2 | 24(25) | SA3 | 1000,300 | LH | KD +63 | +4 |
| Startup | Active | Recovery | Cancel | Damage | Guard | On Hit | On Block |
|---|---|---|---|---|---|---|---|
| 33 | 2,2 | 24(25) | SA3 | 1200,400 | LH | KD +63 | +4 |
- Hold 18-20f for Perfect version
- Clashes with single-hit projectiles (clash is Super cancelable)
- Cancel Hitconfirm Window: 25f / 30f Perfect (Super)
- Both hits count separately for damage scaling
HP Knuckle has slow startup but travels about half screen. The uncharged version is usually punishable at -4, but if spaced well it can be made completely safe. The juggle state it creates only allows a cancel into SA3, so it's less rewarding in combos than LP or MP Knuckle. When juggled into, such as after 5LP~MP~HP Target Combo, Luke has worse knockdown advantage.
Charged HP Knuckle moves Luke forward with significant frame advantage, but has a slow and reactable windup making it susceptible to jumps or Drive Impact. Luke can cancel into SA3 on reaction to DI armor, and he can punish a predicted jump by releasing the button early (a fairly high risk, low reward gamble). Charged HP Knuckle can't be comboed into outside of Punish Counter 2HP, which is not a problem since LP and MP Knuckle are more rewarding anyway. The projectile clash of Charged HP Knuckle can actually come in handy due to the range it's used from, though it can't really be used this way on reaction. This held version also leads to an incredibly advantageous knockdown on hit, letting Luke do multiple dashes for oki or set up safe jumps.
OD Flash Knuckle (214PP)
| Startup | Active | Recovery | Cancel | Damage | Guard | On Hit | On Block |
|---|---|---|---|---|---|---|---|
| 15 | 3 | 39 | SA2 SA3 | 400x2 | LH | KD +52 | -22 |
- Puts opponent into limited juggle state
- Cancel Hitconfirm Window: 14f 1st / 47f 2nd (Super)
- 2nd hit canceled to SA3 (or SA2 on final cancel frame) will whiff, but can easily juggle without a cancel
| Startup | Active | Recovery | Cancel | Damage | Guard | On Hit | On Block |
|---|---|---|---|---|---|---|---|
| 1 | - | - | - | 500,1500 | - | HKD +12 | - |
- DDT costs an extra Drive bar (on hit only)
- Must be input during 1st hit of 214PP
OD Flash Knuckle is Luke's primary combo extender, giving a juggle state similar to charged LP Knuckle without the slow startup. It will work consistently even from a 3-hit light confirm (but does not combo directly from 5LP). The DDT follow-up only slightly increases Luke's damage compared to using a meterless follow-up juggle, but may be useful for its Hard Knockdown property depending on screen position.
Aerial Flash Knuckle (j.214P)
| Startup | Active | Recovery | Cancel | Damage | Guard | On Hit | On Block |
|---|---|---|---|---|---|---|---|
| 14 | 5 | 13(20) land | - | 700 | LH | KD ~ | -12(+3) |
- Cannot be done from Back Jump (unless canceled from j.MP)
- Forced Knockdown state until landing; Luke is in a crouching state from 4th recovery frame onward
- 7f extra landing recovery on whiff (if input during first 32 jump frames)
| Startup | Active | Recovery | Cancel | Damage | Guard | On Hit | On Block |
|---|---|---|---|---|---|---|---|
| 23 | 6 | 15 land | - | 1000 | LH | KD ~ | -30(-21) |
- Cannot be done from Back Jump (unless canceled from j.MP)
- Forced Knockdown state until landing; Luke is in a crouching state from 4th recovery frame onward
| Startup | Active | Recovery | Cancel | Damage | Guard | On Hit | On Block |
|---|---|---|---|---|---|---|---|
| 14 | 6 | 15 land | - | 1300 | LH | KD ~ | -33(-21) |
- Cannot be done from Back Jump (unless canceled from j.MP)
- Forced Knockdown state until landing; Luke is in a crouching state from 4th recovery frame onward
Aerial Flash Knuckle is mostly used for extra damage when air-to-air j.MP connects. The uncharged version can be safe if spaced well, but the charged and OD versions fly upward at the end, making them very punishable on block.
Luke can partially charge the attack after a 214[LP] > j.MP juggle, granting him more advantage for his juggle after landing. This is required to follow-up with a Super, and the timing is quite strict for an SA3 juggle. It is possible (though very difficult) for the fully charged version to follow-up with a 623LP juggle if the opponent is juggled as high as possible while Luke is near the ground.
Avenger (236K)
| Startup | Active | Recovery | Cancel | Damage | Guard | On Hit | On Block |
|---|---|---|---|---|---|---|---|
| 12 | - | 33 | - | - | - | - | - |
- Luke is in a Counter-hit state for entire duration
- Follow-up P/K can be input up to frame 32
| Startup | Active | Recovery | Cancel | Damage | Guard | On Hit | On Block |
|---|---|---|---|---|---|---|---|
| 11 | [33] | 10 | - | - | - | - | - |
- Armor (1-hit): 3-35f; [] refers to active armored period
- Does not carry through into follow-up attacks
- Luke is in a Punish Counter state for entire duration
- Follow-up P/K can be input up to frame 32
- Follow-up P/K can be input immediately after armor hit freeze even if 11f startup has not passed
Luke's command dash with 2 possible ending specials, both of which are usually unsafe on block. Unlike many other command dashes, there is no way to stop early, making it poor for pressure and resets. The armor on the OD version can be used as a prediction against slow pokes or projectiles, but the follow-ups are too slow to use effectively on reaction.
No Chaser (236K~P)
| Startup | Active | Recovery | Cancel | Damage | Guard | On Hit | On Block |
|---|---|---|---|---|---|---|---|
| 12+12 | 7 | 19 | SA3 | 900 | LH | KD +32(+38) | -6(0) |
- Puts opponent into limited juggle state; can juggle 623LP at max spacing
- Cancel Hitconfirm Window: 19f (Super)
| Startup | Active | Recovery | Cancel | Damage | Guard | On Hit | On Block |
|---|---|---|---|---|---|---|---|
| 11+12 | 7 | 19 | SA2 SA3 | 1300 | LH | KD +32(+38) | -6(0) |
- Puts opponent into limited juggle state; can juggle 623LP at max spacing
- Cancel Hitconfirm Window: 24f (Super)
- Final cancel frame into SA2 will whiff midscreen
- Applies 50% damage scaling to next hit when beginning a combo (100/50/40...)
A shoulder tackle follow-up with a lot of active frames. Can be safe if spaced near max range. Can be canceled into Super on reaction, but a well-spaced tackle give less time to react to the hitconfirm.
Impaler (236K~K)
| Startup | Active | Recovery | Cancel | Damage | Guard | On Hit | On Block |
|---|---|---|---|---|---|---|---|
| 12+13 | 8 | 22(27) | - | 1200 | H | KD +30(+35) | -8(-3) |
- Airborne 4-19f (Forced Knockdown state)
- Knocks opponent down, but has too much recovery to juggle afterward
| Startup | Active | Recovery | Cancel | Damage | Guard | On Hit | On Block |
|---|---|---|---|---|---|---|---|
| 11+13 | 8 | 19 | - | 1200 | H | KD +38(+43) | -5(0) |
- Airborne 4-19f (Forced Knockdown state)
- Puts opponents into limited juggle state; can pick up juggle even if it connects at point blank
- Applies 50% damage scaling to next hit when beginning a combo (100/50/40...)
An overhead flip kick with airborne frames that allow it to beat throws. Safe if spaced out properly or timed as a meaty, good for catching jump-outs. Because Luke cannot stop his run and has no low option, the overhead property does not grant much mixup potential against opponents who know the matchup.
Super Arts
Level 1 Super (236236P)
| Startup | Active | Recovery | Cancel | Damage | Guard | On Hit | On Block |
|---|---|---|---|---|---|---|---|
| 6 | 13(1)7(2)7(23)5 | 45 | - | 300x4,800 (2000) | LH | KD +17(+30) | -29 |
- Full Invuln: 1f; Strike/Throw Invuln: 2-6f; Armor Break
- Extends a projectile-vulnerable hurtbox on frames 2-5 of startup
- Drive Gauge Depletion: 0.5 bars (hit) / 0.25 bars (block)
- Distribution: 1000x5 (hit) / 500x5 (block)
- 30% minimum damage scaling
5-hit projectile with Super priority, making it an effective fireball counter at some ranges. However, Luke extends his hurtbox during startup, making it hard to counter fast or close-range projectiles on reaction. SA1 is a great juggle ender to tack on some extra damage.
The first 4 hits travel about 65% of the screen, and the final hit reaches fullscreen. The knockdown advantage increases the farther you are from the wall. While there appears to be a gap before the final hit, the projectiles form a true blockstring.
The full damage distribution of the 5 hits is 300x4,800.
Level 2 Super (214214P)
| Startup | Active | Recovery | Cancel | Damage | Guard | On Hit | On Block |
|---|---|---|---|---|---|---|---|
| 5 | 3 | 51 | - | 2800 | LH | KD +2 | -29 |
- Full Invuln: 1-7f; Armor Break
- Drive Gauge Depletion: 1 bar (hit) / 0.5 bars (block)
- 40% minimum damage scaling
An invincible short-range Super that is fast enough to work in many juggles. Performs one hit on whiff or block, but on hit locks into a full animation that sends the opponent fullscreen with a tumbling knockdown. This animation is not fully invincible, so lingering moves like Kimberly's spraycan can hit him out of it.
In the corner, Luke is left at the perfect spacing for an auto-timed strike/throw mixup.
Level 3 Super (236236K)
| Startup | Active | Recovery | Cancel | Damage | Guard | On Hit | On Block |
|---|---|---|---|---|---|---|---|
| 10(27) | 4 | 66(92) | - | 4000 | LH | HKD +18 | -42 |
- Full Invuln: 1-13(30)f; Armor Break
- Fixed recovery period on block; 26f extra recovery on whiff
- Drive Gauge Depletion: 1.5 bars (hit) / 0.75 bars (block)
- Cinematic time regenerates ~2 Drive bars for Luke
- 50% minimum damage scaling; applies 10% immediate damage scaling when canceled from special moves
| Startup | Active | Recovery | Cancel | Damage | Guard | On Hit | On Block |
|---|---|---|---|---|---|---|---|
| 10(27) | 4 | 66(92) | - | 4500 | LH | HKD +18 | -42 |
- Full Invuln: 1-13(30)f; Armor Break
- Fixed recovery period on block; 26f extra recovery on whiff
- Available at 25% HP or below
- Drive Gauge Depletion: 2 bars (hit) / 1 bar (block)
- Cinematic time regenerates ~2.3 Drive bars for Luke
- 50% minimum damage scaling; applies 10% immediate damage scaling when canceled from special moves
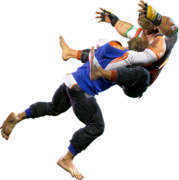
Luke runs forward toward the opponent and locks into a cinematic on hit; if blocked, Luke bounces away, usually requiring them to walk or dash before starting a punish. The actual startup varies depending on the opponent's distance, making it hard to use as a projectile counter from beyond half screen. Luke is fully invincible the entire time he is running. The max range of SA3 is about 2/3 screen, at which point the active frames will occur even if Luke has not reached the opponent.
SA3 is a great combo ender, but does not work in all special cancels. The most reliable option after a launcher or wall bounce is to juggle 214HP > SA3. The juggle hitbox reaches high above Luke, but not high enough to combo after a move like Rising Uppercut.
Taunts
Neutral Taunt (5PPPKKK)
| Startup | Active | Recovery | Cancel | Damage | Guard | On Hit | On Block |
|---|---|---|---|---|---|---|---|
| 96 (total) | - | - | - | - | - | - | - |
Forward Taunt (6PPPKKK)
| Startup | Active | Recovery | Cancel | Damage | Guard | On Hit | On Block |
|---|---|---|---|---|---|---|---|
| 180 (total) | - | - | - | - | - | - | - |
Back Taunt (4PPPKKK)
| Startup | Active | Recovery | Cancel | Damage | Guard | On Hit | On Block |
|---|---|---|---|---|---|---|---|
| 109 (total) | - | - | - | - | - | - | - |
