| Early game information
This game is relatively new, and its pages are still being written. Some information may be mildly inaccurate or missing altogether. You can join the SF6 Resource Hub for more info on editing and other ways you can potentially help with this resource. |
Introduction
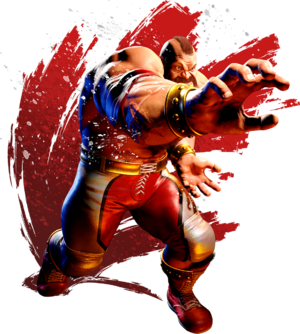
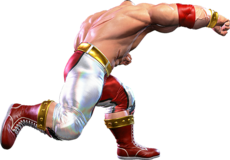
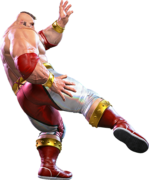
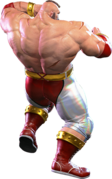
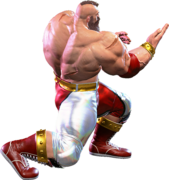
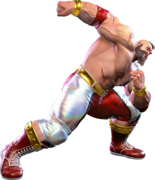
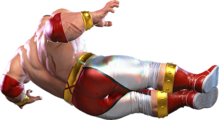
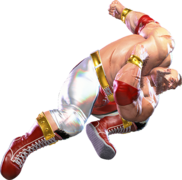
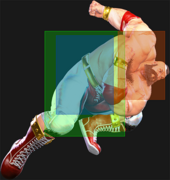
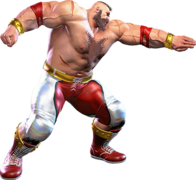
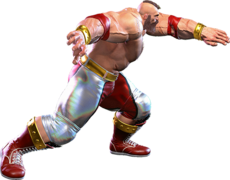
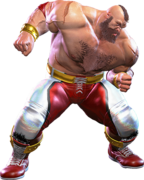
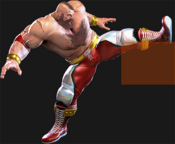
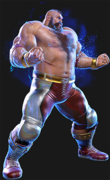
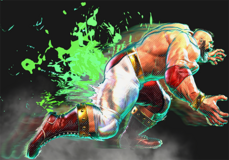
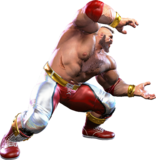
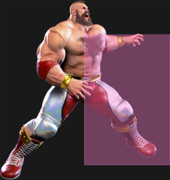
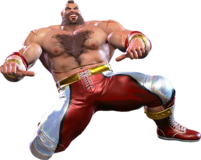
A colossal wrestler nicknamed the Red Cyclone. Zangief is dedicated to physical improvement and instructing his students.
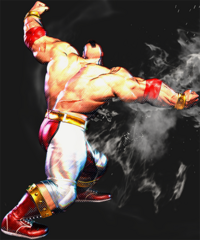
Zangief is the original big-body grappler character, and acts as a lumbering monster who utilizes his size and long reach to intimidate the opponent into sitting still, before opening them back up with one of his many command grabs.
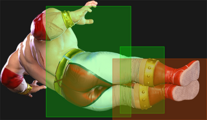
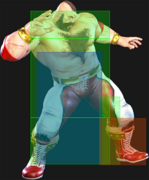
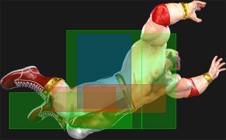
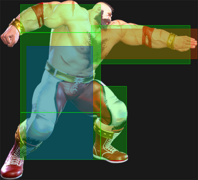
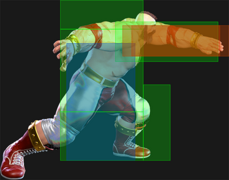
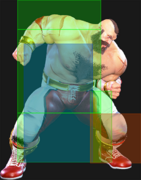
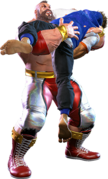
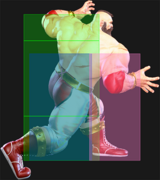
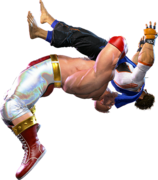
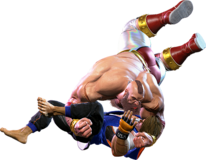
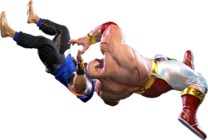
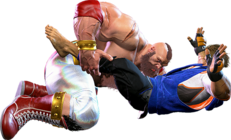
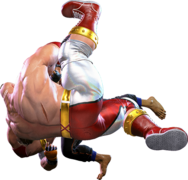
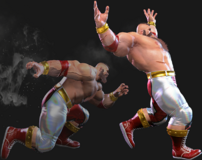
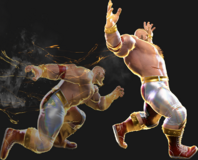
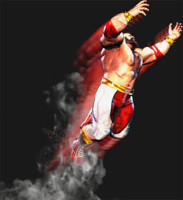
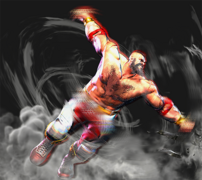
Zangief's plan is very simple: Play the throw game. Gief's huge size allows him to poke at longer distances than most of the cast, making it difficult for them to respond to his advance without surrendering space or committing to a high-risk option. 5MP, 5HP, 5LP, and 5MK can wear down the opponent while he looks for an opening. When the opportunity arises, Zangief lurches forward and grabs his opponent with the signature Screw Piledriver. This command grab has completely absurd range, is incredibly fast, and deals monstrous damage on hit. SPD has the potential to instantly turn the tide of a match and sets up the remainder of the Zangief's gameplan.
From here, Zangief continues to approach his opponent, moving between safer options and risker options to capitalize on the mistakes of his opponents. Zangief has dozens of ways to set up tick throws and punish poor decision making. He also has a bunch of unique tools for hard reads, like Siberian Express. Additionally, Zangief's signature Lariat allows him to become projectile invulnerable for a while, giving him the ability to punish fireballs thrown from too close. Coupled with his solid pokes, Zangief's tools make him a midrange menace who is well-equipped to muscle his opponent to the corner, where his offense becomes all the more terrifying.
While Zangief's offense is effective, he is notably not a vortex-style character like some other famous grapplers. Every time Gief uses Screw Piledriver, he sends the opponent nearly fullscreen and must take a big risk to keep the momentum going. Zangief is notably weak to keepaway, and in general must play very patiently. There are many strong zoners on the SF6 roster, which can make his life quite difficult. Even still, a good Zangief player is more than capable of overcoming his bad matchups compared to previous games. Choosing to stick with the Red Cyclone will let you live the wrestler power fantasy of your dreams while terrifying your opponents into submission.
| Pick if you like: | Avoid if you dislike: |
|---|---|
|
|
Classic & Modern Versions Comparison
| Missing Normals |
|
|---|---|
| Missing Command Normals |
|
| Shortcut-Only Specials |
|
| Miscellaneous Changes |
|
Zangief loses access to some of his best neutral tools with Modern, 5MK and 2MK, both very valuable for being pokes with huge range that are still quite safe from drive impacts, he also loses 5HK which typically allows for immediate high-damage punish counter options with 5HK, 3MP> SA1 or 5HK, 3MP, OD Borscht Dynamite (360KK)
6HK is gone, his only grounded overhead, and 3HK, which is a situationally useful low/throw invincible option. His best air-to-air J.HP has been gutted in favor of going all-in on his normally difficult Borscht Dynamite (360k) aerial grab with its Modern one-button input.
Generally modern Zangief has lost a lot of his important long-range kicks for the sake of his inputs being made considerably easier for his rewarding specials. He loses considerable strength in his mixup game without his overhead (6HK) but one-button inputs have made his anti-air with SA1 and Borscht Dynamite (360K), which are very rare to see, much more consistent and common. Screw Piledriver (360P) (and SA3) is extremely scary on Modern, he can whip it out as a reaction without fear of accidentally missing, (SA3 also doesn't require a jump) but he will still need to do the standard input if he wants to use Light/Medium SPD at longer ranges, or to get the full value of SA3's insane damage.
As a character with notoriously difficult inputs, Modern can curb some of the frustrations of playing Zangief normally, while also creating new ones due to the removal of important tools.
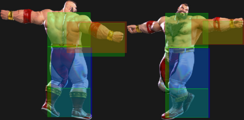
| Zangief | |
|---|---|
| Vitals | |
| Life Points | 11000 |
| Ground Movement | |
| Forward Walk Speed | 0.0364 |
| Backward Walk Speed | 0.025 |
| Forward Dash Speed | 22 |
| Backward Dash Speed | 25 |
| Forward Dash Distance | 1.007 |
| Backward Dash Distance | 0.712 |
| Drive Rush Min. Distance (Throw) | 0.327 |
| Drive Rush Min. Distance (Block) | 1.455 |
| Drive Rush Max Distance | 3.040 |
| Jumping | |
| Jump Speed | 5+38+3 |
| Jump Apex | 2.115 |
| Forward Jump Distance | 1.725 |
| Backward Jump Distance | 1.406 |
| Throws | |
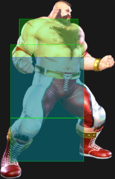
| Throw Range | 1.02 |
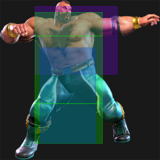
| Throw Hurtbox | 0.43 |
| Frame Data Glossary - SF6 | |
|---|---|
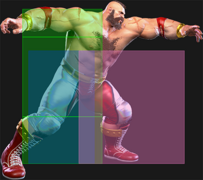
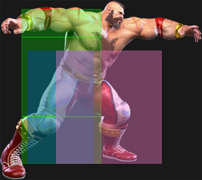
| Hitbox Images | Street Fighter 6/Glossary |
| Active | Street Fighter 6/Glossary |
| Cancel | Street Fighter 6/Glossary |
| Cancel Hitconfirm Windows | Street Fighter 6/Glossary |
| Damage | Street Fighter 6/Glossary |
| Damage Scaling | Street Fighter 6/Glossary |
| Drive Rush Cancel Advantage | Street Fighter 6/Glossary |
| Forced Knockdown | Street Fighter 6/Glossary |
| Guard | Street Fighter 6/Glossary |
| Juggles | Street Fighter 6/Glossary |
| On Hit/Block | Street Fighter 6/Glossary |
| Recovery | Street Fighter 6/Glossary |
| Startup | Street Fighter 6/Glossary |
Normals
Standing Normals
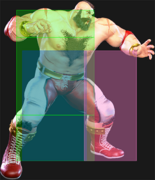
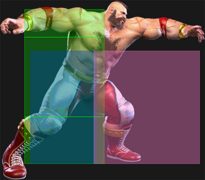
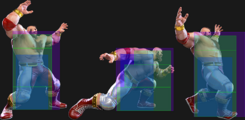
5LP
| Startup | Active | Recovery | Cancel | Damage | Guard | On Hit | On Block |
|---|---|---|---|---|---|---|---|
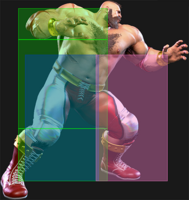
| 7(4) | 3 | 9 | Chn Sp SA | 400 | LH | +4 | +2 |
- Chains into 5LP/2LP/2LK (true blockstring into all)
- 4f startup on the chained version, allowing tighter blockstrings
- Cancel Hitconfirm Window: 13f
- Drive Rush cancel advantage: +6 oH / +4 oB
- Applies 10% damage scaling to next hit when beginning a combo (100/90/80...)
This standing jab has incredible range for a light normal, and at +2 it sets up a true mixup into a strike or SPD. To compensate, the startup and pushback are also much higher than most lights. Starting a light chain with 5LP will guarantee the next hit is a true blockstring, which is rare in SF6; this makes his pressure a little safer against reversals. Chaining into 5LP from another light normal will leave a small gap that can frame trap.
Despite the animation, it does not anti-air at all like in previous games.
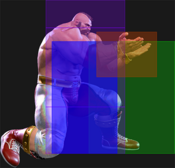
5MP
| Startup | Active | Recovery | Cancel | Damage | Guard | On Hit | On Block |
|---|---|---|---|---|---|---|---|
| 9 | 4 | 17 | TC | 700 | LH | +2 | -2 |
- Cancel Hitconfirm Window: 28f (TC)
- Can cancel to Target Combo on whiff
- Requires extra frame advantage for TC to combo (CH, PC, DR, meaty)
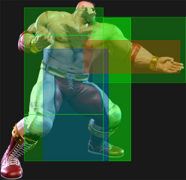
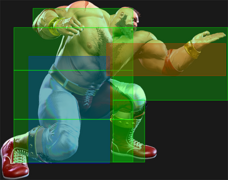
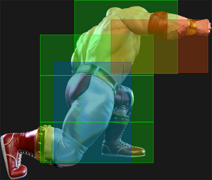
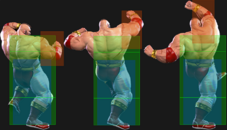
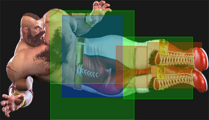
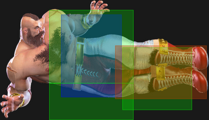
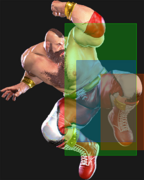
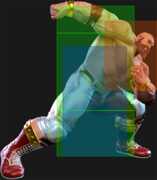
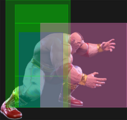
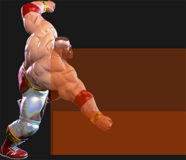
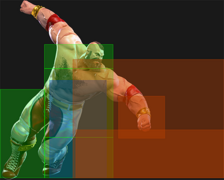
A poke with good horizontal range, decent frame advantage on block, as much pushback as a light button, low recovery, and even a Target Combo follow-up. All these factors make it a very valuable button for high level Zangief play. It's difficult for opponents to whiff punish it on reaction as its recovery is identical to that of Gief's 5LK and some other characters' 2MKs. Zangief extends his lower hurtbox a bit, making it slightly weaker to lows than it appears. It can lose to Drive Impact since it's not cancelable, although Zangief can recover safely if he hits the armor very early.
With the added frame advantage provided by Drive Rush, 5MP becomes +2 on block and can combo naturally into its Target Combo on hit. Combined with its minimal pushback, DR~5MP makes for a useful approach and pressure option in situations where Headbutt (6HP) or Knee Hammer (6MK) are too slow, granting a confirm into TC on hit and a tick throw setup on block.
Although the Target Combo follow-up is extremely lenient to hitconfirm when you land a Counter-hit in neutral, you can't autopilot the TC as a counterpoke because it comes out on whiff.
5HP
| Startup | Active | Recovery | Cancel | Damage | Guard | On Hit | On Block |
|---|---|---|---|---|---|---|---|
| (6~22)+10 | 3 | 22(24) | - | 1000 | LH | +3 | -3 |
- Upper Body Armor (1-hit): 4f until button release (no armor if not held)
- Button can be held up to 22f for partial charge; 23f gives full charge
- Startup is 10f after releasing button (minimum 16f); 2f extra recovery on whiff
- Puts airborne opponents into limited juggle state
- Counter-hit/Punish Counter: KD +32
| Startup | Active | Recovery | Cancel | Damage | Guard | On Hit | On Block |
|---|---|---|---|---|---|---|---|
| 32 | 3 | 22(24) | - | 1400 | LH | KD +40 | +3 |
- Upper Body Armor (1-hit): 4-34f
- Button must be held 23f; 2f extra recovery on whiff
- Counter-hit: KD +40
- Punish Counter: HKD +54, opponent slides far along the ground
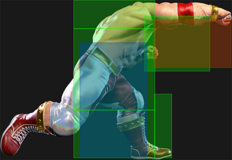
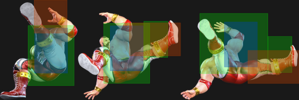
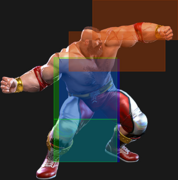
Reaching almost half screen, 5HP is one of Zangief's most threatening neutral tools. It can be used to harass characters from beyond the range of their cancelable pokes, and hits high enough to catch opponents early in their jump. Since 5HP knocks down on counter-hit, it trades favorably against most buttons, making it risky for opponents to challenge. However, the move is slow to start up, and the long total duration makes it highly vulnerable to Drive Impact.
By holding down the HP button, Zangief charges his punch, gaining 1 hit of armor in the process. The armor starts up in 4 frames and remains active until the button is released, allowing him to absorb an attack and then quickly punish. Notably, you can briefly hold the button down to still gain armor while having the move come out of the quickest possible frame. A partially charged 5HP can be extremely useful to counter safe but reactable moves like E. Honda's Sumo Headbutt. However, the armor will not protect against moves which hit the lower half of Zangief's body, including the many powerful cancelable 2MKs in the game.
When fully charged, 5[HP] gains significant range and damage, no longer requiring a counter-hit for a knockdown. It also causes an improved Hard Knockdown on Punish Counter, granting excellent oki and corner carry. Finally, it becomes advantageous on block, though the high pushback makes this unreliable as a tick throw setup. These benefits come at the cost of making 5[HP] one of the slowest normals in the game, making it punishable on reaction with Drive Impact.
Charging 5HP can be useful as a prediction vs. fireballs or slow mid-range pokes. It acts as a pseudo-Drive Impact, and can even be used during Burnout to counter the opponent's DI. As an anti-air, it is useful against characters who can mix up their jump arc since it reaches far enough to punish baits while still armoring through normal jump-ins. A partially charged 5HP pairs very well with Drive Rush, as it allows you to cover a large amount of space, is difficult to check with most pokes or fireballs thanks to the armor, and leaves you +7 on hit/+1 on block while typically being in range for at least LP SPD.
5LK
| Startup | Active | Recovery | Cancel | Damage | Guard | On Hit | On Block |
|---|---|---|---|---|---|---|---|
| 7 | 2 | 17 | Sp SA | 400 | LH | -2 | -4 |
- Cancel Hitconfirm Window: 13f
- Drive Rush cancel advantage: +7 oH / +5 oB
- Applies 10% damage scaling to next hit when beginning a combo (100/90/80...)
The long range and slow startup/recovery make 5LK more comparable to a medium normal. It has a good hitbox for whiff punishing lows when canceled to OD Lariat (PPP); at closer ranges, meterless Lariat (PP) can also combo. It is great for canceling into Drive Rush at mid-range, giving combos on hit and a true blockstring to 2LK if blocked; he can also threaten a slightly delayed command throw in either case. The Drive Rush cancel cannot be mindlessly buffered in neutral, however, since it will drain the 3 bars even on whiff.
5MK
| Startup | Active | Recovery | Cancel | Damage | Guard | On Hit | On Block |
|---|---|---|---|---|---|---|---|
| 10 | 4 | 19 | - | 800 | LH | +1 | -4 |
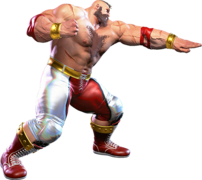
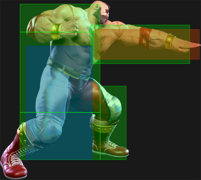
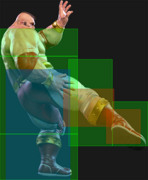
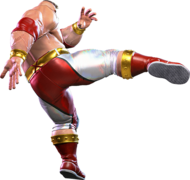
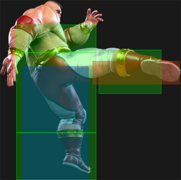
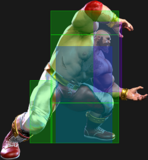
A great long-ranged poke with a hitbox that dodges most low attacks. The hitbox is slightly disjointed, so it will beat other pokes in neutral if spaced properly, and the high damage makes it trade favorably with most buttons. The pushback on block ensures that 5MK is safe unless used near point blank.
5HK
| Startup | Active | Recovery | Cancel | Damage | Guard | On Hit | On Block |
|---|---|---|---|---|---|---|---|
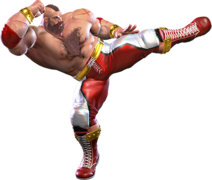
| 13 | 4 | 21 | - | 1000 | LH | +3 | +1 |
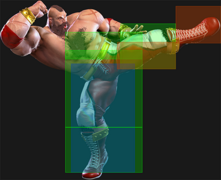
- Leg is Anti-Air Invuln 13-22f
- Extended leg is vulnerable to projectiles 1f before active
- Whiffs on crouching opponents
- Punish Counter: KD +51 Spin (free juggle state)
- Puts airborne opponents into a limited juggle state
Slow to start up, but has great horizontal range and a good anti-air hitbox, especially against neutral jumps. In the corner, Zangief can follow up an air hit with a juggle into OD Borscht Dynamite (j.360+KK) for big damage on opponents that are scared of command throws. Midscreen, the knockdown advantage is enough for a Dash + Drive Rush to secure corner carry and point blank oki. If it manages to land as a Punish Counter, it will grant an improved juggle even on grounded hit, allowing an easy conversion anywhere on the screen. It can even juggle into SA2, though the follow-up juggle is much more limited.
Crouching Normals
2LP
| Startup | Active | Recovery | Cancel | Damage | Guard | On Hit | On Block |
|---|---|---|---|---|---|---|---|
| 6(3) | 2 | 8 | Chn Sp SA | 300 | LH | +6 | +1 |
- Chains into 5LP/2LP/2LK (true blockstring into 2LP/2LK)
- 3f startup on the chained version, allowing tighter blockstrings
- Cancel Hitconfirm Window: 12f
- Drive Rush cancel advantage: +6 oH / +1 oB
- Applies 10% damage scaling to next hit when beginning a combo (100/90/80...)
A powerful jab with a good combination of speed, range, and cancelability, Zangief can harass opponents with this in the mid-range. It is plus on block, though an opponent at close range can mash a 4f normal to interrupt a tick command throw. Cancels into meterless Lariat (PP) or even OD Lariat (PPP) will whiff at longer ranges, so converting into Drive Rush is the most consistent confirm option.
2MP
| Startup | Active | Recovery | Cancel | Damage | Guard | On Hit | On Block |
|---|---|---|---|---|---|---|---|
| 8 | 3 | 16 | Sp SA | 700 | LH | +3 | -1 |
- Cancel Hitconfirm Window: 15f
- Drive Rush cancel advantage: +12 oH / +8 oB
2MP is a relatively stubby medium button with nearly identical range to 2LP. The hitbox sticks out beyond the hurtbox, making it a good counterpoke in neutral. From here, Zangief can cancel into SA2 for big damage, or cancel to Drive Rush for an extended combo or a reset into SPD. The hitbox is high enough to swat down some airborne moves like Ken's Dragonlash Kick, granting a Forced Knockdown and a juggle to Lariat (PP).
When used out of Drive Rush, 2MP becomes +3 on block for a strike/throw mixup that can't be mashed out of. On hit it becomes +7, linking into 3MP > Lariat (PP) consistently. While 2MP is one of Zangief's most useful buttons out of Drive Rush, the slow movement and short range can make it hard to approach with the 1-bar Parry Drive Rush version.
2HP
| Startup | Active | Recovery | Cancel | Damage | Guard | On Hit | On Block |
|---|---|---|---|---|---|---|---|
| 12 | 8 | 35 | - | 1000 | LH | KD +20 | -19 |
- Punish Counter: KD +33 (higher juggle state)
- Head hurtbox is Anti-Air Invuln 10-19f
- Active frames 4-8 cannot hit grounded, but can anti-air cross-ups
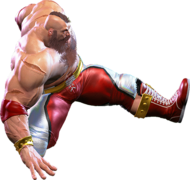
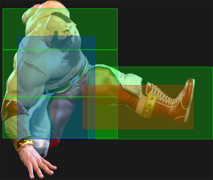
An anti-air that reaches extremely high, but has slow startup making it more difficult to use than Lariat (PP). 2HP is one of the few anti-air buttons that can actually hit opponents at cross-up range, which is useful for opponents trying to jump out of the corner. However, Zangief moves forward during this move, which makes hitting cross-up attempts less consistent.
The knockdown on hit gives time to set up oki; it is technically possible to juggle OD Borscht Dynamite (j.360+KK) after a max-height Punish Counter 2HP, but the timing is incredibly strict.
This button serves little purpose outside of specific anti-air scenarios; it is terribly unsafe on block and worse than 5HK as a punish starter.
2LK
| Startup | Active | Recovery | Cancel | Damage | Guard | On Hit | On Block |
|---|---|---|---|---|---|---|---|
| 4(3) | 3 | 12 | Chn | 250 | L | 0 | -3 |
- Chains into 5LP/2LP/2LK (true blockstring into 2LP/2LK)
- 3f startup on the chained version, allowing tighter blockstrings
- Applies 10% damage scaling to next hit when beginning a combo (100/90/80...)
The longest 4f in the game and Zangief's only one, highly important for punishes and interrupting the opponent's pressure. The major drawbacks, however, are its abysmal advantage on hit, unusually long recovery for a light, and inability to be canceled for confirms. If in range to chain into 5LP/2LP, it is possible to get a cancel into a proper confirm, but the light chains will often put the opponent out of range for a Lariat (PP) knockdown. At full range, the only thing Zangief can do is use the advantage to make spacing traps or walk forward and threaten SPD.
2MK
| Startup | Active | Recovery | Cancel | Damage | Guard | On Hit | On Block |
|---|---|---|---|---|---|---|---|
| 9 | 3 | 18 | - | 700 | L | +2 | -2 |
A long-ranged low poke with a great disjointed hitbox, though vulnerable to Drive Impact due to its slow speed. Good in neutral when combined with 5MP and 5MK, which hit much higher. Not very useful as a starter out of Drive Rush, as the link to 2LP cannot combo into anything else without another Drive Rush cancel.
2HK
| Startup | Active | Recovery | Cancel | Damage | Guard | On Hit | On Block |
|---|---|---|---|---|---|---|---|
| 12 | 3 | 27 | - | 1000 | L | HKD +32 | -13 |
- Counter-hit/Punish Counter: HKD +45
- Opponent falls forward with a different animation
- Has some juggle potential; not a Hard Knockdown when juggled into
A sweep with massive range and good damage, essential to Zangief's mixup game. Many characters struggle to punish when well-spaced, despite being very unsafe on paper. It is quite whiff punishable and vulnerable to Drive Impact, so it must be used carefully.
On hit, the Hard Knockdown allows for follow-up oki with Drive Rush even at max range; this does not apply if juggled into midscreen, since the opponent can back rise to escape pressure. After an SPD knockdown, DR~2HK is a common tactic to keep the opponent in place. The extra blockstun ensures that very few characters will be able to punish properly, and it opens up the threat of an overhead or a second SPD.
Jumping Normals
j.LP
| Startup | Active | Recovery | Cancel | Damage | Guard | On Hit | On Block |
|---|---|---|---|---|---|---|---|
| 5 | 7 | 3 land | - | 300 | H | - | - |
Zangief's fastest air-to-air button with long horizontal range. If done too early on the way up, the opponent can land first, leaving you punishable.
j.MP
| Startup | Active | Recovery | Cancel | Damage | Guard | On Hit | On Block |
|---|---|---|---|---|---|---|---|
| 8 | 5 | 3 land | - | 700 | H | - | - |
- Puts airborne opponents into a limited juggle state on Counter-hit/Punish Counter
Another solid air-to-air, j.MP is slower but generally advantageous after landing. Also key jump-in normal in perfect safe jump setups for Zangief as well, both due to its range and being +11 on block with relatively low pushback after a proper safe jump. The juggle state on an air-to-air allows a strong conversion into OD Borscht Dynamite provided you land at least 10 frames before the opponent.
j.HP
| Startup | Active | Recovery | Cancel | Damage | Guard | On Hit | On Block |
|---|---|---|---|---|---|---|---|
| 9 | 6 | 3 land | - | 800 | H | - | - |
- Spike knockdown vs. airborne opponents on hit
A solid jump-in option with more hitstun and blockstun than j.HK, allowing it to link to 6HP more consistently. The hitbox reaches downward on the later active frames, allowing it to work from close range jumps. If it hits an airborne opponent, Zangief gets reliable follow-up oki due to the knockdown.
j.LK
| Startup | Active | Recovery | Cancel | Damage | Guard | On Hit | On Block |
|---|---|---|---|---|---|---|---|
| 5 | 10 | 3 land | - | 300 | H | - | - |
- Can hit Cross-up
- Can be used as a fuzzy instant overhead
A jump-in with very short horizontal range, this button is mostly used to intentionally leave Zangief with minimal frame advantage, setting up a quick strike/throw mixup. While it can hit as a cross-up, it is much harder to use than j.2HP. The hurtbox does not extend much when using this, allowing it to bait anti-airs at some ranges. If it hits as an air-to-air, the opponent may land first, putting Zangief at a disadvantage.
j.MK
| Startup | Active | Recovery | Cancel | Damage | Guard | On Hit | On Block |
|---|---|---|---|---|---|---|---|
| 8 | 8 | 3 land | - | 500 | H | - | - |
- Can be used as a fuzzy instant overhead vs. JP/Marisa/Zangief
- Opponent must be in Burnout or block a deep j.2HP for true blockstring
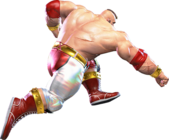
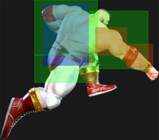
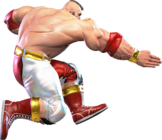
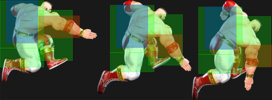
An invaluable air normal due to its long horizontal and downward reach. It allows Zangief to attack quite early in his jump arc while still being advantageous after landing, making it more difficult to anti-air him. It can also work as an air-to-air from a backwards jump in situations where Lariat (PP) and 2HP are risky to attempt.
j.HK
| Startup | Active | Recovery | Cancel | Damage | Guard | On Hit | On Block |
|---|---|---|---|---|---|---|---|
| 10 | 7 | 3 land | - | 800 | H | - | - |
- Can hold the button 20f for a charged version
- Holding less than 20f gives regular j.HK after release
| Startup | Active | Recovery | Cancel | Damage | Guard | On Hit | On Block |
|---|---|---|---|---|---|---|---|
| 32 | 6 | 30 land (oH/oB) 20(12) land (whiff) |
- | 1500 | H | Wall Splat +1(+33) | -30(-43) |
- Body is Projectile Invuln 32f until land (legs are still vulnerable)
- Causes Wall Splat on hit, Wall Bounce on Punish Counter; opponent is in a free juggle state
- KD Advantage varies based on connect height and distance from corner
- Landing recovery: 30f oH/oB (bounce away), 20f full charge whiff, 12f partial charge whiff
- 20f landing recovery is cancelable (starting frame 2) into Dash or any attack
- If active frames 2-6 connect right as Zangief lands, he does not bounce away
- Landing recovery becomes cancelable into any move except jump (-1 oB if not canceled)
Good horizontal range for a jump-in. Pairs well with j.HP which hits from closer range. The hitstun and blockstun of j.HK is a bit lower, making it harder to link into 6HP.
When fully charged, j.[HK] does 700 more damage and sends the opponent flying fullscreen. If the HK charge is released early, Zangief does not gain any extra benefits; it simply becomes a slower j.HK. Conversely, starting the input too late and then landing before the active frames come out will cause Zangief to incur extra landing recovery; it's important to start the input early in the jump.
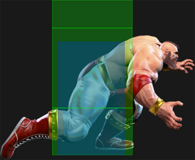
The most useful situation for j.[HK] is as a punish for reversals that are at least -42 on block or whiff; it also works as a hard callout against command grabs, as jumping is the primary way to dodge them anyway. It won't punish when neutral jumping out of a normal throw, but most players can easily anti-air you in this scenario regardless. It can also be used hard read against fireballs; you can start charging the HK right as you jump, and continue holding it if you see the opponent threw a projectile. This will cause it to land as a Punish Counter, ensuring a wall bounce combo into 3MP or OD Borscht Dynamite midscreen. In the corner, the opponent will fly over Zangief's head, making follow-ups difficult or impossible.
Unfortunately, the move is extremely unsafe on block; despite bouncing far away, the opponent can close the distance with Drive Rush for a punish. The risk vs. reward is slanted heavily in favor of the opponent, so j.[HK] should be used sparingly unless it's guaranteed. However, it is technically possible to land the full charge without the unsafe bounce away. By timing a perfect safe jump that hits on a later active frame, Zangief will drop down immediately and can cancel his recovery into any action except walk or jump. This includes Drive Parry, enabling Zangief to properly safe jump against every anti air reversal in the game, including Lily's 4f Enhanced Tomahawk Buster. Practical knockdowns where Zangief is specifically at a 43 frame advantage do exist and enable perfect safe jump setups where a charged j.HK cancel can be executed consistently, though the high pushback on block makes this less optimal since Zangief will have more difficulty pushing a strike/throw mixup.
Command Normals
3MP
| Startup | Active | Recovery | Cancel | Damage | Guard | On Hit | On Block |
|---|---|---|---|---|---|---|---|
| 7 | 3 | 21 | Sp SA | 800 | LH | -1 | -3 |
- Arm is Anti-Air Invuln 7-12f (not useful AA due to head hurtbox)
- Forces stand on hit
- Puts airborne opponents into a limited juggle state
- Cancel Hitconfirm Window: 21f
- Special/DR cancel is delayed until after active frames
- Drive Rush cancel advantage: +11 oH / +9 oB
Zangief's fastest medium attack, main frame trap, and one of his most important combo tools. The range is very short, so it doesn't have much use in neutral. It is slightly disjointed, allowing it to counterpoke situationally, but that role is usually best left to 2MP. As an anti-air, the range at which it's effective is so precise that it's not worth attempting in most cases; the hurtbox around Zangief's head is simply too large. However, the fast startup and upward angle can let it interrupt some airborne attacks that usually go over crouching buttons, like Ken's Dragonlash Kick.
The hitconfirm time is very lenient; with a little practice, it can be easily confirmed into Lariat or OD Lariat. Note that the final cancel frame does not combo into meterless Lariat (PP), so use the OD version if you want to be safer. By forcing stand on hit, Lariat is much more consistent in combos outside of point blank range.
The ability to maintain a juggle state lets Zangief extend his combos for big damage. 3MP does not have any natural juggle potential itself, instead relying on free juggle states or Drive Rush to get things started. After a high juggle, Zangief can jump directly into OD Borscht Dynamite (j.360+KK). In the corner, he can cancel a low-height 3MP to OD Lariat (PPP), which staggers the hits if done correctly; this allows a meter dump combo ending in OD Borscht. It also combos directly to SA1 when canceled, making it his most reliable way of landing this Super.
6MK
| Startup | Active | Recovery | Cancel | Damage | Guard | On Hit | On Block |
|---|---|---|---|---|---|---|---|
| 14 | 7 | 14 | - | 600 | LH | 0(+6) | -4(+2) |
- Lower Body Invuln / Low Crush: 7-23f (not airborne)
A hopkick that can be spaced for better frame advantage; the final active frame is wider than the others, making it easier to land at max distance. A max-range 6MK can lead to combos on hit or a strike/SPD mixup on block. If combined with Drive Rush, Zangief unlocks even better options, though this makes it harder to space precisely if not used in an oki setup.
The move is useful against low pokes in neutral, low crushing about halfway through its startup. It is not actually airborne, however, so Zangief is vulnerable to throws or a full counter-hit combo if interrupted.
6HP
| Startup | Active | Recovery | Cancel | Damage | Guard | On Hit | On Block |
|---|---|---|---|---|---|---|---|
| 14 | 5 | 15(17) | Sp SA | 900 | LH | +6 | +4 |
- 2f extra recovery on whiff
- Puts airborne opponents into a limited juggle state
- Cancel Hitconfirm Window: 19f
- Special/DR cancel is delayed until after 3rd active frame
- Drive Rush cancel advantage: +14 oH / +12 oB
One of Zangief's most important pressure tools; at a whopping +4 on block, Zangief can choose between a frame trap or command throw mixup. 3MP is a great button to frame trap with, as it's single-hit confirmable into Lariat. Another good option is 2LP, which will link to 2MP on Counter-hit (but leaves an interruptible gap if blocked). Against a turtling opponent, Zangief can simply go for another headbutt to reset the situation; making the opponent block these sequences will quickly drain their Drive Gauge.
On normal hit, 6HP can only link into 2LP and 2LK, neither of which allow for a meterless confirm. Fortunately, 6HP's many active frames make it easy to time as a meaty, granting a much more rewarding link into 3MP. 6HP itself can be Drive Rush canceled into another 6HP for big damage, which also creates a frame trap on block; apart from that and a deep j.HP, it can be difficult to combo into 6HP without bonus advantage from a Punish Counter or Drive Rush normal starter.
When used in neutral, the Headbutt has fairly short range. Zangief extends a hurtbox after the active frames, making it easy to whiff punish and limiting its use as a counterpoke. The recovery time is fairly short, however, so it can be useful to mix 6HP in with other neutral buttons to see how they respond.
6HK
| Startup | Active | Recovery | Cancel | Damage | Guard | On Hit | On Block |
|---|---|---|---|---|---|---|---|
| 22(24) | 7(5) | 25 | - | 1300 | H | KD +28(+30) | -12(-8) |
- Lower Body Invuln / Low Crush: 13-28f (not airborne)
- Active frames 1-2 only hit airborne, 3-4 only hit standing
- Effectively 24f vs. stand, 26f vs. crouch (with 2f better KD Advantage)
- Has juggle potential; puts airborne opponents into limited juggle state
- Punish Counter: KD +42(44) free juggle OTG state
A long range and fairly slow overhead with significant pushback on block. It is very disadvantageous on block, but with good spacing (or with the help of Drive Rush) it can be difficult for some characters to punish. The move starts with a hitbox straight above Zangief that anti-airs, then continues downward in an arcing motion. Unlike most overheads, Zangief can't threaten with a combo follow-up after a Drive Rush hit since it knocks down.
Cyclone Wheel Kick can be used in a manner similar to 6MK to beat low pokes, though the slower startup makes it less likely to punish. If it does land as a Punish Counter, the ground bounce allows a 3MP juggle follow-up. On a grounded punish, this gives the exact height needed for 3MP > OD Lariat to juggle into OD Borscht Dynamite in the corner. If the Punish happens on an airborne opponent, the juggle height is less consistent. Because 6HK does high damage itself and leads to this powerful juggle, it can be used as a DP punish starter.
3HK
| Startup | Active | Recovery | Cancel | Damage | Guard | On Hit | On Block |
|---|---|---|---|---|---|---|---|
| 16 | 4 | 40 | - | 1000 | LH | KD +21 | -18 |
- Throw Invuln / Lower Body Invuln / Low Crush: 5-26f (not airborne)
- Has juggle potential; puts airborne opponents into a limited juggle state
- Punish Counter: KD +60 Tumble; if opponent reaches corner HKD +128 Wall Splat
- Wall Splat is grounded and throwable, but strikes still put opponent into limited juggle state afterwards
A dropkick that can be used to bait lows and throws, similar to a move like Guile or Chun-Li's 6HK; unlike those moves, however, 3HK is horrendously unsafe on block and whiff. The hitbox has an excellent disjoint for counterpoking, but even from half screen it is trivial to whiff punish with a Drive Rush starter on reaction.
If landed as a Punish Counter, the opponent is sent tumbling across the screen, giving Zangief great corner carry. Upon reaching the corner, the opponent hits the wall with a rare grounded wall splat that allows a combo into throws. This can be used to improve your punish damage over a raw SPD, or to get decent damage without spending meter on the 6HK Punish Counter route.
22MK
| Startup | Active | Recovery | Cancel | Damage | Guard | On Hit | On Block |
|---|---|---|---|---|---|---|---|
| 9 | 3 | 17 | TC | 500 | LH | +4 | -3 |
- Cancel Hitconfirm Window: 22f (TC)
- Can perform Target Combo follow-ups on whiff
Zangief takes a step forward and stomps the ground. It does not hit low despite the animation, but does leave him safe on block. On hit, he can link 2LK, 5LP > Lariat from point blank or go into a throw reset.
The Target Combo follow-up is unusual; Zangief can chain into the 2nd hit on reaction, but this leaves him at -3 on hit; from there, he cannot combo to the 3rd hit, so there is little reason to continue the TC if the initial stomp connects. By intentionally whiffing the 1st hit before the opponent wake up from a knockdown, Zangief can choose to continue with the TC or stop for a different strike/throw mixup. This can be useful for auto-timed oki or for scoring a counter-hit 22MK~MK.
j.2HP
| Startup | Active | Recovery | Cancel | Damage | Guard | On Hit | On Block |
|---|---|---|---|---|---|---|---|
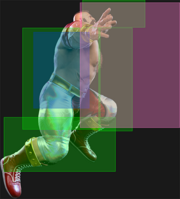
| 9 | 9 | 8 land | - | 800 | H | - | - |
- Can hit Cross-up
- Spike knockdown vs. airborne opponents on Counter-hit/Punish Counter
- Counts as 2 hits for damage scaling when comboed into (applies to next hit)
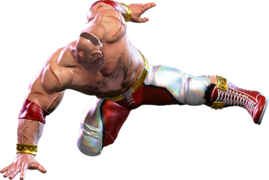
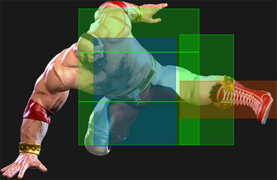
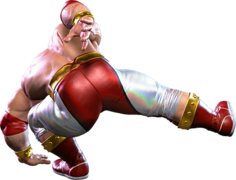
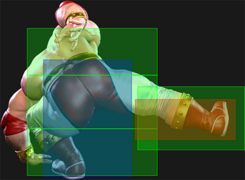
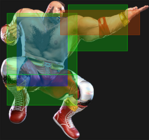
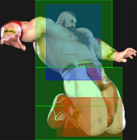
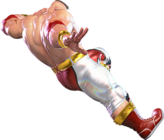
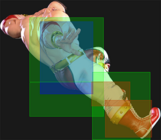
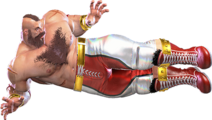
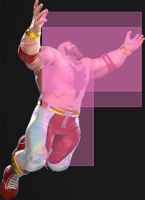
The classic "Body Splash", this is a great cross-up tool with a wide hitbox and high reward on hit. Usable from any jump direction, it can be tricky to anti-air when mixed with his other options, since the hurtbox shifts upward during the attack. It has more landing recovery than most air normals; as a result, it will always be punishable when Perfect Parried and cannot be used as a safe jump option, even at the latest possible timing.
After a Drive Impact crumple, Zangief can side switch by crossing up with this move; from there, he can juggle Lariat, OD Borscht Dynamite, or immediate SA1. This applies extra damage scaling on the juggle ender, but is definitely worthwhile to gain better screen position.
j.8HP
| Startup | Active | Recovery | Cancel | Damage | Guard | On Hit | On Block |
|---|---|---|---|---|---|---|---|
| 8 | 4 | 3 land | Sp* | 800 | H | - | - |
- Puts airborne opponents into limited juggle state
- Combos to j.360+KK when canceled
A specialized and powerful tool, Flying Headbutt can be used to punish vertical jumps and cross-up attempts. The range is quite short, so it won't effectively air-to-air opponents farther away. Zangief can score big damage by canceling to OD Borscht Dynamite; the meterless version will not juggle here. If Drive meter is in short supply, he can also land and move forward to get oki instead.
Target Combos
5MP~MP~MP
| Startup | Active | Recovery | Cancel | Damage | Guard | On Hit | On Block |
|---|---|---|---|---|---|---|---|
| 9 | 4 | 20 | TC | 600 | LH | +2 | -6 |
- Only combos from 5MP on Counter Hit, Punish Counter, or when used after Drive Rush
- Leaves a 6f blockstring gap after 5MP; can be performed on whiff
- Cancel Hitconfirm Window: 22f (single hit) / 57-65f (TC)
A follow-up to Zangief's large 5MP. Without additional frame advantage, it cannot be comboed into, but can catch an opponent trying to jump away on hit or block. If this second hit connects, Zangief can either finish the combo for corner carry and guaranteed damage or attempt a mixup. The hitconfirm time into the final MP is quite lenient, even when reacting only to this 2nd MP in the sequence.
Due to the follow-up having the same range as Zangief's 5MP, it can whiff due to pushback or if 5MP strikes an extended hurtbox, leaving Zangief open for a punish. It's also incredibly vulnerable to Drive Impact.
| Startup | Active | Recovery | Cancel | Damage | Guard | On Hit | On Block |
|---|---|---|---|---|---|---|---|
| 15 | 3 | 32 | - | 900 | LH | KD +27 | -17 |
- Leaves a 7f blockstring gap after 5MP~MP; can be performed on whiff
On hit, knocks the opponent away with solid corner carry but poor okizeme.
Be wary when canceling into this final attack on block or whiff, as it will leave Zangief wide open if it fails to hit.
22MK~MK~MK
| Startup | Active | Recovery | Cancel | Damage | Guard | On Hit | On Block |
|---|---|---|---|---|---|---|---|
| 9 | 3 | 19 | TC | 500 | LH | -3 | -4 |
- Combos naturally from 22MK, but counter-hit is required to combo into the final stomp
- Leaves a 2f blockstring gap after 22MK; can be performed on whiff
- Cancel Hitconfirm Window: 23f (TC)
An incredibly situational target combo. On hit, Zangief can attempt a mixup between a frame trap with the third stomp, a delayed throw attempt, or a delayed strike with another normal. Whiffing the initial 22MK during an oki setup can allow Zangief to mix between SPD or the 2nd hit of this TC, setting up a potential counter-hit that allows the final TC stomp to combo.
| Startup | Active | Recovery | Cancel | Damage | Guard | On Hit | On Block |
|---|---|---|---|---|---|---|---|
| 10 | 3 | 24 | Sp SA | 700 | LH | -2 | -10 |
- Leaves a 2f blockstring gap after 22MK~MK; can be performed on whiff
- Cancel Hitconfirm Window: 19f (single hit) / 50f (22MK~CH MK~MK > Special)
- Special/DR cancel is delayed until after 2nd active frame
- Drive Rush cancel advantage: +14 oH / +6 oB
A high risk, low reward frame trap option after 22MK~MK. Unsafe on block, but each hit of this TC leaves a 2 frame blockstring gap that can punish an opponent trying to take back their turn. Canceling the final stomp into Drive Rush allows a decent combo on hit, and can safely bail out and go for a mixup on block. Be careful when canceling the final stomp into meterless Lariat, as the combo will drop if the cancel is delayed.
Throws
Neutral Throw (5LPLK)
| Startup | Active | Recovery | Cancel | Damage | Guard | On Hit | On Block |
|---|---|---|---|---|---|---|---|
| 5 | 3 | 23 | - | 1200,600 (2040,600) | T | KD +22(+0) | - |
- Input can be held for an additional hit (+600 damage, but less KD advantage)
- Punish Counter: HKD +22(+0); damage increased to 2040 (+600 more if held)
- Applies 20% immediate damage scaling when comboed into (e.g. after Crumple)
Zangief has the unique ability to hold his throw input, turning Body Slam into the most damaging throw in the game at the cost of okizeme. This allows Zangief to finish off weakened opponents in situations where other normal throws may not, without the risk of whiffing a high-recovery command throw.
By omitting the follow-up hit, Body Slam can be used in corner throw loops with manual timing. This is not particularly useful, as Spine Buster (3LPLK) gets the same damage with better okizeme and some auto-timed throw loop setups.
Forward Throw (6LPLK)
| Startup | Active | Recovery | Cancel | Damage | Guard | On Hit | On Block |
|---|---|---|---|---|---|---|---|
| 5 | 3 | 23 | - | 1500 (2550) | T | KD +10 | - |
- Punish Counter: HKD +10; damage increased to 2550
- Applies 20% immediate damage scaling when comboed into (e.g. after Crumple)
While more damaging than most normal throws, German Suplex provides poor okizeme, even on Punish Counter. Generally inferior to Spine Buster (3LPLK) if you want okizeme and held Body Slam (5LPLK) if you want damage.
Back Throw (4LPLK)
| Startup | Active | Recovery | Cancel | Damage | Guard | On Hit | On Block |
|---|---|---|---|---|---|---|---|
| 5 | 3 | 23 | - | 1400 (2380) | T | KD +8 | - |
- Side switch
- Punish Counter: HKD +8; damage increased to 2380
- Applies 20% immediate damage scaling when comboed into (e.g. after Crumple)
Less damaging than Zangief's other back throws, but gives marginally better okizeme.
A solid defensive throw that switches sides while keeping the opponent close. The okizeme after a midscreen Back Rise is poor, but if you throw the opponent into the corner or land a Punish Counter Hard Knockdown, Zangief can threaten the opponent with a strike/throw mixup. Beware though that Zangief is unable to avoid immediate wakeup attacks by walking backwards against an opponent's normal getup, and that the opponent is also close enough to cross over with a forward jump. For side switching by the corner, you may opt for Brain Buster (2LP2LK) instead to mitigate volatility when trapping your opponent in the corner.
Neutral Crouch Throw (2LPLK)
| Startup | Active | Recovery | Cancel | Damage | Guard | On Hit | On Block |
|---|---|---|---|---|---|---|---|
| 5 | 3 | 23 | - | 1500 (2550) | T | KD +14 | - |
- Side switch
- Punish Counter: HKD +14; damage increased to 2550
- Applies 20% immediate damage scaling when comboed into (e.g. after Crumple)
An alternative to Capture Suplex (4LPLK) when you need to side switch, especially near the corner. Midscreen this throw is unremarkable, but against a cornered opponent Zangief is positioned at a distance where he can tag his opponent with an immediate 5HP. This throw is valuable because it leaves Zangief at a perfect range to anti-air opponents attempting to jump out of the corner. This is something that can be more difficult to do after Capture Suplex, which leaves Zangief too close to the opponent to walk out of their attack range; this essentially forces him to commit to a meaty normal/throw at a range where the opponent's forward jump will cross-up, which is very difficult for Zangief to deal with.
While Zangief cannot threaten a conventional meaty throw/SPD after 2LPLK, he is advantageous enough to Punish Counter even wakeup light attacks with walk forwards MP SPD or 5MP. The freedom to be precisely spaced outside of the range of your opponent's pokes, which is also a spacing where Zangief can reliably anti air without worrying about cross-ups and effortlessly bait perfect parry, is an extremely valuable layer to his pressure against cornered opponents.
Forward Crouch Throw (3LPLK)
| Startup | Active | Recovery | Cancel | Damage | Guard | On Hit | On Block |
|---|---|---|---|---|---|---|---|
| 5 | 3 | 23 | - | 1200 (2040) | T | KD +33 | - |
- Punish Counter: HKD +33; damage increased to 2040
- Applies 20% immediate damage scaling when comboed into (e.g. after Crumple)
A uniquely powerful normal throw, and a third element to add to Zangief's mixup game on top of his strikes and command grabs. Even against Back Rise, Zangief gets incredible okizeme anywhere on screen.
Against midscreen Back Rise, you can dash up and mix the opponent up between strikes and SPD. Alternatively, you can Drive Rush to increase the threat of your strikes or Spine Buster again, letting Zangief loop the mixup. This is something entirely unique to Zangief, as no other character can throw loop midscreen.
If the opponent does not Back Rise or is cornered, the mixup becomes even stronger, allowing you to throw loop without a Drive Rush. Whiffing 22MK leaves Zangief at +5 just inside his throw range for easy mixup timing; he can also walk back to shimmy a reversal throw tech in all matchups except the Zangief mirror.
Back Crouch Throw (1LPLK)
| Startup | Active | Recovery | Cancel | Damage | Guard | On Hit | On Block |
|---|---|---|---|---|---|---|---|
| 5 | 3 | 23 | - | 1500 (2550) | T | KD +9 | - |
- Side switch
- Punish Counter: HKD +9; damage increased to 2550
- Applies 20% immediate damage scaling when comboed into (e.g. after Crumple)
This throw leaves the opponent further away than Brain Buster (2LPLK) while only giving the same knockdown advantage as Capture Suplex (4LPLK); as a result, it is generally outclassed by better options in any situation. Zangief recovers too far away from the opponent for any follow-up oki on hit. This throw is mostly used unintentionally while crouch blocking and inputting a delayed throw tech to cover the standard strike/throw mixup.
Drive System
Drive Impact (HPHK)
| Startup | Active | Recovery | Cancel | Damage | Guard | On Hit | On Block |
|---|---|---|---|---|---|---|---|
| 26 | 2 | 35 | - | 800 | LH | KD +35 / Wall Splat KD +65 | -3 / Wall Splat HKD +72 |
- Armor (2-hit): 1-27f
- Applies 20% damage scaling to next hit when beginning a combo (including Wall Splat on block)
- Combos when canceled from Punish Counter 6HP (no corner wallsplat)
- Useful for draining opponent's Drive gauge, especially after Perfect Parry
See Drive Impact on the Gauges page for more details.
When canceled from a normal, these are the important blockstring gaps; a gap of N will trade with an N-frame startup attack; [] = Burnout
- 6HP: 5[1]
- 3MP: 8[4]
- 2MP: 9[5]
- 22MK~MK~MK: 11[7]
- Note: A gap ≥ 6f can be thrown, and a gap ≥ 10f can be jumped out of by Zangief (9f for most characters)
Against the following characters in Burnout:
- JP (22K), frame 3 counter
- Marisa (214K), frame 3 armor
- Zangief (5[HP]), frame 4 armor
It's important to use a blockstring that cannot be absorbed by their armor/counter moves. Ideally, the string should also not be a true combo, or it will cause a Lock and prevent Stun. Note that if the opponent mashes buttons on wakeup, the counter-hit will cause DI to Lock.
- 6HP > DI: 1f blockstring gap prevents opponent from absorbing the hit
- DR~2MP > DI: 1f blockstring gap prevents opponent from absorbing the hit
- DR~3MP > delay DI: delay allows a small blockstring gap to prevent opponent from absorbing the hit
- Can allow time to confirm a different ender on hit; if delayed too long, the blockstring gap can be too large
Drive Reversal (6HPHK)
| Startup | Active | Recovery | Cancel | Damage | Guard | On Hit | On Block |
|---|---|---|---|---|---|---|---|
| 20 | 3 | 26(31) | - | 500 recoverable | LH | KD +23 | -8 |
- Full Invuln: 1-22f; Armor Break
- 5f extra recovery on hit
See Drive Reversal on the Gauges page for more details.
Drive Parry (MPMK)
| Startup | Active | Recovery | Cancel | Damage | Guard | On Hit | On Block |
|---|---|---|---|---|---|---|---|
| 1 | 8 or until released | 29(1)(11) | - | - | - | - | - |
See Drive Parry on the Gauges page for more details.
- Perfect Parry:
- Applies a 50% damage scaling multiplier to any punish afterwards
- vs. strikes, has only 1f recovery and prevents the opponent from canceling their attack
- vs. projectiles, puts you into a fixed 11f recovery
Drive Rush (66)
| Startup | Active | Recovery | Cancel | Damage | Guard | On Hit | On Block |
|---|---|---|---|---|---|---|---|
| 9(11) | 45(46) | 24(23) | - | - | - | - | - |
- Applies 15% damage scaling multiplier to any follow-up hits when used mid-combo
- Only applies scaling once per combo; does not apply when an enhanced Drive Rush attack starts the combo
See Drive Rush on the Gauges page for more details. Frame data shown in (parentheses) refers to Parry Drive Rush.
- Distance:
- 0.327 (min, cancel into immediate Throw)
- 1.455 (min, earliest blocking/movement frame)
- 3.040 (max, final DR frame)
- See Strategy page for Blockstring Gaps and Combo Routes
Special Moves
Double Lariat (PP)
| Startup | Active | Recovery | Cancel | Damage | Guard | On Hit | On Block |
|---|---|---|---|---|---|---|---|
| 15 | 2(3)2(4)2(8)2(6)2 | 27 | SA3 | 1200 | LH | KD +27(+56) | -12(-41) |
- Upper body is Anti-Air Invuln: 6-16f; Projectile Invuln: 6-45f
- No head hurtbox on frames 1-5; shorter hurtbox on frames 6-13
- Connects once on hit, up to 4 times on block; only first or second hit (but not both) connect on crouching opponents
- Cancel Hitconfirm Window: 18f (SA3; no combo unless armor absorbed)
| Startup | Active | Recovery | Cancel | Damage | Guard | On Hit | On Block |
|---|---|---|---|---|---|---|---|
| 12 | 2(2)2(3)2(6)2(4)2 | 26 | SA2 SA3 (1st) | 500,1000 (1500) | LH | KD +38(+57) | -11(-30) |
- Upper Body is Anti-Air Invuln: 6-13f; Projectile Invuln: 1-36f
- No head hurtbox on frames 1-5; shorter hurtbox on frames 6-13
- Connects twice on hit, up to 5 times on block; only first 2 hits connects on crouching opponents
- Cancel Hitconfirm Window: 18f (SA2/SA3, 1st hit)
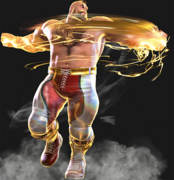
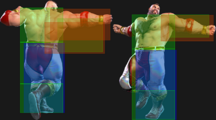
A slow but reliable anti-air, Double Lariat's large size allows it to cover a variety of jump-ins and aerial special moves. Despite the animation, it can’t hit against cross-ups. The anti-air invincibility does not occur immediately, so Lariat must be used a little preemptively; this can make it difficult to use against moves that alter the opponent's air trajectory. Note that the anti-air invincibility is upper body only, and any air attack that manages to hit his knees or below will trade with or outright stuff lariat.
The projectile invincibility lasts throughout most of the animation, making it possible to use as a fireball counter; this is especially useful on the OD version since the invincibility starts immediately, allowing for a later reaction. However, the short horizontal range and slow startup makes it impractical in many situations. Holding forward or back causes Zangief to move slightly in that direction, possibly allowing a later hit to connect against a fireball's recovery.
In combos, it is most common to use 2 light normals canceled into meterless Lariat; beginning with Drive Rush can allow a third light normal for extra hitconfirm time. OD Lariat hits more consistently, allowing for a knockdown from 6HP > 2LP or from a 3-hit string ending with 5LP. It's important to practice which version of Double Lariat to use in every situation, as a dropped hitconfirm can lead to a massive punish for Zangief.
The knockdown situation from Double Lariat is mediocre, granting little to no oki outside the corner. OD Lariat is a bit better, usually allowing Zangief to chase down a back rising opponent with Drive Rush. If OD Lariat connects at the right height (such as after a low-connect 3MP), the second hit will connect much later, allowing for a high-damage juggle into OD Borscht Dynamite (j.360+KK).
The first hit of OD Lariat crumples grounded opponents, allowing a combo into SA3 at closer ranges.
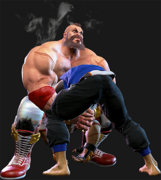
Screw Piledriver (360+P)
| Startup | Active | Recovery | Cancel | Damage | Guard | On Hit | On Block |
|---|---|---|---|---|---|---|---|
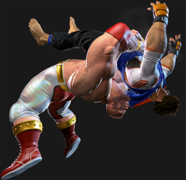
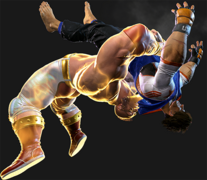
| 5 | 3 | 54 | - | 2500 (2875) | T | HKD +30 | - |
- () refers to Punish Counter damage; Range: 1.62
- Applies 10% immediate damage scaling when comboed into (e.g. crumple, stun, PC 3HK)
| Startup | Active | Recovery | Cancel | Damage | Guard | On Hit | On Block |
|---|---|---|---|---|---|---|---|
| 5 | 3 | 54 | - | 2900 (3335) | T | HKD +28 | - |
- () refers to Punish Counter damage; Range: 1.47
- Applies 10% immediate damage scaling when comboed into (e.g. crumple, stun, PC 3HK)
| Startup | Active | Recovery | Cancel | Damage | Guard | On Hit | On Block |
|---|---|---|---|---|---|---|---|
| 5 | 3 | 54 | - | 3300 (3795) | T | HKD +28 | - |
- () refers to Punish Counter damage; Range: 1.22
- Applies 10% immediate damage scaling when comboed into (e.g. crumple, stun, PC 3HK)
| Startup | Active | Recovery | Cancel | Damage | Guard | On Hit | On Block |
|---|---|---|---|---|---|---|---|
| 5 | 3 | 54 | - | 3400 (3910) | T | HKD +28 | - |
- () refers to Punish Counter damage; Range: 1.52
- No additional scaling when comboed into (e.g. crumple, stun, PC 3HK)
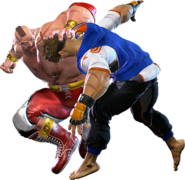
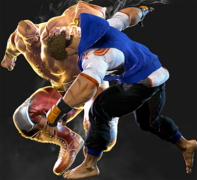
A highly damaging command grab and Zangief's defining move, Screw Piledriver (SPD) boasts excellent range, damage, and speed in exchange for high whiff recovery and poor okizeme advantage on hit. Its pros make it an excellent punishment and mixup tool, while its cons tend to reinforce Zangief's "return to neutral" style of grappling where he gets his damage and has to work his way in all over again.
The range and damage vary according to button strength, with LP having the lowest damage and longest range, while HP has the highest damage and shortest range. The MP version occupies the middle ground for both attributes. The OD version grants even more damage than HP SPD, with range slightly below the LP version, making it the most suitable for punishes, dealing nearly 40% damage for only 2 bars.
As a command grab, Screw Piledriver can only be comboed into under very specific circumstances: a Drive Impact crumple, 3HK Punish Counter wall splat, or a stun during Burnout. Meterless versions all receive additional damage scaling in these combo scenarios, so the OD version is ideal for damage.
After landing Screw Piledriver, Zangief's options are limited. He cannot threaten with a real meaty throw afterwards, meaning his strike options are difficult to enforce. After a Drive Rush, he can meaty with 2HK and 2MK, catch jumps with Cyclone Wheel Kick (6HK), stuff slower buttons with 5MP, or whiff Knee Hammer (6MK) for a gimmicky reset. By buffering a 360 motion during Drive Rush, Zangief can attempt to catch a blocking opponent with a delayed LP SPD, although this leaves a large gap and can sometimes whiff if the opponent walks backwards. LP SPD has slightly more frame advantage, which additionally allows a meaty DR~5LK; Drive Rush canceling the 5LK gives him access to another strike/throw mixup, albeit at the incredibly expensive total cost of 4 drive bars.
Borscht Dynamite (j.360+K)
| Startup | Active | Recovery | Cancel | Damage | Guard | On Hit | On Block |
|---|---|---|---|---|---|---|---|
| 4 | 3 | 21(36)+16 land | - | 2900 (3260) | T | HKD +19 | - |
- Cannot be juggled into; () refers to Punish Counter damage; Range: 1.46
- Forced Knockdown state until landing; crouching state during whiff landing recovery
| Startup | Active | Recovery | Cancel | Damage | Guard | On Hit | On Block |
|---|---|---|---|---|---|---|---|
| 4 | 3 | 21(36)+16 land | - | 3000 (3375) | T | HKD +19 | - |
- Can be juggled into; () refers to Punish Counter damage; Range: 1.64
- Forced Knockdown state until landing; crouching state during whiff landing recovery
- Applies 10% immediate damage scaling when comboed into
An aerial command grab that only works against airborne opponents. The startup is quite fast as an air-to-air option, but the fastest possible startup is 10f from a grounded position (5f prejump, 1f airborne, 4f grab startup). It can be done very low to the ground with a 360+K input, or you can store the input up to 12 frames and input the grab with a delayed K input; be careful not to attempt a jumping kick if you buffered a 360 motion in anticipation of the opponent's jump.
The OD Version has slightly longer range and can be juggled into from other moves, as the normal version is incapable of grabbing an opponent during a limited or free juggle state. It combos from a j.8HP when canceled as an air-to-air, and gives great damage after PC 5HK, 3MP > OD Lariat juggles, or an SA2 launch.
The okizeme afterwards is largely identical to that of Screw Piledriver (360+P), preventing Zangief from throwing the opponent during their wakeup but leaving him advantaged enough to threaten with other options.
Russian Suplex (63214K Close)
| Startup | Active | Recovery | Cancel | Damage | Guard | On Hit | On Block |
|---|---|---|---|---|---|---|---|
| 10 | 2 | 50 | - | 2900 (3335) | T | HKD +26 | - |
- Switches sides on hit; Range: 1.14
- Applies 10% immediate damage scaling when comboed into; () refers to Punish Counter damage
| Startup | Active | Recovery | Cancel | Damage | Guard | On Hit | On Block |
|---|---|---|---|---|---|---|---|
| 10 | 2 | 50 | - | 3200 (3680) | T | HKD +27 | - |
- Switches sides on hit; Range: 1.14
- () refers to Punish Counter damage
Zangief's other close range command grab grants superior okizeme and meter build in exchange for reduced speed, range, and damage. If activated from too far away, he will use the mid-range Siberian Express instead. The move is somewhat difficult to use, as Zangief struggles to get close to the opponent with sufficient frame advantage to activate it without being interrupted by the opponent's light normals. The most practical way to set up this grab requires a cornered opponent, which forces Zangief to lose valuable screen real estate.
While much less versatile than Screw Piledriver (360+P), Russian Suplex is still a valuable tool in Zangief's arsenal. On hit, Zangief can Drive Rush at the opponent to threaten with a meaty 5MP or Knee Hammer (6MK), a meaty LP/MP SPD, a delayed Headbutt (6HP), or a delayed normal throw. The 6MK option is notable, as when done instantly, it is advantageous enough on hit to link into 3MP and leaves you close enough on block to land HP SPD.
The OD version of Russian Suplex deals slightly more damage, but not enough to make it worth the Drive cost. However, it does have two advantages: it does not receive additional damage scaling after a Drive Impact crumple or Punish Counter 3HK wall splat, and it builds significantly higher Super gauge on hit. Landing a Punish Counter Drive Impact into OD Russian Suplex builds almost an entire bar of Super on its own. This makes it a great option for finishing a round, as Zangief has nothing to lose from the Drive cost or the side switch.
Siberian Express (63214K Far)
| Startup | Active | Recovery | Cancel | Damage | Guard | On Hit | On Block |
|---|---|---|---|---|---|---|---|
| 28 | 2 | 41 | - | 2700 (3105) | T | HKD +29 | - |
- Activates in between Russian Suplex range and ~1/2 screen; Run Speed: 0.086
- () refers to Punish Counter damage
| Startup | Active | Recovery | Cancel | Damage | Guard | On Hit | On Block |
|---|---|---|---|---|---|---|---|
| 23 | 2 | 44 | - | 3000 (3450) | T | HKD +29 | - |
- Activates in between Russian Suplex range and ~1/2 screen; Run Speed: 0.086
- () refers to Punish Counter damage
The mid-range version of Siberian Express causes Zangief to immediately lunge forward to grab the opponent. This has better frame advantage than Russian Suplex and doesn't force a side switch, but is much slower to start up and sends the opponent farther away. The initial run has a fixed distance, so opponents may be able to walk or backdash out of its range before it even reaches them. Canceling into this grab from a normal like 5LK is a good way to surprise the opponent, as the startup animation is not immediately obvious. Be careful when canceling into Siberian Express however, as a canceling into a special move shifts Zangief forward. This will often trigger a Russian Suplex to come out even at ranges where Siberian Express would normally trigger without a cancel if care is not taken to space special cancelable moves more than normal.
The OD version starts up noticeably faster, but the yellow flash takes away some of the surprise factor.
| Startup | Active | Recovery | Cancel | Damage | Guard | On Hit | On Block |
|---|---|---|---|---|---|---|---|
| 55(81) | 2 | 40 | - | 2700 (3105) | T | HKD +29 | - |
- Armor (1-hit): 11f until active; activates from over ~1/2 screen
- () refers to Punish Counter damage
- Movement starts on frame 31; Run Speed: 0.094 (31-37f) / 0.090 (38f~) / 0.099 (close proximity)
| Startup | Active | Recovery | Cancel | Damage | Guard | On Hit | On Block |
|---|---|---|---|---|---|---|---|
| 54(81) | 2 | 40 | - | 3000 (3450) | T | HKD +29 | - |
- Armor (2-hit): 3f until active; activates from over ~1/2 screen
- () refers to Punish Counter damage
- Movement starts on frame 28; Run Speed: 0.045 (28-30f) / 0.094 (31-37f) / 0.090 (38f~) / 0.099 (close proximity)
At farther ranges, Zangief throws up his hands before starting his run animation. This makes the overall startup time extremely slow and more visually apparent in exchange for gaining armor during the run. Far Siberian Express reaches more than a full screen length and doesn't activate until it reaches the opponent's position (unless it reaches its max distance). If the armor absorbs a strike, Zangief will immediately transition to the grab animation, which makes it useful against ranged attacks like Dhalsim limbs.
The OD version gains its armor much faster and can absorb an additional hit, making it a better approach tool in certain situations.
On hit, the mid and far versions of Siberian Express give the same knockdown advantage. Zangief can Drive Rush for a meaty 5MP, or attempt a spaced 6MK. To punish reversal normals, he can stop short and use 360+LP near max range for a higher risk option.
Tundra Storm (22HK)
| Startup | Active | Recovery | Cancel | Damage | Guard | On Hit | On Block |
|---|---|---|---|---|---|---|---|
| 6 | 50 | 24 | - | 2400 | - | HKD +5 | - |
Counters any kick move that makes contact with the parry hurtbox between his raised hands. This includes specials and Drive Impacts (but not Supers). It will not activate against kicks that hit on the lower half of his body. On a successful parry, Zangief's counterattack is a throw; this means that it will whiff against airborne or throw invincible kicks. This also happens against kick-based Drive Reversals since they are fully invincible, but Zangief is usually +1 in this scenario.
Tundra Storm is a niche special move with extremely high risk and only moderate reward. If Zangief is in Burnout, it may occasionally be useful as an unexpected counter to Drive Impact, however Zangief has other far superior options for that. Builds significant Drive Gauge on a successful hit.
See Strategy Page for a full list of moves that are countered by Tundra Storm.
Super Arts
Level 1 Super (236236K)
| Startup | Active | Recovery | Cancel | Damage | Guard | On Hit | On Block |
|---|---|---|---|---|---|---|---|
| 11 | 7 | 13+47 land | - | 3500 | T | HKD +29 | - |
- Full Invuln: 1-17f; Airborne 2-30f (Forced Knockdown state)
- Drive Gauge Depletion: 0.5 bars (hit)
- Applies 20% immediate damage scaling when comboed into; 30% minimum damage scaling
A ground-to-air command grab with the highest damage in the game for a Level 1 Super. While invincible on startup, it cannot hit grounded opponents, making it a poor defensive option. As a result, Zangief cannot spend 1 bar to avoid a Drive Impact stun during Burnout like most characters.
As an anti-air, it can be used somewhat consistently against neutral or back jumps. However, it cannot hit against cross-ups (though it can autocorrect with quick reactions). It will whiff against opponents closer to the ground due to its slow startup, making it relatively difficult to anti-air on reaction.
Zangief can juggle into this Super if the opponent is launched high enough. It combos consistently after a held SA2 for a powerful meter dump combo, though the damage is only slightly higher than juggling into OD Borscht Dynamite. It can also be canceled from a juggled 3MP, or juggled after a DI crumple into j.2HP.
On hit, Zangief has okizeme similar to that of Siberian Express (Far 63214K). He can Drive Rush into a meaty 6MK or 5MP. Alternatively, he can stop short and use LP Screw Piledriver to space out and punish fast buttons and counter-hit slow buttons.
When performing a normal throw, a strong tactic is to buffer the SA1 input immediately afterward. If the opponent attempts to jump to escape Zangief's pressure, this allows a quick anti-air reaction; it is important not to input the attack button if the opponent backdashes. If the throw connects or the opponent performs a throw escape, there is plenty of time to react to the scenario and decide what to do next.
Level 2 Super (236236P)
| Startup | Active | Recovery | Cancel | Damage | Guard | On Hit | On Block |
|---|---|---|---|---|---|---|---|
| 18 | 102 | 52 | - | 3160(3060) | LH | HKD +5(+1) | -35 |
- Full Invuln: 1-18f; Projectile Invuln: 19-119f; Armor Break
- Drive Gauge Depletion: 1 bar (hit) / 0.5 bars (block)
- 40% minimum damage scaling
- On a grounded hit, transitions to invincible cinematic that switches sides
- If juggled into, automatically performs the non-cinematic launcher version
- Holding Forward/Back pulls the opponent in that direction; 100 less damage but controls which side opponent lands on
- Keeping the same side also results in 4f worse KD Advantage (+1)
| Startup | Active | Recovery | Cancel | Damage | Guard | On Hit | On Block |
|---|---|---|---|---|---|---|---|
| 18 | 105 | 25(52) | - | 0,60x9,560 (1100) | LH | KD +87 Launch | -35 |
- Full Invuln: 1-18f; Projectile Invuln: 19-122f; Armor Break
- Drive Gauge Depletion: 1 bar (hit) / 0.5 bars (block)
- 40% minimum damage scaling
- Launches opponent into free juggle state on grounded hit (limited juggle state if juggled into)
- () refers to extra recovery on whiff/block
Zangief spins and creates a whirlwind that pulls opponents inward. Can be used to punish fireballs, Drive Impacts, or certain slower moves on reaction. The slow startup makes it easy to bait when used as a reversal, but it's fast enough to be a threat against meaty throws. The slow speed also means it will not combo from lights or the last 4 cancel frames of Hellstab without additional frame advantage. Will generally not work as an anti-air unless the opponent's move has significant landing recovery.
If Cyclone Lariat hits, Zangief has access to a few different follow-ups.
- If no additional input is performed, Zangief will yell "JACKHAMMER!" and slam the opponent behind him for a side switch. This is the highest damage option if you don't want to spend any extra meter.
- By holding Forward or Back, Zangief will carry the opponent a short distance in the held direction, dealing 100 less damage. This allows Zangief to better control his screen position; he can keep the same side or pull the opponent backwards before the side switch. The knockdown advantage is slightly worse on the same-side ender.
- By holding the punch button, Zangief spins in place and ends with a launcher. This deals much less initial damage, but has a higher damage potential if you are willing to spend more resources. The most common ender is simply Dash + 3MP into OD Borscht Dynamite, but in the corner you can squeeze out more damage by starting with 3MP > OD Lariat before the air command throw. SA1 also juggles, but only does marginally more damage than OD Borscht. Zangief can also juggle into Drive Impact to secure a Burnout. If you have no other resources available to spend, any normal or Lariat can finish the juggle, but in that case it is usually better to stick with the unheld Super.
Because it hits multiple times on block, the early hits can be used to put the opponent into Burnout before chipping out with the remaining hits. Opponents can Drive Reversal to prevent this if they react before the Burnout actually occurs, but this requires them to be aware of the gimmick and to have full awareness of the health and Drive meter situation. This situation can also work in reverse where an opponent approximately 5/6 bars recovered will recover in time to not get chipped out by the last and most damaging hit.
Active Frame Distribution
- Unheld: Vacuum 91f, Juggle 1(4)2(7)2(8)2(7)2(8)2(9)2(7)2(9)2(8)3 starting on frame 33
- Held: Vacuum 94f, Juggle 3(5)2(7)2(8)2(7)2(8)2(9)2(7)2(9)2(8)3 starting on frame 33
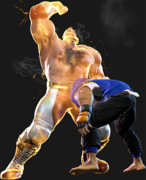
Level 3 Super (720+P)
| Startup | Active | Recovery | Cancel | Damage | Guard | On Hit | On Block |
|---|---|---|---|---|---|---|---|
| 6+0 | 2 | 116 | - | 4800 | T | HKD +26 | - |
- Full Invuln: 1-7f
- Drive Gauge Depletion: 1.5 bars (hit)
- Cinematic time regenerates ~2.2 Drive bars for Zangief
- 50% minimum damage scaling; applies 10% immediate damage scaling when comboed into
- Range: 1.56 (2nd active frame, jumpable: 1.60); between LP and MP SPD
| Startup | Active | Recovery | Cancel | Damage | Guard | On Hit | On Block |
|---|---|---|---|---|---|---|---|
| 6+0 | 2 | 116 | - | 5300 | T | HKD +26 | - |
- Full Invuln: 1-7f
- Available at 25% HP or below
- Drive Gauge Depletion: 2 bars (hit)
- Cinematic time regenerates ~2.7 Drive bars for Zangief
- 50% minimum damage scaling; applies 10% immediate damage scaling when comboed into
- Range: 1.61 (2nd active frame, jumpable: 1.65); nearly identical to LP SPD
An incredibly potent defensive and mixup option, Bolshoi Storm Buster boasts impressive speed, damage, and range. While Zangief has very few options to combo into it (OD Lariat 1st hit, Punish Counter DI, or corner Punish Counter 3HK), it boasts two major upsides to compensate.
First and foremost, unlike other command grab supers, it cannot be jumped or backdashed on reaction to the super flash. If the opponent is not already airborne, out of range, or invincible to throws as the super flash starts, they will be grabbed. Second, Bolshoi Storm Buster deals 800 more damage than other Level 3 Super Arts, making it the single most damaging attack in the game. These two factors, when combined with the move's incredible range and fast startup, make the move perhaps the strongest invincible reversal in the game. While expensive, once Zangief can perform the move, the opponent need act with extreme caution, lest they be consigned to oblivion.
Note: The in-game frame meter display lists this Super as 7f startup, but the first active frame actually occurs during the Super freeze. There are 6 pre-freeze startup frames, and the move can be used to punish attacks that are -6 on hit/block.
Taunts
Neutral Taunt (5PPPKKK)
| Startup | Active | Recovery | Cancel | Damage | Guard | On Hit | On Block |
|---|---|---|---|---|---|---|---|
| 194 (total) | - | - | - | - | - | - | - |
Forward Taunt (6PPPKKK)
| Startup | Active | Recovery | Cancel | Damage | Guard | On Hit | On Block |
|---|---|---|---|---|---|---|---|
| 227 (total) | - | - | - | - | - | - | - |
Back Taunt (4PPPKKK)
| Startup | Active | Recovery | Cancel | Damage | Guard | On Hit | On Block |
|---|---|---|---|---|---|---|---|
| 202 (total) | - | - | - | - | - | - | - |
Down Taunt (2PPPKKK)
| Startup | Active | Recovery | Cancel | Damage | Guard | On Hit | On Block |
|---|---|---|---|---|---|---|---|
| 210 (total) | - | - | - | - | - | - | - |
