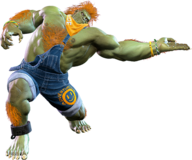
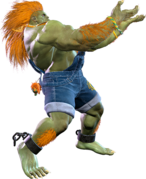
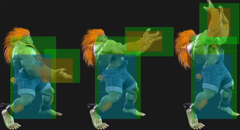
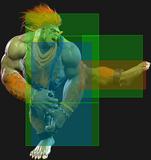
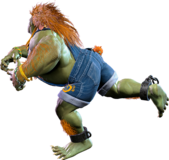
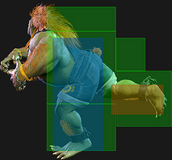
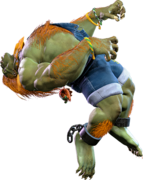
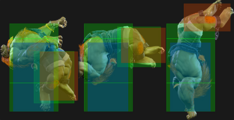
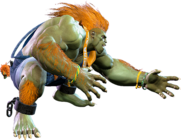
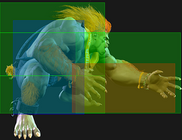
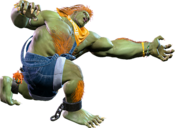
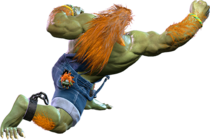
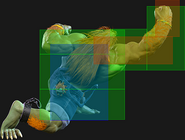
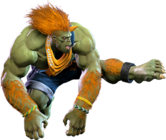
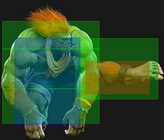
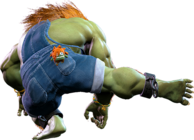
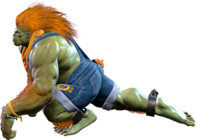
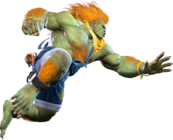
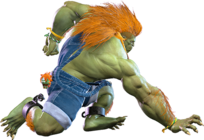
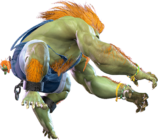
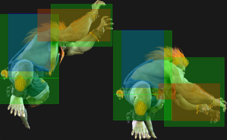
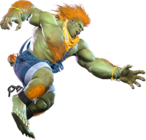
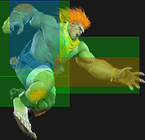
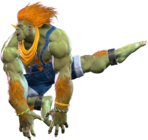
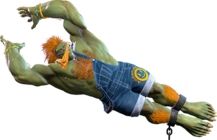
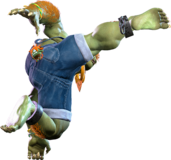
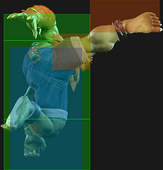
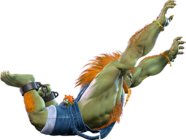
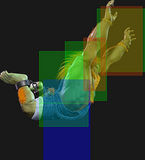
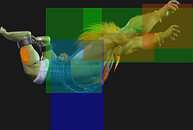
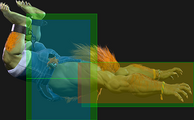
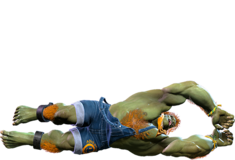
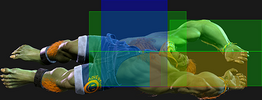
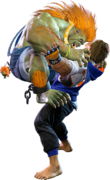
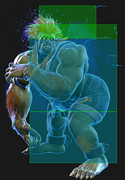
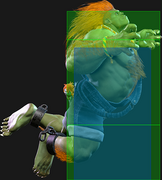
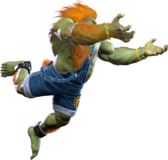
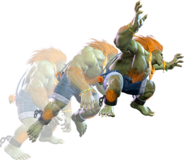
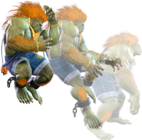
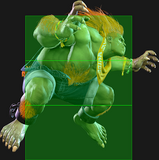
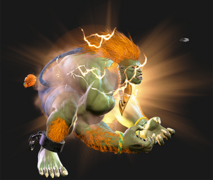
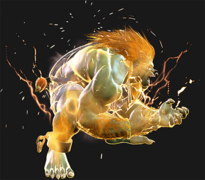
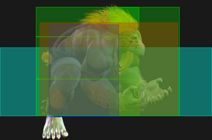
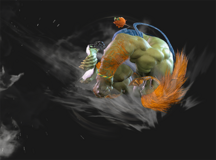
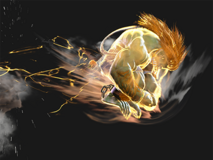
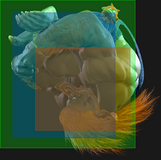
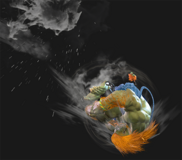
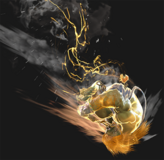
Street Fighter 6/Blanka

From SuperCombo Wiki


Introduction

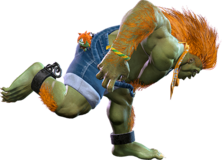
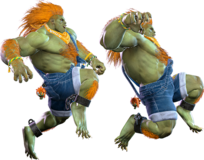
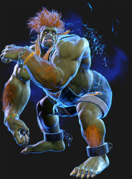
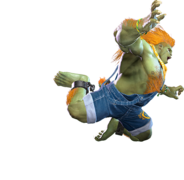
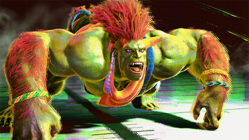
A kindhearted defender of nature, Blanka has become an adventure tour guide, confident his intimate knowledge of the jungle will serve as a springboard to fame—and a comfortable life for his beloved mother.

Blanka is a character that focuses on aggressive mobility and a variety of confusing mind games, supplemented by setplay in the corner. Many of Blanka's tools either allow him to advance quickly or force the opponent to guess at what he's going to do next, which he can use to his advantage by overwhelming them with options.

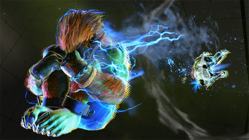
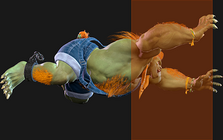
One of the biggest tools that Blanka uses for this gameplan is his Horizontal Rolling Attack special move, often called the Blanka Ball. It travels very quickly and very far, with the heavy version traveling full screen and being difficult to punish in many circumstances. He also has a diving aerial variant in the Aerial Rolling Attack, an anti-air version with the Vertical Rolling Attack, and one that travels in a controllable arc from the ground to the air and back down again with the Backstep Rolling Attack. He also has Surprise Hop, a command dash that allows him to quickly advance forward or backward, on top of a very fast forward dash, and can use Wild Hunt to close the gap when an opponent is expecting to block or parry a Blanka Ball and punish them for it.

All of these moves are supplemented by other unorthodox or shocking maneuvers once Blanka has the opponent scared of what he might do next and manages to get in. Electric Thunder is often used to get confirms when Blanka doesn't have the charge for Blanka Ball, but allows him a fair bit of flexibility on hit and is a powerful launcher when the Overdrive version is used. Many of his normals are also fairly strong for pokes and pressure, such as his light punches and kicks, his 5MP, his 2MP, and his 2MK, and if he can land a Punish Counter, then he can use Coward Crouch to set up for a launcher that does a lot of damage. Blanka becomes especially scary in the corner, though, as he can set up a Blanka-chan Bomb and then throw in an Electric Thunder to activate it for some setplay. Even if he's pushed out, he can rely on a little patience and careful use of surprise maneuvers like Blanka Ball fakeouts, Drive Rush 3HP, Surprise Hop, or Wild Hunt to get back in.

Another notable tool in Blanka's kit is his Level 2 Super Art, Lightning Beast. When activated, it allows him to use Rolling Cannon as follow-ups to his Horizontal, Aerial, Vertical, or Backstep Rolling Attacks, in addition to giving them a lightning aura that makes them a little stronger and lets him activate Blanka-chan Bombs by using one of these moves to pass over them. Rolling Cannon ups his pressure game significantly while Lightning Beast is active, and if set up properly with an Overdrive Electric Thunder or a Coward Crouch launch, Lightning Beast can convert a stray hit from Blanka into huge damage.

In return for all of this, Blanka has to weigh his options carefully when going in for the attack, as the high reward for a fair number of his moves is balanced out by how punishable they are if they're evaded, blocked, or otherwise called out. It can also take some doing to get his combos going at midscreen or otherwise, since a lot of his more intricate combos need a launch from Coward Crouch, Overdrive Electric Thunder, and/or meter for Lightning Beast on hand. If you enjoy bewildering your opponents with risky but rewarding offensive plays and a variety of options, heed the call of the wild and howl with Blanka.


Pick if you like: Avoid if you dislike:
  • Similar-looking, highly unpredictable forward movement options that close gaps, follow unusual trajectories, or cross people up
  • A super that gives you both combo and pressure extensions from stray hits and aggressive approaches
  • Corner setplay that enables high/low/throw mixup and baits defensive options
  • Overwhelming opponents with unorthodox command normals, specials, and other moves
  • Conditional damage that requires either good positioning or spending resources to fully capitalize on
  • Needing to make solid reads/reacting quickly to compensate for the risks in your toolset


Classic & Modern Versions Comparison

List of differences with Modern Blanka
Missing Normals
  • Standing Medium Punch (5MP)
  • Crouching Medium Punch (2MP)
  • Crouching Heavy Kick (2HK)
  • Jumping Light Kick (j.LK)
  • Jumping Medium Punch (j.MP)
  • Jumping Heavy Punch (j.HP)
Missing Command Normals
  • Rock Crusher (6MP)
Shortcut-Only Specials
  • Backstep Rolling Attack (6S)
    • Medium/OD Only
Miscellaneous Changes
  • N/A


Players to Watch

Blanka
SF6 Blanka Portrait.png
Vitals
Life Points 10000
Ground Movement
Forward Walk Speed 0.047
Backward Walk Speed 0.032
Forward Dash Speed 19
Backward Dash Speed 23
Forward Dash Distance 1.578
Backward Dash Distance 1.169
Drive Rush Min. Distance (Throw) 0.476
Drive Rush Min. Distance (Block) 2.082
Drive Rush Max Distance 2.867
Jumping
Jump Speed 4+38+3
Jump Apex 2.115
Forward Jump Distance 1.90
Backward Jump Distance 1.52
Throws
Throw Range 0.9
Throw Hurtbox 0.43
Frame Data Glossary - SF6
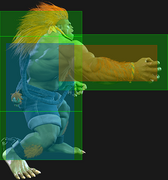
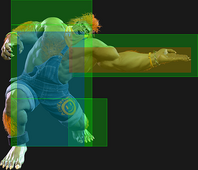
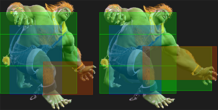
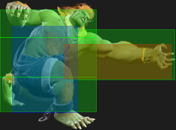
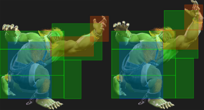
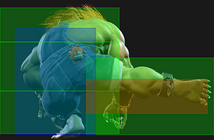
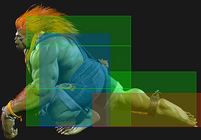
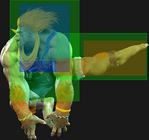
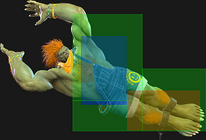
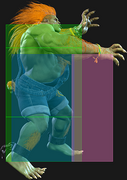
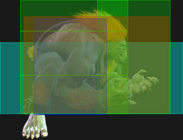
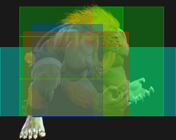
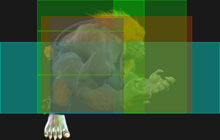
Hitbox Images

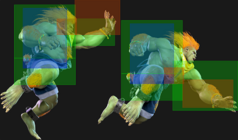
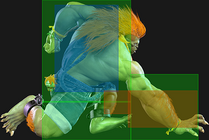
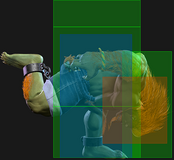
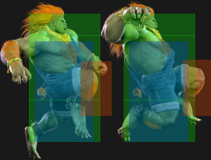
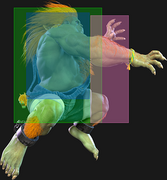
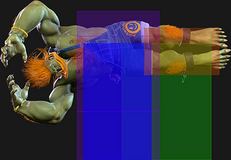
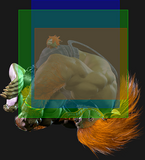
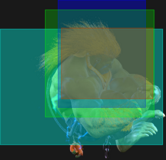
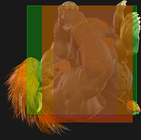
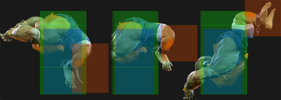
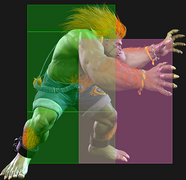
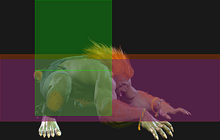
🟥 (Red): Attack hitbox

  • Appears pink for Throw hitboxes

🟩 (Green): Vulnerable hurtbox that can be hit by strikes/projectiles

  • If a move's hitbox and hurtbox overlap, the colors blend to appear orange

🟦 (Blue): Vulnerable throw hurtbox

  • Will be thrown if Pink throw hitbox touches Blue throw hurtbox


Active

How many frames a move remains active (can hurt opponents) for. For projectiles with a maximum active period, a value may be listed in [brackets], but this number is not factored into the move's total frame count.

  • For multi-hit moves with no gaps between the active hitboxes, active frames are listed as X,Y (or sometimes X*Y)
  • For multi-hit moves with gaps between hits, active frames are listed as X(n)Y where n = the frame gap between hitboxes.


Cancel

Available options for canceling one move into another move.

  • "Chn": Chain cancel (Light normals; specific chain options listed in Description)
  • "TC": Target Combo
  • "Sp": Special move
  • "SA": Super Art (if a number is listed, refers only to that specific Super; SA3 = Lv.3 Super Art)
  • "Jmp": Jump cancel (usually on hit only, if applicable)
  • "SS": Serenity Stream (Chun-Li's stance)
    • If one hit of a multi-hit attack is cancelable, this can be indicated with (1st), (2nd), etc.
    • Occasionally, a move can be canceled only into a specific follow-up (e.g. Dee Jay [4]6P > 22PP); this can be indicated by listing the move input in the Cancel field, or with an asterisk that is explained in the move notes (Sp*)


Cancel Hitconfirm Windows

Hitconfirm reaction windows into Special Moves, Target Combos, and Super Arts.

  • Refers to the amount of time (in frames) you have to cancel one attack into another attack on reaction
    • e.g. most cancelable 2MKs have a 13 frame window to cancel into a Special/Super on reaction, making them nearly impossible to hitconfirm
  • Counts from the first frame the attack connects until the final cancelable frame
    • Visual effects like hitsparks and HP drain do not actually occur until frame 2; the first frame is still counted to keep the numbers consistent with previous games, and because it is technically possible to start reacting to the character's reeling animation on frame 1
  • If a Target Combo is cancelable into another attack, the hitconfirm window will include the entire sequence starting from the first hit
    • If there is a frame gap on block between hits of the TC, the hitconfirm window may also be included for just the followup hit
    • Some sequences like Ken's 5MP~HP TC may have a range of values listed (43f~47f). In this example, inputting 5MP~HP at its usual timing gives a 43f hitconfirm into a Special/Super. Delaying the chain into HP gives more total time for the final hitconfirm.


Damage

Attack damage on hit. Multi-hit moves may have the damage listed for individual hits as X,Y (or sometimes X*Y). Sometimes a move's damage changes depending on which active frame connects, or on cinematic vs. non-cinematic hits; in this case, multiple values may be listed, and it will be clarified in the move description.

Damage Scaling

Some moves cause additional damage scaling in combos. Refer to Game Data page for a more detailed breakdown.

Scaling Types:

  • Starter: When a move begins the combo, the next attack is scaled by X percent
    • e.g. Ryu 2MK (20% Starter) > Hadoken: Hadoken is at 80% damage scaling
  • Combo: When a move is comboed into, the next attack is scaled by X percent or X number of hits
    • e.g. Ryu 2HP > OD High Blade Kick (2-Hit Combo Scaling) > Shoryuken: Shoryuken is at 70% damage scaling (100% > 100% > [skip 80%] > 70%)
    • e.g. Cammy 5HP > OD Spiral Arrow (5% Combo Scaling) > Cannon Spike: Cannon Spike is at 75% damage scaling (100% > 100% > [80-5 = 75%])
  • Immediate: When a move is comboed into, this attack is scaled by X percent
    • e.g. Drive Impact Crumple (20% Starter) > Throw (20% Immediate): Throw is at 60% damage scaling
  • Multiplier: A damage scaling multiplier applies after Perfect Parry (50%) and mid-combo Drive Rush (15%). Any hits in the combo continue their usual damage scaling, but reduced by these amounts. These can bring the minimum scaling below the usual 10%, and they stack with each other; as a result, the minimum scaling can reach 4% using a long Drive Rush combo after Perfect Parry.
  • Minimum Scaling: The lowest damage scaling that can be applied to an attack. Super Art Level 1/2/3 generally has 30%/40%/50% minimum scaling respectively. This ensures the attack will still do reasonable damage even at the end of a heavily scaled combo.


Drive Rush Cancel Advantage

Refers to the frame advantage when canceling a normal, command normal, or Target Combo into Drive Rush on hit or block (abbreviated as DRC for Drive Rush Cancel). This is calculated at the moment a follow-up attack can be input, not at the moment the character can block or perform movement options. An attack that with DRC +8 on Hit can link into an 8-frame attack, and DRC +4 on Block can create a true blockstring into a 4-frame attack.

Note that any DRC on Block worse than +4 cannot form a true blockstring, allowing the opponent to interrupt with an invincible reversal. Most light normals are slightly negative after a DRC on block, meaning the opponent can mash their fastest normal to guarantee a counter-hit (though this requires fast reactions). The attacking character could punish this with Light > DRC into an immediate invincible attack, but this would be an incredibly expensive and high-risk gambit.

Forced Knockdown

Most airborne command normals, special moves, and Super Arts put the user in a "Forced Knockdown" state. While in this state, an air knockdown will occur when being hit by any attack, even if it would otherwise cause an air reset.

As an example, Ryu's 2HP causes an air reset when used as an anti-air. Against a move like Cammy's Hooligan Combination, however, the 2HP puts her into an air knockdown state. This allows Ryu to successfully cancel 2HP into Shoryuken for a juggle, similar to how a Drive Impact wall splat works. Taking advantage of Forced Knockdown juggles is important for dealing with moves like Ken's Dragonlash, Dhalsim's Air Teleport, or Kimberly's 6HK~Hop sequence.

Moves that already cause an air knockdown, like most j.MP air-to-airs, will not display the "Forced Knockdown" message.

Guard

Refers to the direction an attack must be blocked. L is for Low attacks (must be blocked crouching), H is for High attacks/overheads (must be blocked standing), LH is for attacks that can be blocked crouching or standing. T is for Throw attacks which cannot be blocked.

Juggles

When a character is put into an Air Knockdown state, it is often possible to follow up with a Juggle attack before they hit the ground. In the simplest terms, there are 2 main juggle states:

  • Free Juggle: any attack can juggle, causing an Air Reset or an Air Knockdown
  • Limited Juggle: only specific attacks with juggle potential may juggle


The following is a more detailed overview of the SF6 juggle system:

Juggle Count (JC): The status of the character being juggled. A high JC limits which attacks can work in juggles.

  • JC0: free juggle state - any attack that can hit an airborne opponent will work
  • JC1+: limited juggle state - juggle only works if the attack's Juggle Limit ≥ defender's Juggle Count

Juggle Start (JS): When starting a juggle, the opponent's JC will be set to this value. May be different vs. standing and airborne opponents.

  • Attack with Juggle Start value of 3 will put opponent at JC3, so only attacks with Juggle Limit value ≥ 3 can follow up

Juggle Increase (JI): When opponent is already in a juggle state, attacks will increase the opponent's JC by this amount.

  • Airborne opponent at JC1 followed by attack with Juggle Increase value of 3 will set opponent to JC4

Juggle Limit (JL): Property of an attack hitbox that determines whether it connects on a juggled opponent. The JL must be ≥ the opponent's JC to hit successfully.

  • An uppercut with a JL value of 5 will connect on an opponent at JC5 or below, but will whiff on JC6 opponent
  • Most normals have a JL value of 0, meaning they only work in Free Juggle (JC0) states
  • Some multi-hit attacks have different JL values on each hit, so a 3-hit move may only hit twice in juggles

An example to tie everything together:

  • An attack (JS3) launches opponent into the air (Opponent now at JC3)
  • Followed up with an attack (JI2/JL4); it connects, because JL4 ≥ JC3 (Opponent now at JC5)
  • Attempts to juggle again with same attack (JL4), but whiffs because JL4 < JC5 (Opponent hits the ground)

Drive Rush notes:

  • DR normals have a Juggle Start/Increase value of 0
  • DR normals have +3 added to their usual Juggle Limit


On Hit/Block

These are frame advantage values when the attack hits or is blocked. If the number is positive, then the move will recover before the defender can act again. If the number is negative, the defender will be able to act before the attacker and maybe even punish. KD refers to knockdown on hit, and the listed KD Advantage refers to how many frames the attacker can act before the defender finishes their wakeup animation.

  • Note that generally, there is an extra +2 hit advantage on Counterhits and +4 hit advantage on Punish Counters (exceptions are noted in the description).


Recovery

How many frames it takes for a move to finish after the active frames have finished. For projectiles, recovery is considered to begin after the first active frame.

  • Moves with different recovery values on hit/block/whiff may have multiple values listed like X(Y), with specific details listed in the description.


Startup

How many frames it takes before the move becomes 'active' or have a hit box. The last startup frame and the first active frame are the same frame, meaning all values are written as Startup + 1.

  • Moves with multiple relevant startup values may be listed as X(Y); for example, a move that hits airborne first before hitting grounded opponents, or a 2-hit move where the first hit whiffs at some ranges.


Normals

Standing Normals

5LP
Standing Light Punch
5LP
SF6 Blanka 5lp.png
SF6 Blanka 5lp hitbox.png
Hitboxes Off
Hitboxes On

5LP
Standing Light Punch
Startup Active Recovery Cancel Damage Guard On Hit On Block
5 3 10 Sp SA 300 LH +3 -3
  • Cancel Hitconfirm Window: 13f
  • Drive Rush cancel advantage: +6 oH / 0 oB
  • SA2 cancel advantage: +5 oH / -1 oB
  • Coward Crouch cancel advantage: -3 oH / -9 oB
  • Forward Hop cancel advantage: -12 oH / -18 oB
  • Applies 10% damage scaling to next hit when beginning a combo (100/90/80...)


Excellent reach for a 5-frame light attack. Cannot be chained into, and has no follow-up links without counter-hit or Punish Counter. Canceling into MP Rolling Attack is a consistent buffer option, and Electricity also combos at closer ranges. Can be used to frame trap after a blocked 4MK if Blanka is too far for 5LK to reach.

5MP
Standing Medium Punch
5MP
SF6 Blanka 5mp.png
SF6 Blanka 5mp hitbox.png
Hitboxes Off
Hitboxes On

5MP
Standing Medium Punch
Startup Active Recovery Cancel Damage Guard On Hit On Block
10 3 15 SA 700 LH +3 -4
  • Cancel Hitconfirm Window: 15f (Super)
  • SA2 cancel advantage: +10 oH / +3 oB


One of Blanka's longest-reaching pokes. Does not special cancel, limiting its utility and increasing its risk against Drive Impact, but can be super canceled.

5HP
Standing Heavy Punch
5HP
SF6 Blanka 5hp.png
SF6 Blanka 5hp hitbox.png
Hitboxes Off
Hitboxes On

5HP
Standing Heavy Punch
Startup Active Recovery Cancel Damage Guard On Hit On Block
10 7 17(22) Sp SA 800 LH +3 -3
  • 5f extra recovery on whiff
  • Forces stand; active frames 6-7 only hit airborne opponents
  • Cancel Hitconfirm Window: 16f
  • Drive Rush cancel advantage: +17 oH / +11 oB
  • SA2 cancel advantage: +16 oH / +10 oB
  • Coward Crouch cancel advantage: +8 oH / +2 oB
  • Forward Hop cancel advantage: -1 oH / -7 oB


Essential combo tool up close, primarily used as a link after DR~5HK. The high hitstun allows a combo into a 2PP~P launch for optimal punishes. Canceling into SA2 or Drive Rush also give powerful extensions. In neutral, it is too slow and stubby to use consistently as a poke. Although Blanka swings his arms upward, the large hurtbox makes it weak as an anti-air against most jump-in attacks.

5LK
Standing Light Kick
5LK
SF6 Blanka 5lk.png
SF6 Blanka 5lk hitbox.png
Hitboxes Off
Hitboxes On

5LK
Standing Light Kick
Startup Active Recovery Cancel Damage Guard On Hit On Block
4 4 7 Chn Sp SA 300 LH +5 -2
  • Chains into 5LK/2LP/2LK
  • Cancel Hitconfirm Window: 14f
  • Drive Rush cancel advantage: +6 oH / -1 oB
  • SA2 cancel advantage: +5 oH / -2 oB
  • Coward Crouch cancel advantage: -3 oH / -10 oB
  • Forward Hop cancel advantage: -12 oH / -19 oB
  • Applies 10% damage scaling to next hit when beginning a combo (100/90/80...)


Blanka's only 4-frame normal, essential for defensive situations and frame traps. In addition to his chainable lights, it also links into 5LP for knockdown hitconfirm. Also good for applying meaty pressure due to the high number of active frames.

5MK
Standing Medium Kick
5MK
SF6 Blanka 5mk.png
SF6 Blanka 5mk hitbox.png
Hitboxes Off
Hitboxes On

5MK
Standing Medium Kick
Startup Active Recovery Cancel Damage Guard On Hit On Block
8 3 17(20) Sp SA 600 LH +4 -2
  • 3f extra recovery on whiff
  • Cancel Hitconfirm Window: 15f
  • Drive Rush cancel advantage: +14 oH / +8 oB
  • SA2 cancel advantage: +13 oH / +7 oB
  • Coward Crouch cancel advantage: +5 oH / -1 oB
  • Forward Hop cancel advantage: -4 oH / -10 oB


A solid poke thanks to its above average reach. Minimal pushback on hit makes converting into Electric Thunder (214P) very consistent. Comboing into Blanka Ball or Upball takes some execution, as you must input the 5MK with a neutral direction before quickly finishing the charge motion.

5HK
Standing Heavy Kick
5HK
SF6 Blanka 5hk.png
SF6 Blanka 5hk hitbox.png
Hitboxes Off
Hitboxes On

5HK
Standing Heavy Kick
Startup Active Recovery Cancel Damage Guard On Hit On Block
7 9 18(15) - 800 LH +6 -4
  • 3f less recovery on block
  • Forces stand
  • Frames 13-15 (active frames 7-9) can anti-air cross-ups unlike most AAs
  • Counter-hit/Punish Counter puts airborne opponents into limited juggle state (high float)


Highly rewarding anti-air tool, especially if it lands as a counter-hit or punish counter (even after an anti-air trade). The high juggle state gives Blanka numerous options for follow-up damage. While the vertical hitbox is excellent, it can be slightly tricky to time against opponents that can alter their air trajectory, leaving Blanka open for a punish as the move recovers.

The high active frame count makes 5HK an excellent meaty option if well-timed. In Punish or Drive Rush routes, it can link directly to 5HP for optimal damage and oki.


Crouching Normals

2LP
Crouching Light Punch
2LP
SF6 Blanka 2lp.png
SF6 Blanka 2lp hitbox.png
Hitboxes Off
Hitboxes On

2LP
Crouching Light Punch
Startup Active Recovery Cancel Damage Guard On Hit On Block
6 3 8 Chn Sp SA 300 LH +4 -2
  • Chains into 5LK/2LP/2LK
  • Cancel Hitconfirm Window: 13f
  • Drive Rush cancel advantage: +5 oH / -1 oB
  • SA2 cancel advantage: +4 oH / -2 oB
  • Coward Crouch cancel advantage: -4 oH / -10 oB
  • Forward Hop cancel advantage: -13 oH / -19 oB
  • Applies 10% damage scaling to next hit when beginning a combo (100/90/80...)


Excellent reach for a light attack, and the longest range of Blanka's light normals. Unlike 5LP, it can chain into itself for pressure and hit-confirms. The startup is slow for a light (comparable to many characters' medium buttons) but the fast recovery keeps it safe from whiff punishment.

2MP
Crouching Medium Punch
2MP
SF6 Blanka 2mp.png
SF6 Blanka 2mp hitbox 1 2.png

SF6 Blanka 2mp hitbox 3.png

SF6 Blanka 2mp hitbox 4 5.png
Enough active frames for you?
Hitboxes Off
Hitboxes On

2MP
Crouching Medium Punch
Startup Active Recovery Cancel Damage Guard On Hit On Block
9 5 16 Sp SA 600 LH -1 -5
  • Can anti-air on active frames 4-5 but cannot hit cross-up
  • Cancel Hitconfirm Window: 19f
  • Drive Rush cancel advantage: +10 oH / +6 oB
  • SA2 cancel advantage: +9 oH / +5 oB
  • Coward Crouch cancel advantage: +1 oH / -3 oB
  • Forward Hop cancel advantage: -8 oH / -12 oB


Primary poking tool for Blanka, thanks to its excellent reach, active frames, and consistent conversions into Blanka Ball. When spaced out in neutral, it can connect as late as the 3rd active frame; this increases its hit/block advantage by up to 2f, but also makes the cancel hitconfirm window 2f more difficult. It has limited utility in combo routes, but may occasionally be useful in situations where 5HP won't reach and 5HK is too far to allow a follow-up.

2MP can work situationally as an anti-air on the later active frames, but this is rarely the best option at any given range.

2HP
Crouching Heavy Punch
2HP
SF6 Blanka 2hp.png
SF6 Blanka 2hp hitbox.png
Hitboxes Off
Hitboxes On

2HP
Crouching Heavy Punch
Startup Active Recovery Cancel Damage Guard On Hit On Block
15 5 20(21) - 800 LH 0 -5
  • Punish Counter: HKD +80 (puts airborne opponents into limited juggle state)
  • 1f extra recovery on block
  • Forces stand


Enormous reach for a normal attack, and one of Blanka's farthest-reaching neutral options. Great for harassing the opponent's Drive gauge, especially when they are on the lookout to Perfect Parry a Blanka Ball. Can be fairly easily counterpoked and whiff punished due to the slow startup and long recovery time, so it should be used sparingly.

On Punish Counter, it knocks the opponent to the other end of the screen; this doesn't allow a follow-up juggle, but gives Blanka great screen position. After a whiff punish, closet the gap with MP Rolling Attack for follow-up oki, or set up a Blanka-chan doll.

2HP can anti-air near its max range, but is liable to lose or trade with stronger jump-ins.

2LK
Crouching Light Kick
2LK
SF6 Blanka 2lk.png
SF6 Blanka 2lk hitbox.png
Hitboxes Off
Hitboxes On

2LK
Crouching Light Kick
Startup Active Recovery Cancel Damage Guard On Hit On Block
5 2 10 Chn 200 L +3 -3
  • Chains into 5LK/2LP/2LK
  • Applies 10% damage scaling to next hit when beginning a combo (100/90/80...)


Blanka's fastest low, typically making it good for pressure. Chaining into 2LP leaves a 5f blockstring gap, and a chain into another 2LK leaves a 4f gap, allowing the opponent to mash out of pressure or at least force a trade. Chaining from 2LK into 5LK will frame trap any of the opponent's buttons.

2MK
Crouching Medium Kick
2MK
SF6 Blanka 2mk.png
SF6 Blanka 2mk hitbox.png
Hitboxes Off
Hitboxes On

2MK
Crouching Medium Kick
Startup Active Recovery Cancel Damage Guard On Hit On Block
8 3 16 Sp SA 500 L +5 -5
  • Cancel Hitconfirm Window: 13f
  • Drive Rush cancel advantage: +14 oH / +4 oB
  • SA2 cancel advantage: +13 oH / +3 oB
  • Coward Crouch cancel advantage: +5 oH / -5 oB
  • Forward Hop cancel advantage: -4 oH / -14 oB
  • Applies 20% damage scaling to next hit when beginning a combo (100/80/70...)


One of Blanka's primary midrange pokes along with 2MP, 5MP, and his light attacks. A safe, low poke thanks to its fairly quick recovery, though a bit stubby compared to his other medium buttons. It has similar range to other 2MKs like Ryu or Chun-Li, but because Blanka has a wider hurtbox he can easily get outpoked near its max range.

Up close, it has enough frame advantage to link directly into 5LP, allowing for meterless combo conversions. When used out of Drive Rush, the +4 frame advantage boost keeps 2MK safe on block while allowing a link to 2MP even at longer ranges. It can also just cancel into specials directly, particularly Blanka Ball or Electric Thunder.

2HK
Crouching Heavy Kick
2HK
SF6 Blanka 2hk.png
SF6 Blanka 2hk hitbox.png
Hitboxes Off
Hitboxes On

2HK
Crouching Heavy Kick
Startup Active Recovery Cancel Damage Guard On Hit On Block
11 4 23 - 900 L HKD +25 -12
  • Counter-hit/Punish Counter: HKD +46
  • Has juggle potential; not a Hard Knockdown when juggled into


Blanka's traditional sweep with fairly long range and a convenient Hard Knockdown on hit. Has a lot of recovery, above-average startup and is unsafe on block, so it should be used either as a whiff punish or against characters with poor ranged punish options.


Jumping Normals

j.LP
Jumping Light Punch
j.LP
SF6 Blanka jlp.png
SF6 Blanka jlp hitbox.png
Hitboxes Off
Hitboxes On

j.LP
Jumping Light Punch
Startup Active Recovery Cancel Damage Guard On Hit On Block
4 5 3 land - 300 H - -


Decent air-to-air on the way up.

j.MP
Jumping Medium Punch
j.MP
SF6 Blanka jmp.png
SF6 Blanka jmp hitbox.png
Hitboxes Off
Hitboxes On

j.MP
Jumping Medium Punch
Startup Active Recovery Cancel Damage Guard On Hit On Block
7 7 3 land Sp 700 H - -
  • Puts airborne opponents into a limited juggle state
  • Cancelable into Aerial Rolling Attack (no charge required during SA2)


Rewarding air-to-air if you have back charge, though the downward angle of the hitbox can make it harder to use in some scenarios. Allows a juggle route into Aerial Rolling Attack after OD Rolling Attack.

j.HP
Jumping Heavy Punch
j.HP
SF6 Blanka jhp.png
SF6 Blanka jhp hitbox.png
Hitboxes Off
Hitboxes On

j.HP
Jumping Heavy Punch
Startup Active Recovery Cancel Damage Guard On Hit On Block
9 4 3 land - 800 H - -
  • Spike knockdown vs. airborne opponents


Blanka hits slightly above himself before swinging his arms down. More vulnerable to anti-airs than j.HK since the hurtbox extends well outside the attack hitbox.

8j.HP
Neutral Jumping Heavy Punch
8j.HP
SF6 Blanka 8jhp.png
SF6 Blanka 8jhp hitbox.png
Hitboxes Off
Hitboxes On

8HP
Neutral Jumping Heavy Punch
Startup Active Recovery Cancel Damage Guard On Hit On Block
7 3 3 land - 800 H - -


Air-to-air with decent horizontal range. Does not cancel into Aerial Rolling Attack like j.MP, but is more rewarding when Blanka does not have charge.

j.LK
Jumping Light Kick
j.LK
SF6 Blanka jlk.png
SF6 Blanka jlk hitbox.png
Hitboxes Off
Hitboxes On

j.LK
Jumping Light Kick
Startup Active Recovery Cancel Damage Guard On Hit On Block
5 6 3 land - 300 H - -


Fast startup and a good angle for an air-to-air.

j.MK
Jumping Medium Kick
j.MK
SF6 Blanka jmk.png
SF6 Blanka jmk hitbox.png
Hitboxes Off
Hitboxes On

j.MK
Jumping Medium Kick
Startup Active Recovery Cancel Damage Guard On Hit On Block
7 6 3 land - 500 H - -
  • Can hit cross-up


Fairly wide cross-up hitbox. Great option after Raid Jump (2PP~K) that can hit very ambiguously.

j.HK
Jumping Heavy Kick
j.HK
SF6 Blanka jhk.png
SF6 Blanka jhk hitbox.png
Hitboxes Off
Hitboxes On

j.HK
Jumping Heavy Kick
Startup Active Recovery Cancel Damage Guard On Hit On Block
11 6 3 land - 800 H - -


Blanka's main jump-in attack with solid horizontal and vertical range. The lower edge of the hitbox lines up with the hurtbox, allowing it to beat or trade with many anti-air moves.


Command Normals

6MP
Rock Crusher
6MP
SF6 Blanka 6mp.png
SF6 Blanka 6mp hitbox.png
Hitboxes Off
Hitboxes On

6MP
Rock Crusher
Startup Active Recovery Cancel Damage Guard On Hit On Block
20 2,1 20 - 300x2 H,H +3 -2
  • If 1st hit is blocked, 2nd hit no longer hits overhead
  • Counter-hit/Punish Counter bonus advantage carries through both hits


A short range 2-hit overhead that is safe on block and can lead to combos on Counter-hit/Punish Counter or when used out of Drive Rush. Because the 2nd hit has only 1 active frame, there are no meaty setups that allow a natural follow-up link. Pairs well with Blanka-chan bomb to crack the opponent's defenses.

6MK
Double Knee Bombs
6MK
SF6 Blanka 6mk.png
SF6 Blanka 6mk hitbox.png
Hitboxes Off
Hitboxes On

6MK
Double Knee Bombs
Startup Active Recovery Cancel Damage Guard On Hit On Block
9 3(7)2 18 - 300x2 LH +6 -2
  • Low Crush: 9-23f (not airborne)
  • Counter-hit/Punish Counter bonus advantage carries through both hits


A hopping 2-hit knee strike that advances forward. Can combo naturally into 5LP or 2LP with plenty of time to hitconfirm. Works well out of Drive Rush, giving it extra momentum, plus frames on block, and a combo route into 5HP for great damage.

4MK
Wild Edge
4MK
SF6 Blanka 4mk.png
SF6 Blanka 4mk hitbox.png
Hitboxes Off
Hitboxes On

4MK
Wild Edge
Startup Active Recovery Cancel Damage Guard On Hit On Block
9 6 12 Sp SA 600 LH +8 +2
  • Head hurtbox disappears 1-3f and is anti-air invuln 4-14f
  • Whiffs on crouching opponents from longer ranges
  • Cancel Hitconfirm Window: 20f
  • Drive Rush cancel advantage: +16 oH / +10 oB
  • SA2 cancel advantage: +15 oH / +9 oB
  • Coward Crouch cancel advantage: +7 oH / +1 oB
  • Forward Hop cancel advantage: -2 oH / -8 oB


One of Blanka's best normals with multiple uses.

4MK gives Blanka frame advantage on block, and can even frame trap into itself when used out of Drive Rush. The high active frame count makes it easy to time as a meaty, giving even better frame advantage. It combos naturally into lights or 2MK, and can get much stronger combo routes on Counter-hit or with Drive Rush. The hitconfirm window is extremely lenient, allowing for special/super follow-ups even at a range where links won't work. Its hitbox is completely disjointed, making it a useful anti-air at mid range. The only downside is that Blanka must be relatively close to enact his pressure, since it can whiff against crouchers at when farther away.

6HP
Wild Nail
6HP
SF6 Blanka 6hp.png
SF6 Blanka 6hp hitbox.png
SF6 Blanka 6hp hitbox2.png
SF6 Blanka 6hp hitbox3.png
Hitboxes Off
Hitboxes On

6HP
Wild Nail
Startup Active Recovery Cancel Damage Guard On Hit On Block
18 4 28(31) 2PP* 1100 LH KD +18(+21) -15(-12)
  • Low Crush: 10-20f (not airborne)
  • 3f extra recovery on whiff/block
  • Spike knockdown vs. airborne opponents
  • Punish Counter: Crumple state (HKD +76~79); OTG bounce vs. airborne
  • Cancel Hitconfirm Window: 31f (into 2PP only, up to frame 34 on hit/block)
  • Coward Crouch cancel advantage: KD +23(Crumple +81) oH / -7 oB
  • Applies 20% damage scaling to next hit when beginning a combo (100/80/70...)
  • Blanka is in a crouching state during recovery on frames 21-43


A body splash with good horizontal and vertical reach. Quite unsafe on block, but if well-spaced it can be difficult for most characters to punish. A regular hit gives a fairly unremarkable knockdown, but the Punish Counter crumple state makes it useful as a DP punish and as a predictive tool against low pokes.

Canceling into Coward Crouch will not keep Blanka safe on block, but it does allow a juggle into Wild Lift on Punish Counter. By holding up to cancel the Coward Crouch immediately, it's also possible to score a free juggle into any attack 6f or faster.

3HP
Amazon River Run
3HP
SF6 Blanka 3hp.png
SF6 Blanka 3hp hitbox.png
Hitboxes Off
Hitboxes On

3HP
Amazon River Run
Startup Active Recovery Cancel Damage Guard On Hit On Block
14 10 22 - 1000 L KD +29(+38) -18(-9)
  • Low Profile: 10-29f (avoids most projectiles)
  • Punish Counter: HKD +29~38


A very long range low-hitting slide that knocks down. Excellent tool against fireballs if Blanka is spaced out far enough to reach his low-profile frames without running into the projectile. The slow startup can make it hard to react to faster projectiles like Sonic Boom in this way, so it must be used a bit pre-emptively. It is very unsafe on block and can usually be punished even at max range.

When combined with Drive Rush, 3HP becomes a powerful approach tool. It can be made much safer on block (often unpunishable due to pushback), and the screen freeze can give time to react to a projectile's startup to initiate the slide. The forward momentum of Drive Rush will allow it to reach from a much greater distance than usual.

Has naturally high juggle potential, making it useful as a situational combo ender that leaves Blanka close to the opponent.


Target Combos

Blanka has no target combos.

Throws

Forward Throw (LPLK)
Forward Throw
LPLK
SF6 Blanka lplk.png
SF6 Blanka lplk hitbox.png
Hitboxes Off
Hitboxes On

LPLK
Wild Fang
Startup Active Recovery Cancel Damage Guard On Hit On Block
5 3 23 - 1200 (2040) T KD +30 -
  • Punish Counter: HKD +30
  • Applies 20% immediate damage scaling when comboed into (e.g. after Crumple)
  • Applies 20% damage scaling to 3rd hit of combo after juggling into Blanka-chan
    • e.g. Throw (100), Blanka-chan (100), follow-up juggle (60)


Sets up an excellent corner throw loop with multiple options to alter the timing. Walking forward requires manual timing on the next strike/throw mixup, but allows for precise positioning and is the best option for baiting the opponent's throw tech.

Throw into Forward Dash puts Blanka at +11, requiring some manual timing on the throw loop while allowing for some strong auto-timed meaty normals. This gives just enough time to walk back out of the opponent's throw range for a shimmy (only a reversal throw from Zangief can reach Blanka).

Throw into Forward Hop (6KKK) is +3 for an auto-timed setup, but does not allow Blanka to walk back to bait the opponent's throw tech. Forward Hop also allows for a meaty strike after a midscreen Back Rise, but requires walking an additional ~6f to get back into throw range.

Juggling into a Blanka-chan doll after a forward throw is possible, but requires a fairly precise setup due to the long throw animation. The most common method is to throw a LP Blanka-chan from long range, dash forward into 214PP to activate it, then quickly advance forward and throw the opponent. The opponent can only be juggled if they make contact with Blanka-chan right before they hit the ground. The follow-up juggle will be a bit weaker due to the extra damage scaling from a throw starter, but can still lead to great damage when spending resources.

Back Throw (4LPLK)
Back Throw
4LPLK
SF6 Blanka 4lplk.png
SF6 Blanka lplk hitbox.png
Hitboxes Off
Hitboxes On

4LPLK
Jungle Flip
Startup Active Recovery Cancel Damage Guard On Hit On Block
5 3 23 - 1200 (2040) T KD +27 -
  • Side switch
  • Punish Counter: HKD +27
  • Applies 20% immediate damage scaling when comboed into (e.g. after Crumple)


After throwing the opponent back into the corner, Blanka can dash up for strike/throw oki (+8 after dash). Midscreen, his Drive Rush momentum doesn't carry him far enough to get any follow-up pressure.

Air Throw (LPLK Air)
Air Throw
LPLK (air)
SF6 Blanka jlplk.png
SF6 Blanka jlplk hitbox.png
Hitboxes Off
Hitboxes On

j.LPLK
Wild Bites
Startup Active Recovery Cancel Damage Guard On Hit On Block
5 3 3 land - 1200 (2040) T KD +22 -
  • Punish Counter: HKD +22


Solid air-to-air option against close jumps. Can also be used out of Coward Crouch ~ Raid Jump if you read the opponent's jump. Does not allow for throw oki, but Blanka can Drive Rush into a meaty strike to set up a tick throw scenario.


Drive System

Drive Impact (HPHK)
Drive Impact
HPHK
SF6 Blanka hphk.png
SF6 Blanka hphk hitbox.png
Hitboxes Off
Hitboxes On

HPHK
Wild Scratch
Startup Active Recovery Cancel Damage Guard On Hit On Block
26 2 35 - 800 LH KD +35 / Wall Splat KD +65 -3 / Wall Splat HKD +72
  • Armor (2-hit): 1-27f
  • Applies 20% damage scaling to next hit when beginning a combo (including Wall Splat on block)
  • Combos when canceled from 5HP or Punish Counter 4MK/5MK/2MK (no corner wallsplat)
    • Useful for draining opponent's Drive gauge, especially after Perfect Parry

See Drive Impact on the Gauges page for more details.

When canceled from a normal, these are the important blockstring gaps; a gap of N will trade with an N-frame startup attack; [] = Burnout

  • 5HP: 6[2]
  • 4MK: 7[3]
  • 5MK: 9[5]
  • 2MP: 11[7]
  • 2MK: 13[9]
  • Note: A gap ≥ 6f can be thrown, and a gap ≥ 9f can be jumped out of by most characters

Against the following characters in Burnout:

  • JP (22K), frame 3 counter
  • Marisa (214K), frame 3 armor
  • Zangief (5[HP]), frame 4 armor

It's important to use a blockstring that cannot be absorbed by their armor/counter moves. Ideally, the string should also not be a true combo, or it will cause a Lock and prevent Stun. Note that if the opponent mashes buttons on wakeup, the counter-hit will cause DI to Lock.

  • 5HP > DI: 2f blockstring gap prevents opponent from absorbing the hit
  • 4MK > DI: 3f blockstring gap will work vs. Zangief 5[HP]
  • DR~5MK > DI: 1f blockstring gap prevents opponent from absorbing the hit
  • DR~2MP > DI: 3f blockstring gap will work vs. Zangief 5[HP]

Drive Reversal (6HPHK)
Drive Reversal
6HPHK (in blockstun)
SF6 Blanka 6hphk.png
SF6 Blanka 6hphk hitbox.png
Hitboxes Off
Hitboxes On

6HPHK
Quick Rolling Attack
Startup Active Recovery Cancel Damage Guard On Hit On Block
20 3 26(31) - 500 recoverable LH KD +23 -8
  • Full Invuln: 1-22f; Armor Break
  • 5f extra recovery on hit

See Drive Reversal on the Gauges page for more details.

Drive Parry (MPMK)
Drive Parry
MPMK
SF6 Blanka mpmk.png
SF6 Blanka mpmk hitbox.png
Hitboxes Off
Hitboxes On

MPMK
Drive Parry
Startup Active Recovery Cancel Damage Guard On Hit On Block
1 8 or until released 29(1)(11) - - - - -

See Drive Parry on the Gauges page for more details.

  • Perfect Parry:
    • Applies a 50% damage scaling multiplier to any punish afterwards
    • vs. strikes, has only 1f recovery and prevents the opponent from canceling their attack
    • vs. projectiles, puts you into a fixed 11f recovery

Drive Rush (66)
Drive Rush
66
SF6 Blanka 66.png
SF6 Blanka 66 hitbox.png
Hitboxes Off
Hitboxes On

66
Drive Rush
Startup Active Recovery Cancel Damage Guard On Hit On Block
9(11) 45(46) 24(23) - - - - -
  • Applies 15% damage scaling multiplier to any follow-up hits when used mid-combo
    • Only applies scaling once per combo; does not apply when an enhanced Drive Rush attack starts the combo

See Drive Rush on the Gauges page for more details. Frame data shown in (parentheses) refers to Parry Drive Rush.

  • Distance:
    • 0.476 (min, cancel into immediate Throw)
    • 2.082 (min, earliest blocking/movement frame)
    • 2.867 (max, final DR frame)
  • See Strategy page for Blockstring Gaps and Combo Routes


Special Moves

Coward Crouch (2PP)
Coward Crouch
2PP
SF6 Blanka 2pp.png

SF6 Blanka 2pp p.png
Wild Lift

SF6 Blanka 2pp k.png
Raid Jump
SF6 Blanka 2pp hitbox.png

SF6 Blanka 2pp p hitbox.png
Wild Lift

SF6 Blanka 2pp k hitbox.png
Raid Jump
Hitboxes Off
Hitboxes On

2PP
Coward Crouch
Startup Active Recovery Cancel Damage Guard On Hit On Block
18 [1~102] 28 - - - - -
  • Can hold Down to extend the crouch up to an extra 50f
    • If no input is made, Blanka crouches for 52f (98f total animation)
  • Low Profile / Upper Body Projectile Invuln: 9-29(130)f; lasts until the final 18f of recovery
  • Can input Wild Lift, Raid Jump, or Surprise Hop from frame 19~
    • Surprise Hop has 3f extra recovery when performed out of Coward Crouch
  • Can tap Up to exit stance from frame 20~
  • Counter-hit state for entire move duration

A crouching stance that can be canceled into from normals, most notably 5HP. Blanka can follow this up with a launching attack, a shallow jump, a forward or back hop, or by simply exiting the stance. The low profile frames are good at ducking under projectiles and Drive Impact, and the variable follow-up timing allows Blanka to act unpredictably, making it a bit harder for the opponent to punish the stance recovery.

2PP~P
Wild Lift
Startup Active Recovery Cancel Damage Guard On Hit On Block
18+8 7 31 - 600 LH KD +55 -21

An upward swipe that launches the opponent on hit, but is very unsafe on block. The final 3 active frames have a very disjointed vertical hitbox, allowing it to anti-air at some ranges if the opponent jumps in response to the crouch animation. Combos naturally from 5HP, but can also work after Counter-hit 4MK or Punish Counter/Drive Rush 5MK and 2MK. Blanka can maintain charge while inputting Wild Lift, allowing for easy juggles like Vertical Roll.

2PP~K
Raid Jump
Startup Active Recovery Cancel Damage Guard On Hit On Block
18~ - 12(3) land - - - - -
  • Upper Body Projectile Invuln: 1-9f
  • Airborne 9-43f; Counter-hit state for entire duration (but no Forced Knockdown)
  • 12f landing recovery if no air attack is used

A hop with a much lower trajectory than a normal jump, allowing Blanka to set up some ambiguous cross-up setups. Blanka can maintain charge while inputting the jump, allowing him to use Aerial Rolling Attack from a forward jump without any execution hurdles. The upper body projectile invincibility from Coward Crouch is maintained throughout the pre-jump frames, making it easier to jump after dodging a fireball without getting clipped from behind.

Any blockstring into Coward Crouch + Raid Jump leaves an enormous gap that the opponent can interrupt on reaction. An activated Blanka-chan doll can help to use this more effectively as a mix-up tool on block.

Surprise Hop (6KKK/4KKK)
Surprise Hop
6KKK/4KKK
SF6 Blanka 6kkk.png

SF6 Blanka 4kkk.png
SF6 Blanka 6kkk hitbox.png

SF6 Blanka 4kkk hitbox.png
Hitboxes Off
Hitboxes On

6KKK
Surprise Forward Hop
Startup Active Recovery Cancel Damage Guard On Hit On Block
27(30) total - - - - - - -
  • Throw Invuln: 12-22f
    • Partial Low Crush during this time, but will not hop over all low pokes
  • Distance: 230.945; 3f more recovery when done from Coward Crouch
  • No collision box on frames 4-22 (can pass through the opponent)
4KKK
Surprise Back Hop
Startup Active Recovery Cancel Damage Guard On Hit On Block
32(35) total - - - - - - -
  • Airborne 11-21f (Forced Knockdown state)
  • Distance: 186.108; 3f more recovery when done from Coward Crouch


A hop that can be input in either direction. Can be canceled into like a special move, allowing Blanka to mix up with Blanka-chan dolls or keep himself safe. He can also hop to exit Coward Crouch, making it harder to punish reliably. The hop can be input while crouching with 3KKK or 1KKK, allowing Blanka to maintain down charge for an immediate Vertical Roll.

Forward Hop is useful in Blanka's throw loops, setting up an auto-timed +3 situation in the corner while keeping him in range for a meaty normal midscreen. The brief throw invincible period allows Blanka to punish an attempted throw tech when canceled from a light normal (unless significantly delayed); afterwards, Blanka has enough time to punish with 5HK, 5HP > 2PP~P for big damage. This is a decent option to mix with standard tick throws, but should be used sparingly as it is very unsafe.

Electric Thunder (214P)
Electric Thunder
214P
SF6 Blanka 214p.png

SF6 Blanka 214pp.png
SF6 Blanka 214p hitbox.png
SF6 Blanka 214p hitbox2.png
Button Held

SF6 Blanka 214pp hitbox.png
SF6 Blanka 214pp hitbox2.png
Button Held
Hitboxes Off
Hitboxes On

214P
Electric Thunder
Startup Active Recovery Cancel Damage Guard On Hit On Block
10 2(3)2(3)2~ 15(17) SA3 800 [900] LH KD +39 -3
  • Strike hitbox; 2f extra recovery on whiff
  • Can hold button to extend active frames on whiff only
  • Activates Blanka-chan doll (meterless 1-hit version)
  • Cancel Hitconfirm Window: 20f (Super)
214PP
Electric Thunder
Startup Active Recovery Cancel Damage Guard On Hit On Block
10 2(3)2(3)2~ 15(17) SA2 SA3 400,600 [500,600] LH KD +40 +4
  • Strike hitbox with forward movement during startup; 2f extra recovery on whiff
  • Can hold button to extend active frames on whiff only
  • Activates Blanka-chan doll (OD 3-hit version)
  • Cancel Hitconfirm Window: 50f hit / 22f block (Super)
  • SA2 cancel advantage: KD +54(60) hit / +9 block


Electric Thunder is Blanka's primary hitconfirm ender when charge is not available, leaving him safe on block with moderate pushback. The range is quite short, causing the meterless version to whiff in longer range cancels; holding the button down to extend the active frames can mess with the opponent's punish attempt, but this is a risky habit to get into as it opens the door for even stronger punishes against Blanka like a Drive Impact. On hit, a Forward Hop will close the gap for oki.

The OD version is much more reliable in combos and blockstrings due to its forward movement. It gives excellent frame advantage on block for extended pressure, though the opponent is left slightly out of throw range. On hit, it transitions to a launching follow-up attack that can lead to further juggles. Canceling into SA2 leads to powerful combos and setups on hit while granting enormous block advantage to begin mounting his offense. Activating a Blanka-chan doll with OD Electricity is one of Blanka's most powerful offensive tools, leading to extended mixups and juggles that are difficult to escape.

Both versions of Electricity receive a slight damage/chip boost during SA2 (Lightning Beast), but no other changes are applied during the install.

Rolling Attack ([4]6P)
Rolling Attack
[4]6P
SF6 Blanka 46p.png

SF6 Blanka 46pp.png
SF6 Blanka 46p hitbox.png
Hitboxes Off
Hitboxes On

[4]6LP
Rolling Attack
Startup Active Recovery Cancel Damage Guard On Hit On Block
10 11 3+8 land
(32+10 land oB)
(41+6 land oH)
SA3 1000 LH KD +13 -23
  • 40f charge time; Airborne 10-23f (Forced Knockdown state)
  • Cancel Hitconfirm Window: 22f (Super); all active frames are cancelable
[4]6MP
Rolling Attack
Startup Active Recovery Cancel Damage Guard On Hit On Block
12 19 3+8 land
(32+10 land oB)
(41+6 land oH)
SA3 1200 LH KD +14 -23
  • 40f charge time; Airborne 12-33f (Forced Knockdown state)
  • Punish Counter: KD +66 Tumble / limited juggle OTG state
  • Cancel Hitconfirm Window: 22f (Super); only the first 11 active frames are cancelable
[4]6HP
Rolling Attack
Startup Active Recovery Cancel Damage Guard On Hit On Block
22 20 2+23 land
(28+6 land oB)
(30+6 land oH)
SA3 1300 LH KD +19 -15
  • 40f charge time; Airborne 20-43f (Forced Knockdown state)
  • Punish Counter: KD +86 Tumble / limited juggle OTG state
  • Cancel Hitconfirm Window: 22f (Super); only the first 6 active frames are cancelable
  • Applies 20% damage scaling to next hit when beginning a combo (100/80/70...)
[4]6PP
Rolling Attack
Startup Active Recovery Cancel Damage Guard On Hit On Block
18 22 2+15 land
(25+1 land oB)
(12+15 land oH)
SA2 SA3 800 LH KD +57 -7
  • 40f charge time; Airborne 18-41f (Forced Knockdown state)
  • Side switches on hit unless opponent is near the corner
  • Cancel Hitconfirm Window: 19f (Super); only the first 2 active frames are cancelable
  • SA2 cancel advantage: KD +74 hit / +9 block
  • Applies 20% damage scaling to next hit when beginning a combo (100/80/70...)


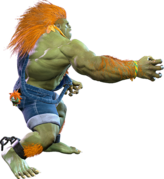
The infamous "Blanka Ball" that lets him control much of the horizontal space, especially against characters without strong projectiles. Heavier versions have slower startup but travel farther across the screen. Each version has a particular use that is essential to Blanka's overall gameplan.

LP Blanka Ball is primarily used to intentionally stop short of the opponent, whiffing with quick landing recovery. Many opponents will try to parry frequently in neutral against Blanka to avoid losing Drive gauge on block or to punish the safer versions of Blanka Ball with a Perfect Parry; mixing in the occasional LP Ball lets him land and immediately throw to punish this. It's important not to accidentally use this version at a range where it can be blocked, as it's horribly unsafe. If the opponent expects a whiffed LP Ball, they can stuff it with a quick jab punish on reaction.

MP Blanka Ball is the most common version in combos with its good combination of speed and distance, hitting much more consistently than Electric Thunder from ranged pokes. In some matchups it can also be used as a decent whiff punish tool if Blanka already has charge, though it's quite risky to throw out if the opponent might block it. A successful Punish Counter can lead to a juggled SA1 in the corner, but in most cases the reward is just better oki and corner carry.

HP Blanka Ball has much slower startup than the other versions, but travels full screen and is much safer on block due to the high pushback. In almost all cases, a Perfect Parry is required to punish it effectively. This version is great for harassing the opponent's Drive gauge, chipping away a full bar every time they block. The threat of HP Blanka Ball is what makes whiffed LP Ball so strong. The slow startup does make it a little easier to Perfect Parry or to interrupt with an anti-air invincible move, and makes it more likely for Blanka to run into a projectile before it can connect with the opponent. If it manages to land as a Punish Counter, the tumble state allows Blanka to combo into DR~3HP from anywhere on the screen.

Notable punishes for HP Blanka Ball without Perfect Parry include:

  • Cammy SA3
  • Blanka SA1 (during SA2 install only)
  • Guile SA1 (only if blocked from close range)

OD Blanka Ball has the same full screen presence of the HP version, while being faster and even safer on block. Blanka can still be punished if the opponent Perfect Parries, but with only 1 landing recovery frame the opponent may have difficulty scoring a useful punish; for consistency, they will likely need to Drive Rush into a low starter like 2MK, or use a juggle starter instead. On hit, Blanka switches sides and launches the opponent upward for a follow-up juggle like [2]8K or j.MP > j.[4]6P.

Rolling Attack
SA2 Install
[4]6P
SF6 Blanka 46p.png

SF6 Blanka 46pp.png
SF6 Blanka 46p sa2 hitbox.png
Hitboxes Off
Hitboxes On

[4]6LP
Rolling Attack (SA2)
Startup Active Recovery Cancel Damage Guard On Hit On Block
10 12 2+8 land
(39+1 land oB)
(41+6 land oH)
Sp* 1100 LH KD +13 -21
  • 40f charge time (no charge required if canceled into)
  • Airborne 10-23f (Forced Knockdown state)
  • Activates Blanka-chan doll (meterless 1-hit version)
  • Cancel Hitconfirm Window: 58f hit / 56f block (Rolling Cannon)
  • Applies 10% damage scaling to next hit when beginning a combo, or 10% immediate scaling when comboed into
[4]6MP
Rolling Attack (SA2)
Startup Active Recovery Cancel Damage Guard On Hit On Block
12 19 3+8 land
(39+1 land oB)
(41+6 land oH)
Sp* 1300 LH KD +14 -21
  • 40f charge time (no charge required if canceled into)
  • Airborne 12-33f (Forced Knockdown state)
  • Punish Counter: KD +66 Tumble / limited juggle OTG state
  • Activates Blanka-chan doll (meterless 1-hit version)
  • Cancel Hitconfirm Window: 58f hit / 56f block (Rolling Cannon)
  • Applies 10% damage scaling to next hit when beginning a combo, or 10% immediate scaling when comboed into
[4]6HP
Rolling Attack (SA2)
Startup Active Recovery Cancel Damage Guard On Hit On Block
20 22 2+23 land
(39+1 land oB)
(41+6 land oH)
Sp* 1400 LH KD +19 -21
  • 40f charge time (no charge required if canceled into)
  • Airborne 18-43f (Forced Knockdown state)
  • Punish Counter: KD +81 Tumble / limited juggle OTG state
  • Activates Blanka-chan doll (meterless 1-hit version)
  • Cancel Hitconfirm Window: 58f hit / 56f block (Rolling Cannon)
  • Applies 20% damage scaling to next hit when beginning a combo, or 10% immediate scaling when comboed into
[4]6PP
Rolling Attack (SA2)
Startup Active Recovery Cancel Damage Guard On Hit On Block
18 22 7+10 land
(25+1 land oB)
(17+10 land oH)
Sp* 900 LH KD +57 -7
  • 40f charge time (no charge required if canceled into)
  • Airborne 18-46f (Forced Knockdown state)
  • Activates Blanka-chan doll (OD 3-hit version)
  • Cancel Hitconfirm Window: 42f block (Rolling Cannon)
  • Applies 20% damage scaling to next hit when beginning a combo (100/80/70...)


The general usage of Rolling Attack during the SA2 install is the same, but there are some key changes. Charge is no longer required when canceling into the move, making combos much more consistent. Each usage of Blanka Ball drains 100f from the 1500f install timer, or about 6.7% of the total time. Electricity is applied during the attack, allowing for the activation of Blanka-chan dolls that can lead to powerful juggles on hit or mixups on block.
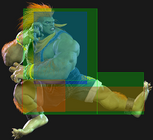
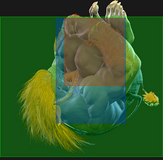
After bouncing off the opponent on hit/block, Blanka can cancel into a Rolling Cannon follow-up (except for the OD version on hit). This allows for extended combos and juggles with plenty of time to confirm on hit. On block, Blanka can use the 3P Rolling Cannon to get frame advantage, or fly backwards to make punishes more difficult. If the opponent crouch blocks after a meterless Blanka Ball, the 3P Rolling Cannon will not form a true blockstring, allowing the opponent to Perfect Parry or interrupt it with an anti-air invincible attack.

All versions on block have only 1 frame of landing recovery, much like the standard OD version. This makes punishes a bit more awkward and requires the opponent to be aware of this property, presenting an important knowledge check. LP and MP versions are slightly safer on block and bounce much farther away, limiting the punish options of most characters. The HP version, meanwhile, recovers closer and is 6f worse on block; this makes it much more punishable if not canceled into Rolling Cannon. OD Blanka Ball also recovers closer, but at -7 it is still generally safe.

After a Punish Counter MP or HP version, the opponent's tumbling OTG state can be followed up anywhere on the screen with a 3P Rolling Cannon or an enhanced SA1. This dramatically increases the damage output on a successful punish starter compared to the non-SA2 versions.

Aerial Rolling Attack (j.[4]6P)
Aerial Rolling Attack
j.[4]6P
SF6 Blanka j46p.png

SF6 Blanka j46pp.png
SF6 Blanka j46p hitbox.png
Hitboxes Off
Hitboxes On

j.[4]6P
Aerial Rolling Attack
Startup Active Recovery Cancel Damage Guard On Hit On Block
13 until land 17 land - 1000 LH KD +38(+45) -9(-2)
  • 40f charge time
  • Can hit cross-up; button strength determines trajectory (LP close, MP mid, HP far)
  • Forced Knockdown state until landing
  • Puts grounded opponents into limited juggle state; spike knockdown vs. airborne opponents
j.[4]6PP
Aerial Rolling Attack
Startup Active Recovery Cancel Damage Guard On Hit On Block
13 until land 10 land - 600x2 LH KD +29(+30) +2(+8)
  • 40f charge time; transitions to 2nd attack on hit only
  • Can hit cross-up (2nd attack whiffs midscreen)
  • Forced Knockdown state until landing


A unique "divekick" that requires charge, notable for its ability to be performed from a backwards jump. The meterless version is usually unsafe, but with accurate spacing it can avoid punishment. The OD version always grants frame advantage on block, making it an excellent pressure starter. While the execution is difficult, Aerial Ball can be done from a forward jump; an easier (but more reactable) option is to charge while inputting Coward Crouch > Raid Jump, then using Aerial Ball to change your jump trajectory.

Being usable from a backwards jump allows Blanka to hold up-back on wakeup to avoid a throw, then punish the whiff on reaction. The OD version is excellent for this purpose, since it's safe on block and leads to massive corner carry on hit to escape the corner. This makes Blanka the most dangerous character in the game to attempt a corner throw loop against, allowing him to get away with more risky options on defense.

Aerial Ball can be used in combos when canceled from j.MP, most notably after an OD Blanka Ball launch. This gives more damage and better oki than a Vertical Roll juggle ender. This can also be useful in air-to-air situations, allowing a backwards j.MP to deal extra damage without giving up screen position. It can also be used in spacing traps with moves like Electric Thunder; if the opponent tries to take back their turn on block with a slow enough normal, Blanka may be able to avoid it with the jump and come back down to whiff punish the recovery (though the effectiveness of this technique varies heavily based on the matchup).

Aerial Rolling Attack
SA2 Install
j.[4]6P
SF6 Blanka j46p.png

SF6 Blanka j46pp.png
SF6 Blanka j46p sa2 hitbox.png
Hitboxes Off
Hitboxes On

j.[4]6P
Aerial Rolling Attack (SA2)
Startup Active Recovery Cancel Damage Guard On Hit On Block
13 until land 17 land Sp* 1100 LH KD +38(+45) -9(-2)
  • 40f charge time (no charge required if canceled into)
  • Can hit cross-up; button strength determines trajectory (LP close, MP mid, HP far)
  • Forced Knockdown state until landing
  • Puts grounded opponents into limited juggle state; spike knockdown vs. airborne opponents
  • Activates Blanka-chan doll (meterless 1-hit version)
  • Cancel Hitconfirm Window: 22(17)f (Rolling Cannon, height-dependent)
  • Applies 10% damage scaling to next hit when beginning a combo, or 10% immediate scaling when comboed into
j.[4]6PP
Aerial Rolling Attack (SA2)
Startup Active Recovery Cancel Damage Guard On Hit On Block
13 until land 10 land Sp* 700x2 LH KD +29(+30) +2(+8)
  • 40f charge time (no charge required if canceled into); transitions to 2nd attack on hit only
  • Can hit cross-up (2nd attack whiffs midscreen)
  • Forced Knockdown state until landing
  • Activates Blanka-chan doll (OD 3-hit version)
  • Cancel Hitconfirm Window: 72(66)f hit / 17f block (Rolling Cannon, height-dependent)
  • Applies 10% damage scaling to next hit when beginning a combo, or 10% immediate scaling when comboed into


The SA2 install version of Aerial Ball is mostly identical, but has a few key changes compared to the original. It deals slightly more damage, and can be canceled into from j.MP with no charge; this can even be done late from a forward j.MP, leaving a small gap in the blockstring that can catch opponents who expect an immediate tick throw after landing. It also gains the ability to cancel into Rolling Cannon before landing (unless it connects at the minimum possible height, in which case a cancel is no longer possible). This can be used to make the meterless versions safe, or set up a tricky cross-up sequence like j.MP > Aerial Ball > Rolling Cannon, which can hit in many different ways depending on the spacing and timing.

Like all ball-type SA2 specials, the install timer is drained by 100f (6.7% of the total time) per use, even when not canceled into. It also can be used to activate a Blanka-chan doll, which is especially great for corner mixups.

If SA2 Aerial Ball connects very low to the ground and is canceled into the downward Rolling Cannon (2P), it reduces Blanka's landing recovery and grants significant frame advantage on block without deducting Rolling Cannon's usual 200f from the install timer. While this is likely a bug, it is an effective technique for confusing the opponent who expects Blanka to be at frame disadvantage after a blocked meterless Aerial Ball.

Vertical Rolling Attack ([2]8K)
Vertical Rolling Attack
[2]8K
SF6 Blanka 28k.png

SF6 Blanka 28kk.png
SF6 Blanka 28k hitbox.png

SF6 Blanka 28kk hitbox.png
Hitboxes Off
Hitboxes On

[2]8LK
Vertical Rolling Attack
Startup Active Recovery Cancel Damage Guard On Hit On Block
8 19 31+17 land
(34+10 land oB)
(39+7 land oH)
- 1200 LH KD +35 -27
  • Anti-Air Invuln: 8-26f; Airborne 6-57f (Forced Knockdown state)
  • 40f charge time; farthest horizontal range (most useful in grounded combos)
[2]8MK
Vertical Rolling Attack
Startup Active Recovery Cancel Damage Guard On Hit On Block
8 19 31+17 land
(34+10 land oB)
(39+7 land oH)
- 1300 LH KD +42 -27
  • Anti-Air Invuln: 8-26f; Airborne 6-57f (Forced Knockdown state)
  • 40f charge time; travels up and slightly forward for standard anti-air purposes
[2]8HK
Vertical Rolling Attack
Startup Active Recovery Cancel Damage Guard On Hit On Block
8 19 31+17 land
(34+10 land oB)
(39+7 land oH)
- 1400 LH KD +42 -27
  • Anti-Air Invuln: 8-26f; Airborne 6-57f (Forced Knockdown state)
  • 40f charge time; travels straight up for deep anti-airs and juggles
[2]8KK
Vertical Rolling Attack
Startup Active Recovery Cancel Damage Guard On Hit On Block
7 8(2)6 31+17 land
(34+23 land oB)
(44+7 land oH)
- 800x2 LH KD +28 -40
  • Full Invuln: 1-10f; Airborne 4-53f (Forced Knockdown state)
  • 40f charge time; travels up, in between the trajectory of MK and HK versions


An upward angled attack used as an anti-air, reversal, and combo/juggle ender. Each strength has its own trajectory, with LK traveling the farthest and HK traveling straight up. The LK version can be used in grounded combos for better damage and oki than Rolling Attack, but anything more than 2 light attacks will cause it to whiff on standard-height crouching opponents. It is massively unsafe on whiff and block; Blanka comes back down with an unusual backward trajectory that can make may require the opponent to walk or Drive Rush forward to begin their optimal punish route.

The anti-air invincibility frames on the meterless versions do not occur until the active frames, so it must be used a bit pre-emptively. The OD version is Blanka's main reversal option, but is liable to whiff against close jumps. All versions cannot hit anti-air against cross-ups, so Blanka's best option is to delay OD Vertical Roll as long as possible to allow the opponent to fully swap sides, or to anti-air early before the opponent has a chance to cross over.

Vertical Rolling Attack
SA2 Install
[2]8K
SF6 Blanka 28k.png

SF6 Blanka 28kk.png
SF6 Blanka 28k sa2 hitbox.png

SF6 Blanka 28kk sa2 hitbox.png
Hitboxes Off
Hitboxes On

[2]8LK
Vertical Rolling Attack (SA2)
Startup Active Recovery Cancel Damage Guard On Hit On Block
8 19 31+17 land
(35+1 land oB)
(39+7 land oH)
Sp* 1300 LH KD +35 -18
  • Anti-Air Invuln: 8-26f; Airborne 6-57f (Forced Knockdown state)
  • 40f charge time (no charge required if canceled into)
  • Farthest horizontal range (most useful in grounded combos)
  • Activates Blanka-chan doll (meterless 1-hit version)
  • Cancel Hitconfirm Window: 60f hit / 51f block (Rolling Cannon)
  • Applies 10% damage scaling to next hit when beginning a combo, or 10% immediate scaling when comboed into
[2]8MK
Vertical Rolling Attack (SA2)
Startup Active Recovery Cancel Damage Guard On Hit On Block
8 19 31+17 land
(35+1 land oB)
(39+7 land oH)
Sp* 1400 LH KD +37 -19
  • Anti-Air Invuln: 8-26f; Airborne 6-57f (Forced Knockdown state)
  • 40f charge time (no charge required if canceled into)
  • Travels up and slightly forward for standard anti-air purposes
  • Activates Blanka-chan doll (meterless 1-hit version)
  • Cancel Hitconfirm Window: 60f hit / 52f block (Rolling Cannon)
  • Applies 10% damage scaling to next hit when beginning a combo, or 10% immediate scaling when comboed into
[2]8HK
Vertical Rolling Attack (SA2)
Startup Active Recovery Cancel Damage Guard On Hit On Block
8 19 31+17 land
(35+1 land oB)
(39+7 land oH)
Sp* 1500 LH KD +42 -19
  • Anti-Air Invuln: 8-26f; Airborne 6-57f (Forced Knockdown state)
  • 40f charge time (no charge required if canceled into)
  • Travels straight up for deep anti-airs and juggles
  • Activates Blanka-chan doll (meterless 1-hit version)
  • Cancel Hitconfirm Window: 60f hit / 52f block (Rolling Cannon)
  • Applies 10% damage scaling to next hit when beginning a combo, or 10% immediate scaling when comboed into
[2]8KK
Vertical Rolling Attack (SA2)
Startup Active Recovery Cancel Damage Guard On Hit On Block
7 8(2)6 31+17 land
(34+23 land oB)
(44+7 land oH)
Sp* (oH) 900,850 LH KD +27 -40
  • Full Invuln: 1-10f; Airborne 4-53f (Forced Knockdown state)
  • 40f charge time (no charge required if canceled into)
  • Travels up, in between the trajectory of MK and HK versions
  • Activates Blanka-chan doll (OD 3-hit version)
  • Cancel Hitconfirm Window: 82f hit (Rolling Cannon)
  • Applies 40% damage scaling to next hit when beginning a combo, or 10% immediate scaling when comboed into


The SA2 install version of Vertical Roll is a great juggle starter when canceled into a Rolling Cannon follow-up; while there is additional damage scaling applied, it massively increases Blanka's damage potential overall. The lack of charge requirement when canceled into also makes the attack more versatile, making Blanka free to move around and combo in situations that would normally be impossible.

Other properties like attack angle, no cross-up hitbox, and invincibility frames are identical to the regular version. Blanka loses 100f (6.7%) of the install timer when activating Vertical Roll, and it can be used to activate a Blanka-chan doll with either the meterless or OD electricity.

On block, Vertical Roll is a safer and bounces farther away compared to the regular version; it also has only 1 frame of landing recovery, making a grounded punish much more difficult. While the opponent could simply Drive Rush into a juggle starter, the ability to cancel into Rolling Cannon makes this a risky proposition. It's important to note that against crouch blocking opponents, Vertical Roll into Rolling Cannon cannot create a true blockstring; this means that an anti-air invincible special can punish Blanka for attempting to use the 3P follow-up as a divekick. This creates a sort of rock-paper-scissors mind game for both players that is generally weighted in Blanka's favor.

After OD Vertical Roll on block, Blanka cannot follow up with Rolling Cannon to keep himself safe. It does have more juggle potential than the meterless versions, making it a bit more useful in certain juggle routes.

Backstep Rolling Attack (63214K)
Backstep Rolling Attack
Rainbow Ball
63214K
SF6 Blanka 63214k.png

SF6 Blanka 63214kk.png
SF6 Blanka 63214k hitbox.png

SF6 Blanka 63214kk hitbox.png
OD Version 1st Hit
Hitboxes Off
Hitboxes On

63214LK
Backstep Rolling Attack
Startup Active Recovery Cancel Damage Guard On Hit On Block
41 24 5 land - 1000 LH +8(+14) +2(+8)
  • Airborne 8-12f, 27-64f (Forced Knockdown state); can hit cross-up
  • Shortest trajectory (can steer forward/backward)
63214MK
Backstep Rolling Attack
Startup Active Recovery Cancel Damage Guard On Hit On Block
41 27 5 land - 1000 LH +7(+14) +1(+8)
  • Airborne 8-12f, 27-67f (Forced Knockdown state); can hit cross-up
  • Medium trajectory (can steer forward/backward)
63214HK
Backstep Rolling Attack
Startup Active Recovery Cancel Damage Guard On Hit On Block
41 29 5 land - 1000 LH +7(+13) +3(+9)
  • Airborne 8-12f, 27-69f (Forced Knockdown state); can hit cross-up
  • Farthest trajectory (can steer forward/backward)
63214KK
Backstep Rolling Attack
Startup Active Recovery Cancel Damage Guard On Hit On Block
8(41) 5(28)21(1)4 4 land SA2 SA3 (1st) 300,350x2 LH,LH,LH +10(+13) / KD +55 +6(+9)
  • Airborne 8-12f, 27-66f (Forced Knockdown state); can hit cross-up on downward hit
  • () on Startup refers to the downward aerial hit
  • Medium trajectory (can steer forward/backward)
  • Cancel Hitconfirm Window: 16f (Super, 1st hit only)
  • SA2 cancel advantage: KD +68 hit / +6 block


Backstep Roll (or "Rainbow Ball") causes Blanka to take a step back and jump, coming down with an arc trajectory that can be controlled to some extent. Steering forward can significantly increase the total distance, while holding back only mildly slows the forward movement; it requires some precision to not entirely whiff over a midscreen opponent. Backstep Roll leads to great frame advantage on hit or block, and can be spaced for an ambiguous cross-up. The exact frame advantage depends on the opponent's height and whether they were standing or crouching, which must be taken into account when deciding on a combo or frame trap route after landing.

While the move has slow startup and a large vulnerable hurtbox, it can be challenging for the opponent to anti-air when the spacing is unpredictable. Opponents can try to jump back and air-to-air, or catch the landing recovery with some long-range Supers on a short version.

The OD version has an initial hit with very short range; it has some utility in juggles, especially in corner Blanka-chan setups where it can allow extended juggle routes with multiple Blanka-chan dolls. The downward hit of the OD version connects twice vs. standing opponents and only once vs. crouching opponents.

Backstep Rolling Attack
SA2 Install
63214K
SF6 Blanka 63214k.png

SF6 Blanka 63214kk.png
SF6 Blanka 63214k sa2 hitbox.png

SF6 Blanka 63214kk hitbox.png
OD Version 1st hit
Hitboxes Off
Hitboxes On

63214LK
Backstep Rolling Attack (SA2)
Startup Active Recovery Cancel Damage Guard On Hit On Block
41 24 5 land Sp* 1100 LH +8(+14) +2(+8)
  • Airborne 8-12f, 27-64f (Forced Knockdown state); can hit cross-up
  • Shortest trajectory (can steer forward/backward)
  • Activates Blanka-chan doll (meterless 1-hit version)
  • Cancel Hitconfirm Window: 22(18)f (Rolling Cannon, height-dependent)
  • Applies 10% damage scaling to next hit when beginning a combo, or 10% immediate scaling when comboed into
63214MK
Backstep Rolling Attack (SA2)
Startup Active Recovery Cancel Damage Guard On Hit On Block
41 27 5 land Sp* 1100 LH +7(+14) +1(+8)
  • Airborne 8-12f, 27-67f (Forced Knockdown state); can hit cross-up
  • Medium trajectory (can steer forward/backward)
  • Activates Blanka-chan doll (meterless 1-hit version)
  • Cancel Hitconfirm Window: 23(19)f (Rolling Cannon, height-dependent)
  • Applies 10% damage scaling to next hit when beginning a combo, or 10% immediate scaling when comboed into
63214HK
Backstep Rolling Attack (SA2)
Startup Active Recovery Cancel Damage Guard On Hit On Block
41 29 5 land Sp* 1100 LH +7(+13) +3(+9)
  • Airborne 8-12f, 27-69f (Forced Knockdown state); can hit cross-up
  • Farthest trajectory (can steer forward/backward)
  • Activates Blanka-chan doll (meterless 1-hit version)
  • Cancel Hitconfirm Window: 22(18)f (Rolling Cannon, height-dependent)
  • Applies 10% damage scaling to next hit when beginning a combo, or 10% immediate scaling when comboed into
63214KK
Backstep Rolling Attack (SA2)
Startup Active Recovery Cancel Damage Guard On Hit On Block
8(41) 5(28)21(1)4 4 land Sp* 300,450x2 LH,LH,LH +10(+13) / KD +55 +6(+9)
  • Airborne 8-12f, 27-66f (Forced Knockdown state); can hit cross-up on downward hit
  • Medium trajectory (can steer forward/backward)
  • Activates Blanka-chan doll (OD 3-hit version)
  • Cancel Hitconfirm Window: 36(19)f (Rolling Cannon, height-dependent)
  • Applies 10% damage scaling to next hit when beginning a combo, or 10% immediate scaling when comboed into


The SA2 install version of Backstep Roll does slightly more damage, though this is somewhat mitigated by the additional damage scaling. It can also cancel into Rolling Cannon like all other ball-type special moves. Since it already leads to strong combos on hit and pressure on block, this doesn't change very much overall, although it's possible to set up some Rolling Cannon cross-ups midscreen. Activating this move drains 100f (6.7%) from the install timer, and importantly it gains electricity to activate Blanka-chan; this makes it harder for the opponent to defend against in neutral, especially on the OD version. Corner juggles with OD Backstep Roll and Blanka-chan dolls can deal massive damage, especially if Blanka has an extra bar for SA1 juggles.

Wild Hunt (236K)
Wild Hunt
236K
SF6 Blanka 236lk.png

SF6 Blanka 236kk.png
SF6 Blanka 236lk hitbox.png
Hitboxes Off
Hitboxes On

236LK
Wild Hunt
Startup Active Recovery Cancel Damage Guard On Hit On Block
34 3 57 - 1600 (1840) T HKD +35 -
236MK
Wild Hunt
Startup Active Recovery Cancel Damage Guard On Hit On Block
39 3 57 - 1700 (1955) T HKD +35 -
236HK
Wild Hunt
Startup Active Recovery Cancel Damage Guard On Hit On Block
43 3 57 - 1800 (2070) T HKD +35 -
236KK
Wild Hunt
Startup Active Recovery Cancel Damage Guard On Hit On Block
32 3 57 - 2000 (2300) T HKD +64 -
  • Airborne 9-28f (Forced Knockdown state); Range: 2.70-3.59
  • Can hold forward/back to control the trajectory


A slow, hopping command grab that can open up overly-defensive opponents, draining a bar of Drive gauge if you manage to throw during their parry attempt. The startup is quite reactable, so it helps to make the opponent focus on other threats like HP Blanka Ball or an activated Blanka-chan doll first. Blanka can be punished heavily if the opponent jumps or backdashes. In addition to its faster startup, the OD version is the best at avoiding the opponent's attacks by pulling up the hurtbox while hopping.

Blanka-chan Bomb (22P)
Blanka-chan Bomb
22P
SF6 Blanka 22p.png

SF6 Blanka 22p 214p.png
SF6 Blanka 22p hitbox.png
Idle, waiting to be activated by electricity

SF6 Blanka 22p 214hitbox.png
Hit trajectory depends on type of electricity
Hitboxes Off
Hitboxes On

22P
Blanka-chan Bomb
Startup Active Recovery Cancel Damage Guard On Hit On Block
39+35 [1000] 11 - - - - -
  • Starts each round with 3 dolls; can only replenish mid-round with Back Taunt
  • Button strength determines doll placement (LP close, MP mid, HP far)
  • Blanka can only place 1 doll on-screen at a time
  • Blanka is in a counter-hit state for entire throwing animation
  • The doll stock is consumed on frame 25, and spawns on frame 39
    • If counter-hit between these frames, loses the doll completely
  • After spawning, the doll takes 35 more frames to reach the ground and become interactable
  • Doll disappears if completely off-screen or after 1000 frames
  • Doll can be activated with any electricity source (different effects depending on meterless/OD/Super type)
22P~214P
Blanka-chan Bomb (Charge)
Startup Active Recovery Cancel Damage Guard On Hit On Block
36 - - - 800 LH KD -
  • Activated with meterless electricity source (214LP or SA2 Ball-type special)
  • Doll disappears if Blanka is hit during the first 34f after electricity activation
  • Puts opponent into free juggle state or maintains existing juggle state
  • 1-hit projectile; walks slowly forward (Projectile Speed: 0.04)
22P~214PP
Blanka-chan Bomb (OD Charge)
Startup Active Recovery Cancel Damage Guard On Hit On Block
36 - - - 400x3 LH KD -
  • Activated with OD electricity source (214PP or SA2 OD Ball-type special)
  • Doll disappears if Blanka is hit during the first 23f after electricity activation
  • Puts opponent into free juggle state or maintains existing juggle state
  • 3-hit projectile; bounces 3 times before running forward (Projectile Speed: 0.012 bounce / 0.05 walk)
    • Doll can change direction if opponent switches sides while it bounces
22P~236236P
Blanka-chan Bomb (SA1 Charge)
Startup Active Recovery Cancel Damage Guard On Hit On Block
26 - - - 200x5 LH KD -
  • Activated with SA1 electricity
  • Doll disappears if Blanka is hit during the first 24f after electricity activation
  • Puts opponent into free juggle state or maintains existing juggle state
  • 5-hit projectile; shoot forward at slight upward angle (Projectile Speed: 0.1)


Blanka's ultimate setplay tool, comparable to Kimberly's spraycans. The LP version of the doll is most commonly used, as it allows Blanka to activate it more easily at close range.

The meterless doll activation causes it to march slowly along the ground, allowing Blanka to follow behind it for better screen position. It's easy to anti-air if the opponent tries to avoid the doll with a jump, and Blanka can more safely attempt gimmicks like Button > Surprise Hop or Button > Raid Jump while the opponent is afraid to attack.

Activating the doll with OD electricity generally leads to the strongest juggles and mixups, especially in the corner. The OD doll hits do not increase the opponent's juggle count even when juggling multiple times, and it has minimal impact on damage scaling (only causing 1 hit of scaling regardless of how many times it connects). It's even possible to juggle into OD Blanka-chan after a throw under some very specific circumstances.

If you happen to have a doll nearby, SA1 becomes a safe reversal option (+8 on block at worst). You generally want to use dolls when you have momentum near the opponent's corner, so this isn't the most practical scenario, but it's worth remembering if you throw a doll and then get back thrown into the corner.


Super Arts

Level 1 Super (236236P)
Shout of Earth
Level 1 Super Art
236236P
SF6 Blanka 236236p.png
SF6 Blanka 236236p hitbox.png

SF6 Blanka 236236p hitbox2.png
Lightning Beast Version Hits fullscreen
Hitboxes Off
Hitboxes On

236236P
Shout of Earth
Startup Active Recovery Cancel Damage Guard On Hit On Block
8 9 62 - 2000 [2200] LH KD +15 -29
  • Full Invuln: 1f; Strike/Throw Invuln: 2-9f; Armor Break
  • Drive Gauge Depletion: 0.5 bars (hit) / 0.25 bars (block)
  • 30% minimum damage scaling
  • Significantly higher KD Advantage when juggled into
  • During SA2: deals 200 more damage and reaches full screen


Blanka sends out a projectile hitbox in both directions that hits low to the ground. Works well as a reversal, but can only anti-air if the opponent uses an air attack that incurs landing recovery. SA1 can also activate a Blanka-chan doll, which has a unique 5-hit version that makes the super safe (minimum of +8 on block).

The full screen range during SA2 install makes it a great option for punishing things that are normally safe based on distance. A useful tactic against low-health projectile characters is to stand at long range and activate SA2 on reaction to a projectile, then immediately SA1 for the punish. It's an expensive option to bait projectiles, so ideally this should be used to secure a game win.

Level 2 Super (214214P)
Lightning Beast
Level 2 Super Art
214214P
SF6 Blanka 214214p.png

214214P
Lightning Beast
Startup Active Recovery Cancel Damage Guard On Hit On Block
1 [1500 total] 9 - - - - -
  • Install lasts 1500f (25 seconds); gives access to Rolling Cannon after any "Ball-type" special move
  • Install timer is depleted by 100f (6.7%) when using Ball-type special, or 200f (13.3%) when using Rolling Cannon
  • Improves the damage and properties of Ball-type specials and SA1, including:
    • Can cancel into [4]6P, j.[4]6P, and [2]8K without charge
    • Electrical property is applied, allowing for Blanka-chan doll activation
    • SA1 reaches full screen in both directions


One of the best install supers in the game, and one of the few Level 2 Supers that sees more competitive use than a Level 3. Nearly every aspect of Blanka's game is greatly improved while the install is active. Combo routes all deal more damage and corner carry, anti-airs become much more deadly, and ambiguous cross-up blockstrings are abundant. Even punishing unsafe specials on block becomes a chore for the opponent, as Blanka remains airborne during the recovery of many of his specials. Learning to fully utilize this Super will elevate your Blanka from annoying to horrifying.

Rolling Cannon (Direction+P)
Rolling Cannon
Any Direction + P
SF6 Blanka xp.png
SF6 Blanka xp hitbox.png
Hitboxes Off
Hitboxes On

Any Direction + P (during SA2)
Rolling Cannon
Startup Active Recovery Cancel Damage Guard On Hit On Block
3 25 7(9) land Sp* 400 LH KD~ -
  • Available during SA2 only; drains 200f (13.3%) of total install timer
  • Can be input in any direction after [4]6P, j.[4]6P, [2]8K, or 63214K
    • Cannot use after [4]6PP on hit, or [2]8KK on block
  • Has electricity to activate Blanka-chan (1-hit meterless version)
  • Can chain into itself on hit/block (up to 3 per sequence; this limit resets after landing mid-combo)
  • Cancel Hitconfirm Window: 41f (self-chain; cancel window ends if Blanka lands)
  • Puts opponent into limited juggle state on hit
  • Total recovery varies; 7f landing recovery on 8P/7P/4P/1P, 9f landing recovery on 2P/3P/6P/9P
  • Drive Gauge Depletion: 0.2 bars (per hit) / 0.1 bars (per block)
  • Does NOT have 40% minimum damage scaling like a standard SA2


Rolling Cannon lets you extend combos and create tricky pressure sequences for as long as the install is active. It can also make it difficult or impossible to punish some moves that are usually unsafe (though it cannot save you after a blocked OD Vertical Roll). The exact frame advantage of any hit varies tremendously based on the angle and height, but in general Blanka can get massive block advantage on any downward-angled ball. It's important to note that Rolling Cannon cannot chain into itself on whiff, so choosing the wrong timing or angle can lead to big punishment.

The window to input each successive Rolling Cannon is extremely long, allowing for delays to create gaps in the blockstring. This is important for setting up ambiguous cross-ups, as a true blockstring will not require the opponent to change their block direction. If the opponent tries to hold Parry to avoid all mixups, landing with a downward 2P version allows Blanka to walk up for a throw punish instead.

After Aerial Rolling Attack connects at the lowest possible height, inputting the 2P version gives Blanka great frame advantage without spending any of his install timer; this may be an unintended bug, as he usually has to spend time to take advantage of any SA2 benefits.

Level 3 Super (236236K)
Ground Shave Cannonball
Level 3 Super Art
236236K
SF6 Blanka 236236k.png

SF6 Blanka 236236k(ca).png
CA version grants 500 extra damage
SF6 Blanka 236236k hitbox.png
Hitboxes Off
Hitboxes On

236236K
Ground Shave Cannonball
Startup Active Recovery Cancel Damage Guard On Hit On Block
10 3 61 - 4000 LH HKD +50 -46
  • Full Invuln: 1-12f; Airborne 2-12f; Armor Break
  • Drive Gauge Depletion: 1.5 bars (hit) / 0.75 bars (block)
    • Cinematic time regenerates ~1.6 Drive bars for Blanka
  • 50% minimum damage scaling; applies 10% immediate damage scaling when canceled from special moves
236236K
Ground Shave Cannonball (CA)
Startup Active Recovery Cancel Damage Guard On Hit On Block
10 3 61 - 4500 LH HKD +14 -46
  • Full Invuln: 1-12f; Airborne 2-12f; Armor Break
  • Available at 25% HP or below
  • Drive Gauge Depletion: 2 bars (hit) / 1 bar (block)
    • Cinematic time regenerates ~1.3 Drive bars for Blanka
  • 50% minimum damage scaling; applies 10% immediate damage scaling when canceled from special moves


An easy-to-use Super that reaches about 60% of the screen length, making it a decent projectile counter. While it works well in many combo and juggle route, the high utility of SA2 makes it hard to justify saving 3 bars of meter. This is compounded by the fact that it regenerates less Drive gauge during the cinematic than most characters; this is because Blanka is technically considered airborne during most of the cinematic, which slows the rate of Drive regeneration.


Taunts

Neutral Taunt (5PPPKKK)
Neutral Taunt
5PPPKKK
SF6 Blanka 5pppkkk.png
"Peekaboo!"

5PPPKKK
Neutral Taunt
Startup Active Recovery Cancel Damage Guard On Hit On Block
145 (total) - - - - - - -

Forward Taunt (6PPPKKK)
Forward Taunt
6PPPKKK
SF6 Blanka 6pppkkk.png
"Ha ha... uhuhuhuhuh"

6PPPKKK
Forward Taunt
Startup Active Recovery Cancel Damage Guard On Hit On Block
150 (total) - - - - - - -

Back Taunt (4PPPKKK)
Back Taunt
4PPPKKK
SF6 Blanka 4pppkkk.png
*Starts juggling*

4PPPKKK
Back Taunt
Startup Active Recovery Cancel Damage Guard On Hit On Block
188 - 45 - - - - -
  • Startup refers to time until 1 Blanka-chan is replenished
  • 233f total animation
  • Fun fact: he is humming his SF2 theme while juggling!


SF6 Navigation

General
FAQ
HUD
Characters
A.K.I.
Blanka
Cammy
Chun-Li
Dee Jay
Dhalsim
Ed
E. Honda
Guile
Jamie
JP
Juri
Ken
Kimberly
Lily
Luke
Manon
Marisa
Rashid
Ryu
Zangief
Data
Cammy
Ed
Guile
Jamie
JP
Juri
Ken
Lily
Luke
Manon
Ryu