Introduction
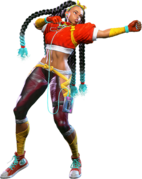
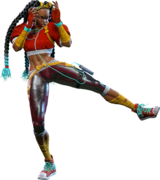
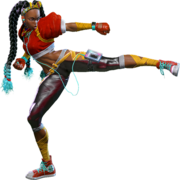
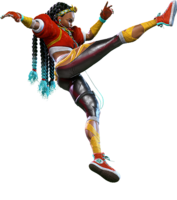
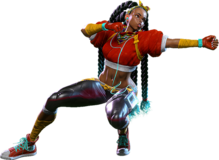
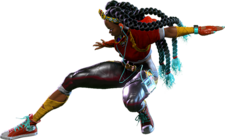
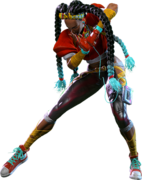
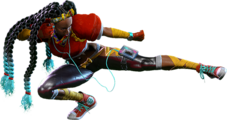
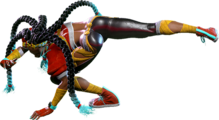
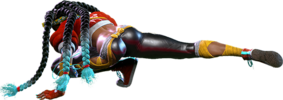
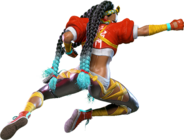
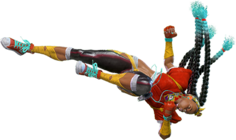
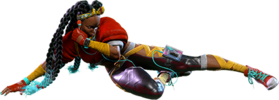
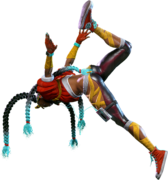
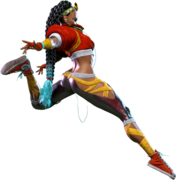
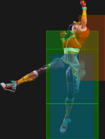
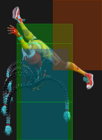
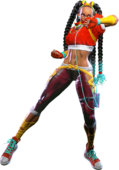
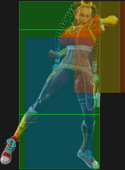
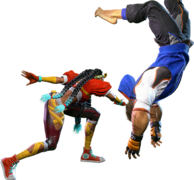
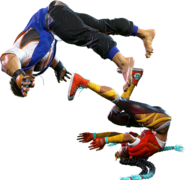
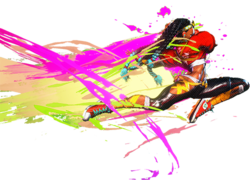
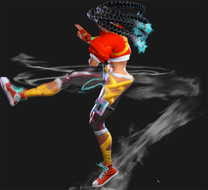
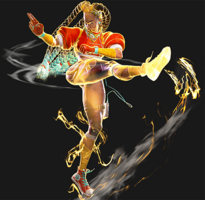
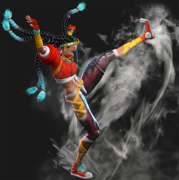
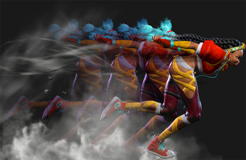
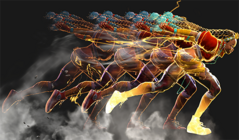
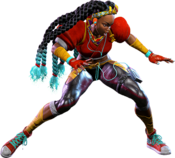
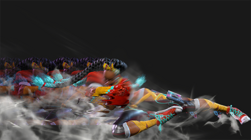
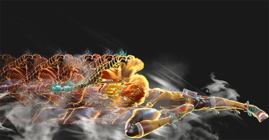
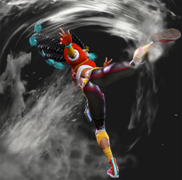
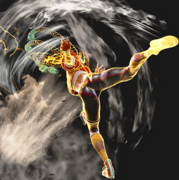
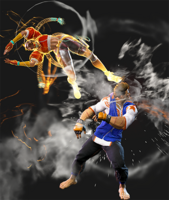
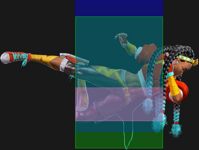
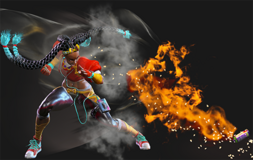
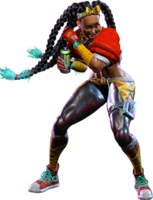
Uninvited student to Guy, the 39th successor to Bushinryu. Kimberly had an ordinary upbringing, but she's a genuine prodigy who graduated college early... and now wants to be a ninja. Loves '80s pop culture.
Kimberly is a fast, tricky character who uses her plethora of unique movement options and setplay to get in and keep the opponent guessing. Good Kimberly players use the many tools at her disposal to approach the opponent unpredictably and lock them down with a variety of unexpected attacks, pushing them to the corner where she can really put the pressure on.
On the movement and neutral fronts, Kimberly not only has a high walk speed, a far-reaching Drive Rush and Drive Impact, and good pokes with 5MK and 5LK, but she also has the classic Bushinryu Sprint special move, which has a variety of different options to approach the opponent on the ground like the Shadow Slicer slide or the Neck Hunter overhead. She can also use Hidden Variable, a teleport that lets her move in from the ground or air depending on whether she uses the Overdrive version or not. Shadow Slicer, Hidden Variable, and 3MK also give Kimberly ways to evade projectiles and get in on opponents who try to keep her out with them, while j.2MP lets her adjust her jump arc to bait anti-airs; on the ground, her 2HP and Bushin Senpukyaku serve as anti-airs, while the aerial version of Bushin Senpukyaku is a combo ender and juggle setup tool.
Where Kimberly especially shines, though, is the corner. Many of her combos give great corner carry, so once the opponent's stuck there, she can use Shuriken Bomb to set up powerful okizeme and keep the pressure going, which works exceptionally well with the likes of Sprint and its follow-ups, Hidden Variable, and plain old strike/throw mix to force the opponent to guess at what she's going to do next. All of the above is especially true once Kimberly lands her Lv. 3 Super Art, Bushin Ninjastar Cypher. Once it hits successfully, Kimberly gains a damage and movement speed buff for the rest of the match, bringing her damage in line with the rest of the cast and making it even harder to deal with her walkspeed and the advantages that it gives her.
However, Kimberly's mobility and tricks are counterbalanced by her defensive options. Because Overdrive Bushin Senpukyaku doesn't have full invulnerability, Kimberly has to rely on system mechanics, Bushin Beats (her Level 1 Super Art), or Bushin Ninjastar Cypher when she needs to defend or force herself out of a bad situation. The buff from Ninjastar Cypher is also significant enough that without it, Kimberly's combos are going to be more useful for corner carry than damage until or unless she lands it, and her light buttons don't normally lend to the types of combos which give great oki at midscreen. If you like high-speed grooves and a bag of ninja tricks, then get on the scene with Kimberly.
| Pick if you like: | Avoid if you dislike: |
|---|---|
|
|
Classic & Modern Versions Comparison
| Missing Normals |
|
|---|---|
| Missing Command Normals |
|
| Shortcut-Only Specials |
|
| Miscellaneous Changes |
|
| Kimberly | |
|---|---|
| Vitals | |
| Life Points | 10000 |
| Ground Movement | |
| Forward Walk Speed | 0.0505 (0.0561) |
| Backward Walk Speed | 0.033 (0.0366) |
| Forward Dash Speed | 18 |
| Backward Dash Speed | 23 |
| Forward Dash Distance | 1.409 |
| Backward Dash Distance | 0.893 |
| Drive Rush Min. Distance (Throw) | 0.817 |
| Drive Rush Min. Distance (Block) | 2.479 |
| Drive Rush Max Distance | 3.565 |
| Jumping | |
| Jump Speed | 4+38+3 |
| Jump Apex | 2.115 |
| Forward Jump Distance | 1.90 |
| Backward Jump Distance | 1.52 |
| Throws | |
| Throw Range | 0.8 |
| Throw Hurtbox | 0.33 |
| Frame Data Glossary - SF6 | |
|---|---|
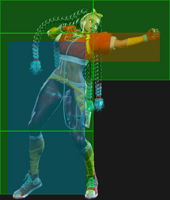
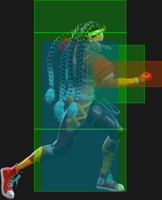
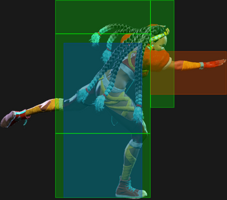
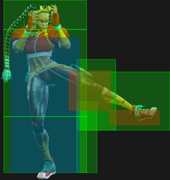
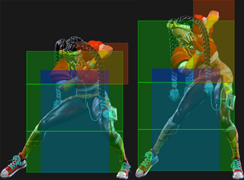
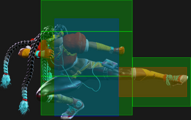
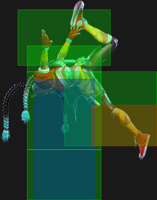
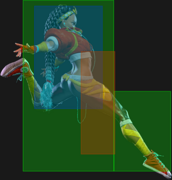
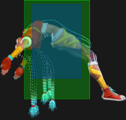
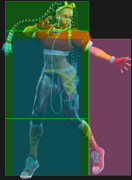
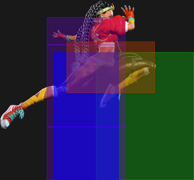
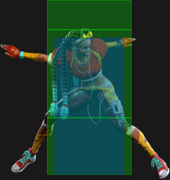
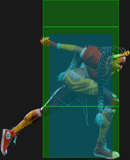
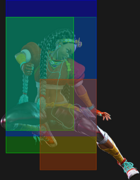
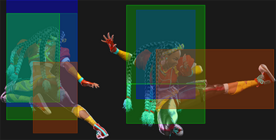
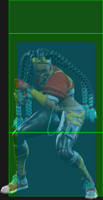
| Hitbox Images |
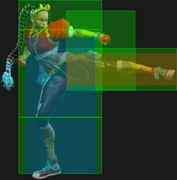
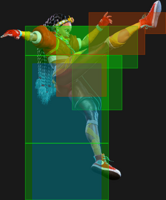
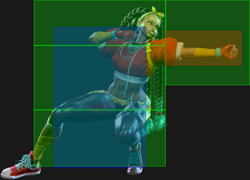
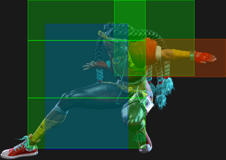
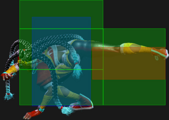
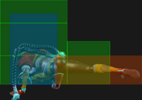
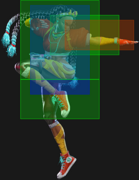
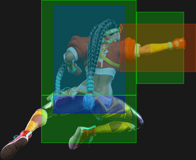
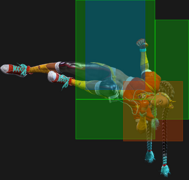
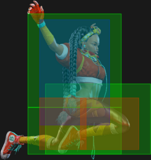
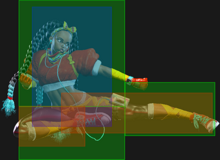
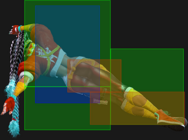
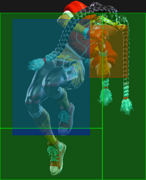
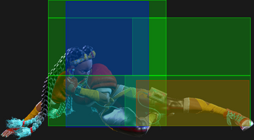
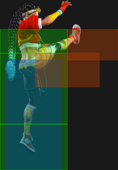
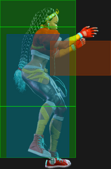
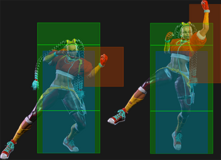
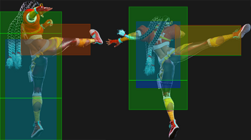
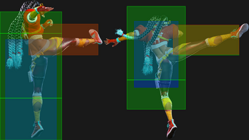
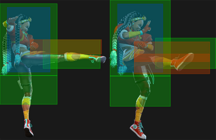
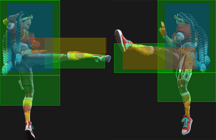
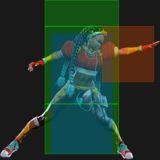
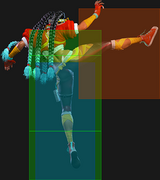
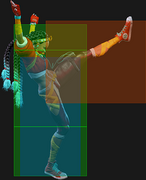
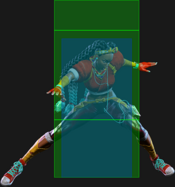
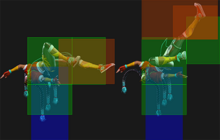
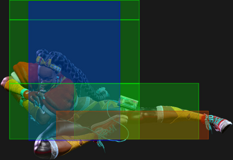
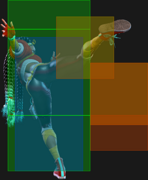
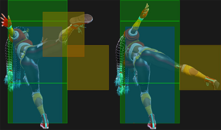
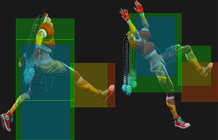
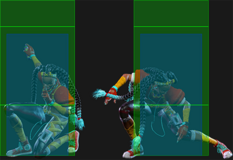
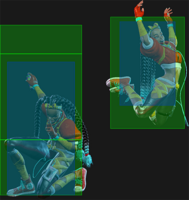
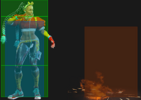
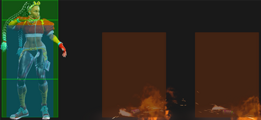
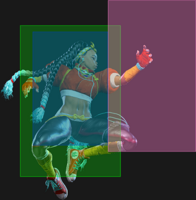
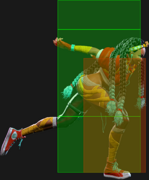
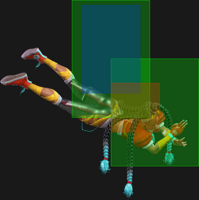
🟥 (Red): Attack hitbox
🟩 (Green): Vulnerable hurtbox that can be hit by strikes/projectiles
🟦 (Blue): Vulnerable throw hurtbox
|
| Active |
How many frames a move remains active (can hurt opponents) for. For projectiles with a maximum active period, a value may be listed in [brackets], but this number is not factored into the move's total frame count.
|
| Cancel |
Available options for canceling one move into another move.
|
| Cancel Hitconfirm Windows |
Hitconfirm reaction windows into Special Moves, Target Combos, and Super Arts.
|
| Damage |
Attack damage on hit. Multi-hit moves may have the damage listed for individual hits as X,Y (or sometimes X*Y). Sometimes a move's damage changes depending on which active frame connects, or on cinematic vs. non-cinematic hits; in this case, multiple values may be listed, and it will be clarified in the move description.
|
| Damage Scaling |
Some moves cause additional damage scaling in combos. Refer to Game Data page for a more detailed breakdown. Scaling Types:
|
| Drive Rush Cancel Advantage |
Refers to the frame advantage when canceling a normal, command normal, or Target Combo into Drive Rush on hit or block (abbreviated as DRC for Drive Rush Cancel). This is calculated at the moment a follow-up attack can be input, not at the moment the character can block or perform movement options. An attack that with DRC +8 on Hit can link into an 8-frame attack, and DRC +4 on Block can create a true blockstring into a 4-frame attack. Note that any DRC on Block worse than +4 cannot form a true blockstring, allowing the opponent to interrupt with an invincible reversal. Most light normals are slightly negative after a DRC on block, meaning the opponent can mash their fastest normal to guarantee a counter-hit (though this requires fast reactions). The attacking character could punish this with Light > DRC into an immediate invincible attack, but this would be an incredibly expensive and high-risk gambit.
|
| Forced Knockdown |
Most airborne command normals, special moves, and Super Arts put the user in a "Forced Knockdown" state. While in this state, an air knockdown will occur when being hit by any attack, even if it would otherwise cause an air reset. As an example, Ryu's 2HP causes an air reset when used as an anti-air. Against a move like Cammy's Hooligan Combination, however, the 2HP puts her into an air knockdown state. This allows Ryu to successfully cancel 2HP into Shoryuken for a juggle, similar to how a Drive Impact wall splat works. Taking advantage of Forced Knockdown juggles is important for dealing with moves like Ken's Dragonlash, Dhalsim's Air Teleport, or Kimberly's 6HK~Hop sequence. Moves that already cause an air knockdown, like most j.MP air-to-airs, will not display the "Forced Knockdown" message.
|
| Guard |
Refers to the direction an attack must be blocked. L is for Low attacks (must be blocked crouching), H is for High attacks/overheads (must be blocked standing), LH is for attacks that can be blocked crouching or standing. T is for Throw attacks which cannot be blocked.
|
| Juggles |
When a character is put into an Air Knockdown state, it is often possible to follow up with a Juggle attack before they hit the ground. In the simplest terms, there are 2 main juggle states:
The following is a more detailed overview of the SF6 juggle system:
Juggle Start (JS): When starting a juggle, the opponent's JC will be set to this value. May be different vs. standing and airborne opponents.
Juggle Increase (JI): When opponent is already in a juggle state, attacks will increase the opponent's JC by this amount.
Juggle Limit (JL): Property of an attack hitbox that determines whether it connects on a juggled opponent. The JL must be ≥ the opponent's JC to hit successfully.
An example to tie everything together:
Drive Rush notes:
|
| On Hit/Block |
These are frame advantage values when the attack hits or is blocked. If the number is positive, then the move will recover before the defender can act again. If the number is negative, the defender will be able to act before the attacker and maybe even punish. KD refers to knockdown on hit, and the listed KD Advantage refers to how many frames the attacker can act before the defender finishes their wakeup animation.
|
| Recovery |
How many frames it takes for a move to finish after the active frames have finished. For projectiles, recovery is considered to begin after the first active frame.
|
| Startup |
How many frames it takes before the move becomes 'active' or have a hit box. The last startup frame and the first active frame are the same frame, meaning all values are written as Startup + 1.
|
Normals
Standing Normals
5LP
| Startup | Active | Recovery | Cancel | Damage | Guard | On Hit | On Block |
|---|---|---|---|---|---|---|---|
| 5 | 2 | 8 | Chn Sp SA TC | 270 | LH | +5 | -2 |
- Chains into 5LP/2LP/2LK or into Bushin Prism Strikes target combo
- Cancel Hitconfirm Window: 12f
- Drive Rush cancel advantage: +5 oH / -2 oB
- Run~Stop cancel advantage: -8 oH / -15 oB; OD Version: -5 oH / -12
- Applies 10% damage scaling to next hit when beginning a combo (100/90/80...)
Good range for a confirmable light normal, allowing for a 3-hit light confirm on its own or from 2LK/2LP. 5LP links naturally into 5LK, which makes her combos a little more consistent outside of point blank range. After a Punish Counter or Drive Rush, it can link directly to 5HP for a more powerful combo route; the pushback is too far to link 2HP on standing opponents.
Pressuring with 5LP strings is good for beating Drive Impact armor with a quick confirm into her 5LP~MP~HP Target Combo. However, the chain timing on 5LP is a little slower than her other light normals. This means that if your first 5LP connects too late against the DI armor, Kimberly is more likely to get hit out of her light chain. Using 5LP x3 is also likely to result in 5LP~MP whiffing at max range.
5MP
| Startup | Active | Recovery | Cancel | Damage | Guard | On Hit | On Block |
|---|---|---|---|---|---|---|---|
| 6 | 3 | 18 | Sp SA TC | 540 | LH | +3 | -2 |
- Chains into 5MP~HP target combo
- Cancel Hitconfirm Window: 15f
- Drive Rush cancel advantage: +14 oH / +9 oB
- Run~Stop cancel advantage: +1 oH / -4 oB; OD Version: +4 oH / -1
5MP is primarily used as combo filler, linking after 2MP, 5HK, or a counter-hit 5LP/2LP. From there, chaining into the 5MP~HP Target Combo leads to good damage and corner carry. The attack itself does not have great range, and the recovery is fairly long for a medium button, making it risky to throw out as a predictive counterpoke. It carries its Drive Rush momentum quite well; combined with its disjointed hitbox, this is a good approach option to force a strike/throw mixup that is difficult to jab on reaction.
5HP
| Startup | Active | Recovery | Cancel | Damage | Guard | On Hit | On Block |
|---|---|---|---|---|---|---|---|
| 9 | 3 | 20 | Sp SA | 630 | LH | +3 | -4 |
- Punish Counter: +23 Stagger
- Cancel Hitconfirm Window: 17f (PC: 27f)
- Does not combo into 236HP on final cancel frame
- Drive Rush cancel advantage: +16 oH / +9 oB
- Run~Stop cancel advantage: +3 oH / -4 oB; OD Version: +6 oH / -1
5HP is Kimberly's best punish combo starter, and a decent poke when spaced well. With good reactions it can be hitconfirmed into a special move, allowing Kimberly to abuse a cornered opponent with it while chipping away at their Drive gauge. 5HP can naturally combo into 236HP for a meterless juggle.
The unique stagger animation after a Punish Counter gives Kimberly a long hitconfirm window, and lets her get point blank for a follow-up combo with Run~Stop or Teleport. Even if you fail to cancel properly, a Forward Dash leaves Kimberly at +5 for a light combo extension.
Kimberly cannot link into 5HP naturally, but the Counter-hit link from 2MP and 5HK is a useful pressure option. Several Drive Rush starters also allow a direct link, most notably 2MK, 5LP, and 5HK (but NOT 2LP).
In some juggle routes, DR~5HP is more useful than DR~2HP because it juggles into 236K~LK without crossing under the opponent. This can also be used to pick up some awkward Shuriken Bomb juggles at longer ranges where 2HP won't reach.
5LK
| Startup | Active | Recovery | Cancel | Damage | Guard | On Hit | On Block |
|---|---|---|---|---|---|---|---|
| 5 | 3 | 11 | Sp SA | 270 | LH | +1 | -3 |
- Cancel Hitconfirm Window: 13f
- Drive Rush cancel advantage: +5 oH / +1 oB
- Run~Stop cancel advantage: -8 oH / -12 oB; OD Version: -5 oH / -9
- Applies 10% damage scaling to next hit when beginning a combo (100/90/80...)
5LK is Kimberly's longest ranged light normal, linking from 5LP or 2MK. In most cases, 214HK is the best cancel ender, but it whiffs against crouchers at max range; 236LP or SA1/SA3 will hit more consistently.
At 5f startup, this button is useful for consistent punishes on many "safe-ish" attacks; as a Punish Counter, it can combo into 236MP, 236PP, or 236K~MK Slide which are all more rewarding.
Buffering into a Drive Rush Cancel grants a link to 5LP, 5HP > Special; while this is expensive relative to its damage output, this sequence is amazing as a low-risk counterpoke in neutral to finish off an opponent. If the 5LK hits as a Counter-hit or Punish, Kimberly can get even stronger routes from this cancel. Be sure the 5LK is in range when attempting a Drive Rush cancel, or Kimberly will perform an expensive 3-bar cancel on whiff.
5MK
| Startup | Active | Recovery | Cancel | Damage | Guard | On Hit | On Block |
|---|---|---|---|---|---|---|---|
| 8 | 3 | 18 | Sp SA | 540 | LH | +1 | -4 |
- Cancel Hitconfirm Window: 15f
- Drive Rush cancel advantage: +12 oH / +7 oB
- Run~Stop cancel advantage: -1 oH / -6 oB; OD Version: +2 oH / -3
- Applies 15% damage scaling to next hit when beginning a combo (100/85/75...)
5MK is Kimberly's most important neutral button due to its range and cancelability. When canceled to Drive Rush, it links into 5HK for her optimal damage routes; on block, linking to Drive Rush 5MP, 2MP, or 2MK is airtight, preventing the opponent from mashing out a reversal. As a whiff punish, it gains a combo into 236HP or 236K Arc Step for increased damage, corner carry, and/or oki.
While 5MK is -4 on block, it should never be punishable when used at its proper range. It is an important tool against opponents who frequently use Drive Impact, as it can cancel into counter-DI unlike other pokes such as 2MK, 3MK, or 2HK.
5HK
| Startup | Active | Recovery | Cancel | Damage | Guard | On Hit | On Block |
|---|---|---|---|---|---|---|---|
| 12 | 4 | 17 | - | 630 | LH | +7 | +2 |
- Whiffs vs. crouching opponents if not point blank
- Upper body is Anti-Air Invuln 10-15f (cannot hit cross-up)
5HK is one of Kimberly's few normals with block advantage, although the short range and slow startup means it can't be easily abused for pressure. It links consistently into 5MP~HP with plenty of time to react to the hit/block; after a Counter-hit, it links into 5HP instead.
With 4 active frames, it is easy to time 5HK as a meaty on the opponent's wakeup. It can be up to +5 on block without even spending Drive gauge. Despite the animation, Kimberly is not airborne at any point, so it cannot be used as a low/throw crush.
The slow startup actually gives 5HK more time to carry its forward momentum after Drive Rush, making it great as an approach tool from longer ranges. This forward momentum also allows a follow-up link into 2MP, 5MP~HP to squeeze out some extra damage; you can even microwalk before 2MP to build some Drive meter, potentially preventing Burnout. Keep in mind that on block, there are no Drive Rush cancels that form a true blockstring to 5HK, so the opponent can interrupt with a reversal.
5HK can be used as an anti-air in some circumstances; the most useful application of this is when chasing down a back jump with Drive Rush, as 2HP usually won't reach far enough to anti-air the opponent. If this hits an airborne opponent, a quick follow-up juggle like 214HK, 236LP, or a Super is possible.
Crouching Normals
2LP
| Startup | Active | Recovery | Cancel | Damage | Guard | On Hit | On Block |
|---|---|---|---|---|---|---|---|
| 4 | 3 | 7 | Chn Sp SA | 270 | LH | +4 | -2 |
- Chains into 5LP/2LP/2LK
- Cancel Hitconfirm Window: 13f
- Drive Rush cancel advantage: +4 oH / -2 oB
- Run~Stop cancel advantage: -9 oH / -15 oB; OD Version: -6 oH / -12
- Applies 10% damage scaling to next hit when beginning a combo (100/90/80...)
2LP is Kimberly's only 4f normal, giving it some extra utility in punishes and scramble situations; however, the range and frame advantage is worse than 5LP. Its speed is useful for comboing after her 4HK overhead without spending Drive meter, and for more consistent links after a well-spaced 3MK slide.
When pressuring the opponent, 2LP chains more quickly than 5LP, making it safer to chain against Drive Impact armor. It also has less pushback, allowing for a consistent 3-light confirm into Bushin Prism Strikes. Beginning a blockstring with 2LP, 2LK, 5LP will break DI armor, confirm a hit, or punish an opponent that tries to walk back after blocking the initial hit.
If Kimberly lands a Counter-hit, she can link directly to 2MP or 5MP for a more powerful ender, though this is not really feasible as a pure reaction. As a max range Punish Counter, 2LP becomes +8, allowing a link to 5MK that will reach more consistently than her other follow-ups. When canceled into Drive Rush, Kimberly is +4; she can follow this up with a 2LP, 2HP link even from whiff punish range.
2MP
| Startup | Active | Recovery | Cancel | Damage | Guard | On Hit | On Block |
|---|---|---|---|---|---|---|---|
| 6 | 3 | 13 | Sp SA | 450 | LH | +7 | -1 |
- Cancel Hitconfirm Window: 15f
- Special/DR cancel is delayed until after 2nd active frame
- Drive Rush cancel advantage: +12 oH / +4 oB
- Run~Stop cancel advantage: -1 oH / -9 oB; OD Version: +2 oH / -6
2MP is Kimberly's most consistent, practical combo starter, linking into itself or 5MP~HP. It's also fast enough to frame trap after some Drive Rush buttons, unlike her other combo starter 5HK. On Counter-hit, she can link into 5HP (or a 2HK Hard Knockdown if range is a concern).
2MP has very low recovery, making it relatively safe as a counterpoke and against Drive Impact armor. When used as a whiff punish in this way, it gains additional cancel routes like 236HP. When used after blocked DR~5LP/2LP/2LK, your 2MP will trade with the opponent's 4f normals; this can set up a trade combo into 5MP~HP and sometimes even 5HP; converting this makes it much riskier for the opponent to mash out of your block pressure.
2HP
| Startup | Active | Recovery | Cancel | Damage | Guard | On Hit | On Block |
|---|---|---|---|---|---|---|---|
| 8 | 6 | 17 | Sp SA | 720 | LH | +3 | -2 |
- Forces stand on hit
- Solid anti-air but cannot hit cross-up
- All active frames are cancelable
- Cancel Hitconfirm Window: 20f
- Drive Rush cancel advantage: +16 oH / +11 oB
- Run~Stop cancel advantage: +3 oH / -2 oB; OD Version: +6 oH / +1
2HP is a solid anti-air for jumps above and directly in front of Kimberly, though it's not suitable for cross-ups or long range jumps. It can be canceled into Run~Stop for a tricky left/right mixup after the anti-air, which can also be used as a means of escaping the corner.
On the ground, 2HP has abysmal range, but the large number of active frames makes it useful in some meaty setups. This allows Kimberly to be up to +8 on hit or +3 on block with the right setup; however, canceling a meaty 2HP into Run~Stop does not grant any additional advantage. If you recognize that the opponent uses light normals to interrupt your Run pressure, you can attempt a frame trap by canceling 2HP into Arc Step.
This button has great utility in max damage Drive Rush juggles. While the opportunities to land DR~2HP are limited, they can juggle to her 236K~LK Flip Kick, which does great damage and allows even more follow-ups. The opponent is launched high enough to juggle an instant j.236P, and potentially even the OD version depending on the combo route. In some situations, Kimberly can even react with an anti-air DR~2HP for a juggle knockdown, or anti-air a Forced Knockdown with 2HP, instant j.236PP for huge damage.
After a corner Drive Impact Wallsplat, 2HP is the most common way to continue the juggle; it can combo into 236K~LK, instant j.236P for good meterless damage and decent oki. If the Drive Impact crumples, wait a moment for the opponent to become airborne before hitting 2HP. Note that after an OD Bushin Hojin Kick wallsplat, 2HP does not have enough juggle potential to use this route without Drive Rush.
2LK
| Startup | Active | Recovery | Cancel | Damage | Guard | On Hit | On Block |
|---|---|---|---|---|---|---|---|
| 5 | 3 | 7 | Chn | 180 | L | +2 | -2 |
- Chains into 5LP/2LP/2LK
- Applies 10% damage scaling to next hit when beginning a combo (100/90/80...)
2LK is Kimberly's primary low hitconfirm starter. It has slightly more pushback than 2LP or 5LP, but still works well in 3-hit confirms. While not cancelable, it chains quickly enough that it can even be useful against Drive Impact armor. Her most useful routes are:
- 2LK, 5LP, 5LP (low start, 3-hit confirm)
- 2LP, 2LK, 5LP (catch a mid-blockstring back walk after blocked 2LP)
After Drive Rush, 2LK becomes +6, granting a link into 2MP, 5MP~HP. This has shorter range and leads to less damage than DR~2MK, but the faster startup makes it harder for the opponent to stuff on reaction.
2MK
| Startup | Active | Recovery | Cancel | Damage | Guard | On Hit | On Block |
|---|---|---|---|---|---|---|---|
| 7 | 3 | 16 | - | 540 | L | +5 | +1 |
- Not cancelable on hit/block
- Applies 15% damage scaling to next hit when beginning a combo (100/85/75...)
Unlike most 2MKs, this button is not cancelable, meaning that Kimberly lacks the all-important low poke into Drive Rush confirms. It also makes the button more susceptible to Drive Impact, as it can't be canceled into a counter-DI.
Despite this, Kimberly's 2MK is still a quite useful attack. It has advantage on block, making it useful in pressure (especially after Drive Rush where it becomes +5). It can link into light normals on hit from close range, or important buttons like 5HP after Drive Rush. At certain ranges, it can even be used as a whiff punish that links directly into SA3, though this is risky to drop if you're not certain it will reach.
Compared to 2LK, it's much easier for the opponent to stuff this low poke on reaction to the Drive Rush screen freeze. However, if used from farther away, the forward momentum and can make this hard to do consistently. If you mix up the ranges from which you start a Drive Rush, you can make the opponent second-guess their reactions. Just remember to be careful about Drive Impact, as this is a fairly consistent reaction counter to DR~2MK.
2HK
| Startup | Active | Recovery | Cancel | Damage | Guard | On Hit | On Block |
|---|---|---|---|---|---|---|---|
| 8 | 3 | 24 | - | 810 | L | HKD +31 | -10 |
- Counter-hit/Punish Counter: HKD +43
- Has juggle potential; not a Hard Knockdown when juggled into
Kimberly's primary low threat in footsie range is her simple sweep. At 8f startup, it's one of the faster sweeps in the game. Several characters have difficulty punishing it, especially those who have a 2HK with 11f or more startup. Against characters with a 10f or faster 2HK, it becomes much harder to space this button safely on block (and sometimes impossible). If the opponent is constantly trying to walk back and forth but is too close for a 3MK slide, 2HK can force them to slow down their approach.
While 2HK can be juggled into, this is almost never optimal; Kimberly doesn't even get the benefit of a Hard Knockdown in this juggle, and there is always something else that does more damage.
Jumping Normals
j.LP
| Startup | Active | Recovery | Cancel | Damage | Guard | On Hit | On Block |
|---|---|---|---|---|---|---|---|
| 4 | 10 | 3 land | - | 270 | H | - | - |
Can be used as a quick panic jump back air-to-air, but otherwise has little utility.
j.MP
| Startup | Active | Recovery | Cancel | Damage | Guard | On Hit | On Block |
|---|---|---|---|---|---|---|---|
| 6 | 4 | 3 land | Sp SA2 | 450 | H | - | - |
- Puts airborne opponents into limited juggle state
- Shifts Kimberly's hurtbox upward during startup
Kimberly's j.MP is a rewarding air-to-air button that knocks down, and it can be canceled for extra damage and corner carry. It is useful in several air juggles, particularly after a 236HP/236PP launch or a j.236PP into 6HK. It has somewhat limited juggle potential, so it will not work after a 236KK~K Wall Splat; it's important to keep this in mind, since it looks to similar to Kimberly's other 6HK juggle routes.
Canceling into j.214K gives some extra damage and corner carry, and a direct cancel to Air SA2 can be used to secure a KO against opponents trying to jump out of Kimberly's pressure. However, it cannot be canceled into j.236P (and it wouldn't have enough juggle points to connect regardless). It also cannot be canceled when performed after a 6HK~Hop; in these cases, Kimberly must land before continuing the juggle.
j.HP
| Startup | Active | Recovery | Cancel | Damage | Guard | On Hit | On Block |
|---|---|---|---|---|---|---|---|
| 8 | 5 | 3 land | - | 630 | H | - | - |
- Spike knockdown vs. airborne opponents
This air normal has a bit less horizontal range than j.HK, but it hits downward a bit more, making it useful from closer ranges. If it catches the opponent airborne, they are knocked straight down to the ground, giving it some air-to-air utility. Any juggle into 6HK~Hop (such as corner wallsplat or either of her OD command throws) into a j.HP knockdown can be used to easily set up a safe jump.
j.LK
| Startup | Active | Recovery | Cancel | Damage | Guard | On Hit | On Block |
|---|---|---|---|---|---|---|---|
| 5 | 10 | 3 land | - | 270 | H | - | - |
- Can hit Cross-up
- Can be used as a fuzzy instant overhead (vs. Blanka, does not work after perfect safe jump timing)
A cross-up with fairly low hitstun and blockstun, this is mainly useful if you want to surprise the opponent with a quick throw reset after landing. It is difficult to get a decent combo afterwards unless it connects very deeply. The cross-up hitbox does not reach as far backwards as j.MK.
The instant overhead property is useful in a particular corner safe jump setup with Spraycan: 236KK~K, Land + 22HP, j.HP/j.HK, instant j.LK. If the opponent stand blocks the first air normal and then switches to crouch block, the j.LK will hit crouching since they are still locked into standing blockstun. The spraycan will then explode for a combo, allowing a juggle. If the opponent holds Parry before the first jump-in, it's possible to react with a Throw instead of jumping again. Also note that this setup doesn't work against Blanka; his head hurtbox is shifted too far back for j.LK to connect after a perfect safe jump.
j.MK
| Startup | Active | Recovery | Cancel | Damage | Guard | On Hit | On Block |
|---|---|---|---|---|---|---|---|
| 7 | 6 | 3 land | - | 540 | H | - | - |
- Can hit Cross-up
Kimberly's main cross-up button that leads into her BnB combo starters. It has a wider cross-up hitbox than j.MK, and can consistently lead to combo starters like 2MP; slower heavy normals are harder to connect without a very deep connect, however.
j.HK
| Startup | Active | Recovery | Cancel | Damage | Guard | On Hit | On Block |
|---|---|---|---|---|---|---|---|
| 9 | 6 | 3 land | - | 630 | H | - | - |
- Causes air reset after Wall Splat into 6HK~Hop
This air normal has great horizontal range and a good downward hitbox, making it her most commonly used jump-in. When combined with empty jumps and late j.214K, it can be annoying for the opponent to anti-air consistently. It really shines during air reset juggles like Close 236KK~K (wallsplat), 6HK~j.HK. This corner sequence gives Kimberly an immediate high/low/throw mixup that can potentially loop into itself depending on what hits.
Command Normals
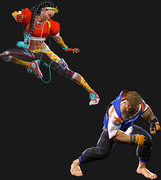
j.2MP
| Startup | Active | Recovery | Cancel | Damage | Guard | On Hit | On Block |
|---|---|---|---|---|---|---|---|
| 13 | until land | 8 land | - | 540 | LH | +4(+7) | -3(0) |
- Forward Jump only; Forced Knockdown state until landing
- Spike knockdown vs. airborne opponents
- Minimum frame advantage is vs. tall standing characters only (usually +5/-2 vs. stand)
Elbow Drop stops Kimberly's forward jump momentum and drops straight down, allowing her to precisely navigate over projectiles, bait short-range anti-airs, or fake a cross-up attempt. If predicted, the hurtbox is very large and easy to anti-air; additionally, the Forced Knockdown state gives a stronger juggle reward to an opponent that calls it out.
The attack always allows a link into light normals on hit, though 5LP won't combo naturally against tall standing characters. If the opponent stand blocks, it is slightly negative on block. It can be difficult to confirm the hit before inputting the follow-up, so there is some risk in attempting follow-up pressure after the elbow unless you see the opponent whiff an attack. If the opponent crouches, j.2MP gains better frame advantage, though this is very unlikely to occur as the natural response is to stand block against jumps.
3MK
| Startup | Active | Recovery | Cancel | Damage | Guard | On Hit | On Block |
|---|---|---|---|---|---|---|---|
| 11 | 10 | 16 | - | 450 | L | -3(+6) | -9(0) |
- Low Profile / Upper Body Projectile Invuln: 9-21f
- Maintains a limited juggle state if it connects during a free juggle
- No juggle potential on 3MK itself
- Applies 15% damage scaling to next hit when beginning a combo (100/85/75...)
3MK is one of Kimberly's most important anti-projectile tools. It does not low profile immediately, but at the right spacing it can be used on reaction to some fireballs. Fast projectiles may reach Kimberly too quickly for her to slide on reaction, and slow fireballs may create a "shield" that forces a trade after the slide connects; the best timing and spacing to use this attack will depend on the matchup.
Because 3MK will connect as a Punish Counter when used against projectiles, it becomes much easier to follow up with a combo. It can even link into 5HP at perfect spacing, though 5MP~HP is a more consistent option. It is still possible to combo after a regular hit, but requires much more precision. Note that this combo will do a little less damage than usual due to the unique damage scaling penalty applied to this attack.
Kimberly will never have advantage on block unless the opponent is in Burnout; it is quite difficult to space this move perfectly, as the opponent could just walk forward for a few frames to make the move unsafe even on hit. Kimberly players should be careful about overusing this move in neutral against opponents with good neutral spacing.
4HK
| Startup | Active | Recovery | Cancel | Damage | Guard | On Hit | On Block |
|---|---|---|---|---|---|---|---|
| 22 | 2 | 19 | - | 720 | H | +4 | -3 |
- Forces Crouch on standing opponents
- Spike knockdown vs. airborne opponents
- Applies 25% damage scaling to next hit when beginning a combo (100/75/65...)
4HK is a great overhead; it is safe on block while allowing a link to 2LP without spending Drive meter. This link only works from close range, but Kimberly has many ways to set it up, especially in the corner. If the opponent somehow gets hit standing, they will be forced into a crouching state, widening their hurtbox; if not for this, the follow-up link would probably not work properly.
While having a meterless overhead route is useful, the actual combo afterward is generally pretty weak without spending SA3. When used from Drive Rush, 4HK becomes +8, allowing a link to 5MP~HP. Note that the Drive Rush momentum is much weaker than on 5HK, so Kimberly can't add another 2MP as combo filler. There is no safe blockstring into 4HK when canceling a normal into Drive Rush, and any blockstring gap is easily countered with a delayed button.
Despite appearing to be airborne, Kimberly is grounded for the entire animation, so it cannot be used to crush lows and throws.
6HK
| Startup | Active | Recovery | Cancel | Damage | Guard | On Hit | On Block |
|---|---|---|---|---|---|---|---|
| 27 | 3 | 3+18(10) land | Jmp | 720 | LH | +1(+2) | -3 |
- Airborne 18-32f (Forced Knockdown state)
- Puts airborne opponents into limited juggle state
- 1f more hitstun vs. crouching opponents; 8f less landing recovery on block
- Cancel Hitconfirm Window: 20f (into Forward/Neutral/Back Step Up)
- Applies 20% damage scaling to next hit when beginning a combo (100/80/70...)
6HK is a slow but long ranged hopkick that can leap over mid-ranged low pokes, but does not jump high enough to avoid standard projectiles. When the attack connects with the opponent, Kimberly can choose to land, or cancel into 3 different aerial hop directions. If she simply lands, the move is safe on block but slightly disadvantageous. Landing after a Punish Counter allows a link to any light normal.
6HK has juggle potential, and is instrumental in Kimberly's corner juggles/resets after her j.236PP ground bounce or her Close 236KK~K wall splat. After juggling, she can land and finish with 236LP > SA3, or jump cancel into an air normal or j.214K.
6HK~8/9/7
| Startup | Active | Recovery | Cancel | Damage | Guard | On Hit | On Block |
|---|---|---|---|---|---|---|---|
| 20 | - | 30+3 | - | - | - | -10(-9) | -22 |
- Remains on the same side after hit/block
- Cannot perform any air specials or SA2 afterwards
| Startup | Active | Recovery | Cancel | Damage | Guard | On Hit | On Block |
|---|---|---|---|---|---|---|---|
| 20 | - | 30+3 | - | - | - | -10(-9) | -22 |
- Leads to cross-up j.LK/j.MK
- Can perform j.214K afterwards (useful in corner juggles)
- Can also perform Air SA2, but serves no practical purpose
| Startup | Active | Recovery | Cancel | Damage | Guard | On Hit | On Block |
|---|---|---|---|---|---|---|---|
| 16 | - | 30+3 | - | - | - | -10(-9) | -22 |
- Safest of the three hop follow-ups, but can still be punished by some moves
- Can perform j.236P on the way back (no practical purpose)
Kimberly can hop in 3 different directions after connecting 6HK. On block, both the neutral and forward hop lose to 5LP from most characters, resulting in a Forced Knockdown; on hit, Kimberly can come down with a j.MK to beat the opponent's normal. If the 6HK is a Counter-hit, Kimberly can combo into j.LK on the way down (or j.MK on Punish Counter). With good reactions, you can hitconfirm a Punish Counter 6HK into a neutral or forward Hop to continue the combo, depending on whether you want a side switch; this is most applicable when using 6HK to hop over low pokes.
Some characters have reversals that can beat both neutral and forward hops, so it's usually a good idea to start with no hop or a back hop to gauge the opponent's defensive reactions.
Target Combos
5LP~MP~HP~HK
| Startup | Active | Recovery | Cancel | Damage | Guard | On Hit | On Block |
|---|---|---|---|---|---|---|---|
| 6 | 3 | 18 | TC | 360(324) | LH | +1 | -6 |
- Cancel Hitconfirm Window: 29f (TC follow-up)
- () refers to scaled damage when starting combo with 5LP
| Startup | Active | Recovery | Cancel | Damage | Guard | On Hit | On Block |
|---|---|---|---|---|---|---|---|
| 12 | 2 | 25 | TC | 440(352) | LH | KD +47 | -10 |
- Puts opponent into limited juggle state
- Cancel Hitconfirm Window: 50-51f (TC follow-up)
- () refers to scaled damage when starting combo with 5LP~MP
| Startup | Active | Recovery | Cancel | Damage | Guard | On Hit | On Block |
|---|---|---|---|---|---|---|---|
| 26 | 3 | 24 | - | 520(364) | LH | KD +26 | -12 |
- 10f gap before final HK on block
- () refers to scaled damage when starting combo with 5LP~MP~HP
Kimberly's version of the classic "Bushin Chain", with multiple ending options after MP. This Target Combo gives Kimberly an easy, effective hitconfirm, especially in scramble situations, but the damage is fairly low compared to her other routes. If well-spaced, this can be difficult for some characters to punish; however, the MP whiffs at max 5LP range, so it can be tricky to find the exact spacing. A string like 2LP, 5LP, 5LP~MP will usually work, but starting with 5LP or 2LK pushes too far away.
In the corner, it is best to stop after launching the opponent with HP. This launch can be followed up with 214MK or 214KK for more damage than the HK ender. Even more useful, however, is using the knockdown advantage to place a Shuriken Bomb for an auto-timed corner mixup (see Shuriken Bomb Setups for more details). If Kimberly has no cans available, this same knockdown allows her to reload safely instead.
After launching with 236HP, Kimberly can do DR~5LP to juggle this TC for some good corner carry, though the damage is weaker than the standard meterless routes.
5LP~MP~2HP~HK/2HK
| Startup | Active | Recovery | Cancel | Damage | Guard | On Hit | On Block |
|---|---|---|---|---|---|---|---|
| 10 | 2 | 25 | TC | 580(464) | LH | +2 | -10 |
- Cancel Hitconfirm Window: 50-51f (TC follow-up)
- True blockstring even at max delay
- () refers to scaled damage when starting combo with 5LP~MP
| Startup | Active | Recovery | Cancel | Damage | Guard | On Hit | On Block |
|---|---|---|---|---|---|---|---|
| 15 | 3 | 24 | - | 750(525) | LH | KD +26(+45) | -12 |
- Sends opponent across the screen on grounded hit
- In Drive Rush juggles, maintains limited juggle state
- True blockstring even at max delay
- () refers to scaled damage when starting combo with 5LP~MP~2HP
| Startup | Active | Recovery | Cancel | Damage | Guard | On Hit | On Block |
|---|---|---|---|---|---|---|---|
| 15 | 3 | 23 | - | 750(525) | LH | KD +16 | -12 |
- Throws the opponent backwards for a sideswitch
- True blockstring even at max delay
- () refers to scaled damage when starting combo with 5LP~MP~2HP
After the Bushin Chain MP, hitting 2HP leads to a different branch of the Target Combo. 2HP itself leaves Kimberly at point blank range, allowing for a tricky throw reset on grounded hits. Against Drive Impact armor, this becomes a +4 Counter-hit that allows a follow-up link to 2LP. After the 2HP hit, Kimberly has 2 follow-up options.
Ending the chain with HK sends the opponent flying far across the screen, making this the best Bushin Chain route for corner carry. From this, Kimberly can do an immediate 236K~MK Slide that is safe on block; it's very likely the opponent will attempt a punish here if they haven't seen this setup, which could result in an unsafe attack. If the opponent knows and respects this setup, Kimberly can also surprise the opponent with a 236K~HK Overhead or a Run~Stop into Throw, though these are easily countered by a mashing opponent.
After a launch like 236HP, Kimberly can Drive Rush into 5LP~MP~2HP~HK to maintain the juggle state; she can juggle an immediate SA1, but the most useful ender is 236LP into Run~Stop for oki, or SA3 for damage. The oki must be manually timed, but this route gives great corner carry with even more damage than a j.236P juggle ender. And while it costs 1 Drive bar, Kimberly would need to use Drive Rush for oki after the j.236P anyway, so it's a strictly better midscreen route.
Ending with 2HK results in a sideswitch throw. This is a great option if Kimberly lands a light normal while she is cornered, as it immediately puts her into position to initiate corner pressure. Unlike the other Bushin Chain options, this move cannot connect in juggles, although it is a strike that can be blocked.
5MP~HP
| Startup | Active | Recovery | Cancel | Damage | Guard | On Hit | On Block |
|---|---|---|---|---|---|---|---|
| 10 | 3 | 26 | Sp SA | 360 | LH | KD +28 | -12 |
- Puts opponent into limited juggle state
- Cancel Hitconfirm Window: 38-40f
- Drive Rush cancel advantage: KD +47 oH / +7 oB
- Run~Stop cancel advantage: KD +34 oH / -6 oB; OD Version: KD +37 oH / -3
This Target Combo is one of Kimberly's most important combo routes. It links from many starters, such as 2MP, 5HK, CH 2LP/5LP/2MK, and lots of Drive Rush/Punish attacks.
Because it launches the opponent airborne, it cannot juggle into 236HP; 236PP must be used to achieve a similar launch. However, Kimberly usually has better uses for Drive meter, so most juggles should end in Close 236K~K for oki and corner carry, 236K~MK Slide for corner juggles or Spraycan setups, or 236MP for a good mix of damage and midscreen oki. Near the corner, 5MP~HP can juggle into Close 236KK~K for a wallsplat, which gives great damage and mixup options.
Canceling into Drive Rush provides safety and a mixup on block if you mess up the confirm, and on hit it leads to some interesting juggle routes. For example, 5MP~HP > DR~2HP can juggle directly to instant j.236PP for an expensive 5-bar sequence that leads to great corner carry and reset potential. More practically, Kimberly can do 5MP~HP > DR~5MP~HP > 236K~LK for only 3 bars, which can also end with 236LP > SA3 for amazing damage.
Throws
Forward Throw (LPLK)
| Startup | Active | Recovery | Cancel | Damage | Guard | On Hit | On Block |
|---|---|---|---|---|---|---|---|
| 5 | 3 | 23 | - | 1082 (1838) | T | KD +17 | - |
- Punish Counter: HKD +17
- Applies 20% damage scaling to next hit when beginning a juggle into Spraycan
- Total scaling looks like: Throw (100), Spraycan (80), Follow-up Juggle (60) ...
- Applies 20% immediate damage scaling when comboed into (e.g. after Crumple)
Kimberly's forward throw is excellent for starting her offense, especially in the corner where she can walk for a manually timed throw loop.
Midscreen, Kimberly has two main options to chase the opponent's Back Rise. DR~2MK is +5 on block and hits low, allowing Kimberly to link into 5HP if the opponent tries to walk, dash, or jump out of pressure. However, it does not carry her momentum very well, so she can't easily threaten another throw on block. While 2MK is not cancelable, this setup is safe against Drive Impact.
In contrast, DR~5MP hits meaty to become +3 while leaving Kimberly close enough for a tick throw on block. On hit, she can easily confirm into 5MP~HP into your combo of choice. While it doesn't hit low, it's great for conditioning the opponent not to hit buttons on wakeup, which lets Kimberly sneak in a throw after letting Drive Rush move a little closer.
Forward Throw can combo into a Shuriken Bomb explosion if timed perfectly with a setup. Just the threat of this option makes opponents far more likely to tech a throw or wake up with an invincible reversal after certain knockdowns.
Back Throw (4LPLK)
| Startup | Active | Recovery | Cancel | Damage | Guard | On Hit | On Block |
|---|---|---|---|---|---|---|---|
| 5 | 3 | 23 | - | 1082 (1839) | T | KD +8 | - |
- Side switch
- Punish Counter: HKD +8
- Applies 20% immediate damage scaling when comboed into (e.g. after Crumple)
After back throwing the opponent into the corner, Kimberly can still apply pressure with an immediate button like 5HP or 5MK. She cannot walk very far while still maintaining frame advantage, however, making it impossible to start a throw loop directly from this.
Midscreen, the opponent is too far away to initiate any offense.
Drive System
Drive Impact (HPHK)
| Startup | Active | Recovery | Cancel | Damage | Guard | On Hit | On Block |
|---|---|---|---|---|---|---|---|
| 26 | 2 | 35 | - | 720 | LH | KD +35 / Wall Splat KD +65 | -3 / Wall Splat HKD +72 |
- Armor (2-hit): 1-27f
- Applies 20% damage scaling to next hit when beginning a combo (including Wall Splat on block)
- Combos when canceled from Punish Counter 5HP/2HP/5MP (no corner wallsplat)
- Useful for draining opponent's Drive gauge, especially after Perfect Parry
See Drive Impact on the Gauges page for more details.
When canceled from a normal, these are the important blockstring gaps; a gap of N will trade with an N-frame startup attack; [] = Burnout
- 2HP: 6[2]
- 5HP, 5MP: 8[4]
- 5MK, 5MP~HP: 10[6]
- 2MP: 13[9]
- Note: A gap ≥ 6f can be thrown, and a gap ≥ 9f can be jumped out of by most characters
Against the following characters in Burnout:
- JP (22K), frame 3 counter
- Marisa (214K), frame 3 armor
- Zangief (5[HP]), frame 4 armor
It's important to use a blockstring that cannot be absorbed by their armor/counter moves. Ideally, the string should also not be a true combo, or it will cause a Lock and prevent Stun. Note that if the opponent mashes buttons on wakeup, the counter-hit will cause DI to Lock.
- 2HP > DI: 2f gap prevents opponent from absorbing the hit
- The short horizontal range makes it harder to land in some contexts (e.g. corner throw loop)
- DR~5MK > DI: 2f gap, costs an extra bar but doesn't require point blank oki
- In poor oki scenarios like Back Throw, meaty 5MK > DRC~5MK > DI can stun for 4 bars and has no risk of counter-hit Lock
Drive Reversal (6HPHK)
| Startup | Active | Recovery | Cancel | Damage | Guard | On Hit | On Block |
|---|---|---|---|---|---|---|---|
| 20 | 3 | 26(31) | - | 500 recoverable | LH | KD +23 | -8 |
- Full Invuln: 1-22f; Armor Break
- 5f extra recovery on hit
See Drive Reversal on the Gauges page for more details.
Drive Reversal is Kimberly's only move that does "standard" damage even before her SA3 install; after SA3, it does 555 recoverable damage.
Drive Parry (MPMK)
| Startup | Active | Recovery | Cancel | Damage | Guard | On Hit | On Block |
|---|---|---|---|---|---|---|---|
| 1 | 8 or until released | 29(1)(11) | - | - | - | - | - |
See Drive Parry on the Gauges page for more details.
- Perfect Parry:
- Applies a 50% damage scaling multiplier to any punish afterwards
- vs. strikes, has only 1f recovery and prevents the opponent from canceling their attack
- vs. projectiles, puts you into a fixed 11f recovery
Drive Rush (66)
| Startup | Active | Recovery | Cancel | Damage | Guard | On Hit | On Block |
|---|---|---|---|---|---|---|---|
| 9(11) | 45(46) | 24(23) | - | - | - | - | - |
- Applies 15% damage scaling multiplier to any follow-up hits when used mid-combo
- Only applies scaling once per combo; does not apply when an enhanced Drive Rush attack starts the combo
See Drive Rush on the Gauges page for more details. Frame data shown in (parentheses) refers to Parry Drive Rush.
- Distance:
- 0.817 (min, cancel into immediate Throw)
- 2.479 (min, earliest blocking/movement frame)
- 3.565 (max, final DR frame)
- See Strategy page for Blockstring Gaps and Combo Routes
Special Moves
Bushin Senpukyaku (214K)
| Startup | Active | Recovery | Cancel | Damage | Guard | On Hit | On Block |
|---|---|---|---|---|---|---|---|
| 6 | 6(1)6(1)6(8)3 | 6+17 land | - | 360,270,360 (990) | LH | KD +23 | -30 |
- Anti-Air Invuln: 6-11f; Lower Body Projectile Invuln: 7-42f
- Airborne 7-42f (Forced Knockdown state)
| Startup | Active | Recovery | Cancel | Damage | Guard | On Hit | On Block |
|---|---|---|---|---|---|---|---|
| 7 | 6(1)6(1)6(8)3 | 8+17 land | - | 360x3 (1080) | LH | KD +22 | -32 |
- Anti-Air Invuln: 7-12f; Lower Body Projectile Invuln: 8-45f
- Airborne 8-45f (Forced Knockdown state)
| Startup | Active | Recovery | Cancel | Damage | Guard | On Hit | On Block |
|---|---|---|---|---|---|---|---|
| 8 | 6(1)6(1)6(8)3 | 11+17 land | - | 450,360x2 (1170) | LH | KD +21 | -35 |
- Anti-Air Invuln: 8-13f; Lower Body Projectile Invuln: 9-49f
- Airborne 9-49f (Forced Knockdown state)
| Startup | Active | Recovery | Cancel | Damage | Guard | On Hit | On Block |
|---|---|---|---|---|---|---|---|
| 6 | 6(1)6(1)6(1)6(1)2 | 12+17 land | - | 450,180x3,360 (1350) | LH | KD +20 | -40 |
- Anti-Air Invuln: 1-11f; Lower Body Projectile Invuln: 7-47f
- Airborne 7-47f (Forced Knockdown state)
- Applies 30% damage scaling to next hit when beginning a combo (100/70/60...)
- Only relevant if Spraycan detonates after 1st grounded hit, or after high-connect 4 hit 214KK
Bushin Senpukyaku is a semi-reliable anti-air; meterless versions must be used slightly preemptively, making them weak against deep jumps or divekicks. The OD version does not have full startup invincibility, but is the most reliable against airborne attacks.
214HK can be used to confirm into a knockdown from a light normal starter, comboing consistently except from a max range 5LK. As a juggle ender, this move is consistent but unremarkable. The oki after a midscreen juggle is quite poor; j.236P is better for damage while 236K~MK is generally better for corner carry with midscreen oki. In the corner, Kimberly is usually better off using 236KK for a wallsplat juggle or a Shuriken Bomb mixup. There are some situations where a particular version of 214K can improve her corner damage, however:
- 236HP, 236KK~MK Slide, 214HK
- 5MP~HP > 236K~MK Slide, 214MK
- 5LP~MP~HP, 214MK
Aerial Bushin Senpukyaku (j.214K)
| Startup | Active | Recovery | Cancel | Damage | Guard | On Hit | On Block |
|---|---|---|---|---|---|---|---|
| 8 | 2(7)2(7)2 | 12 land | - | 225x2,450 (900) | LH | +4(+8) KD +38(42) |
-1(+4) |
- Cannot hit cross-up; Forced Knockdown state until landing
- Applies 20% damage scaling to next hit when beginning a combo (100/80/70...)
| Startup | Active | Recovery | Cancel | Damage | Guard | On Hit | On Block |
|---|---|---|---|---|---|---|---|
| 8 | 2(2)3(2)2(2)3(2)2 | 12 land | SA2 | 450,90x2,270,450 (1350) | LH | +5(+8) KD +46(51) |
-1(+4) |
- Can hit cross-up; cancelable into Air SA2; Forced Knockdown state until landing
- Applies 20% damage scaling to next hit when beginning a combo; counts as 2 hits for damage scaling when comboed into (applies to next hit)
Air 214K can only be performed out of a forward jump, or after a 6HK~Forward Hop on hit/block. It cancels from j.MP, making it a useful juggle ender after a 236HP launch, though it doesn't give great oki midscreen. The OD version is useful for canceling into Air SA2, or landing into a juggled SA3 in the corner; it also leads to a Shuriken Bomb setup.
Air Senpukyaku can be performed very low to the ground in two ways: with a Tiger Knee motion (214~9+K) or by delaying it until just before Kimberly lands. The Tiger Knee version whiffs on crouching opponents on both the regular and OD versions, though the OD one can hit cross-up, making it a useful mixup tool on wakeup outside the corner.
By delaying j.214K until the end of a jump, it can hit crouchers and can even connect 3 times on standing opponents for good damage or block pressure. This tactic becomes much stronger if you condition the opponent with frequent Empty Jump into Throw or 2LK, as they are more likely to input something on defense right as they expect you to land. The OD version has less pushback and better forward momentum, allowing for more consistent follow-ups on hit or block.
From a long range jump, Air Senpukyaku moves Kimberly forward surprisingly far; she can make the opponent second guess their anti-air options by mixing between long-range j.HK, empty jump, Elbow Drop, or late j.214K.
Vagabond Edge (236P)
| Startup | Active | Recovery | Cancel | Damage | Guard | On Hit | On Block |
|---|---|---|---|---|---|---|---|
| 10 | 2 | 22 | SA3 | 810 | LH | +3 (KD +30~36) | -6 |
- Strongest cancel into SA3; has juggle potential; () refers to KD Adv. when juggled into
- Becomes safe vs. opponents in Burnout
- Cancel Hitconfirm Window: 18f (Super)
- Applies 20% damage scaling to next hit when beginning a combo (100/80/70...)
| Startup | Active | Recovery | Cancel | Damage | Guard | On Hit | On Block |
|---|---|---|---|---|---|---|---|
| 17 | 2 | 28 | SA3 (1st) | 540x2 (1080) | LH | KD +37(+26) | -12 |
- 2nd hit does not come out on block; has juggle potential
- Cancel Hitconfirm Window: 14f (Super)
| Startup | Active | Recovery | Cancel | Damage | Guard | On Hit | On Block |
|---|---|---|---|---|---|---|---|
| 24 | 2 | 28 | SA3 (1st) / Jmp | 360,180 (540) | LH | KD +56 | -12 |
- 2nd hit does not come out on block; 2nd hit jump cancelable into Forward Jump
- Has no juggle potential, so won't combo from 5MP~HP Target Combo
- Cancel Hitconfirm Window: 14f (Super)
| Startup | Active | Recovery | Cancel | Damage | Guard | On Hit | On Block |
|---|---|---|---|---|---|---|---|
| 17 | 2 | 28 | SA2 SA3 (1st) / Jmp | 360,180 (540) | LH | KD +56 | -12 |
- 2nd hit does not come out on block; 2nd hit jump cancelable into Forward Jump
- Has juggle potential, combos from 5MP~HP Target Combo
- Cancel Hitconfirm Window: 14f (Super)
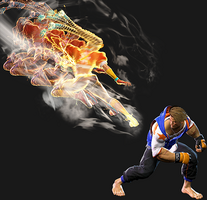
Vagabond Edge is a forward-advancing elbow attack with different variations depending on the button strength used. It is somewhat reminiscent of Guy/Zeku's Hozanto from previous games, though it can't duck underneath projectiles. All strengths of this move have some utility that sets it apart from the others.
236LP is the fastest and least unsafe version, comboing from lights; however, it can whiff at longer ranges, such as after a whiff punish 5LK. It leaves Kimberly at close range with frame advantage on hit, allowing for a quick strike/throw mixup. It is generally not possible to space this move safely on block, as most characters have a 5f light normal that will punish even at max range; against an opponent in Burnout, however, it becomes a safe cancel from any of Kimberly's pokes and an easy confirm into Super.
In juggles, 236LP is an ideal ender when SA3 is available for a cancel. Any juggle into the 236K~LK flip kick can be ended like this max damage. While other strengths are Super cancelable on the first hit, only the LP version does all its damage at once, making it much stronger. 236LP is fast enough to chain from crouching lights to break Drive Impact armor with a Counter-hit; in this scenario it becomes +5, allowing a link into more light normals.
236MP is generally the least used version; it gives solid damage and midscreen oki, but Kimberly is usually better off going for corner carry instead. It does have one important use in her stun combos vs. burned out opponents: after throwing a Spraycan, an immediate 2HP > 236MP does great damage while launching the opponent into the bomb explosion for an incredibly damaging follow-up juggle.
236HP is a meterless launcher that combos from 5HP or from Punish Counter medium normals. It can even be hitconfirmed with good reactions, although the combo will drop on the final 5HP cancel frame. On hit it can be jump canceled into j.236P (damage + corner oki) or j.MP > j.214K (corner carry, potential Super follow-ups). Even without the jump cancel, Kimberly can follow up with a 3MK slide into 214MK anywhere on screen, or a Drive Rush 5LP~MP~HP for a Spraycan setup. The primary weakness of HP Vagabond is that it doesn't connect from her 5MP~HP due to the juggle state.
236PP has the speed of the MP version with the launch of the HP version. It's a decent combo option from her mediums, including 5MP~HP, and can also be canceled into from Light normal punishes. However, the damage potential after the launch is not very high relative to the meter cost. It is usually more optimal to spend Drive meter on corner combos rather than on midscreen juggles. If Kimberly has the resources to spend on a midscreen kill combo, however, consider using the OD version of Vagabond Edge.
Sprint (236K)
| Startup | Active | Recovery | Cancel | Damage | Guard | On Hit | On Block |
|---|---|---|---|---|---|---|---|
| 8 | - | - | - | - | - | - | - |
- Movement speed: 11.23/frame during cancelable frames; shortest Run~Stop distance: 1.64
- Cancels into follow-ups after 8f minimum
| Startup | Active | Recovery | Cancel | Damage | Guard | On Hit | On Block |
|---|---|---|---|---|---|---|---|
| 8(7) | - | - | - | - | - | - | - |
- Movement speed: 13.47/frame during cancelable frames; shortest Run~Stop distance: 1.48
- Cancels into follow-ups after 8f minimum (6f minimum for OD Stop)
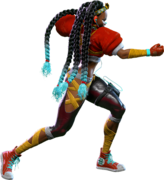
Kimberly quickly breaks into a running animation, with multiple follow-up options that come out by hitting a button or by colliding with the opponent. The entire Sprint animation puts Kimberly into a Counter-hit state, though all follow-ups except for Emergency Stop (236K~P) have Punish Counter recovery.
The P, LK, MK and HK follow-ups can all be input by holding the button rather than timing it; for example, holding 236[MK] will result in the fastest possible Run~Slide input. This is not always ideal, as from fullscreen you may need to sprint a longer distance to ensure the follow-up can connect.
Emergency Stop (236K~LP)
| Startup | Active | Recovery | Cancel | Damage | Guard | On Hit | On Block |
|---|---|---|---|---|---|---|---|
| 8+14 | - | - | - | - | - | - | - |
- Latest possible stop is 55f (41+14) if Kimberly runs fullscreen without colliding with opponent
| Startup | Active | Recovery | Cancel | Damage | Guard | On Hit | On Block |
|---|---|---|---|---|---|---|---|
| 6+13 | - | - | - | - | - | - | - |
- Latest possible stop is 53f (41+12) if Kimberly runs fullscreen without colliding with opponent
The ability to quickly stop makes Kimberly's offense much harder to counter; the threat of a Stop + Throw means that the opponent can't simply Drive Impact or Parry to avoid all the follow-ups on reaction. Kimberly is usually at a frame disadvantage after canceling a normal into 236K~P, but the OD version is plus when canceled from 5HP (and can even lead to a follow-up combo). The opponent will score a Counter-hit if they punish the Sprint or the Stop animation, so it should be used sparingly and unpredictably.
After anti-air 2HP, canceling into Sprint allows Kimberly to stop directly under the opponent, creating an ambiguous left/right mixup or escaping the corner. The threat of this mixup will make many opponents hesitant to jump in neutral, allowing Kimberly players to focus on the ground game.
Torso Cleaver (236K~LK)
| Startup | Active | Recovery | Cancel | Damage | Guard | On Hit | On Block |
|---|---|---|---|---|---|---|---|
| 8+21 | 7 | 16 | SA3 | 900 | LH | KD +41 (+53~56) | +1 |
- Active frames 1-2 only hit grounded; active frames 3-7 only hit airborne
- () refers to KD Adv. when juggled into
- Cancel Hitconfirm Window: 27f (Super)
| Startup | Active | Recovery | Cancel | Damage | Guard | On Hit | On Block |
|---|---|---|---|---|---|---|---|
| 8+17 | 7 | 16 | SA2 SA3 | 540x2 | LH | KD +43 (+56~60) | +3 |
- 2 hits; active frames 1-2 only hit grounded; active frames 3-7 only hit airborne
- () refers to KD Adv. when juggled into
- Cancel Hitconfirm Window: 34f (Super)
Kimberly performs a running flip kick that is plus on block, allowing a frame trap into a light normal against grounded opponent. The startup is quite slow, so the opponent can easily interrupt if she tries to abuse this is a blockstring. It may be possible to condition an opponent not to hit buttons, but this would involve using risky options like a preemptive Run~Slide.
It is possible for the upwards part of the kick to anti-air, though this can't really be done reliably on demand. If it does connect on an airborne opponent, it can juggle directly into j.236PP which can begin one of Kimberly's most powerful juggle sequences. While 236K~LK cannot combo directly from 5MP~HP, it is great after any OTG bounce or a Spraycan explosion. After a wallsplat, Kimberly can get good damage with 2HP > 236K~LK into any juggle ender. She can also set up Spraycan oki after a juggle in the corner.
Cancel blockstring gaps; [] = OD
- 2HP: 9[5]
- 5HP: 11[7]
- 5MK / 5MP~HP: 13[9]
Shadow Slide (236K~MK)
| Startup | Active | Recovery | Cancel | Damage | Guard | On Hit | On Block |
|---|---|---|---|---|---|---|---|
| 8+10 | 12 | 19 | SA3 | 720 | L | KD +39(+50) | -12(-1) |
- Low Profile / Upper Body Projectile Invuln: 6-21f
- () refers to KD Adv. when juggled into
- Cancel Hitconfirm Window: 16f (Super)
- Applies 20% damage scaling to next hit when beginning a combo (100/80/70...)
| Startup | Active | Recovery | Cancel | Damage | Guard | On Hit | On Block |
|---|---|---|---|---|---|---|---|
| 8+8 | 8,4 | 19 | SA2 SA3 (1st) | 700,200 (900) | L,L | KD +47(+50) | -10(-7) |
- Low Profile / Upper Body Projectile Invuln: 4-19f
- () refers to KD Adv. when juggled into
- 1st hit Forces Stand vs. grounded opponents (allows SA2 to combo consistently)
- Cancel Hitconfirm Window: 16f (Super, 1st hit only)
- Applies 20% damage scaling to next hit when beginning a combo (100/80/70...)
Shadow Slide is a fast, low-hitting attack that knocks down on hit. It can be used to counter most projectiles, though it may require inputting a fullscreen preemptive Sprint and then reacting to the fireball animation with MK. This move can also be used as a random gimmick to open up a standing opponent, but it's very unsafe unless it connects from max range. This is more likely to succeed if you first condition the opponent to expect the safe 236K~HK Overhead ender.
236K~MK makes a great juggle ender from Kimberly's 5MP~HP Target Combo. It carries the opponent far toward the corner, and can be followed up with a 214MK juggle if she reaches the edge of the screen. It can also set up Shuriken Bomb oki from a very practical combo starter. When juggled from 5MP~HP, delaying the slide until the latest possible frame sets up a safe jump that works anywhere on the screen; use j.HK against a back rise or j.MK against a midscreen neutral rise.
While the Shadow Slide normally only combos from mediums and heavies, it can also connect after a light Punish Counter. After a 5LP~MP~2HP~HK Target Combo, Kimberly can do an immediate 236K~MK that hits meaty and is safe on block. It's a bit gimmicky, but it can condition the opponent to block low after this knockdown and open up some other mixup opportunities. The opponent may also input something unsafe, expecting to have a punish after blocking the slide.
The OD version is even better at avoiding projectiles, and has better juggle properties; for example, after a 236HP launch, juggling into 236KK~MK allows a follow-up 214HK for extra damage. While only the first hit is Super cancelable, it can juggle into SA3 after both hits near the corner.
Neck Hunter (236K~HK)
| Startup | Active | Recovery | Cancel | Damage | Guard | On Hit | On Block |
|---|---|---|---|---|---|---|---|
| 8+19 | 5 | 19 | SA3 | 900 | H | KD +23 | -3 |
- SA3 cancel whiffs unless opponent is in a high juggle state
| Startup | Active | Recovery | Cancel | Damage | Guard | On Hit | On Block |
|---|---|---|---|---|---|---|---|
| 8+15 | 2,3 | 19 | SA2 SA3 (2nd) | 810,270 (1080) | H | KD +25(+44) | -1 |
- Puts airborne opponents into a short OTG juggle state
- Only 2nd hit is Super cancelable (cancel whiffs on grounded opponents)
236K~HK is a running overhead that is safe on block, though it leaves Kimberly at a disadvantage. Conditioning the opponent to stand block enables Kimberly to mix up with a gimmicky Slide ender, or to input Emergency Stop into a low/throw reset. If the opponent attempts to counter this overhead with Drive Impact, it can be canceled to SA3 on reaction; this is the only way the Super will connect properly on a grounded opponent.
Juggling into 236KK~HK does allow a quick OTG juggle (including SA3), though this mostly a waste of meter compared to Kimberly's other combo routes. It is technically possible for the meterless overhead to juggle into Super as well, but it requires a very high juggle state and serves no real purpose.
While Kimberly appears to be airborne during the overhead animation, she is fully grounded and susceptible to counter-hit punishes. It is generally possible to interrupt blockstrings ending with this move, though against a burned out opponent Kimberly can abuse the overhead in blockstrings (especially the OD version) for continuous chip damage sequences.
Cancel blockstring gaps; [] = OD
- 2HP: 7[3]
- 5HP: 9[5]
- 5MK / 5MP~HP: 11[7]
Arc Step (236K proximity)
| Startup | Active | Recovery | Cancel | Damage | Guard | On Hit | On Block |
|---|---|---|---|---|---|---|---|
| 8+15 | 2(6)2 | 25(26+4 land) | - | 270,180 (450) | LH | +3 | -6 |
- Airborne (hit/block): 24-58f (Forced Knockdown state)
| Startup | Active | Recovery | Cancel | Damage | Guard | On Hit | On Block |
|---|---|---|---|---|---|---|---|
| 8+13 | 2(6)2 | 25(26+4 land) | - | 180,90 (270) | LH | +3 | -6 |
- Airborne (hit/block): 22-56f (Forced Knockdown state)
Arc Step activates when Kimberly's Sprint gets close to a grounded opponent. The long pushback makes it safe on block in almost all cases, though the slow startup makes this move interruptible on block when canceled from anything besides 5HP. If the opponent is airborne before Arc Step activates, she will continue to run past them, but if they jump after the activation she can whiff this attack, leaving Kimberly vulnerable to a punish.
On hit or block, Kimberly bounces off the opponent's head and has the option to perform two follow-ups: a Divekick or a Command Throw. In the corner, the opponent must jump or backdash to beat the command throw, or block the divekick. A midscreen opponent can jump backwards, beating both options, while losing ground in the process. An invincible reversal can also beat both, but this can be punished by simply not inputting a follow-up.
If the opponent neutral jumps or jumps back near the corner in anticipation of the Throw follow-up, Kimberly can input no follow-up, then land and punish the jump with a Dash + 214K anti-air. Depending on the opponent's air options, she may also be able to react with DR~2HP to start a juggle; this is especially powerful against a cornered opponent without great downward-reaching air attacks.
Blockstring Gaps when canceled into; [] = OD
- 2HP: 3[1]
- 5HP: 5[3]
- 5MK / 5MP~HP: 7[5]
Bushin Hojin Kick (236K proximity~K)
| Startup | Active | Recovery | Cancel | Damage | Guard | On Hit | On Block |
|---|---|---|---|---|---|---|---|
| 8+15+13 | 6 | 20 land | - | 630 | LH | KD +29(+31) | -8 |
- KD Adv. is slightly worse when juggled into
- Forced Knockdown state until landing
| Startup | Active | Recovery | Cancel | Damage | Guard | On Hit | On Block |
|---|---|---|---|---|---|---|---|
| 8+13+13 | 6 | 20 land | SA2 | 420,210 (630) | LH | KD +43 (Wall Splat +86) | -8 |
- Causes Wall Splat near corner (limited juggle follow-up)
- Cancel into SA2 only works near corner
- Forced Knockdown state until landing
The Divekick after Arc Step is a reliable combo ender; the meterless version gives good midscreen oki, but is a little weaker than her other combo routes. It is fairly unsafe on block, making it a risky gimmick to attempt a divekick/throw mixup after Arc Step connects. It is also fairly easy to interrupt the divekick with a normal, which allows Kimberly to be juggled in a Forced KD state.
Close 236KK~K is one of Kimberly's best uses of Drive meter. In the corner, it gives her a high wallsplat. While she doesn't have a ton of remaining juggle potential after this hit, she can juggle into 6HK~Hop, which gives a j.HK air reset or a j.214K knockdown ender. Alternatively, she can juggle 236K~LK, which leads to a Spraycan setup or a damaging 236LP > SA3 finisher. Kimberly can very quickly kill an opponent by looping into OD Arc Step wallsplat mixups in the corner, giving her some of the scariest offensive potential in the game.
Bushin Izuna Otoshi (236K proximity~P)
| Startup | Active | Recovery | Cancel | Damage | Guard | On Hit | On Block |
|---|---|---|---|---|---|---|---|
| 8+15+13 | 6 | 40 land | - | 1440 | T | HKD +31 | - |
- Forced Knockdown state until landing
| Startup | Active | Recovery | Cancel | Damage | Guard | On Hit | On Block |
|---|---|---|---|---|---|---|---|
| 8+13+13 | 6 | 40 land | - | 900 | T | HKD +94 (OTG) | - |
- Causes OTG bounce on hit
- Forced Knockdown state until landing
- Applies 20% damage scaling to next hit when beginning a combo (100/80/70...)
Close 236K~P is a command grab that hits both standing and crouching opponents, though it whiffs if they become airborne. Kimberly can use this as a cheeky reset after comboing into Arc Step, which is quite a large boost to her meterless damage; however, the opponent can just hold up after being hit, since the Divekick would hit them regardless.
The OD version creates an OTG juggle state similar to j.236PP, which can set up the 6HK~j.HK air resets just like the Divekick wallsplat. This can also lead to some incredible juggles with DR~2HP > 236K~LK, a route that Kimberly normally has trouble achieving without a Spraycan setup.
Hidden Variable (214P)
| Startup | Active | Recovery | Cancel | Damage | Guard | On Hit | On Block |
|---|---|---|---|---|---|---|---|
| 19 | 8 | 17(7) | - | - | - | - | - |
- Full Invuln: 19-26f (when off-screen)
- After reappearing, recovery is cancelable into any attack after 5f (otherwise 17f recovery)
- Carries forward momentum well, allowing Kimberly to stay close to the opponent after the follow-up hit
| Startup | Active | Recovery | Cancel | Damage | Guard | On Hit | On Block |
|---|---|---|---|---|---|---|---|
| 19 | 8 | 16(7)+3 land | - | - | - | - | - |
- Full Invuln: 19-26f (when off-screen); Airborne 22-42f (Forced Knockdown state)
- After reappearing, recovery is cancelable into any air normal, special, or Super after 5f (otherwise 14+3f recovery)
- Air attacks have the same landing properties as regular air normals
- If no air attack, Kimberly can block on the final 2 landing recovery frames
Kimberly disappears behind a cloud of colorful paint, then reappears near the opponent where she can quickly attack. The color differs between the meterless and OD versions, making it easier to differentiate between them. This is important because the meterless one stays grounded while the OD version comes down from the air. Teleport can put a huge burden on the opponent's mental stack, as they are likely already trying to focus on other visual cues like the Drive Rush screen freeze or the Drive Impact effect. 214PP can be especially dangerous, as Kimberly can come down with an air attack, or land into a low/throw mixup.
Both teleports can be used to navigate through projectiles; the OD version is particularly good at this, as it's very unlikely to get hit by a lingering fireball hitbox after reappearing. Many characters have options to counter both Teleport versions on reaction if they are used predictably, and OD Teleport can be punished especially hard with its Forced Knockdown state. While a little risky, it is possible to cancel a poke into 214P after it is absorbed by Drive Impact, allowing for a punish without spending your own Drive meter.
214P is used after Punish Counter 5HP to put Kimberly point blank after the stagger; from this, she can link 5HK or another 5HP. Using 214PP in this situation allows Kimberly to add a j.HK to her punish route, though it's not a huge damage increase for its meter cost.
Cancel blockstring data for grounded Teleports:
- 2HP: -23 [17f gap into 2LP]
- 5HP: -25 [19f gap into 2LP]
- 5MK / 5MP~HP: -27 [21f gap into 2LP]
Shuriken Bomb (22P)
| Startup | Active | Recovery | Cancel | Damage | Guard | On Hit | On Block |
|---|---|---|---|---|---|---|---|
| 18(103) | [10] | 26 | - | 450 | LH | KD +88 | - |
- Button strength determines the placement of the spray cans (LP close, MP mid, HP far)
- Spray can explodes after 103f (including 19f startup)
- Explosion puts opponent into a free juggle state
- Limited juggle state if juggled into, like after Throw + OTG explosion
- Applies 20% damage scaling to next hit when beginning a combo; counts as 2 hits for damage scaling when comboed into (applies to next hit)
| Startup | Active | Recovery | Cancel | Damage | Guard | On Hit | On Block |
|---|---|---|---|---|---|---|---|
| 19(103) | [10 each] | 26 | - | 450x2 (900) | LH | KD +90-93 | - |
- Press 2 buttons to throw out 2 cans simultaneously; does not consume Drive Gauge
- Spraycans will be placed according to which button strengths are used
- LP Spraycan detonates 2f before MP Spraycan, and 6f before HP Spraycan
- Applies 20% damage scaling to next hit when beginning a combo; counts as 2 hits for damage scaling when comboed into (applies to next hit)
Kimberly starts each round with 2 spraycans in stock; these do not automatically replenish between rounds, so the stock must be managed carefully with Genius at Play.
Landing certain knockdowns in the corner into HP Spraycan allows for some devastatingly powerful mixups. This often requires sacrificing some optimal damage, but it's more than worth it for the potential reward. Timed properly, Kimberly can juggle the bomb explosion after a Throw, leading to huge damage; as a result, it's very common for opponents to tech a throw or wake up with an invincible reversal in this scenario. In some cases, it is even possible for Kimberly to get hit by a reversal, then wake up and punish the opponent who just hit them. Even if Kimberly's bomb mixup is defended properly, the spraycan detonation forces the opponent into more blockstun, giving her another chance at landing a hit.
If the opponent plays passively, throwing a can from long range can allow Kimberly a way in, or force the opponent to take action to avoid it. This is generally a less rewarding way of using the spraycans, but it can be great to close out a round or to prevent a character from throwing a projectile for a couple seconds. This is one situation where the double spraycan really comes in handy, as it does a much better job of limiting the opponent's movement options.
Genius at Play (22P refill)
| Startup | Active | Recovery | Cancel | Damage | Guard | On Hit | On Block |
|---|---|---|---|---|---|---|---|
| 42 | - | 2 | - | - | - | - | - |
- Refills 1 spray can
| Startup | Active | Recovery | Cancel | Damage | Guard | On Hit | On Block |
|---|---|---|---|---|---|---|---|
| 42 | - | 2 | - | - | - | - | - |
- Refills 2 spray cans
Performing the input for Shuriken Bomb will result in a reload animation if Kimberly is out of spraycans; if Kimberly has any cans stocked, she cannot reload until they are used up, and she cannot start a reload while a spraycan is currently active on the ground.
The total animation lasts the same amount of time as throwing the bomb, so all of Kimberly's spraycan setups also function as reload setups. She can also run away and try to reload from fullscreen; opponents with projectiles will likely make it difficult to get a free reload, however. After stunning a burned out opponent, the long dizzy animation lets Kimberly reload before throwing another spraycan, setting up an extremely powerful stun combo.
The listed Startup time is how long it takes until Kimberly receives the additional spraycan, and the Recovery is the remaining vulnerable period. This means that it's easier to actually reload with 22PP, as it's less likely to get interrupted early. If Kimberly has meter to spare near the end of a round against a low health opponent, it may be worthwhile to spend meter on the OD Reload and use a spraycans as a pseudo-zoning tool.
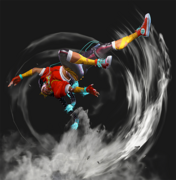
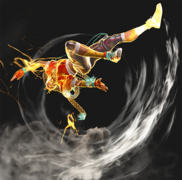
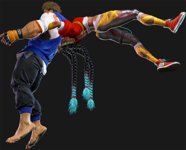
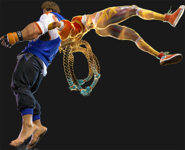
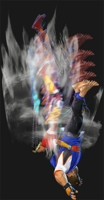
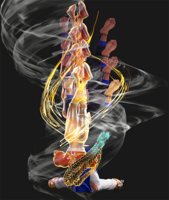
Nue Twister (j.236P)
| Startup | Active | Recovery | Cancel | Damage | Guard | On Hit | On Block |
|---|---|---|---|---|---|---|---|
| 5 | 3 | 20 land | - | 1440 | T | HKD +22 | - |
- Forced Knockdown state until landing; the first 15 landing recovery frames put Kimberly in a crouching state
- Range: 1.0; can be juggled into
| Startup | Active | Recovery | Cancel | Damage | Guard | On Hit | On Block |
|---|---|---|---|---|---|---|---|
| 5 | 3 | 20 land | - | 900 | T | HKD +98 OTG | - |
- Forced Knockdown state until landing; the first 15 landing recovery frames put Kimberly in a crouching state
- Range: 1.0; less juggle potential than meterless version
- Puts opponent into limited juggle OTG bounce
- Applies 20% damage scaling to next hit when beginning a combo (100/80/70...)
Nue Twister is an air grab that can be performed from any jump direction, only hitting airborne opponents. Unlike j.214K, this special does not work after 6HK~Hop or when canceled from j.MP after a launch. It can be performed very low to the ground with a "Tiger Knee" (2369P) motion, which is often required for juggles. With some quick reactions, Nue Twister can be used as a reaction air-to-air, but this can be prohibitively difficult against characters with strong air movement options.
Meterless j.236P is often Kimberly's optimal meterless ender in the corner. Midscreen, it recovers too far away to take real advantage of the Hard Knockdown without spending meter on Drive Rush. For this reason, it's usually a better idea to optimize for corner carry rather than damage on midscreen combos.
The OD version j.236PP is much harder to land due its much lower juggle potential. It can juggle after anti-air 236K~LK, a Shuriken Bomb explosion, or 5MP~HP > DR~2HP, but all of these are very situational or expensive. If it does land, however, the OTG bounce allows Kimberly to juggle with DR~2HP > 236K~LK, and with enough Drive meter she can even start looping this sequence, ending with 236LP > SA3 for massive damage.
Super Arts
Level 1 Super (236236K)
| Startup | Active | Recovery | Cancel | Damage | Guard | On Hit | On Block |
|---|---|---|---|---|---|---|---|
| 12 | 15 | 40 | - | 1800 | LH | KD +22 | -25 |
- Full Invuln: 1f; Strike/Throw Invuln: 2-14f; Armor Break
- Drive Gauge Depletion: 0.5 bars (hit) / 0.25 bars (block)
- 30% minimum damage scaling
| Startup | Active | Recovery | Cancel | Damage | Guard | On Hit | On Block |
|---|---|---|---|---|---|---|---|
| 12 | 15 | 40 | - | 2000 | LH | KD +38 | -25 |
- Full Invuln: 1f; Strike/Throw Invuln: 2-14f; Armor Break
- Consumes 1 spray can if available
- Drive Gauge Depletion: 0.5 bars (hit) / 0.25 bars (block)
- 30% minimum damage scaling
Without any true invincible specials, this is Kimberly's most commonly available reversal option; unfortunately it is quite slow, making it weak to meaty light pressure. It does not work as a projectile punish, and is too slow to punish most ranged moves like sweeps. It does have decent juggle potential, allowing you to tack on extra damage after moves like 236HP, corner 5MP~HP > Arc Step, or Wallsplat > 236K~LK. If the opponent is very nearly in Burnout, using a quick combo into this Super is a good way to drain their final but of Drive gauge.
If Kimberly is approaching Burnout, it's a good idea to keep at least one bar of Super meter stocked just in case. This will allow her to counter a corner Drive Impact, preventing a stun. This is difficult to do on reaction, but it's worth buffering the Super motion any time you think the opponent might try to set this up.
With a Spraycan stocked, Kimberly will use it at the end of the Super animation in exchange for 200 extra damage and 16f better KD Advantage. This gives much stronger oki, but because spraycans are so valuable to Kimberly's offense, it may not be worth wasting one on this Super.
Level 2 Super (214214P)
| Startup | Active | Recovery | Cancel | Damage | Guard | On Hit | On Block |
|---|---|---|---|---|---|---|---|
| 13 | until land | 39 land | - | 2600 | LH | KD +22 | -26(-20) |
- Full Invuln: 1f (until freeze); Armor Break
- Airborne 2-20f (Forced Knockdown state)
- Drive Gauge Depletion: 1 bar (hit) / 0.5 bars (block)
- 40% minimum damage scaling
| Startup | Active | Recovery | Cancel | Damage | Guard | On Hit | On Block |
|---|---|---|---|---|---|---|---|
| 13 | until land | 39 land | - | 2600 | LH | KD +22 | -26(-20) |
- Full Invuln: 1f (until freeze); Armor Break
- Airborne 1f~land (Forced Knockdown state); can only be used from Forward Jump
- Drive Gauge Depletion: 1 bar (hit) / 0.5 bars (block)
- 40% minimum damage scaling
Kimberly's SA2 jumps high in the air before diving about half screen into a cinematic hit. While this sounds like it would be a good counter to projectiles, in practice it almost always just lands onto the fireball (though it can work at certain ranges against fast fireballs). The startup is too slow to be an effective whiff punish against most attacks, and the poor invincibility makes it a weak reversal. If the opponent attempts to chip you out in Burnout with a close range Super (especially a projectile Super), a whiffed SA2 may allow Kimberly to escape and punish after landing.
The grounded version of this move has a tendency to whiff when canceled from several OD special moves; in any case, it's almost never the optimal juggle ender, so this isn't a big loss.
Air SA2 is more useful overall due to its ability to cancel from j.214KK to tack on extra damage and drain some Drive meter. In the corner, Kimberly is better off landing and juggling SA3 instead if she has it available. The Air Super can potentially be used if you react to a fireball when jumping forward from long range, though it's still not the most practical counter.
Kimberly can dash after the knockdown to become +4 at point blank, making this the best super for follow-up oki. If you have the momentum and your opponent is getting low on Drive meter, this can make it worthwhile instead of saving meter for SA3.
The first hit only does 300 damage, making it very weak in the event of a trade. If a spraycan is active on-screen, the Super freeze will cause it to disappear (may be an unintentional bug).
Level 3 Super (236236P)
| Startup | Active | Recovery | Cancel | Damage | Guard | On Hit | On Block |
|---|---|---|---|---|---|---|---|
| 8 | 6 | 51 | - | 4000 | LH | HKD +16 | -35 |
- Full Invuln: 1-13f; Armor Break
- Drive Gauge Depletion: 1.5 bars (hit) / 0.75 bars (block)
- Cinematic time regenerates ~1.9 Drive bars for Kimberly
- 50% minimum damage scaling; applies 10% immediate damage scaling when canceled from special moves
| Startup | Active | Recovery | Cancel | Damage | Guard | On Hit | On Block |
|---|---|---|---|---|---|---|---|
| 8 | 6 | 51 | - | 4500 | LH | HKD +16 | -35 |
- Full Invuln: 1-13f; Armor Break
- Available at 25% HP or below
- Drive Gauge Depletion: 2 bars (hit) / 1 bar (block)
- Cinematic time regenerates ~2.1 Drive bars for Kimberly
- 50% minimum damage scaling; applies 10% immediate damage scaling when canceled from special moves
SA3 is Kimberly's most useful Super by far. It cancels from useful moves like 236LP or 236K~MK Slide, and works in many juggles (especially near the corner). In some matchups, it can work as a fireball counter with good reactions due to its big forward step during the startup animation. And while it's a much more expensive reversal option than SA1, the faster startup makes it much more likely to work against the opponent's offensive pressure.
Immediately upon activating the Super, Kimberly enters an install state that boosts her damage and walk speed by 11% until the end of the match. As a result, it can be a good idea to use this in early rounds rather than saving it for the end of the final round, so that Kimberly can take advantage of the buffs. This damage buff puts the damage of most of Kimberly's attacks on par with the rest of the cast, as most moves are weaker by default.
Importantly, the music that plays from Kimberly's cassette tape is much better than her default theme, and it takes priority over any music that was playing beforehand. If both Kimberly players in a mirror match activate their SA3, the music gains a vocal track.
Taunts
Neutral Taunt (5PPPKKK)
| Startup | Active | Recovery | Cancel | Damage | Guard | On Hit | On Block |
|---|---|---|---|---|---|---|---|
| 200 (total) | - | - | - | - | - | - | - |
- Standard neutral taunt
- During SA3 Super install, this taunt can be input with 2PPPKKK instead
| Startup | Active | Recovery | Cancel | Damage | Guard | On Hit | On Block |
|---|---|---|---|---|---|---|---|
| 545 (total) | - | - | - | - | - | - | - |
- Neutral taunt during SA3 Super install (music activated)
Forward Taunt (6PPPKKK)
| Startup | Active | Recovery | Cancel | Damage | Guard | On Hit | On Block |
|---|---|---|---|---|---|---|---|
| 290 (total) | - | - | - | - | - | - | - |
Back Taunt (4PPPKKK)
| Startup | Active | Recovery | Cancel | Damage | Guard | On Hit | On Block |
|---|---|---|---|---|---|---|---|
| 328 (total) | - | - | - | - | - | - | - |

