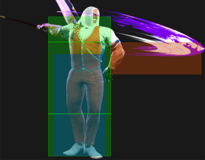
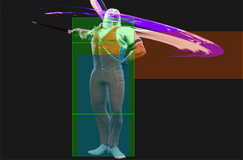
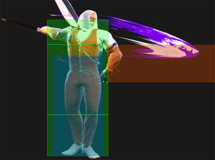
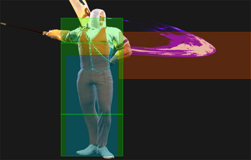
| Early game information
This game is relatively new, and its pages are still being written. Some information may be mildly inaccurate or missing altogether. You can join the SF6 Resource Hub for more info on editing and other ways you can potentially help with this resource. |
Introduction
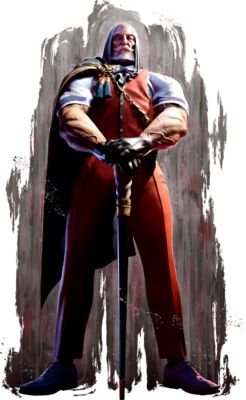
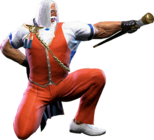
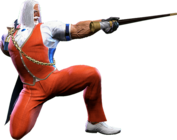
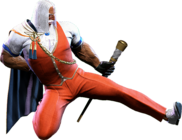
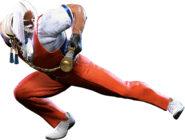
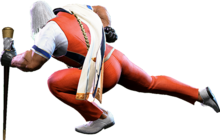
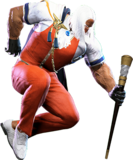
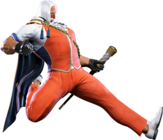
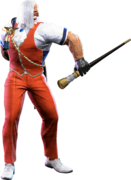
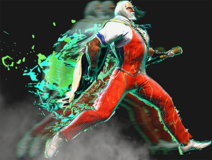
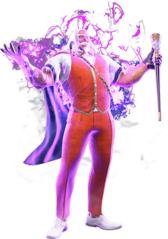
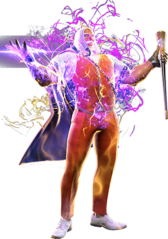
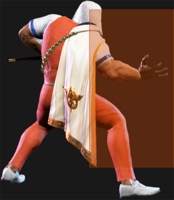
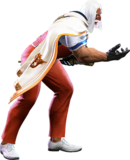
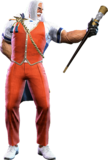
Head of an international NGO responsible for many successful investment projects, and the man behind Nayshall's present prosperity. Has a beloved cat named Cybele.
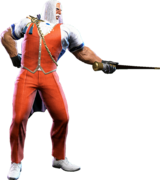
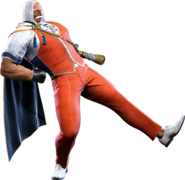
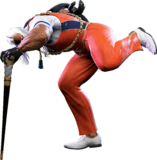
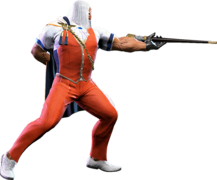
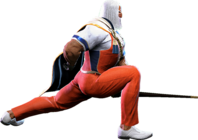
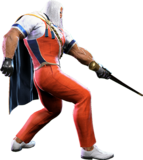
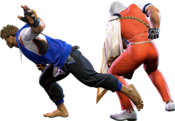
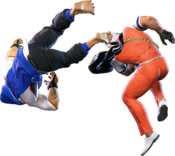
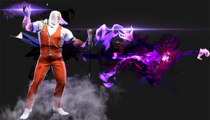
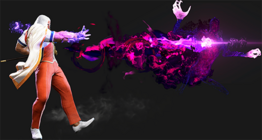
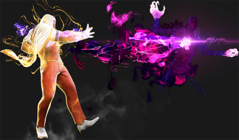
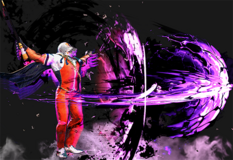
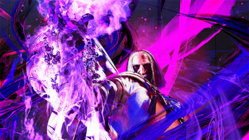
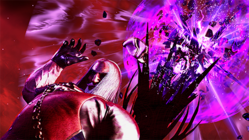
The elegant ex-Shadaloo financier saunters onto the battlefield as a slow but powerful zoner. Unlike other zoners who focus on firing off quick projectiles or pestering opponents with fast and long-ranged normals, JP chooses instead to bury his opposition in a barrage of psychic power. JP wants his opponents sitting still, for it is when they feel there is no hope of escape that he can set them up for a devious mixup situation.
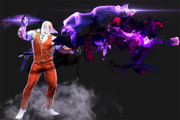
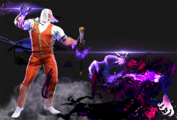
JP's central special moves are Torbalan and Triglav. The former is a slow but large projectile that can be fired along three different lanes of movement, and the latter is a nearly instant spike attack that can come out at nearly any part of the screen. While Torbalan is slow, it has a ton of uses and can even mix up your opponents as one variant is a low and another is an overhead. Triglav meanwhile acts as both a detterent and anti-air, catching people trying to move towards JP and sniping out poor air approaches. With these two special moves, JP forces his opponents back towards the corner and continues to bury them in full-screen pressure. Once an opponent has eaten a combo or chooses to sit still for long enough, JP can deploy his signature Departure, a portal that will either shoot out a tracking spike or act as a teleport point for JP to warp to at any time.
While JP's zoning is strong, any good opponent will eventually get past it. Once they are within striking distance, JP likes to use his midrange pokes to bat opponents backwards. 5HP is a great callout tool that can be special canceled, while his 2HP is a solid anti-air and his 2HK is a fantastic poke. Any good hit JP gets can be instantly canceled into a Drive Rush combo that sends your opponent to the opposite end of the screen and allows him to resume his zoning. Opponents who make overly-deliberate plays can be hit with JP's counter Amnesia, which deals no damage but leaves opponents stuck to a timed bomb.
JP has an extremely large mixup toolbox. His throw game is very strong and has high reward, but he can also perform powerful high/low mixups if he has Depature set up above you. His level 2 super is an incredible mixup tool that can be used to create airtight mixups, resets, and even full-on unblockables to melt your health bar. JP has mixups everywhere- he has mixups in his Target Combos, he has mixups in his pressure sequences, and he even has mixups in his zoning! JP has access to Embrace, a fullscreen projectile command grab that gives JP excellent pressure opportunity on hit, looks just like Torbalan, and does high damage.
It's important to stress that all this offensive power comes at a steep cost, that being JP's movement. Unlike other zoners who don't necessarily sacrifice movement for their zoning prowess, JP has terrible movement stats and must rely on Drive Rush for any considerable mobility. In addition, JP's zoning specials are very slow and open him up to punish opportunities on an incorrect play that other zoners might be safe from. JP also has a notable deadzone within the midrange, where his pokes are either fast, but too stubby, or long, but too slow. His tall standing hurtbox and wide frame also make him vulnerable to mixups at a greater extent than other members of the cast, and while he does have Amnesia to bail him out of bad scenarios, that too carries immense risk. In general, JP is great for players who love to keep their opponents at a constant disadvantage and can manage to get around his slower movement. If you love overwhelming offensive might without having to get your hands too dirty, then there's no better pick than this master of Psycho Power.
| Pick if you like: | Avoid if you dislike: |
|---|---|
|
|
Classic & Modern Versions Comparison
| Missing Normals |
|
|---|---|
| Missing Command Normals |
|
| Shortcut-Only Specials |
|
| Miscellaneous Changes |
|
| JP | |
|---|---|
| Vitals | |
| Life Points | 10000 |
| Ground Movement | |
| Forward Walk Speed | 0.037 |
| Backward Walk Speed | 0.025 |
| Forward Dash Speed | 22 |
| Backward Dash Speed | 23 |
| Forward Dash Distance | 1.454 |
| Backward Dash Distance | 1.003 |
| Drive Rush Min. Distance (Throw) | 0.525 |
| Drive Rush Min. Distance (Block) | 1.857 |
| Drive Rush Max Distance | 3.628 |
| Jumping | |
| Jump Speed | 4+38+3 |
| Jump Apex | 2.115 |
| Forward Jump Distance | 1.90 |
| Backward Jump Distance | 1.52 |
| Throws | |
| Throw Range | 0.8 |
| Throw Hurtbox | 0.33 |
| Frame Data Glossary - SF6 | |
|---|---|
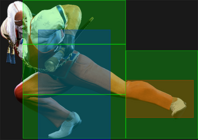
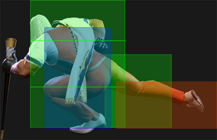
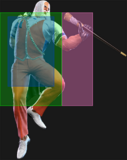
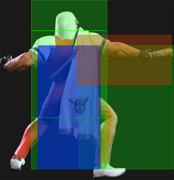
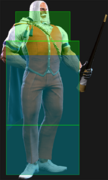
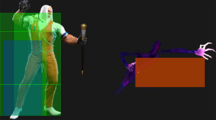
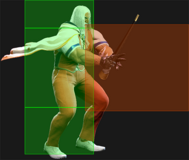
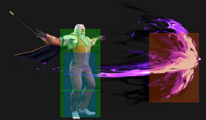
| Hitbox Images |
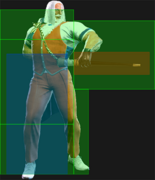
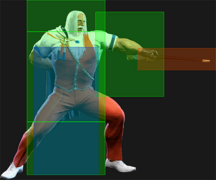
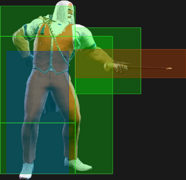
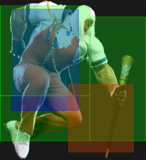
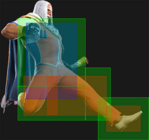
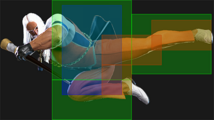
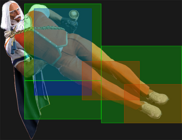
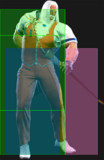
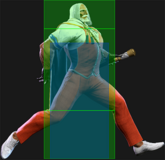
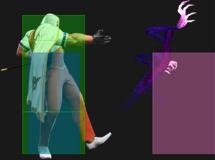
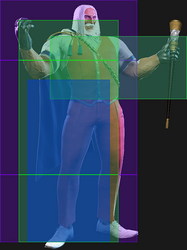
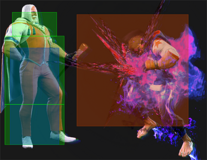
🟥 (Red): Attack hitbox
🟩 (Green): Vulnerable hurtbox that can be hit by strikes/projectiles
🟦 (Blue): Vulnerable throw hurtbox
|
| Active |
How many frames a move remains active (can hurt opponents) for. For projectiles with a maximum active period, a value may be listed in [brackets], but this number is not factored into the move's total frame count.
|
| Cancel |
Available options for canceling one move into another move.
|
| Cancel Hitconfirm Windows |
Hitconfirm reaction windows into Special Moves, Target Combos, and Super Arts.
|
| Damage |
Attack damage on hit. Multi-hit moves may have the damage listed for individual hits as X,Y (or sometimes X*Y). Sometimes a move's damage changes depending on which active frame connects, or on cinematic vs. non-cinematic hits; in this case, multiple values may be listed, and it will be clarified in the move description.
|
| Damage Scaling |
Some moves cause additional damage scaling in combos. Refer to Game Data page for a more detailed breakdown. Scaling Types:
|
| Drive Rush Cancel Advantage |
Refers to the frame advantage when canceling a normal, command normal, or Target Combo into Drive Rush on hit or block (abbreviated as DRC for Drive Rush Cancel). This is calculated at the moment a follow-up attack can be input, not at the moment the character can block or perform movement options. An attack that with DRC +8 on Hit can link into an 8-frame attack, and DRC +4 on Block can create a true blockstring into a 4-frame attack. Note that any DRC on Block worse than +4 cannot form a true blockstring, allowing the opponent to interrupt with an invincible reversal. Most light normals are slightly negative after a DRC on block, meaning the opponent can mash their fastest normal to guarantee a counter-hit (though this requires fast reactions). The attacking character could punish this with Light > DRC into an immediate invincible attack, but this would be an incredibly expensive and high-risk gambit.
|
| Forced Knockdown |
Most airborne command normals, special moves, and Super Arts put the user in a "Forced Knockdown" state. While in this state, an air knockdown will occur when being hit by any attack, even if it would otherwise cause an air reset. As an example, Ryu's 2HP causes an air reset when used as an anti-air. Against a move like Cammy's Hooligan Combination, however, the 2HP puts her into an air knockdown state. This allows Ryu to successfully cancel 2HP into Shoryuken for a juggle, similar to how a Drive Impact wall splat works. Taking advantage of Forced Knockdown juggles is important for dealing with moves like Ken's Dragonlash, Dhalsim's Air Teleport, or Kimberly's 6HK~Hop sequence. Moves that already cause an air knockdown, like most j.MP air-to-airs, will not display the "Forced Knockdown" message.
|
| Guard |
Refers to the direction an attack must be blocked. L is for Low attacks (must be blocked crouching), H is for High attacks/overheads (must be blocked standing), LH is for attacks that can be blocked crouching or standing. T is for Throw attacks which cannot be blocked.
|
| Juggles |
When a character is put into an Air Knockdown state, it is often possible to follow up with a Juggle attack before they hit the ground. In the simplest terms, there are 2 main juggle states:
The following is a more detailed overview of the SF6 juggle system:
Juggle Start (JS): When starting a juggle, the opponent's JC will be set to this value. May be different vs. standing and airborne opponents.
Juggle Increase (JI): When opponent is already in a juggle state, attacks will increase the opponent's JC by this amount.
Juggle Limit (JL): Property of an attack hitbox that determines whether it connects on a juggled opponent. The JL must be ≥ the opponent's JC to hit successfully.
An example to tie everything together:
Drive Rush notes:
|
| On Hit/Block |
These are frame advantage values when the attack hits or is blocked. If the number is positive, then the move will recover before the defender can act again. If the number is negative, the defender will be able to act before the attacker and maybe even punish. KD refers to knockdown on hit, and the listed KD Advantage refers to how many frames the attacker can act before the defender finishes their wakeup animation.
|
| Recovery |
How many frames it takes for a move to finish after the active frames have finished. For projectiles, recovery is considered to begin after the first active frame.
|
| Startup |
How many frames it takes before the move becomes 'active' or have a hit box. The last startup frame and the first active frame are the same frame, meaning all values are written as Startup + 1.
|
Normals
Standing Normals
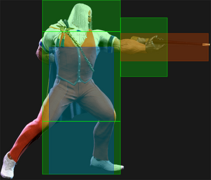
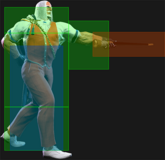
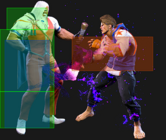
5LP
| Startup | Active | Recovery | Cancel | Damage | Guard | On Hit | On Block |
|---|---|---|---|---|---|---|---|
| 6 | 3 | 10 | Chn Sp SA | 300 | LH | +4 | -2 |
- Chains into 5LP/2LP/2LK
- Cancel Hitconfirm Window: 13f
- DR cancel is delayed until after 2nd active frame
- Drive Rush cancel advantage: +6 oH / 0 oB
- Applies 10% damage scaling to next hit when beginning a combo (100/90/80...)
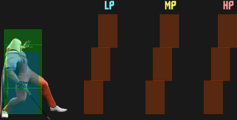
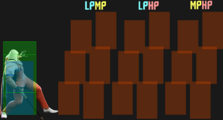
JP's farthest reaching light normal, making it a good light chain ender for canceling into LP Stribog.
The startup is too slow to be a consistent defensive option, though it can be useful for avoiding spacing traps where 2LP whiffs.
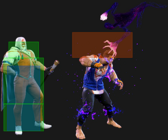
5MP
| Startup | Active | Recovery | Cancel | Damage | Guard | On Hit | On Block |
|---|---|---|---|---|---|---|---|
| 12 | 3 | 21 | - | 700 | LH | +1 | -6 |
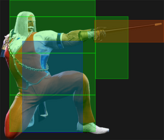
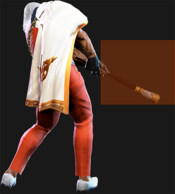
JP's farthest reaching poke, with a good hitbox disjoint at the tip. 5MP is a great neutral tool to control space, whiff punish when 5HP won't reach, and stop some longer-range Drive Rushes (a common counter to his zoning). The high pushback on block keeps it safe at most ranges, making it great for harassment and keepaway.
5MP is vulnerable to Drive Impact since it cannot be canceled, and it lacks any reward on hit even with Drive Rush or Punish Counter; use 5HP instead whenever the range allows it.
As a round start option, 5MP can trade with fireballs and interrupt some Drive Rushes, but beware of buttons like Chun-Li's 5HP that can potentially whiff punish it hard.
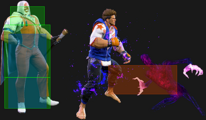
5HP
| Startup | Active | Recovery | Cancel | Damage | Guard | On Hit | On Block |
|---|---|---|---|---|---|---|---|
| 12 | 2 | 22 | Sp SA | 800 | LH | +3 | -3 |
- Punish Counter: +25 Stagger
- Has very high juggle potential and puts airborne opponents into a limited juggle state
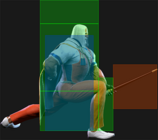
- Extends a hurtbox 1f before active that is vulnerable to projectiles
- Extends a widened hurtbox during active/recovery frames (easier to whiff punish)
- Cancel Hitconfirm Window: 16f (PC: 23f)
- Drive Rush cancel advantage: +17 oH / +11 oB
- Applies 20% damage scaling to next hit when beginning a combo (100/80/70...)
An important mid-range, combo, and juggle tool thanks to its disjointed hitbox and great reward on hit. Unlike some of his other mid-range moves, it is cancelable; this allows it to shut down Drive Impact and convert stray hits into full combos. Frame-wise it is very similar to 5MP, giving up some range in exchange for versatility.
The heavy hitstun allows a combo into LK Torbalan from any range. Buffering LP/MP Stribog is very effective at mid-range, leading to a knockdown on hit or an airtight blockstring (unless the first hit of MP Stribog whiffs). Most characters cannot punish this if well-spaced. Canceling into HP Stribog leaves a large blockstring gap, so it cannot be abused for endless pressure; OD Stribog also leaves a small gap that can lose to reversals or Perfect Parry.
5HP (along with 2HP) is useful in Drive Rush combos, leading to a powerful HP Stribog wall bounce. It has incredible juggle potential even without Drive Rush, and sees a lot of use in JP's launch combos.
JP gets massive frame advantage on Punish Counter, making it a useful starter for very unsafe moves like blocked reversals. The opponent is staggered long enough to link a 1-bar Drive Rush follow-up instead of using a 3-bar cancel. He can even cancel into OD Departure while still linking 2MP for a powerful 2-bar juggle starter. Keep in mind that there is extra damage scaling when starting a punish with 5HP, so there may be more optimal starters in some circumstances.
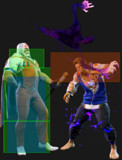
5LK
| Startup | Active | Recovery | Cancel | Damage | Guard | On Hit | On Block |
|---|---|---|---|---|---|---|---|
| 5 | 3 | 11 | Sp SA | 300 | LH | +3 | -2 |
- Hitbox is low enough to the ground to break Upper-Body armor (like Marisa's meterless parry)
- Cancel Hitconfirm Window: 13f
- DR cancel is delayed until after 2nd active frame
- Drive Rush cancel advantage: +6 oH / +1 oB
- Applies 10% damage scaling to next hit when beginning a combo (100/90/80...)
Since it can't be chained into, 5LK is reserved for Counter-hit confirms (usually from 2MK), or for frame trapping after a blocked 5HK at longer distance where 2LP would lack range.
5MK
| Startup | Active | Recovery | Cancel | Damage | Guard | On Hit | On Block |
|---|---|---|---|---|---|---|---|
| 8 | 3 | 19 | Sp SA | 600 | LH | +1 | -3 |
- Cancel Hitconfirm Window: 15f
- Special/DR cancel is delayed until after active frames
- Drive Rush cancel advantage: +11 oH / +7 oB
1f slower, but farther reaching than 2MP which generally makes this button JP's main special cancelable button in neutral. It can be especially threating off Drive Rush and has the same enders as 2MP for combos. One of JPs normals with the most pushback on block, which makes it particularly safe and useful for pressure. Uniquely, when 5MK is special canceled it also moves JP forward.
5HK
| Startup | Active | Recovery | Cancel | Damage | Guard | On Hit | On Block |
|---|---|---|---|---|---|---|---|
| 12 | 4 | 17 | TC | 800 | LH | +7 | +2 |
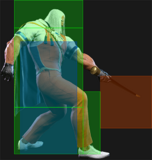
- Anti-Air Invuln: 9-15f (Head) / 12-17f (Leg)
- Whiffs on crouching opponents at farther ranges
- Cancel Hitconfirm Window: 18f (TC)
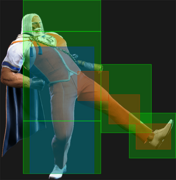
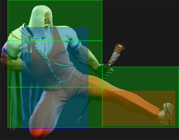
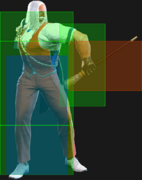
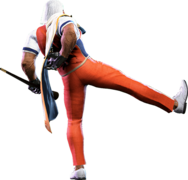
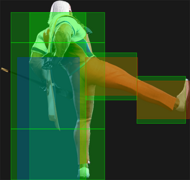
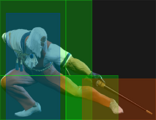
A strong upward-angled kick with many uses. It is great for block pressure at +2, giving JP a frame trap into 2LP or 5LK. Due to the low recovery, JP can block the opponent's Drive Reversal if it isn't used at the earliest possible timing. It is also a great combo starter on hit, linking into 2MP at closer ranges or chaining into the 5HK~HP Target Combo from nearly any range. This Target Combo is also safe on block with multiple cancel options to keep the opponent on their toes.
5HK is fast enough to combo after jump-ins or Drive Impact crumples. It can even anti-air in some situations where 2HP or 6HK might whiff, though it's far less rewarding than 6HK. The only downside is that it doesn't reach crouching opponents at its max range.
Crouching Normals
2LP
| Startup | Active | Recovery | Cancel | Damage | Guard | On Hit | On Block |
|---|---|---|---|---|---|---|---|
| 4 | 2 | 11 | Chn Sp SA | 300 | LH | +4 | -1 |
- Chains into 5LP/2LP/2LK
- Cancel Hitconfirm Window: 12f
- DR cancel is delayed until after 2nd active frame
- Drive Rush cancel advantage: +6 oH / +1 oB
- Applies 10% damage scaling to next hit when beginning a combo (100/90/80...)
JP's fastest attack, good for contesting the opponent's blockstrings. Can combo into LP Stribog. After a Punish Counter against -4 attacks, it can combo into 2MP.
2MP
| Startup | Active | Recovery | Cancel | Damage | Guard | On Hit | On Block |
|---|---|---|---|---|---|---|---|
| 7 | 4 | 14 | Sp SA | 600 | LH | +6 | -2 |
- Cancel Hitconfirm Window: 16f
- Special/DR cancel is delayed until after active frames
- Drive Rush cancel advantage: +11 oH / +3 oB
Great mid-range poke, and the least committal of JP's mediums thanks to low recovery, on top of being safe against Drive Impact. A bit stubbier than 5MK, but the faster speed and the good disjoint will help in some situations. Links into itself, 5MK or 4MP if you can score a Counter-hit in neutral and aren't too far, but can't link into anything if you hit at the tip. Its hitbox is also high enough to sometimes work as an anti-air, though this isn't very reliable or rewarding.
2MP is also an important combo tool for JP, as it can link from 5HK and then cancel into MP Stribog (except at maximum range where it falls out, in that case use LP Stribog). It can also be Drive Rush canceled into 2HP for HP Stribog combos.
2HP
| Startup | Active | Recovery | Cancel | Damage | Guard | On Hit | On Block |
|---|---|---|---|---|---|---|---|
| 9 | 6 | 20 | Sp SA | 800 | LH | +1 | -6 |
- Solid anti-air but cannot hit cross-up
- Forces stand on hit
- Cancel Hitconfirm Window: 20f
- Drive Rush cancel advantage: +17 oH / +10 oB
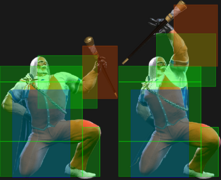
JP's most consistent anti-air, with short horizontal range and a disjointed vertical hitbox. Against strong jump-ins, JP must use this early to avoid trading with his extended arm hurtbox. It cannot hit opponents behind JP, so against closer jumps it's safer to use Air Throw or j.LP instead. When used against Forced Knockdown aerial moves like Cammy's Hooligan Combination or Dhalsim's Air Teleport, 2HP can be canceled into DR~5HP > HP Stribog for a powerful conversion.
2HP has the highest juggle potential out of all of JP's normals. In most anti-air and juggle routes, it results in an air reset. Canceling into Torbalan allows for a high/low mixup that is safe to Drive Impact, though some Supers can punish this upon landing. In the corner, this cancel must be done very low to the ground to prevent the opponent from mashing out. A cancel into Torbalan Feint is roughly even on hit and can bait reversals or cause the opponent to whiff a parry. Canceling into Departure is riskier, but much more rewarding if the opponent isn't ready for an immediate punish; OD Departure is only around -4, making it a safe air reset option unless absolutely point blank. Embrace is the riskiest of all anti-air cancel options, but can be useful as an occasional surprise against opponents who tend to parry frequently.
2HP is JP's fastest heavy normal, making it useful in some Drive Rush routes where 5HP, 5HK, or 6HK cannot combo.
2LK
| Startup | Active | Recovery | Cancel | Damage | Guard | On Hit | On Block |
|---|---|---|---|---|---|---|---|
| 6 | 2 | 10 | Chn | 200 | L | +2 | -2 |
- Chains into 5LP/2LP/2LK
- Applies 10% damage scaling to next hit when beginning a combo (100/90/80...)
JP's fastest low, and your only way to chain multiple lows during pressure. Also good for catching opponents trying to walk out of pressure (such as when they are covered by an Amnesia bomb). The 6 frames of startup makes it harder to mash during your opponent's pressure, but it still useful for countering shimmy, which will happen often as your opponents attempt to bait OD Amnesia or Delay Tech.
2MK
| Startup | Active | Recovery | Cancel | Damage | Guard | On Hit | On Block |
|---|---|---|---|---|---|---|---|
| 9 | 3 | 17 | - | 700 | L | +3 | -3 |
- Moves JP forward
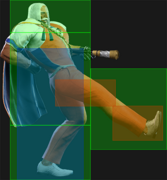
A fantastic neutral poke with great range and forward movement throughout the animation. It offers useful links on Counter-hit (5LK) and Punish Counter (2MP). It is not cancelable, making it a bit vulnerable to early Drive Impacts, though this is a risky read for your opponent. The forward movement and low-hitting property also makes it a surprisingly good button on defense to beat spacing traps.
Using it out of Drive Rush improves it to +1 on block and +7 on hit, making it one of JP's best approach buttons, and your best way to start a combo from a low.
2HK
| Startup | Active | Recovery | Cancel | Damage | Guard | On Hit | On Block |
|---|---|---|---|---|---|---|---|
| 10 | 3 | 21 | - | 900 | L | HKD +27 | -6 |
- Counter-hit/Punish Counter: HKD +48
- Has slight juggle potential (after corner 22P or 236KK); not a Hard Knockdown when juggled into
Relatively short range (even shorter than 2MK), but compensates with great hitbox priority and by being much safer on block than most sweeps. Difficult for most characters to punish unless done at close range.
Jumping Normals
j.LP
| Startup | Active | Recovery | Cancel | Damage | Guard | On Hit | On Block |
|---|---|---|---|---|---|---|---|
| 5 | 10 | 3 land | - | 300 | H | - | - |
JP's fastest air attack alongside air throw if you're not sure your other air-to-airs will be fast enough.
j.MP
| Startup | Active | Recovery | Cancel | Damage | Guard | On Hit | On Block |
|---|---|---|---|---|---|---|---|
| 12 | 3 | 3 land | - | 700 | H | - | - |
- Whiffs on crouching opponents
- Extends a large hurtbox 2f before active
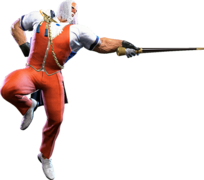
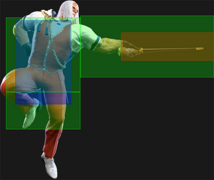
JP's longest ranged air normal, making it a great air-to-air from a distance most characters cannot reach. Neutral jumping at mid-range allows JP to come down with j.MP to stuff the opponent's grounded approach, and can punish some whiffed normals and projectiles. The hurtbox is quite large, so an opponent who correctly predicts this button can easily hit JP out of the air.
j.HP
| Startup | Active | Recovery | Cancel | Damage | Guard | On Hit | On Block |
|---|---|---|---|---|---|---|---|
| 9 | 5 | 3 land | - | 800 | H | - | - |
- Causes spike knockdown vs. airborne opponents on Counter-hit/Punish Counter
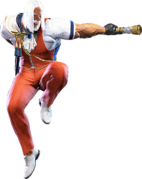
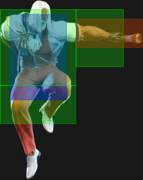
JP's most disjointed air normal, allowing him to stuff some anti-air normals when jumping from close range.
j.LK
| Startup | Active | Recovery | Cancel | Damage | Guard | On Hit | On Block |
|---|---|---|---|---|---|---|---|
| 6 | 8 | 3 land | - | 300 | H | - | - |
- Can hit cross-up
- Can be used as a fuzzy instant overhead (requires perfect safe jump timing)
This simple kick is one of your most versatile air normals for pressure. It works great as a jump-in after a Teleport, can crossup from Teleport, allows fuzzy overhead setups with OD Portals, punishes Delay Tech when covered by a portal or reset combos during SA2.
j.MK
| Startup | Active | Recovery | Cancel | Damage | Guard | On Hit | On Block |
|---|---|---|---|---|---|---|---|
| 7 | 6 | 3 land | - | 600 | H | - | - |
- Puts airborne opponents into a limited juggle state, and has juggle potential itself
- Shifts JP's hurtbox upward during startup
Has worse range than j.MP, but much better reward after an air-to-air thanks to the juggle state that gives strong okizeme. Also an important combo tool for OD Departure combos.
j.HK
| Startup | Active | Recovery | Cancel | Damage | Guard | On Hit | On Block |
|---|---|---|---|---|---|---|---|
| 11 | 6 | 3 land | - | 800 | H | - | - |
- Extends a hurtbox 1f before active
JP's best all-purpose air normal. The large hitbox covers both air and ground approaches and works great for both jump-ins, retreating jumps, and Teleports if you manage to avoid moves with high recovery.
Do note that it won't link to 5HK on normal hit if you land it too high up, so be ready to follow up with 4MP in those situations.
Command Normals
4MP
| Startup | Active | Recovery | Cancel | Damage | Guard | On Hit | On Block |
|---|---|---|---|---|---|---|---|
| 8 | 3 | 16 | Sp SA TC | 500 | LH | +5 | -1 |
- Cancel Hitconfirm Window: 17f / 23f (TC)
- TC cancel leaves a 1f blockstring gap
- Drive Rush cancel advantage: +14 oH / +8 oB
A short range strike that can be confirmed into a 4MP~MP Target Combo with quite lenient hitconfirm timing. A situational alternative to 5MK with less range but a more disjointed hitbox, making it a safer poke and more suited to beat advancing moves or other disjoints.
6MK
| Startup | Active | Recovery | Cancel | Damage | Guard | On Hit | On Block |
|---|---|---|---|---|---|---|---|
| 22 | 2 | 19 | - | 700 | H | +3 | -3 |
A safe on block overhead. A Drive Rush starter lets JP link into 2MP for high damage and corner carry, and meaty timing allows a meterless link into 2LP.
6MK is an invaluable tool when combined with moves like Amnesia Bomb, Departure spikes, and SA2. These allow JP to get much stronger follow-up combos, and the distracting visual effects can make it harder for the opponent to react to the overhead startup.
3HP
| Startup | Active | Recovery | Cancel | Damage | Guard | On Hit | On Block |
|---|---|---|---|---|---|---|---|
| 16 | 3 | 31 | - | 900 | L | HKD +17 | -14 |
- Counter-hit/Punish Counter: HKD +39
- Has high juggle potential; not a Hard Knockdown when juggled into
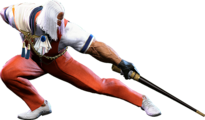
A long-range sweep with a disjointed hitbox on the cane. Has great range, and can be difficult for some characters to punish if well-spaced. At closer ranges where the pushback is less relevant, JP can still cover his recovery with Departure or Amnesia bombs. 3HP is a good tool against people who frequently back walk out of JP's pressure, or who walk in and out of JP's other poke ranges to bait a whiff.
6HK
| Startup | Active | Recovery | Cancel | Damage | Guard | On Hit | On Block |
|---|---|---|---|---|---|---|---|
| 11 | 2,4 | 24 | Sp SA (2nd) | 300,600 | LH | KD +38 | -5(-8) |
- Anti-Air Invuln: 8-16f (Head/Leg); cannot hit cross-up
- 1st hit forces stand; 2nd hit whiffs on crouch blocking opponents (3f worse advantage)
- Puts opponents into limited juggle state
- Cancel Hitconfirm Window: 34f (2nd hit only)
- Special/DR cancel is delayed until after 4th active frame (2nd active frame of 2nd hit)
- Drive Rush cancel advantage: KD +55 oH / +12 oB
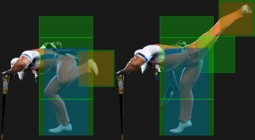
A 2-hit launching kick. Works as a highly rewarding ranged anti-air, though the startup is a bit slow and can whiff under close jumps. A cancel into Triglav works consistently, but stronger options exist depending on the screen position and distance from the opponent. In the corner, a raw 6HK can juggle to HP Stribog for a wall bounce, or to MP Stribog after a Drive Impact wall splat. Midscreen, a Drive Rush cancel into 5HP > HP Stribog can work, but requires somewhat precise timing to avoid whiffing under the opponent.
JP cannot cancel 6HK to keep himself safe against a crouch blocking opponent, as the 2nd hit whiffs and the 1st hit is not cancelable. In this scenario it becomes -8 on block, leading to a hefty punish. The first hit does force stand, allowing a successful combo even on a crouching opponent.
Target Combos
4MP~MP
| Startup | Active | Recovery | Cancel | Damage | Guard | On Hit | On Block |
|---|---|---|---|---|---|---|---|
| 10 | 3 | 20 | Sp SA | 500 | LH | +3 | -6 |
- Cancel Hitconfirm Window: 16f (single hit) / 46f (full TC)
- Drive Rush cancel advantage: +16 oH / +7 oB
A special-cancelable Target Combo that makes hitconfirming 4MP very easy. Since it has more hitstun than 2MP/5MK, it can combo into Triglav or LK Torbalan for corner juggles.
Chaining into the second hit on block always leaves a 1-frame gap that will beat mashing, but it loses to invincible reversals or Perfect Parry.
5HK~HP~HP/HK
| Startup | Active | Recovery | Cancel | Damage | Guard | On Hit | On Block |
|---|---|---|---|---|---|---|---|
| 20 | 3 | 20 | Sp SA TC | 500 | LH | +3 | -3 |
- True blockstring from 5HK (can leave 1f gap if manually delayed)
- Special Cancel Hitconfirm Window: 18f (single-hit) / 51-54f (full TC)
- Special/DR cancel is delayed until after 2nd active frame
- TC Cancel Hitconfirm Window: 21f (single-hit) / 54-57f (full TC)
- Drive Rush cancel advantage: +15 oH / +9 oB
A Target Combo that does everything you could hope for. This 2nd hit is safe on block, cancelable, easy to hitconfirm in neutral, and has built-in mixups. The HP/HK enders are not true combos and are mostly reserved for Departure/SA2 mixups.
The safest option on block is to simply end the string and wait, as JP is only -3. This allows you to bait reversals, whiffed Parry, and Drive Impact. You can also cancel into Drive Rush to force a mixup and avoid a disadvantageous situation, though this is expensive. Depending on how you expect the opponent to react, here are some other cancel options:
- MP Stribog (236MP): frame traps all non-invincible moves, but is unsafe on block and loses to Drive Impact. At longer ranges, the pushback may keep JP safe. Beats most SA1 reversals, but some like Luke's are fast enough to punish JP before the projectile hitbox comes out.
- Triglav (22P): trades with 4f attacks, leaving JP with enough KD advantage to set up Departure and still have frame advantage afterwards. Can juggle with SA3, or even more in the corner. Loses to Drive Impact but beats reversal SA1.
- LK Torbalan (236LK): trades with 4f attacks like Triglav, but has worse KD advantage. Recovers in time to punish Drive Impact and beats reversal SA1.
- MK/HK Torbalan (236MK/HK): Loses to fast reversal normals, but can be spaced to make many buttons whiff. Recovers in time to punish Drive Impact. Will beat most SA1 reversals, but some faster ones can punish JP.
- Embrace (214K): throws opponents who block, parry, or attempt Drive Impact. Use sparingly, as it's quite reactable and leads to a huge punish if jumped. Loses to SA1s.
| Startup | Active | Recovery | Cancel | Damage | Guard | On Hit | On Block |
|---|---|---|---|---|---|---|---|
| 21 | 3 | 22 | - | 1000 | H | +3 | -4 |
Overhead follow-up. Does not combo naturally from 5HK~HP, and leaves an 8f blockstring gap that is easily interruptible unless covered with Departure or SA2.
| Startup | Active | Recovery | Cancel | Damage | Guard | On Hit | On Block |
|---|---|---|---|---|---|---|---|
| 21 | 3 | 22 | - | 1000 | L | +3 | -4 |
Low follow-up. Does not combo naturally from 5HK~HP, and leaves an 8f blockstring gap that is easily interruptible unless covered with Departure or SA2.
You can substitute the overhead and low follow-ups with cancels to MK or HK Torbalan. This leave the same gap on block, but give better reward on hit, allowing corner combos without counter-hit. They are also safe to Drive Impact. Because they are projectiles, they can beat most SA1 reversals, which is especially important to know against characters without fully invincible OD reversals.
The only advantage to the High/Low TC enders is that they are less punishable, at -4 instead of Torbalan's -8.
Throws
Forward Throw (LPLK)
| Startup | Active | Recovery | Cancel | Damage | Guard | On Hit | On Block |
|---|---|---|---|---|---|---|---|
| 5 | 3 | 23 | - | 1200 (2040) | T | KD +24 | - |
- Punish Counter: HKD +24
- Applies 40% damage scaling to next hit when beginning a combo (into SA2/Departure/OD Amnesia)
- Applies 20% immediate damage scaling when comboed into (e.g. after Crumple)
JP has access to a corner throw loop without walking or dashing, but it must be manually timed. He can also dash forward to be +2, giving easier timing but reducing his ability to shimmy to bait a throw while blocking reversals. Midscreen, the opponent is sent far away, allowing JP to start setting up his offense.
JP can combo out of Forward Throw with either SA2 or a Departure spike. To land this juggle, JP must throw immediately after setting up a Departure portal or after activating SA2. In the corner it's also possible for the opponent to block 1 hit of SA2 before getting thrown and juggled by the last hit, but this is very precise. The 2nd OD Amnesia bomb can also juggle after a throw, but it doesn't lead to any further damage.
Back Throw (4LPLK)
| Startup | Active | Recovery | Cancel | Damage | Guard | On Hit | On Block |
|---|---|---|---|---|---|---|---|
| 5 | 3 | 23 | - | 1200 (2040) | T | KD +36 | - |
- Side switch
- Punish Counter: HKD +36
- Applies 20% immediate damage scaling when comboed into (e.g. after Crumple)
- No additional scaling if opponent is juggled into SA2/Departure/OD Amnesia (throw does 0 damage in this case)
JP throws the opponent nearly a full screen away; after throwing the opponent back into the corner, he can dash to get strike/throw oki at +14.
Just like Forward Throw, it's possible to juggle into SA2 or a Departure spike, and can even juggle into the 2nd bomb of OD Amnesia with a true follow-up combo. When this happens, the throw itself does 0 damage; this is great for scaling purposes when throwing the opponent back into the corner, where JP can follow up with further juggles. Midscreen, a combo after back throw is fairly useless; the Departure spike does less damage than just letting the throw play out on its own and has no follow-up, and an immediate SA2 into throw doesn't even juggle (JP must throw after the first projectile is blocked).
Air Throw (LPLK Air)
| Startup | Active | Recovery | Cancel | Damage | Guard | On Hit | On Block |
|---|---|---|---|---|---|---|---|
| 5 | 3 | 3 land | - | 1200 (2040) | T | KD +32 | - |
- Side switch
- Punish Counter: HKD +32
Jump back air throw is a good anti-air against close jumps and cross-ups that could make 2HP whiff. Midscreen, this leads to very weak oki; it's better to just set up a Departure or throw a projectile. If throwing the opponent backwards into the corner, it's possible for JP to force some real oki.
Drive System
Drive Impact (HPHK)
| Startup | Active | Recovery | Cancel | Damage | Guard | On Hit | On Block |
|---|---|---|---|---|---|---|---|
| 26 | 2 | 35 | - | 800 | LH | KD +35 / Wall Splat KD +65 | -3 / Wall Splat HKD +72 |
- Armor (2-hit): 1-27f
- Applies 20% damage scaling to next hit when beginning a combo (including Wall Splat on block)
- Combos when canceled from 5HP/2HP or Punish Counter 4MP (no corner wallsplat)
- Useful for draining opponent's Drive gauge, especially after Perfect Parry
See Drive Impact on the Gauges page for more details.
When canceled from a normal, these are the important blockstring gaps; a gap of N will trade with an N-frame startup attack; [] = Burnout
- 6HK: 5[1]
- 5HP: 6[2]
- 2HP: 7[3]
- 5HK~HP: 8[4]
- 4MP: 9[5]
- 5MK, 4MP~MP: 10[6]
- 2MP: 14[10]
- Note: A gap ≥ 6f can be thrown, and a gap ≥ 9f can be jumped out of by most characters
Against the following characters in Burnout:
- JP (22K), frame 3 counter
- Marisa (214K), frame 3 armor
- Zangief (5[HP]), frame 4 armor
It's important to use a blockstring that cannot be absorbed by their armor/counter moves. Ideally, the string should also not be a true combo, or it will cause a Lock and prevent Stun. Note that if the opponent mashes buttons on wakeup, the counter-hit will cause DI to Lock.
- 6HK > DI: 1f blockstring gap prevents opponent from absorbing the hit, but whiffs on crouch block
- 5HP > DI: 2f blockstring gap prevents opponent from absorbing the hit
- 2HP > DI: 3f blockstring gap will work vs. Zangief 5[HP]
- DR~4MP > DI: 1f blockstring gap prevents opponent from absorbing the hit
- DR~5MK > DI: 2f blockstring gap prevents opponent from absorbing the hit
Drive Reversal (6HPHK)
| Startup | Active | Recovery | Cancel | Damage | Guard | On Hit | On Block |
|---|---|---|---|---|---|---|---|
| 20 | 3 | 26(31) | - | 500 recoverable | LH | KD +23 | -8 |
- Full Invuln: 1-22f; Armor Break
- 5f extra recovery on hit
See Drive Reversal on the Gauges page for more details.
Drive Parry (MPMK)
| Startup | Active | Recovery | Cancel | Damage | Guard | On Hit | On Block |
|---|---|---|---|---|---|---|---|
| 1 | 8 or until released | 29(1)(11) | - | - | - | - | - |
See Drive Parry on the Gauges page for more details.
- Perfect Parry:
- Applies a 50% damage scaling multiplier to any punish afterwards
- vs. strikes, has only 1f recovery and prevents the opponent from canceling their attack
- vs. projectiles, puts you into a fixed 11f recovery
Drive Rush (66)
| Startup | Active | Recovery | Cancel | Damage | Guard | On Hit | On Block |
|---|---|---|---|---|---|---|---|
| 9(11) | 45(46) | 24(23) | - | - | - | - | - |
- Applies 15% damage scaling multiplier to any follow-up hits when used mid-combo
- Only applies scaling once per combo; does not apply when an enhanced Drive Rush attack starts the combo
See Drive Rush on the Gauges page for more details. Frame data shown in (parentheses) refers to Parry Drive Rush.
- Distance:
- 0.525 (min, cancel into immediate Throw)
- 1.857 (min, earliest blocking/movement frame)
- 3.628 (max, final DR frame)
- See Strategy page for Blockstring Gaps and Combo Routes
Special Moves
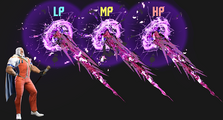
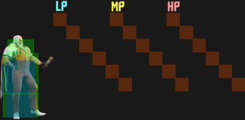
Triglav (22P)
| Startup | Active | Recovery | Cancel | Damage | Guard | On Hit | On Block |
|---|---|---|---|---|---|---|---|
| 22 | 10 | 24 | SA3 | 800 | LH | KD +44 | -2 |
- Counts as a projectile
- Cancel Hitconfirm Window: 17f (Super)
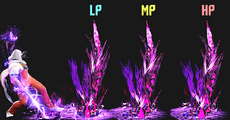
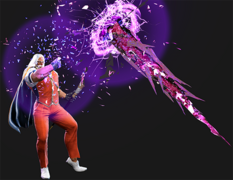
JP summons a spike from the ground, with the button used determining the location.
Important zoning tool: First, it's a great way to force opponent to sit still after blocking Torbalan or Departure's follow-up, which are highly plus when done from fullscreen. It will catch them jumping or dashing, forcing them to walk and block or wait for the spike to come out before acting. It's also great for anti-zoning as it will ignore your opponent's fireball and strike them directly, at the price that you will trade with their fireball instead of nullifying it, which can be a viable strategy if you have life lead. Also works as a full-screen check against characters that might try to use the distance for setups (like Ryu's Denjin Charge).
The best counter-play to Triglav is to attempt to perfect parry and punish with either a fast traveling move (Spiral Arrow, Blanka Ball) or with Drive Rush into a fast normal.
Triglav is also an important combo tool for JP. The spikes launch the opponent into a juggle state, and have juggle potential themselves. On regular grounded hit, you can only land 2HP or SA1 in the corner. But on a high air connect, you can land a second spike anywhere on screen. The importance of Triglav comes in completing launch combos for JP, such as after an HP Stribog wall bounce, after an enemy has been hit by Departure's follow-up and many of JP's other launches.
| Startup | Active | Recovery | Cancel | Damage | Guard | On Hit | On Block |
|---|---|---|---|---|---|---|---|
| 20 | 10,10 | 14 | SA2 SA3 | 500x2 | LH | KD +53(+50) | +3 |
- Cancel Hitconfirm Window: 19f (Super)
- Punish Counter on 1st hit launches higher for slightly better advantage (KD +57)
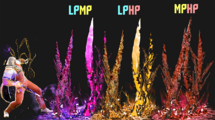
JP summons two spikes. The button combination determines the location, with LP+MP using the LP location, LP+HP using the MP location and MP+HP using the HP location.
Hits two times, useful for single-hit armored moves that might beat regular Triglav, and is also plus on block allowing for pressure reset if you cancel it from a heavy normal or the 4MP target combo. On hit, the juggle state is a little more limited as you can't land 2HP anymore but can still juggle SA1.
Stribog (236P)
| Startup | Active | Recovery | Cancel | Damage | Guard | On Hit | On Block |
|---|---|---|---|---|---|---|---|
| 16 | 3,3 | 28 | SA3 | 300,700 | LH | KD +38 | -10 |
- First hit counts as a strike, the 2nd hit as a projectile.
- Cancel Hitconfirm Window: 27f (Super); 11f if only projectile hits
JP swipes his cane in front of him, sending his opponent away on hit. LP and MP are both combo enders, and can confirm into SA3.
In corner juggles, the LP version is used either as an ender to setup a safe jump (canceled from 5HP), or when going for damage/SA3 after a very high connect of Triglav. During an SA2 juggle (like after a cancel from OD Triglav), the LP and MP version instead act as combo extenders, used to maintain the opponent juggled while the ghosts attack.
Midscreen, your opponent is thrown far enough that you can setup Departure without too much risk, but in the corner your opponent will be able to interrupt you.
| Startup | Active | Recovery | Cancel | Damage | Guard | On Hit | On Block |
|---|---|---|---|---|---|---|---|
| 20 | 3(1)3 | 27 | SA3 | 400,800 | LH | KD +42 | -8 |
- First hit counts as a strike, the 2nd hit as a projectile.
- Puts opponents into a limited juggle state on hit
- Cancel Hitconfirm Window: 30f (Super); 13f if only projectile hits
On a grounded hit, 236MP's frame advantage is enough for an auto-timed safe jump, or an OD Departure setup that still gives you the time to meaty with a light normal. On a cornered opponent, you can also follow a ground hit with 2HP for a reset, or SA1 for damage. In corner juggles, 236MP is used to extend combos by popping the opponent upward (usually immediatly after HP Stribog or during wallsplat combos).
| Startup | Active | Recovery | Cancel | Damage | Guard | On Hit | On Block |
|---|---|---|---|---|---|---|---|
| 28 | 3(9)3 | 19 | SA3 | 300,500 | LH | KD +67(+87) | +4 |
- First hit counts as a strike, the 2nd hit as a projectile.
- Cancel Hitconfirm Window: 31f (Super); 6f if only projectile hits
HP Stribog wall bounces and acts as a combo extender. This version is way slower and won't combo from any normal on normal grounded hit. To land it, you have to use a Drive Rush heavy, or juggle into it after 6HK in the corner.
As it is plus on block, you can use it to reset pressure on opponents that respects you too much, but keep in mind that any cancel into HP Stribog outside of burnout leaves at least 6-frames gaps for your opponent to attack.
| Startup | Active | Recovery | Cancel | Damage | Guard | On Hit | On Block |
|---|---|---|---|---|---|---|---|
| 22 | 3(6)3 | 22 | SA2 SA3 | 300,500 | LH | KD +67(+87) | +2 |
- First hit counts as a strike, the 2nd hit as a projectile.
- Cancel Hitconfirm Window: 39f (Super); 17f if only projectile hits
Faster than the HP version, allowing it to combo after heavies or the 4MP target combo. It still wall bounces, but not as long as HP Stribog, which makes the follow-ups a bit more limited. Entirely outclassed by OD Torbalan, which has the same startup (and the same frame traps), more frame advantage, the same conversions and is safe to Drive Impact (when canceled into from heavies).
Still plus on block, but unlike OD Triglav doesn't true string from heavies, however the gap is small enough that anything that isn't invincible will get countered.
Departure (214P)
| Startup | Active | Recovery | Cancel | Damage | Guard | On Hit | On Block |
|---|---|---|---|---|---|---|---|
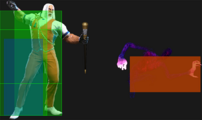
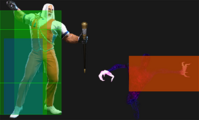
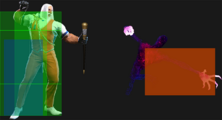
| 50+100 | [10] | 50 total | - | 800 | LH | KD ~ | - |
- Portal placement depends on button strength (LP close, MP mid, HP far)
- Portal disappears if JP is hit, or if portal disappears off-screen
JP places a mid-air portal that can be followed up with a teleport or a spike projectile. If no follow-up is input, it automatically performs a spike in the direction of the opponent. The portal cannot be placed beyond the corner of the screen, so in the corner there is no difference between strengths.
Useful for zoning, okizeme and mixups. Having Departure set up and close to your opponent forces them to respect JP's options, otherwise they risk being hit by the follow-up. However, Departure's animation is very long, and JP usually needs a knockdown to set it up safely. The automatic spike projectile will come out even if JP is blocking, making it risky for the opponent to attempt any offense besides a throw.
| Startup | Active | Recovery | Cancel | Damage | Guard | On Hit | On Block |
|---|---|---|---|---|---|---|---|
| 40+70 | [10(20)10] | 40 total | - | 500x2 | LH | KD ~ | - |
OD Departure places two portals. The button combination determines where each portal is located, allowing for 3 possible placement configurations. In the corner, both portals will occupy the same space since they cannot be placed off-screen.
The spike follow-ups are always triggered from the closest summoned portal first, with a slight delay before the farther spike activates. The teleport follow-up travels to the closest portal if input with 214LP, or the farthest portal if input with 214MP.
Due to having 10 fewer frames of recovery, OD Departure is safer to set up in neutral or after knockdowns. The staggered double spike hit also gives more combo and mixup opportunities. Punish Counter 5HP can be canceled into OD Departure, leaving enough time for an extended combo follow-up. This gives JP a high damage punish and the opportunity to side switch with the LP+HP version.
Departure: Window (214P~214LP/MP)
| Startup | Active | Recovery | Cancel | Damage | Guard | On Hit | On Block |
|---|---|---|---|---|---|---|---|
| 6 | [20] | 16+3 land | - | - | - | - | - |
- Full Invuln: 6-25f; Airborne 26-41f (Forced Knockdown state)
JP teleports to his portal, and can act out of it after reappearing in the air. Depending on the position of the portal, this can set up a left/right mixup or an empty jump into 2LK or throw. If the opponent has a strong horizontal attack like Sumo Headbutt or Blanka Ball, JP can use Departure: Window to reposition (though this is difficult to do on reaction).
If the opponent is attempting to parry projectiles like the Departure spikes, mixing up with the teleport allows JP to land and punish the parry recovery with a throw. It can also be used if you predict the opponent will throw their own projectile, giving JP a full jump-in punish from anywhere on the screen. There is a visual/audio cue to differentiate between teleport and spike, so opponents with decent reactions can hit JP out of the air if done predictably.
Departure: Shadow (214P~214HP)
| Startup | Active | Recovery | Cancel | Damage | Guard | On Hit | On Block |
|---|---|---|---|---|---|---|---|
| 19(21) | [10] | 21 | - | 800 | LH | KD +58(+60) | +9(+11) |
- Puts opponents into a free juggle state on hit
- Opponent builds 50% extra Drive meter when parrying the projectile spike
- Applies 20% damage scaling to next hit when beginning a combo (100/80/70...)
| Startup | Active | Recovery | Cancel | Damage | Guard | On Hit | On Block |
|---|---|---|---|---|---|---|---|
| 19(21) | [10(20)10] | 21 | - | 500x2 | LH | KD +92 | +39(+40) |
- Puts opponents into a free juggle state on hit
- Opponent builds 40% extra Drive meter when parrying the projectile spikes
- Applies 20% damage scaling to next hit when beginning a combo (100/80/70...)
Summons a spike projectile aimed diagonally downward toward the opponent regardless of which side they are on. The spike itself is identical to the version that triggers automatically, but since JP has to snap his fingers, he is less free to mix up the opponent with the spike covering his approach. However, the ability to mix up the timing of his various projectiles makes the manual spike activation a more potent zoning tool.
Opponents will find the spike difficult to avoid once JP has a portal set up at mid/long range. The threat of the spike projectile makes opponents want to parry more frequently, which can be exploited with a teleport instead. Because it's so hard to avoid, it becomes an invaluable tool for chipping away at the Drive gauge (or the HP gauge, if the opponent is in Burnout). If the spike is blocked, JP has enough frame advantage for a nearly guaranteed Triglav to chip away even further.
A stray hit with Departure: Shadow can be very rewarding to land due to its free juggle state; from certain ranges, JP can react with a DR~5HP for a high damage juggle sequence. Even at full screen, JP can simply juggle Triglav > SA3, or simply set up another Departure to continue zoning.
Torbalan (236K)
| Startup | Active | Recovery | Cancel | Damage | Guard | On Hit | On Block |
|---|---|---|---|---|---|---|---|
| 14+8 | 6 | 50 total | SA3 | 800 | LH | KD +42~ | -6~ |
- Cancel Hitconfirm Window: 20f (Super)
- Projectile Speed: 0.13 (decelerates by 0.01/frame in close proximity)
| Startup | Active | Recovery | Cancel | Damage | Guard | On Hit | On Block |
|---|---|---|---|---|---|---|---|
| 14+12 | 6 | 50 total | SA3 | 1000 | H | +6~ | -8~ |
- Cancel Hitconfirm Window: 16f (Super, no combo at close range without CH/PC)
- Projectile Speed: 0.13 (decelerates by 0.01/frame in close proximity)
| Startup | Active | Recovery | Cancel | Damage | Guard | On Hit | On Block |
|---|---|---|---|---|---|---|---|
| 14+12 | 6 | 50 total | SA3 | 1000 | L | +6~ | -8~ |
- Cancel Hitconfirm Window: 16f (Super, no combo at close range without CH/PC)
- Projectile Speed: 0.13 (decelerates by 0.01/frame in close proximity)
Torbalan is an unique "ghost" projectile as it does not have a hitbox while traveling, but will instead start its attack when in close proximity to the opponent.
One of JP's core zoning tools, as they provide frame advantage when blocked at a distance which lets JP threaten with Triglav to enforce the plus frames. Once the opponent is scared of the spike, you can go for greedier things like Departure or another Torbalan. They are also essential in zoning wars to cancel out your opponent's projectiles.
Uniquely for projectiles, MK hits overhead while HK hits low, allowing JP to mixup his opponent from a distance. While slow when done from far away, the low property of HK can be used to prevent opponents from walking back out of pressure or making the threat of Departure Teleport into a jump normal harder to defend against, while MK's property as a high can disrupt opponents using a charge anti-air like Flash Kick looking to anti-air the teleport.
From up-close, they are a bit more efficient as raw mixup thanks to their ability to be canceled into from normals and their similar animations and startup sound, although any cancel outside of Drive Rush/Burnout will leave big mashable gabs. Those gaps can be made scarier to challenge thanks to LK Torbalan being fast enough to frame trap and Embrace being able to catch Parries and Drive Impact.
On hit, LK Torbalan knocks enemies into a limited juggle state similar to the one of MP Stribog, while MK and HK leaves the opponent standing. Combos out of MK/HK are possible on regular hit but difficult outside of the corner as the pushback prevents JP's light from reaching unless they were used raw and point blank. On counter-hit, you can link 5MK and get a combo. At long-range, you can usually follow any version with Triglav.
Due to their nature of only activating once close, a big counter-play to Torbalan is rapid forward movement, be it from special moves (Ken's Dragonlash), Drive Rushes (Dee Jay) or even dashes (Juri). If the opponents passes through Torbalan too fast, it will miss and leave JP punishable.
| Startup | Active | Recovery | Cancel | Damage | Guard | On Hit | On Block |
|---|---|---|---|---|---|---|---|
| 22 | 6(14)6 | 50 total | - | 400x2 | LH | KD +66~ | +25~ |
- Projectile Speed: 0.13 (decelerates by 0.01/frame in close proximity)
OD Torbalan is a great way to either force JP's turn, with great advantage on block up-close, or to win fireball wars thanks to going through meterless ones. If the opponent respects it from a distance, you can usually get away with summoning Departure. It's also fast enough to frame trap from heavy buttons and resets pressure on block. On hit, can be followed up anywhere with Triglav or SA1 when close.
Torbalan Feint (236[K])
| Startup | Active | Recovery | Cancel | Damage | Guard | On Hit | On Block |
|---|---|---|---|---|---|---|---|
| 34 total | - | - | - | - | - | - | - |
By holding down the button, meterless versions of Torbalan will become a feint with much less recovery. This allows JP to bait moves like jump, Parry, or anti-projectile attacks that would otherwise be fast enough to punish Torbalan on reaction. The recovery is faster than any actual projectile, but still slow enough that JP could get hit by a random jump or Drive Rush if timed poorly. OD Torbalan cannot be feinted.
Embrace (214K)
| Startup | Active | Recovery | Cancel | Damage | Guard | On Hit | On Block |
|---|---|---|---|---|---|---|---|
| 26~ | 3 | 44 | - | 1800 (2070) | T | HKD +18 | - |
- Throw with 1 hit of non-OD projectile durability
- Projectile Speed: 0.13 (decelerates by 0.01/frame in close proximity)
- Cannot be performed while Departure or SA2 is active on-screen
JP summons a clone that will travel full screen and grab a grounded opponent. On top of adding an additional layers to JP's zoning that opponents need to be constantly aware of, preventing them from reaction blocking/parrying, it allows JP to counter universal options against Torbalan and Triglav, such as Drive Parries on reaction, or Drive Impact. Just like Torbalan, the throw hitbox is not present until the clone is in close proximity to the opponent.
It's worth noting that projectile invincibility (e.g. Cammy's Spin Knuckle) does not allow the opponent to bypass the Embrace; instead, the opponent must use airborne or throw invincible moves. This makes it harder for some characters to use a one-size-fits-all counter as soon as they react to JP throwing a projectile. Opponents can listen for a specific voice clip to jump over the throw, so the farther away the opponent is, the easier it will be for them to react consistently.
Embrace is slow for a command grab when used at close range, but can still be effective due to the Torbalan-like visual cue and the threat of cancelling into other safe frame trap or high/low projectiles. It's also much harder for opponents to listen for the audio cue from close range cancels while still focusing on other aspects of JP's offense. Embrace leaves a 6-frame gap at minimum when canceled into, but any bonus advantage from Drive Rush or Burnout turns 5HP > Embrace into a true frame trap.
| Startup | Active | Recovery | Cancel | Damage | Guard | On Hit | On Block |
|---|---|---|---|---|---|---|---|
| 26~ | 3 | 44 | - | 2600 (2990) | T | HKD +18 | - |
- Throw with 1-hit OD projectile durability (destroys non-OD projectiles)
- Projectile Speed: 0.13 (decelerates by 0.01/frame in close proximity)
- Cannot be performed while Departure or SA2 is active on-screen
OD Embrace has some extra damage and can go through opponents' projectiles. The slower startup makes it weaker than OD Torbalan in projectile wars, but it is quite rewarding to land especially against opponents who instinctively try to parry against JP. Besides the damage, durability, and Drive cost, it is identical to the meterless version.
Amnesia (22K)
| Startup | Active | Recovery | Cancel | Damage | Guard | On Hit | On Block |
|---|---|---|---|---|---|---|---|
| 3 | 18 | 35(17) | - | - | - | - | - |
- Strike Invuln: 3-20f; counters any physical attack (not throws or projectiles)
- Counter-hit state on frames 1-2, then Punish Counter state until end of recovery
- 17f recovery on successful counter activation is fully invincible; advantage depends on opponent's attack
- Successful counter prevents opponent from canceling their attack (similar to Perfect Parry)
JP takes a pose, and will counter any attack while he is glowing. If Amnesia successfully catches an attack, JP will place one bomb behind him that tracks enemies and explodes after a certain moment. JP usually cannot punish light or medium attacks after a successful counter, while slower heavies and specials are often punishable. Countering a Drive Impact leaves JP at +19, allowing for a full 5HP punish.
After a midscreen counter, JP will take a big step back, making it much harder to punish the opponent; 5HP will rarely reach unless the opponent's move was extremely unsafe. 5MP and 2MK are more reliable in this situation due to their long range. In the corner, there is nowhere for JP to step back to, so he is left much closer for a punish opportunity.
| Startup | Active | Recovery | Cancel | Damage | Guard | On Hit | On Block |
|---|---|---|---|---|---|---|---|
| 1 | 20 | 35(17) | - | - | - | - | - |
- Strike/Throw Invuln: 1-20f; counters any physical attack or throw (not projectiles)
- Punish Counter state until end of recovery
- 17f recovery on successful counter activation is fully invincible; advantage depends on opponent's attack
- Successful counter prevents opponent from canceling their attack (similar to Perfect Parry)
OD Amnesia is JP's primary reversal option; unlike the meterless version, it activates on frame 1 and beats throws. This makes it an extremely powerful option on wakeup or in any blockstring gap. The long active frame period means that even if the opponent delays their throw attempt after baiting JP's wakeup, they can still be punished for their throw attempt. Characters with strong meaty projectile options can deal with this move more effectively, as they will not cause the counter to activate. This version leaves 2 bombs behind, granting much stronger combo and mixup potential.
There are pros and cons to having a counter rather than a traditional invincible reversal. The damage can greatly exceed that of a traditional reversal, and it can lead to strong mixups even if the opponent uses lower-risk options. It's especially devastating as a response to corner throw loops, greatly tilting the risk/reward balance. However, the damage after OD Amnesia is often not guaranteed, especially midscreen. When JP is pressured by safer light or medium strikes, he has to earn his damage by landing a mixup before the bombs detonate.
Amnesia Bomb (22K)
| Startup | Active | Recovery | Cancel | Damage | Guard | On Hit | On Block |
|---|---|---|---|---|---|---|---|
| 59 | 10 | - | - | 800 | LH | KD ~ | - |
- Puts opponents into a free juggle state on hit
- Doesn't go away if JP is hit
- Applies 50% damage scaling when beginning a combo; applies 60% immediate damage scaling when comboed into
Almost uncontestable tools which allow JP to setup whatever he wants as long as they are on the opponent and outside of throw or super range. If the opponent attempts to OD Reversal out, the bomb will usually hit them after their invincibility end and give a free combo to JP. The bomb has an enormous proximity guard range, preventing the opponent from walking back to gain separation from JP before the detonation.
The only real way of going around the bombs is to use an attack with a cinematic, such as any throw/command grab, or a cinematic SA3.
| Startup | Active | Recovery | Cancel | Damage | Guard | On Hit | On Block |
|---|---|---|---|---|---|---|---|
| 59 | 10(32)10 | - | - | 600x2 | LH | KD ~ | - |
- Puts opponents into a free juggle state on hit
- Doesn't go away if JP is hit
- Opponent builds 50% extra Drive meter when parrying the bombs
- Applies 50% damage scaling when beginning a combo; applies 60% immediate damage scaling when comboed into
Two bombs instead of one; the first one explodes at the same time the regular one would while the second one is delayed. This allows JP to combo out of his throw if used immediately after the counter. Like the meterless version, the bomb's proximity guard range makes it impossible to walk back out of JP's range before it detonates.
Some characters can block or parry the first bomb, then whiff an immediate air normal to avoid the second hit. This is not a free escape, as JP can apply pressure to prevent the jump out; other counterplay includes setting up a portal and punishing the jump with Departure: Shadow. The following are some moves that can be used to escape between bomb hits:
- j.MP: A.K.I., Cammy, Chun-Li, Dee Jay, Ed, Guile, Jamie, Ken, Kimberly, Lily, Manon, Rashid, Ryu
- j.MK: Cammy, Ed, Guile, JP, Ken, Lily, Manon, Rashid, Ryu
- j.HK: Chun-Li, Ed, Jamie, Juri
- nj.HK: Chun-Li, Juri, Ken
- Misc: Chun-Li j.2MK (whiff only), Rashid nj.8HK, Dhalsim ground teleport
- No Escape: Blanka, E. Honda, Luke, Marisa, Zangief
Super Arts
Level 1 Super (236236P)
| Startup | Active | Recovery | Cancel | Damage | Guard | On Hit | On Block |
|---|---|---|---|---|---|---|---|
| 8 | 14,1~ | 62 | - | 400,1600 (2000) | LH | KD +22(+32) | -33(-23) |
- Full Invuln: 1f; Strike/Throw Invuln: 2-10f; Armor Break
- Drive Gauge Depletion: 0.5 bars (hit) / 0.25 bars (block)
- 2-hit projectile hitbox with Super priority
- 1st hit can be Perfect Parried like a strike; useful in corner juggles
- 2nd hit travels fullscreen
- Projectile Speed: 0.3 (2nd hit)
- 30% minimum damage scaling
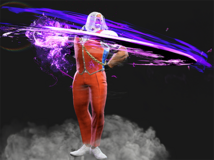
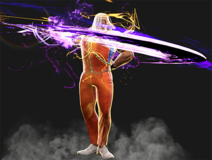
Chornobog hits a short distance in front of JP before shooting a full-screen projectile on the 2nd hit. It can go through and punish some slower fireballs (like JP's own Torbalan). The vertical hitbox can whiff on some neutral jump baits, but overall can be a solid anti-air. SA1 is a solid reversal option, especially when in Burnout or if you expect the opponent to use a safe meaty strike against OD Amnesia.
SA1 has some of the highest juggle potential of JP's arsenal, and can be used at the end of most of his launches for extra damage. The corner makes it much easier to land the first hit, allowing juggle routes like 236MP into SA1. Do note that ending a combo in SA1 sacrifices okizeme.
Because SA1 is a projectile, many characters can bait the reversal and avoid it with a projectile-invuln move after the super freeze (e.g. Jamie's Bakkai, Cammy's Spin Knuckle, or Zangief's Lariat). This allows a burned out opponent to slightly delay their pressure without fear of being chipped out by reversal SA1.
Level 2 Super (214214P)
| Startup | Active | Recovery | Cancel | Damage | Guard | On Hit | On Block |
|---|---|---|---|---|---|---|---|
| 1 | - | 7 | - | 500x4 (2000) | LH,H,L,H | - | - |
- Full Invuln: 1f (until freeze); Armor Break
- Summons four 1-hit projectile clones with Super priority (disappears if JP is hit)
- Total startup of each projectile: 29f / 66f / 103f / 140f
- JP cannot use Torbalan or Embrace while active
- Drive Gauge Depletion: 1 bar (0.25 per hit) / 0.4 bars (0.1 per block)
- 40% minimum damage scaling (applies to projectile clones only)
- Applies 25% damage scaling to 3rd hit when beginning a combo (100/100/55...)
- Applies 25% immediate damage scaling when comboed into
JP summons 4 projectile clones that track the opponent's location, attacking one at a time. Great as a combo extender or to start pressure from anywhere on the screen. The invincibility only lasts until the Super freeze, so it shouldn't be used as a defensive option.
The projectiles always have the same attack pattern and must be blocked in the order: Low/High > High > Low > High. On block or parry, there is a 17 frame gap between each projectile; this allows JP to threaten the opponent with a throw, which prevents the opponent from simply holding parry to avoid the mixup. Depending on the timing, a throw can even combo into one of the clones, allowing a (heavily scaled) follow-up juggle. The blockstring gaps give the opponent an opportunity to counter with an invincible reversal, but JP can use other moves to extend the blockstun and prevent this.
The game does not allow simultaneous Low and Overhead hits to break the opponent's guard, so there are no true unblockable setups with this Super. However, even a 1 frame difference between hits will require the opponent to block both in the proper direction. Combining an overhead projectile with 2LK/2MK or a low projectile with 6MK creates a "pseudo-unblockable" sequence. While parry can block both directions, the opponent cannot activate their parry if they are already stuck in blockstun.
The 4 projectiles all combo into each other on hit, allowing JP to add a few strong hits of his own before the Super ends or reposition for optimal screen position. He is locked out of any other ghost projectile specials (236K/214K) for the duration of the Super, but can still set up Departure portals for increased damage or a tricky reset.
Level 3 Super (236236K)
| Startup | Active | Recovery | Cancel | Damage | Guard | On Hit | On Block |
|---|---|---|---|---|---|---|---|
| 18 | 6 | 62 | - | 4000 | LH | HKD +44 | -50 |
- Full Invuln: 1-23f; Armor Break
- Drive Gauge Depletion: 1.5 bars (hit) / 0.75 bars (block)
- Cinematic time regenerates ~1.8 Drive bars for JP
- 50% minimum damage scaling; applies 10% immediate damage scaling when canceled from special moves
| Startup | Active | Recovery | Cancel | Damage | Guard | On Hit | On Block |
|---|---|---|---|---|---|---|---|
| 18 | 6 | 62 | - | 4500 | LH | HKD +44 | -50 |
- Full Invuln: 1-23f; Armor Break
- Available at 25% HP or below
- Drive Gauge Depletion: 2 bars (hit) / 1 bar (block)
- Cinematic time regenerates ~2.2 Drive bars for JP
- 50% minimum damage scaling; applies 10% immediate damage scaling when canceled from special moves
JP teleports to the opponent's location, allowing combo conversions from full screen or a projectile punish with good reactions. The attack can whiff if the opponent is too high in the air, like after a HP Stribog wall bounce. The startup is quite slow, making it risky as a reversal option; SA1 is the better Super reversal unless the opponent is using a meaty projectile.
The Critical Art version has the same knockdown advantage as his regular SA3, but leaves JP and the opponent a full screen apart after the cinematic.
Taunts
Neutral Taunt (5PPPKKK)
| Startup | Active | Recovery | Cancel | Damage | Guard | On Hit | On Block |
|---|---|---|---|---|---|---|---|
| 220 (total) | - | - | - | - | - | - | - |
Forward Taunt (6PPPKKK)
| Startup | Active | Recovery | Cancel | Damage | Guard | On Hit | On Block |
|---|---|---|---|---|---|---|---|
| 395 (total) | - | - | - | - | - | - | - |
Back Taunt (4PPPKKK)
| Startup | Active | Recovery | Cancel | Damage | Guard | On Hit | On Block |
|---|---|---|---|---|---|---|---|
| 202 (total) | - | - | - | - | - | - | - |
