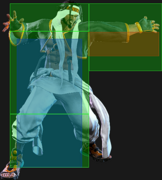
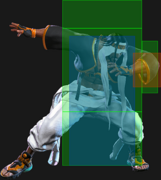
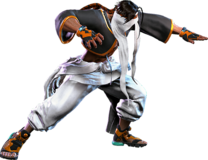
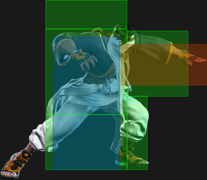
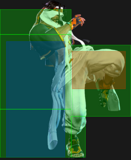
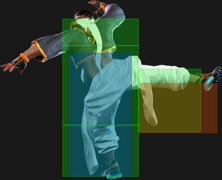
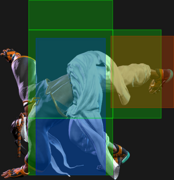
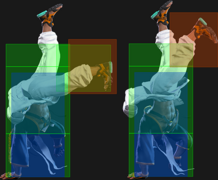
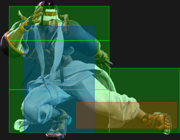
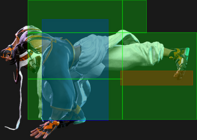
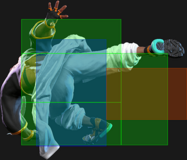
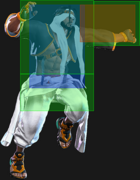
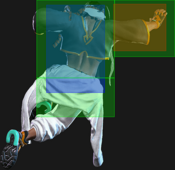
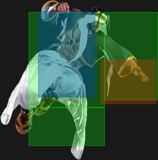
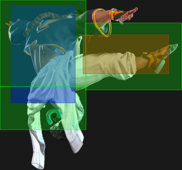
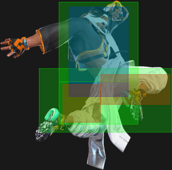
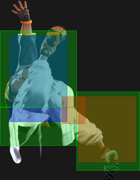
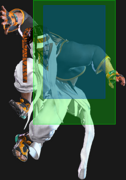
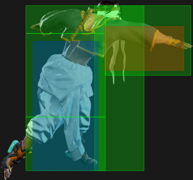
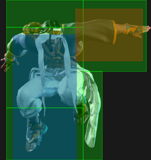
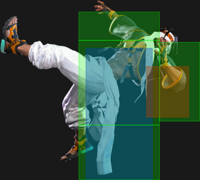
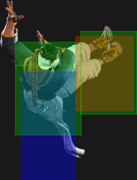
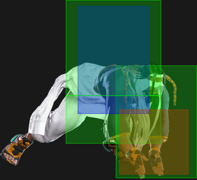
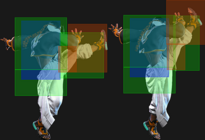
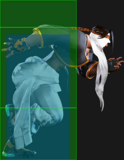
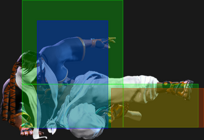
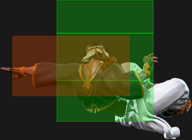
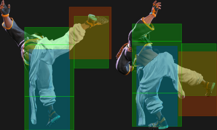
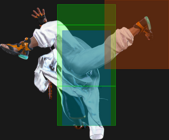
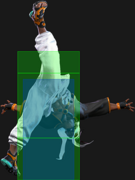
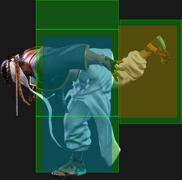
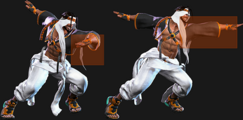
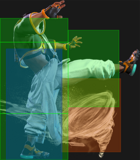
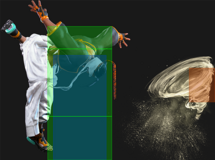
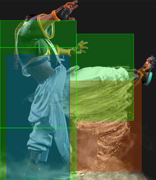
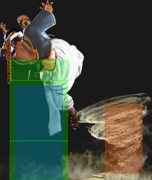
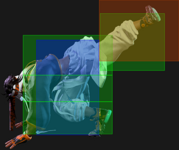
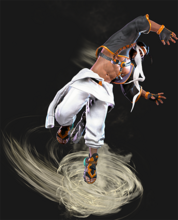
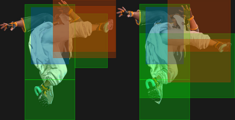
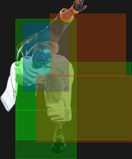
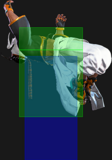
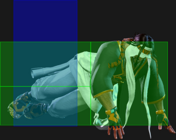
Street Fighter 6/Rashid

From SuperCombo Wiki


Introduction

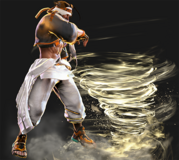
"The Soaring Eagle of the Desert" that fights using parkour. With the wind as his ally, he outfoxes opponents with his high mobility. Born into nobility, he's a carefree but earnest man. Loves video streaming.

Rashid is a character with a unique focus on strong mobility options and unique "air current" projectiles. These air currents modify Rashid's movement when he passes through them while jumping or performing a special, affecting the way he chooses to approach his opponent.

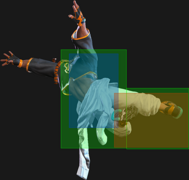
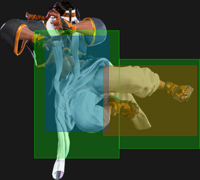
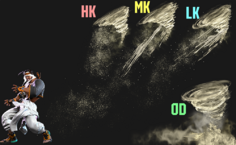
While Rashid has the traditional shotoclone fireball/DP combo to work with, he puts a number of unique touches on them to make them his own. His fireball Whirlwind Shot travels upwards at a diagonal angle instead of fully horizontal, and can be charged up to leave an air current. His DP Spinning Mixer meanwhile travels in many directions rather than the usual single version. The light version goes horizontally, the medium version travels diagonally up, and the heavy version goes straight upwards. As one can see, Rashid places a lot of emphasis on controlling the space directly in front of him and above him.

The reason why is that Rashid has a number of extremely powerful mobility tools once he's established control over these spaces. Rashid is unique among the cast in that he has a run which activates after he takes a forward dash. He can use 6KK to front flip across the screen, or use Arabian Skyhigh to flip through the air and come down in unique angles. Combining all of these options together, accented further with the air currents he creates, can allow Rashid unprecedented forward movement.

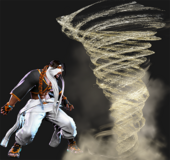
Once he's zoned in on you, Rashid becomes frightening to deal with as a defender. Rashid not only has a throw loop, but his light Spinning Mixer does good Drive Bar damage and is safe on block. Rashid has many ways to threaten quick mixups with 6HP or be plus on block with 2MP. Once he's gotten you launched into a combo, Rashid can layer on Arabian Cyclone during your wakeup to keep you blocking. Even worse, Arabian Cyclone can also be used to set up high/low/throw mixups. If he's got meter to spend, Rashid can also drop the powerful Ysaar onto you to force a checkmate scenario. All in all, Rashid's close-range offense is one of the strongest in the game and something he excels at.

And excel at that offense he must, as Rashid's pokes are very stubby and his footsies in general is lacking. Rashid's kit is very complex and freeform, which both acts as a boon (in that it gives him lots of tools) and a curse (in that picking the best option can be difficult). As well, while Spinning Mixer is a decent anti-air option, it is only air-invulnerable on frame 6 as opposed to the standard frame 1, which combined with his mediocre anti-air buttons makes it hard for him to reactively stuff aerial approaches. All in all, Rashid is excellent for people who want to get in and flex their offense. If you want peerless mobility, excellent close-range pressure and a wealth of style alongside it, ride the waves with Rashid.


Pick if you like: Avoid if you dislike:
  • Diverse, powerful, and plentiful mobility options, including: a run with command normal followups, forward-moving specials, crossover flips, and double-jumping air specials
  • Consistent and threatening pressure with many ways to be plus on block
  • Plentiful ways to spend resources and force mixups, including one of the most oppressive projectile supers in the game
  • Lacking fullscreen options and smaller buttons in neutral, making strong movement a must
  • A large and complex kit, which can make efficient decision making difficult
  • Anti-airs that require precise timing due to their minimal invincibility


Classic & Modern Versions Comparison

List of differences with Modern Rashid
Missing Normals
  • Standing Light Kick (5LK)
  • Crouching Medium Punch (2MP)
  • Jumping Light Punch (j.LP)
  • Jumping Medium Punch (j.MP)
  • Jumping Heavy Punch (j.HP)
Missing Command Normals
  • Crescent Kick (6HK)
Shortcut-Only Specials
  • Whirlwind Shot (5S)
    • MK version by default; hold left/right to change trajectory
  • Eagle Spike (4S)
    • Light/OD Only
Miscellaneous Changes
  • N/A


Rashid
SF6 Rashid Portrait.png
Vitals
Life Points 10000
Ground Movement
Forward Walk Speed 0.045
Backward Walk Speed 0.032
Forward Dash Speed 18
Backward Dash Speed 25
Forward Dash Distance 1.20 (1.86)
Backward Dash Distance 1.10 (1.91)
Drive Rush Min. Distance (Throw) 0.796
Drive Rush Min. Distance (Block) 2.253
Drive Rush Max Distance 2.998
Jumping
Jump Speed 4+38+3
Jump Apex 2.115
Forward Jump Distance 1.90 (5.07)
Backward Jump Distance 1.52 (3.63)
Throws
Throw Range 0.8
Throw Hurtbox 0.33
Frame Data Glossary - SF6
Hitbox Images

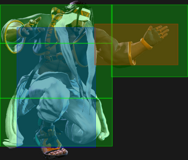
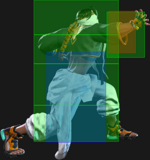
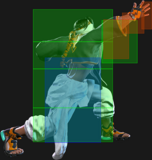
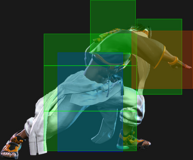
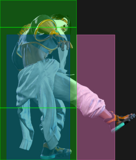
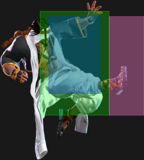
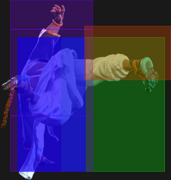
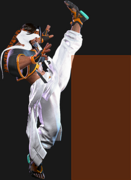
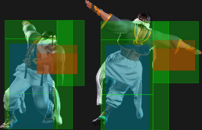
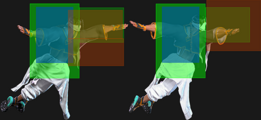
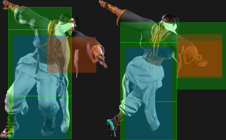
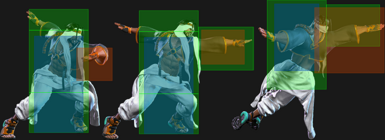
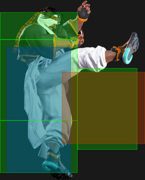
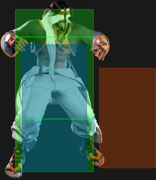
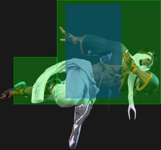
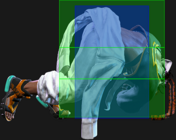
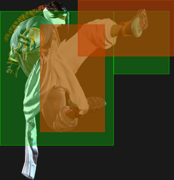
🟥 (Red): Attack hitbox

  • Appears pink for Throw hitboxes

🟩 (Green): Vulnerable hurtbox that can be hit by strikes/projectiles

  • If a move's hitbox and hurtbox overlap, the colors blend to appear orange

🟦 (Blue): Vulnerable throw hurtbox

  • Will be thrown if Pink throw hitbox touches Blue throw hurtbox


Active

How many frames a move remains active (can hurt opponents) for. For projectiles with a maximum active period, a value may be listed in [brackets], but this number is not factored into the move's total frame count.

  • For multi-hit moves with no gaps between the active hitboxes, active frames are listed as X,Y (or sometimes X*Y)
  • For multi-hit moves with gaps between hits, active frames are listed as X(n)Y where n = the frame gap between hitboxes.


Cancel

Available options for canceling one move into another move.

  • "Chn": Chain cancel (Light normals; specific chain options listed in Description)
  • "TC": Target Combo
  • "Sp": Special move
  • "SA": Super Art (if a number is listed, refers only to that specific Super; SA3 = Lv.3 Super Art)
  • "Jmp": Jump cancel (usually on hit only, if applicable)
  • "SS": Serenity Stream (Chun-Li's stance)
    • If one hit of a multi-hit attack is cancelable, this can be indicated with (1st), (2nd), etc.
    • Occasionally, a move can be canceled only into a specific follow-up (e.g. Dee Jay [4]6P > 22PP); this can be indicated by listing the move input in the Cancel field, or with an asterisk that is explained in the move notes (Sp*)


Cancel Hitconfirm Windows

Hitconfirm reaction windows into Special Moves, Target Combos, and Super Arts.

  • Refers to the amount of time (in frames) you have to cancel one attack into another attack on reaction
    • e.g. most cancelable 2MKs have a 13 frame window to cancel into a Special/Super on reaction, making them nearly impossible to hitconfirm
  • Counts from the first frame the attack connects until the final cancelable frame
    • Visual effects like hitsparks and HP drain do not actually occur until frame 2; the first frame is still counted to keep the numbers consistent with previous games, and because it is technically possible to start reacting to the character's reeling animation on frame 1
  • If a Target Combo is cancelable into another attack, the hitconfirm window will include the entire sequence starting from the first hit
    • If there is a frame gap on block between hits of the TC, the hitconfirm window may also be included for just the followup hit
    • Some sequences like Ken's 5MP~HP TC may have a range of values listed (43f~47f). In this example, inputting 5MP~HP at its usual timing gives a 43f hitconfirm into a Special/Super. Delaying the chain into HP gives more total time for the final hitconfirm.


Damage

Attack damage on hit. Multi-hit moves may have the damage listed for individual hits as X,Y (or sometimes X*Y). Sometimes a move's damage changes depending on which active frame connects, or on cinematic vs. non-cinematic hits; in this case, multiple values may be listed, and it will be clarified in the move description.

Damage Scaling

Some moves cause additional damage scaling in combos. Refer to Game Data page for a more detailed breakdown.

Scaling Types:

  • Starter: When a move begins the combo, the next attack is scaled by X percent
    • e.g. Ryu 2MK (20% Starter) > Hadoken: Hadoken is at 80% damage scaling
  • Combo: When a move is comboed into, the next attack is scaled by X percent or X number of hits
    • e.g. Ryu 2HP > OD High Blade Kick (2-Hit Combo Scaling) > Shoryuken: Shoryuken is at 70% damage scaling (100% > 100% > [skip 80%] > 70%)
    • e.g. Cammy 5HP > OD Spiral Arrow (5% Combo Scaling) > Cannon Spike: Cannon Spike is at 75% damage scaling (100% > 100% > [80-5 = 75%])
  • Immediate: When a move is comboed into, this attack is scaled by X percent
    • e.g. Drive Impact Crumple (20% Starter) > Throw (20% Immediate): Throw is at 60% damage scaling
  • Multiplier: A damage scaling multiplier applies after Perfect Parry (50%) and mid-combo Drive Rush (15%). Any hits in the combo continue their usual damage scaling, but reduced by these amounts. These can bring the minimum scaling below the usual 10%, and they stack with each other; as a result, the minimum scaling can reach 4% using a long Drive Rush combo after Perfect Parry.
  • Minimum Scaling: The lowest damage scaling that can be applied to an attack. Super Art Level 1/2/3 generally has 30%/40%/50% minimum scaling respectively. This ensures the attack will still do reasonable damage even at the end of a heavily scaled combo.


Drive Rush Cancel Advantage

Refers to the frame advantage when canceling a normal, command normal, or Target Combo into Drive Rush on hit or block (abbreviated as DRC for Drive Rush Cancel). This is calculated at the moment a follow-up attack can be input, not at the moment the character can block or perform movement options. An attack that with DRC +8 on Hit can link into an 8-frame attack, and DRC +4 on Block can create a true blockstring into a 4-frame attack.

Note that any DRC on Block worse than +4 cannot form a true blockstring, allowing the opponent to interrupt with an invincible reversal. Most light normals are slightly negative after a DRC on block, meaning the opponent can mash their fastest normal to guarantee a counter-hit (though this requires fast reactions). The attacking character could punish this with Light > DRC into an immediate invincible attack, but this would be an incredibly expensive and high-risk gambit.

Forced Knockdown

Most airborne command normals, special moves, and Super Arts put the user in a "Forced Knockdown" state. While in this state, an air knockdown will occur when being hit by any attack, even if it would otherwise cause an air reset.

As an example, Ryu's 2HP causes an air reset when used as an anti-air. Against a move like Cammy's Hooligan Combination, however, the 2HP puts her into an air knockdown state. This allows Ryu to successfully cancel 2HP into Shoryuken for a juggle, similar to how a Drive Impact wall splat works. Taking advantage of Forced Knockdown juggles is important for dealing with moves like Ken's Dragonlash, Dhalsim's Air Teleport, or Kimberly's 6HK~Hop sequence.

Moves that already cause an air knockdown, like most j.MP air-to-airs, will not display the "Forced Knockdown" message.

Guard

Refers to the direction an attack must be blocked. L is for Low attacks (must be blocked crouching), H is for High attacks/overheads (must be blocked standing), LH is for attacks that can be blocked crouching or standing. T is for Throw attacks which cannot be blocked.

Juggles

When a character is put into an Air Knockdown state, it is often possible to follow up with a Juggle attack before they hit the ground. In the simplest terms, there are 2 main juggle states:

  • Free Juggle: any attack can juggle, causing an Air Reset or an Air Knockdown
  • Limited Juggle: only specific attacks with juggle potential may juggle


The following is a more detailed overview of the SF6 juggle system:

Juggle Count (JC): The status of the character being juggled. A high JC limits which attacks can work in juggles.

  • JC0: free juggle state - any attack that can hit an airborne opponent will work
  • JC1+: limited juggle state - juggle only works if the attack's Juggle Limit ≥ defender's Juggle Count

Juggle Start (JS): When starting a juggle, the opponent's JC will be set to this value. May be different vs. standing and airborne opponents.

  • Attack with Juggle Start value of 3 will put opponent at JC3, so only attacks with Juggle Limit value ≥ 3 can follow up

Juggle Increase (JI): When opponent is already in a juggle state, attacks will increase the opponent's JC by this amount.

  • Airborne opponent at JC1 followed by attack with Juggle Increase value of 3 will set opponent to JC4

Juggle Limit (JL): Property of an attack hitbox that determines whether it connects on a juggled opponent. The JL must be ≥ the opponent's JC to hit successfully.

  • An uppercut with a JL value of 5 will connect on an opponent at JC5 or below, but will whiff on JC6 opponent
  • Most normals have a JL value of 0, meaning they only work in Free Juggle (JC0) states
  • Some multi-hit attacks have different JL values on each hit, so a 3-hit move may only hit twice in juggles

An example to tie everything together:

  • An attack (JS3) launches opponent into the air (Opponent now at JC3)
  • Followed up with an attack (JI2/JL4); it connects, because JL4 ≥ JC3 (Opponent now at JC5)
  • Attempts to juggle again with same attack (JL4), but whiffs because JL4 < JC5 (Opponent hits the ground)

Drive Rush notes:

  • DR normals have a Juggle Start/Increase value of 0
  • DR normals have +3 added to their usual Juggle Limit


On Hit/Block

These are frame advantage values when the attack hits or is blocked. If the number is positive, then the move will recover before the defender can act again. If the number is negative, the defender will be able to act before the attacker and maybe even punish. KD refers to knockdown on hit, and the listed KD Advantage refers to how many frames the attacker can act before the defender finishes their wakeup animation.

  • Note that generally, there is an extra +2 hit advantage on Counterhits and +4 hit advantage on Punish Counters (exceptions are noted in the description).


Recovery

How many frames it takes for a move to finish after the active frames have finished. For projectiles, recovery is considered to begin after the first active frame.

  • Moves with different recovery values on hit/block/whiff may have multiple values listed like X(Y), with specific details listed in the description.


Startup

How many frames it takes before the move becomes 'active' or have a hit box. The last startup frame and the first active frame are the same frame, meaning all values are written as Startup + 1.

  • Moves with multiple relevant startup values may be listed as X(Y); for example, a move that hits airborne first before hitting grounded opponents, or a 2-hit move where the first hit whiffs at some ranges.


Normals

Standing Normals

5LP
Standing Light Punch
5LP
SF6 Rashid 5lp.png
SF6 Rashid 5lp hitbox.png
Hitboxes Off
Hitboxes On

5LP
Standing Light Punch
Startup Active Recovery Cancel Damage Guard On Hit On Block
4 2 9 Chn Sp SA 300 LH +4 -1
  • Chains into 5LP/2LP/2LK
  • Cancel Hitconfirm Window: 12f
  • Drive Rush cancel advantage: +5 oH / 0 oB
  • Applies 10% damage scaling to next hit when beginning a combo (100/90/80...)


Rashid's 4f button of choice, useful in both pressure and as an abare tool. It can chain up to 3 times, ending in LP or MP Spinning Mixer. It can also link into 5LK on hit, allowing for a stronger 214LK ender.

5MP
Standing Medium Punch
5MP
SF6 Rashid 5mp.png
SF6 Rashid 5mp hitbox.png
Hitboxes Off
Hitboxes On

5MP
Standing Medium Punch
Startup Active Recovery Cancel Damage Guard On Hit On Block
6 3 14 TC Sp SA 600 LH +5 +1
  • Chains into 5MP~HK target combo
  • Cancel Hitconfirm Window: 15f
  • Drive Rush cancel advantage: +12 oH / +8 oB


One of Rashid's two medium normals with advantage on block. 5MP is a bit worse than 2MP in pressure due to its larger pushback, but it gives access to a useful launching Target Combo (5MP~HK) instead. This button also serves as useful combo filler after a 5MK starter.

Rashid can frame trap with light normals after 5MP, but his options out of this are very limited due to his generally stubby buttons. It is a great button to use out of Drive Rush on both hit and block.

5HP
Standing Heavy Punch
5HP
SF6 Rashid 5hp.png
SF6 Rashid 5hp hitbox.png
Hitboxes Off
Hitboxes On

5HP
Standing Heavy Punch
Startup Active Recovery Cancel Damage Guard On Hit On Block
9 3 21 Sp SA 800 LH +1 -4
  • Cancel Hitconfirm Window: 17f
    • Special/DR cancel is delayed until after 2nd active frame
  • Drive Rush cancel advantage: +14 oH / +9 oB


A decent counterpoke due to its hitbox, but lacking the range to compete with some of the games stronger buttons. This button is great in many Drive Rush combos, although it is too slow to combo from 2MK > DRC without at least a Counter-hit advantage bonus.

Rashid has several useful cancel routes like MK/OD Eagle Spike or OD Arabian Cyclone. With a Punish Counter or DR~5HP starter, you gain access to HK Eagle Spike's enormous corner carry as well.

5LK
Standing Light Kick
5LK
SF6 Rashid 5lk.png
SF6 Rashid 5lk hitbox.png
Hitboxes Off
Hitboxes On

5LK
Standing Light Kick
Startup Active Recovery Cancel Damage Guard On Hit On Block
4 3 10 Sp SA 300 LH +3 -1
  • Cancel Hitconfirm Window: 13f
    • DR cancel is delayed until after active frames
  • Drive Rush cancel advantage: +4 oH / 0 oB
  • Applies 10% damage scaling to next hit when beginning a combo (100/90/80...)


5LK has the most hitstun of any of Rashid's light normals, allowing it to combo into 214LK. The range is a little short, limiting Rashid's combo options; DR~2LK momentum is needed to link into this from a low chain.

5MK
Standing Medium Kick
5MK
SF6 Rashid 5mk.png
SF6 Rashid 5mk hitbox.png
Hitboxes Off
Hitboxes On

5MK
Standing Medium Kick
Startup Active Recovery Cancel Damage Guard On Hit On Block
8 3 17(19) - 600 LH +6 -3
  • 2f extra recovery on whiff


One of Rashid's farthest reaching pokes, this combo starter links naturally into 5MP if close enough. Without Drive Rush or Burnout, the block disadvantage will immediately end Rashid's pressure.

At max range, 5MK will not combo into anything, but on Counter-hit it links to itself for a little extra damage. Somewhat vulnerable to Drive Impact since it cannot cancel, but Rashid has plenty of options to discourage random DI usage.

5HK
Standing Heavy Kick
5HK
SF6 Rashid 5hk.png
SF6 Rashid 5hk hitbox 1.png

SF6 Rashid 5hk hitbox 2.png
Hitboxes Off
Hitboxes On

5HK
Standing Heavy Kick
Startup Active Recovery Cancel Damage Guard On Hit On Block
13 8 18 - 800 LH -1 -5
  • Punish Counter: KD +49 Launch (limited juggle state)
  • Puts airborne opponents into limited juggle state
  • Forces Stand on hit; final 2 active frames whiff on crouching opponents
  • Anti-air hitbox cannot hit cross-up
  • Extends a hurtbox 1f before active that is vulnerable to projectiles


A fairly long range kick with high pushback on block; despite the frame disadvantage, most characters will struggle to take their turn back after blocking.

The Punish Counter juggle state makes it great for whiff punishing, allowing a follow-up like MP Spinning Mixer from almost any range. It also gives a juggle off of any airborne hit, but the upward hitbox does not truly begin until the 6th active frame; this makes it a slow but rewarding 18f anti-air if you are ready to predict the opponent's jump timing. Be careful not to attempt this from closer ranges, as Rashid can simply whiff under the opponent.


Crouching Normals

2LP
Crouching Light Punch
2LP
SF6 Rashid 2lp.png
Boi
SF6 Rashid 2lp hitbox.png
Hitboxes Off
Hitboxes On

2LP
Crouching Light Punch
Startup Active Recovery Cancel Damage Guard On Hit On Block
5 3 7 Chn Sp SA 300 LH +5 -1
  • Chains into 5LP/2LP/2LK
  • Cancel Hitconfirm Window: 13f
    • DR cancel is delayed until after 2nd active frame
  • Drive Rush cancel advantage: +4 oH / -2 oB
  • Applies 10% damage scaling to next hit when beginning a combo (100/90/80...)


Compared to 5LP, this button has worse range and startup, but compensates with less pushback and better hit advantage. The opponent is more likely to be left in throw range for a mixup between tick throw or a chained light normal. A 3-hit chain starting with 2LP can link into 5LK, which allows better combos than ending with a LP button.

2MP
Crouching Medium Punch
2MP
SF6 Rashid 2mp.png
SF6 Rashid 2mp hitbox 1.png

SF6 Rashid 2mp hitbox 2.png
Hitboxes Off
Hitboxes On

2MP
Crouching Medium Punch
Startup Active Recovery Cancel Damage Guard On Hit On Block
6 4 13 Sp SA 600 LH +4 +1
  • Anti-air hitbox on frames 7-9 (cannot hit opponents behind Rashid)
  • Can whiff on crouching opponents longer ranges
  • Cancel Hitconfirm Window: 16f
  • Drive Rush cancel advantage: +11 oH / +8 oB


Rashid's other plus on block normal alongside 5MP. In comparison, 2MP has more active frames and less pushback, making it better as a meaty tool. It is generally worse as combo filler because it often won't connect on the first active frame, so stick with 5MP for that purpose.

The anti-air hitbox is fairly low to the ground, making it difficult to time against stronger jump-ins, and it is largely ineffective against close jumps.

2HP
Crouching Heavy Punch
2HP
SF6 Rashid 2hp.png
SF6 Rashid 2hp hitbox.png
Hitboxes Off
Hitboxes On

2HP
Crouching Heavy Punch
Startup Active Recovery Cancel Damage Guard On Hit On Block
12 3 21(23) SA 900 LH +5 -6
  • 2f extra recovery on whiff
  • Cancel Hitconfirm Window: 17f (Super)
  • Applies 20% damage scaling to next hit when beginning a combo (100/80/70...)


One of Rashid's better ranged pokes, despite being a little slow on startup and recovery. It can be buffered into Supers to greatly increase its damage potential, and can even be canceled on reaction if you're fast enough.

2HP can be used as a punish starter into 5HP, but the high pushback will cause combos to drop outside of close range. Its best combo use is in Drive Rush cancels after 5MP, 5HP, or Punish Counter 2MK, providing the same link options without the finicky range issues.

2LK
Crouching Light Kick
2LK
SF6 Rashid 2lk.png
SF6 Rashid 2lk hitbox.png
Hitboxes Off
Hitboxes On

2LK
Crouching Light Kick
Startup Active Recovery Cancel Damage Guard On Hit On Block
5 3 8 Chn 200 L +3 -1
  • Chains into 5LP/2LP/2LK
  • Applies 10% damage scaling to next hit when beginning a combo (100/90/80...)


Rashid's 2LK is fairly standard, allowing for chains into either LP button that can be canceled for a low-damage combo. The pushback is higher than his other lights, so he won't be able to end a combo with 5LK > 214LK, but he can still get a 3-hit combo into Spinning Mixer. When used after Drive Rush, Rashid can frame trap into 5MP, which also allows a quick confirm on hit.

2MK
Crouching Medium Kick
2MK
SF6 Rashid 2mk.png
SF6 Rashid 2mk hitbox.png
Hitboxes Off
Hitboxes On

2MK
Crouching Medium Kick
Startup Active Recovery Cancel Damage Guard On Hit On Block
7 3 18 Sp SA 500 L -1 -5
  • Cancel Hitconfirm Window: 13f
    • DR cancel is delayed until after active frames
  • Drive Rush cancel advantage: +8 oH / +4 oB
  • Applies 20% damage scaling to next hit when beginning a combo (100/80/70...)


Rashid's farthest reaching special cancelable move. This is an integral neutral tool as it can be useful to setup Drive Rush or buffered special moves. The range is on the lower end when it comes to cancelable 2MKs, but it's also one of the faster ones at 7f startup. After confirming a hit into Drive Rush cancel, Rashid's best link is 5MK, 5HP. If you whiff punish with 2MK, go into 2HP, 5HP instead for extra damage.

2HK
Crouching Heavy Kick
2HK
SF6 Rashid 2hk.png
SF6 Rashid 2hk hitbox.png
Hitboxes Off
Hitboxes On

2HK
Crouching Heavy Kick
Startup Active Recovery Cancel Damage Guard On Hit On Block
9 3 24(28) - 900 L HKD +31 -11
  • Counter-hit/Punish Counter: HKD +47
  • Has juggle potential; not a Hard Knockdown when juggled into
  • 4f extra recovery on block (block disadvantage is fixed regardless of which active frame connects)


Rashid's sweep has fairly short range and is easily punished by most characters even at max range. It is fast enough to use as an occasional whiff punish, or to punish other sweeps if the pushback allows it. It becomes a much better harassment tool against opponents in Burnout as long as they don't have a great 7f normal to punish with.


Jumping Normals

j.LP
Jumping Light Punch
j.LP
SF6 Rashid jlp.png
SF6 Rashid jlp hitbox.png
Hitboxes Off
Hitboxes On

j.LP
Jumping Light Punch
Startup Active Recovery Cancel Damage Guard On Hit On Block
4 5 3 land - 300 H - -


A fast air-to-air normal for situations where other anti-airs may whiff or are too slow.

j.MP
Jumping Medium Punch
j.MP
SF6 Rashid jmp.png
SF6 Rashid jmp hitbox.png
Hitboxes Off
Hitboxes On

j.MP
Jumping Medium Punch
Startup Active Recovery Cancel Damage Guard On Hit On Block
9 5 3 land Sp 600 H - -
  • Puts airborne opponents into limited juggle state
  • Cancelable into j.214K when used from forward jump
  • Shifts Rashid's hurtbox upward during startup


A useful air-to-air that can lead to some extra damage when canceled. If done late in the jump arc, Rashid can land and pick up a juggle on the ground as well.

j.HP
Jumping Heavy Punch
j.HP
SF6 Rashid jhp.png
SF6 Rashid jhp hitbox.png
Hitboxes Off
Hitboxes On

j.HP
Jumping Heavy Punch
Startup Active Recovery Cancel Damage Guard On Hit On Block
8 4(2)3 3 land - 400x2 H,H - -
  • 1st hit puts airborne opponents into limited juggle state
  • 2nd hit causes spike knockdown vs. airborne opponents


A 2-hit air normal that requires semi-precise timing to ensure both hits connect. As an air-to-air, both hits will connect properly for a knockdown. Ending a juggle with j.HP is generally a weak option, as only one hit will connect. If the first hit is stand blocked, the second hit will not hit overhead against an opponent that immediately crouch blocks.

j.LK
Jumping Light Kick
j.LK
SF6 Rashid jlk.png
SF6 Rashid jlk hitbox.png
Hitboxes Off
Hitboxes On

j.LK
Jumping Light Kick
Startup Active Recovery Cancel Damage Guard On Hit On Block
5 5 3 land - 300 H - -
  • Longest horizontal range of Rashid's air normals


Mostly used as an air-to-air due to its long horizontal range.

j.MK
Jumping Medium Kick
j.MK
SF6 Rashid jmk.png
SF6 Rashid jmk hitbox.png
Hitboxes Off
Hitboxes On

j.MK
Jumping Medium Kick
Startup Active Recovery Cancel Damage Guard On Hit On Block
7 6 3 land - 500 H - -
  • Can hit Cross-up
  • Shifts Rashid's hurtbox upward during startup


A cross-up air normal with a somewhat narrow hitbox. Neutral jumping into an Air Current while standing next to the opponent will usually carry Rashid just far enough for j.MK to hit as a cross-up.

j.HK
Jumping Heavy Kick
j.HK
SF6 Rashid jhk.png
SF6 Rashid jhk hitbox.png
Hitboxes Off
Hitboxes On

j.HK
Jumping Heavy Kick
Startup Active Recovery Cancel Damage Guard On Hit On Block
10 5 3 land - 800 H - -
  • Spike knockdown vs. airborne opponents when used after j.214K or 214P~4K


A heavy jump-in that's easier to time than j.HP due to being a single hit. It does not cause an air knockdown on a normal air connect, but in certain juggle routes it becomes a useful knockdown ender.

Wall Jump
Wall Jump
9 (against wall)
SF6 Rashid walljump.png
SF6 Rashid walljump hitbox.png
Hitboxes Off
Hitboxes On

9 (against wall)
Wall Jump
Startup Active Recovery Cancel Damage Guard On Hit On Block
- - - - - - - -
  • Forced Knockdown and Counter-hit state for the entire duration
  • Cannot be performed after j.2HP or j.214K
  • Can be done from Back or Neutral Jump if fully against the back wall
  • Can also be done against a cornered opponent after a Forward Jump
    • Rashid will face the new direction after bouncing off wall, affecting the direction that air attacks come out


While not quite as scary as its SFV counterpart, Rashid's wall jump can be used to escape the corner against unprepared opponents. Even the threat of the wall jump may cause an opponent to hesitate when anti-airing a cornered Rashid.


Command Normals

6MP
Flapping Spin
6MP
SF6 Rashid 6mp.png

SF6 Rashid 6mp2.png
SF6 Rashid 6mp hitbox 1.png

SF6 Rashid 6mp hitbox 2.png
Hitboxes Off
Hitboxes On

6MP
Flapping Spin
Startup Active Recovery Cancel Damage Guard On Hit On Block
8(24) 2(14)2 18 Sp SA (1st) 300x2 LH +1 -3
  • 2 hits; () refers to 2nd hit startup if 1st hit whiffs
    • 1st hit puts airborne opponents into limited juggle state and maintains existing juggle state
    • 2nd hit causes air reset when juggled into
  • Counter-hit/Punish Counter bonus advantage applies to both hits
  • Cancel Hitconfirm Window: 11f (1st hit only)
  • Drive Rush cancel advantage: +13 oH / +7 oB
  • Can be affected by Air Current on frames 3-10 (travels fullscreen)


Rashid takes a big step forward while attacking twice. The gap between hits is quite large, so the second hit is easily interrupted if the first hit whiffs in neutral. After a whiff punish, Rashid can link into a light normal to extend the combo. This is much easier to do if there is an Air Current on the screen due to the massive range buff it receives.

The most common use for 6MP is to extend juggle combos by canceling the first hit. For example, after a corner Drive Impact wallsplat, Rashid can juggle 5HP > 214MP, then juggling into 6MP > 236HP. There are various juggles where the height or spacing can be inconsistent, and starting with 6MP simplifies the combo.

6HP
Beak Assault
6HP
SF6 Rashid 6hp.png
SF6 Rashid 6hp hitbox.png
Hitboxes Off
Hitboxes On

6HP
Beak Assault
Startup Active Recovery Cancel Damage Guard On Hit On Block
22 3 21 - 800 H +3 -3
  • Not airborne despite the hopping animation
  • Can be affected by Air Current on frames 4-25 (travels nearly fullscreen)


Rashid hops forward and comes down with an overhead elbow that is safe on block and somewhat hard to see. With perfect spacing or meaty timing it is possible to link naturally into a light normal, but this is very precise. The range boost from an Air Current makes 6HP a great surprise attack in neutral, especially if there is an active SA2 tornado on screen.

When used out of Drive Rush, Rashid is slightly plus on block and can link into 5MP on hit, greatly increasing his damage potential.

6HK
Crescent Kick
6HK
SF6 Rashid 6hk.png
SF6 Rashid 6hk hitbox 1.png

SF6 Rashid 6hk hitbox 2.png
Hitboxes Off
Hitboxes On

6HK
Crescent Kick
Startup Active Recovery Cancel Damage Guard On Hit On Block
16 4 20(23) - 900 LH +2(+5) -3(0)
  • Lower Body Strike Invuln: 7-19f (not airborne)
  • 3 extra recovery frames on whiff
  • Applies 20% damage scaling to next hit when beginning a combo (100/80/70...)
  • Can be affected by Air Current on frames 6-19 (travels fullscreen)


A hopkick with decent range that can beat many low pokes in neutral while remaining safe on block. If spaced perfectly, it can be up to +5 on hit and 0 on block even without a Drive Rush enhancement. After successfully punishing a low poke, the forward movement ensures Rashid will be in range to combo into 5MP. 6HK also works well after Drive Rush; if the opponent uses delayed jabs to stuff attempted overheads, using 6HK instead is likely to result in a counter-hit.

Although Rashid's lower body hurtbox disappears during the flip, this move can still lose to particularly tall lows (such as Zangief's sweep).

j.2HP
Blitz Strike
j.2HP
SF6 Rashid j2hp.png
SF6 Rashid j2hp hitbox.png
Hitboxes Off
Hitboxes On

j.2HP
Blitz Strike
Startup Active Recovery Cancel Damage Guard On Hit On Block
10 5 3 land Sp 850 H -9(-1) -29(-21)
  • Usable during Forward Jump or after j.214K
  • Spike knockdown and OTG juggle state vs. airborne opponents
  • Bounces off opponents on hit/block/parry; listed frame advantage assumes grounded connect with no air follow-up
    • Bounce is in a Forced Knockdown state until landing
    • If juggled right as Rashid lands, does not bounce; allows a meterless juggle follow-up
  • Cancel Hitconfirm Window: 14f (into j.214K); allows stagger pressure on block
    • Can still input air normals/specials after this cancel window, but Rashid will be higher in the air
  • Applies 15% damage scaling to next hit when beginning a combo (100/85/75...)


An air command normal that can be useful in extended juggles or to confuse grounded opponents with Rashid's various air mobility options. If the attack hits, Rashid can combo into a follow-up j.HP or j.HK to extend the combo. On block, Rashid can be juggled out of the air as he bounces.

Some of Rashid's most optimal juggle combos involve timing a late j.2HP to skip the bounce animation. This is incredibly strict, but gives juggle options that would otherwise be unattainable.

j.8HK
Aerial Shot
j.8HK
SF6 Rashid j8hk.png
SF6 Rashid j8hk hitbox.png
Hitboxes Off
Hitboxes On

j.8HK
Aerial Shot
Startup Active Recovery Cancel Damage Guard On Hit On Block
8 5 3 land - 800 H - -
  • During Neutral Jump only; puts airborne opponents into limited juggle state
  • Shifts Rashid's hurtbox upward during startup


Aerial Shot is a good air-to-air due to its knockdown potential, allowing Rashid to pick up juggles depending on the height it connects. The hitbox is relatively high up, making it harder to use against grounded opponents without getting anti-aired. After a Drive Impact crumple, Rashid can use j.8HK to knock the opponent into the air as he descends, opening up some useful juggle routes without excessive scaling or meter use.

6[6] Run
Run
6[6]
SF6 Rashid 66 hold.png
SF6 Rashid 66 hold hitbox.png
Run
Hitboxes Off
Hitboxes On

6[6]
Run
Startup Active Recovery Cancel Damage Guard On Hit On Block
20 - 5(18) - - - - -
  • Cancelable into 6P/6K follow-ups on frames 20-72
  • 5f recovery when stopping the run; no stopping recovery if canceled into Forward Jump
  • After 72f, has 18f stopping recovery for a total 90f Run duration
  • Rashid is in a Counter-hit state for the entire run animation
  • Can be affected by Air Current for entire duration (except 18f recovery), increasing its speed


By inputting a dash and holding forward, Rashid transitions to a sprint animation. Can lead to 2 possible attack follow-ups. Useful for covering large distances when Rashid has significant knockdown advantage, but Drive Rush is much better for approaching in neutral.

6[6] Run Follow-ups
Run Follow-ups
6[6]~6P/6K
SF6 Rashid 66 hold 6p.png
Backup (Slide 6P)

SF6 Rashid 66 hold 6k.png
Tempest Moon 6K
SF6 Rashid 66 hold 6p hitbox 1.png
SF6 Rashid 66 hold 6p hitbox 2.png
Backup (Slide 6P)

SF6 Rashid 66 hold 6k hitbox 2.png
Tempest Moon 6K
SF6 Rashid 66 hold 6k air hitbox.png
Air Current 1st hit
Hitboxes Off
Hitboxes On

6[6]~6P
Backup
Startup Active Recovery Cancel Damage Guard On Hit On Block
20+8 10 17 - 400x2 L,LH +7 -10(-1)
  • Crouching state for entire move duration; cannot hit airborne opponents
  • Upper Body Projectile Invuln: 1-19f (on hit, remains invuln for entire duration)
  • 2 hits + side switch on hit; 1 hit + no side switch on block
  • Counter-hit/Punish Counter bonus advantage applies to both hits
  • Can be affected by Air Current on frames 1-17


Rashid's Slide can be used against most standard projectiles, but will not go under low ones like Juri 236LK or Rashid 236KK; the early frames of his meterless 236K is also low to the ground. Because Rashid has to perform a forward dash and wait 20f to start the slide, it is not practical as a pure reaction counter. Like most slides, it can be made safe if spaced near max range. This also helps Rashid stay close after a side switch on hit, opening up stronger follow-up routes. Hitting a cornered opponent keeps Rashid at point blank for even easier follow-up conversions, with no Punish Counter required.

6[6]~6K
Tempest Moon
Startup Active Recovery Cancel Damage Guard On Hit On Block
20+16 2(4)3 21 - 600x2 LH,LH +3 -4
  • Airborne/Throw Invuln: 6-21f (Forced Knockdown state)
  • Counter-hit/Punish Counter bonus advantage applies to both hits
  • Applies 15% damage scaling to next hit when beginning a combo (100/85/75...)
  • Can be affected by Air Current on frames 1-3 (becomes Enhanced version)


The airborne frames of Run~6K make this useful against throw tech and low pokes, granting a link to 5MP on Punish Counter. This can be especially useful against opponents who wake up with 2MK to call out your shimmy attempt. However, it's unsafe on block unless it is well-spaced (or the opponent is in Burnout), so this is an aggressive read.

6[6]~6K (Air Current)
Tempest Moon (Air Current)
Startup Active Recovery Cancel Damage Guard On Hit On Block
20+9 3(21)2(3)3 22 - 400x2,600 LH,LH KD +56 OTG / KD +22 -5
  • Airborne 21-36f (Forced Knockdown state)
  • 1st hit puts opponent into limited juggle OTG state
  • Applies 20% damage scaling to next hit when beginning a combo; counts as 2 hits for damage scaling when comboed into (applies to next hit)


The enhanced version of Run~6K is mostly used for corner carry juggles. One common route is 5MP~HK > 214PP, followed by Run~6HK to force an OTG bounce. If the first hit doesn't connect, the move can still cause a regular knockdown. However, it's more unsafe than the non-enhanced version due to being -5 and having lots of forward momentum.

6KK
Side Flip
6KK
SF6 Rashid 6kk.png
Can pass through opponents

SF6 Rashid 6kk kk.png
Distance changes depending on direction held
SF6 Rashid 6kk hitbox.png

SF6 Rashid 6kk kk hitbox.png
Hitboxes Off
Hitboxes On

6KK
Side Flip
Startup Active Recovery Cancel Damage Guard On Hit On Block
32 total - - - - - - -
  • Collision box disappears frames 6-23, allowing Rashid to pass through opponent
  • Can be affected by Air Current on frames 2-20 (travels nearly fullscreen)
  • Can input 4KK/5KK/6KK follow-up on frames 19-25
  • Travel Distance: 1.7 (3.62 enhanced)
6KK~KK
Front Flip
Startup Active Recovery Cancel Damage Guard On Hit On Block
18+51 total - 8 land - - - - -
  • Airborne 11-43f (Forced Knockdown state); air attacks possible on frames 22-40
  • Input during 6KK; holding forward/neutral/back affects the flip distance
  • Can be affected by Air Current on frames 1-36 (jumps forward fullscreen)


Side Flip enhances Rashid's already great mobility options, giving him a side switch and multiple air trajectories to confuse the opponent.

With an active Air Current, Rashid gains massive distance on 6KK and on all versions of the flip. This can be useful to escape the corner or for SA2 tornado mixups.


Target Combos

5MP~HK
Rising Kick
5MP~HK
SF6 Rashid 5mp hk.png
SF6 Rashid 5mp hk hitbox.png
Hitboxes Off
Hitboxes On

5MP~HK
Rising Kick
Startup Active Recovery Cancel Damage Guard On Hit On Block
13 4 36 Sp SA 400 LH KD +42 -20
  • Puts opponent into limited juggle state
  • True blockstring even at max delay
  • Cancel Hitconfirm Window: 49f
    • Special/DR cancel is delayed until after 4th recovery frame
  • Drive Rush cancel advantage: KD +65 oH / +3 oB
  • Counts as 2 hits for damage scaling when comboed into (applies to next hit)


A useful Target Combo extension from 5MP. The timing of the cancel window doesn't allow Eagle Spike to connect outside of the corner, but Rashid can use 214PP into Run~6K for great corner carry and a follow-up juggle. The two hits of the TC are always a true blockstring, so even on a missed hitconfirm you can simply cancel to 236LP for safety on block.


Throws

Forward Throw (LPLK)
Forward Throw
LPLK
SF6 Rashid lplk.png
SF6 Rashid lplk hitbox.png
Hitboxes Off
Hitboxes On

LPLK
Riding Glider
Startup Active Recovery Cancel Damage Guard On Hit On Block
5 3 23 - 1200 (2040) T KD +27 -
  • Punish Counter: HKD +27
  • Applies 20% immediate damage scaling when comboed into (e.g. after Crumple)


Rashid gets excellent knockdown advantage on his forward throw, allowing for a corner throw loop that can be mixed up with a shimmy to bait the opponent's throw tech. Each throw must be manually timed, as he has too much knockdown advantage after a dash to throw immediately. Remember that holding forward after a dash results in a Run, which will affect the throw loop setup.

Midscreen, the opponent is left too far away for Rashid to get oki even with Drive Rush.

Back Throw (4LPLK)
Back Throw
4LPLK
SF6 Rashid 4lplk.png
SF6 Rashid lplk hitbox.png
Hitboxes Off
Hitboxes On

4LPLK
Sunset Drop
Startup Active Recovery Cancel Damage Guard On Hit On Block
5 3 23 - 1200 (2040) T KD +27 -
  • Side switch
  • Punish Counter: HKD +27
  • Applies 20% immediate damage scaling when comboed into (e.g. after Crumple)


After back throwing the opponent into the corner, Rashid is too far to threaten with immediate throw oki. However, he can still pressure with a Drive Rush normal, which inherently makes a second throw a viable option.

Air Throw (LPLK Air)
Air Throw
LPLK (air)
SF6 Rashid jlplk.png
SF6 Rashid jlplk hitbox.png
Hitboxes Off
Hitboxes On

j.LPLK
Desert Slider
Startup Active Recovery Cancel Damage Guard On Hit On Block
5 3 3 land - 1200 (2040) T KD +27 -
  • Punish Counter: HKD +27


Air Throw is a good air-to-air against close range jumps. Rashid slides on the opponent like a skateboard, taking them toward the corner. In the corner, he can get follow-up oki with Drive Rush, but midscreen he is left quite far away from the opponent.


Drive System

Drive Impact (HPHK)
Drive Impact
HPHK
SF6 Rashid hphk.png
SF6 Rashid hphk hitbox.png
Hitboxes Off
Hitboxes On

HPHK
Eagle Edge
Startup Active Recovery Cancel Damage Guard On Hit On Block
26 2 35 - 800 LH KD +35 / Wall Splat KD +65 -3 / Wall Splat HKD +72
  • Armor (2-hit): 1-27f
  • Applies 20% damage scaling to next hit when beginning a combo (including Wall Splat on block)
  • Combos when canceled from Punish Counter 5HP/6MP (no corner wallsplat)
    • Useful for draining opponent's Drive gauge, especially after Perfect Parry

See Drive Impact on the Gauges page for more details.

When canceled from a normal, these are the important blockstring gaps; a gap of N will trade with an N-frame startup attack; [] = Burnout

  • 5HP: 8[4]
  • 5MP, 2MP, 6MP: 10[6]
  • 2MK: 11[7]
  • 5MP~HK: 14[10]
  • Note: A gap ≥ 6f can be thrown, and a gap ≥ 9f can be jumped out of by most characters

Against the following characters in Burnout:

  • JP (22K), frame 3 counter
  • Marisa (214K), frame 3 armor
  • Zangief (5[HP]), frame 4 armor

It's important to use a blockstring that cannot be absorbed by their armor/counter moves. Ideally, the string should also not be a true combo, or it will cause a Lock and prevent Stun. Note that if the opponent mashes buttons on wakeup, the counter-hit will cause DI to Lock.

  • DR~5MP > DI: 2f blockstring gap prevents opponent from absorbing the hit
  • DR~2MP > DI: 2f blockstring gap prevents opponent from absorbing the hit
  • DR~6MP > DI: 2f blockstring gap prevents opponent from absorbing the hit
  • DR~2MK > DI: 3f blockstring gap will work vs. Zangief 5[HP]

Drive Reversal (6HPHK)
Drive Reversal
6HPHK (in blockstun)
SF6 Rashid 6hphk.png
SF6 Rashid 6hphk hitbox.png
Hitboxes Off
Hitboxes On

6HPHK
Eagle Slash
Startup Active Recovery Cancel Damage Guard On Hit On Block
20 3 26(31) - 500 recoverable LH KD +23 -8
  • Full Invuln: 1-22f; Armor Break
  • 5f extra recovery on hit

See Drive Reversal on the Gauges page for more details.

Drive Parry (MPMK)
Drive Parry
MPMK
SF6 Rashid mpmk.png
"Wachu gonna do?"
SF6 Rashid mpmk hitbox.png
Hitboxes Off
Hitboxes On

MPMK
Drive Parry
Startup Active Recovery Cancel Damage Guard On Hit On Block
1 8 or until released 29(1)(11) - - - - -

See Drive Parry on the Gauges page for more details.

  • Perfect Parry:
    • Applies a 50% damage scaling multiplier to any punish afterwards
    • vs. strikes, has only 1f recovery and prevents the opponent from canceling their attack
    • vs. projectiles, puts you into a fixed 11f recovery

Drive Rush (66)
Drive Rush
66
SF6 Rashid 66.png
SF6 Rashid 66 hitbox.png
Hitboxes Off
Hitboxes On

66
Drive Rush
Startup Active Recovery Cancel Damage Guard On Hit On Block
9(11) 45(46) 24(23) - - - - -
  • Applies 15% damage scaling multiplier to any follow-up hits when used mid-combo
    • Only applies scaling once per combo; does not apply when an enhanced Drive Rush attack starts the combo

See Drive Rush on the Gauges page for more details. Frame data shown in (parentheses) refers to Parry Drive Rush.

  • Distance:
    • 0.796 (min, cancel into immediate Throw)
    • 2.253 (min, earliest blocking/movement frame)
    • 2.998 (max, final DR frame)
  • See Strategy page for Blockstring Gaps and Combo Routes


Special Moves

Spinning Mixer (236P)
Spinning Mixer
236P
SF6 Rashid 236lp.png
LP - Grounded

SF6 Rashid 236mp.png
MP - 45 degree angle

SF6 Rashid 236hp.png
HP - Straight up

SF6 Rashid 236pp.png
OD - 45 degree angle
SF6 Rashid 236lp hitbox.png
LP - Grounded

SF6 Rashid 236mp hitbox.png
MP - 45 degree angle

SF6 Rashid 236hp hitbox.png
HP - Straight up

SF6 Rashid 236pp hitbox 1.png
SF6 Rashid 236pp hitbox 2.png
OD - 45 degree angle
Hitboxes Off
Hitboxes On

236LP
Spinning Mixer
Startup Active Recovery Cancel Damage Guard On Hit On Block
8 3(5)2(4)2 19(24) SA3 (1st) 300,200x2 (700) LH +2 -3
  • Counter-hit/Punish Counter bonus advantage applies through all hits (especially useful vs. Drive Impact)
  • Cancel Hitconfirm Window: 10f (Super, 1st hit)
  • Applies 30% damage scaling to next hit when beginning a combo (100/70/60...)
  • Can be affected by Air Current on frames 2-16
236MP
Spinning Mixer
Startup Active Recovery Cancel Damage Guard On Hit On Block
8 1,2(2)2(5)2(3)2 34+14 land SA3, (Sp/SA land) 300,100x3,200 (800) LH KD +31 -45(-49)
  • Anti-Air Invuln: 6-10f (cannot hit cross-ups behind Rashid)
  • Airborne 13-60f (Forced Knockdown state)
  • The last 11f of landing recovery are cancelable into specials/Supers on hit
  • Final hit whiffs on crouch block (4f worse advantage)
  • Cancel Hitconfirm Window: 11f (Super)
  • Applies 10% damage scaling to next hit when beginning a combo (100/90/80...)
  • Can be affected by Air Current on frames 2-8
236HP
Spinning Mixer
Startup Active Recovery Cancel Damage Guard On Hit On Block
6 2(2)3(3)3(4)
3(4)3(4)3
24+14 land - 100x5,700 (1200) LH KD +33 -55
  • Anti-Air Invuln: 6-12f; works well vs. cross-ups
  • Airborne 8-63f (Forced Knockdown state)
  • Can be affected by Air Current on frames 2-5
236PP
Spinning Mixer
Startup Active Recovery Cancel Damage Guard On Hit On Block
6 1,2(2)3(2)4(2)
4(2)4(2)4(2)4(2)3
38+19(15) land - 300x2,100x6,200 (1400) LH KD +25 -42(-48)
  • Full Invuln: 1-8f; Anti-Air Invuln: 9-13f (cannot hit cross-ups)
  • Airborne 10-86f (Forced Knockdown state)
  • Final hit whiffs on crouch block (6f worse advantage)
  • Applies 20% damage scaling to next hit when beginning a combo (100/80/70...)
  • Can be affected by Air Current on frames 2-9


Spinning Mixer is a great special move due to its versatility; each version brings something unique to the table.

236LP is a good buffer from Rashid's light normals due to its safety on block. While it's not a good idea to consistently put yourself in a -3 situation, Rashid's stubby cancelable normals often don't permit him to get close enough for a proper hitconfirm. Using 5LP > 236LP to interrupt the opponent's pressure is often a good way to take back Rashid's turn, and it has the added benefit of breaking Drive Impact armor if done early enough, allowing a link into another 5LP. On hit, this move does mediocre damage and corner carry, but allows for a strike/throw mixup. If the opponent is in Burnout, 236LP is +1 on block; this allows for some limited follow-up pressure, but the pushback is too high for Rashid to loop this continuously.

236MP also works consistently from light hitconfirms, giving a knockdown and more corner carry than the LP version. The damage is a little lower, but in the corner Rashid can cancel his landing frames into 236PP to make it more rewarding. In certain juggles, these landing frames can also juggle into a Super. MP Mixer gives Rashid a reliable meterless pickup after Punish Counter 5HK, which is great for his whiff punish game. It can be used as an anti-air at certain ranges where 236HP won't reach, but the timing window is somewhat strict and may lose to strong jump-ins.

236HP travels straight upward and has a strong anti-air hitbox that works against close jumps, including cross-ups. It is not immediately anti-air invuln, so it must be timed a little early; however, starting too early will make the invuln run out before it connects. As a result, some strong jumpins like Divekicks are difficult for Rashid to anti-air consistently. HP Spinning Mixer is the strongest meterless version for ending juggles, but usually only works in the corner due to its short range.

236PP is Rashid's invincible OD reversal. It has the same trajectory as 236MP, making it easy to bait with a neutral jump. OD Mixer has better juggle potential than the other versions, notably connecting after a corner 236MP even from a grounded starter. The anti-air invincibility frames extend beyond the full invincibility period, though it can still lose to some air attacks if used too early.

Spinning Mixer
236P
SF6 Rashid 236lp.png
LP - Grounded

SF6 Rashid 236mp.png
MP - Slight upwards angle

SF6 Rashid 236hp.png
HP - Straight up

SF6 Rashid 236pp.png
OD - Slight upwards angle
SF6 Rashid 236lp air hitbox.png

SF6 Rashid 236mp air hitbox.png

SF6 Rashid 236hp hitbox.png

SF6 Rashid 236pp air hitbox.png
Hitboxes Off
Hitboxes On

236LP (Air Current)
Spinning Mixer
Startup Active Recovery Cancel Damage Guard On Hit On Block
6 2(4)3(3)3(4)3(3)
3(4)3(3)3(4)3(3)3
15 SA3 (1st) 200,100x8 (1000) LH +4 +2
  • Travels fullscreen, giving combos on hit and pressure on block
  • Counter-hit/Punish Counter bonus advantage applies through all hits
  • Cancel Hitconfirm Window: 9f (Super, 1st hit)
  • Applies 20% damage scaling to next hit when beginning a combo; counts as 2 hits for damage scaling when comboed into (applies to next hit)
236MP (Air Current)
Spinning Mixer
Startup Active Recovery Cancel Damage Guard On Hit On Block
5 1,2(2)2(4)2(3)2(6)
2(3)2(5)2(3)2(5)2(3)2
37+19 land SA3 200x2,100x8,200 (1400) LH KD +42 -78(-83)
  • Anti-Air Invuln: 5-8f (cannot hit cross-ups behind Rashid)
  • Airborne 9-96f (Forced Knockdown state)
  • Cancel Hitconfirm Window: 8f (Super)
  • 1 less hit (5f worse advantage) vs. crouch block
236HP (Air Current)
Spinning Mixer
Startup Active Recovery Cancel Damage Guard On Hit On Block
5 2(2)3(3)3(4)3(3)
3(2)3(2)3(2)3(3)3
39+14 land - 125x8,800 (1800) LH KD +27 -83
  • Anti-Air Invuln: 5-11f; works well vs. cross-ups
  • Airborne 7-90f (Forced Knockdown state)
236PP (Air Current)
Spinning Mixer
Startup Active Recovery Cancel Damage Guard On Hit On Block
4 1,2(2)3(2)4(2)4(2)
4(2)4(2)4(2)4(2)4
36+19 land Sp* (air) 200x2,100x8,200 (1400) LH KD +47 -72(-84)
  • Full Invuln: 1-6f (cannot hit cross-ups behind Rashid)
  • Airborne 8-95f (Forced Knockdown state); cancelable into j.214K on hit/block
  • 2 fewer hits (12f worse advantage) vs. crouch block
  • Cancel Hitconfirm Window: 99f Hit / 83f Block (j.214K)
  • Applies 20% damage scaling to next hit when beginning a combo (100/80/70...)


Passing through an air current (such as Lv.2 Super, charged 236[K], or 214PP) powers up Spinning Mixer and gives each version more damage and improved properties.

Enhanced 236LP hits up to 9 times instead of 3, and allows Rashid to link 5LK > 214LK or 5LP > 236MP on hit; if the Mixer counter-hits, he gets even better rewards on hit. On block, he is +2 for the strike/throw mixup. Because it hits so many times, opponents are likely to use Drive Reversal to knock Rashid away; if the opponent is low on meter, setting this up to make them burn out is a worthwhile endeavor. Since the enhanced 236LP is so powerful, it's easy to use it predictably as soon as an Air Current is available; opponents can sniff this out with a back jump and punish hard, so be sure to mix up the timing and consider occasionally baiting this jump.

Enhanced 236MP travels fullscreen and does almost twice as much damage as the standard version. While it's great at taking the opponent to the corner, it no longer allows a follow-up OD Spinning Mixer juggle.

Enhanced 236HP is the highest damage version of Spinning Mixer. Otherwise, it is mostly the same as the standard version, and is useful if the opponent is too late jumping over a 236[K] or a whiffed 214PP. Many SA2 juggles will end with this move.

At only 4f startup, Enhanced 236PP is the fastest invincible reversal in the game. It can be used to catch jumps or whiffed attacks from long range; however, the invincibility window is shortened to match the faster startup, so it's not always reliable in those situations. The main benefit of Enhanced OD Mixer is that it cancels to Arabian Skyhigh (j.214K) in mid-air, giving Rashid a high damage extension. This cancel also works on block, which may confuse the opponent enough for them to mess up their punish attempt.

Eagle Spike (214K)
Eagle Spike
214K
SF6 Rashid 214lk.png

SF6 Rashid 214kk.png
SF6 Rashid 214lk hitbox.png
LK version

SF6 Rashid 214mk hitbox.png
MK/HK/OD versions
Hitboxes Off
Hitboxes On

214LK
Eagle Spike
Startup Active Recovery Cancel Damage Guard On Hit On Block
15 13 11+20 land
(19+32 land oB)
- 1100 LH KD +30(+42) -36
214MK
Eagle Spike
Startup Active Recovery Cancel Damage Guard On Hit On Block
21 13 5+21 land
(22+33 land oB)
- 1300 LH KD +52(+64) -36
214HK
Eagle Spike
Startup Active Recovery Cancel Damage Guard On Hit On Block
26 13 6+21 land
(22+33 land oB)
- 1500 LH KD +56(+68) -36
214KK
Eagle Spike
Startup Active Recovery Cancel Damage Guard On Hit On Block
21 13 7+19 land
(22+33 land oB)
- 1000 LH KD +53(+65) -36
  • Airborne 12-40f (Forced Knockdown state)
  • Puts opponent into limited juggle state on hit; side switches if not in the corner
  • Can be affected by Air Current on frames 6-29
  • Counts as 2 hits for damage scaling when comboed into (applies to next hit)


Rashid flies forward with a thrusting kick, dealing solid damage and corner carry. It is usually the preferred ender when possible, but the slow startup makes it much more restrictive in combos than Spinning Mixer. The great KD advantage lets Rashid set up his bag of tricks, like a fully charged Whirlwind Shot after the MK and HK versions. OD Eagle Spike can be used in combos to escape the corner and score some extra juggle damage.

All versions are massively unsafe on block; while he bounces far away, Drive Rush makes it trivial to punish with a strong combo. On all blocked Eagle Spikes, Rashid bounces off with a fixed recovery; this means that he cannot make the move safer by connecting on a later active frame. This does not apply on hit, as he can get better KD advantage on a late connect; this even allows unique juggles after a well-spaced corner 214LK, such as 236LP > 236MP > 236PP.

If Eagle Spike passes through an active Air Current, it turns into the enhanced version instead.

Eagle Spike
214K
SF6 Rashid 214lk.png

SF6 Rashid 214kk.png
SF6 Rashid 214lk hitbox.png
LK version

SF6 Rashid 214mk hitbox.png
MK/HK/OD versions
Hitboxes Off
Hitboxes On

214LK (Air Current)
Eagle Spike (Air Current)
Startup Active Recovery Cancel Damage Guard On Hit On Block
14 13 11+22 land
(19+20 land oB)
- 1300 LH KD +35(+47) -24
  • Airborne 8-37f (Forced Knockdown state)
  • Puts opponent into limited juggle state on hit
  • On block, bounces away with extra recovery (block disadvantage is not affected by spacing)
214MK (Air Current)
Eagle Spike (Air Current)
Startup Active Recovery Cancel Damage Guard On Hit On Block
17 15 5+45 land
(22+12 land oH/oB)
- 1500 LH KD +59 -15
  • Airborne 8-36f (Forced Knockdown state)
  • Puts opponent into limited juggle state on hit; great corner carry
  • On hit/block, bounces away on recovery (frame advantage is not affected by spacing)
  • Punish Counter: KD +113 Tumble (allows follow-up 214K)
214HK (Air Current)
Eagle Spike (Air Current)
Startup Active Recovery Cancel Damage Guard On Hit On Block
17 15 5+45 land
(22+12 land oH/oB)
- 1500 LH KD +59 -15
  • Airborne 8-36f (Forced Knockdown state)
  • Puts opponent into limited juggle state on hit; great corner carry
  • On hit/block, bounces away on recovery (frame advantage is not affected by spacing)
  • Punish Counter: KD +113 Tumble (allows follow-up 214K)
214KK (Air Current)
Eagle Spike (Air Current)
Startup Active Recovery Cancel Damage Guard On Hit On Block
18 14 7+15 land
(22+21 land oB)
- 1300 LH KD +53(+65) -24
  • Projectile Invuln: 7-37f; Airborne 9-37f (Forced Knockdown state)
  • Puts opponent into limited juggle state on hit; side switches if not in the corner
  • On block, bounces away with extra recovery (block disadvantage is not affected by spacing)


When enhanced by an Air Current, Eagle Spike gets extra damage, faster startup, better block advantage and more block pushback. The LK version gets improved corner carry, putting it more in line with the higher strength versions; it can still be punished by some Supers and character-specific Drive Rush starters, so it's not completely abusable. The MK and HK versions (which are functionally identical to each other) are safe against most of the cast; even a move like Cammy's SA3 will not reach for a midscreen punish. The downside is that they also bounce back fullscreen on hit, causing Rashid to lose his best follow-up oki.

Enhanced OD Eagle Spike has projectile invincibility, and is quite rewarding to land. The damage potential is higher since Rashid is not subjected to extra damage scaling like the standard version. It can be difficult to actually make use of this invincibility since it requires Rashid to set up the Air Current immediately beforehand. Walking in front of the SA2 projectile is one of the few practical scenarios where this might be useful.

Whirlwind Shot (236K)
Whirlwind Shot
236K
SF6 Rashid 236k.png

SF6 Rashid 236kk.png
Full Charge Shot Tornado
SF6 Rashid 236k hitbox 1.png
SF6 Rashid 236k hitbox 2.png

SF6 Rashid 236kk hitbox 1.png
SF6 Rashid 236kk hitbox 2.png
Hitboxes Off
Hitboxes On

236K
Whirlwind Shot
Startup Active Recovery Cancel Damage Guard On Hit On Block
11+6 - 35 SA3 600 LH -1 -9
  • 1-hit projectile; comes out if button is held less than 28f (total startup 17-33f)
  • Cancel Hitconfirm Window: 4f (Super)
  • Projectile Speed: 0.03 (1-2f) / LK 0.1 / MK 0.07 / HK 0.04
236{K}
Whirlwind Shot (Partial Hold)
Startup Active Recovery Cancel Damage Guard On Hit On Block
28+6 - 35 SA3 600,300 LH +5 0
  • 2-hit projectile; button must be held 28-47f (total startup 34-53f)
  • Counter-hit/Punish Counter bonus advantage applies to both hits
  • Cancel Hitconfirm Window: 4f (Super)
  • Projectile Speed: 0.03 (1-2f) / LK 0.1 / MK 0.07 / HK 0.04
236[K]
Whirlwind Shot (Hold)
Startup Active Recovery Cancel Damage Guard On Hit On Block
53 - 35 SA3 400x2,200 LH +16 +8
  • 3-hit projectile; button must be held 48f
  • Counter-hit/Punish Counter bonus advantage applies to all hits
  • Cancel Hitconfirm Window: 9f (Super)
  • Projectile Speed: 0.03 (1-2f) / LK 0.1 / MK 0.07 / HK 0.04
  • Creates Air Current on frame 51 next to Rashid that lasts 60f and enhances many of his moves
236KK
Whirlwind Shot
Startup Active Recovery Cancel Damage Guard On Hit On Block
17 - 35 SA2 SA3 300,400 LH KD +49 -2
  • 2-hit OD projectile; 2nd hit puts opponent into limited juggle state
  • Comes out if button is held less than 35f (total startup 17-40f)
  • Cancel Hitconfirm Window: 12f (Super)
  • Projectile Speed: 0.03 (1-2f) / 0.09 (3f~)
  • Applies 25% damage scaling to next hit when beginning a combo; applies an extra 15% damage scaling to next attack when comboed into
236[KK]
Whirlwind Shot (Hold)
Startup Active Recovery Cancel Damage Guard On Hit On Block
44 - 35 SA2 SA3 400x3 LH KD +65 +10
  • 3-hit OD projectile; 3rd hit puts opponent into limited juggle state
  • Button must be held 35f
  • Cancel Hitconfirm Window: 12f (Super)
  • Projectile Speed: 0.03 (1-2f) / 0.09 (3f~)
  • Applies 20% damage scaling to next hit when beginning a combo; counts as 2 hits for damage scaling when comboed into (applies to next hit)
  • Creates Air Current on frame 41 next to Rashid that lasts 60f and enhances many of his moves


Whirlwind Shot is an arcing fireball that can be charged up to enhance its properties. The trajectory depends on the button strength, with LK going the farthest while HK immediately veers upward. The initial hitbox for all versions is large and starts low to the ground, then shrinks as Rashid kicks it away. It takes a long time to charge to a higher level, making it risky to attempt in a blockstring or in neutral; the most common scenario to use charged versions is after a knockdown with high advantage, like some versions of Eagle Spike. If the opponent is cornered, standing at mid-range and charging a Whirlwind can work well if you mix up the strength and charge timings; if you think they may try to jump over the projectile, using a well-spaced HK version can hit them out of the air due to its short arc.

The OD version travels fullscreen straight along the ground, and hits low enough that some anti-projectile moves cannot duck under it. There are only 2 versions of this move, so partially charging it does not enhance its properties. However, a partial charge can still be useful to create an artificial frame gap on block, which may bait the opponent into hitting a button. The threat of an early release may also convince the opponent not to hit a button when canceled from a ranged normal, allowing Rashid to get a full charge and immediate follow-up pressure.

A fully charged Whirlwind Shot is the only meterless way for Rashid to create an Air Current. Setting up oki scenarios into 236[K] allows Rashid to follow up with enhanced Spinning Mixer for even more damage or block pressure. It's important to be aware of the opponent's reversal options when setting this up, however; Level 1 Supers will lose to the projectile release, but some Level 2 and 3 Supers can shut down much of Rashid's Whirlwind oki.

A defensive Drive Impact is something you must always consider when doing using charged Whirlwind Shot. The OD version charges fast enough that Rashid can cancel into it from medium or heavy normals to beat DI (but not from 5MP~HK). In neutral, DI is also not a viable reaction; at worst, Rashid would get Counter-hit by an early DI rather than crumpled. Charging the meterless version is a bit more risky; there is plenty of time for the defender to hit DI in neutral or from a canceled poke, since only the fully charged version can break the armor. Again, this will only result in a Counter-hit, so it's not a tremendous risk. Rashid does have an interesting counter strategy against Drive Impact - he can release the Whirlwind on reaction to DI, and immediately cancel into SA3 to break through the armor.

All versions of Whirlwind Shot cannot be used if SA2 is active on the screen. The active hitbox must be fully dissipated before Rashid can start inputting another projectile.

Arabian Cyclone (214P)
Arabian Cyclone
214P
SF6 Rashid 214lp.png

SF6 Rashid 214pp.png
SF6 Rashid 214p hitbox 1.png

SF6 Rashid 214p hitbox 2.png
Hitboxes Off
Hitboxes On

214LP
Arabian Cyclone
Startup Active Recovery Cancel Damage Guard On Hit On Block
15 3(1)15 28(14) SA3 400x2 LH +2 -6
  • Leg Projectile Invuln: 15-17f
  • 47f total animation; cancelable into 4K or 6K Follow-ups on frames 21-22
  • Counter-hit/Punish Counter bonus advantage applies to both hits
  • Cancel Hitconfirm Window: 20f (Super)
  • The listed 28f recovery starts after tornado's 1st active frame, 14f recovery is after tornado dissipates
214MP
Arabian Cyclone
Startup Active Recovery Cancel Damage Guard On Hit On Block
20 3(1)15 26(12) SA3 400,500 LH +4 -4
  • Leg Projectile Invuln: 20-22f
  • 50f total animation; cancelable into 4K or 6K Follow-ups on frames 26-27
  • Counter-hit/Punish Counter bonus advantage applies to both hits
  • Cancel Hitconfirm Window: 19f (Super)
  • The listed 26f recovery starts after tornado's 1st active frame, 12f recovery is after tornado dissipates
214HP
Arabian Cyclone
Startup Active Recovery Cancel Damage Guard On Hit On Block
27 3(1)15 29(24) SA3 400,300x2 LH KD +40 -2
  • Leg Projectile Invuln: 27-29f
  • 1st hit puts opponent into limited juggle state (Tornado will not launch grounded opponent)
  • 69f total animation; cancelable into 4K or 6K Follow-ups on frames 33-34
  • Cancel Hitconfirm Window: 19f (Super)
  • The listed 29f recovery starts after tornado's 2nd hit occurs, 24f recovery is after tornado dissipates
214PP
Arabian Cyclone
Startup Active Recovery Cancel Damage Guard On Hit On Block
20 3(1)29 25(29) SA2 SA3 400x2 LH KD +49 -10
  • Leg Projectile Invuln: 20-22f
  • 1st hit puts opponent into limited juggle state (Tornado will not launch grounded opponent)
  • 49f total animation; cancelable into 4K or 6K Follow-ups on frames 26-27
  • 4f extra recovery on block; listed recovery time starts after tornado's 1st active frame
  • Cancel Hitconfirm Window: 21f (Super)
  • Applies 20% damage scaling to next hit when beginning a combo; counts as 2 hits for damage scaling when comboed into (applies to next hit)
  • Creates an Air Current on frame 53 that lasts 60f and enhances many of Rashid's moves


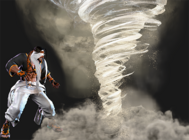
Arabian Cyclone starts with a strike, then spawns a pseudo-projectile tornado with a ton of active frames, making it an incredible meaty on the opponent's wakeup. This tornado will clash with projectiles, but acts as a strike hitbox, making it vulnerable to Level 1 Supers. Each strength of the meterless Cyclone becomes progressively safer, but has slower startup that limit Rashid's safe cancel options.

MP Cyclone is great in corner combos, consistently linking into 5LK > 214LK; the pushback midscreen causes this route to whiff unless starting from a point blank 214MP. HP Cyclone is most commonly juggled into after 5MP~HK Target Combo for some easy meterless damage. OD Cyclone's juggle state is easily comboed into, allowing Rashid to follow-up with an enhanced Run~6K that gives tremendous corner carry. A cancel into Super occurs after the tornado hits, giving plenty of time for a hitconfirm. This also makes meterless 214P a great midrange buffer against opponents in Burnout, as all versions are safe and can be easily hitconfirmed into more damage.

It is possible to use Arabian Cyclone in projectile wars, but the slow startup forces Rashid to throw his out preemptively. Canceling into the 6K Roll follow-up can potentially allow for a punish depending on the situation.

Arabian Cyclone Follow-ups (214P~4K/6K)
Arabian Cyclone Follow-ups
214P~4K/6K
SF6 Rashid 214p 4k.png
4K: Wind Stroke

SF6 Rashid 214p 6k.png
6K: Rolling Assault

SF6 Rashid 214p 6k k.png
6K~K: Nail Assault
SF6 Rashid 214p 4k hitbox.png
4K: Wind Stroke

SF6 Rashid 214p 6k hitbox.png
6K: Rolling Assault

SF6 Rashid 214p 6k k hitbox.png
6K~K: Nail Assault
Hitboxes Off
Hitboxes On

214P~4K
Wing Stroke
Startup Active Recovery Cancel Damage Guard On Hit On Block
32 - 6 land - - - - -
  • Airborne 22-61f (Forced Knockdown state)
  • Cancelable into air normals/specials on frames 32-51
  • Can be affected by Air Current on frames 23-47
  • 6f landing recovery if no air move is used; 67f total animation
214P~6K
Rolling Assault
Startup Active Recovery Cancel Damage Guard On Hit On Block
- - 33 - - - - -
  • Upper Body Projectile Invuln: 5-30f; Crouching state 6-33f
    • Can still lose to low-height projectiles like Juri 236LK or Rashid 236KK
  • Cancelable into Nail Assault follow-up on frames 17-20
  • Can be affected by Air Current on frames 8-25
  • Frame Advantage when canceled from 214P on hit/block:
    • 214LP/214MP: -5 oH / -13 oB
    • 214HP: KD +43 / +1 oB
    • 214PP: KD +39 / -16 oB
    • Note: a late meaty 214P on the opponent's wakeup gives much better advantage after the roll
214P~6K~K
Nail Assault
Startup Active Recovery Cancel Damage Guard On Hit On Block
17 3 26 SA3 600 LH KD +44 -9
  • Upper Body Projectile Invuln: 1-19f
  • On the ground, only combos naturally from 214HP/214PP versions
  • Crouching state for entire move duration
  • Puts opponent into limited juggle state on hit
  • Cancel Hitconfirm Window: 16f (Super)
  • Applies 20% damage scaling to next hit when beginning a combo (100/80/70...)


The follow-ups to Arabian Cyclone give Rashid extra mobility options to confuse the opponent and navigate through their defenses. Gliding with 4K lets Rashid perform a low-height float into an air normal that hits overhead; the unusual look of this glide can be confusing to defend against if you're not looking for it. It also allows meterless combo extensions after 214HP juggles, usually ending with a j.HK knockdown. This gives decent meterless damage and corner carry from a Target Combo starter.

Assault Roll can be used to close the gap after a blocked 214HP, giving Rashid frame advantage. Other versions are unsafe on block but may occasionally work as a gimmick if the opponent is not expecting it. If the HP or OD Cyclone hits, Rashid can cancel his roll into Nail Assault to pick up the juggle, which further cancels into SA3. While the roll and Nail Assault can both duck under standard projectiles, it is difficult to use this as a reaction counter due to the slow startup of Arabian Cyclone.

Arabian Skyhigh (j.214K)
Arabian Skyhigh
j.214K
Hitboxes Off
Hitboxes On

j.214LK
Arabian Skyhigh
Startup Active Recovery Cancel Damage Guard On Hit On Block
13(14) 9 3 land - 600 LH KD +16(+18)~ -32(-35)
  • Leg Projectile Invuln: 1-21f; Forced Knockdown state until landing
  • Puts opponent into limited juggle state on hit
  • Can be affected by Air Current on frames 1-13
j.214MK
Arabian Skyhigh
Startup Active Recovery Cancel Damage Guard On Hit On Block
18(19) 9 3 land - 700 LH KD +18(+20)~ -35(-38)
  • Leg Projectile Invuln: 1-26f; Forced Knockdown state until landing
  • Puts opponent into limited juggle state on hit
  • Can be affected by Air Current on frames 1-18
j.214HK
Arabian Skyhigh
Startup Active Recovery Cancel Damage Guard On Hit On Block
21(22) 9 3 land - 800 LH KD +20(+22)~ -43(-46)
  • Leg Projectile Invuln: 1-29f; Forced Knockdown state until landing
  • Puts opponent into limited juggle state on hit
  • Can be affected by Air Current on frames 1-21
j.214KK
Arabian Skyhigh
Startup Active Recovery Cancel Damage Guard On Hit On Block
13(14) 9 3 land - 1000,500 LH KD +34(+35)~ -25(-29)
  • Leg Projectile Invuln: 1-21f; Forced Knockdown state until landing
  • On hit, transitions into projectile invuln divekick follow-up; puts opponent into limited juggle state OTG state
  • Can be affected by Air Current on frames 1-13


Arabian Skyhigh is an aerial flip kick that transitions into a double jump; the trajectory of the jump depends on the button strength, with LK being the shortest and HK being the longest. It can be used after a forward jump (including after a j.MP/j.2HP cancel) or after a 6KK~KK Front Flip. All versions have a minimum height restriction; as an example, they will not activate after a low-connect j.2HP in juggles. When affected by an Air Current, Rashid shifts forward farther before performing the double jump.

After the double jump, Rashid can use air normals on the way down. When used in air juggles, his heavy air normals (j.HP, j.HK, or j.2HP) will spike the opponent downward. The OD version causes Rashid to perform a divekick that bounces the opponent; if the opponent is high enough, he can follow this up with a 236HP juggle in the corner.


Super Arts

Level 1 Super (236236K)
Super Rashid Kick
Level 1 Super Art
236236K
SF6 Rashid 236236k.png
SF6 Rashid 236236k hitbox.png
Hitboxes Off
Hitboxes On

236236K
Super Rashid Kick
Startup Active Recovery Cancel Damage Guard On Hit On Block
9 7 20+56 land
(33+42 land oB)
- 2100(1800) LH KD +11(+7~14) -53
  • Full Invuln: 1f; Strike/Throw Invuln: 2-15f; Armor Break
  • Airborne 9-35f (Forced Knockdown state)
  • Drive Gauge Depletion: 0.5 bars (hit) / 0.25 bars (block)
  • 30% minimum damage scaling
  • Grounded hit gives a cinematic side switch with extra damage
  • Aerial hit does 300 less damage, no side switch, and has variable KD advantage depending on height


Rashid's SA1 is an upward kick that is useful in juggles, as an anti-air, or as an invincible reversal that can help escape the corner. It has a somewhat shallow trajectory, making it weak to jumps right above him, but Rashid already has 236HP to cover this range.

Because the grounded version switches sides, you generally want to avoid ending a grounded combo with this Super if the opponent is near the corner. Instead, use a route that juggles into it; the positioning is worth far more than the slight damage loss.

On block, Rashid bounces far away from the opponent. However, at -53 it is still easy to punish, especially with Drive Rush or a forward dash into Drive Impact.

SA1 only does 500 damage on the first hit in the event of a trade, which can happen if Rashid runs into a projectile as he hits the opponent.

Level 2 Super (214214K)
Ysaar
Level 2 Super Art
214214K
SF6 Rashid 214214k.png
I summon you... BIG WALL!
SF6 Rashid 214214k hitbox.png
Hitboxes Off
Hitboxes On

214214K
Ysaar
Startup Active Recovery Cancel Damage Guard On Hit On Block
11 [349] 22 - 200x5 LH KD +104 +33
  • Armor Break; no invincibility of any kind
  • Spawns a 5-hit Super projectile tornado; travels slowly across the screen, covering a full screen distance
    • Can kick the projectile with 214P to make it travel quickly toward the opponent (even after a side switch)
    • Cannot use 236K while Super is active
  • Puts opponent into limited juggle state; listed KD/Block Advantage assumes a point blank connect
  • Drive Gauge Depletion: 1 bar (hit) / 0.5 bars (block)
    • Distribution: 2000x5 (hit) / 1000x5 (block)
  • 40% minimum damage scaling; counts as 2 hits for damage scaling when comboed into (applies to next hit)
  • Projectile Speed: 0.01 (starts moving on 7th active frame)
    • After 214P kick: 0.06 (1-7f), 0.115 (8f~)
  • Creates an Air Current that lasts until 120f after Super dissipates (enhances many of Rashid's moves)


Rashid summons a slow-moving tornado that gives access to damaging juggles on hit and mixups on block due to the Air Current enhancement. If activating it raw in neutral, it should be done from a long distance so that the opponent cannot interrupt the startup. If Rashid is hit before the tornado spawns, it will not come out and the meter will be wasted. Because the tornado has Super priority, it cannot be dissipated with regular or OD projectiles. Unlike most projectiles, it also does not disappear if it ends up off-screen.

If the opponent attempts to Drive Reversal a button canceled into SA2, Rashid will get knocked down but the tornado will still punish them. Rashid can follow this up with HK Eagle Spike from anywhere on screen, even if he Back Rises. Other juggle options are also possible after a Neutral Rise, such as Drive Rush into enhanced OD Spinning Mixer if you want to spend more meter to optimize the damage. Chun-Li's Drive Reversal will only hit once, leaving Rashid at point blank for an even easier juggle. Dhalsim's also hit once but doesn't knock down at all, giving Rashid much more combo flexibility.

Level 3 Super (236236P)
Altair
Level 3 Super Art
236236P
SF6 Rashid 236236p.png

SF6 Rashid 236236p(ca).png
Smile for the camera! (Critical Art adds 500 more damage)
SF6 Rashid 236236p hitbox.png
Critical Art adds 500 more damage
Hitboxes Off
Hitboxes On

236236P
Altair
Startup Active Recovery Cancel Damage Guard On Hit On Block
11 18 82 - 4000 LH HKD +17 -75
  • Full Invuln: 1-15f; Armor Break
  • Drive Gauge Depletion: 1.5 bars (hit) / 0.75 bars (block)
    • Cinematic time regenerates ~1.8 Drive bars for Rashid
  • 50% minimum damage scaling; applies 10% immediate damage scaling when canceled from special moves
236236P
Altair (CA)
Startup Active Recovery Cancel Damage Guard On Hit On Block
11 18 82 - 4500 LH HKD +18 -75
  • Full Invuln: 1-15f; Armor Break
  • Available at 25% HP or below
  • Drive Gauge Depletion: 2 bars (hit) / 1 bar (block)
    • Cinematic time regenerates ~1.9 Drive bars for Rashid
  • 50% minimum damage scaling; applies 10% immediate damage scaling when canceled from special moves


Rashid's SA3 has him performing an invincible version of his LP Spinning Mixer as he glides toward the opponent. The startup is somewhat slow, making it vulnerable to light meaties, and it's even slower at longer ranges due to Rashid's travel time. If it hits, it immediately enters a cinematic; this makes it somewhat useful against projectiles from within ~1/2 screen, as he only needs to clip an extended hurtbox to score a punish. While SA3 is extremely invincible, the full invuln does not last through all active frames. In the event of a trade, it only deals 10 damage and Rashid may be susceptible to trade combos.

Altair can be juggled into, although the slow startup means it will not work in every possible juggle route; for example, a grounded 236MP cannot cancel its landing recovery into SA3. Some common cancel routes include 236LP (1st hit), 236MP (1st/2nd hits), 214P, and Roll > Nail Assault.

After the cinematic, Rashid can apply pressure with a Drive Rush starter anywhere on the screen, although he cannot throw against a reversal 4f light normal. 6HK is also a useful meterless meaty option after a regular SA3 (but not CA); Rashid must walk forward slightly if using this midscreen, otherwise it will whiff on opponents that don't hit a button.

The biggest weakness of SA3 is that SA2 exists; much like Blanka, Rashid's optimal strategy is almost always to throw out SA2 the moment he gets it. The best use case for SA3 is to guarantee a kill in the final round or to use the extra Drive damage to put the opponent into Burnout.


Taunts

Neutral Taunt (5PPPKKK)
Neutral Taunt
5PPPKKK
SF6 Rashid 5pppkkk.png
"Do this... this.. and this! It's easy as pie."
SF6 Rashid 5pppkkk hitbox 1.png

SF6 Rashid 5pppkkk hitbox 2.png
"Do this... this.. and this! It's easy as pie."
Hitboxes Off
Hitboxes On

5PPPKKK
Neutral Taunt
Startup Active Recovery Cancel Damage Guard On Hit On Block
534 (total) - - - - - - -
  • Rashid's hurtbox shifts as he hops and dips during the taunt
  • Lower Body Invuln: 52-74f, 83-107f, 208-236f
  • Low Profile: 121-141f, 169-186f

Forward Taunt (6PPPKKK)
Forward Taunt
6PPPKKK
SF6 Rashid 6pppkkk.png
"Hey look, just relax and have fun, alright?"

6PPPKKK
Forward Taunt
Startup Active Recovery Cancel Damage Guard On Hit On Block
545 (total) - - - - - - -

Back Taunt (4PPPKKK)
Back Taunt
4PPPKKK
SF6 Rashid 4pppkkk.png
"Check this out! *does a flip* Now you try."

4PPPKKK
Back Taunt
Startup Active Recovery Cancel Damage Guard On Hit On Block
220 (total) - - - - - - -


SF6 Navigation

General
FAQ •
Controls •
HUD •
Glossary •
Movement •
Offense •
Defense •
Gauges •
Game Data •
Patch Notes •
Characters
A.K.I.
Blanka
Cammy
Chun-Li
Dee Jay
Dhalsim
Ed
E. Honda
Guile
Jamie
JP
Juri
Ken
Kimberly
Lily
Luke
Manon
Marisa
Rashid
Ryu
Zangief
Data
A.K.I. •
Blanka •
Cammy •
Chun-Li •
Dee Jay •
Dhalsim •
E. Honda •
Ed •
Guile •
Jamie •
JP •
Juri •
Ken •
Kimberly •
Lily •
Luke •
Manon •
Marisa •
Rashid •
Ryu •