| Early game information
This game is relatively new, and its pages are still being written. Some information may be mildly inaccurate or missing altogether. You can join the SF6 Resource Hub for more info on editing and other ways you can potentially help with this resource. |
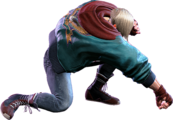
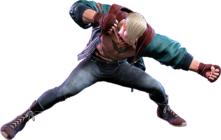
Introduction
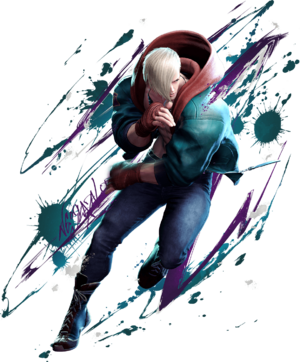
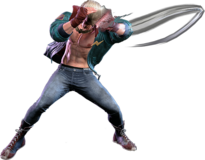
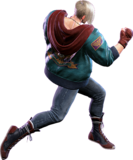
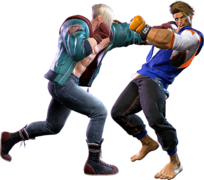
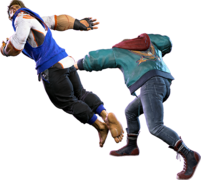
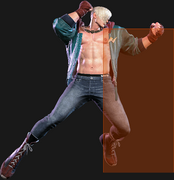
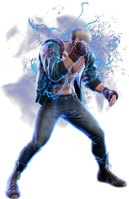
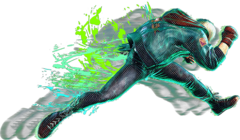
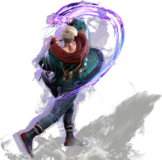
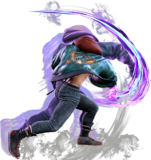
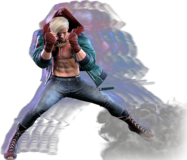
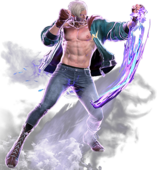
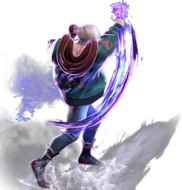
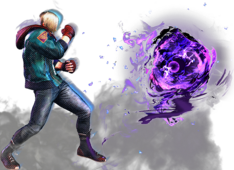
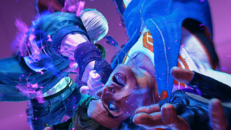
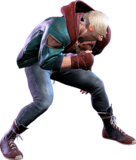
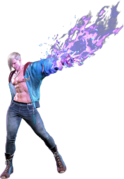
A Psycho Power-wielding youth aged up rapidly by Shadaloo's experimentation, on a journey and a mission to free other subjects. He gets his short temper and foul mouth from Balrog, his former mentor.
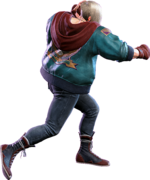
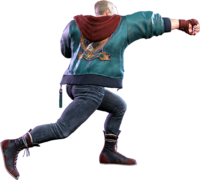
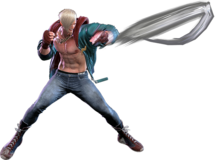
Ed is a midrange zoner with strong emphasis on hard callouts and looping okizeme. In contrast to the usual "boxer" archetype, Ed prefers to play things out in the midrange. Where Balrog was a rushdown pressure fighter, and Dudley is a counter-punching orthodox, Ed is an outfighter with flicker-style jabs modelled after Thomas Hearns. Ed is most comfortable giving his opponents a bit of breathing room, where his excellent pokes can go to work.
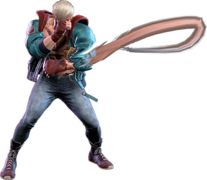
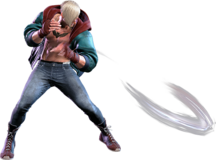
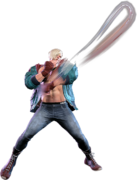
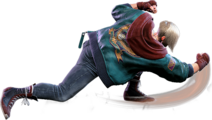
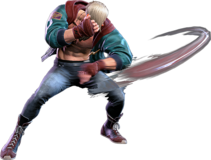
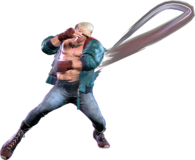
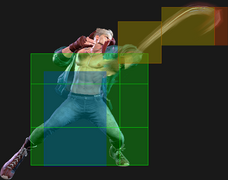
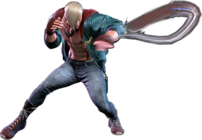
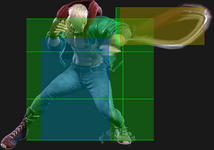
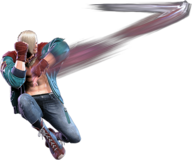
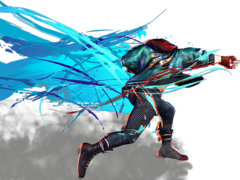
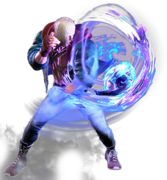
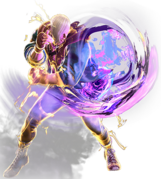
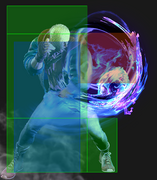
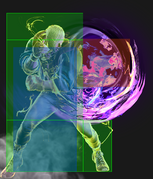
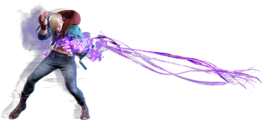
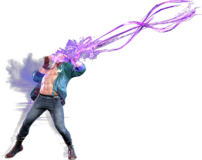
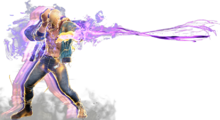
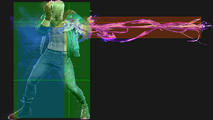
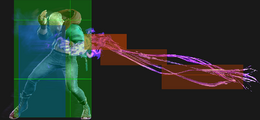
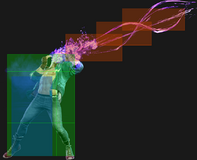
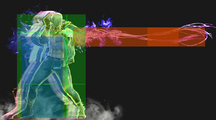
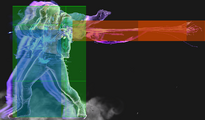
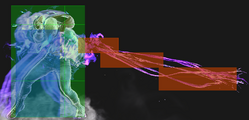
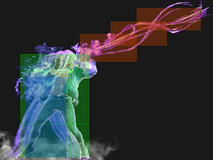
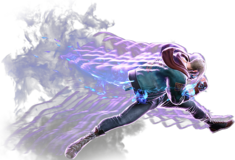
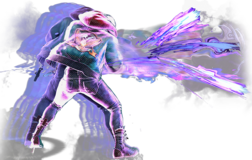
Ed's signature move is Psycho Flicker, which comes in an uncharged and charged variant. While uncharged, Psycho Flicker acts medium-range lash special, keeping opponents back. While good for holdingspace in front of Ed, it really shines when charged up, where it gains the properties of pulling Ed's opponents towards him on hit or block. If the charged hit lands, the opponent is put in a juggle state, while on block they are pulled next to Ed while leaving him at +4. Ed's entire gameplan centers around use (and abuse) of this move. It can be used as anything from a neutral detterent, to a pressure reset, to even a full on okizeme tool for maintaining advantage. While flicker is unsafe, Ed can cancel out of a flicker charge with Kill Switch, a command dash which lets him either pull back to dodge DI attempts or close in for a throw.
Ed's other specials are a standard suite of tools. Psycho Spark is a swipe that can nullify projectiles or be used as okizeme tool. It also has a followup that allows Ed to shoot his own fireballs, each of which has great speed for their button strength. Psycho Upper is a standard uppercut with good combo utility, and Psycho Blitz is a good combo ender. What is particularly notable about Blitz and Upper is that they both set up excellent safejumps no matter the screen location, allowing Ed to continue offense easily after a combo. Both enders also leave opponents at great screen distance if he chooses not to follow up. Ed's most notable move outside of this collection is Psycho Cannon, a fireball super that can be tacked onto combos, used as a pressure extender/mixup tool, or thrown out in neutral to follow behind it.
Ed's gameplan is focused around holding distance with his incredible pokes before calling out the opponent's hesitation. All of Ed's kick normals are "flicker" jabs that have absurd range for their button strength. Many of these buttons are special cancellable, giving Ed the ability to be an excellent whiff-punisher if he chooses. If opponents respects Ed too much, he can charge a Psycho Flicker and yoink them close for a huge callout, or back off more and make them come to him. While Ed does have to consistently play around Drive Parry, calling out parry attempts by cancelling Flicker into Kill Switch gives Ed excellent reward. Ed's consistent safejumps, great damage and solid throw game only magnify his offensive prowess.
This midrange power comes at a huge cost, however. Ed's close range offensive options, particularly his jabs, are downright terrible. He has no ways to generate plus frames without committing to a big read with Psycho Flicker, and he notably lacks any kind of overhead option for mixups. This bad close-range offense even extends to his reversal options. While Light Upper is a good anti-air, OD Upper is able to be safejabbed, and his Level 1 Psycho Storm super has similar issues. This means that Ed really struggles to escape pressure situations even if he takes a huge risk, and it can be difficult for him to jab check whatsoever. All in all, Ed excels when he's in control of the match. When the opponent is sitting right where he wants them, Ed excels with dominating neutral control and a snowballing gameplan. If you like unconventional zoning, Hitman-style boxing, and can stay cool when put in the corner, Ed will put your opponents on the ropes.
| Pick if you like: | Avoid if you dislike: |
|---|---|
|
|
Classic & Modern Versions Comparison
| Missing Normals |
|
|---|---|
| Missing Command Normals |
|
| Shortcut-Only Specials |
|
| Miscellaneous Changes |
|
| Ed | |
|---|---|
| Vitals | |
| Life Points | 10000 |
| Ground Movement | |
| Forward Walk Speed | 0.0475 |
| Backward Walk Speed | 0.032 |
| Forward Dash Speed | 19 |
| Backward Dash Speed | 23 |
| Forward Dash Distance | 1.348 |
| Backward Dash Distance | 0.803 |
| Drive Rush Min. Distance (Throw) | 0.910 |
| Drive Rush Min. Distance (Block) | 2.190 |
| Drive Rush Max Distance | 3.374 |
| Jumping | |
| Jump Speed | 4+38+3 |
| Jump Apex | 2.115 |
| Forward Jump Distance | 1.90 |
| Backward Jump Distance | 1.52 |
| Throws | |
| Throw Range | 0.8 |
| Throw Hurtbox | 0.33 |
| Frame Data Glossary - SF6 | |
|---|---|
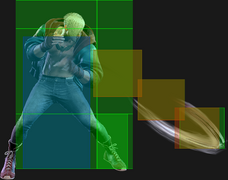
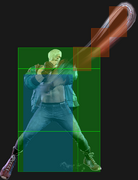
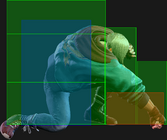
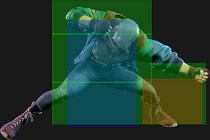
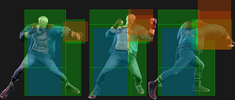
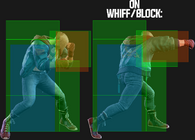
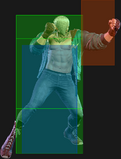
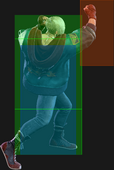
| Hitbox Images |
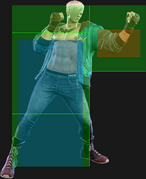
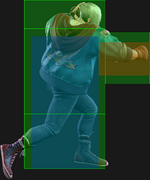
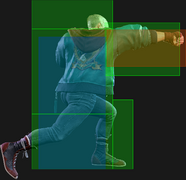
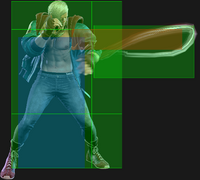
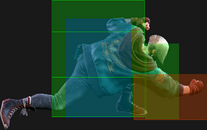
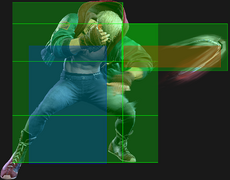
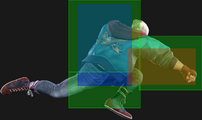
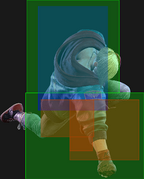
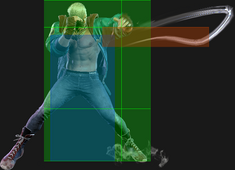
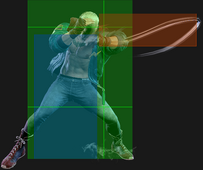
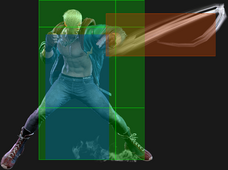
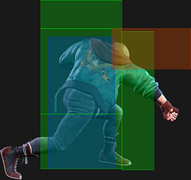
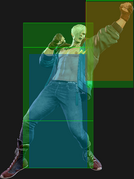
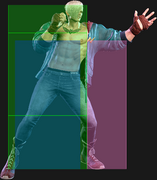
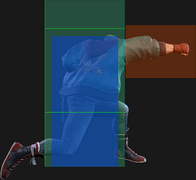
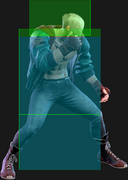
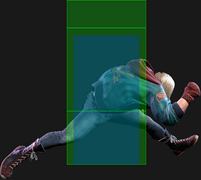
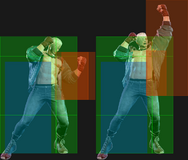
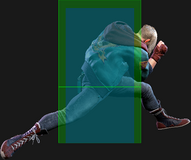
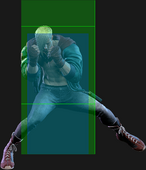
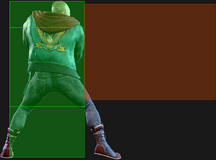
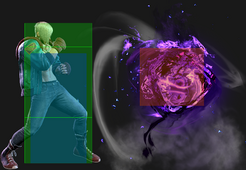
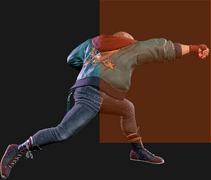
🟥 (Red): Attack hitbox
🟩 (Green): Vulnerable hurtbox that can be hit by strikes/projectiles
🟦 (Blue): Vulnerable throw hurtbox
|
| Active |
How many frames a move remains active (can hurt opponents) for. For projectiles with a maximum active period, a value may be listed in [brackets], but this number is not factored into the move's total frame count.
|
| Cancel |
Available options for canceling one move into another move.
|
| Cancel Hitconfirm Windows |
Hitconfirm reaction windows into Special Moves, Target Combos, and Super Arts.
|
| Damage |
Attack damage on hit. Multi-hit moves may have the damage listed for individual hits as X,Y (or sometimes X*Y). Sometimes a move's damage changes depending on which active frame connects, or on cinematic vs. non-cinematic hits; in this case, multiple values may be listed, and it will be clarified in the move description.
|
| Damage Scaling |
Some moves cause additional damage scaling in combos. Refer to Game Data page for a more detailed breakdown. Scaling Types:
|
| Drive Rush Cancel Advantage |
Refers to the frame advantage when canceling a normal, command normal, or Target Combo into Drive Rush on hit or block (abbreviated as DRC for Drive Rush Cancel). This is calculated at the moment a follow-up attack can be input, not at the moment the character can block or perform movement options. An attack that with DRC +8 on Hit can link into an 8-frame attack, and DRC +4 on Block can create a true blockstring into a 4-frame attack. Note that any DRC on Block worse than +4 cannot form a true blockstring, allowing the opponent to interrupt with an invincible reversal. Most light normals are slightly negative after a DRC on block, meaning the opponent can mash their fastest normal to guarantee a counter-hit (though this requires fast reactions). The attacking character could punish this with Light > DRC into an immediate invincible attack, but this would be an incredibly expensive and high-risk gambit.
|
| Forced Knockdown |
Most airborne command normals, special moves, and Super Arts put the user in a "Forced Knockdown" state. While in this state, an air knockdown will occur when being hit by any attack, even if it would otherwise cause an air reset. As an example, Ryu's 2HP causes an air reset when used as an anti-air. Against a move like Cammy's Hooligan Combination, however, the 2HP puts her into an air knockdown state. This allows Ryu to successfully cancel 2HP into Shoryuken for a juggle, similar to how a Drive Impact wall splat works. Taking advantage of Forced Knockdown juggles is important for dealing with moves like Ken's Dragonlash, Dhalsim's Air Teleport, or Kimberly's 6HK~Hop sequence. Moves that already cause an air knockdown, like most j.MP air-to-airs, will not display the "Forced Knockdown" message.
|
| Guard |
Refers to the direction an attack must be blocked. L is for Low attacks (must be blocked crouching), H is for High attacks/overheads (must be blocked standing), LH is for attacks that can be blocked crouching or standing. T is for Throw attacks which cannot be blocked.
|
| Juggles |
When a character is put into an Air Knockdown state, it is often possible to follow up with a Juggle attack before they hit the ground. In the simplest terms, there are 2 main juggle states:
The following is a more detailed overview of the SF6 juggle system:
Juggle Start (JS): When starting a juggle, the opponent's JC will be set to this value. May be different vs. standing and airborne opponents.
Juggle Increase (JI): When opponent is already in a juggle state, attacks will increase the opponent's JC by this amount.
Juggle Limit (JL): Property of an attack hitbox that determines whether it connects on a juggled opponent. The JL must be ≥ the opponent's JC to hit successfully.
An example to tie everything together:
Drive Rush notes:
|
| On Hit/Block |
These are frame advantage values when the attack hits or is blocked. If the number is positive, then the move will recover before the defender can act again. If the number is negative, the defender will be able to act before the attacker and maybe even punish. KD refers to knockdown on hit, and the listed KD Advantage refers to how many frames the attacker can act before the defender finishes their wakeup animation.
|
| Recovery |
How many frames it takes for a move to finish after the active frames have finished. For projectiles, recovery is considered to begin after the first active frame.
|
| Startup |
How many frames it takes before the move becomes 'active' or have a hit box. The last startup frame and the first active frame are the same frame, meaning all values are written as Startup + 1.
|
Normals
Standing Normals
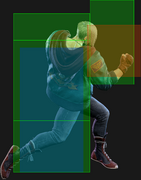
5LP
| Startup | Active | Recovery | Cancel | Damage | Guard | On Hit | On Block |
|---|---|---|---|---|---|---|---|
| 4 | 3 | 7 | Chn Sp SA | 300 | LH | +4 | -1 |
- Chains into 5LP/2LP
- Self-chain has 3 different jab animations, but all have identical data/hitboxes
- Cancel Hitconfirm Window: 13f
- Drive Rush cancel advantage: +4 oH / -1 oB
- Kill Rush (Forward/Back) cancel advantage: -18 oH / -23 oB
- Applies 10% damage scaling to next hit when beginning a combo (100/90/80...)
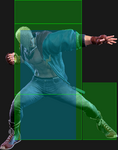
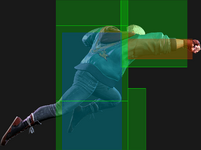
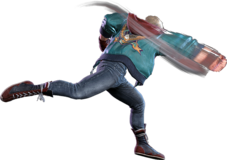
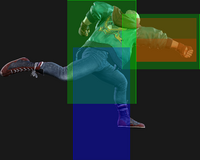
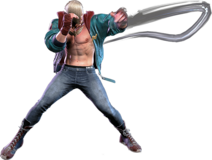
A chainable jab with very short range, making it difficult to use in punishes and confirms beyond point blank. The pushback on hit and block is low, so it is still usable in 3-light chains for hitconfirms.
Ed gets very little reward on Counter-hit, with a links like 2LK > 623MP or 5LK~LK~LK being his only real conversions. After a Punish Counter or DR~5LP starter, he can link into 5MP~HP for decent damage, though at max range his punish conversion is limited to 2MP.
5MP
| Startup | Active | Recovery | Cancel | Damage | Guard | On Hit | On Block |
|---|---|---|---|---|---|---|---|
| 7 | 3 | 15 | Sp SA TC | 600 | LH | +6 | -1 |
- Cancel Hitconfirm Window: 15f
- Drive Rush cancel advantage: +14 oH / +7 oB
- Kill Rush (Forward/Back) cancel advantage: -8 oH / -15 oB
Primarily used as a combo tool and an approach out of Drive Rush that grants Ed advantage on block. In particular, it is the best option to use when canceling 2MP~DRC in neutral since it combos on hit and frame traps on block (though it leaves a gap that the opponent can reversal through).
5MP can chain into a launching 5MP~HP Target Combo with several useful juggle enders, most notably HP Blitz.
5HP
| Startup | Active | Recovery | Cancel | Damage | Guard | On Hit | On Block |
|---|---|---|---|---|---|---|---|
| 10 | 4 | 18 | Sp SA | 800 | LH | +5 | -2 |
- Forces stand
- Can be charged into Psycho Knuckle; releasing before 30f results in regular 5HP
- Button release startup is 4-8f depending on charge time
- Cancel Hitconfirm Window: 18f
- Drive Rush cancel advantage: +17 oH / +10 oB
- Kill Rush (Forward/Back) cancel advantage: -5 oH / -12 oB
Hard hitting 10-framer comparable to Ryu or Ken's similar 5HP. Its strong hit advantage is useful in many Punish and Drive Rush routes, such as max range PC 5HP into 2MK. As a combo starter, forcing the opponent to stand allows a confirm into DRC~5HK for big damage; it also works well in several juggle routes.
This is Ed's only useful buffer into OD Flicker, making it a powerful neutral tool; however, this string can be interrupted on block at close range with a quick normal, so be sure to space it out.
5LK
| Startup | Active | Recovery | Cancel | Damage | Guard | On Hit | On Block |
|---|---|---|---|---|---|---|---|
| 6 | 2 | 13 | TC | 300 | LH | +3 | -3 |
- Extends a strike-only hurtbox 3f before active
- Cancel Hitconfirm Window: 14f (TC)
- Applies 10% damage scaling to next hit when beginning a combo (100/90/80...)
A ranged poke with range and frame data more similar to a medium button than a light. 5LK is great for harassing the opponent in neutral with his safe 5LK~LK Target Combo, then confirming the final LK on hit. It doesn't cancel into anything else, but occasionally Ed is +6 and this is his only combo ender.
Ed extends a large hurtbox on startup, making 5LK very susceptible to counterpokes. This also makes it harder to use against Drive Rush normals that slide forward with a disjointed hitbox.
5MK
| Startup | Active | Recovery | Cancel | Damage | Guard | On Hit | On Block |
|---|---|---|---|---|---|---|---|
| 10 | 2 | 16(18) | Sp SA TC | 600 | LH | 0 | -5 |
- 2f extra recovery on whiff
- Extends a strike-only hurtbox on frames 4-9
- Cancel Hitconfirm Window: 14f / 17f (TC)
- Drive Rush cancel advantage: +8 oH / +3 oB
- Kill Rush (Forward/Back) cancel advantage: -14 oH / -19 oB
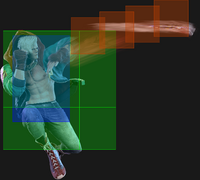
A poke with excellent range and a Target Combo extension that can be confirmed into a knockdown. The early extended hurtbox allows it to be counterpoked if used too close to the opponent, but if well-spaced the opponent will have difficulty reaching Ed. Once 5MK is active, the hurtbox is slightly outside the hitbox, but it only lingers for a few frames afterward, making it difficult to whiff punish on reaction.
5MK is one of the few medium buttons in the game that cannot create a true blockstring when Drive Rush canceled; as a result, opponents can always interrupt the follow-up with an invincible reversal. The reward on hit is also on the weaker side, with 5MP being his main route.
5HK
| Startup | Active | Recovery | Cancel | Damage | Guard | On Hit | On Block |
|---|---|---|---|---|---|---|---|
| 10 | 3 | 12 | Sp SA | 800 | LH | +8 | +3 |
- Whiffs on crouching opponents
- Cancel Hitconfirm Window: 17f
- Drive Rush cancel advantage: +13 oH / +8 oB
- Kill Rush (Forward/Back) cancel advantage: -9 oH / -14 oB
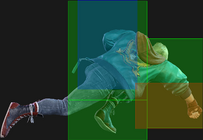
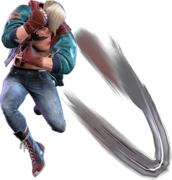
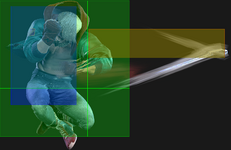
Insanely disjointed upwards hitting blow. 5HK is a remarkable anti-air from beyond cross-up range, even stuffing nightmare buttons like Luke's j.HP if used early enough. Its damage, fast recovery, and upwards hitbox make it a staple in many Drive Rush juggle routes, especially in the corner where it is less likely to cross under the opponent. In grounded combos, it makes an excellent punish starter with a link directly to 5HP. The hit advantage even allows Ed to microwalk for a triple DRC combo loop (or a double loop without burning out).
While 5HK has advantage on block, it will whiff on crouching opponents; only a true blockstring like 5HP~DRC into 5HK can force the opponent to keep standing if the first hit was stand blocked.
Crouching Normals
2LP
| Startup | Active | Recovery | Cancel | Damage | Guard | On Hit | On Block |
|---|---|---|---|---|---|---|---|
| 4 | 3 | 10 | Chn | 200 | L | +3 | -5 |
- Chains into 5LP/2LP
- Applies 10% damage scaling to next hit when beginning a combo (100/90/80...)
Although it's nice to have a low-hitting 4 framer, Ed's 2LP lacks utility compared to other characters; in fact, it's essentially a 2LK in all but name. The range is comparable to Guile's 2LP or Ken's 5LP, but the lack of cancelability makes it a much weaker confirm tool and defensive option. Chaining into 5LP works from close range, but from farther out Ed has limited ways to cash out for damage.
As a Punish Counter starter, 2LP can link into 5MP at closer ranges, but this has similar range issues when spaced out. Linking to 2LK or 5LK is slightly more consistent. If you expect to interrupt the opponent's pressure with this button, CH 2LP links into 2LK > 623MP for a quick but consistent confirm.
2MP
| Startup | Active | Recovery | Cancel | Damage | Guard | On Hit | On Block |
|---|---|---|---|---|---|---|---|
| 8 | 3 | 19 | Sp SA | 500 | L | +2 | -6 |
- Cancel Hitconfirm Window: 13f
- DR cancel is delayed until after active frames
- Drive Rush cancel advantage: +12 oH / +4 oB
- Kill Rush (Forward/Back) cancel advantage: -8 oH / -16 oB
- Applies 20% damage scaling to next hit when beginning a combo (100/80/70...)
Acts functionally like a cancelable 2MK for most characters, though Ed's has some of the shortest range in the game. Canceling into Drive Rush is a decent way to initiate some offense against opponents trying to walk back, and a buffer into HP Blitz, HP Uppercut, or SA1 can whiff punish from surprisingly far out.
After blocking a spaced out Drive Reversal (like after max range 5MK), this is Ed's most consistent punish option outside of Burnout.
2HP
| Startup | Active | Recovery | Cancel | Damage | Guard | On Hit | On Block |
|---|---|---|---|---|---|---|---|
| 10 | 4 | 24 | - | 900 | L | HKD +30 | -12 |
- Counter-hit/Punish Counter: HKD +47
- Has juggle potential; not a Hard Knockdown when juggled into
Ed's "sweep". While unsafe on block, this button's long range and fast startup can make it his only punish option on some moves, such as a perfectly spaced Jamie 2HK.
2LK
| Startup | Active | Recovery | Cancel | Damage | Guard | On Hit | On Block |
|---|---|---|---|---|---|---|---|
| 5 | 2 | 11 | Sp SA | 300 | LH | +3 | -4 |
- Extends a strike-only hurtbox 2f before active
- Cancel Hitconfirm Window: 12f
- Special/DR cancel is delayed until after active frames
- Drive Rush cancel advantage: +5 oH / -2 oB
- Kill Rush (Forward/Back) cancel advantage: -17 oH / -24 oB
- Applies 10% damage scaling to next hit when beginning a combo (100/90/80...)
A light poke with excellent range for how fast it is. It serves the function usually reserved for a 5LK, punishing slightly unsafe moves and stuffing grounded approaches. In fact, only Blanka, Manon, and Ken have a cancelable 5f light normal with more range than this 2LK. The best special to buffer into is MP Uppercut, as the forward movement will guarantee the hit if it connects.
While useful in some counter-hit routes, this button cannot be linked into naturally from other lights.
2MK
| Startup | Active | Recovery | Cancel | Damage | Guard | On Hit | On Block |
|---|---|---|---|---|---|---|---|
| 9 | 2 | 16 | Sp SA | 600 | LH | +8 | -1 |
- Forces stand; whiffs vs. crouching opponents at longer range
- Cancel Hitconfirm Window: 14f
- Drive Rush cancel advantage: +16 oH / +7 oB
- Kill Rush (Forward/Back) cancel advantage: -6 oH / -15 oB
2MK is an upward-angled poke with excellent range, though it is much weaker against characters with good crouching buttons. By forcing the opponent to stand on hit, Ed can convert a Drive Rush cancel into 5HK consistently for extra damage, making it a real threat in neutral.
The strong hit advantage allows Ed to combo into 5MP at closer ranges, and 2MP from a bit farther out. There is a small range on the screen where 2MK hits crouchers but cannot link afterwards; at this range, a cancel or a Counter-hit/Punish Counter into 5HP is the best follow-up.
As an anti-air, 2MK tends to lose or trade with most jump-ins. Being only 1f faster than 5HK and covering a similar angle, the only real advantage to this move is that it can be input while crouching.
2HK
| Startup | Active | Recovery | Cancel | Damage | Guard | On Hit | On Block |
|---|---|---|---|---|---|---|---|
| 12 | 2 | 17 | Sp SA TC | 800 | LH | +1 | -4 |
- Cancel Hitconfirm Window: 16f / 19f (TC)
- Drive Rush cancel advantage: +10 oH / +5 oB
- Kill Rush (Forward/Back) cancel advantage: -12 oH / -17 oB
A cancelable buffer tool with decent range and a hitconfirmable Target Combo follow-up that can combo into a Super. This is not a sweep like most other 2HKs; instead, Ed slides forward during startup and hits the opponent mid. This has slightly longer range than even his 5MK or 2MK pokes due to the forward momentum, and Ed does not extend a significant hurtbox until the active frames begin, making it harder for the opponent to counterpoke.
Jumping Normals
j.LP
| Startup | Active | Recovery | Cancel | Damage | Guard | On Hit | On Block |
|---|---|---|---|---|---|---|---|
| 5 | 5 | 3 land | - | 300 | H | - | - |
Ed's fastest air normal with a slight downward angle. A consistent but unrewarding air-to-air.
j.MP
| Startup | Active | Recovery | Cancel | Damage | Guard | On Hit | On Block |
|---|---|---|---|---|---|---|---|
| 8 | 6 | 3 land | - | 500 | H | - | - |
- Can hit cross-up
- Shifts Ed's hurtbox upward during startup
Ed's only cross-up and one of his farthest downward-reaching attacks, comparable to j.LK with more hitstun to combo even from max height. When jumping over a poke or fireball, j.MP is the most likely button to punish the opponent and lead to a damaging combo. The hitbox is quite mediocre, however, and is unlikely to beat or trade with most anti-airs.
j.HP
| Startup | Active | Recovery | Cancel | Damage | Guard | On Hit | On Block |
|---|---|---|---|---|---|---|---|
| 9 | 4 | 3 land | - | 800 | H | - | - |
- Spike knockdown vs. airborne opponents on Counter-hit/Punish Counter
A jump-in with a slight downward angle, this button has a better hitbox than j.MP near the fist but doesn't reach down quite as far. This means Ed must time it later in his jump arc, making it less likely to punish an opponent's whiffed poke or fireball.
j.LK
| Startup | Active | Recovery | Cancel | Damage | Guard | On Hit | On Block |
|---|---|---|---|---|---|---|---|
| 8 | 3 | 3 land | - | 300 | H | - | - |
- Can be used as a fuzzy instant overhead (opponent must be in Burnout for true blockstring)
A punch that reaches down to the floor, with a bit more horizontal range than j.MP. The hitbox and hurtbox are perfectly aligned at its furthest point, so it is susceptible to losing or trading with most well-timed anti-airs. When connecting near max height, Ed is actually slightly negative on block, so j.MP is usually better for getting pressure off close jump-ins.
While this move can hit as an instant overhead, its slow speed makes it difficult to lock the opponent into standing blockstun.
j.MK
| Startup | Active | Recovery | Cancel | Damage | Guard | On Hit | On Block |
|---|---|---|---|---|---|---|---|
| 10 | 2 | 3 land | - | 700 | H | - | - |
- Extends a large horizontal hurtbox 3f before active
- Shifts Ed's hurtbox upward during startup
An air-to-air with enormous horizontal reach for swatting opponents out of the air outside Ed's usual anti-air range. Great against characters like Dhalsim that like to stay airborne at half screen range. Very susceptible to counterpokes and anti-airs, as the hurtbox perfectly mirrors the hitbox and is vulnerable before the active frames.
j.HK
| Startup | Active | Recovery | Cancel | Damage | Guard | On Hit | On Block |
|---|---|---|---|---|---|---|---|
| 8 | 2 | 3 land | - | 800 | H | - | - |
- Puts airborne opponents into limited juggle state
- Shifts Ed's hurtbox upward during startup
A disjointed air-to-air and juggle tool with a sharp upward angle, making it difficult to land against grounded opponents even while standing. Has some slight juggle potential, allowing Ed to use this in some SA2 juggle routes.
Command Normals
5[HP]
| Startup | Active | Recovery | Cancel | Damage | Guard | On Hit | On Block |
|---|---|---|---|---|---|---|---|
| 30+9 | 1~15 | 25~35 | 6KK* | 800 | LH | Crumple +76 (+12 ground) | -2(+2) |
- 30f charge time; crumples opponent on hit (4f better grounded hit advantage on Punish Counter)
- Side switch on hit/block unless opponent is cornered (4f better block advantage in corner)
- Puts airborne opponents into limited juggle state
- Foot hurtbox is extended from frame 7 onward (can be counterpoked with lows)
- Charge is cancelable into Kill Rush (Forward) on frames 9-30
- Applies 20% damage scaling to next hit when beginning a combo (100/80/70...)
| Startup | Active | Recovery | Cancel | Damage | Guard | On Hit | On Block |
|---|---|---|---|---|---|---|---|
| 60+9 | 1~15 | 29~35 | 6KK* | 1200 | LH | Crumple +76 (+12 ground) | +4 |
- 60f charge time; crumples opponent on hit (4f better grounded hit advantage on Punish Counter)
- Side switch on hit/block unless opponent is cornered
- Puts airborne opponents into limited juggle state
- 1 hit of meterless projectile durability during active frames
- Foot hurtbox is extended from frame 7 onward (can be counterpoked with lows)
- Charge is cancelable into Kill Rush (Forward) on frames 9-60
- Applies 20% damage scaling to next hit when beginning a combo (100/80/70...)
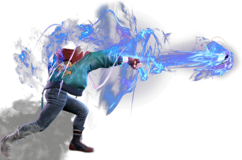
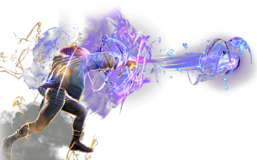
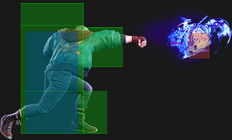
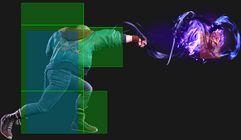
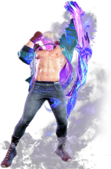
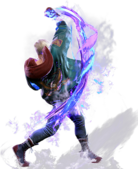
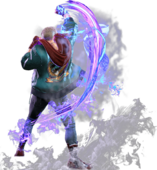
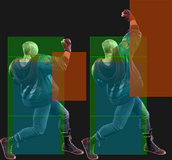
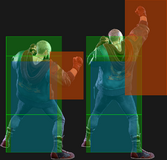
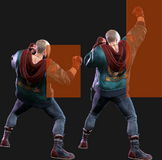
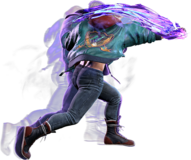
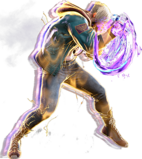
Ed charges a winding punch before launching himself for a fullscreen attack. The early startup frames are not immediately apparent, but as he continues charging his fist glows purple.
Upon a successful hit, Ed switches sides and the opponent is left in a crumple state that allows a full follow-up combo. If you're late, the opponent is popped up for a juggle instead. On block, the side switch still occurs but the frame advantage depends on how long the move was held; Lv.1 Psycho Knuckle is slightly minus, while Lv.2 Psycho Knuckle is very plus. On both hit and block, Ed will not switch sides with a cornered opponent; this also grants Ed frame advantage on a blocked Lv.1 version.
The Lv.2 version can be used to pierce through 1-hit projectiles; however, the charge time is far too slow to use this on reaction (and is fairly impractical even on a predicted fireball). The main benefit of this property is preventing opponents from throwing meterless fireball as soon as they react to the charging animation.
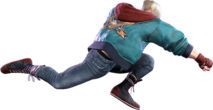
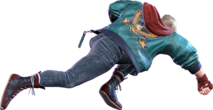
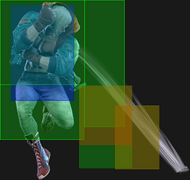
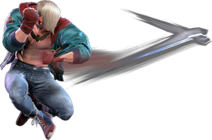
Releasing HP before frame 30 results in a standard 5HP, which can potentially bait an opponent expecting the attack from long range. Ed can also cancel the charging animation into Kill Rush (Forward), which is especially useful against opponents who hold Parry when they see the attack charging. One of the biggest threats to Ed is Drive Impact; while it's possible to bait this using a Kill Rush cancel, the long dash recovery is still likely to be hit before he recovers (resulting in a non-crumple counter-hit).
In OD Blitz > SA2 launching juggles, Psycho Knuckle can be used for near fullscreen corner carry. Example routes after the SA2 connects are 623HP, 6HP, Lv.1 Knuckle or 623HP, Dash, Lv.2 Knuckle. In grounded combos, Ed has much less time to charge the attack, making it not worth the damage sacrifice.
6HP
| Startup | Active | Recovery | Cancel | Damage | Guard | On Hit | On Block |
|---|---|---|---|---|---|---|---|
| 17 | 3 | 21 | - | 900 | LH | +1 | -3 |
- Low Crush 7-19f (not airborne)
- KD vs. airborne opponents; airborne Punish Counter gives significantly more KD advantage
- Limited juggle OTG state as opponent hits the ground
A forward-moving leaping punch useful for hopping over the opponent's low pokes. Has juggle potential, so has potential use in many combo routes. If you successfully crush a low and get a punish counter, it can lead to a small combo.
When juggling into 6HP at the maximum possible height, the opponent bounces high enough to juggle into SA2 in the corner. All other moves with juggle potential are too slow. This is not particularly useful, as Ed has much stronger and more consistent juggle routes.
Target Combos
5LK~LK~LK
| Startup | Active | Recovery | Cancel | Damage | Guard | On Hit | On Block |
|---|---|---|---|---|---|---|---|
| 7 | 3 | 15 | TC | 400(360) | LH | +3 | -3 |
- Cancel Hitconfirm Window: 29f (TC)
| Startup | Active | Recovery | Cancel | Damage | Guard | On Hit | On Block |
|---|---|---|---|---|---|---|---|
| 7 | 3 | 16 | - | 600(480) | LH | +1 | -8 |
A hitconfirmable extension from Ed's long-range 5LK that is safe on the 2nd hit. The full combo string pulls Ed in closer to the opponent, allowing him to continue pressure with a 4f normal on hit, though the opponent can interrupt a throw attempt.
5LK~LK is an excellent harassment tool against opponents in Burnout, leaving Ed +1 on block.
5MP~HP
| Startup | Active | Recovery | Cancel | Damage | Guard | On Hit | On Block |
|---|---|---|---|---|---|---|---|
| 13 | 2 | 23 | Sp* SA | 400 | LH | KD +38 | -8(-23) |
- Puts opponents into limited juggle state
- Always a true blockstring from 5MP, but can whiff at max range (more unsafe)
- Cancel Hitconfirm Window: 41f (into any move except Kill Rush Backward)
- Special/DR cancel is delayed until after active frames
- Drive Rush cancel advantage: KD +52 / +6 oB
- Kill Rush (Forward) cancel advantage: KD +30 / -16 oB
- Counts as 2 hits for damage scaling when comboed into (applies to next hit)
A Target Combo extension from one of Ed's most important combo buttons. It can juggle into most attacks, most notably HP Blitz for a safe jump anywhere on screen. It can also be DR canceled for pressure on block and a juggle on hit, though this can be awkward to convert midscreen.
The pushback on block can make it difficult to punish near max range for some characters; stubby combo starters like Ed's own 5MP can whiff, which can be an effective knowledge check. In Burnout, some characters can't punish with their 4f button outside point blank, and Lily 5LK can't punish at any range. Keep in mind that at absolute max range, Ed can whiff the Target Combo extension, making him much more punishable.
5MK~MK~HP
| Startup | Active | Recovery | Cancel | Damage | Guard | On Hit | On Block |
|---|---|---|---|---|---|---|---|
| 7 | 2 | 20 | TC | 300 | LH | 0(-15) | -6(-20) |
- Always a true blockstring from 5MK even at max delay
- Can whiff at max range (much more unsafe on hit/block)
- Cancel Hitconfirm Window: 33f
| Startup | Active | Recovery | Cancel | Damage | Guard | On Hit | On Block |
|---|---|---|---|---|---|---|---|
| 11 | 5 | 23 | - | 600(480) | LH | KD +35 | -11 |
- Not an overhead despite the animation
A follow-up attack to 5MK that allows Ed to harass opponents near its max range. Despite being -6 on the 2nd hit, many characters have difficulty punishing when well-spaced. After confirming the first 2 hits, the HP ender can secure a knockdown that gives good oki anywhere on the screen.
In whiff punish situations, this Target Combo has a tendency to whiff. It's better to stick with 623HP or Drive Rush if you're outside of Ed's usual 5MK range.
2HK~HP
| Startup | Active | Recovery | Cancel | Damage | Guard | On Hit | On Block |
|---|---|---|---|---|---|---|---|
| 12 | 5 | 19 | SA | 700 | LH | KD +34 | -8 |
- Puts opponents into limited juggle state
- True blockstring (can leave up to 2f blockstring gap if HP is delayed)
- Cancel Hitconfirm Window: 18f (single hit) / 43-47f (full TC) (Super)
- Super cancel is delayed until after 2nd active frame
- Counts as 3 hits for damage scaling when comboed into (applies to next hit)
A confirmable extension from Ed's longest ranged poke. The damage potential is somewhat limited by the lack of special cancels and the high damage scaling, but it can be useful to close out a round. The opponent's juggle state is not quite as useful as OD Blitz when comboing into SA2.
If you expect the opponent to hit a button after your 2HK (-4 on block), you can delay this Target Combo chain to create a small blockstring gap. This is best used into SA2 to keep Ed safe if the opponent doesn't take the bait.
Throws
Forward Throw (LPLK)
| Startup | Active | Recovery | Cancel | Damage | Guard | On Hit | On Block |
|---|---|---|---|---|---|---|---|
| 5 | 3 | 23 | - | 1200 (2040) | T | KD +34 | - |
- Punish Counter: HKD +34
- Applies 20% immediate damage scaling when comboed into (e.g. after Crumple)
Ed has several options for corner throw loop pressure. The most powerful is a charged LK Flicker, which is safe to most reversals and pulls the opponent in at +4 on block. A forward dash allows Ed to walk forward and manually time his follow-up throw, or step back and bait the opponent's throw escape while blocking reversals. The easiest option for timing is Kill Rush (Forward), which leaves Ed at +3. However, in this scenario you, cannot walk back to bait the opponent's throw escape. It can be useful to switch up your corner throw options so the opponent doesn't get too comfortable defending against one specific mixup.
Back Throw (4LPLK)
| Startup | Active | Recovery | Cancel | Damage | Guard | On Hit | On Block |
|---|---|---|---|---|---|---|---|
| 5 | 3 | 23 | - | 1200 (2040) | T | KD +24 | - |
- Side switches
- Punish Counter: HKD +24
- Applies 20% immediate damage scaling when comboed into (e.g. after Crumple)
After throwing the opponent back into the corner, Ed can dash up to become +5; this grants him perfect meaty timing for another throw or strike.
Drive System
Drive Impact (HPHK)
| Startup | Active | Recovery | Cancel | Damage | Guard | On Hit | On Block |
|---|---|---|---|---|---|---|---|
| 26 | 2 | 35 | - | 800 | LH | KD +35 / Wall Splat KD +65 | -3 / Wall Splat HKD +72 |
- Armor (2-hit): 1-27f
- Applies 20% damage scaling to next hit when beginning a combo (including Wall Splat on block)
- Combos when canceled from 5HP or Punish Counter 5HK/5MP/2MP/2MK (no corner wallsplat)
- Useful for draining opponent's Drive gauge, especially after Perfect Parry
See Drive Impact on the Gauges page for more details.
When canceled from a normal, these are the important blockstring gaps; a gap of N will trade with an N-frame startup attack; [] = Burnout
- 5HP: 7[3]
- 5HK: 9[5]
- 5MP, 2MK: 10[6]
- 2MP, 5MP~HP: 11[7]
- 2HK: 12[8]
- 5MK: 14[10]
- Note: A gap ≥ 6f can be thrown, and a gap ≥ 9f can be jumped out of by most characters
Against the following characters in Burnout:
- JP (22K), frame 3 counter
- Marisa (214K), frame 3 armor
- Zangief (5[HP]), frame 4 armor
It's important to use a blockstring that cannot be absorbed by their armor/counter moves. Ideally, the string should also not be a true combo, or it will cause a Lock and prevent Stun. Note that if the opponent mashes buttons on wakeup, the counter-hit will cause DI to Lock.
- 5HP > DI: 3f blockstring gap will work vs. Zangief 5[HP]
- DR~5HK > DI: 1f blockstring gap prevents opponent from absorbing the hit, but whiffs on crouch block
- DR~5MP > DI: 2f blockstring gap prevents opponent from absorbing the hit
- DR~2MK > DI: 2f blockstring gap prevents opponent from absorbing the hit
- DR~2MP > DI: 3f blockstring gap will work vs. Zangief 5[HP]
Drive Reversal (6HPHK)
| Startup | Active | Recovery | Cancel | Damage | Guard | On Hit | On Block |
|---|---|---|---|---|---|---|---|
| 20 | 3 | 26(31) | - | 500 recoverable | LH | KD +23 | -8 |
- Full Invuln: 1-22f; Armor Break
- 5f extra recovery on hit
See Drive Reversal on the Gauges page for more details.
Drive Parry (MPMK)
| Startup | Active | Recovery | Cancel | Damage | Guard | On Hit | On Block |
|---|---|---|---|---|---|---|---|
| 1 | 8 or until released | 29(1)(11) | - | - | - | - | - |
See Drive Parry on the Gauges page for more details.
- Perfect Parry:
- Applies a 50% damage scaling multiplier to any punish afterwards
- vs. strikes, has only 1f recovery and prevents the opponent from canceling their attack
- vs. projectiles, puts you into a fixed 11f recovery
Drive Rush (66)
| Startup | Active | Recovery | Cancel | Damage | Guard | On Hit | On Block |
|---|---|---|---|---|---|---|---|
| 9(11) | 45(46) | 24(23) | - | - | - | - | - |
- Applies 15% damage scaling multiplier to any follow-up hits when used mid-combo
- Only applies scaling once per combo; does not apply when an enhanced Drive Rush attack starts the combo
See Drive Rush on the Gauges page for more details. Frame data shown in (parentheses) refers to Parry Drive Rush.
- Distance:
- 0.910 (min, cancel into immediate Throw)
- 2.190 (min, earliest blocking/movement frame)
- 3.374 (max, final DR frame)
- See Strategy page for Blockstring Gaps and Combo Routes
Special Moves
Psycho Spark (236P)
| Startup | Active | Recovery | Cancel | Damage | Guard | On Hit | On Block |
|---|---|---|---|---|---|---|---|
| 14 | 12 | 8 | 6P* SA3 | 400 | LH | +3 | -5 |
- Creates a 1-hit projectile that can clash with other meterless projectiles
- On Perfect Parry, opponent has only 1f recovery but no screen freeze
- Cancel Hitconfirm Window: 16f (Super) / 20f (6P); final 4 cancel frames will not combo into 6P
| Startup | Active | Recovery | Cancel | Damage | Guard | On Hit | On Block |
|---|---|---|---|---|---|---|---|
| 14 | 12 | 7 | 6P* SA2 SA3 | 200x2 | LH | KD +43 | -2 |
- Creates a 2-hit projectile that can clash with other OD projectiles
- On Perfect Parry, opponent has only 1f recovery per hit but no screen freeze
- Cancel Hitconfirm Window: 14f (Super) / 22f (6P)
A punch enhanced by Psycho Power. This short-ranged attack can negate other projectiles of equal priority, making it useful in fireball wars. Also has enough juggle potential to be useful in several combo routes.
Ed can cancel the recovery of this move into his Psycho Shoot projectile. The button strength of the initial 236P does not affect the follow-up, but the OD follow-up can only follow from 236PP.
Psycho Spark is an excellent meaty tool due to its high number of active frames. The meterless version can be up to +14/+6 if well-timed. The OD version can be slightly better if timed perfectly on the last frame (+16/+10), but this slight boost is not worth the Drive cost.
This attack has some odd properties when Perfect Parried. The opponent will only incur 1f recovery as though they are parrying a strike, but there is no screen freeze or invincibility. For the OD version, this means that the opponent must Perfect Parry both hits with unusually fast timing in order to punish Ed.
Psycho Shoot (236P~6P)
| Startup | Active | Recovery | Cancel | Damage | Guard | On Hit | On Block |
|---|---|---|---|---|---|---|---|
| 12 | - | 30 | SA3 | 600 | LH | +3 | -8 |
- 1-hit projectile; button strength determines projectile speed (LP slow, MP mid, HP fast)
- Cancel Hitconfirm Window: 4f (Super)
- Projectile Speed: 0.05 / 0.10 / 0.15
| Startup | Active | Recovery | Cancel | Damage | Guard | On Hit | On Block |
|---|---|---|---|---|---|---|---|
| 12 | - | 28 | SA2 SA3 | 400x2 | LH | KD +46~ | -2 |
- 2-hit OD projectile; only possible after 236PP starter (no additional Drive cost)
- Button strength determines projectile speed (LP slow, MP mid, HP fast)
- Cancel Hitconfirm Window: 10f (Super)
- Projectile Speed: 0.05 / 0.10 / 0.15
A projectile that can only be input as a follow-up to Psycho Spark. This makes it harder to use for zoning, as Ed gives the opponent a visual cue if you throw it predictably. If you can set up the light version, it moves slowly enough for Ed to approach behind it to initiate his offense. The Light OD version is even better for this, as opponents won't easily be able to dissipate it with their own projectile.
Meterless Psycho Shoot is unsafe on block at close range, but canceling a button into 236P should give enough time to hitconfirm it. The projectile itself has juggle potential, and gives Ed some useful corner carry routes.
Psycho Uppercut (623P)
| Startup | Active | Recovery | Cancel | Damage | Guard | On Hit | On Block |
|---|---|---|---|---|---|---|---|
| 10 | 8 | 23(28) | SA3 | 900 | LH | KD +38 | -13 |
- Anti-Air Invuln: 1-15f (cannot hit cross-up)
- Allows follow-up juggle on high connect; 5f extra recovery on whiff
- Cancel Hitconfirm Window: 24f (Super)
- Applies 30% damage scaling to next hit when beginning a combo; counts as 2 hits for damage scaling when comboed into (applies to next hit)
| Startup | Active | Recovery | Cancel | Damage | Guard | On Hit | On Block |
|---|---|---|---|---|---|---|---|
| 14 | 6 | 32 | SA3 | 1000 | LH | KD +39 | -20 |
- Anti-Air Invuln: 1-19f; takes slight step forward
- Cancel Hitconfirm Window: 22f (Super)
| Startup | Active | Recovery | Cancel | Damage | Guard | On Hit | On Block |
|---|---|---|---|---|---|---|---|
| 16 | 6 | 33 | SA3 | 1200 | LH | KD +38 | -21 |
- Anti-Air Invuln: 1-19f; takes large step forward
- Cancel Hitconfirm Window: 22f (Super)
| Startup | Active | Recovery | Cancel | Damage | Guard | On Hit | On Block |
|---|---|---|---|---|---|---|---|
| 13 | 6 | 36(41) | - | 800x2 | LH | KD +18 | -28 |
- Full Invuln: 1-16f; takes large step forward
- 2nd hit only comes out on hit/block/parry (not on whiff or Perfect Parry)
- On hit, invincibility is extended to cover the 2nd attack
An uppercut used for combos, juggles, anti-airs, and reversals. Each button strength is useful for different purposes.
LP Uppercut is Ed's primary anti-air, especially against close jumps, as he stands in place. It's a bit slow compared to similar moves in the game, but the high launch can set up a follow-up juggle if used early enough. Follow-up hits will incur an additional scaling penalty.
MP Uppercut is significantly slower than LP, but the forward movement makes it a more consistent anti-air against longer ranged jumps. It's also a useful buffer tool from 2LK.
HP Uppercut takes a large step forward, making it the best version for combos and midscreen buffers. It is the slowest of all versions, making it quite hard to anti-air with, though it can be useful if you predict a long-range move with extra landing recovery like Cammy's Cannon Strike. In most basic SA2 juggles, this version is used once or twice for optimal damage.
OD Uppercut is Ed's primary reversal with full invincibility. He takes a large step forward, giving it similar anti-air utility to the MP and HP versions. The forward movement also makes it useful as an anti-fireball tool in some matchups. Unfortunately for Ed, the startup of this move is quite slow; opponents can safely pressure Ed with a light normal on his wakeup, then recover on time to block the uppercut. It can still be useful if you predict a throw or a slower meaty normal. Keep in mind that you can use Perfect Parry to discourage the opponent's "safe" light pressure, forcing opponents to mix up their options a bit more.
Note that while all meterless versions are cancelable into SA3, it will simply whiff under the opponent. The only exception is a late canceled LP Uppercut, which can combo on the last 5 cancel frames (but is much more strict vs. airborne opponents). This Super cancel is primarily useful against armored attacks, or for chipping out an opponent in Burnout.
Psycho Blitz (214P)
| Startup | Active | Recovery | Cancel | Damage | Guard | On Hit | On Block |
|---|---|---|---|---|---|---|---|
| 11 | 3(3)3(6)4 | 14 | SA3 | 200x2,400 (800) | LH | +3 | -5 |
- 3 hits; Counter-hit/Punish Counter advantage carries through all hits
- Puts airborne opponents into limited juggle state
- Cancel Hitconfirm Window: 30f (Super)
| Startup | Active | Recovery | Cancel | Damage | Guard | On Hit | On Block |
|---|---|---|---|---|---|---|---|
| 13 | 2(7)3(9)3 | 16(24) | SA3 | 250x2,400 (900) | LH | KD +39 | -12 |
- 3 hits; 8f extra recovery on block
- Puts opponents into limited juggle state
- Cancel Hitconfirm Window: 39f (Super)
| Startup | Active | Recovery | Cancel | Damage | Guard | On Hit | On Block |
|---|---|---|---|---|---|---|---|
| 15 | 2(11)2(6)2 | 23(26) | SA3 | 250x2,600 (1100) | LH | KD +40 | -12 |
- 3 hits; 3f extra recovery on block
- Puts opponents into limited juggle state
- Cancel Hitconfirm Window: 39f (Super)
| Startup | Active | Recovery | Cancel | Damage | Guard | On Hit | On Block |
|---|---|---|---|---|---|---|---|
| 13 | 1(4)1(3)1(3) 1(3)1(3)1(8)2 |
20 | SA2 SA3 | 150x8,200 (1400) | LH | KD +42 | -3 |
- Cancel Hitconfirm Window: 61f / 85f (Super, grounded / airborne; only 54f on block)
- Launching hit only combos into midscreen LP/MP SA2 when canceled
- Counts as 2 hits for damage scaling when comboed into (applies to next hit)
An advancing combo ender with high juggle potential.
The LP version combos from lights and leaves the opponent standing for a strike/throw/shimmy mixup. It can almost always be punished by light normals on block, though it becomes a safe buffer option against opponents in Burnout. On cornered opponents, juggling into it at the lowest possible height can set up a safe jump.
The MP and HP versions both knock down and grant Ed solid oki, but are much more unsafe on block. MP combos from light normals, while HP requires a medium or heavy starter. By juggling 5MP~HP into HP Blitz, you can set up a j.HP safe jump anywhere on the screen; note that midscreen, you will land quite far from the opponent, making it risky to attempt a throw on block.
OD Blitz is safe on block and combos from light normals. While a solid combo ender on its own, the most useful property of this move is its ability to cancel into SA2 for powerful juggle sequences. Canceling early on the 8th hit keeps the opponent grounded (also allowing an SA3 cancel), while the final hit launches the opponent. This launching hit will drop follow-up juggles in the corner, so it should be used midscreen into SA2 (LP or MP versions).
Psycho Flicker (236K)
| Startup | Active | Recovery | Cancel | Damage | Guard | On Hit | On Block |
|---|---|---|---|---|---|---|---|
| 11+5 | 4 | 26(24) | SA3 | 800 | LH | +1 | -6 |
- Punish Counter: KD +60 Crumple (+21 before opponent becomes airborne)
- Puts airborne opponents into a limited juggle state
- 2f less total recovery on Hit only
- Cancel Hitconfirm Window: 7f (Super); causes 30% immediate damage scaling on SA3
| Startup | Active | Recovery | Cancel | Damage | Guard | On Hit | On Block |
|---|---|---|---|---|---|---|---|
| 15+5 | 4 | 26(25) | SA3 | 900 | LH | +3 | -6 |
- Counter-Hit: KD +36; Punish Counter: KD +62 Crumple (+23 before opponent becomes airborne)
- Puts airborne opponents into a limited juggle state
- 1f less total recovery on Hit only
- Cancel Hitconfirm Window: 7f (Super); causes 30% immediate damage scaling on SA3
| Startup | Active | Recovery | Cancel | Damage | Guard | On Hit | On Block |
|---|---|---|---|---|---|---|---|
| 12+5 | 8 | 18 | SA3 | 800 | - | KD +51(+63) | - |
- Can only hit airborne opponents; leaves opponent in a limited juggle state
- KD Advantage varies based on opponent's height
- Cancel Hitconfirm Window: 7f (Super)
| Startup | Active | Recovery | Cancel | Damage | Guard | On Hit | On Block |
|---|---|---|---|---|---|---|---|
| 25 | 4 | 32 | SA2 SA3 (1st) | 400x2 | LH | KD +61 | +4 |
- Launches grounded opponent up into a limited juggle state; slams airborne opponents down for an OTG bounce
- Cancel Hitconfirm Window: 4f (Super)
- Applies 20% damage scaling to next hit when beginning a combo; applies an extra 5% damage scaling to next attack when comboed into
An extremely long ranged hit that can hit straight or at an upward angle. All uncharged versions are a 1-hit projectile that can clash with projectiles of the same priority. Notably, the OD version will not continue to grab the opponent if it clashes with another OD projectile (but can pierce right through a regular fireball).
The LK and MK versions aim straight forward, with MK having more range and damage in exchange for a little extra startup. On Punish Counter, the crumple state allows a Drive Rush conversion for high damage. LK Flicker is an excellent buffer option out of 5HP that cannot be interrupted on block; the reward is fairly low, however, and any cancel into SA3 will put Ed at the minimum damage scaling level.
HK Flicker aims diagonally upward with a disjointed hitbox. It can be used in some high-connect juggles to tack on extra damage, but is a little slow to be a consistent anti-air. However, if you partially charge the attack and the opponent jumps in anticipation of a horizontal Flicker, you can release it early to snipe them out of the air.
The OD version pulls the opponent toward Ed without needing to charge it up. This grants excellent frame advantage on block, and gives a juggle on hit. It only combos naturally from 5HP, but on block this cancel can be interrupted with fast normals. Because there is no charged version, Ed cannot cancel this into any Kill Rush command dash. If the opponent Parries, they are not pulled nearly as far; this prevents Ed from getting a strike/throw mixup from farther ranges.
Psycho Flicker (Hold) (236[K])
| Startup | Active | Recovery | Cancel | Damage | Guard | On Hit | On Block |
|---|---|---|---|---|---|---|---|
| 26+5 | 5 | 24 | SA3 (1st) | 800,200 | LH | KD +61 | +4 |
- Launches grounded opponent up into a limited juggle state; slams airborne opponents down for an OTG bounce
- Cancelable into Kill Rush (Forward/Back) from frame 16 until release (can input with 66/44 or 6K/4K)
- Cancel Hitconfirm Window: 6f (Super, 1st hit)
- Applies 20% damage scaling to next hit when beginning a combo; applies an extra 15% damage scaling to next attack when comboed into
| Startup | Active | Recovery | Cancel | Damage | Guard | On Hit | On Block |
|---|---|---|---|---|---|---|---|
| 30+5 | 5 | 24 | SA3 (1st) | 800,200 | LH | KD +61 | +4 |
- Launches grounded opponent up into a limited juggle state; slams airborne opponents down for an OTG bounce
- Cancelable into Kill Rush (Forward/Back) from frame 16 until release (can input with 66/44 or 6K/4K)
- Cancel Hitconfirm Window: 6f (Super, 1st hit)
- Applies 20% damage scaling to next hit when beginning a combo; applies an extra 15% damage scaling to next attack when comboed into
| Startup | Active | Recovery | Cancel | Damage | Guard | On Hit | On Block |
|---|---|---|---|---|---|---|---|
| 30+5 | 10 | 19 | SA3 (1st) | 800,200 | - | KD +56(68) | - |
- Can only hit airborne opponents; slams opponent down for a limited juggle OTG bounce
- KD Advantage varies based on opponent's height
- Cancelable into Kill Rush (Forward/Back) from frame 16 until release (can input with 66/44 or 6K/4K)
- Cancel Hitconfirm Window: 6f (Super, 1st hit)
- Applies 20% damage scaling to next hit when beginning a combo; applies an extra 15% damage scaling to next attack when comboed into
All meterless version of Flicker can be enhanced by holding the button; you must charge at least 26f for LK and 30f for MK/HK Flicker, and it automatically releases after 115f. This turns the move into a 2-hit projectile, allowing it to grab the opponent through their 1-hit meterless projectile, or completely dissipate a 2-hit projectile (though it still loses to OD or Super projectiles).
Hitting the opponent with a charged Flicker launches them up into a high juggle state; if the opponent is airborne, they are instead slammed down for an OTG juggle. The high launch state allows you to keep the same side or cross under before continuing the juggle. Charged HK Flicker in particular is a great combo extension after an SA2 juggle.
Charged LK Flicker is an excellent oki tool after corner throws that beats jumps and is safe to most defensive options (notably, the projectile hitbox beats any reversal SA1). The opponent can Perfect Parry the Flicker release, but some characters struggle to punish Ed even when successful. After forcing the opponent to block, they are pulled in close for a strike/throw mixup that can loop into itself. However, an opponent using Parry from longer ranges will not be pulled in close enough for a mixup.
All versions retain the same angle as their non-charged counterparts, and the LK/MK versions gain additional range. Since the opponent can't tell which version you are charging, they may try jumping to avoid being grabbed from midscreen. If you occasionally charge the HK version in neutral, you can release the button for a quick long-range anti-air. However, since this doesn't hit grounded opponents, you run the risk of being punished by a Drive Rush or forward dash.
Another defensive option to consider when charging Flicker is Drive Impact. The grab effect does not work against armor, so if you get too predictable the opponent can punish you heavily on reaction to the charge animation. One way to counter this is to cancel the charge into an early Kill Rush command dash. If you do this early enough, you can recover and counter with a DI of your own. This technique also works against Parry, allowing you to land a Punish Counter throw. The easiest way to cancel into Kill Rush is to simply hit 6K or 4K, since it's faster than a dash input and the held Kick button counts as part of the 6KK/4KK input.
Kill Rush (5/6KK or 4KK)
| Startup | Active | Recovery | Cancel | Damage | Guard | On Hit | On Block |
|---|---|---|---|---|---|---|---|
| - | - | 31 | 6P* | - | - | - | - |
- Counter-hit state for entire duration; head hurtbox disappears on frames 1-10
- Can be performed while charging Psycho Knuckle or 236[K]
- Cancelable into Kill Switch Breaker (11-12f) or Kill Switch Chaser (13-24f)
| Startup | Active | Recovery | Cancel | Damage | Guard | On Hit | On Block |
|---|---|---|---|---|---|---|---|
| - | - | 31 | - | - | - | - | - |
- Counter-hit state for entire duration; head hurtbox disappears on frames 3-26
- Can be performed while charging 236[K]; cannot be performed after 5MP~HP
- Distance: 0.999 (slightly farther than backdash)
A ducking command dash used for positioning, oki, and for its launching follow-up attack. Ed does not duck under projectiles, but the slightly lower hurtbox can dodge some high-angled normals or make jump-ins whiff over his head.
Ed's chargeable attacks can be canceled into Kill Rush to prevent the opponent from always reacting with Parry or Drive Impact. Psycho Knuckle only allows the Forward version, while meterless Flicker can go either direction. While charging Flicker, the fastest and easiest way to input Kill Rush is simply 6K or 4K, since the held kick counts as one of the buttons for the move input. It can also input as a Forward Dash or Back Dash if you prefer.
The forward version is used to auto-time Ed's pressure after some knockdowns, such as his corner throw loop which leaves him at +3.
Kill Switch Break/Chaser (5/6KK~6P)
| Startup | Active | Recovery | Cancel | Damage | Guard | On Hit | On Block |
|---|---|---|---|---|---|---|---|
| 11+11 | 3 | 20 | SA3 | 600 | LH | KD +38 | -4 |
- 6P must be input early (11-12f) out of Kill Rush (Forward)
- Puts opponent into limited juggle state; cannot hit cross-up
- Cancel Hitconfirm Window: 12f (Super)
- Applies 20% damage scaling to next hit when beginning a combo; counts as 2 hits for damage scaling when comboed into (applies to next hit)
| Startup | Active | Recovery | Cancel | Damage | Guard | On Hit | On Block |
|---|---|---|---|---|---|---|---|
| 13+11 | 3 | 20 | SA3 | 600 | LH | KD +50 | -6 |
- 6P must be input late (13-24f) out of Kill Rush (Forward)
- Puts opponent into limited juggle state; cannot hit cross-up
- Cancel Hitconfirm Window: 10f (Super, final 2 cancel frames whiff)
- Applies 20% damage scaling to next hit when beginning a combo (100/80/70...)
A launching uppercut that can only be input out of Kill Rush (Forward). The version Ed uses depends on the button timing; an early 6P results in a weak launch that can only be canceled into SA3, while a late input launches much higher for stronger juggles like HP Blitz. If the opponent is already airborne, both versions juggle high enough for a follow-up.
The late input requirement of Kill Switch Chaser limits its use in combos; only 5HP can naturally combo into it, requiring a 3f window similar to Luke's Perfect Flash Knuckle. The use of Drive Rush normals can make this more lenient in some routes.
Super Arts
Level 1 Super (236236K)
| Startup | Active | Recovery | Cancel | Damage | Guard | On Hit | On Block |
|---|---|---|---|---|---|---|---|
| 13 | 2(7)2(16)2(3) 2(16)1(1)1(1)1 |
56 | - | 10x7,1300 (2000) | LH | KD +33 | -32 |
- Full Invuln: 1f; Strike/Throw Invuln: 2-14f; Armor Break
- Higher KD Advantage vs. airborne opponents
- Drive Gauge Depletion: 0.5 bars (hit) / 0.25 bars (block)
- 30% minimum damage scaling
A long-ranged Super with a disjointed hitbox, primarily used as a juggle ender to tack on extra damage.
While it can be used as an invincible reversal, the slow startup creates the same weakness as OD Uppercut; opponents can simply pressure Ed with a meaty light normal and recover in time to block. SA1 also has the additional weakness of losing to projectiles, so as a defensive option it is mostly limited to avoiding stun in Burnout.
The final attack comes out on hit only. All hits form a true blockstring, so an opponent in Burnout can not avoid a chip kill once it connects.
Level 2 Super (214214P)
| Startup | Active | Recovery | Cancel | Damage | Guard | On Hit | On Block |
|---|---|---|---|---|---|---|---|
| 8 | - | 27 | - | 150x6,200 (1100) | LH | KD +115~ | +65~ |
- Armor Break; button strength determines projectile speed (LP slow, MP mid, HP fast)
- 7-hit Super priority projectile; last hit puts opponent into limited juggle state
- Drive Gauge Depletion: 1 bar (hit) / 0.5 bars (block)
- 40% minimum damage scaling
- Projectile Speed: 0.03 / 0.045 / 0.09
Extremely potent fireball super similar to Rashid's Ysaar. The variable projectile speeds and high durability allow Ed players to create free-form mixups that are hard to predict. Ed can use the fast version to string together long and creative combos, or use the slow version to control space and effectively skip neutral. It's also great in pressure, letting him repeatedly extend his blockstrings and push the opponent to the corner. SA2 can pair well with Drive Impact, as the opponent is easily hit out of their counter-DI if timed properly. Be careful when activating raw in neutral, as anti-fireball moves (especially Supers) can punish the long recovery.
If the last hit of SA2 connects simultaneously with a strike, the opponent will be kept grounded for a full combo. This can be set up in the corner by holding Up + Forward into a late j.HP after the Super activation.
Level 3 Super (236236P)
| Startup | Active | Recovery | Cancel | Damage | Guard | On Hit | On Block |
|---|---|---|---|---|---|---|---|
| 10 | 10 | 64 | - | 4000 | LH | HKD +24 | -49 |
- Full Invuln: 1-14f; Armor Break
- Drive Gauge Depletion: 1.5 bars (hit) / 0.75 bars (block)
- Cinematic time regenerates ~2.2 Drive bars for Ed
- Only deals 500 damage if 1st hit trades
- 50% minimum damage scaling; applies 10% immediate damage scaling when canceled from special moves
- From canceled 236LK/236MK only, applies 30% immediate damage scaling
| Startup | Active | Recovery | Cancel | Damage | Guard | On Hit | On Block |
|---|---|---|---|---|---|---|---|
| 10 | 10 | 64 | - | 4500 | LH | HKD +24 | -49 |
- Full Invuln: 1-14f; Armor Break
- Available at 25% HP or below
- Drive Gauge Depletion: 2 bars (hit) / 1 bar (block)
- Cinematic time regenerates ~2.2 Drive bars for Ed
- Only deals 500 damage if 1st hit trades
- 50% minimum damage scaling; applies 10% immediate damage scaling when canceled from special moves
- From canceled 236LK/236MK only, applies 30% immediate damage scaling
While SA2 is most often used for its versatility, SA3 is Ed's strongest combo and juggle ender for cashing out damage in heavily scaled combos. It whiffs in most Psycho Uppercut cancels, but overall it is quite combo-friendly. It also makes for a decent anti-fireball tool from about half screen, especially against opponents with an extended projectile hurtbox.
While expensive, SA3 is also Ed's fastest invincible reversal option. Some characters can still safely meaty this Super with its 10f startup, but it is much more likely to beat safe jab setups intended to bait OD Uppercut or SA1.
Taunts
Neutral Taunt (5PPPKKK)
| Startup | Active | Recovery | Cancel | Damage | Guard | On Hit | On Block |
|---|---|---|---|---|---|---|---|
| 192 (total) | - | - | - | - | - | - | - |
Forward Taunt (6PPPKKK)
| Startup | Active | Recovery | Cancel | Damage | Guard | On Hit | On Block |
|---|---|---|---|---|---|---|---|
| 304 (total) | - | - | - | - | - | - | - |
Back Taunt (4PPPKKK)
| Startup | Active | Recovery | Cancel | Damage | Guard | On Hit | On Block |
|---|---|---|---|---|---|---|---|
| 370 (total) | - | - | - | - | - | - | - |
