| Pre-release information
This page is under construction based on pre-release data. Join the SF6 Resource Hub for info on editing. |
Introduction
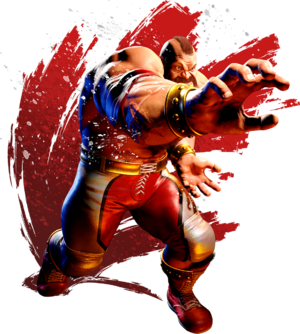
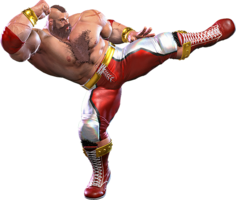
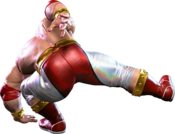
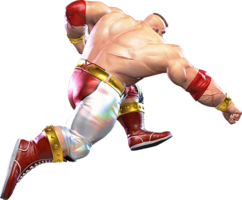
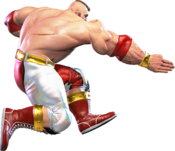
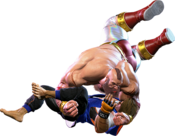
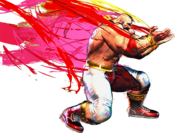
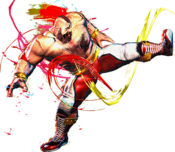
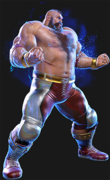
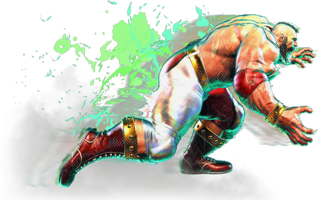
A colossal wrestler nicknamed the Red Cyclone. Zangief is dedicated to physical improvement and instructing his students.
Zangief is the original big-body grappler character, and acts as a lumbering monster who utilizes his size and long reach to intimidate the opponent into sitting still, before opening them back up with one of his many command grabs.
Zangief's plan is very simple: Play the throw game. Gief's huge size allows him to poke at longer distances than most of the cast, making it difficult for them to respond to his advance without surrendering space or committing to a high-risk option. 5MP, 5HP, 5LP, and 5MK can wear down the opponent while he looks for an opening. When the opportunity arises, Zangief lurches forward and grabs his opponent with the signature Screw Piledriver. This command grab has completely absurd range, is incredibly fast, and deals monstrous damage on hit. SPD has the potential to instantly turn the tide of a match and sets up the remainder of the Zangief's gameplan.
From here, Zangief continues to approach his opponent, moving between safer options and risker options to capitalize on the mistakes of his opponents. Zangief has dozens of ways to set up tick throws and punish poor decision making. He also has a bunch of unique tools for hard reads, like Siberian Express. Additionally, Zangief's signature Lariat allows him to become projectile invulnerable for a while, giving him the ability to punish fireballs thrown from too close. Coupled with his solid pokes, Zangief's tools make him a midrange menace who is well-equipped to muscle his opponent to the corner, where his offense becomes all the more terrifying.
While Zangief's offense is effective, he is notably not a vortex-style character like some other famous grapplers. Every time Gief uses Screw Piledriver, he sends the opponent nearly fullscreen and must take a big risk to keep the momentum going. Zangief is notably weak to keepaway, and in general must play very patiently. There are many strong zoners on the SF6 roster, which can make his life quite difficult. Even still, a good Zangief player is more than capable of overcoming his bad matchups compared to previous games. Choosing to stick with the Red Cyclone will let you live the wrestler power fantasy of your dreams while terrifying your opponents into submission.
| Pick if you like: | Avoid if you dislike: |
|---|---|
|
|
Classic & Modern Versions Comparison
| Missing Normals |
|
|---|---|
| Missing Command Normals |
|
| Shortcut-Only Specials |
|
| Miscellaneous Changes |
|
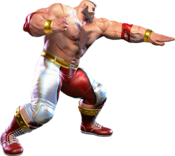
Zangief loses access to some of his best neutral tools with Modern, 5MK and 2MK, both very valuable for being pokes with huge range that are still quite safe from drive impacts, he also loses 5HK which typically allows for immediate high-damage punish counter options with 5HK, 3MP> SA1 or 5HK, 3MP, OD Borscht Dynamite (360KK)
3HK, which is a situationally useful low/throw invincible option, is gone. j.HP has been gutted in favor of going all-in on his normally difficult Borscht Dynamite (360K) aerial grab with its Modern one-button input.
Generally, Modern Zangief has lost a lot of his important long-range kicks for the sake of his inputs being made considerably easier for his rewarding specials. One-button inputs have made his anti-air with SA1 and Borscht Dynamite (360K), which are very rare to see, much more consistent and common. Screw Piledriver (360P) (and SA3) is extremely scary on Modern, he can whip it out as a reaction without fear of accidentally missing, (SA3 also doesn't require a jump) but he will still need to do the standard input if he wants to use Light/Medium SPD at longer ranges, or to get the full value of SA3's insane damage.
As a character with notoriously difficult inputs, Modern can curb some of the frustrations of playing Zangief normally, while also creating new ones due to the removal of important tools.
| Zangief | |
|---|---|
| Vitals | |
| Life Points | 11000 |
| Ground Movement | |
| Forward Walk Speed | 0.0364 |
| Backward Walk Speed | 0.025 |
| Forward Dash Speed | 22 |
| Backward Dash Speed | 25 |
| Forward Dash Distance | 1.007 |
| Backward Dash Distance | 0.712 |
| Drive Rush Min. Distance (Throw) | 0.327 |
| Drive Rush Min. Distance (Block) | 1.455 |
| Drive Rush Max Distance | 3.040 |
| Jumping | |
| Jump Speed | 5+38+3 |
| Jump Apex | 2.115 |
| Forward Jump Distance | 1.725 |
| Backward Jump Distance | 1.406 |
| Throws | |
| Throw Range | 1.02 |
| Throw Hurtbox | 0.43 |
| Frame Data Glossary - SF6 | |
|---|---|
| Hitbox Images |
🟥 (Red): Attack hitbox
🟩 (Green): Vulnerable hurtbox that can be hit by strikes/projectiles
🟦 (Blue): Vulnerable throw hurtbox
|
| Active |
How many frames a move remains active (can hurt opponents) for. For projectiles with a maximum active period, a value may be listed in [brackets], but this number is not factored into the move's total frame count.
|
| Cancel |
Available options for canceling one move into another move.
|
| Cancel Hitconfirm Windows |
Hitconfirm reaction windows into Special Moves, Target Combos, and Super Arts.
|
| Damage |
Attack damage on hit. Multi-hit moves may have the damage listed for individual hits as X,Y (or sometimes X*Y). Sometimes a move's damage changes depending on which active frame connects, or on cinematic vs. non-cinematic hits; in this case, multiple values may be listed, and it will be clarified in the move description.
|
| Damage Scaling |
Some moves cause additional damage scaling in combos. Refer to Game Data page for a more detailed breakdown. Scaling Types:
|
| Drive Rush Cancel Advantage |
Refers to the frame advantage when canceling a normal, command normal, or Target Combo into Drive Rush on hit or block (abbreviated as DRC for Drive Rush Cancel). This is calculated at the moment a follow-up attack can be input, not at the moment the character can block or perform movement options. An attack that with DRC +8 on Hit can link into an 8-frame attack, and DRC +4 on Block can create a true blockstring into a 4-frame attack. Note that any DRC on Block worse than +4 cannot form a true blockstring, allowing the opponent to interrupt with an invincible reversal. Most light normals are slightly negative after a DRC on block, meaning the opponent can mash their fastest normal to guarantee a counter-hit (though this requires fast reactions). The attacking character could punish this with Light > DRC into an immediate invincible attack, but this would be an incredibly expensive and high-risk gambit.
|
| Forced Knockdown |
Most airborne command normals, special moves, and Super Arts put the user in a "Forced Knockdown" state. While in this state, an air knockdown will occur when being hit by any attack, even if it would otherwise cause an air reset. As an example, Ryu's 2HP causes an air reset when used as an anti-air. Against a move like Cammy's Hooligan Combination, however, the 2HP puts her into an air knockdown state. This allows Ryu to successfully cancel 2HP into Shoryuken for a juggle, similar to how a Drive Impact wall splat works. Taking advantage of Forced Knockdown juggles is important for dealing with moves like Ken's Dragonlash, Dhalsim's Air Teleport, or Kimberly's 6HK~Hop sequence. Moves that already cause an air knockdown, like most j.MP air-to-airs, will not display the "Forced Knockdown" message.
|
| Guard |
Refers to the direction an attack must be blocked. L is for Low attacks (must be blocked crouching), H is for High attacks/overheads (must be blocked standing), LH is for attacks that can be blocked crouching or standing. T is for Throw attacks which cannot be blocked.
|
| Juggles |
When a character is put into an Air Knockdown state, it is often possible to follow up with a Juggle attack before they hit the ground. In the simplest terms, there are 2 main juggle states:
The following is a more detailed overview of the SF6 juggle system:
Juggle Start (JS): When starting a juggle, the opponent's JC will be set to this value. May be different vs. standing and airborne opponents.
Juggle Increase (JI): When opponent is already in a juggle state, attacks will increase the opponent's JC by this amount.
Juggle Limit (JL): Property of an attack hitbox that determines whether it connects on a juggled opponent. The JL must be ≥ the opponent's JC to hit successfully.
An example to tie everything together:
Drive Rush notes:
|
| On Hit/Block |
These are frame advantage values when the attack hits or is blocked. If the number is positive, then the move will recover before the defender can act again. If the number is negative, the defender will be able to act before the attacker and maybe even punish. KD refers to knockdown on hit, and the listed KD Advantage refers to how many frames the attacker can act before the defender finishes their wakeup animation.
|
| Recovery |
How many frames it takes for a move to finish after the active frames have finished. For projectiles, recovery is considered to begin after the first active frame.
|
| Startup |
How many frames it takes before the move becomes 'active' or have a hit box. The last startup frame and the first active frame are the same frame, meaning all values are written as Startup + 1.
|
Normals
Standing Normals
5LP
| Startup | Active | Recovery | Cancel | Damage | Guard | On Hit | On Block |
|---|---|---|---|---|---|---|---|
| 7(4) | 3 | 9 | Chn Sp SA | 400 | LH | +4 | +2 |
5MP
| Startup | Active | Recovery | Cancel | Damage | Guard | On Hit | On Block |
|---|---|---|---|---|---|---|---|
| 9 | 4 | 17 | TC | 700 | LH | +2 | -2 |
5HP
| Startup | Active | Recovery | Cancel | Damage | Guard | On Hit | On Block |
|---|---|---|---|---|---|---|---|
| (6~22)+10 | 3 | 22(24) | - | 1000 | LH | +3 | -3 |
5LK
| Startup | Active | Recovery | Cancel | Damage | Guard | On Hit | On Block |
|---|---|---|---|---|---|---|---|
| 7 | 2 | 17 | Sp SA | 400 | LH | -2 | -4 |
5MK
| Startup | Active | Recovery | Cancel | Damage | Guard | On Hit | On Block |
|---|---|---|---|---|---|---|---|
| 10 | 4 | 19 | - | 900 | LH | +1 | -4 |
5HK
| Startup | Active | Recovery | Cancel | Damage | Guard | On Hit | On Block |
|---|---|---|---|---|---|---|---|
| 13 | 4 | 21 | - | 1000 | LH | +3 | +1 |
Crouching Normals
2LP
| Startup | Active | Recovery | Cancel | Damage | Guard | On Hit | On Block |
|---|---|---|---|---|---|---|---|
| 6(3) | 2 | 8 | Chn Sp SA | 300 | LH | +6 | +1 |
2MP
| Startup | Active | Recovery | Cancel | Damage | Guard | On Hit | On Block |
|---|---|---|---|---|---|---|---|
| 8 | 3 | 16 | Sp SA | 700 | LH | +3 | -1 |
2HP
| Startup | Active | Recovery | Cancel | Damage | Guard | On Hit | On Block |
|---|---|---|---|---|---|---|---|
| 11 | 9 | 35 | - | 1000 | LH | KD +20 | -20 |
2LK
| Startup | Active | Recovery | Cancel | Damage | Guard | On Hit | On Block |
|---|---|---|---|---|---|---|---|
| 4(3) | 3 | 12 | Chn | 250 | L | 0 | -3 |
2MK
| Startup | Active | Recovery | Cancel | Damage | Guard | On Hit | On Block |
|---|---|---|---|---|---|---|---|
| 9 | 3 | 18 | - | 700 | L | +3 | -2 |
2HK
| Startup | Active | Recovery | Cancel | Damage | Guard | On Hit | On Block |
|---|---|---|---|---|---|---|---|
| 12 | 3 | 27 | - | 1000 | L | HKD +32 | -13 |
Jumping Normals
j.LP
| Startup | Active | Recovery | Cancel | Damage | Guard | On Hit | On Block |
|---|---|---|---|---|---|---|---|
| 5 | 7 | 3 land | - | 300 | H | +11 | +8 |
j.MP
| Startup | Active | Recovery | Cancel | Damage | Guard | On Hit | On Block |
|---|---|---|---|---|---|---|---|
| 8 | 5 | 3 land | - | 700 | H | +10 (+14) | +7 (+11) |
j.HP
| Startup | Active | Recovery | Cancel | Damage | Guard | On Hit | On Block |
|---|---|---|---|---|---|---|---|
| 9 | 6 | 3 land | - | 800 | H | +15 (+21) | +7 (+13) |
j.LK
| Startup | Active | Recovery | Cancel | Damage | Guard | On Hit | On Block |
|---|---|---|---|---|---|---|---|
| 5 | 10 | 3 land | - | 300 | H | +2 (+11) | -1 (+8) |
j.MK
| Startup | Active | Recovery | Cancel | Damage | Guard | On Hit | On Block |
|---|---|---|---|---|---|---|---|
| 8 | 8 | 3 land | - | 500 | H | +6 (+14) | +3 (+11) |
j.HK
Command Normals
Target Combos
Universal Mechanics
Throws
Forward Throw (LPLK)
No results
Back Throw (4LPLK)
| Startup | Active | Recovery | Cancel | Damage | Guard | On Hit | On Block |
|---|---|---|---|---|---|---|---|
| 5 | 3 | 23 | - | 1400 (2380) | T | KD +8 | - |
Drive Moves
Drive Impact (HPHK)
| Startup | Active | Recovery | Cancel | Damage | Guard | On Hit | On Block |
|---|---|---|---|---|---|---|---|
| 26 | 2 | 35 | - | 800 | LH | KD +35 / Wall Splat KD +65 | -3 / Wall Splat HKD +72 |
See Drive Impact
- Notable blockstring gaps (8f or less cannot be escaped by jumping):
- -
Drive Reversal (6HPHK)
| Startup | Active | Recovery | Cancel | Damage | Guard | On Hit | On Block |
|---|---|---|---|---|---|---|---|
| 20 | 3 | 26(31) | - | 500 recoverable | LH | KD +23 | -6 |
See Drive Reversal
- Full Invuln: 1-22f; Armor Break
Drive Parry (MPMK)
| Startup | Active | Recovery | Cancel | Damage | Guard | On Hit | On Block |
|---|---|---|---|---|---|---|---|
| 1 | 12 or until released | 33(1)(11) | - | - | - | - | - |
See Drive Parry
- Perfect Parry has only 1f recovery, and disables the opponent from canceling their attack
- Perfect Parry vs. projectiles puts you into a fixed 11f recovery
Drive Rush (66)
| Startup | Active | Recovery | Cancel | Damage | Guard | On Hit | On Block |
|---|---|---|---|---|---|---|---|
| 9(11) | 45(46) | 24(23) | - | - | - | - | - |
See Drive Rush
- Frame data shown in (parentheses) refers to the version used after Parry
Taunts
Neutral Taunt (5PPPKKK)
| Startup | Active | Recovery | Cancel | Damage | Guard | On Hit | On Block |
|---|---|---|---|---|---|---|---|
| 194 (total) | - | - | - | - | - | - | - |
Forward Taunt (6PPPKKK)
| Startup | Active | Recovery | Cancel | Damage | Guard | On Hit | On Block |
|---|---|---|---|---|---|---|---|
| 227 (total) | - | - | - | - | - | - | - |
Back Taunt (4PPPKKK)
Special Moves
Move Name (236P)
No results
No results No results No results
Super Arts
Level 1 Super (236236P)
No results
Level 2 Super (214214P)
No results
Level 3 Super ()
CA version grants 500 extra damage
No results
No results
