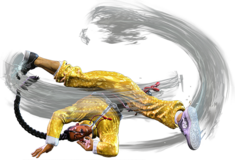
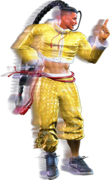
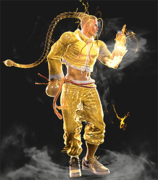
Street Fighter 6/Jamie: Difference between revisions

From SuperCombo Wiki
Line 1,185: Line 1,185:
| input    = 236236P
| input    = 236236P
| images  =  
| images  =  
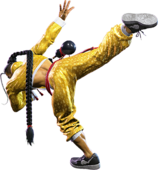
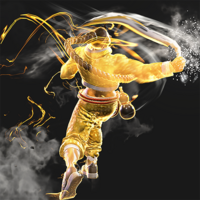
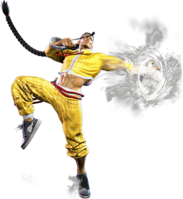
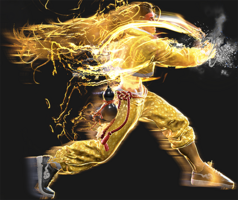
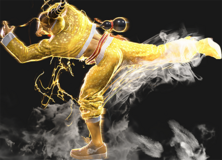
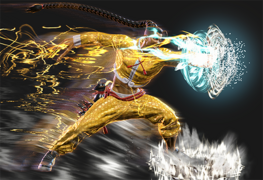
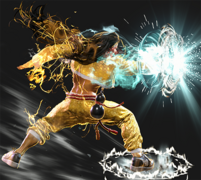
{{MoveDataCargoImage|imageHeight=140px|Jamie_236236p_dl2|caption=Bootleg You Hou}}
{{MoveDataCargoImage|imageHeight=140px|Jamie_236236p_dl2|caption=}}
----
----
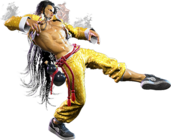
{{MoveDataCargoImage|imageHeight=140px|Jamie_236236p_ca_dl2|caption=CA does much more damage, but no followup juggle}}

Revision as of 19:02, 22 June 2023


Introduction

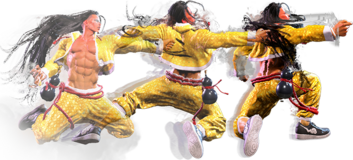
This self-styled Chinatown peacekeeper aspires to the example set by Yun and Yang, the Twin Dragons. An expert dancer, Jamie places justice and friendship above all else, defending his town with martial skill.

Jamie is a close-range fighter that specializes in poking, footsies, and harassment, with quick normals that he can use once he's in. He also benefits from a powerup system that allows his damage potential and flexibility to snowball the more chances he gets to power up.

Jamie's key mechanic is based on taking drinks. By using his forward throw, The Devil Inside, the Freeflow Kicks ending to his Freeflow Strikes special move, or certain target combos, Jamie can increase his Drink Level, up to a maximum of 4. Each time he drinks, his damage increases, bringing him to standard damage at Drink Lv. 2 and putting him above it at Drink Lv. 3 and higher. He also unlocks more target combos and special moves at specific Drink Levels, gradually opening up the complexity of his moveset and increasing his flexibility significantly; his most notable special move unlocks, in ascending order from Drink Lv. 1 to 4, are his aerial special move Luminous Dive Kick, his anti-projectile and super cancel bridge Bakkai, the command throw Tenshin, and the super-cancelable follow-up to his advancing move Swagger Step, the Swagger Hermit Punch. Jamie can also temporarily boost himself to Drink Lv. 4 (if he isn't already there) by using his Lv. 2 Super Art, The Devil's Song; if he already has 4 drinks, it instead becomes a tool to quickly replenish Drive Gauge and lets him keep up the pressure.

As far as his selection of normals and specials go, Jamie has 5MK, 2MK, and 5HK as strong cancelable pokes, as well as a grounded overhead in 6MK. He can use these moves, as well as careful uses of Freeflow Strikes and Swagger Step, to pester the opponent at close and mid range until they make a mistake. He also has 2HP and Arrow Kick as anti-air options, with Overdrive Arrow Kick explicitly serving as a reversal against aggressive opponents. Successful hits with sweep, Freeflow Strikes, Punish Counters, or any moves that knock the opponent down and away will give Jamie more time to drink without fear of repercussion, especially against opponents that aren't able to establish strong enough ranged pressure to stop Jamie from drinking when he's farther away from them.

In exchange for how powerful drinks make Jamie, though, it is no exaggeration to say that his gameplan is very much reliant on getting them, even if he doesn't make it to Drink Lv. 4 in a given round. Without drinks, Jamie lacks a lot of his most powerful tools, in addition to missing out on damage; it becomes an uphill battle to keep up unless he's gotten a few sips in, even with The Devil's Song acting as a Hail Mary option to close the gap in emergencies. It is also worth noting that Jamie's Drink Level does not carry over between rounds, meaning that he has to be prepared to get set up all over again, but once he gets going, he's a real menace. If you're looking for a bit of breaking and swaying alongside an infighter that only gets stronger when he's loaded up, then Jamie is your man.


Pick if you like: Avoid if you dislike:
  • Nuanced and rewarding decision making focused around an unlock mechanic
  • Pestering and rushing down opponents at close and close-mid range with strong poking normals and forward-moving specials
  • Gaining access to a wide variety of tools and options over time
  • Forcing the opponent to approach you
  • Often needing to choose between unlocking new options and maintaining pressure after a combo
  • Not having access to all of your options at the start of each round
  • Being weak against fireballs


Classic & Modern Versions Comparison

List of differences with Modern Jamie
Missing Normals
  • Standing Light Kick (5LK)
  • Crouching Medium Punch (2MP)
  • Jumping Light Kick (j.LK)
  • Jumping Medium Punch (j.MP)
  • Jumping Heavy Kick (j.HK)
Missing Command Normals
  • N/A
Shortcut-Only Specials
  • Bakkai (2S)
    • Medium/OD Only
  • Tenshin (4S)
Miscellaneous Changes
  • N/A


Jamie
SF6 Jamie Portrait.png
Vitals
Life Points 10000
Ground Movement
Forward Walk Speed 0.048
Backward Walk Speed 0.035
Forward Dash Speed 19
Backward Dash Speed 23
Forward Dash Distance 1.50
Backward Dash Distance 0.85
Drive Rush Min. Distance (Throw) 0.988
Drive Rush Min. Distance (Block) 2.030
Drive Rush Max Distance 3.002
Jumping
Jump Speed 4+38+3
Jump Apex 2.115
Forward Jump Distance 1.90
Backward Jump Distance 1.52
Throws
Throw Range 0.8
Throw Hurtbox 0.33


Jamie Drink Levels (DL) in a Nutshell
DL0 DL1 DL2 DL3 DL4 Lv.2 Super
(Install)
Damage Scaling 90% 95% 100% 105% 110% 105%
New Moves N/A
  • 5LP~LP~MP
    (Bitter Strikes)
  • j.214K
    (Luminous Dive Kick)
  • 6MK~MK~P
    (Full Moon Kick)
  • 236K
    (Bakkai)
  • 4HP~HP~HK
    (Intoxicated Assault)
  • 63214K
    (Tenshin)
  • 6HK~4HK~P
    (Ransui Haze)
  • 214P~6P
    (Swagger Hermit Punch)
  • Same as DL4
Unless otherwise specified, most moves will display their DL2 version, making it easy to calculate damage values for other Drink Levels.
For moves that only exist at DL3 or DL4, the lowest possible Drink Level version will be displayed by default.


Frame Data Glossary - SF6
Hitbox Images

🟥 (Red): Attack hitbox

  • Appears pink for Throw hitboxes

🟩 (Green): Vulnerable hurtbox that can be hit by strikes/projectiles

  • If a move's hitbox and hurtbox overlap, the colors blend to appear orange

🟦 (Blue): Vulnerable throw hurtbox

  • Will be thrown if Pink throw hitbox touches Blue throw hurtbox


Active

How many frames a move remains active (can hurt opponents) for. For projectiles with a maximum active period, a value may be listed in [brackets], but this number is not factored into the move's total frame count.

  • For multi-hit moves with no gaps between the active hitboxes, active frames are listed as X,Y (or sometimes X*Y)
  • For multi-hit moves with gaps between hits, active frames are listed as X(n)Y where n = the frame gap between hitboxes.


Cancel

Available options for canceling one move into another move.

  • "Chn": Chain cancel (Light normals; specific chain options listed in Description)
  • "TC": Target Combo
  • "Sp": Special move
  • "SA": Super Art (if a number is listed, refers only to that specific Super; SA3 = Lv.3 Super Art)
  • "Jmp": Jump cancel (usually on hit only, if applicable)
  • "SS": Serenity Stream (Chun-Li's stance)
    • If one hit of a multi-hit attack is cancelable, this can be indicated with (1st), (2nd), etc.
    • Occasionally, a move can be canceled only into a specific follow-up (e.g. Dee Jay [4]6P > 22PP); this can be indicated by listing the move input in the Cancel field, or with an asterisk that is explained in the move notes (Sp*)


Cancel Hitconfirm Windows

Hitconfirm reaction windows into Special Moves, Target Combos, and Super Arts.

  • Refers to the amount of time (in frames) you have to cancel one attack into another attack on reaction
    • e.g. most cancelable 2MKs have a 13 frame window to cancel into a Special/Super on reaction, making them nearly impossible to hitconfirm
  • Counts from the first frame the attack connects until the final cancelable frame
    • Visual effects like hitsparks and HP drain do not actually occur until frame 2; the first frame is still counted to keep the numbers consistent with previous games, and because it is technically possible to start reacting to the character's reeling animation on frame 1
  • If a Target Combo is cancelable into another attack, the hitconfirm window will include the entire sequence starting from the first hit
    • If there is a frame gap on block between hits of the TC, the hitconfirm window may also be included for just the followup hit
    • Some sequences like Ken's 5MP~HP TC may have a range of values listed (43f~47f). In this example, inputting 5MP~HP at its usual timing gives a 43f hitconfirm into a Special/Super. Delaying the chain into HP gives more total time for the final hitconfirm.


Damage

Attack damage on hit. Multi-hit moves may have the damage listed for individual hits as X,Y (or sometimes X*Y). Sometimes a move's damage changes depending on which active frame connects, or on cinematic vs. non-cinematic hits; in this case, multiple values may be listed, and it will be clarified in the move description.

Damage Scaling

Some moves cause additional damage scaling in combos. Refer to Game Data page for a more detailed breakdown.

Scaling Types:

  • Starter: When a move begins the combo, the next attack is scaled by X percent
    • e.g. Ryu 2MK (20% Starter) > Hadoken: Hadoken is at 80% damage scaling
  • Combo: When a move is comboed into, the next attack is scaled by X percent or X number of hits
    • e.g. Ryu 2HP > OD High Blade Kick (2-Hit Combo Scaling) > Shoryuken: Shoryuken is at 70% damage scaling (100% > 100% > [skip 80%] > 70%)
    • e.g. Cammy 5HP > OD Spiral Arrow (5% Combo Scaling) > Cannon Spike: Cannon Spike is at 75% damage scaling (100% > 100% > [80-5 = 75%])
  • Immediate: When a move is comboed into, this attack is scaled by X percent
    • e.g. Drive Impact Crumple (20% Starter) > Throw (20% Immediate): Throw is at 60% damage scaling
  • Multiplier: A damage scaling multiplier applies after Perfect Parry (50%) and mid-combo Drive Rush (15%). Any hits in the combo continue their usual damage scaling, but reduced by these amounts. These can bring the minimum scaling below the usual 10%, and they stack with each other; as a result, the minimum scaling can reach 4% using a long Drive Rush combo after Perfect Parry.
  • Minimum Scaling: The lowest damage scaling that can be applied to an attack. Super Art Level 1/2/3 generally has 30%/40%/50% minimum scaling respectively. This ensures the attack will still do reasonable damage even at the end of a heavily scaled combo.


Drive Rush Cancel Advantage

Refers to the frame advantage when canceling a normal, command normal, or Target Combo into Drive Rush on hit or block (abbreviated as DRC for Drive Rush Cancel). This is calculated at the moment a follow-up attack can be input, not at the moment the character can block or perform movement options. An attack that with DRC +8 on Hit can link into an 8-frame attack, and DRC +4 on Block can create a true blockstring into a 4-frame attack.

Note that any DRC on Block worse than +4 cannot form a true blockstring, allowing the opponent to interrupt with an invincible reversal. Most light normals are slightly negative after a DRC on block, meaning the opponent can mash their fastest normal to guarantee a counter-hit (though this requires fast reactions). The attacking character could punish this with Light > DRC into an immediate invincible attack, but this would be an incredibly expensive and high-risk gambit.

Forced Knockdown

Most airborne command normals, special moves, and Super Arts put the user in a "Forced Knockdown" state. While in this state, an air knockdown will occur when being hit by any attack, even if it would otherwise cause an air reset.

As an example, Ryu's 2HP causes an air reset when used as an anti-air. Against a move like Cammy's Hooligan Combination, however, the 2HP puts her into an air knockdown state. This allows Ryu to successfully cancel 2HP into Shoryuken for a juggle, similar to how a Drive Impact wall splat works. Taking advantage of Forced Knockdown juggles is important for dealing with moves like Ken's Dragonlash, Dhalsim's Air Teleport, or Kimberly's 6HK~Hop sequence.

Moves that already cause an air knockdown, like most j.MP air-to-airs, will not display the "Forced Knockdown" message.

Guard

Refers to the direction an attack must be blocked. L is for Low attacks (must be blocked crouching), H is for High attacks/overheads (must be blocked standing), LH is for attacks that can be blocked crouching or standing. T is for Throw attacks which cannot be blocked.

Juggles

When a character is put into an Air Knockdown state, it is often possible to follow up with a Juggle attack before they hit the ground. In the simplest terms, there are 2 main juggle states:

  • Free Juggle: any attack can juggle, causing an Air Reset or an Air Knockdown
  • Limited Juggle: only specific attacks with juggle potential may juggle


The following is a more detailed overview of the SF6 juggle system:

Juggle Count (JC): The status of the character being juggled. A high JC limits which attacks can work in juggles.

  • JC0: free juggle state - any attack that can hit an airborne opponent will work
  • JC1+: limited juggle state - juggle only works if the attack's Juggle Limit ≥ defender's Juggle Count

Juggle Start (JS): When starting a juggle, the opponent's JC will be set to this value. May be different vs. standing and airborne opponents.

  • Attack with Juggle Start value of 3 will put opponent at JC3, so only attacks with Juggle Limit value ≥ 3 can follow up

Juggle Increase (JI): When opponent is already in a juggle state, attacks will increase the opponent's JC by this amount.

  • Airborne opponent at JC1 followed by attack with Juggle Increase value of 3 will set opponent to JC4

Juggle Limit (JL): Property of an attack hitbox that determines whether it connects on a juggled opponent. The JL must be ≥ the opponent's JC to hit successfully.

  • An uppercut with a JL value of 5 will connect on an opponent at JC5 or below, but will whiff on JC6 opponent
  • Most normals have a JL value of 0, meaning they only work in Free Juggle (JC0) states
  • Some multi-hit attacks have different JL values on each hit, so a 3-hit move may only hit twice in juggles

An example to tie everything together:

  • An attack (JS3) launches opponent into the air (Opponent now at JC3)
  • Followed up with an attack (JI2/JL4); it connects, because JL4 ≥ JC3 (Opponent now at JC5)
  • Attempts to juggle again with same attack (JL4), but whiffs because JL4 < JC5 (Opponent hits the ground)

Drive Rush notes:

  • DR normals have a Juggle Start/Increase value of 0
  • DR normals have +3 added to their usual Juggle Limit


On Hit/Block

These are frame advantage values when the attack hits or is blocked. If the number is positive, then the move will recover before the defender can act again. If the number is negative, the defender will be able to act before the attacker and maybe even punish. KD refers to knockdown on hit, and the listed KD Advantage refers to how many frames the attacker can act before the defender finishes their wakeup animation.

  • Note that generally, there is an extra +2 hit advantage on Counterhits and +4 hit advantage on Punish Counters (exceptions are noted in the description).


Recovery

How many frames it takes for a move to finish after the active frames have finished. For projectiles, recovery is considered to begin after the first active frame.

  • Moves with different recovery values on hit/block/whiff may have multiple values listed like X(Y), with specific details listed in the description.


Startup

How many frames it takes before the move becomes 'active' or have a hit box. The last startup frame and the first active frame are the same frame, meaning all values are written as Startup + 1.

  • Moves with multiple relevant startup values may be listed as X(Y); for example, a move that hits airborne first before hitting grounded opponents, or a 2-hit move where the first hit whiffs at some ranges.


Normals

Standing Normals

5LP

Standing Light Punch
5LP
SF6 Jamie 5lp.png
DL0

SF6 Jamie 5lp dl1.png
DL1+

5LP
Stand LP (DL0)
Startup Active Recovery Cancel Damage Guard On Hit On Block
5 2 7 Sp SA 270 LH +5 0
  • Cancel reaction window: 12f
  • xx Lv.2 Super: +7/+2


Overshadowed by 2LP and 5LK, this normal doesn't see much use until Jamie has a drink. The frame data of this normal gets worse above Drink Lv.1 but makes up for it in other ways.

5LP
Stand LP (DL2)
Startup Active Recovery Cancel Damage Guard On Hit On Block
5 3 9 Sp SA TC 300 LH +2 -3
  • Damage DL1-DL4: 285/300/315/330
  • Cancel reaction window: 13f
  • xx Lv.2 Super: +7/+2


At Drink Lv.1 and above, 5LP becomes Jamie's longest range light normal and has a powerful Target Combo cancel into LK~MP, which allows for very strong confirms from light normals.

5MP

Standing Medium Punch
5MP
SF6 Jamie 5mp.png

5MP
Stand MP (DL2)
Startup Active Recovery Cancel Damage Guard On Hit On Block
8 4 14 - 600 LH +5 +2
  • Damage DL0-DL4: 540/570/600/630/660


Jamie's only plus on block normal. Despite this, it is often awkward to use for pressure as it leaves Jamie outside of normal throw range. This normal is best used in combos as after Drive Rush it will link into 2HP and after Drink Lv.3+ when a command grab can function as a tick throw afterwards.

Drive Rush > 5MP functions as an unmashable strike/throw mixup with 63214K unlocked at Drink Lv.3+.

5HP

Standing Heavy Punch
5HP
SF6 Jamie 5hp.png

5HP
Stand HP (DL2)
Startup Active Recovery Cancel Damage Guard On Hit On Block
5 1(1)1(4)3 20 Sp SA (2nd) 100x2,700 (900) LH +1(+3) -3(-1)
  • Damage DL0-DL4: 810/855/900/945/990
  • Counterhit/Punish Counter bonus frame advantage carries over to all 3 hits
  • High juggle potential; final 2 hits maintain juggle state and can allow a followup juggle
  • Cancel reaction window: 18f
  • xx Lv.2 Super: +11/+5


While Jamie's 3-hit 5HP has some unique and interesting properties, there are a lot of downsides to this normal's design. The first 2 hits have finicky range and low damage, but are the only ones that can be cancelled. In most combos it is strictly worse than 5LK, which has identical startup, longer range and higher cancel damage. The extra hitstun allows 5HP to cancel into 236MP or 214LP, but these are not important combo routes. From longer ranges where only the 3rd hit connects, 5HP is functionally a weak 12f non-cancellable poke; 5MK, 2MK, and 5HK are stronger in this context.

The move is not entirely useless; 5HP > Drive Rush gives stronger confirm routes, and Drive Rush into 5HP gives an easily confirmable followup link. The hits are also fast enough to break Drive Impact armor if done early enough, leading to a standing followup combo. In juggles where the last hit connects, it can be used to add free damage since it no longer requires a cancel.

5LK

Standing Light Kick
5LK
SF6 Jamie 5lk.png

Lua error in Module:MoveDataParser at line 119: attempt to index field '?' (a nil value).
"Jamie's Jig"

5LK
Stand LK (DL2)
Startup Active Recovery Cancel Damage Guard On Hit On Block
5 2 11 Chn Sp SA 300 LH +3 -1
  • Damage DL0-DL4: 270/285/300/315/330
  • Chains into 5LK/2LP/2LK
  • Cancel reaction window: 13f
  • xx Lv.2 Super: +9/+5


Jamie's 5LK has properties more commonly seen in a 5LP; it can be chained into and has decent (but not exceptional) range, making it useful as combo filler or in some punishes. It has the unique ability to chain into itself infinitely on whiff, allowing Jamie to "dance" with the animation. Jamie shifts forward during the 5LK animation, so chaining out of it at the earliest timing will act as a sort of "kara-cancel" to keep him closer to the opponent.

5LK can combo into LP or OD Freeflow Strikes, any Arrow Kick, or Super. Slower specials like Bakkai or Swagger Step (both of which are far stronger in Super cancels) require stronger combo routes.

5MK

Standing Medium Kick
5MK
SF6 Jamie 5mk.png

5MK
Stand MK (DL2)
Startup Active Recovery Cancel Damage Guard On Hit On Block
10 3 17 Sp SA 600 LH +2 -3
  • Damage DL0-DL4: 540/570/600/630/660
  • Cancel reaction window: 15f
  • xx Lv.2 Super: +14/+10


5MK is a solid mid-range poke that can be buffered into specials to score a knockdown. Compared to 2MK, it is 3f slower but hits from slightly longer range and is slightly less whiff punishable.

5HK

Standing Heavy Kick
5HK
SF6 Jamie 5hk.png

5HK
Stand HK (DL2)
Startup Active Recovery Cancel Damage Guard On Hit On Block
15 3 21 Sp SA 800 LH +1 -5
  • Damage DL0-DL4: 720/760/800/840/880
  • Punish Counter: Crumple KD +71 (+8 before opponent becomes airborne)
  • Puts airborne opponents into limited juggle state
  • Cancel reaction window: 17f (PC: 29f)
  • xx Lv.2 Super: +17/+11 (KD +87)


While quite slow, 5HK has solid range due to its forward movement, making it a real threat in neutral. The long recovery on this move makes it very risky to whiff in neutral, but on block the pushback usually keeps it safe even at -5. The hitbox is quite low to the ground, making it worthless as an anti-air; the juggle properties vs. airborne only allow Jamie to safely cancel into a special when hitting the opponent's early jump frames. The crumple state from Punish Counter causes the opponent to fall backwards, making the followups a bit more limited compared to the corner.

Crouching Normals

2LP

Crouching Light Punch
2LP
SF6 Jamie 2lp.png

2LP
Crouch LP (DL2)
Startup Active Recovery Cancel Damage Guard On Hit On Block
4 2 9 Chn Sp SA 250 LH +5 -1
  • Damage DL0-DL4: 225/237/250/262/275
  • Chains into 5LK/2LP/2LK
  • Cancel reaction window: 13f
  • xx Lv.2 Super: +9/+3


Jamie's only 4f startup normal, making it useful in certain punishes and for pressure strings. This is the only chainable light normal that works well against Drive Impact, but the chain speed is below average, making it more susceptible to a Punish Counter.

2MP

Crouching Medium Punch
2MP
SF6 Jamie 2mp.png

2MP
Crouch MP (DL2)
Startup Active Recovery Cancel Damage Guard On Hit On Block
6 3 13 Sp SA 600 LH +5 -1
  • Damage DL0-DL4: 540/570/600/630/660
  • Cancel reaction window: 16f
  • xx Lv.2 Super: +12/+9


A standard cancellable 6f medium button. Jamie can't link into it without Drive Rush, Counterhit, or Punish Counter bonus advantage, and at only +3 he also needs one of these to link out of it. Very non-committal in neutral when buffered as a counterpoke.

2HP

Crouching Heavy Punch
2HP
SF6 Jamie 2hp.png

2HP
Crouch HP (DL2)
Startup Active Recovery Cancel Damage Guard On Hit On Block
9 5 23 Sp SA 900 LH 0 -8
  • Damage DL0-DL4: 810/855/900/945/990
  • Forces stand on hit
  • Only the first 2 active frames are cancellable
  • Cancel reaction window: 16f
  • xx Lv.2 Super: +21/+13


Works fairly well as an anti-air due to its vertical reach and large number of active frames. Does not have a useful cancel when used as an anti-air, as only the early grounded frames are cancellable.

2LK

Crouching Light Kick
2LK
SF6 Jamie 2lk.png

2LK
Crouch LK (DL2)
Startup Active Recovery Cancel Damage Guard On Hit On Block
5 2 11 Chn 200 L +1 -3
  • Damage DL0-DL4: 180/190/200/210/220
  • Chains into 5LK/2LP/2LK


A standard 5f low confirm starter. For a 3-hit light confirm, use 2LK~2LP~5LK, as this is the only confirm route that beats reversal 4f light normals.

2MK

Crouching Medium Kick
2MK
SF6 Jamie 2mk.png

2MK
Crouch MK (DL2)
Startup Active Recovery Cancel Damage Guard On Hit On Block
7 3 18 Sp SA 500 L -1 -6
  • Damage DL0-DL4: 450/475/500/525/550
  • Applies a 20% damage scaling penalty to the next hit when used as a combo starter (100/80/70/60...)
  • Cancel reaction window: 13f
  • xx Lv.2 Super: +12/+7


Jamie's 2MK is relatively fast with decent range, and the high pushback makes it safe to poke with. If well-spaced, cancels into 236P are often safe, but the LP version can whiff at absolute max range.

2HK

Crouching Heavy Kick
2HK
SF6 Jamie 2hk.png

2HK
Crouch HK (DL2)
Startup Active Recovery Cancel Damage Guard On Hit On Block
9 2(2)3 28(29) TC 400x2 L,L* HKD +33 -11
  • Damage DL0-DL4: 360x2/380x2/400x2/420x2/440x2
  • Counterhit/Punish Counter: +49 HKD
  • Has high juggle potential; no longer HKD when juggled into
  • Cancel reaction window: 33f (PC: 43f)


This 2-hit sweep is a low on both hits and has slightly more range on the 2nd hit. It's fairly easy to punish on block, so should not be thrown out randomly very often. 2HK has a lot of juggle potential, and leads to a Target Combo followup into HK that is great for increasing his Drink Level without sacrificing corner oki.

Jumping Normals

j.LP

Jumping Light Punch
j.LP
SF6 Jamie jlp.png

j.LP
Jump LP (DL2)
Startup Active Recovery Cancel Damage Guard On Hit On Block
5 9 3 land - 300 H - -
  • Damage DL0-DL4: 270/285/300/315/330
  • Can hit Crossup; can hit as fuzzy Instant Overhead


As a crossup, j.LP is far inferior to j.MK. The instant overhead property allows Jamie to close out a round by making the opponent block a deep jump-in; as they transition to a crouch block, they will be stuck in a standing state for a few frames, allowing the j.LP to connect. This is high risk and should only ever be attempted if it is certain to end the round.

j.MP

Jumping Medium Punch
j.MP
SF6 Jamie jmp.png

j.MP
Jump MP (DL2)
Startup Active Recovery Cancel Damage Guard On Hit On Block
7 4 3 land Sp 700 H - -
  • Damage DL0-DL4: 630/665/700/735/770
  • Puts airborne opponents into limited juggle state
  • Cancels into j.214K Divekick (DL1+, forward jump only)


The knockdown makes it useful as an air-to-air. The hitbox reaches quite high above Jamie, so it will whiff if you try to delay it too long in juggle combos.

j.HP

Jumping Heavy Punch
j.HP
SF6 Jamie jhp.png

j.HP
Jump HP (DL2)
Startup Active Recovery Cancel Damage Guard On Hit On Block
10 6 3 land - 800 H - -
  • Damage DL0-DL4: 720/760/800/840/880
  • Spiked knockdown vs. airborne opponents


Has high juggle potential. Against grounded opponents, this is stronger than j.HK since all the damage is done on a single hit.

j.LK

Jumping Light Kick
j.LK
SF6 Jamie jlk.png

j.LK
Jump LK (DL2)
Startup Active Recovery Cancel Damage Guard On Hit On Block
6 6 3 land - 300 H - -
  • Damage DL0-DL4: 270/285/300/315/330


Has the longest horizontal range out of all Jamie's air normals, but the low hitstun makes it fairly useless near its max range except as an air-to-air.

j.MK

Jumping Medium Kick
j.MK
SF6 Jamie jmk.png

j.MK
Jump MK (DL2)
Startup Active Recovery Cancel Damage Guard On Hit On Block
7 6 3 land - 500 H - -
  • Damage DL0-DL4: 450/475/500/525/550
  • Can hit Crossup


A better crossup than j.LP due to its higher damage and wider hitbox.

j.HK

Jumping Heavy Kick
j.HK
SF6 Jamie jhk.png

Lua error in Module:MoveDataParser at line 119: attempt to index field '?' (a nil value).

j.HK
Jump HK (DL2)
Startup Active Recovery Cancel Damage Guard On Hit On Block
8 3(5)4 3 land - 400x2 H - -
  • Damage DL0-DL4: 360x2/380x2/400x2/420x2/440x2
  • 1st hit puts airborne opponents into limited juggle state
    • 2nd hit causes air reset


As an air-to-air, j.HK hits twice; if only the first hit connects, Jamie can land and follow up with a grounded juggle. When used mid-juggle (like after anti-air 2KK), the first hit will whiff and the second hit causes the air juggle.

Against grounded opponents, only one hit will connect, dealing less damage than a medium air normal. The long gap in active frames can also make it difficult to time properly. The hitbox is not particularly good against anti-airs, so it's usually better to stick with j.HP for that purpose.

Command Normals

2KK

Tensei Kick
2KK
SF6 Jamie 2kk.png

2KK
Tensei Kick (DL2)
Startup Active Recovery Cancel Damage Guard On Hit On Block
9 3 22 Jmp 600 LH KD +53 Launch -8
  • Damage DL0-DL4: 540/570/600/630/660
  • Puts opponent into limited juggle state
  • Cancel reaction window: 17f (jump, on hit only)


Tensei Kick is a launching command normal that has mediocre range and is very unsafe on block. It can be used as an anti-air, but the timing is a bit specific. The jump cancel will always jump forward regardless of which direction is held, and it cannot cancel to a grounded special move during prejump frames.

At DL1 or higher, Jamie can anti-air with 2HK into j.MP xx j.214KK, then land and juggle his 2HK~K~P Target Combo for a free Drink Level.

6MK

Falling Star Kick
6MK
SF6 Jamie 6mk.png

6MK
Falling Star Kick (DL0)
Startup Active Recovery Cancel Damage Guard On Hit On Block
22 3 20 - 540 H +1 -3
  • Damage DL0-DL1: 540/570
  • 10-19f Low Crush (not airborne)
6MK
Falling Star Kick (DL2)
Startup Active Recovery Cancel Damage Guard On Hit On Block
22 3 20 TC 600 H +1 -3
  • Damage DL2-DL4: 600/630/660
  • 10-19f Low Crush (not airborne)
  • Cancel reaction window: 15f (TC)


A hopping overhead that can be spaced to hit later in its active frames, resulting in better frame advantage. When used out of Drive Rush, Jamie can link light normals or 5HP afterward.

At DL2 and above, 6MK has more range and a Target Combo followup (6MK~MK~P) for a knockdown and an optional Drink level increase.

4HP

Hermit's Elbow
4HP
SF6 Jamie 4hp.png
DL0-DL2

SF6 Jamie 4hp dl3.png
DL3+

4HP
Hermit's Elbow (DL2)
Startup Active Recovery Cancel Damage Guard On Hit On Block
18 4 20 SA 800 LH +1 -3
  • Damage DL0-DL2: 720/760/800
  • Cancel reaction window: 19f (Super)
  • xx Lv.2 Super: +15/+11
4HP
Hermit's Elbow (DL3)
Startup Active Recovery Cancel Damage Guard On Hit On Block
18 4 21(19) SA TC 840 LH +1 -3
  • Damage DL3-DL4: 840/880
  • Cancel reaction window: 19f (Super) / 20f (TC)
  • xx Lv.2 Super: +14/+12


Hermit's Elbow pulls back during startup, making it a useful shimmy tool in tick throw situations. If you successfully bait the opponent's throw and land a Punish Counter, it becomes +5 and can link into 5LK or 5HP. At its max possible range, it can become +4 as a meaty and link into 2LP without a Counterhit. The super cancel window is also quite lenient, allowing for high damage confirms.

At Drink Lv.3, 4HP gains a Target Combo followup into HP. This TC will only combo if the 4HP hits meaty or with extra frame advantage from Counterhit. In order to confirm the TC as late as possible on reaction, a Punish Counter, Drive Rush start, or final-frame meaty timing is required. However, Jamie gets more damage by simply linking 5LP~LK~MP, since the 4HP becomes +5 in these scenarios. Note that due to increased pushback, the DL3 version can no longer link to 5HP even at +5.

6HK

Senei Kick
6HK
SF6 Jamie 6hk.png
DL0-DL3

SF6 Jamie 6hk dl4.png
DL4

6HK
Senei Kick (DL2)
Startup Active Recovery Cancel Damage Guard On Hit On Block
16 3 20 SA 900 LH +3 -3
  • Damage DL0-DL3: 810/855/900/945
  • Cancel reaction window: 18f (Super)
  • xx Lv.2 Super: +19/+13
6HK
Senei Kick (DL4)
Startup Active Recovery Cancel Damage Guard On Hit On Block
16 4 19 SA TC 990 LH +3 -3
  • Cancel reaction window: 18f (Super) / 25f (Followup)
  • xx Lv.2 Super: +19/+13


A long range stepkick that can be confirmed into a Super on hit. You cannot space it to connect meaty at max range, so the only followup links require Counterhit, Punish Counter, or Drive Rush (which travels nearly full screen).

At Drink Lv.4, the move gains extra range and some new Target Combo followups. The TC requires a Counterhit to combo, but the timing is very lenient to react to this. Even if the confirm is missed, the TC followups are cancellable themselves, allowing Jamie to end with a safe option like 236PP even on a failed hitconfirm.

Target Combos

2HK~HK~P

Phantom Sway
(DL0)
2HK~HK~P
SF6 Jamie 2hk hk.png

SF6 Jamie 2hk hk p.png

2HK~HK
Phantom Sway (DL2)
Startup Active Recovery Cancel Damage Guard On Hit On Block
12 3 43 TC 500 LH KD +22(23) -28
  • Damage DL0-DL4: 450/475/500/525/550
  • Cancel reaction window: 58f (TC Drink)
2HK~HK~P
Phantom Sway + Drink (DL2)
Startup Active Recovery Cancel Damage Guard On Hit On Block
- - 56+5 - - - KD +4(5) -46
  • Maintains corner oki while increasing Drink Level
  • At DL4, drink gains 1 Drive bar


Jamie's 2-hit 2HK gives plenty of time to confirm the Target Combo followup afterward on hit, though 2HK is unsafe on block regardless. Jamie gets no midscreen oki if the opponent back rises, so the Drink ender is generally the best option. In the corner, Jamie can Drink and still push a mixup at +3. This TC has high juggle potential, and even gains slightly more KD advantage when juggled into.

Unlike many Drink activations, going from DL3 to DL4 does not grant Jamie any additional advantage on hit or block.

5LP~LK~MP

Bitter Strikes
(DL1)
5LP~LK~MP
SF6 Jamie 5lp lk.png

SF6 Jamie 5lp lk mp.png

5LP~LK
Bitter Strikes 1 (DL2)
Startup Active Recovery Cancel Damage Guard On Hit On Block
6 2 16 TC 200(160) LH -3 -8
  • Damage DL1-DL4: 190(170)/200(180)/210(188)/220(198)
  • Cancel reaction window: 29f (TC)
  • () refers to scaled damage when beginning combo with 5LP
5LP~LK~MP
Bitter Strikes 2 (DL2)
Startup Active Recovery Cancel Damage Guard On Hit On Block
8 3 21(23) Sp SA 500(350) LH -2 -10
  • Damage DL1-DL4: 475(380)/500(400)/525(420)/550(440)
  • Cancel reaction window: 52f
  • xx Lv.2 Super: +12/+4
  • () refers to scaled damage when beginning combo with 5LP~LK


Since 5LP loses much of its frame advantage at Drink Lv.1 and above, this Target Combo is the primary way to convert jab into damage. The MP ender can combo into 236LP/MP/PP, 214LP, 236LK, 623K, or Super. The only safe enders after committing to the TC followup are 236PP and Lv.2 Super. If the opponent tries to punish the TC on block, Jamie can frame trap any non-invincible reversal with 236LP or the much safer 236PP.

6MK~MK~P

Full Moon Kick
(DL2)
6MK~MK~P
SF6 Jamie 6mk mk.png

SF6 Jamie 6mk mk p.png

6MK~MK
Full Moon Kick (DL2)
Startup Active Recovery Cancel Damage Guard On Hit On Block
15 3(5)2 28 TC 200x2 LH KD +31 -14
  • Damage DL2-DL4: 200x2/210x2/220x2
  • Cancel reaction window: 62f (TC)
6MK~MK~P
Full Moon Kick + Drink (DL2)
Startup Active Recovery Cancel Damage Guard On Hit On Block
- - 53+8 (DL3: 53+5) - - - KD -1 (DL3: KD +2) -46 (DL3: -43)
  • Increases Drink Level by 1
    • DL3: KD +2 on Hit, -43 on Block
    • DL4: restores 1 bar of Drive Gauge


Confirming this TC directly from 6MK is strict, but possible with good reactions. It's hard to chase down the opponent for midscreen oki, so ending with a Drink is usually worthwhile.

In the corner, ending with a Drink puts Jamie at -1, making it a little risky; if going from DL3 to DL4, he instead gets slight KD advantage to apply pressure. Jamie can apply much better corner pressure by skipping the drink. 6MK~MK sets up the perfect timing for a meaty 214HP to become +2 on block while remaining safe against Drive Impact. Many opponents will instinctively press a button here, giving Jamie a free Counterhit.

4HP~HP~HK

Intoxicated Assault
(DL3)
4HP~HP~HK
SF6 Jamie 4hp hp.png

SF6 Jamie 4hp hp hk.png

4HP~HP
Intoxicated Assault 1 (DL3)
Startup Active Recovery Cancel Damage Guard On Hit On Block
21 4 20 SA TC 630 LH +1 -11
  • Damage DL3-DL4: 630/660
  • Only combos on Counterhit/Punish Counter or with meaty timing; 3f gap on block
  • Cancel reaction window: 18f / 56f (TC)
  • xx Lv.2 Super: +18/+8
4HP~HP~HK
Intoxicated Assault 2 (DL3)
Startup Active Recovery Cancel Damage Guard On Hit On Block
21 3 37 - 840(672) LH KD +23 -20
  • Airborne 18f~ (Forced Knockdown state)
  • 7f gap between final 2 hits on block


This Target Combo sequence is most useful when performing 4HP as a shimmy to bait a throw tech, since it guarantees a Punish Counter if successful. The listed Cancel Reaction values are for the final HK input, when reacting to just the HP followup, or the entire sequence on Counterhit/Punish Counter. While the HP followup is unsafe, it can be used to frame trap an opponent that predictably hits buttons after blocking 4HP. If the final HK is performed on block, the opponent can interrupt with any 6f or faster button that will put Jamie into a free juggle state due to the Forced Knockdown property.

6HK~4HK~P

Ransui Haze
(DL4)
6HK~4HK~P
SF6 Jamie 6hk 4hk.png

SF6 Jamie 6hk 4hk p close.png

SF6 Jamie 6hk 4hk p mid.png

SF6 Jamie 6hk 4hk p far.png

6HK~4HK
Ransui Haze (DL4)
Startup Active Recovery Cancel Damage Guard On Hit On Block
- - 76 TC - - - -
  • Sways and walks backward; press P at different times to change followup
  • Earliest followup timing can be input after 25f of 6HK+Sway
  • Cancel reaction window: 25f (to combo CH 6HK into Headbutt)
6HK~4HK~P (close)
Ransui Haze Headbutt (DL4)
Startup Active Recovery Cancel Damage Guard On Hit On Block
(25~45)+15 4 28 Sp SA 935 LH KD +32 -12
  • Requires Counterhit/Punish Counter to combo from 6HK
  • Cancellable into any special or Super
  • Cancel reaction window: 20f (Headbutt) / 59-60f (CH 6HK + Headbutt)
  • xx Lv.2 Super: KD+39/+10
6HK~4HK~P (mid)
Ransui Haze Triple Fist (DL4)
Startup Active Recovery Cancel Damage Guard On Hit On Block
(51~75)+4 2(8)2(11)2 27 Sp SA 330x2,660 (1320) LH KD +35 -9
  • Cancellable into any special or Super
  • Cancel reaction window: 60/40/17f (spin fists only, more hits allows easier confirm)
  • xx Lv.2 Super: KD+42/+13
6HK~4HK~P (far)
Ransui Haze Drink (DL4)
Startup Active Recovery Cancel Damage Guard On Hit On Block
(76~100)+Drink - 52(112) - - - - -
  • Restores 1 Drive bar or equivalent Burnout gauge on final Drink recovery frame
  • If no button/direction is input during recovery, restores 2 Drive bars after 112f


Every part of this Target Combo can be input on hit, block, or whiff from 6HK. The 4HK causes Jamie to stumble away from the opponent, and the timing of Jamie's P input changes which followup occurs. All listed startups include the 6HK plus the minimum/maximum delay before hitting P during the Sway animation. The close Headbutt followup is fairly easy to confirm on Counterhit or Punish Counter 6HK. The minimum gap between 6HK and Headbutt is 1f on normal hit, 7f on block, making it a poor frame trap option. The Spinning Fists cannot be comboed into, but are useful for stopping an opponent from chasing down the Sway. The Drink causes Jamie to continue stumbling backwards, making it hard to chase down without a projectile. This does give up a lot of ground, but it may be worth the Drive build depending on the circumstances.

Throws

Forward Throw (LPLK)

Forward Throw
LPLK
SF6 Jamie lplk.png

LPLK
Back Shaver (DL2)
Startup Active Recovery Cancel Damage Guard On Hit On Block
5 3 23 - 1200 (2040) T KD +23(+7) -
  • Damage DL0-DL4: 1080/1139/1200/1259/1320
    • Punish Counter: 1836/1937/2040/2141/2244; +23 HKD
  • Allows for strong, auto-timed corner throw loops (+4 after Forward Dash)
    • Also works midscreen if opponent does not Back Rise

Back Throw (4LPLK)

Back Throw
4LPLK
SF6 Jamie 4lplk.png

4LPLK
Wheel Punch (DL2)
Startup Active Recovery Cancel Damage Guard On Hit On Block
5 3 23 - 1200 (2040) T KD +26 -
  • Damage DL0-DL4: 1080/1139/1200/1259/1320
    • Punish Counter: 1836/1937/2040/2141/2244; +38 HKD
  • Side switches; can dash (+19) or walk to get oki if back throwing opponent into corner

Drive System

Drive Impact (HPHK)

Drive Impact
HPHK
SF6 Jamie hphk.png

HPHK
Vainglory Strike (DL2)
Startup Active Recovery Cancel Damage Guard On Hit On Block
26 2 35 - 800 LH KD +35 / Wall Splat KD +65 -3 / Wall Splat HKD +72

See Drive Impact

  • Damage DL0-DL4: 720/760/800/840/880

When cancelled from a normal, these are the important blockstring gaps; a gap of N will trade with an N-frame startup attack; [] = Burnout

  • 2HP, 6HK~4HK~Spin: 7[3]
  • 5HK: 9[5]
  • 5MK, 6HK~4HK~Headbutt: 10[6]
  • 2MP: 11[7]
  • 2MK: 13[9]
  • 5HP: 15[11]
  • 5LP~LK~MP: 16[12]
  • Note: A gap ≥ 6f can be thrown, and a gap ≥ 9f can be jumped out of by most characters

Drive Reversal (6HPHK)

Drive Reversal
6HPHK (in blockstun)
SF6 Jamie 6hphk.png

6HPHK
Leg Sweep (Block)
Startup Active Recovery Cancel Damage Guard On Hit On Block
20 3 26(31) - 500 recoverable LH KD +23 -6

See Drive Reversal

  • Damage DL0-DL4: 450/475/500/525/550 Recoverable
  • Full Invuln: 1-22f; Armor Break

Drive Parry (MPMK)

Drive Parry
MPMK
SF6 Jamie mpmk.png

MPMK
Drive Parry
Startup Active Recovery Cancel Damage Guard On Hit On Block
1 12 or until released 33(1)(11) - - - - -

See Drive Parry

  • Perfect Parry has only 1f recovery, and disables the opponent from canceling their attack
  • Perfect Parry vs. projectiles puts you into a fixed 11f recovery

Drive Rush (66)

Drive Rush
66
Lua error in Module:MoveDataParser at line 119: attempt to index field '?' (a nil value).

                  No results

See Drive Rush. Frame data shown in (parentheses) refers to the version used after Parry.

  • Distance:
    • 110.7 (min, normal cancel)
    • 202.9 (min, block/movement cancel)
    • 307.1 (max, no cancel)
  • Notable Drive Rush cancel combo routes:
  • Notable Drive Rush cancel blockstring gaps:

Special Moves

The Devil Inside (22P)

The Devil Inside
(DL0)
22P
SF6 Jamie 22p.png

SF6 Jamie 22p activation.png

22P
The Devil Inside
Startup Active Recovery Cancel Damage Guard On Hit On Block
48 - 2 - - - - -
22P (hold)
The Devil Inside (2 drinks)
Startup Active Recovery Cancel Damage Guard On Hit On Block
92(90) - 5 - - - - -
22P (hold)
The Devil Inside (3 drinks)
Startup Active Recovery Cancel Damage Guard On Hit On Block
141(139) - 5 - - - - -
22P (hold)
The Devil Inside (4 drinks)
Startup Active Recovery Cancel Damage Guard On Hit On Block
188 - 5 - - - - -
  • Increases Drink Level by 1-4 depending on how long button is held; Startup represents the time it takes to build each Drink
  • In DL4, regains 0.5 Drive bars per level increase (or equivalent Burnout reduction)
  • Drink Level from 0-4 affects moveset and base damage scaling (90/95/100/105/110% respectively)
  • Entire animation is in a Counterhit state
22P (activation)
The Devil Inside (DL4 activation)
Startup Active Recovery Cancel Damage Guard On Hit On Block
1 - 4 - - - - -
  • Happens automatically upon reaching DL4; Drink recovers more quickly, potentially giving stronger oki
  • Screen freezes for 25f (1f full invincibility on the frame this occurs)
  • The 4 vulnerable post-freeze frames put Jamie in a Counterhit state

Freeflow Strikes (236P)

Freeflow Strikes
(DL0)
236P
SF6 Jamie 236lp.png

SF6 Jamie 236pp.png

236LP
LP Freeflow Strikes 1 (DL2)
Startup Active Recovery Cancel Damage Guard On Hit On Block
13 2 24 SA3 350 LH -1 -6
  • Cancel reaction window: 19f (Followup) / 14f (Super)
236MP
MP Freeflow Strikes 1 (DL2)
Startup Active Recovery Cancel Damage Guard On Hit On Block
16 2 24 SA3 400 LH -1 -6
  • Cancel reaction window: 19f (Followup) / 14f (Super)
    • 18f confirm window to combo into ~6K
236HP
HP Freeflow Strikes 1 (DL2)
Startup Active Recovery Cancel Damage Guard On Hit On Block
19 2 24 SA3 450 LH -1 -6
  • Cancel reaction window: 19f (Followup) / 14f (Super)
    • 16f confirm window to combo into ~6P, 15f to combo into ~6K
236PP
OD Freeflow Strikes 1 (DL2)
Startup Active Recovery Cancel Damage Guard On Hit On Block
13 2 24 SA2 SA3 450 LH +1 -3
  • Cancel reaction window: 23f (Followup) / 15f (Super)
    • 22f confirm window to combo into ~6K
  • xx Lv.2 Super: +17/+14


Freeflow Strikes (or "Rekkas") are forward-moving strikes that can be confirmed into optional followups. Higher strength versions move farther but have slower startup, with the OD version gaining both speed and longer range. At Drink Lv.0 to Lv.3, each Rekka is a single hit, and only the first part of the sequence can cancel into Super. If well-spaced, the first meterless Freeflow Strike is often safe; the LP version is usually the best for this since it has less forward movement, but this can also cause it to whiff in max range cancels. The OD version is always safe.

When attempting to confirm into the 6P or 6K followups on hit, it's important to note that the followup speed depends on the strength of the first Rekka. Delaying the confirm too long, especially on HP Rekka, can cause the followup to come out without comboing. The 6K followup is slightly slower than 6P, which also makes the confirm slightly stricter. OD Rekka cancelled into Lv.2 Super is a great option on hit or block, leading to great combos or block pressure from a mid-range poke.

This move and its followups can be used in juggles, but they can be very inconsistent depending on the screen position and opponent's juggle height; OD Rekkas are the most consistent overall, and the corner makes things easier as well.

Freeflow Strikes
(DL4)
236P
SF6 Jamie 236lp dl4.png

SF6 Jamie 236pp dl4.png

236LP
LP Freeflow Strikes 1 (DL4)
Startup Active Recovery Cancel Damage Guard On Hit On Block
13 2(9)3 19 SA3 220x2 (440) LH +1 -3
  • Cancel reaction window: 36f (Followup) / 29f (Super)
    • 33f confirm window to combo into ~6P, 34f to combo into ~6K
236MP
MP Freeflow Strikes 1 (DL4)
Startup Active Recovery Cancel Damage Guard On Hit On Block
16 2(9)3 19 SA3 220,330 (550) LH +1 -3
  • Cancel reaction window: 36f (Followup) / 29f (Super)
    • 33f confirm window to combo into ~6P, 31f to combo into ~6K
236HP
HP Freeflow Strikes 1 (DL4)
Startup Active Recovery Cancel Damage Guard On Hit On Block
19 2(9)3 19 SA3 220,440 (660) LH +1 -3
  • Cancel reaction window: 36f (Followup) / 29f (Super)
    • 33f confirm window to combo into ~6P, 28f to combo into ~6K
236PP
OD Freeflow Strikes 1 (DL4)
Startup Active Recovery Cancel Damage Guard On Hit On Block
13 2(9)3 19 SA2 SA3 220,440 (660) LH +3 -3
  • Cancel reaction window: 36f (Followup) / 27f (Super)
    • 35f confirm window to combo into ~6P
  • xx Lv.2 Super: +18/+13 1st hit, +18/+12 2nd hit


At max Drink Level, Freeflow Strikes becomes a 2-hit attack, gaining additional damage and making it much easier to confirm followups or Super. It also becomes safe on block for all versions, giving Jamie a great confirmable pressure tool from mid-range. In some juggle routes, it becomes harder to combo into the 6K followups due to the extra pushback, so the 6P followups are recommended for more consistency.

Freeflow Strikes Punch 1 (236P~6P)

Freeflow Strikes Punch 1
(DL0)
236P~6P
SF6 Jamie 236lp 6p.png

SF6 Jamie 236pp 6p.png

236LP~6P
LP Freeflow Strikes Punch 1 (DL2)
Startup Active Recovery Cancel Damage Guard On Hit On Block
13 [33] 2 28 - 350 LH -3 -13
  • Cancel reaction window: 18f (Followup)
  • 0-2f gap between Rekka and 6P on block
236MP~6P
MP Freeflow Strikes Punch 1 (DL2)
Startup Active Recovery Cancel Damage Guard On Hit On Block
16 [39] 2 28 - 400 LH -3 -11
  • Cancel reaction window: 18f (Followup)
  • 0-5f gap between Rekka and 6P on block
236HP~6P
HP Freeflow Strikes Punch 1 (DL2)
Startup Active Recovery Cancel Damage Guard On Hit On Block
19 [45] 2 28 - 450 LH -3 -9
  • Cancel reaction window: 18f (Followup)
  • 3-8f gap between Rekka and 6P on block
236PP~6P
OD Freeflow Strikes Punch 1 (DL2)
Startup Active Recovery Cancel Damage Guard On Hit On Block
13 [34] 2 28 - 450 LH -3 -9
  • Cancel reaction window: 18f (Followup)
  • 0-3f gap between Rekka and 6P on block


The Punch followups are the preferred route for damage, juggles, and oki; they can be performed on hit, block, or whiff. The LP, MP, and OD Rekka starters require a manual delay to create a blockstring gap, while HP Rekka can automatically frame trap with a 3f gap at the fastest timing. While risky, this frame trap can be used against an opponent that tries to punish your first Rekka on block. On hit, stopping after the first 6P puts Jamie at a slight disadvantage; an unaware opponent may be caught off guard with a quick throw reset, but attempting this is sacrificing guaranteed damage and a knockdown.

The cancel reaction window applies to the 6P hit only and does not include the first 236P hit. In the startup column, [] refers to the total startup time for 236P~6P when the first Rekka whiffs, which can be useful for certain long-range punishes.

Freeflow Strikes Punch 1
(DL4)
236P~6P
SF6 Jamie 236lp 6p dl4.png

SF6 Jamie 236pp 6p dl4.png

236LP~6P
LP Freeflow Strikes Punch 1 (DL4)
Startup Active Recovery Cancel Damage Guard On Hit On Block
15 [48] 2(5)2 27 - 220,275 (495) LH -2 -10
  • Cancel reaction window: 28f (Followup)
  • 2-7f gap between Rekka and 6P on block
236MP~6P
MP Freeflow Strikes Punch 1 (DL4)
Startup Active Recovery Cancel Damage Guard On Hit On Block
15 [51] 2(5)2 27 - 220,275 (495) LH -2 -10
  • Cancel reaction window: 28f (Followup)
  • 2-7f gap between Rekka and 6P on block
236HP~6P
HP Freeflow Strikes Punch 1 (DL4)
Startup Active Recovery Cancel Damage Guard On Hit On Block
15 [54] 2(5)2 27 - 220,275 (495) LH -2 -10
  • Cancel reaction window: 28f (Followup)
  • 2-7f gap between Rekka and 6P on block
236PP~6P
OD Freeflow Strikes Punch 1 (DL4)
Startup Active Recovery Cancel Damage Guard On Hit On Block
15 [48] 2(5)2 27 - 220,330 (550) LH -2 -10
  • Cancel reaction window: 28f (Followup)
  • 2-7f gap between Rekka and 6P on block


The Punch followups are the preferred route for damage, juggles, and oki; they can be performed on hit, block, or whiff. Like the initial Rekka, this followup is 2 hits when at max Drink Level. All strengths of Rekka lead to the same 2-7f gap between hits on block, which can be used to frame trap the opponent. However, this frame gap is not very useful for two reasons: the initial Rekka is safe (meaning the opponent is less likely to hit a button while attempting a punish), and a Counterhit does not give Jamie the bonus frame advantage when both hits of the followup connect.

The cancel reaction window applies to the 6P hit only and does not include the first 236P hit. In the startup column, [] refers to the total startup time for 236P~6P when the first Rekka whiffs, which can be useful for certain long-range punishes.

Freeflow Strikes Punch 2 (236P~6P~6P)

Freeflow Strikes Punch 2
(DL0)
236P~6P~6P
SF6 Jamie 236lp 6p 6p.png

SF6 Jamie 236pp 6p 6p.png

236LP~6P~6P
LP Freeflow Strikes Punch 2 (DL2)
Startup Active Recovery Cancel Damage Guard On Hit On Block
13 [53] 2 30 - 550 (440) LH KD +27 -17
  • 1-5f gap before final hit on block
236MP~6P~6P
MP Freeflow Strikes Punch 2 (DL2)
Startup Active Recovery Cancel Damage Guard On Hit On Block
16 [62] 2 30 - 600 (480) LH KD +27 -15
  • 2-6f gap before final hit on block
236HP~6P~6P
HP Freeflow Strikes Punch 2 (DL2)
Startup Active Recovery Cancel Damage Guard On Hit On Block
19 [71] 2 30 - 650 (520) LH KD +27 -13
  • 3-7f gap before final hit on block
236PP~6P~6P
OD Freeflow Strikes Punch 2 (DL2)
Startup Active Recovery Cancel Damage Guard On Hit On Block
13 [53] 2 30 - 750 (600) LH KD +28 -13
  • 0-2f gap before final hit on block


The final 6P followup completes the Punch sequence. It can be done on hit, block, or whiff and has juggle potential. This sequence gets no oki midscreen if the opponent back rises, but it has good corner carry and is Jamie's most consistent combo ender. Like the first 6P followup, there is a blockstring gap between the final 2 hits that varies based on the button timing, but this is a very unsafe gimmick for beating the opponent's attempted Rekka punish.

In the startup column, [] refers to the total startup time for 236P~6P~6P when the first 2 hits of Rekka whiff at the fastest speed. In the Damage column, the first value lists the unscaled damage; () refers to the damage at 80% scaling, which is what would normally occur when starting a combo with the first Rekka.

Freeflow Strikes Punch 2
(DL4)
236P~6P~6P
SF6 Jamie 236lp 6p 6p dl4.png

SF6 Jamie 236pp 6p 6p dl4.png

236LP~6P~6P
LP Freeflow Strikes Punch 2 (DL4)
Startup Active Recovery Cancel Damage Guard On Hit On Block
16 [78] 2(4)2(14)3 28 - 165x2,495 (132x2,396) LH KD +27 -14
  • 2-6f gap before final hit on block
236MP~6P~6P
MP Freeflow Strikes Punch 2 (DL4)
Startup Active Recovery Cancel Damage Guard On Hit On Block
16 [81] 2(4)2(14)3 28 - 162x2,495 (132x2,396) LH KD +27 -14
  • 2-6f gap before final hit on block
236HP~6P~6P
HP Freeflow Strikes Punch 2 (DL4)
Startup Active Recovery Cancel Damage Guard On Hit On Block
16 [84] 2(4)2(14)3 28 - 162x2,495 (132x2,396) LH KD +27 -14
  • 2-6f gap before final hit on block
236PP~6P~6P
OD Freeflow Strikes Punch 2 (DL4)
Startup Active Recovery Cancel Damage Guard On Hit On Block
16 [78] 2(4)2(14)3 28 - 165x2,605 (132x2,484) LH KD +28 -14
  • 2-6f gap before final hit on block


At max Drink Level, the Rekka Punch ender does 3 hits. Other than some minor changes to the frame data and blockstring gaps, it functions the same as the DL0-DL3 versions.

Freeflow Kicks 1 (236P~6K)

Freeflow Kicks 1
(DL0)
236P~6K
SF6 Jamie 236lp 6k.png

SF6 Jamie 236pp 6k.png

236LP~6K
LP Freeflow Kicks 1 (DL2)
Startup Active Recovery Cancel Damage Guard On Hit On Block
14 2 32 - 250 LH -7 -15
  • Cancel reaction window: 16f (Followup)
  • 0-3f gap between Rekka and 6K on block (DL4: 0-6f)
236MP~6K
MP Freeflow Kicks 1 (DL2)
Startup Active Recovery Cancel Damage Guard On Hit On Block
17 2 32 - 300 LH -7 -15
  • Cancel reaction window: 16f (Followup)
  • 1-6f gap between Rekka and 6K on block (DL4: 2-9f)
236HP~6K
HP Freeflow Kicks 1 (DL2)
Startup Active Recovery Cancel Damage Guard On Hit On Block
20 2 32 - 300 LH -7 -15
  • Cancel reaction window: 16f (Followup)
  • 4-9f gap between Rekka and 6K on block (DL4: 4-12f)
236PP~6K
OD Freeflow Kicks 1 (DL2)
Startup Active Recovery Cancel Damage Guard On Hit On Block
14 2 32 - 350 LH -7 -15
  • Cancel reaction window: 16f (Followup)
  • 0-4f gap between Rekka and 6K on block (DL4: 1-6f)


The 6K followup gives less damage and worse oki than the 6P route, but allows Jamie to end with a Drink. It can only be performed on hit or block; the move will not come out if 236P whiffs. Unfortunately for Jamie, this means there is no way to safely space this move at max distance.

The cancel reaction window only applies to the 6K hit and does not include the first 236P hit; this is only really relevant if the initial Rekka is blocked, and you attempt to frame trap into the unsafe followup.

Freeflow Kicks 2 (236P~6K~6K)

Freeflow Kicks 2
(DL0)
236P~6K~6K
SF6 Jamie 236lp 6k 6k.png

SF6 Jamie 236pp 6k 6k.png

236LP~6K~6K
LP Freeflow Kicks 2 (DL2)
Startup Active Recovery Cancel Damage Guard On Hit On Block
18 2 35+29 - 450 (360) LH KD -1 (DL3: KD +23) -49 (DL3 -25)
  • 2-6f gap before final hit on block
236MP~6K~6K
MP Freeflow Kicks 2 (DL2)
Startup Active Recovery Cancel Damage Guard On Hit On Block
21 2 36+28 - 500 (400) LH KD -1 (DL3: KD +22) -49 (DL3 -26)
  • 5-9f gap before final hit on block
236HP~6K~6K
HP Freeflow Kicks 2 (DL2)
Startup Active Recovery Cancel Damage Guard On Hit On Block
24 2 36+28 - 550 (440) LH KD -1 (DL3: KD +22) -49 (DL3 -26)
  • 8-12f gap before final hit on block
236PP~6K~6K
OD Freeflow Kicks 2 (DL2)
Startup Active Recovery Cancel Damage Guard On Hit On Block
18 2 36+28 - 600 (480) LH KD +1 (DL3: KD +24) -49 (DL3 -26)
  • 2-6f gap before final hit on block


The final 6K followup, like its predecessor, can only come out on hit or block. If successful, it levels up Jamie's Drink Level by 1. Because Rekkas are so easy to confirm into, this move is the primary way to level up. The meterless versions leave Jamie at a slight disadvantage after knockdown, making it slightly risky to use in the corner; to avoid this risk, use the OD version to give Jamie slightly more KD advantage.

The long drink animation makes the 6K ender extremely unsafe on block. The drink itself is interruptible, and any punish within the first 21f will stop Jamie's drink level from increasing (20f for the LP version). Like the other Rekka followups, it is possible to frame trap the opponent if they attempt a punish. The exact blockstring gap can change depending on the button timing.

In the Damage column, the first value lists the unscaled damage; () refers to the damage at 80% scaling, which is what would normally occur when starting a combo with the first Rekka.

Freeflow Kicks 2
(DL3)
236P~6K~6K
Lua error in Module:MoveDataParser at line 119: attempt to index field '?' (a nil value).

Lua error in Module:MoveDataParser at line 119: attempt to index field '?' (a nil value).

                  No results
  • 2-6f gap before final hit on block

No results

  • 5-9f gap before final hit on block

No results

  • 8-12f gap before final hit on block

No results

  • 2-6f gap before final hit on block


Mostly identical to the DL0-DL2 versions, except that the drink activation gives Jamie far better KD advantage. There is no longer a need to use the OD version for safety in the corner.

Freeflow Kicks 2
(DL4)
236P~6K~6K
Lua error in Module:MoveDataParser at line 119: attempt to index field '?' (a nil value).

Lua error in Module:MoveDataParser at line 119: attempt to index field '?' (a nil value).

                  No results
  • 2-6f gap before final hit on block

No results

  • 5-9f gap before final hit on block

No results

  • 8-12f gap before final hit on block

No results

  • 2-6f gap before final hit on block


Functions the same as the DL0-DL2 versions, but restores 1 bar of Drive gauge rather than a Drink Level. Jamie at DL4 gets far more damage from his Punch Rekkas, but this can be useful if he is approaching Burnout. It also makes the OD version significantly stronger, as it immediately restores half the spent Drive gauge.

Swagger Step (214P)

Swagger Step
(DL0)
214P
SF6 Jamie 214lp.png

SF6 Jamie 214pp.png

214LP
Swagger Step (DL2)
Startup Active Recovery Cancel Damage Guard On Hit On Block
17 9 17 SA3 900 LH KD +39(+47) -6(+2)
  • Damage DL0-DL4: 810/855/900/945/990
  • Cancel reaction window: 25f (Super/DL4 Followup)
    • 22f to confirm 6P juggle after DL4 grounded hit
214MP
Swagger Step (DL2)
Startup Active Recovery Cancel Damage Guard On Hit On Block
20 9 17 SA3 1000 LH KD +39(+47) -6(+2)
  • Damage DL0-DL4: 900/950/1000/1050/1100
  • Cancel reaction window: 25f (Super/DL4 Followup)
    • 22f to confirm 6P juggle after DL4 grounded hit
214HP
Swagger Step (DL2)
Startup Active Recovery Cancel Damage Guard On Hit On Block
25 9 16 SA3 1200 LH KD +42(+50) -3(+5)
  • Damage DL0-DL4: 1080/1140/1200/1260/1320
  • Cancel reaction window: 25f (Super/DL4 Followup)
    • 22f to confirm 6P juggle after DL4 grounded hit
214PP
Swagger Step (DL2)
Startup Active Recovery Cancel Damage Guard On Hit On Block
20 9 15 SA2 SA3 1100 LH KD +73(+81) Tumble -1(+7)
  • Damage DL0-DL4: 990/1045/1100/1155/1210
  • Causes Tumble state; can OTG juggle near corner
  • Punish Counter: Tumble KD +87 (corner Wall Splat)
    • Opponent is considered standing and throwable, but becomes airborne after followup hit
  • Cancel reaction window: 25f (Super/DL4 Followup)
  • xx Lv.2 Super: KD+89(103)/+15


Swagger Step is a forward lunging palm attack that can be made safe if well-spaced. It has juggle potential and can combo on the ground, though the slow startup limits the cancel routes that are actually useful. Since Rekka can only cancel the first hit into Super, Swagger Step is the better move for high damage Super cancels. Note that the Super confirm window is quite lenient, but becomes more strict when spaced to hit on later active frames (17f window at minimum).

At Drink Lv.4, Jamie gains an additional 6P Followup for extra damage. This can be confirmed off a raw 214P hit, but may drop if input too late.

Grounded cancel routes: (CH = +2 Counterhit, PC = +4 Punish Counter)

  • 214HP: CH 5HK, CH 2HP
  • 214MP/214PP: 5MK, 5HK, 2HP, CH 2MP, CH 2MK, PC 5HP (+ all above)
  • 214LP: 5HP, 2MP, 2MK, 5LP~LK~MP, CH 2LP, CH 5LK (+ all above)

Swagger Hermit Punch (214P~6P)

Swagger Hermit Punch
(DL4)
214P~6P
SF6 Jamie 214p 6p.png

SF6 Jamie 214pp 6p.png

214P~6P
Swagger Hermit Punch (DL4)
Startup Active Recovery Cancel Damage Guard On Hit On Block
19 3 39 SA3 990 LH KD +20(+19) -23
  • 1f gap between hits on block
    • Can delay gap up to 8f after 214LP/214MP, or 7f after 214HP
  • Cancel reaction window: 19f (Super)
214PP~6P
Swagger Hermit Punch (DL4)
Startup Active Recovery Cancel Damage Guard On Hit On Block
19 3 39 SA2 SA3 880 LH KD +20 -23
  • Forms a true blockstring after 214PP
    • Can delay to create a gap up to 5f on block
  • Cancel reaction window: 19f (Super)
  • xx Lv.2 Super: KD+55/+12


This followup to Swagger Step is only available at max Drink Level. It works in juggles or in grounded combos, adding significant damage especially when cancelled into Lv.3 Super. It is much more unsafe on block than the first part of Swagger Step, though it can be used as a risky frame trap if the opponent tries to punish you. The 6P can be delayed significantly, though this can cause it to drop against grounded opponents unless the Swagger Step hits meaty.

Arrow Kick (623K)

Arrow Kick
(DL0)
623K
SF6 Jamie 623lk.png

SF6 Jamie 623kk.png

623LK
Arrow Kick (DL2)
Startup Active Recovery Cancel Damage Guard On Hit On Block
5 7 55 - 500x2 LH KD +42 -44
  • Damage DL0-DL4: 900/950/1000/1050/1100
  • Anti-Air Invuln: 1-12f; Lower Body Strike Invuln: 6-22f
623MK
Arrow Kick (DL2)
Startup Active Recovery Cancel Damage Guard On Hit On Block
8 7 53 - 500,700 (1200) LH KD +34 -43
  • Damage DL0-DL4: 1080/1140/1200/1260/1320
  • Anti-Air Invuln: 1-14f; Lower Body Strike Invuln: 8-23f
623HK
Arrow Kick (DL2)
Startup Active Recovery Cancel Damage Guard On Hit On Block
10 7 53 - 500,400,500 (1400) LH KD +39 -43
  • Damage DL0-DL4: 1260/1330/1400/1470/1540
  • Anti-Air Invuln: 1-16f; Lower Body Strike Invuln: 10-25f
623KK
Arrow Kick (DL2)
Startup Active Recovery Cancel Damage Guard On Hit On Block
6 7 53 - 500,450,550 (1500) LH KD +40 -43
  • Damage DL0-DL4: 1350/1424/1500/1574/1650
  • Full Invuln: 1-9f; Anti-Air Invuln: 10-12f; Lower Body Strike Invuln: 10-21f


Jamie's most consistent anti-air and OD reversal. He kicks upward before falling back away from the opponent. On hit, this transitions into a leaping followup attack that is fully invincible during the animation. On whiff or block, Jamie does not perform the extra hit, instead standing up from his grounded position. This recovery animation can cause some attempted punishes to whiff at longer ranges, but there is plenty of time to walk or dash forward, or to use a slow ranged punish starter.

Arrow Kick works well in juggles, but in grounded combos it can be finicky near max range. It also has no ability to Super cancel, so its damage potential in punishes is limited. It gives Jamie great oki on hit and the followup animation provides some nice corner carry as well.

Luminous Dive Kick (j.214K)

Luminous Dive Kick
(DL1)
j.214K
SF6 Jamie j214k.png

SF6 Jamie j214kk.png

j.214K
Luminous Dive Kick (DL2)
Startup Active Recovery Cancel Damage Guard On Hit On Block
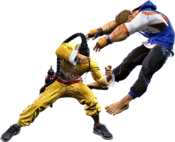
11 1(2)until land 13 land - 1000 LH KD +42(+52) -8(+2)
  • Damage DL1-DL4: 950/1000/1050/1100
  • Forced Knockdown state until land
  • KD vs. airborne opponents (no juggle followup)
j.214KK
Luminous Dive Kick (DL2)
Startup Active Recovery Cancel Damage Guard On Hit On Block
11 1(2)until land 13 land - 800 LH KD +58(+65) -4(+3)
  • Damage DL1-DL4: 760/800/840/880
  • Forced Knockdown state until land
  • Puts grounded opponents into limited juggle state
  • Puts airborne opponents into OTG bounce state
  • 10% damage scaling penalty is applied to followup juggles


At Drink Lv.1, Jamie unlocks a divekick that can be used out of forward jumps. It can be done very low to the ground with a Tiger Knee input (214~9K), and connecting low on the opponents legs gives better advantage on block or on knockdown; he can even juggle after meterless divekick when spaced well enough. The angle of the meterless divekick changes depending on which button is pressed, with LK being short and steep while HK travels farther. This is a useful tool not only for pressure, but for navigating around projectiles, an area in which Jamie usually struggles.

Bakkai (236K)

Bakkai
(DL2)
236K
SF6 Jamie 236lk.png

SF6 Jamie 236kk.png

236LK
Bakkai (DL2)
Startup Active Recovery Cancel Damage Guard On Hit On Block
18 2(2)3(4)2(11)2 24 SA3 250x3,350 (1400) LH KD +42 -12
  • Damage DL2-DL4: 1400/1468/1540
  • Projectile Invuln: 3-24f
  • Cancel reaction window: 47f (Super)
236MK
Bakkai (DL2)
Startup Active Recovery Cancel Damage Guard On Hit On Block
22 2(1)2(3)2(5)2(12)2(5)2 31 SA3 250x5,350 (1600) LH KD +35 -16
  • Damage DL2-DL4: 1600/1677/1760
  • Projectile Invuln: 4-26f
  • Cancel reaction window: 63f (Super)
236HK
Bakkai (DL2)
Startup Active Recovery Cancel Damage Guard On Hit On Block
26 2(6)2(6)2(6)
2(13)2(7)2(15)2
32 SA3 250x6,300 (1800) LH KD +34 -17
  • Damage DL2-DL4: 1800/1887/1980
  • Projectile Invuln: 5-35f
  • Cancel reaction window: 94f (Super)
236KK
Bakkai (DL2)
Startup Active Recovery Cancel Damage Guard On Hit On Block
21 3(3)2(8)2(3)2(7)2(7)
2(12)2(11)2(4)2(4)2
62 SA2 SA3 180x9,380 (2000) LH KD +12 -46
  • Damage DL2-DL4: 2000/2100/2200
  • Projectile Invuln: 3-28f
  • Cancel reaction window: 74f (Super); cancels on 7th hit
  • xx Lv.2 Super: +14/+7


Jamie drops to the ground and begins break dancing, slowly advancing toward the opponent. The slow startup limits this move's combo utility, though it can work in juggles when the situation arises. The high damage makes this great for super cancelling, and with 2 bars the OD version can be made safe on block with an eternity to hitconfirm.

Bakkai is ostensibly Jamie's "anti-projectile" move, though in practice it can be difficult to use like this. OD Bakkai is fairly reliable at mid-range against shoto fireballs, and HK Bakkai has the reach if your reactions are on point. LK and MK are harder to use because they travel a shorter distance during startup. And against strong projectiles like Guile's Sonic Boom, this move can only be done as a pure prediction, at which point you might as well just do random Drive Impact instead.

Grounded cancel routes: (CH = +2 Counterhit, PC = +4 Punish Counter)

  • 236HK: 2HP, PC 5HK
  • 236MK: 5HK, CH 5MK (+ all above)
  • 236KK: PC 5HP, PC 5MK, PC 2MP, PC 2MK (+ all above)
  • 214LK: 5MK, 2MP, 2MK, 5LP~LK~MP, PC 5LK, PC 2LP (+ all above)

Tenshin (63214K)

Tenshin
(DL3)
63214K
SF6 Jamie 63214k.png

SF6 Jamie 63214kk.png

63214K
Tenshin (DL3)
Startup Active Recovery Cancel Damage Guard On Hit On Block
8 2 52 - 0 T +8 -
  • Leaves the opponent standing for a followup combo
63214KK
Tenshin (DL3)
Startup Active Recovery Cancel Damage Guard On Hit On Block
8 2 52 - 682 T HKD +86 Crumple -
  • Damage DL3-DL4: 682/715
  • Crumple state; Jamie is +28 before the opponent goes airborne


Tenshin is a command grab reminiscent Yun, Yang, and Fei Long's similar grab from previous games, though it does not switch sides during the animation. It's a huge boost to Jamie's close range mixup game. He is not point blank after the grab, but is close enough to combo into moves like 5MP or 5HP. While Tenshin can hit as a Counterhit or Punish Counter, this has no effect on frame advantage (OD Tenshin does extra damage on Punish Counter only).

The first attack following Tenshin is unscaled, but any following attacks have a 40% scaling penalty applied (100-60-50-40...). There is also an interesting situation after Punish Counter 214PP's tumbling Wall Splat. Jamie can combo into Tenshin after this, in which case the throw is scaled by 20% and any followups immediately skip to the 40% scaling penalty.

Sometimes, Jamie will say a naughty word when he whiffs the grab. Be careful when playing Jamie with small children nearby.

Super Arts

Level 1 Super (236236K)

Breakin'
Level 1 Super Art
236236K
SF6 Jamie 236236k.png

236236K
Breakin'
Startup Active Recovery Cancel Damage Guard On Hit On Block
8 2,7(6)5(6)2(7)2(7)
2(6)2(6)2(6)2(29)
2(9)2(6)2(5)2
74 - 2200 LH KD +12 -60
  • Damage DL0-DL4: 1890/1989/2100/2199/2310
    • Chip: 450/472/500/522/550
  • Strike/Throw Invuln: 1-11f; Armor Break
  • Depletes 1/2 Drive bar from opponent on hit
236236K~[2]
Breakin' ~ Drink
Startup Active Recovery Cancel Damage Guard On Hit On Block
8 2,7(6)5(6)2(7)2(7)
2(6)2(5)2(7)
2(7)2(6)2
107(86) - 1850 LH KD +4 (DL3: KD +25) -93 (DL3: -72)
  • Damage DL0-DL4: 1575/1658/1750/1833/1925
    • Chip: 360/380/400/420/440
  • Strike/Throw Invuln: 1-11f; Armor Break
  • Depletes 1/2 Drive bar from opponent on hit
  • Ends in a Drink in exchange for reduced Damage and KD Advantage


A more powerful version of Jamie's Bakkai special, this super has good range and locks the opponent into the full break dancing animation on hit. This Super is extremely unsafe on block so should always be carefully hitconfirmed. A little over halfway through the animation, there is a gap on block; the opponent can hit Jamie out of this to prevent additional Drive/Chip damage, but a mistimed button can also result in the opponent getting hit by the second half of the Super.

During the Super animation, you can hold Down to increase your Drink Level by 1, at the cost of some damage and knockdown advantage. If doing this on block, the opponent can easily interrupt Jamie before he gains a Drink Level, and there is no longer a blockstring gap that can hit the opponent's mistimed punish.

At DL3, ending with a Drink activation changes the recovery to 93, making it -79 on block.

At DL4, ending with a Drink restores 1 bar of Drive gauge, allowing Jamie exchange some Super meter for Drive meter in his combo routes.

Level 2 Super (214214P)

The Devil's Song
Level 2 Super Art
214214P
SF6 Jamie 214214p.png

214214P
The Devil's Song (DL0-DL4)
Startup Active Recovery Cancel Damage Guard On Hit On Block
1 [900] 5 - - - - -
  • Puts Jamie at Drink Lv.4 until the install timer runs out
  • Jamie's damage scaling is only set to 105% rather than the usual 110% in DL4

No results

  • Instantly refills 3 Drive bars or 50% Burnout gauge; does not start an install timer
  • Can be useful as a cancel from OD specials for safety or combo extensions


A useful install that gives Jamie access to his entire moveset without needing to slowly accumulate drinks. The Super activation itself is good for applying pressure to force a mixup, or for extending a combo. The timer lasts 15 seconds and freezes when the opponent is in hitstop or blockstop, after which time Jamie returns back to Drink Level 0. This is unfortunate if Jamie had already accumulated some Drink levels, so it's important to use this time effectively to secure the win.

If Jamie is already at Drink Lv.4, he can still use this Super for its cancel properties in order to get easy frame advantage. He can also treat his Super meter as a reserve tank for his Drive gauge, restoring 3 Drive for the cost of 2 Super bars whenever he wants. There is no downside to activating, as it won't start an install timer; this means that Jamie can get right back to building more Super meter and will not revert back to Drink Level 0.

Level 3 Super (236236P)

Getsugo Saiho
Level 3 Super Art
236236P
SF6 Jamie 236236p.png

Lua error in Module:MoveDataParser at line 119: attempt to index field '?' (a nil value).
CA does much more damage, but no followup juggle

236236P
Getsuga Saiho (DL2)
Startup Active Recovery Cancel Damage Guard On Hit On Block
10 3(13)3 42 - 2600 (500) LH HKD +71 (KD +14) -27
  • Damage DL0-DL4: 2340/2469/2600/2729/2860
    • Non-Cinematic Hit: 450/475/500/525/550
    • Chip: 450x2/475x2/500x2/525x2/550x2
  • Full Invuln: 1-11f; Armor Break
  • Launches opponent into free juggle state on cinematic hit
  • Depletes 1.5 Drive bars from opponent on hit
    • Cinematic time regenerates ~1.8 Drive bars for Jamie

No results

  • Damage DL0-DL4: 4050/4274/4500/4724/4950
    • Non-Cinematic Hit: 450/475/500/525/550
    • Chip: 450,675/475,712/500,750/525,787/550,825
  • Full Invuln: 1-11f; Armor Break
  • No juggle followup on cinematic hit
  • Depletes 2 Drive bars from opponent on hit
    • Cinematic time regenerates ~2.2 Drive bars for Jamie


Jamie's Lv.3 Super goes into a cinematic if the first hit connects, while the 2nd hit is extremely weak on its own. The cinematic hit ends by launching the opponent, reminiscent of Yun's You Hou Ultra 1 from USF4. As a result, the damage is quite low, instead relying on the followup juggle to make it worthwhile. The cinematic ends abruptly, so it takes practice to learn exactly when to execute the followup. Jamie has several options, like Dash + 5HP or Drive Rush~2HP into further juggles.

The Critical Art version lacks this ending juggle, but makes up for it with higher base damage and a cooler ending cinematic.

Taunts

Neutral Taunt (5PPPKKK)

Neutral Taunt
(DL0-DL3)
5PPPKKK
SF6 Jamie 5pppkkk.png
"Where's my bed? You're putting me to sleep, man."

5PPPKKK
Neutral Taunt (DL0-DL3)
Startup Active Recovery Cancel Damage Guard On Hit On Block
434 (total) - - - - - - -
  • Has a unique variation at Drink Lv.4

Neutral Taunt
(DL4)
5PPPKKK
SF6 Jamie 5pppkkk dl4.png
"You're still here? This... is your last chance."

5PPPKKK
Neutral Taunt (DL4)
Startup Active Recovery Cancel Damage Guard On Hit On Block
599 (total) - - - - - - -

Forward Taunt (6PPPKKK)

Forward Taunt
(DL0)
6PPPKKK
SF6 Jamie 6pppkkk.png
"Bring it!"

6PPPKKK
Forward Taunt (DL0)
Startup Active Recovery Cancel Damage Guard On Hit On Block
116 (total) - - - - - - -
  • Changes with each Drink level

Forward Taunt
(DL1)
6PPPKKK
SF6 Jamie 6pppkkk dl1.png
"Come on, let me see your sick flow!"

6PPPKKK
Forward Taunt (DL1)
Startup Active Recovery Cancel Damage Guard On Hit On Block
169 (total) - - - - - - -
  • Changes with each Drink level

Forward Taunt
(DL2)
6PPPKKK
SF6 Jamie 6pppkkk dl2.png
"You gonna show me some moves? Don't screw up!"

6PPPKKK
Forward Taunt (DL2)
Startup Active Recovery Cancel Damage Guard On Hit On Block
243 (total) - - - - - - -
  • Changes with each Drink level

Forward Taunt
(DL3)
6PPPKKK
SF6 Jamie 6pppkkk dl3.png
"You think you knew what I'm gonna do next?"

6PPPKKK
Forward Taunt (DL3)
Startup Active Recovery Cancel Damage Guard On Hit On Block
255 (total) - - - - - - -
  • Changes with each Drink level

Forward Taunt
(DL4)
6PPPKKK
SF6 Jamie 6pppkkk dl4.png
"I ain't through with you.... zzz .... oh man, oh man."

6PPPKKK
Forward Taunt (DL4)
Startup Active Recovery Cancel Damage Guard On Hit On Block
738 (total) - - - - - - -
  • Changes with each Drink level

Back Taunt (4PPPKKK)

Back Taunt
4PPPKKK
SF6 Jamie 4pppkkk.png
"Listen! Da na, da na da na, da da da... right!"

5PPPKKK
Back Taunt
Startup Active Recovery Cancel Damage Guard On Hit On Block
608 (total) - - - - - - -


SF6 Navigation

General
FAQ
HUD
Characters
A.K.I.
Akuma
Blanka
Cammy
Chun-Li
Dee Jay
Dhalsim
Ed
E. Honda
Guile
Jamie
JP
Juri
Ken
Kimberly
Lily
Luke
M. Bison
Manon
Marisa
Rashid
Ryu
Zangief
Data
Akuma
Cammy
Ed
Guile
Jamie
JP
Juri
Ken
Lily
Luke
Manon
Ryu