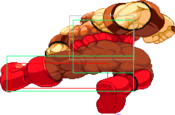
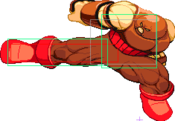
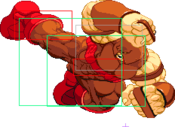
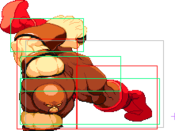
TheIntercom (talk | contribs) |
(→Super Moves: add in yoshi's research on headcrush) |
||
| (37 intermediate revisions by 5 users not shown) | |||
| Line 1: | Line 1: | ||
{{MVC2 Character Intro|char= juggernaut|full=Juggernaut|short=JGN|content= | |||
== Introduction == | |||
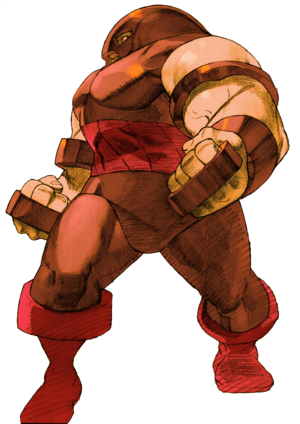
= Introduction = | Cain Marko is a regular human who was empowered by a gem belonging to the deity Cyttorak, becoming a literal human juggernaut. He possesses superhuman strength and durability, and is virtually immune to most physical attacks; his helmet also protects him from mental attacks. Although not a mutant, Juggernaut has been featured as a prominent member of the Brotherhood of Mutants. He is also the stepbrother of Professor X. | ||
Juggernaut is the great equalizer. With the help of the Power-Up Glitch even a solo Juggernaut can touch of death most of the cast for next to no execution. A simple Headcrush is usually all it takes to force your opponent to adjust their behavior and shift the momentum of the match. Your normal buttons occupy very popular sections of the screen and the hits add up fast, even more if you're already Glitched. Any assist that you chose will be impossible to ignore, offering many characters the damage they need to compete. | |||
On the other hand, Juggernaut has few decent defensive options but ultimately struggles. Juggernaut's Headcrush is great for blowing through projectiles and block strings, Super Armor provides some much needed breathing room when dealing with your opponent's offense, and his Defense is among the highest in the game. However, Juggernaut's large body makes him an easy target for being rushed down, his moves are very slow and punishable, he can't really deal with pressure from above, and he has no strong options for dealing with runaway. These weaknesses really add up against Juggernaut, making him much easier to utilize as an assist. | |||
' | |||
[[File:MVC2Juggernaut.gif|center]] | |||
''' | == Gameplay == | ||
{{2 Column Flex|flex1=6|flex2=4 | |||
|content1= | |||
{{Content Box|content= | |||
'''Juggernaut''' is a simple and powerful character to help with learning the fundamentals of defense in MvC2; A character that is great for beginners and can remain viable in higher level play but might be seen as a gimmick. | |||
{{ProConTable | |||
|pros= | |||
* '''Explosive Damage''': A single touch can lead to death under the right circumstances. | |||
* '''Big Buttons''': Normal buttons that take up huge portions of the screen and last for an extremely long time compared to other characters. | |||
* '''Super Armor''': Lets Juggernaut absorb a number of non-heavy hits or projectile before entering hitstun, even when he's an assist. | |||
* '''Simple Execution''': It doesn't get easier than having a raw super be your optimal punish. | |||
* '''Heavy Weight''': Juggernaut falls faster than average so he's harder for some characters to combo. | |||
* '''Ground Throws''': Good range and monstrous damage potential in the corner. Provides an outstanding reward for dealing with an opponent's offense. | |||
* '''High Defense''': Gives Juggernaut more chances to trade and helps his assists deal with being punished. | |||
* '''Whiff Punishes''': Headcrush and THC Headcrush allow for some punishes that even the best characters might not have access to. | |||
* '''Power-Up Glitch''': Turns Juggernaut and his damage potential into a serious threat which demands respect from the entire cast. | |||
|cons= | |||
* '''Big Body''': Being a larger target means you have to deal with more pressure and mixups than the average character. You'll be stuck on your back unless you can successfully pushblock or call an assist. Makes Juggernaut easier to combo for some characters. | |||
* '''Meter Hungry''': Headcrush is your best source of damage but Juggernaut cannot easily build meter for himself. | |||
* '''Low Mobility''': Juggernaut must rely on his assists to help deal with runaway. Body Press might work in a pinch but tends to be unsafe. | |||
* '''Slow Recovery''': Basically every single move Juggernaut can perform is punishable. All of them are punishable on whiff, most of them on block, even some of them on hit. | |||
* '''Defensive Options''': While Headcrush and Super Armor are great options, sometimes they aren't enough to deal with a properly layered offense. Especially from above. | |||
* '''Power-Up Glitch''': Predictable. Some opponents will make changing characters very punishing and very difficult. | |||
}} | |||
}} | |||
|content2= | |||
{{Content Box|content= | |||
<center><youtube>H1qAtBFdbDs</youtube></center> | |||
}} | |||
}} | |||
== Character Summary == | |||
{{3 Column Flex | |||
|content1= | |||
{{Content Box|header=Special Moves|content= | |||
;Juggernaut Punch | |||
*{{hcf}} + {{p}} | |||
;Juggernaut Body Press | |||
*{{hcf}} + {{k}} | |||
;Earthquake Punch | |||
*{{qcfd}} + {{p}} | |||
;Cyttorak Power-Up | |||
*{{dp}} + {{lp}}{{hp}} | |||
}} | |||
|content2= | |||
{{Content Box|header=Super Moves|content= | |||
;Juggernaut Headcrush (Dash super) | |||
* {{qcf}} + {{lp}} + {{hp}} | |||
}} | |||
|content3= | |||
{{Content Box|header=Assist Moves|content= | |||
;Type α - Ground Type | |||
*Assist: {{lp}}Earthquake Punch | |||
*Counter: {{lp}}Earthquake Punch | |||
*Combination: Juggernaut Headcrush | |||
;Type β - Dash Type | |||
*Assist: {{hp}} Juggernaut Punch | |||
*Counter: {{hp}} Juggernaut Punch | |||
*Combination: Juggernaut Headcrush | |||
;Type γ - Variety Type | |||
*Assist: {{hk}} Body Press | |||
*Counter: {{hk}} Body Press | |||
*Combination: Juggernaut Headcrush | |||
}} | |||
}} | |||
}} | |||
== Moves List == | |||
=== Normal Moves === | |||
{{MoveData | |||
|image= MVC2_Juggernaut_5LP.png | |||
|caption= yes, your light punch is a poke | |||
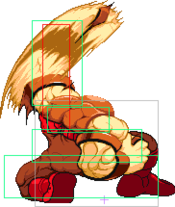
|name= Light Punch | |||
|linkname= 5LP | |||
|input= {{lp}} | |||
|data= | |||
{{AttackData-MVSC2 | |||
|Damage= 7 / 10 | |||
|Startup= 9 | |||
|Active= 3 | |||
|Recovery= 20 | |||
|Guard= HL | |||
|Special Property= None | |||
|Cancel= Chain, Special, SJ, Super | |||
|Adv. Hit= - | |||
|Adv. Guard= - | |||
|Adv. Pushblock= - | |||
|description= a quick short attack. Decent damage for a jab.<br>Good priority and a nice lead in for low jump pressure to keep them from air throwing you.<br>Probably one of our my most used attacks. Usually the scariest because after this connects, the follow up is 5{{mp}} or Headcrush.<br>is our most preferred poke / pressure tool | |||
}} | |||
}} | |||
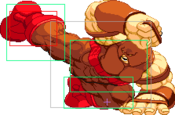
{{MoveData | |||
|image= MVC2_Juggernaut_5MP_3.png | |||
|name= Medium Punch | |||
|linkname= 5MP | |||
|input= {{mp}} | |||
|data= | |||
{{AttackData-MVSC2 | |||
|Damage= 10 / 15 | |||
|Startup= 10 | |||
|Active= 6 | |||
|Recovery= 29 | |||
|Guard= HL | |||
|Special Property= None | |||
|Cancel= Special, Super, SJ cancellable frames 17~33 | |||
|Adv. Hit= - | |||
|Adv. Guard= - | |||
|Adv. Pushblock= - | |||
|description= This is the second jab hit.<br>Has a slightly shorter range but and doesn't do much damage (read: would be considered plenty of damage for any other character). | |||
}} | |||
}} | |||
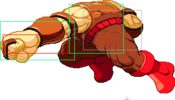
{{MoveData | |||
|image= MVC2_Juggernaut_5HP_3.png | |||
|caption= Hitting this at least 3 times a match is mandatory | |||
|name= Heavy Punch | |||
|linkname= 5HP | |||
|input= {{hp}} | |||
|data= | |||
{{AttackData-MVSC2 | |||
|Damage= 17 / 25 | |||
|Startup= 8 | |||
|Active= 8 | |||
|Recovery= 41 | |||
|Guard= HL | |||
|Special Property= None | |||
|Cancel= Special, SJ, Super | |||
|Adv. Hit= - | |||
|Adv. Guard= - | |||
|Adv. Pushblock= - | |||
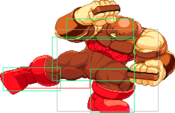
|description= will stun anything known by man. 5{{hp}} > Headcrush Deals insane damage even without the glitch<br>can be used as a makeshift anti-air | |||
}} | |||
}} | |||
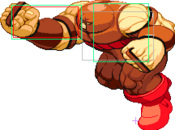
{{MoveData | |||
|image= MVC2_Juggernaut_6HP.png | |||
|caption= | |||
|name= Forward Heavy Punch | |||
|linkname= 6HP | |||
|input= {{f}} + {{hp}} | |||
|data= | |||
{{AttackData-MVSC2 | |||
|Damage= 20 / 30 | |||
|Startup= 20 | |||
|Active= 8 | |||
|Recovery= 28 | |||
|Guard= HL | |||
|Special Property= None | |||
|Cancel= Special, SJ, Super | |||
|Adv. Hit= - | |||
|Adv. Guard= - | |||
|Adv. Pushblock= - | |||
|description= Juggernaut's longest normal<br> has a very long startup so it is mostly used to extend corner combos | |||
}} | |||
}} | |||
{{MoveData | |||
|image= MVC2_Juggernaut_5LK.png | |||
|caption= | |||
|name= Light Kick | |||
|linkname= 5LK | |||
|input= {{lk}} | |||
|data= | |||
{{AttackData-MVSC2 | |||
|Damage= 7 / 10 | |||
|Startup= 6 | |||
|Active= 1 | |||
|Recovery= 21 | |||
|Guard= HL | |||
|Special Property= None | |||
|Cancel= Chain, Special, SJ, Super | |||
|Adv. Hit= - | |||
|Adv. Guard= - | |||
|Adv. Pushblock= - | |||
|description= generic low kick<br>has good range but is still shorter than 5{{lp}} | |||
}} | |||
}} | |||
{{MoveData | |||
|image= MVC2_Juggernaut_5MK_2.png | |||
|caption= | |||
|name= Medium Kick | |||
|linkname= 5MK | |||
|input= {{mk}} | |||
|data= | |||
{{AttackData-MVSC2 | |||
|Damage= 10 / 15 | |||
|Startup= 6 | |||
|Active= 24 | |||
|Recovery= 22 | |||
|Guard= HL | |||
|Special Property= None | |||
|Cancel= Special, SJ, Super | |||
|Adv. Hit= - | |||
|Adv. Guard= - | |||
|Adv. Pushblock= - | |||
|description= The stomp!<br>I don't recommend this move unless you've already won your opponent. | |||
}} | |||
}} | |||
{{MoveData | |||
|image= MVC2_Juggernaut_5HK.png | |||
|caption= | |||
|name= Heavy Kick | |||
|linkname= 5HK | |||
|input= {{hk}} | |||
|data= | |||
{{AttackData-MVSC2 | |||
|Damage= 17 / 25 | |||
|Startup= 14 | |||
|Active= 3 | |||
|Recovery= 40 | |||
|Guard= HL | |||
|Special Property= Launcher | |||
|Cancel= Special, SJ, Super | |||
|Adv. Hit= - | |||
|Adv. Guard= - | |||
|Adv. Pushblock= - | |||
|description= a pretty powerful, high, slow kick.<br>Decent range and nice damage and launcher that you can't follow up (except in a corner?). | |||
}} | |||
}} | |||
{{MoveData | |||
|image= MVC2_Juggernaut_2LP.png | |||
|caption= | |||
|name= Crouching Light Punch | |||
|linkname= 2LP | |||
|input= {{d}} + {{lp}} | |||
|data= | |||
{{AttackData-MVSC2 | |||
|Damage= 7 / 10 | |||
|Startup= 9 | |||
|Active= 3 | |||
|Recovery= 11 | |||
|Guard= L | |||
|Special Property= OTG | |||
|Cancel= Chain, Special, Super | |||
|Adv. Hit= - | |||
|Adv. Guard= - | |||
|Adv. Pushblock= - | |||
|description= 5{{lp}} but low | |||
}} | |||
}} | |||
{{MoveData | |||
|image= MVC2_Juggernaut_2MP.png | |||
|caption= | |||
|name= Crouching Medium Punch | |||
|linkname= 2MP | |||
|input= {{d}} + {{mp}} | |||
|data= | |||
{{AttackData-MVSC2 | |||
|Damage= 10 / 15 | |||
|Startup= 13 | |||
|Active= 6 | |||
|Recovery= 32 | |||
|Guard= HL | |||
|Special Property= None | |||
|Cancel= Chain, Special, Super, SJ Cancellable 22~38 | |||
|Adv. Hit= - | |||
|Adv. Guard= - | |||
|Adv. Pushblock= - | |||
|description= generic {{mp}} filler | |||
}} | |||
}} | |||
{{MoveData | |||
|image= MVC2_Juggernaut_2HP_2.png | |||
|caption= | |||
|name= Crouching Heavy Punch | |||
|linkname= 2HP | |||
|input= {{d}} + {{hp}} | |||
|data= | |||
{{AttackData-MVSC2 | |||
|Damage= 17 / 25 | |||
|Startup= 11 | |||
|Active= 6 | |||
|Recovery= 39 | |||
|Guard= HL | |||
|Special Property= None | |||
|Cancel= Special, SJ, Super | |||
|Adv. Hit= - | |||
|Adv. Guard= - | |||
|Adv. Pushblock= - | |||
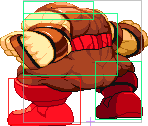
|description= Our primary launcher.<br>Attempting to launch someone is rarely a good idea.<br>You can either jump up after this and combo away (ending with this same punch for very nice damage) or body splash (the {{hk}} version does almost as much damage as his arial rave). | |||
}} | |||
}} | |||
{{MoveData | |||
|image= MVC2_Juggernaut_2LK.png | |||
|caption= footsies | |||
|name= Crouching Light Kick | |||
|linkname= 2LK | |||
|input= {{d}} + {{lk}} | |||
|data= | |||
{{AttackData-MVSC2 | |||
|Damage= 7 / 10 | |||
|Startup= 6 | |||
|Active= 5 | |||
|Recovery= 14 | |||
|Guard= L | |||
|Special Property= None | |||
|Cancel= Chain, Special, SJ, Super | |||
|Adv. Hit= - | |||
|Adv. Guard= - | |||
|Adv. Pushblock= - | |||
|description= very fast, has slight advantages compared to 5{{lp}} to warrant using it in bnbs vmbut the difference isn't big | |||
}} | |||
}} | |||
{{MoveData | |||
|image= MVC2_Juggernaut_2MK.png | |||
|caption= psychic footsies | |||
|name= Crouching Medium Kick | |||
|linkname= 2MK | |||
|input= {{d}} + {{mk}} | |||
|data= | |||
{{AttackData-MVSC2 | |||
|Damage= 10 / 15 | |||
|Startup= 10 | |||
|Active= 3 | |||
|Recovery= 35 | |||
|Guard= L | |||
|Special Property= None | |||
|Cancel= Special, Super SJ cancellable 22・42 | |||
|Adv. Hit= - | |||
|Adv. Guard= - | |||
|Adv. Pushblock= - | |||
|description= is a sweep, generally useless since Juggernaut usually knocks away opponents in combos and doesn't benefit from being super close to his opponents | |||
}} | |||
}} | |||
{{MoveData | |||
|image= MVC2_Juggernaut_2HK_2.png | |||
|name= Crouching Heavy Kick | |||
|linkname= 2HK | |||
|input= {{d}} + {{hk}} | |||
|data= | |||
{{AttackData-MVSC2 | |||
|Damage= 17 / 25 | |||
|Startup= 14 | |||
|Active= 5 | |||
|Recovery= 44 | |||
|Guard= L | |||
|Special Property= | |||
|Cancel= | |||
|Adv. Hit= - | |||
|Adv. Guard= - | |||
|Adv. Pushblock= - | |||
|description= slow and not useful.<br>On a successful hit, this move will stun any opponent it does not launch. | |||
}} | |||
}} | |||
{{MoveData | |||
|image= MVC2_Juggernaut_J.LP.png | |||
|caption= | |||
|name= Air Light Punch | |||
|linkname= j.LP | |||
|input= j.{{lp}} | |||
|data= | |||
{{AttackData-MVSC2 | |||
|Damage= 7 / 10 | |||
|Startup= 6 | |||
|Active= 14 | |||
|Recovery= 8 | |||
|Guard= H | |||
|Special Property= None | |||
|Cancel= Chain, Special, Super | |||
|Adv. Hit= - | |||
|Adv. Guard= - | |||
|Adv. Pushblock= - | |||
|description= 5{{lp}} but jumping | |||
}} | |||
}} | |||
{{MoveData | |||
|image= MVC2_Juggernaut_J.MP.png | |||
|caption= | |||
|name= Air Medium Punch | |||
|linkname= j.MP | |||
|input= j.{{mp}} | |||
|data= | |||
{{AttackData-MVSC2 | |||
|Damage= 10 / 17 | |||
|Startup= 9 | |||
|Active= 5 | |||
|Recovery= 24 | |||
|Guard= H | |||
|Special Property= None | |||
|Cancel= Special, Super | |||
|Adv. Hit= - | |||
|Adv. Guard= - | |||
|Adv. Pushblock= - | |||
|description= 5{{mp}} but jumping | |||
}} | |||
}} | |||
{{MoveData | |||
|image= MVC2_Juggernaut_J.HP_2.png | |||
|name= Jumping Heavy Punch | |||
|linkname= j.HP | |||
|input= j.{{hp}} | |||
|data= | |||
{{AttackData-MVSC2 | |||
|Damage= 17 / 25 | |||
|Startup= 12 | |||
|Active= 5 | |||
|Recovery= 32 | |||
|Guard= H | |||
|Special Property= Flying screen | |||
|Cancel= Special, Super | |||
|Adv. Hit= - | |||
|Adv. Guard= - | |||
|Adv. Pushblock= - | |||
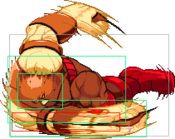
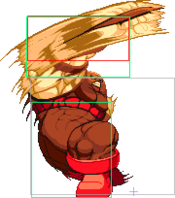
|description= a giant swipe<br>knocks down aerial opponents and deals amazing damage | |||
}} | |||
}} | |||
= | {{MoveData | ||
|image= MVC2_Juggernaut_J.LK.png | |||
|caption= | |||
|name= Air Light Kick | |||
|linkname= j.LK | |||
|input= j.{{lk}} | |||
|data= | |||
{{AttackData-MVSC2 | |||
|Damage= 7 / 10 | |||
|Startup= 6 | |||
|Active= 12 | |||
|Recovery= 8 | |||
|Guard= H | |||
|Special Property= None | |||
|Cancel= Chain, Special, Super | |||
|Adv. Hit= - | |||
|Adv. Guard= - | |||
|Adv. Pushblock= - | |||
|description= has an alright downward angle | |||
}} | |||
}} | |||
= | {{MoveData | ||
|image= MVC2_Juggernaut_J.MK.png | |||
|caption= | |||
|name= Air Medium Kick | |||
|linkname= j.MK | |||
|input= j.{{mk}} | |||
|data= | |||
{{AttackData-MVSC2 | |||
|Damage= 10 / 15 | |||
|Startup= 11 | |||
|Active= 5 | |||
|Recovery= 16 | |||
|Guard= H | |||
|Special Property= None | |||
|Cancel= Special, Super | |||
|Adv. Hit= - | |||
|Adv. Guard= - | |||
|Adv. Pushblock= - | |||
|description= filler air combo move | |||
}} | |||
}} | |||
== Special | {{MoveData | ||
|image= MVC2_Juggernaut_J.HK.png | |||
|caption= | |||
|name= Air Heavy Kick | |||
|linkname= j.HK | |||
|input= j.{{hk}} | |||
|data= | |||
{{AttackData-MVSC2 | |||
|Damage= 17 / 25 | |||
|Startup= 12 | |||
|Active= 6 | |||
|Recovery= 18 | |||
|Guard= H | |||
|Special Property= Flying Screen | |||
|Cancel= Special, Super | |||
|Adv. Hit= - | |||
|Adv. Guard= - | |||
|Adv. Pushblock= - | |||
|description= 5{{hk}} but useful<br>deals great damage and can extend an air combo if they are against the corner | |||
}} | |||
}} | |||
=== Special Moves === | |||
First set of damage is for normal. Second set of damage is for Power-Up. Third set of damage is with Power-Up glitch applied. | First set of damage is for normal. Second set of damage is for Power-Up. Third set of damage is with Power-Up glitch applied. | ||
=== | {{lp}} / {{hp}} - Power-up {{lp}} / Power-up{{hp}} - Glitched {{lp}} / Glitched {{hp}} | ||
{{MoveData | |||
|image= MVC2_Juggernaut_41236p.png | |||
|caption= This isn't a dash, it's a teleport at this point | |||
|name= Juggernaut Punch | |||
|linkname= hcf + p | |||
|input= {{hcf}} + {{p}} | |||
|data= | |||
{{AttackData-MVSC2 | |||
|Damage= 20 / 28 -- 30 / 42 | |||
|Startup= | |||
|Active= | |||
|Recovery= | |||
|Guard= HL | |||
|Special Property= Knock away on hit | |||
|Cancel= Chain, Special, SJ, Super | |||
|Adv. Hit= - | |||
|Adv. Guard= - | |||
|Adv. Pushblock= - | |||
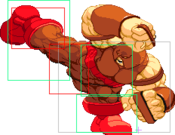
|description= Probably Juggernaut's most important special move, due to its insane range, damage and super armor.<br>great to end ground combos.<br>This can be done with either {{lp}}, which is faster but stationary or {{hp}}, which has a dash and deals more damage but is much slower.<br>redefines Juggernaut's playstyle and movement the same way Hammer fall does to Potemkin<br>{{hp}} version is very minus on block, but it's so fast it puts the dashes of rushdowns to shame | |||
}} | |||
}} | |||
{{MoveData | |||
|image= MVC2_Juggernaut_41236k.png | |||
|caption= | |||
|name= Juggernaut Body Press | |||
|linkname= hcf + k | |||
|input= {{hcf}} + {{k}} | |||
|data= | |||
{{AttackData-MVSC2 | |||
|Damage= 19 / 25 -- 23 / 29 -- 29 / 38 | |||
|Startup= | |||
|Active= | |||
|Recovery= | |||
|Guard= HL | |||
|Special Property= {{airok}}{{high}}{{Hardknockdown}} | |||
|Cancel= Chain, Special, SJ, Super | |||
|Adv. Hit= - | |||
|Adv. Guard= - | |||
|Adv. Pushblock= - | |||
|description= Jugg jumps in the air and does a body press<br>quite situational but deals good damage and knocks downs<br>has very poor recovery and can't be comboed into easily | |||
}} | |||
}} | |||
{{MoveData | |||
|image= MVC2_Juggernaut_2MP.png | |||
|image2= MVC2_Juggernaut_632p_proj.png | |||
|caption= you most likely did this while trying to attack low after a dash | |||
|caption2= The shockwaves | |||
|name= Earthquake Punch | |||
|linkname= qcfd + p | |||
|input= {{qcfd}} + {{p}} | |||
|data= | |||
{{AttackData-MVSC2 | |||
|Damage= 18 / 22 -- 27 / 33 | |||
|Startup= | |||
|Active= | |||
|Recovery= | |||
|Guard= HL | |||
|Special Property= {{high}} | |||
|Cancel= Chain, Special, SJ, Super | |||
|Adv. Hit= - | |||
|Adv. Guard= - | |||
|Adv. Pushblock= - | |||
|description= Slams the ground and sends shockwaves forward<br>great for controlling space and punishing reckless dashes, especially as an assist. | |||
}} | |||
}} | |||
{{ | {{MoveData | ||
{{ | |image= MVC2_Juggernaut_632p.png | ||
| | |caption= It's not a glitch, it's Cyttorak's blessing | ||
| | |name= Cyttorak Power-Up | ||
|linkname= dp + lp + hp | |||
}} | |input= {{dp}} + {{lp}}{{hp}} | ||
{{ | |data= | ||
{{AttackData-MVSC2 | |||
|Damage= N/A | |||
|Startup= | |||
|Active= | |||
|Recovery= | |||
|Guard= HL | |||
|Special Property= | |||
|Cancel= Chain, Special, SJ, Super | |||
|Adv. Hit= - | |||
|Adv. Guard= - | |||
|Adv. Pushblock= - | |||
|description= Increases damage for Juggernaut's next attack.<br>The effect is normally canceled whether the attack connects or not, but this effect is permanent when using the Power-up glitch<br>this makes Juggernaut one of the strongest characters in the game. for example, Headcrush deals 150% damage it normally does, making {{d}}{{lk}} > {{hp}} > Headcrush instantly kill a lot of characters<br>how the glitch works is explained below | |||
* it isn't frowned upon when used at all, unlike what forums 12 years ago would lead you to believe | |||
* This glitch was later fixed in the PS3 / Xbox 360 versions, the other versions were not updated so it remains usable | |||
}} | |||
}} | |||
=== Super Moves === | |||
= The | {{MoveData | ||
|image= MVC2_Juggernaut_236pp.png | |||
== | |caption= The health bar evaporator | ||
|name= Juggernaut Headcrush | |||
|linkname= 236 + pp | |||
|input= {{qcf}} + {{lp}}{{hp}} | |||
|data= | |||
{{AttackData-MVSC2 | |||
|Damage= 58 / 63 / 87 | |||
|Startup= | |||
|Active= | |||
|Recovery= | |||
|Guard= HL | |||
|Special Property= [[file:mash.png]] Maximum of 8 hits | |||
|Cancel= Chain, Special, SJ, Super | |||
|Adv. Hit= - | |||
|Adv. Guard= - | |||
|Adv. Pushblock= - | |||
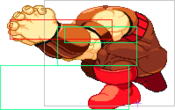
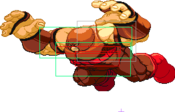
|description= Juggernaut charges forward hitting several times and finally slamming his opponent up into the air<br>Mashing Punch and Kick buttons will increase the hits and damage.<br>Landing the full 8 hits will drain well over half of your opponent's life withput the glitch, and using it in conjunction with his Cyttorak Power-Up or in a combo will take off a lot more. This thing is NASTY.<br>This move will hit through most projectiles (some started supers) and during any opponent's move/dash/non-blocking-jump if you can hit them before their animation ends.<br>Can be used to cross the screen offensively when an opponent is pressuring you from far away (like Dr. Doom in the air or Spider-Man throwing web balls at you) or to run away from Strider.<br>Can also be easily chained from any successful Jugg attack that places a stunned body (falling) infront of him.<br>Careful when mashing buttons...it's comedy to see someone start a headcrush and in their zeal they end up cancelling into another character's super before it even connects, wasting both bars for 0 damage.<br>Cancel into another character's super before the 4th hit because if the 4th hit is the final one, you cannot cancel into another super when it registers. | |||
* The one draw back is mashing out the full 8 hits can be '''— extremely difficult —''' but considering what the pay off is... | |||
====The Mechanics of Mashing Headcrush For All Eight Hits==== | |||
Juggernaut's Headcrush super is coded in a unique way where the more frames he charges without hitting the opponent builds up a counter. Once he hits, each frame that a punch/kick button (direction doesn't work) isn't pressed counts down from that buffer until it's depleted or it reaches 7 hits total, then it does the final hit. When you headcrush point blank, the counter is at one or very close to zero, so you have to mash a button every single frame in order to get 8 hits. It's probably a little more complicated than that since if you headcrush an enemy that's above the ground, there's a lot more delay between hits. So it could be that each hit counts down a large amount and each button mashed counts up, it's hard to tell - but that's the basic mechanics: mash as soon and as quickly as possible. | |||
}} | |||
}} | |||
=== Assist Moves === | |||
{{MvC2CharacterAssists | |||
| [[file:lp.png]] Earthquake Punch || Juggernaut Headcrush | [[file:lp.png]] Earthquake Punch | Very easy to use when extending an opening hit into a full combo. Does a decent amount of chip. Not very much range or damage potential but provides a lot of pressure once you're in. | |||
| [[file:hp.png]] Juggernaut Punch || Juggernaut Headcrush | [[file:hp.png]] Juggernaut Punch | Very popular assist because of the damage potential. Sends the point character flying, which typically ends your combo unless you're in the corner. The super armor can help blow through your opponent's offense. | |||
| [[file:hk.png]] Body Press || Juggernaut Headcrush | [[file:hk.png]] Body Press | [[file:high.png]] One of the only assists in the entire game that has to be blocked high. Can be used as an anti-air or to create an unblockable mixup. Very long recovery so Juggernaut needs a little extra protection compared to his other assists. Has no super armor once Juggernaut is in the air. | |||
}} | |||
- | == Cyttorak Power-Up Glitch == | ||
The Power-Up glitch increases the damage for Juggernaut on every attack, not just the very next one. The glitch only needs to be performed once per match unless you accidentally deactivate it later. To activate the glitch Juggernaut needs to Power-Up, then change to a different character without finishing an attack or otherwise canceling the effect. If Juggernaut isn't flashing when he leaves the screen then the glitch probably wasn't executed correctly. | |||
- | When Juggernaut is brought back into play and uses Power-Up again the glitch is deactivated. | ||
When attempting to setup the glitch, the following moves can be whiffed without removing any of the Power-Up effect: | |||
* {{df}}+{{hp}}, Universal Launcher | |||
* {{qcf}}+{{a1}}, Snapback (Assist 1) | |||
* {{qcf}}+{{a2}}, Snapback (Assist 2) | |||
Juggernaut will remain flashing if any of these moves hit, but he will not have the increased damage. Also, performing an additional Power-Up in this state will not give the increased damage back. In this exact situation, the only way to be sure you're gaining the damage increase is to remove the original flashing effect by using any other attacks, then performing another Power-Up. | |||
==== THC Headcrush ==== | |||
The normal Headcrush is one of Juggernaut's most consistent and punishing threats. The THC Headcrush, on the other hand, has some interesting differences that bring some much needed depth to the table. THC Headcrush is unmashable which might mean less damage up-front, but is Juggernaut's fastest attack by a huge margin. This extra speed allows it to punish basically everything your grounded opponent might consider safe and has the added benefit of being unblockable in certain situations. | |||
===== Unblockable THC ===== | |||
Having Juggernaut on your team grants you access to the THC Headcrush, even when he's an assist, abuse it if you have the meter and your team allows for it. With Juggernaut as an assist you can THC and his Headcrush has a chance to be unblockable as long as your opponent isn't already in blockstun and you are relatively close to them. This works because THC Headcrush will reach the opponent before the super freeze signals that the opponent can block, but frame skip is what ultimately decides if the Headcrush will connect. | |||
== Colors == | |||
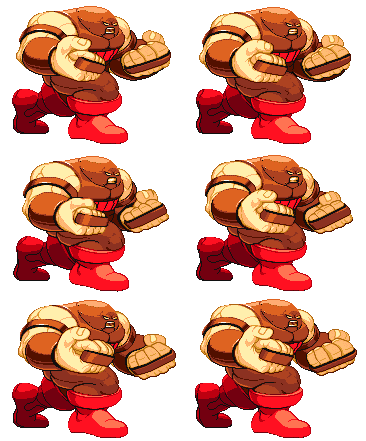
First row: {{lp}}, {{hp}}, A1. Second row: {{lk}}, {{hk}}, A2. | |||
[[Image:Mvc2-juggernaut.png]] | |||
{{Navbox-MVC2}} | {{Navbox-MVC2}} | ||
[[Category:Marvel Vs. Capcom 2]] | [[Category:Marvel Vs. Capcom 2]] | ||
Latest revision as of 01:09, 6 February 2022
Introduction
Cain Marko is a regular human who was empowered by a gem belonging to the deity Cyttorak, becoming a literal human juggernaut. He possesses superhuman strength and durability, and is virtually immune to most physical attacks; his helmet also protects him from mental attacks. Although not a mutant, Juggernaut has been featured as a prominent member of the Brotherhood of Mutants. He is also the stepbrother of Professor X.
Juggernaut is the great equalizer. With the help of the Power-Up Glitch even a solo Juggernaut can touch of death most of the cast for next to no execution. A simple Headcrush is usually all it takes to force your opponent to adjust their behavior and shift the momentum of the match. Your normal buttons occupy very popular sections of the screen and the hits add up fast, even more if you're already Glitched. Any assist that you chose will be impossible to ignore, offering many characters the damage they need to compete.
On the other hand, Juggernaut has few decent defensive options but ultimately struggles. Juggernaut's Headcrush is great for blowing through projectiles and block strings, Super Armor provides some much needed breathing room when dealing with your opponent's offense, and his Defense is among the highest in the game. However, Juggernaut's large body makes him an easy target for being rushed down, his moves are very slow and punishable, he can't really deal with pressure from above, and he has no strong options for dealing with runaway. These weaknesses really add up against Juggernaut, making him much easier to utilize as an assist.
Gameplay
Juggernaut is a simple and powerful character to help with learning the fundamentals of defense in MvC2; A character that is great for beginners and can remain viable in higher level play but might be seen as a gimmick.
| Strengths | Weaknesses |
|---|---|
|
|
Character Summary
- Juggernaut Punch
 +
+ 
- Juggernaut Body Press
 +
+ 
- Earthquake Punch
 +
+ 
- Cyttorak Power-Up
 +
+ 

- Juggernaut Headcrush (Dash super)
 +
+  +
+ 
- Type α - Ground Type
- Assist:
 Earthquake Punch
 - Counter:
 Earthquake Punch
 - Combination: Juggernaut Headcrush
- Type β - Dash Type
- Assist:
 Juggernaut Punch
 - Counter:
 Juggernaut Punch
 - Combination: Juggernaut Headcrush
- Type γ - Variety Type
- Assist:
 Body Press
 - Counter:
 Body Press
 - Combination: Juggernaut Headcrush
Moves List
Normal Moves
| Damage | Startup | Active | Recovery | Guard | |
|---|---|---|---|---|---|
| 7 / 10 | 9 | 3 | 20 | HL | |
| Special Property | Cancel | Adv. Hit | Adv. Guard | Adv. Pushblock | |
| None | Chain, Special, SJ, Super | - | - | - | |
|
a quick short attack. Decent damage for a jab. | |||||
| Damage | Startup | Active | Recovery | Guard | |
|---|---|---|---|---|---|
| 10 / 15 | 10 | 6 | 29 | HL | |
| Special Property | Cancel | Adv. Hit | Adv. Guard | Adv. Pushblock | |
| None | Special, Super, SJ cancellable frames 17~33 | - | - | - | |
|
This is the second jab hit. | |||||
| Damage | Startup | Active | Recovery | Guard | |
|---|---|---|---|---|---|
| 17 / 25 | 8 | 8 | 41 | HL | |
| Special Property | Cancel | Adv. Hit | Adv. Guard | Adv. Pushblock | |
| None | Special, SJ, Super | - | - | - | |
|
will stun anything known by man. 5 | |||||
| Damage | Startup | Active | Recovery | Guard | |
|---|---|---|---|---|---|
| 20 / 30 | 20 | 8 | 28 | HL | |
| Special Property | Cancel | Adv. Hit | Adv. Guard | Adv. Pushblock | |
| None | Special, SJ, Super | - | - | - | |
|
Juggernaut's longest normal | |||||
| Damage | Startup | Active | Recovery | Guard | |
|---|---|---|---|---|---|
| 7 / 10 | 6 | 1 | 21 | HL | |
| Special Property | Cancel | Adv. Hit | Adv. Guard | Adv. Pushblock | |
| None | Chain, Special, SJ, Super | - | - | - | |
|
generic low kick | |||||
| Damage | Startup | Active | Recovery | Guard | |
|---|---|---|---|---|---|
| 10 / 15 | 6 | 24 | 22 | HL | |
| Special Property | Cancel | Adv. Hit | Adv. Guard | Adv. Pushblock | |
| None | Special, SJ, Super | - | - | - | |
|
The stomp! | |||||
| Damage | Startup | Active | Recovery | Guard | |
|---|---|---|---|---|---|
| 17 / 25 | 14 | 3 | 40 | HL | |
| Special Property | Cancel | Adv. Hit | Adv. Guard | Adv. Pushblock | |
| Launcher | Special, SJ, Super | - | - | - | |
|
a pretty powerful, high, slow kick. | |||||
| Damage | Startup | Active | Recovery | Guard | |
|---|---|---|---|---|---|
| 7 / 10 | 9 | 3 | 11 | L | |
| Special Property | Cancel | Adv. Hit | Adv. Guard | Adv. Pushblock | |
| OTG | Chain, Special, Super | - | - | - | |
|
5 | |||||
| Damage | Startup | Active | Recovery | Guard | |
|---|---|---|---|---|---|
| 10 / 15 | 13 | 6 | 32 | HL | |
| Special Property | Cancel | Adv. Hit | Adv. Guard | Adv. Pushblock | |
| None | Chain, Special, Super, SJ Cancellable 22~38 | - | - | - | |
|
generic | |||||
| Damage | Startup | Active | Recovery | Guard | |
|---|---|---|---|---|---|
| 17 / 25 | 11 | 6 | 39 | HL | |
| Special Property | Cancel | Adv. Hit | Adv. Guard | Adv. Pushblock | |
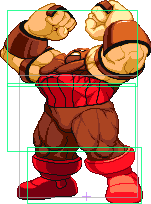
| None | Special, SJ, Super | - | - | - | |
|
Our primary launcher. | |||||
| Damage | Startup | Active | Recovery | Guard | |
|---|---|---|---|---|---|
| 7 / 10 | 6 | 5 | 14 | L | |
| Special Property | Cancel | Adv. Hit | Adv. Guard | Adv. Pushblock | |
| None | Chain, Special, SJ, Super | - | - | - | |
|
very fast, has slight advantages compared to 5 | |||||
| Damage | Startup | Active | Recovery | Guard | |
|---|---|---|---|---|---|
| 10 / 15 | 10 | 3 | 35 | L | |
| Special Property | Cancel | Adv. Hit | Adv. Guard | Adv. Pushblock | |
| None | Special, Super SJ cancellable 22・42 | - | - | - | |
|
is a sweep, generally useless since Juggernaut usually knocks away opponents in combos and doesn't benefit from being super close to his opponents | |||||
| Damage | Startup | Active | Recovery | Guard | |
|---|---|---|---|---|---|
| 17 / 25 | 14 | 5 | 44 | L | |
| Special Property | Cancel | Adv. Hit | Adv. Guard | Adv. Pushblock | |
| - | - | - | - | - | |
|
slow and not useful. | |||||
| Damage | Startup | Active | Recovery | Guard | |
|---|---|---|---|---|---|
| 7 / 10 | 6 | 14 | 8 | H | |
| Special Property | Cancel | Adv. Hit | Adv. Guard | Adv. Pushblock | |
| None | Chain, Special, Super | - | - | - | |
|
5 | |||||
| Damage | Startup | Active | Recovery | Guard | |
|---|---|---|---|---|---|
| 10 / 17 | 9 | 5 | 24 | H | |
| Special Property | Cancel | Adv. Hit | Adv. Guard | Adv. Pushblock | |
| None | Special, Super | - | - | - | |
|
5 | |||||
| Damage | Startup | Active | Recovery | Guard | |
|---|---|---|---|---|---|
| 17 / 25 | 12 | 5 | 32 | H | |
| Special Property | Cancel | Adv. Hit | Adv. Guard | Adv. Pushblock | |
| Flying screen | Special, Super | - | - | - | |
|
a giant swipe | |||||
| Damage | Startup | Active | Recovery | Guard | |
|---|---|---|---|---|---|
| 7 / 10 | 6 | 12 | 8 | H | |
| Special Property | Cancel | Adv. Hit | Adv. Guard | Adv. Pushblock | |
| None | Chain, Special, Super | - | - | - | |
|
has an alright downward angle | |||||
| Damage | Startup | Active | Recovery | Guard | |
|---|---|---|---|---|---|
| 10 / 15 | 11 | 5 | 16 | H | |
| Special Property | Cancel | Adv. Hit | Adv. Guard | Adv. Pushblock | |
| None | Special, Super | - | - | - | |
|
filler air combo move | |||||
| Damage | Startup | Active | Recovery | Guard | |
|---|---|---|---|---|---|
| 17 / 25 | 12 | 6 | 18 | H | |
| Special Property | Cancel | Adv. Hit | Adv. Guard | Adv. Pushblock | |
| Flying Screen | Special, Super | - | - | - | |
|
5 | |||||
Special Moves
First set of damage is for normal. Second set of damage is for Power-Up. Third set of damage is with Power-Up glitch applied.
/
- Power-up
/ Power-up
- Glitched
/ Glitched

| Damage | Startup | Active | Recovery | Guard | |
|---|---|---|---|---|---|
| 20 / 28 -- 30 / 42 | - | - | - | HL | |
| Special Property | Cancel | Adv. Hit | Adv. Guard | Adv. Pushblock | |
| Knock away on hit | Chain, Special, SJ, Super | - | - | - | |
|
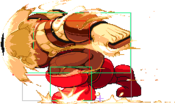
Probably Juggernaut's most important special move, due to its insane range, damage and super armor. | |||||
| Damage | Startup | Active | Recovery | Guard | |
|---|---|---|---|---|---|
| 19 / 25 -- 23 / 29 -- 29 / 38 | - | - | - | HL | |
| Special Property | Cancel | Adv. Hit | Adv. Guard | Adv. Pushblock | |
| Chain, Special, SJ, Super | - | - | - | ||
|
Jugg jumps in the air and does a body press | |||||
| Damage | Startup | Active | Recovery | Guard | |
|---|---|---|---|---|---|
| 18 / 22 -- 27 / 33 | - | - | - | HL | |
| Special Property | Cancel | Adv. Hit | Adv. Guard | Adv. Pushblock | |
| Chain, Special, SJ, Super | - | - | - | ||
|
Slams the ground and sends shockwaves forward | |||||
| Damage | Startup | Active | Recovery | Guard | |
|---|---|---|---|---|---|
| N/A | - | - | - | HL | |
| Special Property | Cancel | Adv. Hit | Adv. Guard | Adv. Pushblock | |
| - | Chain, Special, SJ, Super | - | - | - | |
|
Increases damage for Juggernaut's next attack.
| |||||
Super Moves
Assist Moves
Cyttorak Power-Up Glitch
The Power-Up glitch increases the damage for Juggernaut on every attack, not just the very next one. The glitch only needs to be performed once per match unless you accidentally deactivate it later. To activate the glitch Juggernaut needs to Power-Up, then change to a different character without finishing an attack or otherwise canceling the effect. If Juggernaut isn't flashing when he leaves the screen then the glitch probably wasn't executed correctly.
When Juggernaut is brought back into play and uses Power-Up again the glitch is deactivated.
When attempting to setup the glitch, the following moves can be whiffed without removing any of the Power-Up effect:
 +
+ , Universal Launcher
 +
+ , Snapback (Assist 1)
 +
+ , Snapback (Assist 2)
Juggernaut will remain flashing if any of these moves hit, but he will not have the increased damage. Also, performing an additional Power-Up in this state will not give the increased damage back. In this exact situation, the only way to be sure you're gaining the damage increase is to remove the original flashing effect by using any other attacks, then performing another Power-Up.
THC Headcrush
The normal Headcrush is one of Juggernaut's most consistent and punishing threats. The THC Headcrush, on the other hand, has some interesting differences that bring some much needed depth to the table. THC Headcrush is unmashable which might mean less damage up-front, but is Juggernaut's fastest attack by a huge margin. This extra speed allows it to punish basically everything your grounded opponent might consider safe and has the added benefit of being unblockable in certain situations.
Unblockable THC
Having Juggernaut on your team grants you access to the THC Headcrush, even when he's an assist, abuse it if you have the meter and your team allows for it. With Juggernaut as an assist you can THC and his Headcrush has a chance to be unblockable as long as your opponent isn't already in blockstun and you are relatively close to them. This works because THC Headcrush will reach the opponent before the super freeze signals that the opponent can block, but frame skip is what ultimately decides if the Headcrush will connect.
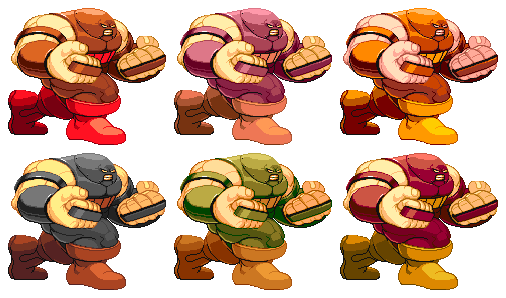
Colors
First row: ![]() ,
, ![]() , A1. Second row:
, A1. Second row: ![]() ,
, ![]() , A2.
, A2.
