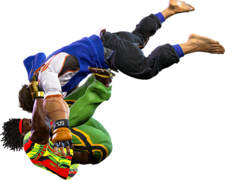
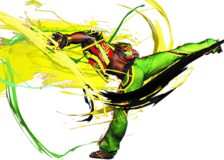
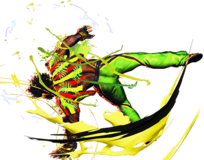
Nodthenbow (talk | contribs) (→6MK: Corrected and improved notes) |
|||
| Line 233: | Line 233: | ||
Advancing plus on block mid. Good meaty due to its long active frames and advantage on block but rather slow to start up | Advancing plus on block mid. Good meaty due to its long active frames and advantage on block but rather slow to start up | ||
*Not an overhead | *Not an overhead | ||
*Hits crouchers on its | *Causes a knockdown on air hit | ||
*The first 2 active frames do not hit standing characters | |||
*Hits crouchers on its 4th active frame (+5/+1 on standing, +6/+2 on crouching) | |||
}} | }} | ||
Revision as of 16:25, 16 June 2023
| Pre-release information
This page is under construction based on pre-release data. Join the SF6 Resource Hub for info on editing. |
Introduction
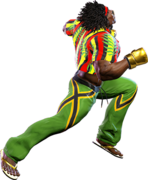
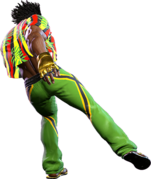
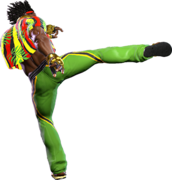
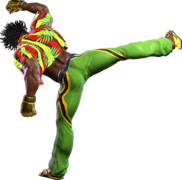
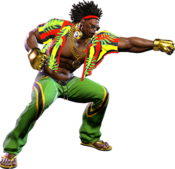
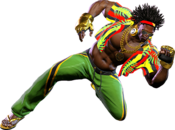
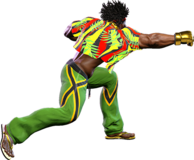
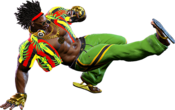
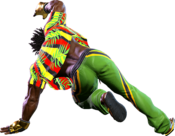
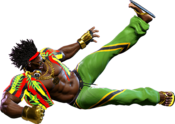
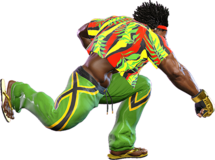
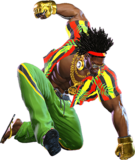
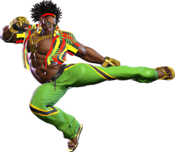
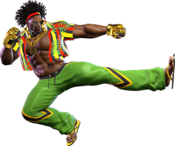
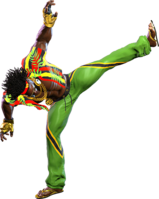
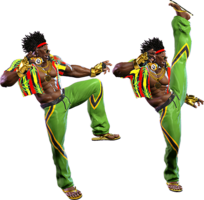
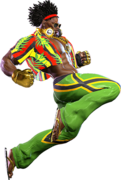
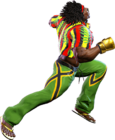
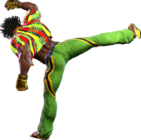
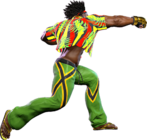
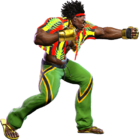
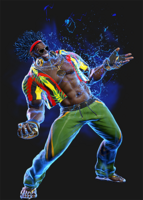
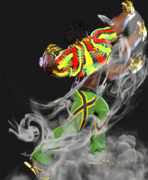
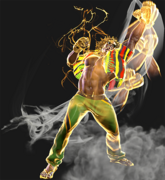
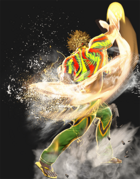
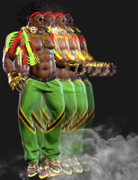
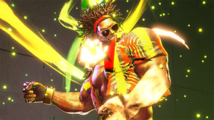
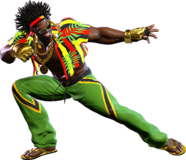
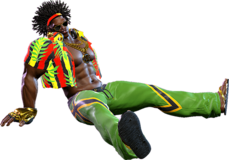
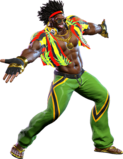
A globally popular dance music superstar, Dee Jay is always ready to have a good time. With a burning love for music and fighting, this Jamaican sensation drives audiences wild with hot new songs and stylish moves.
Dee Jay is a pressure-oriented rushdown character with many ways to set up frame traps or other mixups. His playstyle heavily revolves around feinting, wherein Dee Jay looks like he is approaching or performing a move before ducking away and returning to neutral. Efficient use of feints, his strong pressure buttons, and his excellent Drive Rush can let Dee Jay dance all over the screen like it's nothing.
Jus Cool is Dee Jay's primary tool setting up his pressure, and is a very unique special move. Most comparable to Slayer's "Dandy Step" from the Guilty Gear franchise, Jus Cool sways Dee Jay back and allows him to follow up with five unique follow-ups. Jus Cool can be followed up with a low kick that frame traps, an overhead kick that is safe and knocks down on hit, a launching knee swing for anti-airs, and a forwards dash that can be canceled out of with a second sway back. Utilizing all of these follow-ups can be somewhat tricky, but thankfully Dee Jay has numerous excellent pressure normals to help him along. His 5MP is plus, his 6MK is a plus normal that catches jump-outs, and his j.2K allows him to reset pressure with a jump-in attack must faster than other characters. Combining Jus Cool with his close range pressure options allows Dee Jay to mix opponents regardless of where he is on the screen, making him a devastating dance partner to be duking it out with.
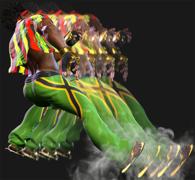
Dee Jay's special move selection is rounded out by Air Slasher, a charge fireball that can be used to counter-zone, Jackknife Maximum for anti-airing, and Rolling Sobat to cover ground and either stagger or knock the opponent down. The most notable trait of these three moves, which winds up tying back into his trickiness, is that their light versions are all feints, which allows Dee Jay to bait people into responding for whiff punishes or reset pressure if he is close. To this end, Dee Jay has a lot of very fast movement options; his forward dash and particularly his Drive Rush are incredibly quick, which pairs well with his many lengthy pokes. If Dee Jay manages to get a good hit his damage potential becomes extremely high, as his OD moves all deal incredible damage and his Machine Gun Upper special is one of the highest damage combo enders in the game.
Dee Jay's up close pressure and screen control is very strong, but comes with somewhat of an awkward kit to work with. None of Dee Jay's longer reaching normals are special cancelable, making it difficult for him to meaningfully follow up with pokes. As well, all of his cancelable buttons are stubby, which can result in him dropping combos if the spacing isn't perfect. Armored moves, particularly Drive Impacts, will break right through his longer buttons if he doesn't use them carefully. Additionally, because his primary reversal is Overdrive Jackknife Maximum and he uses a lot of Drive for conversions, Dee Jay generally has a hard time in Burnout. Thus, Dee Jay can be a surprisingly demanding character at high levels of play. While all of the above can make Dee Jay somewhat awkward to play, putting time into using him effectively will carry you very far. If you enjoy cool beats and slick dance moves, do the dancehall ting with Dee Jay.
| Pick if you like: | Avoid if you dislike: |
|---|---|
|
|
Classic & Modern Versions Comparison
| Missing Normals |
|
|---|---|
| Missing Command Normals |
|
| Shortcut-Only Specials |
|
| Miscellaneous Changes |
|
| Dee Jay | |
|---|---|
| Vitals | |
| Life Points | 10000 |
| Ground Movement | |
| Forward Walk Speed | 0.043 |
| Backward Walk Speed | 0.032 |
| Forward Dash Speed | 19 |
| Backward Dash Speed | 23 |
| Forward Dash Distance | 1.50 |
| Backward Dash Distance | 0.90 |
| Drive Rush Min. Distance (Throw) | 0.763 |
| Drive Rush Min. Distance (Block) | 2.535 |
| Drive Rush Max Distance | 2.713 |
| Jumping | |
| Jump Speed | 4+38+3 |
| Jump Apex | 2.115 |
| Forward Jump Distance | 1.90 |
| Backward Jump Distance | 1.52 |
| Throws | |
| Throw Range | 0.8 |
| Throw Hurtbox | 0.33 |
| Frame Data Glossary - SF6 | |
|---|---|
| Hitbox Images |
🟥 (Red): Attack hitbox
🟩 (Green): Vulnerable hurtbox that can be hit by strikes/projectiles
🟦 (Blue): Vulnerable throw hurtbox
|
| Active |
How many frames a move remains active (can hurt opponents) for. For projectiles with a maximum active period, a value may be listed in [brackets], but this number is not factored into the move's total frame count.
|
| Cancel |
Available options for canceling one move into another move.
|
| Cancel Hitconfirm Windows |
Hitconfirm reaction windows into Special Moves, Target Combos, and Super Arts.
|
| Damage |
Attack damage on hit. Multi-hit moves may have the damage listed for individual hits as X,Y (or sometimes X*Y). Sometimes a move's damage changes depending on which active frame connects, or on cinematic vs. non-cinematic hits; in this case, multiple values may be listed, and it will be clarified in the move description.
|
| Damage Scaling |
Some moves cause additional damage scaling in combos. Refer to Game Data page for a more detailed breakdown. Scaling Types:
|
| Drive Rush Cancel Advantage |
Refers to the frame advantage when canceling a normal, command normal, or Target Combo into Drive Rush on hit or block (abbreviated as DRC for Drive Rush Cancel). This is calculated at the moment a follow-up attack can be input, not at the moment the character can block or perform movement options. An attack that with DRC +8 on Hit can link into an 8-frame attack, and DRC +4 on Block can create a true blockstring into a 4-frame attack. Note that any DRC on Block worse than +4 cannot form a true blockstring, allowing the opponent to interrupt with an invincible reversal. Most light normals are slightly negative after a DRC on block, meaning the opponent can mash their fastest normal to guarantee a counter-hit (though this requires fast reactions). The attacking character could punish this with Light > DRC into an immediate invincible attack, but this would be an incredibly expensive and high-risk gambit.
|
| Forced Knockdown |
Most airborne command normals, special moves, and Super Arts put the user in a "Forced Knockdown" state. While in this state, an air knockdown will occur when being hit by any attack, even if it would otherwise cause an air reset. As an example, Ryu's 2HP causes an air reset when used as an anti-air. Against a move like Cammy's Hooligan Combination, however, the 2HP puts her into an air knockdown state. This allows Ryu to successfully cancel 2HP into Shoryuken for a juggle, similar to how a Drive Impact wall splat works. Taking advantage of Forced Knockdown juggles is important for dealing with moves like Ken's Dragonlash, Dhalsim's Air Teleport, or Kimberly's 6HK~Hop sequence. Moves that already cause an air knockdown, like most j.MP air-to-airs, will not display the "Forced Knockdown" message.
|
| Guard |
Refers to the direction an attack must be blocked. L is for Low attacks (must be blocked crouching), H is for High attacks/overheads (must be blocked standing), LH is for attacks that can be blocked crouching or standing. T is for Throw attacks which cannot be blocked.
|
| Juggles |
When a character is put into an Air Knockdown state, it is often possible to follow up with a Juggle attack before they hit the ground. In the simplest terms, there are 2 main juggle states:
The following is a more detailed overview of the SF6 juggle system:
Juggle Start (JS): When starting a juggle, the opponent's JC will be set to this value. May be different vs. standing and airborne opponents.
Juggle Increase (JI): When opponent is already in a juggle state, attacks will increase the opponent's JC by this amount.
Juggle Limit (JL): Property of an attack hitbox that determines whether it connects on a juggled opponent. The JL must be ≥ the opponent's JC to hit successfully.
An example to tie everything together:
Drive Rush notes:
|
| On Hit/Block |
These are frame advantage values when the attack hits or is blocked. If the number is positive, then the move will recover before the defender can act again. If the number is negative, the defender will be able to act before the attacker and maybe even punish. KD refers to knockdown on hit, and the listed KD Advantage refers to how many frames the attacker can act before the defender finishes their wakeup animation.
|
| Recovery |
How many frames it takes for a move to finish after the active frames have finished. For projectiles, recovery is considered to begin after the first active frame.
|
| Startup |
How many frames it takes before the move becomes 'active' or have a hit box. The last startup frame and the first active frame are the same frame, meaning all values are written as Startup + 1.
|
Normals
Standing Normals
5LP
| Startup | Active | Recovery | Cancel | Damage | Guard | On Hit | On Block |
|---|---|---|---|---|---|---|---|
| 4 | 3 | 6 | Chn Sp SA TC | 300 | LH | +4 | -1 |
Dee Jays fastest normal both in startup and recovery. Good for mashing out of pressure, scrambles and for checking opponents movements, as well as things like Drive Impacts due to its chaining properties
5MP
| Startup | Active | Recovery | Cancel | Damage | Guard | On Hit | On Block |
|---|---|---|---|---|---|---|---|
| 7 | 3 | 13 | TC | 600 | LH | +5 | +2 |
5HP
| Startup | Active | Recovery | Cancel | Damage | Guard | On Hit | On Block |
|---|---|---|---|---|---|---|---|
| 9 | 6 | 18 | Sp SA (close) | 800(700) | LH | +3(+8) | -4(+1) |
Very fast, advancing normal. Special cancellable but only during its initial active frames. Can be spaced to be made better on both hit and block
- Forces stand
- Whiffs on crouchers from further out
5LK
| Startup | Active | Recovery | Cancel | Damage | Guard | On Hit | On Block |
|---|---|---|---|---|---|---|---|
| 5 | 2 | 12 | Sp SA | 300 | LH | +2 | -2 |
5MK
| Startup | Active | Recovery | Cancel | Damage | Guard | On Hit | On Block |
|---|---|---|---|---|---|---|---|
| 9 | 3 | 16 | - | 600 | LH | +6 | -1 |
Dee Jays primary normal for linking out of, as well as a respectable poke. On PC can link into both 5HP from further out and 4HK when up close
- Does not special cancel
5HK
| Startup | Active | Recovery | Cancel | Damage | Guard | On Hit | On Block |
|---|---|---|---|---|---|---|---|
| 12 | 3 | 22(26) | - | 800 | LH | +1 | -5 |
Slower, advancing mid. Best serves as a pre-emptive whiff punish on things with a lot of recovery. Importantly does not special cancel and has a lot of recovery, making it vulnerable to Drive Impacts when used improperly
- Advantage on Punish Counter: +18
Crouching Normals
2LP
| Startup | Active | Recovery | Cancel | Damage | Guard | On Hit | On Block |
|---|---|---|---|---|---|---|---|
| 5 | 3 | 8 | Chn Sp SA | 300 | LH | +4 | -1 |
2MP
| Startup | Active | Recovery | Cancel | Damage | Guard | On Hit | On Block |
|---|---|---|---|---|---|---|---|
| 6 | 4 | 14 | Sp SA | 600 | LH | +4 | -1 |
2HP
| Startup | Active | Recovery | Cancel | Damage | Guard | On Hit | On Block |
|---|---|---|---|---|---|---|---|
| 8 | 2 | 20 | - | 800 | LH | +6 | -2 |
2LK
| Startup | Active | Recovery | Cancel | Damage | Guard | On Hit | On Block |
|---|---|---|---|---|---|---|---|
| 5 | 2 | 10 | Chn | 200 | L | +2 | -2 |
2MK
| Startup | Active | Recovery | Cancel | Damage | Guard | On Hit | On Block |
|---|---|---|---|---|---|---|---|
| 8 | 4 | 19 | - | 700 | L | KD +29 | -6 |
One of Dee Jay's strangest buttons—while not bad by any means, it's a clear weakness to not have a regular crouching medium kick to reliably confirm off of. It does give him a solid knockdown even on normal hit, though, allowing him to set up meaties and throws even from a back recovery.
2HK
| Startup | Active | Recovery | Cancel | Damage | Guard | On Hit | On Block |
|---|---|---|---|---|---|---|---|
| 14 | 10 | 15 | - | 900 | L | HKD +33(+42) | -11(-2) |
Jumping Normals
j.LP
| Startup | Active | Recovery | Cancel | Damage | Guard | On Hit | On Block |
|---|---|---|---|---|---|---|---|
| 4 | 7 | 3 land | - | 300 | H | - | - |
j.MP
| Startup | Active | Recovery | Cancel | Damage | Guard | On Hit | On Block |
|---|---|---|---|---|---|---|---|
| 6 | 4 | 3 land | TC | 700 | H | - | - |
j.HP
| Startup | Active | Recovery | Cancel | Damage | Guard | On Hit | On Block |
|---|---|---|---|---|---|---|---|
| 9 | 6 | 3 land | - | 800 | H | - | - |
j.LK
| Startup | Active | Recovery | Cancel | Damage | Guard | On Hit | On Block |
|---|---|---|---|---|---|---|---|
| 4 | 6 | 3 land | - | 300 | H | - | - |
j.MK
| Startup | Active | Recovery | Cancel | Damage | Guard | On Hit | On Block |
|---|---|---|---|---|---|---|---|
| 8 | 6 | 3 land | - | 500 | H | - | - |
j.HK
Command Normals
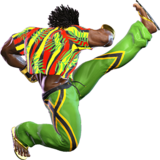
6MK
| Startup | Active | Recovery | Cancel | Damage | Guard | On Hit | On Block |
|---|---|---|---|---|---|---|---|
| 19(21) | 5 | 16 | SA | 700 | LH | +5(+6) | +1(+2) |
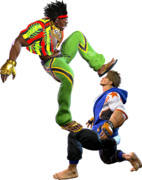
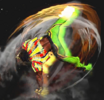
Advancing plus on block mid. Good meaty due to its long active frames and advantage on block but rather slow to start up
- Not an overhead
- Causes a knockdown on air hit
- The first 2 active frames do not hit standing characters
- Hits crouchers on its 4th active frame (+5/+1 on standing, +6/+2 on crouching)
4HK
| Startup | Active | Recovery | Cancel | Damage | Guard | On Hit | On Block |
|---|---|---|---|---|---|---|---|
| 7 | 2,4 | 20 | Sp SA | 500,300 (800) | LH | +1 | -5 |
Very fast anti air, incredibly useful for when Dee Jay doesn't have charge. Cancels on both hits making for rather easy grounded hit confirms
- Second hit launches on air Punish Counter
j.2LK
Target Combos
5LP~MK~MK
| Startup | Active | Recovery | Cancel | Damage | Guard | On Hit | On Block |
|---|---|---|---|---|---|---|---|
| 9 | 3 | 18 | TC | 400(360) | LH | +2 (Whiff -17) | -3 (Whiff -22) |
| Startup | Active | Recovery | Cancel | Damage | Guard | On Hit | On Block |
|---|---|---|---|---|---|---|---|
| 14 | 3 | 21 | - | 625(500) | LH | +2 | -8 |
5MP~HP~HK
| Startup | Active | Recovery | Cancel | Damage | Guard | On Hit | On Block |
|---|---|---|---|---|---|---|---|
| 11 | 7 | 24 | TC | 500 | LH | -2(+2) | -11(-7) |
| Startup | Active | Recovery | Cancel | Damage | Guard | On Hit | On Block |
|---|---|---|---|---|---|---|---|
| 13 | 3 | 30 | SA | 600(480) | LH | KD +34 | -13 |
5MP~MP~HP/4HP
| Startup | Active | Recovery | Cancel | Damage | Guard | On Hit | On Block |
|---|---|---|---|---|---|---|---|
| 12 | 2 | 17(19) | TC | 500 | LH | +2 | -2 |
| Startup | Active | Recovery | Cancel | Damage | Guard | On Hit | On Block |
|---|---|---|---|---|---|---|---|
| 20 | 2 | 24 | - | 900 | LH | KD +43 | -8 |
| Startup | Active | Recovery | Cancel | Damage | Guard | On Hit | On Block |
|---|---|---|---|---|---|---|---|
| - | - | 23 total | - | - | - | -4 | -6 |
Throws
Forward Throw (LPLK)
| Startup | Active | Recovery | Cancel | Damage | Guard | On Hit | On Block |
|---|---|---|---|---|---|---|---|
| 5 | 3 | 23 | - | 1200 (2040) | T | KD +34 | - |
Back Throw (4LPLK)
Drive System
Drive Impact (HPHK)
| Startup | Active | Recovery | Cancel | Damage | Guard | On Hit | On Block |
|---|---|---|---|---|---|---|---|
| 26 | 2 | 35 | - | 800 | LH | KD +35 / Wall Splat KD +65 | -3 / Wall Splat HKD +72 |
See Drive Impact
When cancelled from a normal, these are the important blockstring gaps; a gap of N will trade with an N-frame startup attack; [] = Burnout
- -
- Note: gaps of 8f or less cannot be escaped by jumping
Drive Reversal (6HPHK)
| Startup | Active | Recovery | Cancel | Damage | Guard | On Hit | On Block |
|---|---|---|---|---|---|---|---|
| 20(18) | 3 | 26(31) | - | 500 recoverable | LH | KD +23 | -6 |
See Drive Reversal
- Full Invuln: 1-22f; Armor Break
Drive Parry (MPMK)
| Startup | Active | Recovery | Cancel | Damage | Guard | On Hit | On Block |
|---|---|---|---|---|---|---|---|
| 1 | 12 or until released | 33(1)(11) | - | - | - | - | - |
See Drive Parry
- Perfect Parry has only 1f recovery, and disables the opponent from canceling their attack
- Perfect Parry vs. projectiles puts you into a fixed 11f recovery
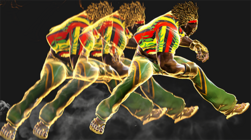
Drive Rush (66)
| Startup | Active | Recovery | Cancel | Damage | Guard | On Hit | On Block |
|---|---|---|---|---|---|---|---|
| 9(11) | 45(46) | 24(23) | - | - | - | - | - |
See Drive Rush. Frame data shown in (parentheses) refers to the version used after Parry.
- Notable Drive Rush cancel combo routes:
- Notable Drive Rush cancel blockstring gaps:
Special Moves
Air Slasher ([4]6P)
| Startup | Active | Recovery | Cancel | Damage | Guard | On Hit | On Block |
|---|---|---|---|---|---|---|---|
| - | - | 21 | - | - | - | - | - |
- 45f charge time
Dee Jay performs a quick feint with the same startup animation as his other fireball. Recovers much quicker than the other versions, and can be used to bait unsafe options an opponent may use to try and go through your fireballs.
| Startup | Active | Recovery | Cancel | Damage | Guard | On Hit | On Block |
|---|---|---|---|---|---|---|---|
| 17 | - | 27 | SA3 22PP | 600 | LH | 0 | -5 |
- 45f charge time
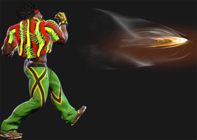
A basic, single fireball that travels fairly quickly. The main reason to use this over the heavy version is its lower total frames of commitment, leaving you less vulnerable to things that beat fireballs like jump-ins and Drive Impact.
| Startup | Active | Recovery | Cancel | Damage | Guard | On Hit | On Block |
|---|---|---|---|---|---|---|---|
| 17(34) | - | 43 | SA3 22PP | 500x2 | LH | +3 | -3 |
- 45f charge time
Dee Jay throws two fireballs with only a small gap in between. Although the two fireballs will outnumber and win a clash against a single normal fireball, an OD fireball will beat out both of them and continue to move towards you. The commitment of this move should be taken into account when throwing it at medium ranges.
| Startup | Active | Recovery | Cancel | Damage | Guard | On Hit | On Block |
|---|---|---|---|---|---|---|---|
| 10(23) | [11(1)~] | 35 | SA2 SA3 | 500x2 | LH | +5 (KD +69) | +2 |
- 45f charge time
Dee Jay creates one very large fireball that launches an opponent on hit. You can Drive Rush in to get a combo about 3/4 screen away. The size of the fireball means it cannot be low profiled like the other versions of this move.
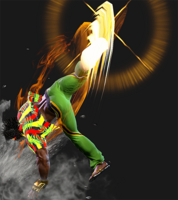
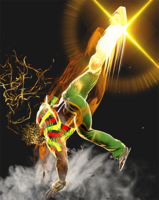
Jackknife Maximum ([2]8K)
| Startup | Active | Recovery | Cancel | Damage | Guard | On Hit | On Block |
|---|---|---|---|---|---|---|---|
| 23 | - | 22+6 land | - | - | - | - | - |
- 40f charge time; Airborne 6-45f
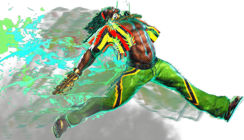
Dee Jay performs a feint that shoots him into the air, letting him quickly descend on his opponent with a jumping normal. Can act as a jump cancel of sorts. Very good for cross-up and safejump setups.
| Startup | Active | Recovery | Cancel | Damage | Guard | On Hit | On Block |
|---|---|---|---|---|---|---|---|
| 6 | 3(10)4 | 22+10 land | - | 600,500 (1100) | LH | KD +41 | -32 |
- Anti-Air Invuln: 1-5f; Airborne 4-44f
- 40f charge time; cannot hit crouching opponents; puts opponent into limited juggle state
| Startup | Active | Recovery | Cancel | Damage | Guard | On Hit | On Block |
|---|---|---|---|---|---|---|---|
| 6 | 4(8)5(8)4 | 17+15 land | - | 600,200,500 (1300) | LH | KD +42(+37) | -44 |
- Anti-Air Invuln: 1-9f; Airborne 4-51f
- 40f charge time; cannot hit crouching opponents; puts opponent into limited juggle state
| Startup | Active | Recovery | Cancel | Damage | Guard | On Hit | On Block |
|---|---|---|---|---|---|---|---|
| 6 | 6(7)3(9)3 | 29+15 land | - | 300x5 (1500) | LH | KD +23 | -55 |
- Full Invuln: 1-11f; Airborne 2-62f
- 40f charge time; only 1st hit connects on crouching opponents; puts opponent into limited juggle state
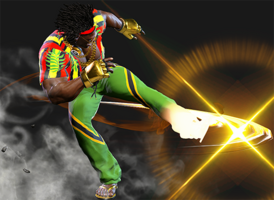
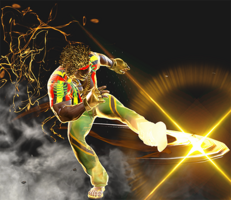
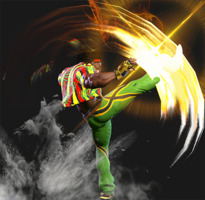
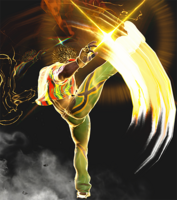
A flash kick style move with slightly shorter charge time, good combo potential, but a relatively small area of effect. It's easy to miss or even trade when anti-airing with this. The feint, however, is a very unique and widely applicable mix-up and pressure tool.
Rolling Sobat (236K)
| Startup | Active | Recovery | Cancel | Damage | Guard | On Hit | On Block |
|---|---|---|---|---|---|---|---|
| - | - | 26 | - | - | - | - | - |
Dee Jay performs a forward moving feint that can be easily canceled into for strike/throw setups.
| Startup | Active | Recovery | Cancel | Damage | Guard | On Hit | On Block |
|---|---|---|---|---|---|---|---|
| 12 | 3 | 23 | SA3 | 1000 | LH | KD +34 | -6(-4) |
This version has only one hit that applies a knockdown.
| Startup | Active | Recovery | Cancel | Damage | Guard | On Hit | On Block |
|---|---|---|---|---|---|---|---|
| 15 | 3(18)4 | 24 | SA3 (1st) | 700x2 (1400) | LH | +2 | -10 |
This version has two hits and keeps a grounded opponent standing. Both hits gain the additional frame advantage from Punish Counter, so you can use this as a far reaching whiff punish and link to a combo afterwards.
| Startup | Active | Recovery | Cancel | Damage | Guard | On Hit | On Block |
|---|---|---|---|---|---|---|---|
| 19 | 2(9)3 | 19 | SA2 SA3 (2nd) | 700,600 (1300) | LH | KD +39 | -2 |
This version has two hits, applies a knockdown, and makes Dee Jay leap forward to close gaps and go over some lows.
Machine Gun Uppercut (214P)
| Startup | Active | Recovery | Cancel | Damage | Guard | On Hit | On Block |
|---|---|---|---|---|---|---|---|
| 15 | 4 | 35 | SA3 | 1650 (800) | LH | KD +34 | -19 |
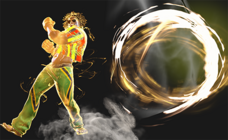
Slow but very high damaging special. Dee Jays highest damage combo ender by a good margin but is rather range dependent. Most commonly used from 2MP in combos but is difficult to use in whiff punishes due to the short range
| Startup | Active | Recovery | Cancel | Damage | Guard | On Hit | On Block |
|---|---|---|---|---|---|---|---|
| 22 | 4 | 35 | SA3 | 1900 (800) | LH | KD +32 | -19 |
A bit of a middle ground of the Light and Heavy versions. Very similar to the other meterless versions. Combos from 5HP and 4HK(1)
| Startup | Active | Recovery | Cancel | Damage | Guard | On Hit | On Block |
|---|---|---|---|---|---|---|---|
| 28 | 4 | 35 | SA3 | 2200 (800) | LH | KD +40 | -19 |
Tied for the slowest version of Machine Gun Uppercut but very rewarding to land. Only works from Punish Counter or Drive Rush 5HP and 4HK(1). Highest meterless combo ender but is very specific for moves that can actually combo into it
| Startup | Active | Recovery | Cancel | Damage | Guard | On Hit | On Block |
|---|---|---|---|---|---|---|---|
| 28 | 4 | 35 | SA2 SA3 | 2500 (800) | LH | HKD +23 | -19 |
A highly rewarding, range dependent combo tool. Similar to the HP version only combos from Punish Counter or Drive Rush 5HP or 4HK(1) but is massively rewarding to use in combos. Offers the highest base damage of any of his specials that cancel to his Level 2 or 3
Jus Cool (214K)
| Startup | Active | Recovery | Cancel | Damage | Guard | On Hit | On Block |
|---|---|---|---|---|---|---|---|
| 13 | - | 24 | - | - | - | - | - |
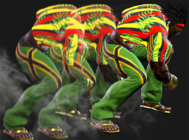
Dee Jay's new special added to Street Fighter 6, upon activation Dee Jay will perform a backstep with 5 followups which can be performed afterwards. The startup of the sway combined with the followups makes them fairly reactable and somewhat difficult to combo into, but in exchange all the followups are safe on block. Can be canceled into from Drive Rush to bait whiffs
| Startup | Active | Recovery | Cancel | Damage | Guard | On Hit | On Block |
|---|---|---|---|---|---|---|---|
| 8 | 5 | 36 | - | 500 | LH | KD +33 | -22 |
The Overdrive version of Jus Cool gains an initial launching hit at a blazing fast 8 frames startup, making it incredibly easy and rewarding to combo into if in range for the initial hit. Bear in mind the somewhat limited range can make it occasionally difficult to combo into it from further out. Additionally all the followups have different frame data compared to the meterless versions
Funky Slicer (214K~LK)
| Startup | Active | Recovery | Cancel | Damage | Guard | On Hit | On Block |
|---|---|---|---|---|---|---|---|
| 13+12 | 3 | 22(20) | SA3 | 800 | L | +2 | -3 |
| Startup | Active | Recovery | Cancel | Damage | Guard | On Hit | On Block |
|---|---|---|---|---|---|---|---|
| 25+9 | 3 | 19(24) | SA2 SA3 | 900 | L | +6 | -2 |
Waning Moon (214K~MK)
| Startup | Active | Recovery | Cancel | Damage | Guard | On Hit | On Block |
|---|---|---|---|---|---|---|---|
| 13+25 | 3 | 16 | - | 1000 | H | HKD +27(+28) | +1 |
Dee Jays only grounded overhead, but a pretty good one. On hit it scores a knockdown and on block it leaves Dee Jay at frame advantage, though outside of throw range, which can set up for a quick and easy shimmy against tech-happy opponents
| Startup | Active | Recovery | Cancel | Damage | Guard | On Hit | On Block |
|---|---|---|---|---|---|---|---|
| 25+19 | 5 | 17 | - | 1100 | H | +5(+7) | -4(-2) |
The OD version of Dee Jays overhead is noticeably faster, but is minus on block rather than plus. In exchange it gives a link to 2MP on hit rather than knocking down, making it much more rewarding when it hits but less so when its blocked
Maximum Strike (214K~HK)
| Startup | Active | Recovery | Cancel | Damage | Guard | On Hit | On Block |
|---|---|---|---|---|---|---|---|
| 13+15 | 5 | 25 | SA3 | 1000 | LH | KD +45 | -10 |
| Startup | Active | Recovery | Cancel | Damage | Guard | On Hit | On Block |
|---|---|---|---|---|---|---|---|
| 25+11 | 5 | 21 | SA2 SA3 | 1000 | LH | KD +55(+57) | -8 |
Juggling Dash/Sway (214K~6P~4P)
| Startup | Active | Recovery | Cancel | Damage | Guard | On Hit | On Block |
|---|---|---|---|---|---|---|---|
| 13 | - | 27 | - | - | - | - | - |
Projectile invincible during the dash
| Startup | Active | Recovery | Cancel | Damage | Guard | On Hit | On Block |
|---|---|---|---|---|---|---|---|
| 19 | - | 22 | - | - | - | KD +40 | -15 |
| Startup | Active | Recovery | Cancel | Damage | Guard | On Hit | On Block |
|---|---|---|---|---|---|---|---|
| 13+17 | - | 29 | - | - | - | - | - |
| Startup | Active | Recovery | Cancel | Damage | Guard | On Hit | On Block |
|---|---|---|---|---|---|---|---|
| 19+16 | - | 22 | - | - | - | KD +24 | -31 |
Speedy Maracas (22PP)
Super Arts
Level 1 Super (236236K)
| Startup | Active | Recovery | Cancel | Damage | Guard | On Hit | On Block |
|---|---|---|---|---|---|---|---|
| 7 | 4 | 45 | - | 1800 | LH | HKD +32 | -24 |
- Full Invuln: 1f (until freeze); Armor Break
- Counterhit: Crumple (HKD +54)
- Punish Counter: Crumple (HKD +67)
Level 2 Super (236236P)
| Startup | Active | Recovery | Cancel | Damage | Guard | On Hit | On Block |
|---|---|---|---|---|---|---|---|
| 12 | 5 | 46 | - | 300 (~2600) |
LH | +6 | -29 |
| Startup | Active | Recovery | Cancel | Damage | Guard | On Hit | On Block |
|---|---|---|---|---|---|---|---|
| 12 | 5 | 46 | - | 300 (1700~2800) |
LH | +6 | -29 |
| Startup | Active | Recovery | Cancel | Damage | Guard | On Hit | On Block |
|---|---|---|---|---|---|---|---|
| 12 | 5 | 46 | - | 200 (1700~3000) |
LH | +6 | -29 |
- Full Invuln: 1-16f; Armor Break
- Depletes ? Drive bars from opponent on hit
Dee Jay lunges forward with a knee strike that can chain into a series of followup attack. The initial activation is nearly identical for all versions of Lv.2 Super, with the HP starter doing only slightly less damage. This hit has great forward movement and invincibility. It's too slow for most reversal applications, but it's great at countering projectiles at mid-range (though it can be difficult to use against characters like Guile).
Regardless of which version is used, the followups can only come out on hit; each hit causes no additional damage scaling, so linking out of the +6 can still be useful. Dee Jay stops immediately if the initial attack whiffs or is blocked, unable to continue with followups.
The timing of the followup sequence starts easy with LP Super, then increases in difficulty with each button strength. This allows players to choose between a safe, consistent combo or a risky but rewarding finisher. This video is a good example for learning the button timing on the MP and HP followups, with audio and visual cues to help practice.
236236LP
| Startup | Active | Recovery | Cancel | Damage | Guard | On Hit | On Block |
|---|---|---|---|---|---|---|---|
| 11 | 4 | 25 | - | 175 | - | +6 (KD +41) | - |
- Timing window: 45f after 236236LP
| Startup | Active | Recovery | Cancel | Damage | Guard | On Hit | On Block |
|---|---|---|---|---|---|---|---|
| 10 | 3 | 23 | - | 175 | - | +6 | - |
- Timing window: ?f after 236236LP~LP
| Startup | Active | Recovery | Cancel | Damage | Guard | On Hit | On Block |
|---|---|---|---|---|---|---|---|
| 12 | 3 | 24 | - | 175 | - | +6 | - |
- Timing window: ?f after 236236LP~LP~MP
| Startup | Active | Recovery | Cancel | Damage | Guard | On Hit | On Block |
|---|---|---|---|---|---|---|---|
| 15 | 4 | 35 | - | 175 | - | +6 | - |
- Timing window: ?f after 236236LP~LP~MP~HP
| Startup | Active | Recovery | Cancel | Damage | Guard | On Hit | On Block |
|---|---|---|---|---|---|---|---|
| 17 | 3 | 47 | - | 200 | - | +6 | - |
- Timing window: ?f after 236236LP~LP~MP~HP~LK
| Startup | Active | Recovery | Cancel | Damage | Guard | On Hit | On Block |
|---|---|---|---|---|---|---|---|
| 18 | 3(5)3 | 79 | - | 500,900 | - | HKD +29 | - |
- Timing window: ?f after 236236LP~LP~MP~HP~LK~MK
The followups to LP Lv.2 Super require no particular rhythm on the hits; just mashing the buttons in sequence is enough to guarantee the full damage. Using this version guarantees a safe 2600 damage, which is only a reduction of 200 max damage from MP Super, or 400 from HP Super. There is no cinematic ender like on the MP and HP versions; as a result, Dee Jay cannot choose which direction to knock the opponent, and he cannot get oki after the knockdown unless he reaches the corner.
236236MP
| Startup | Active | Recovery | Cancel | Damage | Guard | On Hit | On Block |
|---|---|---|---|---|---|---|---|
| 11 | 4 | 25 | - | 100(200) | - | +6 | - |
- Timing window: 34f (11f Rhythm) after 236236MP
| Startup | Active | Recovery | Cancel | Damage | Guard | On Hit | On Block |
|---|---|---|---|---|---|---|---|
| 10 | 3 | 23 | - | 100(200) | - | +6 | - |
- Timing window: ?f (?f Rhythm) after 236236MP~LP
| Startup | Active | Recovery | Cancel | Damage | Guard | On Hit | On Block |
|---|---|---|---|---|---|---|---|
| 12 | 3 | 24 | - | 100(200) | - | +6 | - |
- Timing window: ?f (?f Rhythm) after 236236MP~LP~MP
| Startup | Active | Recovery | Cancel | Damage | Guard | On Hit | On Block |
|---|---|---|---|---|---|---|---|
| 15 | 4 | 35 | - | 100(200) | - | +6 | - |
- Timing window: ?f (?f Rhythm) after 236236MP~LP~MP~HP
| Startup | Active | Recovery | Cancel | Damage | Guard | On Hit | On Block |
|---|---|---|---|---|---|---|---|
| 17 | 3 | 47 | - | 100(200) | - | +6 | - |
- Timing window: ?f (?f Rhythm) after 236236MP~LP~MP~HP~LK
| Startup | Active | Recovery | Cancel | Damage | Guard | On Hit | On Block |
|---|---|---|---|---|---|---|---|
| 18 | 3(5)3 | 79(64) | - | 400,600(200x2) | - | HKD +19 (KD +46) | - |
- Timing window: ?f (?f Rhythm) after 236236MP~LP~MP~HP~LK~MK
| Startup | Active | Recovery | Cancel | Damage | Guard | On Hit | On Block |
|---|---|---|---|---|---|---|---|
| 1 | - | 181 total | - | 400,700 | - | HKD +24(+18) | - |
- Switches sides; requires perfect rhythm sequence to activate
| Startup | Active | Recovery | Cancel | Damage | Guard | On Hit | On Block |
|---|---|---|---|---|---|---|---|
| 1 | - | 151 total | - | 1100 | - | HKD +34(+37) | - |
- Remains on same side; requires perfect rhythm sequence to activate
The MP followups allow for higher damage than the LP version if the buttons are pressed in a particular rhythm. The key is to input each followup right as the previous one connects with the opponent. The hitstop of each hit is reduced compared to the LP Super, so the full animation will feel a bit faster overall. If you drop the rhythm on any hit, you cannot get the rhythm bonus on any further hits in the sequence.
If you managed to get the full rhythm of each hit, you can end with a cinematic finisher. HP switches sides, allowing Dee Jay to regain corner control and even gives oki if he was close to the wall. HK keeps Dee Jay on the same side and grants a Hard Knockdown, allowing for a forward dash into great oki. Choosing not to end in the cinematic hit after a full-rhythm connect will significantly reduce the Super's damage; it would actually be better to land a non-rhythm HK at the end. If done perfectly all the way to the end, Dee Jay will do 200 more damage than LP Super.
236236HP
| Startup | Active | Recovery | Cancel | Damage | Guard | On Hit | On Block |
|---|---|---|---|---|---|---|---|
| 11 | 4 | 25 | - | 100(200) | - | +6 (KD +41~42) | - |
- Timing window: 33f (9f Rhythm) after 236236HP
| Startup | Active | Recovery | Cancel | Damage | Guard | On Hit | On Block |
|---|---|---|---|---|---|---|---|
| 10 | 3 | 23 | - | 100(200) | - | +6 | - |
- Timing window: ?f (?f Rhythm) after 236236HP~LP
| Startup | Active | Recovery | Cancel | Damage | Guard | On Hit | On Block |
|---|---|---|---|---|---|---|---|
| 12 | 3 | 24 | - | 100(200) | - | +6 | - |
- Timing window: ?f (?f Rhythm) after 236236HP~LP~MP
| Startup | Active | Recovery | Cancel | Damage | Guard | On Hit | On Block |
|---|---|---|---|---|---|---|---|
| 15 | 4 | 35 | - | 100(250) | - | +6 | - |
- Timing window: ?f (?f Rhythm) after 236236HP~LP~MP~HP
| Startup | Active | Recovery | Cancel | Damage | Guard | On Hit | On Block |
|---|---|---|---|---|---|---|---|
| 17 | 3 | 47(46) | - | 100(250) | - | +6 | - |
- Timing window: ?f (?f Rhythm) after 236236HP~LP~MP~HP~LK
| Startup | Active | Recovery | Cancel | Damage | Guard | On Hit | On Block |
|---|---|---|---|---|---|---|---|
| 18 | 3(5)3 | 79(64) | - | 400,600(250x2) | - | HKD +19 (KD +46) | - |
- Timing window: ?f (?f Rhythm) after 236236HP~LP~MP~HP~LK~MK
| Startup | Active | Recovery | Cancel | Damage | Guard | On Hit | On Block |
|---|---|---|---|---|---|---|---|
| 1 | - | 181 total | - | 400,800 | - | HKD +24(+18) | - |
- Switches sides; requires perfect rhythm sequence to activate
| Startup | Active | Recovery | Cancel | Damage | Guard | On Hit | On Block |
|---|---|---|---|---|---|---|---|
| 1 | - | 151 total | - | 1200 | - | HKD +34(+37) | - |
- Remains on same side; requires perfect rhythm sequence to activate
The HP version is essentially the same as the MP version, but the timing is even harder. Each hit does even less hitstop than the MP version, causing the full animation to move more quickly with less of an impact on each strike. If done perfectly all the way to the end, Dee Jay will do 400 more damage than LP Super and 200 more damage than MP Super.
Level 3 Super (214214P)
| Startup | Active | Recovery | Cancel | Damage | Guard | On Hit | On Block |
|---|---|---|---|---|---|---|---|
| 9 | 5 | 48 | - | 4000 | LH | HKD +26 | -28 |
- Full Invuln: 1-?f; Armor Break
- Depletes 1.5 Drive bars from opponent on hit
- Cinematic time regenerates ~? Drive bars for Dee Jay
| Startup | Active | Recovery | Cancel | Damage | Guard | On Hit | On Block |
|---|---|---|---|---|---|---|---|
| 9 | 5 | 48 | - | 4500 | LH | HKD +22 | -28 |
- Full Invuln: 1-?f; Armor Break
- Depletes 2 Drive bars from opponent on hit
- Cinematic time regenerates ~? Drive bars for Dee Jay
Taunts
Neutral Taunt (5PPPKKK)
| Startup | Active | Recovery | Cancel | Damage | Guard | On Hit | On Block |
|---|---|---|---|---|---|---|---|
| 264 (total) | - | - | - | - | - | - | - |
Forward Taunt (6PPPKKK)
| Startup | Active | Recovery | Cancel | Damage | Guard | On Hit | On Block |
|---|---|---|---|---|---|---|---|
| 550 (total) | - | - | - | - | - | - | - |
Back Taunt (4PPPKKK)
| Startup | Active | Recovery | Cancel | Damage | Guard | On Hit | On Block |
|---|---|---|---|---|---|---|---|
| 429 (total) | - | - | - | - | - | - | - |


