Neutral
Midrange/Close
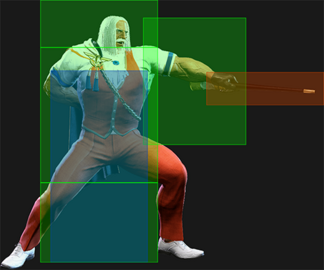
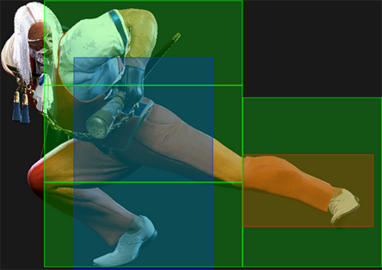
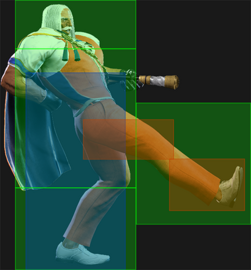
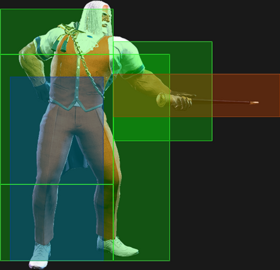
JP's has a lot of great tools for the midrange thanks to good range on most of his pokes and slight disjoints. Your main buttons at this range are 5MP, 5MK, 2MK, 5HP, j.MP, and more situationally 2MP, 4MP and 5HK. His fireballs, and especially his fireballs fakes are also situational tools to force your opponent to commit to more unsafe options like jumping. As some of them lack special cancels, you will have to
- 5MP
- Your first and easiest neutral poke to use, sporting great range and some disjoint. It's especially handy against raw Drive Rushes if you can react in time, but unlike his other pokes you cannot convert any catches into a combo. Once used enough, your opponent will likely try to get around it using either a jump, a Drive Impact, or counterpoke it with one of their own button. For these reasons, this button shouldn't be abused even if it has allowed you to get some stray hits. You should alternate it with another, quicker and cancelable button such as 2MP or 5LP.
- 2MK
- A great low poke, an invaluable tool when opponents try to reposition to deal with JP's other options, walk away from a portal or simply try to shimmy you, as it moving JP forward gives it deceptive range. All of these traits are amplified when used out of Drive Rush, and is one of your core buttons to use out of Raw DR, as it grants great conversions on hit while also giving plus frames on block. It can also be used as a punish tool due to outranging a lot of JP's other buttons of the same speed.
- 5MK
- Used to fish for stray hits such as an opponent advancing or using forward travelling moves, or for forcing your way in with a Drive Rush that you buffer behind it. You can also buffer OD Triglav, as it will combo on hit and be plus on block, but be very careful of opponent recognizing it as a Drive Impact point. Good range and being special-cancelable makes it one of your safest pokes, but more vulnerable to counterpoking itself.
- 5HP
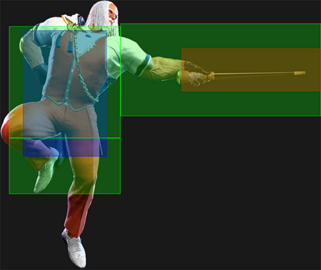
- Big and committal poke, as it has less range than 5MP, but is cancelable. Amazing for whiff punishes as it grants immense frame advantage on Punish Counter allowing you to convert no matter the spacing. On block, you can try to continue pressure by canceling into L Torbalan which frame traps anything the opponent might try after blocking, which then allows you to stagger with it. Crucially, this cancel is safe to Drive Impact (though you still have to worry about reversals). You can also mix with the M and H versions, or even try Embrace, but they can all be jumped out of if the opponent is ready, requiring conditioning with L Torbalan to dissuade. Overall JP's most rewarding move to connect, either on hit or block, but since the hurtbox comes out before the hitbox, you will have to be careful to not stick it out into your opponent's active frames.
- 8j.MP
- Interesting and situational poke that has nearly as much range as 5MP, but isn't weak to Drive Impact and has great frame advantage, able to link at worst into 5MP, and at best into cancelable normals like 5HP. Use it to keep an air presence if your opponent is too jump happy, or to counterpoke after neutral jumping a fireball and the opponent is attempting to approach behind it. Keep in mind that the staff is NOT disjointed and can be anti-aired. It also completely whiffs on crouching opponent, though it will be hard for your opponent to capitalize on it.
Fullscreen
JP's best position, as you can setup your zoning game using Torbalan (236K), Departure (214P) and Triglav (22P). Here, you will want to rotate your options to prevent your opponent from approaching while slowly chipping at their drive gauge and punishing any of their mistake trying to get around your moves. If you can eventually force them into Burnout, JP's zoning goes from annoying to terrifying, as you can inflict massive amount of chip damage while your opponent's options to go around your special moves get greatly reducing due to losing access to things like Drive Rushes.
Torbalan (236K)
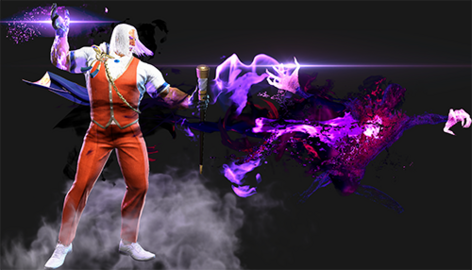
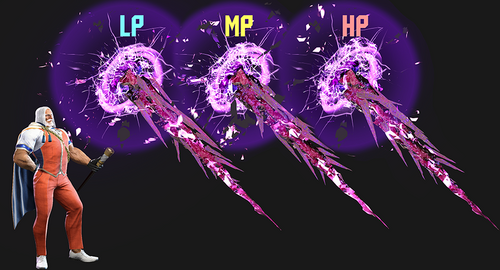
JP's projectiles are unique in different ways. First off, the MK and HK version are unique cases of projectiles that are Overhead and Lows. While the mixup between the two becomes very reactable when used at fullscreen, they still present unique benefits. First, the MK version can disrupt opponents relying on down charge anti-airs by forcing them to temporarily stand up, potentially letting you getting away with a jump-in, especially when combined with Departure's teleport. The HK version can scare the opponent from walking back, useful if you're going for a more close-range approach. What must also be taken into account is the mental stack, as your opponent being too focused on a Portal on top of them, or trying to block Spikes might default to crouch block when seeing any special from JP. While it won't happen all the time, even small chunks of health can add up as your opponent will be forced to block multiple Ghosts when trying to close the gap.
Another unique aspect of JP's Ghosts is their lack of hitbox when traveling, only gaining one once they are "activated" by being close to your opponent. What that means is that opponents moving fast enough, like through a Drive Rush or using special moves that, while lacking true projectile invulnerability, can go fast enough to go past the ghost before it can finish its activation. This drawback forces you to play more carefully with opponents that have easy access to such tools and know the matchup, which means you might have to substitute some Ghosts for more Spikes, trying to hit them during their travels.
Once out, opponents will either try to walk and block (or walk and Drive Parry), jump over them, or use a move that can get around them.
- If they choose to block, you can use the plus frames granted by the attack connecting late to setup your next move. A common follow-up to a blocked Torbalan is using a Spike to force your opponent to respect the fact you are plus and punishing them for trying actions such as a Drive Rush or simply dashing. If it hits, you will be rewarded with a great knockdown that allows you to send another Ghost or setup a Portal safely. If blocked, this puts you at a small frame disadvantage, but depending on distance you might still have a zoning advantage allowing you to go for another special move (matchup dependent, as you might have to respect fast projectiles such as OD Sonic Boom or OD Sandblast). Once the threat of the Spike is on your opponent's mind though, you can start abusing their respect to setup stronger, more advantageous situations such as another projectile (repeating the same situation), or straight up setting up a Portal which is a quasi Neutral win (more on that later).
- Your opponent's next option is jumping over them. This negates the Drive Bar damage and even allows them to gain some space if they decide to jump forward. In those situations, you have to be ready to either anti-air them with your longest range options, typically 5HK and 6HK, or catch them with a well placed Spike, notably the MP version which hits at the distance opponents might usually end up in after a jump forward. This means that you will have to alternate between HP Spike to enforce a fullscreen lockdown, and MP Spike to punish opponents closing the gap through means that would usually be safe thanks to the distance.
- If your opponents attempt a move that would close the distance while going through Torbalan, your safest option is to simply block it, which is safe but depending on the move, might put you in a disadvantageous position (Ken's Dragonlash or Lily's Condor Spire), but for others, might either give you a mixup or a full punish (such as Ryu's Tatsumaki), so evaluate the risk/reward carefully as playing patient might be the most rewarding answer. Another, riskier solution is using Amnesia to counter the move if you can see it coming (or use the OD version to avoid the first vulnerable frames). This can net you good punishes, though getting a 22 input on reaction can be hard and should be reserved for when you have a read. Hitting the move while it's traveling is another option, especially important against Drive Rushes. 2LP is the fastest but stubbiest, while 5LP has more range at the cost of 2 more frames of startup.
Fake Torbalan (236[K])
Unique tools in their own rights, you can hold the button on any version of Torbalan to fake the projectile, while having the same visual and audio cues as a real one. With a much shorter recovery time while still clearing single-hit projectiles, these are amazing tools for mind games, fireball wars and some pressure sequences. At long range, they can bait the opponent into Drive Parrying nothing, wasting their precious Drive Bar while making them hesitate to parry real ones. At mid-range, they can bait jumps, setting up powerful post anti-air sequence if you get a 2HP.
Keep in mind that a lot of counters to Torbalan can potentially punish you out of the recovery of a fake one, remain careful when using them.
Triglav (22P)
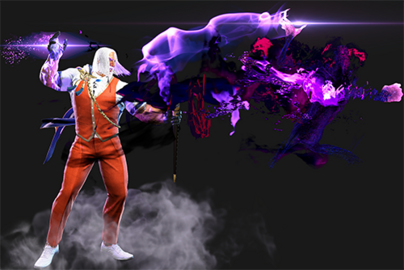
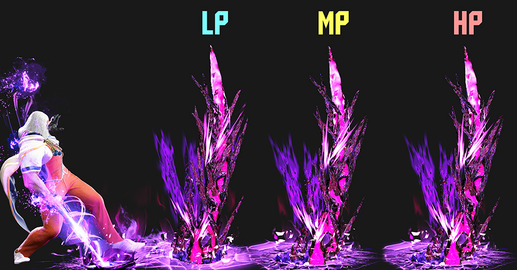
The second part of JP's zoning game, Triglav will directly summon a spike at a fixed location. Triglav is used to harass an opponent attempting actions at long range (such as a fireball), slowly chip at their Drive Bar (as Burnout is one of JP's best win conditions), punish careless approaches and opponents not respecting JP's zoning as they cover a lot of Torbalan's blind spots (horizontally moving specials like Tatsu), and using it after a blocked Projectile will counter-hit almost anything thanks to the tight gap. Using Spikes along his other specials can make JP's fullscreen gameplan suffocating, especially with the right reads on your side.
You will want to mostly mix-up between the HP and the MP version. The HP version is good when you've thrown your opponent on the other side of the screen and are locking them down with Projectiles and potentially a Portal. It is also an amazing, almost zero-risk meaty on their wakeup after combos, as it will counter-hit anything they could try at this distance (the only two true counters are JP and Cammy's SA3, as they go fullscreen). The MP version is good when the opponent starts trying to avoid the HP one, such as when attempting another HP Spike after the first one, as they can jump, dash or Drive Rush of the way. Sprinkle some Projectiles (and fake ones) once the opponent is scared to commit to anything big, and you have 75% of your zoning gameplan.
DO NOT make Triglav your only way of zoning, as your opponent might attempt a read and either jump over the HP version, or use the opportunity of a whiffed MP one to Drive Rush at you. They could also try to Perfect Parry them, which gives an almost guaranteed punish. If your opponent blocks it, you are only at -2, and depending on the distance, you might get away with another Spike of the same strength, or try one closer to you if you read your opponent using the opportunity to approach.
Departure (214P)
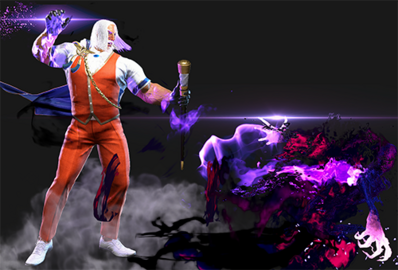
The last piece of your zoning plan, Departure summons a portal at a fixed distance depending on the button used. Getting a portal setup is your end goal when zoning your opponent, as it severly limits their options. Once it's out, using Drive Parry becomes very risky for your opponent, as you can just teleport to them and throw them out of it. This in turns allows you to do even more damage to their Drive Gauge. If they attempt tap parries only when they see your projectiles come out, you can make them waste it by doing fake Torbalans or using the wrong Spike. Before the spike triggers JP has time to do...
- 236K x2
- 236K and 22P in any order
- 236[K] x3
- 236[K] x2 and teleport to departure
- 22P x2
As the timer ticks down, the opponent is effectively glued in place unless they want to risk eating the followup. This can give you time to reposition.
All of this sounds awesome, but you have to remember that Departure takes 50 frames to set up, which means most setups in neutrals are easily punishable, sometimes even from fullscreen. Instead, you have to abuse your opponent's respect, or create thigh situations where your frame disadvantage will be minimal. An opponent overwhelmed by projectiles will have a harder time checking a setup, same thing if you do it after a knockdown (Spikes, especially, give a great knockdown for setups). You can also use a blocked followup to setup another portal immediatly after. This is still disadvantageous, but you can force your opponent to respect after a portal hits by using Triglav.
Please do not try to use a manuel trigger to check an opponent's Drive Rush, it usually won't work.
OD Departure (214pP)
Even outside of Okizeme setup, OD Departure is an amazing use of meter in neutral and in zoning, as the 10 shorter frames of recovery, on top of controling two times more space, makes it an amazing option to force a neutral win. Using it after catching someone with Spikes leaves you plus, making in turn further spikes far harder to disrespect.
Offense
Getting in
Although JP is slower than the average character, you still have good tool to close the gap and begin close-range pressure. Drive Rush is an universal way of forcing plus frame and a mixup on your opponent, and two of your best buttons to use for this are 2MK and 5HP
- 2MK hits low, has great range thanks to moving forward along with DR's momentum, gives a combo on hit if you can catch them not crouching, and being +1 on block, immediately allows you to pressure your opponent with frame traps that will be detailed below.
- 5HP is another good tool out of Drive Rush, as although it is slower than 5HP and can't catch opponents walking back, it makes up for it with a disjoint, even greater range, special cancelability which allows you to counter Drive Impact that might stuff 2MK and use the blockstun to create mixups that can't be mashed out of, forcing your opponent to guess or reversal, opening up the door to stagger pressure and baiting reversals. It also gives the same frame advantage on hit/block (+7/+1), allowing you to go for the same pressure sequences.
Outside of that, using Departure's teleport is another unique way to get in your opponent's face. It is risky to attempt raw in neutral, as your opponent could easily anti-air it with good reactions, but it becomes far more potent if your opponent is focused on other thing (blocking Torbalan or doing setups like Juri getting stocks), or you teleport after they committed to an action. You might not always get a punish, but anti-airing you will become harder and opponents might simply choose to block the jump-in, giving you high frame advantage.
Strike/Throw
JP is blessed with the ability to frame trap from almost any of his normals AND get good reward off of them thanks to Departure setups, making in turn his stagger pressure all the more terrifying.
- First: Light normals, that you are likely to use after a Drive Rush due to being +1. 2LP chains gives repeated frame traps on block while being safe to Drive Impact, and you can get good conversions on hit thanks to DR cancels. Once you are pushed out of their range, you can attempt a last frame trap with LP Stribog (Swipe). This is theoretically mashable up close due to a 4-frames gap, but if done from a distance after pushing the opponent away with two or three lights, you can outrange their fastest normals and beat them with the disjoint. Unsafe up-close (-10), but if you push your opponent away with three lights punishes becomes a lot harder. This is also VERY vulnerable to Drive Impact, as such even if you (usually) don't get punished for it, avoid autopiloting or your opponent will DI each time they see three lights being blocked.
- Mediums: 2MP and 5MK are both mediums but have significant blockstun differences that their frame traps will vary. Off of 2MP, your only true frame trap is still LP Stribog. But 5MK's blockstun allow the MP version to be used instead, which is both more rewarding on hit (giving true OD Departure setups in the corner rather than fake ones), and is a bit safer on block (though still punishable).
5HK - +2 on block allowing for several frame traps
- 2LP 2f gap
- 5LK 3f gap
- 6f moves 4f gap which allows for trades but will generally not combo
- 5LP or 2LK
Blockstrings
- Drive Rush(DR) 2MK
- throw: 4f gap
- 2LP: 3f gap
- on hit; DR 2MK > 2MP > 236MP
This is a great option in in neutral as 2MK hits incredibly far. As well due to it's low recovery it can recover in time to punish Drive impact. This option is great as it establishes threat and forces the opponent to look out for it. the more they respect it the more likely they are to get hit by bigger follow-ups down the line such as DR 6MK.
- 5MK
- DR 2MK: 2f gap, then gives DR 2MK follow up options if blocked
- DR 6MK: leaves a pretty big gap but good for opponents who start to respect DR 2MK
- DR throw: Good to make the opponent want to mash more during blockstrings.
- 214K,236MK,236HK,236P: multiple follow-ups with all but the command grab losing to Drive impact. Mash from opponent also can beat many of these options
5MK hits fairly far and is special cancelable, however the blockstun and recovery makes most special cancels beside Drive Rush susceptible to Drive Impact. This means Drive rush is the safest option after an opponent blocks 5MK
Okizeme and Mixups
Knockdown Advantage: all scenarios assume that opponent will Back Rise midscreen when possible, unless otherwise stated
| Knockdown | KD Adv. | Oki/Notes |
|---|---|---|
| Forward Throw | +24 |
|
| Back Throw | +36 |
|
| Drive Impact (No Crumple) |
+35 | ? |
| Drive Reversal | +23 | ? |
| 2HK | HKD +27 HKD +48 (CH/PC) +34~36 (Juggle) |
|
| 3HP | HKD +17 HKD +39 (CH/PC) |
|
| SA1 - 236236P (Chornobog) |
+22~32 | ? |
| SA3/CA - 236236K (Interdiction) |
HKD +44 | ? |
236LP
Midscreen JP doesn't get too much however he can attempt to setup 214PP but will be slightly minus at -2 and -12 with 214P. This can still be a great option as the distance provided can make it easier for you to stop your opponent from approaching.
In the corner JP can start drive rush pressure. If you are having difficulties timing okizeme you have a few options
dash > DR 2MK can help auto time it
2MK(whiff) > 5HK +5 on block and +10 on hit
236MP
Midscreen 214PP and 214P are generally the options 214PP is +2 with 214P being -8. Good option as the distance and slight frame advantage can make it difficult for opponent to approach.
In the corner JP gets an auto timed j.HK that will safe jump the opponent.
With 214PP JP can go into +2 Departure setups which is listed below.
Drive rush pressure is also possible and dash > DR 2MK works as a solid general option
Setups
+2~+4 corner Departure setups
Can be done by some sample combos below in the corner only
- DI > 6HK > 236MP > 5HP > 236KK > 22P > 214P
- 236HP > 5HP > 236KK > 22P > 214P
- throw > spike trigger > 5HP > 236KK > 22P > 214P
- 236MP > 214PP
- etc
After 22P JP can go into level 1 or 236P > 236236K. Video on the setups can be found here: https://youtu.be/q1Dc_22Ea3Y
| Option | Combo | Oki/Notes |
|---|---|---|
| Throw | Throw, 214P(auto), 5HP > 236KK, 22P | Allows for loopable oki on hit |
| 2LK > 2LP > 236LP | 2LK, 2LP > 236LP, 214P(auto), 5HP > 236KK, 22P | Loopable, allows for JP to be fairly plus if done correctly |
| Backdash, 5MK > 236LP, DR~5HK(+6) or DR~2MK(+1) | Backdash, 5MK > 236LP, 214P(auto), 5HP > 236KK, 22P | Backdash to bait a throw tech |
| 4MP~MP > 236LP, 6MK or DR pressure | 4MP~MP > 236LP, 214P(auto), 5HP > 236KK, 22P | Allows for JP to be plus enough to set up 6MK while adding multiple small frame traps |
| (214PP) 2LK, 2LP, 2LP > Spike, 6MK | dl.6HK > 236MP, 5HP > 236KK, 22P | Loopable, allows for an overhead mixup to be thrown in |
vs. Burnout
Drive Rush
When canceling a normal into Drive Rush on block and following it up with another normal, there may be an interruptible gap in the blockstring. The following table lists these blockstring gaps when performed at the fastest possible timing.
| Gap Value | Meaning |
|---|---|
| 0 | True Blockstring (no gap) if input with fastest button timing; can still lose to Drive Reversal |
| 1 to 4 | Small blockstring gap; opponent can interrupt with an invincible reversal; a 4f gap can trade with 4f normal attack |
| 5+ | Large blockstring gap; opponent can interrupt without an invincible attack |
| 2LP | 5LK | 5LP/2LK | 2MP | 5MK/4MP | 2MK/2HP | 2HK | 6HK | 5MP/5HP/5HK | 3HP | 6MK | |
|---|---|---|---|---|---|---|---|---|---|---|---|
| 5LP~DR | 4 | 5 | 6 | 7 | 8 | 9 | 10 | 11 | 12 | 16 | 22 |
| 5HP~DR | 0 | 0 | 0 | 0 | 0 | 0 | 0 | 0 | 1 | 5 | 11 |
| 5LK~DR | 3 | 4 | 5 | 6 | 7 | 8 | 9 | 10 | 11 | 15 | 21 |
| 5MK~DR | 0 | 0 | 0 | 0 | 1 | 2 | 3 | 4 | 5 | 9 | 15 |
| 2LP~DR | 3 | 4 | 5 | 6 | 7 | 8 | 9 | 10 | 11 | 15 | 21 |
| 2MP~DR | 1 | 2 | 3 | 4 | 5 | 6 | 7 | 8 | 9 | 13 | 19 |
| 2HP~DR | 0 | 0 | 0 | 0 | 0 | 0 | 0 | 1 | 2 | 6 | 12 |
| 4MP~DR | 0 | 0 | 0 | 0 | 0 | 1 | 2 | 3 | 4 | 8 | 14 |
| 6HK(2)~DR | 0 | 0 | 0 | 0 | 0 | 0 | 0 | 0 | 0 | 4 | 10 |
| 4MP~MP~DR | 0 | 0 | 0 | 0 | 1 | 2 | 3 | 4 | 5 | 9 | 15 |
| 5HK~HP~DR | 0 | 0 | 0 | 0 | 0 | 0 | 1 | 2 | 3 | 7 | 13 |
The following table lists the general BnB combo routes when canceling a button into Drive Rush on hit.
| Starter | Hit Adv. | Combo Route |
|---|---|---|
| 5LP~DR | +6 | ? |
| 5LK~DR | ||
| 2LP~DR | ||
| 5MK~DR | +11 | ? |
| 2MP~DR | ||
| 4MP~DR | +14 | ? |
| 5HK~HP~DR | +15 | ? |
| 4MP~MP~DR | +16 | ? |
| 5HP~DR | +17 | ? |
| 2HP~DR | ||
| 6HK(2)~DR | Free Juggle | ? |
Defense
Abare
- 2LP
JP's fastest option but the range isn't great.
- 5LP
Decent option as the range is further than it seems while still having 6f startup
- 22K
Can actually be useful if you know there will be 3f gaps during blockstrings
Reversals
- 22KK
- 236236P(Level 1)
Anti-Airs
- 2HP
- 6HK
- Air Throw
Anti-Projectile
- 22P
- 236KK
- 214KK
- 236236K (SA3)
OD Amnesia (22KK)
- TO-DO: Video example to the right of parry triggers
Infamous tool accessible to JP. When triggered JP will go into 17 frames of recovery while the opponent will go through their remaining active and recovery. This means certain moves that his Amnesia can be punishable while others still plus. The general rule of thumb is moves with 16f of recovery or more will be minus or punishable while anything shorter recovery
- table here
| opponent move recovery | Options |
|---|---|
| 12f recovery or less | Opponent is always plus and if JP is cornered they can enforce some options to threaten past the bombs such as throw, Drive impact, supers, etc. However JP can threaten another layer of RPS by using his level 1 as the bombs will often explode after leaving him safe |
| 17f recovery | ranges from -2~+2 depending on how many active frames left |
| 21f recovery | If JP is cornered he can usually punish with jab (2LP or 5LP) |
| 23f recovery | Almost always punished by 2MP when cornered |
| 29f+ recovery | Can be punished midscreen by several moves such as 5MP or walk up 2MK |
Will use JP's moves to detail this with 5LP, throw, 5HK meaty & non-meaty, and 3HP
- 5LP has 6f startup, 3 active, 10 recovery
- Throw has 5f startup, 3 active, 23 recovery
- 5HK has 12 startup, 4 active, and 17 recovery
- Will do a meaty setup which is throw > DR 5HK making it so 5HK hits on the 3rd active frame
- 3HP has 16 startup, 3 active, and 31 recovery
So for 5LP the opponent triggers this on their first active frame so active frame 1 is frame 1 of parry while the last active frame (3f) is frame 2 of parry recovery. Now opponent will go into the 10 frames of recovery frames.
Math wise you would say remain active + recovery - 17 = advantage. 2 + 10 -17 = -5 however JP can block. This just means it's the opponent's turn still if they are aware
| Move Parried | meaty | first active frame |
active | remaining active |
recovery | equation | result |
|---|---|---|---|---|---|---|---|
| 5LP | no | 1 | 3 | 2 | 10 | 2 + 10 -17 | -5 |
| throw | no | 1 | 3 | 2 | 23 | 2 + 23 -17 | +8 |
| 5HK | no | 1 | 4 | 3 | 17 | 3 + 17 -17 | +3 |
| 5HK (throw > DR 5HK) | yes | 3 | 4 | 1 | 17 | 1 + 17 -17 | +1 |
| 3HP | no | 1 | 3 | 2 | 31 | 2 + 31 -17 | +16 |
Fighting vs. JP
Dealing with Zoning
Some characters can drive rush past ghosts(236K).
Need to know some of JP's setups as often times he can be minus if not done correctly. For instance 236MK/HK > 214HP on block is -21 fullscreen which gives you plenty of time to approach JP
OD Amnesia Counter-play
When JP is cornered use low recovery moves so you can maintain frame advantage. To have a better understanding on how it works please visit this section About OD Amnesia. If a low recovery move was preformed to trigger the parry The options from there are varied.
- Backdash > drive parry
- Best if done after a safe jump as you will be extremely plus and very safe
- Throw
- If it hits most animations will go beyond explosion but is character specific.
- Jab > throw
- If it hits all animations should go beyond explosion with throw tech sometimes avoiding the 2nd bomb.
- (Jab) > (Jab) > DI
- DI can be done immediately or after jabs with each having it's own downside. Raw DI losing to throw with jab > DI being much more reactable.
Defending vs Pressure
TO-DO
