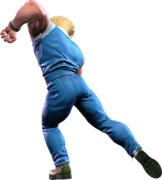
| Early game information
This game is relatively new, and its pages are still being written. Some information may be mildly inaccurate or missing altogether. You can join the SF6 Resource Hub for more info on editing and other ways you can potentially help with this resource. |
Introduction
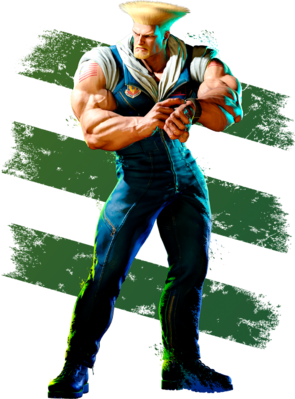
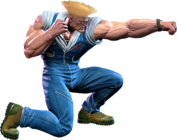
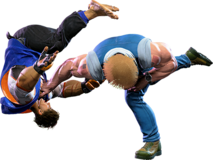
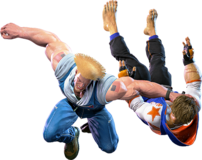
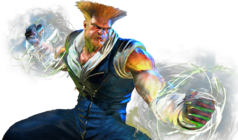
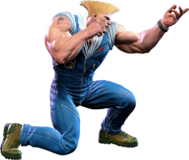
A US Air Force pilot who fights for his country, Guile succeeded in dismantling Shadaloo and avenging his friend Charlie. He enjoys living the family man life, but new battlefields await him.
Ever since his debut in 1991, Guile has been defined by his incredible projectile zoning and strong midrange presence. As the archetypal projectile zoner, Guile specializes in pestering the opponent with a barrage of projectiles before analyzing their next move and punishing accordingly.
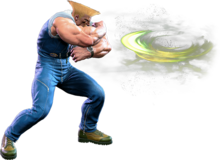
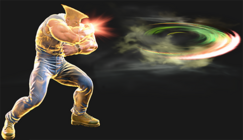
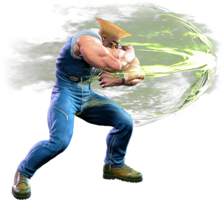
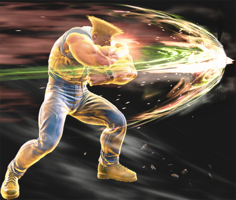
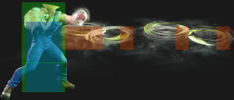
The defining move for Guile is Sonic Boom. Easily the best projectile in the game, Sonic Boom does everything a fireball should do and more. It can be fired at variable speeds, can be used as a shield to protect Guile as he moves forward, has incredibly fast recovery, and even comes with a unique just frame version for better advantage on hit and damage. Guile's gameplan revolves entirely around throwing out Sonic Boom and observing what the opponent does in response. If they eat it, throw another one. If they block it, throw another one to chip away at their Drive Gauge. Opponents who begin using system mechanics like jumping or Drive Impact to get around Sonic Boom are where the games begin for Guile, as his strategy evolves into a classic fireball/uppercut gameplan.
Opponents who leap over Sonic Boom can be met with Flash Kick, a massive ascending uppercut with a huge hitbox. Opponents who choose to be patient and come close to Guile must contend with his incredible 5MK, 2MK, and 5HP. Guile also has a huge selection of excellent command normals, such as 4HP, 4MK and 6HK, which give him great brawling potential. Guile can also use system mechanics well, with a fast overhead and good throw reward making his Drive Rush quite strong. Opponents who try to counterzone Guile with their own fireballs give him the ability to use Sonic Blade to enhance Sonic Boom and turn it into a fireball-eating machine. Simply put, there is no real situation where Guile is at explicit disadvantage, and his strong kit makes him very scary at fullscreen and midscreen. Guile is the undisputed master of fireball wars and punishing jumpins, making him a complete wall to overcome for any opponent.
Guile has no major weaknesses that affect his gameplan, but instead must deal with several important quirks. First, Guile is a charge character, meaning he must always commit to certain actions if he wants to perform them. Flash Kick is an incredible anti-air for sure, but it requires charge and thus is impossible to be performed on reaction akin to Ryu's Shoryuken. However, Guile's 2HP gets the job done just as well, with far less reward as a tradeoff. Similarly, Guile's gameplan is highly consistent and variable, but lacks any major gimmicks to challenge wary opponents. While at low levels Guile is capable of steamrolling impatient opponents who don't understand him, high level Guiles must be very patient and equipped with nerves of steel. Lastly, Guile has some of the longest and highest execution (though rarely necessary) optimal combos in the game. Still, none of these quirks dramatically affect Guile in any negative way, making him into a very strong character overall. If you love projectile zoning, value versatility, and want a character who can punish risky plays without peer, sharpen your mind to a sonic edge with Guile.
| Pick if you like: | Avoid if you dislike: |
|---|---|
|
|
Classic & Modern Versions Comparison
| Missing Normals |
|
|---|---|
| Missing Command Normals |
|
| Shortcut-Only Specials |
|
| Miscellaneous Changes |
|
| Guile | |
|---|---|
| Vitals | |
| Life Points | 10000 |
| Ground Movement | |
| Forward Walk Speed | 0.043 |
| Backward Walk Speed | 0.032 |
| Forward Dash Speed | 21 |
| Backward Dash Speed | 23 |
| Forward Dash Distance | 1.567 |
| Backward Dash Distance | 0.74 |
| Drive Rush Min. Distance (Throw) | 0.805 |
| Drive Rush Min. Distance (Block) | 1.898 |
| Drive Rush Max Distance | 3.461 |
| Jumping | |
| Jump Speed | 4+38+3 |
| Jump Apex | 2.115 |
| Forward Jump Distance | 1.90 |
| Backward Jump Distance | 1.52 |
| Throws | |
| Throw Range | 0.8 |
| Throw Hurtbox | 0.33 |
| Frame Data Glossary - SF6 | |
|---|---|
| Hitbox Images |
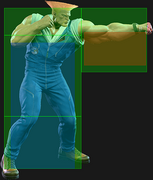
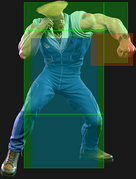
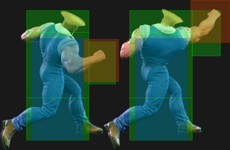
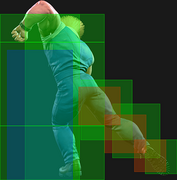
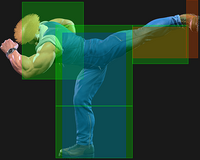
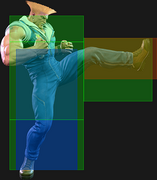
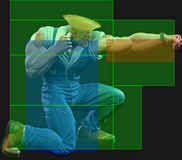
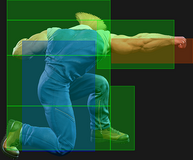
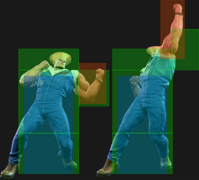
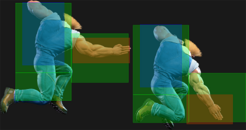
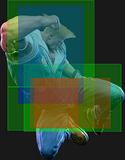
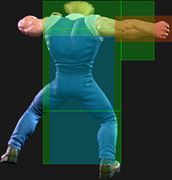
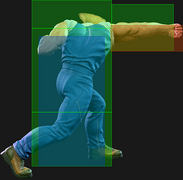
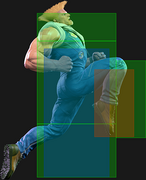
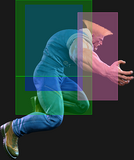
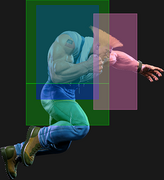
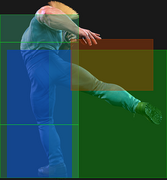
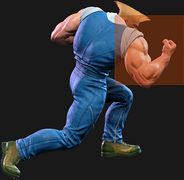
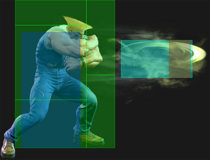
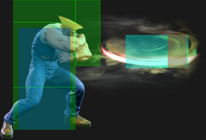
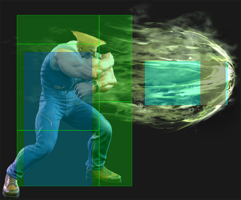
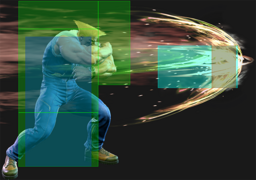
🟥 (Red): Attack hitbox
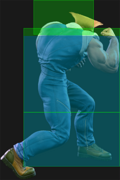
🟩 (Green): Vulnerable hurtbox that can be hit by strikes/projectiles
🟦 (Blue): Vulnerable throw hurtbox
|
| Active |
How many frames a move remains active (can hurt opponents) for. For projectiles with a maximum active period, a value may be listed in [brackets], but this number is not factored into the move's total frame count.
|
| Cancel |
Available options for canceling one move into another move.
|
| Cancel Hitconfirm Windows |
Hitconfirm reaction windows into Special Moves, Target Combos, and Super Arts.
|
| Damage |
Attack damage on hit. Multi-hit moves may have the damage listed for individual hits as X,Y (or sometimes X*Y). Sometimes a move's damage changes depending on which active frame connects, or on cinematic vs. non-cinematic hits; in this case, multiple values may be listed, and it will be clarified in the move description.
|
| Damage Scaling |
Some moves cause additional damage scaling in combos. Refer to Game Data page for a more detailed breakdown. Scaling Types:
|
| Drive Rush Cancel Advantage |
Refers to the frame advantage when canceling a normal, command normal, or Target Combo into Drive Rush on hit or block (abbreviated as DRC for Drive Rush Cancel). This is calculated at the moment a follow-up attack can be input, not at the moment the character can block or perform movement options. An attack that with DRC +8 on Hit can link into an 8-frame attack, and DRC +4 on Block can create a true blockstring into a 4-frame attack. Note that any DRC on Block worse than +4 cannot form a true blockstring, allowing the opponent to interrupt with an invincible reversal. Most light normals are slightly negative after a DRC on block, meaning the opponent can mash their fastest normal to guarantee a counter-hit (though this requires fast reactions). The attacking character could punish this with Light > DRC into an immediate invincible attack, but this would be an incredibly expensive and high-risk gambit.
|
| Forced Knockdown |
Most airborne command normals, special moves, and Super Arts put the user in a "Forced Knockdown" state. While in this state, an air knockdown will occur when being hit by any attack, even if it would otherwise cause an air reset. As an example, Ryu's 2HP causes an air reset when used as an anti-air. Against a move like Cammy's Hooligan Combination, however, the 2HP puts her into an air knockdown state. This allows Ryu to successfully cancel 2HP into Shoryuken for a juggle, similar to how a Drive Impact wall splat works. Taking advantage of Forced Knockdown juggles is important for dealing with moves like Ken's Dragonlash, Dhalsim's Air Teleport, or Kimberly's 6HK~Hop sequence. Moves that already cause an air knockdown, like most j.MP air-to-airs, will not display the "Forced Knockdown" message.
|
| Guard |
Refers to the direction an attack must be blocked. L is for Low attacks (must be blocked crouching), H is for High attacks/overheads (must be blocked standing), LH is for attacks that can be blocked crouching or standing. T is for Throw attacks which cannot be blocked.
|
| Juggles |
When a character is put into an Air Knockdown state, it is often possible to follow up with a Juggle attack before they hit the ground. In the simplest terms, there are 2 main juggle states:
The following is a more detailed overview of the SF6 juggle system:
Juggle Start (JS): When starting a juggle, the opponent's JC will be set to this value. May be different vs. standing and airborne opponents.
Juggle Increase (JI): When opponent is already in a juggle state, attacks will increase the opponent's JC by this amount.
Juggle Limit (JL): Property of an attack hitbox that determines whether it connects on a juggled opponent. The JL must be ≥ the opponent's JC to hit successfully.
An example to tie everything together:
Drive Rush notes:
|
| On Hit/Block |
These are frame advantage values when the attack hits or is blocked. If the number is positive, then the move will recover before the defender can act again. If the number is negative, the defender will be able to act before the attacker and maybe even punish. KD refers to knockdown on hit, and the listed KD Advantage refers to how many frames the attacker can act before the defender finishes their wakeup animation.
|
| Recovery |
How many frames it takes for a move to finish after the active frames have finished. For projectiles, recovery is considered to begin after the first active frame.
|
| Startup |
How many frames it takes before the move becomes 'active' or have a hit box. The last startup frame and the first active frame are the same frame, meaning all values are written as Startup + 1.
|
Normals
Standing Normals
5LP
| Startup | Active | Recovery | Cancel | Damage | Guard | On Hit | On Block |
|---|---|---|---|---|---|---|---|
| 5 | 3 | 7 | Chn Sp SA | 300 | LH | +4 | -2 |
- Chains into 5LP/2LP/2LK
- Cancel Hitconfirm Window: 13f
- xx Lv.2 Super: +7/+1
Slightly longer range than 2LP, making it useful to end a 3-hit light confirm. Other than that, 2LP is generally better in every relevant way (faster startup, better advantage, faster chains against Drive Impact). Notably, 5LP cannot link to 5LK for max range light combos.
5MP
| Startup | Active | Recovery | Cancel | Damage | Guard | On Hit | On Block |
|---|---|---|---|---|---|---|---|
| 7 | 3 | 15 | Sp SA TC | 600 | LH | +6 | 0 |
- Cancel Hitconfirm Window: 15f (17f TC)
- xx Lv.2 Super: +17/+11
At +6, 5MP is Guile's primary combo starter with a natural link into 2MP. It is even on block, so followups are likely to trade unless performed out of Drive Rush. Guile can also chain into 4HP as a Target Combo, which itself can be special cancelled.
5HP
| Startup | Active | Recovery | Cancel | Damage | Guard | On Hit | On Block |
|---|---|---|---|---|---|---|---|
| 7 | 3 | 23 | Sp SA | 900 | LH | -1 | -6 |
- Punish Counter: Stagger (+14)
- Cancel Hitconfirm Window: 17f
- xx Lv.2 Super: +18/+13
Relatively fast for a heavy button and fully cancellable, making it useful in Counterhit and Punish Counter combos. The Punish Counter stagger effect makes 5HP useful in whiff punishes as well.
5LK
| Startup | Active | Recovery | Cancel | Damage | Guard | On Hit | On Block |
|---|---|---|---|---|---|---|---|
| 5 | 2 | 12 | Sp SA | 300 | LH | +3 | -1 |
- Cancel Hitconfirm Window: 12f
- xx Lv.2 Super: +10/+6
5LK has great range for a light button, but due to the nature of Guile's charge moveset it can be difficult to use. Holding back while inputting LK results in Bazooka Knee, making the timing difficult for cancels into Sonic Boom or Super. And because it's a standing normal, the timing is also strict for inputting Somersault Kick.
5MK
| Startup | Active | Recovery | Cancel | Damage | Guard | On Hit | On Block |
|---|---|---|---|---|---|---|---|
| 7 | 5 | 18 | - | 700 | LH | +1 | -4 |
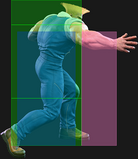
5MK is a fast poke with lots of active frames. It also has a surprisingly good anti-air hitbox, especially at mid-long ranges. It complements Guile's zoning game perfectly as a low-risk option to keep opponents at bay.
5HK
| Startup | Active | Recovery | Cancel | Damage | Guard | On Hit | On Block |
|---|---|---|---|---|---|---|---|
| 13 | 3 | 21 | SA | 800 | LH | +3 | -4 |
- Cancel Hitconfirm Window: 17f
- xx Lv.2 Super: +20/+13
Guile takes a big step forward, giving this button great range. 5HK can be reaction cancelled into Super, or just buffered into Lv.2 Super for followup pressure. Despite being -4, it is rarely punishable due to pushback.
Crouching Normals
2LP
| Startup | Active | Recovery | Cancel | Damage | Guard | On Hit | On Block |
|---|---|---|---|---|---|---|---|
| 4 | 3 | 8 | Chn Sp SA | 300 | LH | +5 | -2 |
- Chains into 5LP/2LP/2LK
- Cancel Hitconfirm Window: 13f
- xx Lv.2 Super: +9/+2
The more useful of Guile's light punches. Fast startup low chain pushback makes it good for confirms; 2LP x2 can chain into 5LP if starting point blank, or link into 5LK for a more difficult combo ender. The faster chain speed makes this Guile's best light normal against Drive Impact armor.
2MP
| Startup | Active | Recovery | Cancel | Damage | Guard | On Hit | On Block |
|---|---|---|---|---|---|---|---|
| 6 | 3 | 13(16) | Sp SA TC | 600 | LH | +4 | -2 |
- Cancel Hitconfirm Window: 15f (16f TC)
- xx Lv.2 Super: +13/+6
2MP is an important combo filler, linking from 5MP and from most Counterhit conversions. It has low pushback on hit, allowing two additional light normals to combo afterward from point blank. It can chain into itself for a launching Target Combo, which gives Guile an option to build charge when too far for his main linking routes.
2HP
| Startup | Active | Recovery | Cancel | Damage | Guard | On Hit | On Block |
|---|---|---|---|---|---|---|---|
| 9 | 5 | 20 | - | 900 | LH | 0 | -9 |
- Forces stand on hit
A very solid anti-air that hits right above Guile's head when Somersault Kick is not an option. If you are following a slow Sonic Boom across the screen and the opponent neutral jumps, you can AA with Drive Rush~2HP and pick up a juggle afterward. It has no other practical use on the ground, as it is not cancellable and has poor frame advantage (making the Force Stand property useless).
2LK
| Startup | Active | Recovery | Cancel | Damage | Guard | On Hit | On Block |
|---|---|---|---|---|---|---|---|
| 5 | 2 | 13 | Chn | 200 | L | +1 | -5 |
- Chains into 5LP/2LP/2LK
A fairly standard 2LK that allows Guile to begin a low combo from a chain. Has no natural links afterward outside of Punish Counter.
2MK
| Startup | Active | Recovery | Cancel | Damage | Guard | On Hit | On Block |
|---|---|---|---|---|---|---|---|
| 8 | 3 | 18 | TC | 500 | L | +4 | -5 |
- Cancel Hitconfirm Window: 18f (TC)
- Applies a 10% damage scaling penalty to the next hit when used as a combo starter (100/90/80/70...)
- Same type of damage scaling as Light Normal starter; also applies to 2MK~6MP Target Combo
Guile's 2MK is an incredibly strong low poke with an optional Target Combo overhead followup. It can be used to safely harass opponents at midrange, and even links to 2LP at point blank. After Drive Rush, Guile can link into all his important combo buttons like 5MP, 2MP, and 5HP.
2HK
| Startup | Active | Recovery | Cancel | Damage | Guard | On Hit | On Block |
|---|---|---|---|---|---|---|---|
| 9 | 2(16)3 | 21 | TC | 450x2 | L,L | HKD +34 | -12 |
- Counterhit/Punish Counter: +44 HKD
- Both hits have some juggle potential; no longer HKD when juggled into
- Cancel Hitconfirm Window: 26f(PC: 29f) (TC)
Guile's 2-hit sweep is fairly strong as a whiff punish, but the slow animation and relatively poor block disadvantage makes it more easily punished than most sweeps. The second hit can hit low for a knockdown even if the first hit is blocked correctly. The first hit has a Target Combo followup into 3HK that only combos in juggles or after Punish Counter. The juggle potential allows 2HK to connect after a corner OD Sonic Boom in some circumstances; it helps to be near max 2MP range, or to combo the OD Boom from 2MP~2MP or 5MP~4HP.
Jumping Normals
j.LP
| Startup | Active | Recovery | Cancel | Damage | Guard | On Hit | On Block |
|---|---|---|---|---|---|---|---|
| 4 | 10 | 3 land | - | 300 | H | - | - |
- Can hit as fuzzy Instant Overhead
The instant overhead property allows Guile to close out a round by making the opponent block a deep jump-in; as they transition to a crouch block, they will be stuck in a standing state for a few frames, allowing the j.LP to connect. This is high risk and should only ever be attempted if it is certain to end the round.
j.MP
| Startup | Active | Recovery | Cancel | Damage | Guard | On Hit | On Block |
|---|---|---|---|---|---|---|---|
| 7 | 3 | 3 land | - | 700 | H | - | - |
- Puts airborne opponents into limited juggle state
Guile's preferred air-to-air normal at close range.
j.HP
| Startup | Active | Recovery | Cancel | Damage | Guard | On Hit | On Block |
|---|---|---|---|---|---|---|---|
| 9 | 4 | 3 land | - | 800 | H | - | - |
- Causes spiked knockdown vs. airborne opponents on Counterhit/Punish Counter
Has a fairly strong downward-reaching hitbox for mid-range jumps.
j.LK
| Startup | Active | Recovery | Cancel | Damage | Guard | On Hit | On Block |
|---|---|---|---|---|---|---|---|
| 6 | 10 | 3 land | - | 300 | H | - | - |
- Can hit Crossup
Guile's only crossup jump-in; has a fairly narrow hitbox and low hitstun.
j.MK
| Startup | Active | Recovery | Cancel | Damage | Guard | On Hit | On Block |
|---|---|---|---|---|---|---|---|
| 7 | 7 | 3 land | - | 600 | H | - | - |
The high angle of the kick makes it a bit awkward to use, as Guile has stronger options against both grounded and airborne opponents.
j.HK
Command Normals
6MP
| Startup | Active | Recovery | Cancel | Damage | Guard | On Hit | On Block |
|---|---|---|---|---|---|---|---|
| 20 | 3 | 19 | - | 800 | H | +2 | -3 |
A relatively fast, safe overhead that can begin combos when used as a meaty or from Drive Rush.
6HP
| Startup | Active | Recovery | Cancel | Damage | Guard | On Hit | On Block |
|---|---|---|---|---|---|---|---|
| 16 | 3 | 20 | - | 800 | LH | +5 | +3 |
- Whiffs vs. crouching opponents
- Has some juggle potential
Has long range due to its great forward movement, but is relatively slow. Surprisingly useful even though it whiffs on crouching opponents, as Parry forces characters to stand and Guile's opponent will most likely be trying to Parry the Sonic Booms he throws.
4HP
| Startup | Active | Recovery | Cancel | Damage | Guard | On Hit | On Block |
|---|---|---|---|---|---|---|---|
| 9 | 3 | 21 | Sp SA | 800 | LH | +1 | -4 |
- Cancel Hitconfirm Window: 17f
- xx Lv.2 Super: +13/+8
Solid neutral button that can be special cancelled while maintaining back charge.
4LK
| Startup | Active | Recovery | Cancel | Damage | Guard | On Hit | On Block |
|---|---|---|---|---|---|---|---|
| 8 | 5 | 15 | - | 500 | LH | 0(+4) | -4(0) |
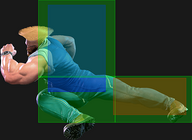
- Low Crush 7-17f
- Has juggle potential
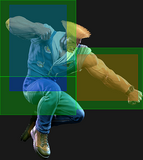
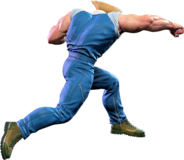
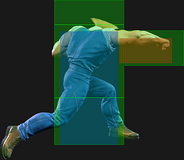
Knee Bazooka works well against low pokes despite not being truly airborne. Its long forward movement allows it to be spaced meaty at up to +4 on hit, 0 on block.
4MK or 6MK
| Startup | Active | Recovery | Cancel | Damage | Guard | On Hit | On Block |
|---|---|---|---|---|---|---|---|
| 11 | 3 | 18(21) | - | 700 | LH | +3 | -6 |
- Low Crush 5-17f
- Has juggle potential
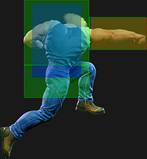
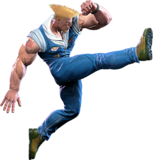
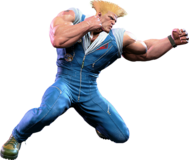
Guile kicks while drifting in the held direction, allowing him to reposition while attacking. Like Knee Bazooka, this is not airborne but can work well against low pokes in neutral.
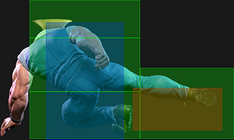
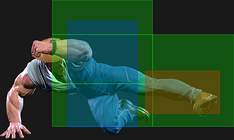
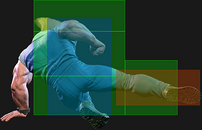
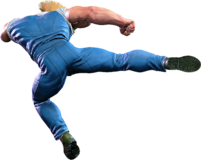
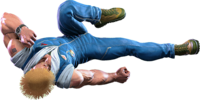
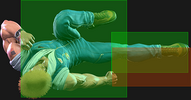
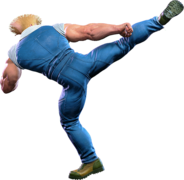
6HK
| Startup | Active | Recovery | Cancel | Damage | Guard | On Hit | On Block |
|---|---|---|---|---|---|---|---|
| 17 | 3 | 26 | - | 1000 | LH | -1 | -8 |
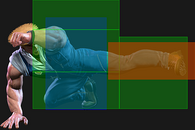
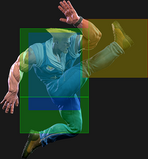
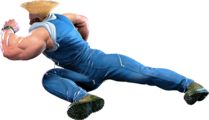
- Throw Invuln/Low Crush: 4-27f (not airborne)
- Punish Counter: KD +55 (grounded), limited juggle state (airborne)
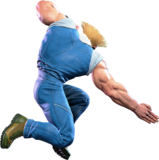
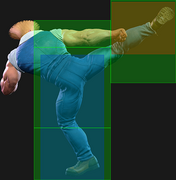
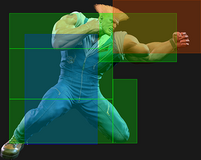
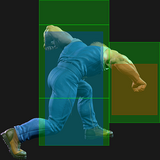
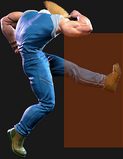
Commonly referred to as Upside-Down Kick (UDK), this move is a great throw bait and low crush. It's quite minus on block, however, making it much riskier than it was in previous SF games—but the notably high pushback on block helps a lot in making it safe. While the animation appears to put Guile airborne, he is fully grounded the entire time.
3HK
| Startup | Active | Recovery | Cancel | Damage | Guard | On Hit | On Block |
|---|---|---|---|---|---|---|---|
| 10 | 3 | 23 | Sp SA | 1000 | LH | 0 | -9 |
- Whiffs on crouching opponents
- Puts airborne opponents into limited juggle state
- Punish Counter: Launch KD +46 (spinning free juggle state)
- Cancel Hitconfirm Window: 23f
- xx Lv.2 Super: +12/+3
A cancellable command normal that can be used as a semi-reliable anti-air at mid to long range. Unlike in previous games, 3HK does not launch grounded opponents on hit (except for Punish Counters).
Target Combos
5MP~4HP
| Startup | Active | Recovery | Cancel | Damage | Guard | On Hit | On Block |
|---|---|---|---|---|---|---|---|
| 16 | 3 | 26 | Sp SA kara | 600 | LH | KD +35 | -9 |
- Cancel Hitconfirm Window: 50-51f
- The beginning of the 4HP animation is kara-cancellable (shifts Guile backwards)
Allows Guile to maintain back charge and convert from max 5MP range, where link followups are likely to whiff. On block, there is an interruptible 1f gap between hits.
2MP~2MP
| Startup | Active | Recovery | Cancel | Damage | Guard | On Hit | On Block |
|---|---|---|---|---|---|---|---|
| 12 | 3 | 16 | Sp SA | 360 | LH | KD +44 | -6 |
- Puts opponents into limited juggle state
- The second 2MP has a 10% damage scaling penalty applied, and counts as 2 hits for scaling
- 100/90/70/60... as combo starter, 100/100/70/60 if comboed into after 1 hit
- Cancel Hitconfirm Window: 41f
- xx Lv.2 Super: KD+56/+6
This Target Combo is good for building the extra charge time needed for Somersault Kick. It can also be easily confirmed into Sonic Boom on block or Somersault on hit, allowing players to focus more on neutral rather than hitconfirms. On block, there is an interruptible 2f gap between the hits.
2MK~6MP
| Startup | Active | Recovery | Cancel | Damage | Guard | On Hit | On Block |
|---|---|---|---|---|---|---|---|
| 20 | 3 | 21 | - | 800(640) | H | +1 | -5 |
- Low into Overhead string
Gives Guile a small mixup option from his unsafe 2MK, which is -5f. On block, there is an interruptible 4f gap between the hits. If this button trades with a 4f normal it is +7f and if it trades with a 5f normal, it can be +9f, both safely link into cr.mp.
2HK~3HK
| Startup | Active | Recovery | Cancel | Damage | Guard | On Hit | On Block |
|---|---|---|---|---|---|---|---|
| 10 | 3 | 25 | Sp SA | 600(480) | LH | KD +33 | -10(-30) |
- Launches opponent into a limited juggle state
- Whiffs on crouching opponents
- Cancel Hitconfirm Window: 57f(PC: 60f)
- xx Lv.2 Super: KD+47 Spin/+2
2HK does not naturally combo into the 3HK followup on grounded opponents. The most common way to land it is after the first hit of Punish Counter 2HK, which pops opponents into the air; this also allows it to work against crouching opponents. Drive Rush into 2HK also works, but this is very risky as there is no safe way to end this on block. It can also work in some juggles, like corner Drive Impact wall splat; in these scenarios, the opponent is launched high enough to juggle LK Somersault into OD Somersault.
Throws
Forward Throw (LPLK)
| Startup | Active | Recovery | Cancel | Damage | Guard | On Hit | On Block |
|---|---|---|---|---|---|---|---|
| 5 | 3 | 23 | - | 1200 (2040) | T | KD +15 | - |
- Does not have access to a true corner throw loop
- Perfectly timed Walk + Throw will beat wakeup attack 5f or slower
- Punish Counter: +16 HKD
Back Throw (4LPLK)
| Startup | Active | Recovery | Cancel | Damage | Guard | On Hit | On Block |
|---|---|---|---|---|---|---|---|
| 5 | 3 | 23 | - | 1200 (2040) | T | KD +18 | - |
- Side switches; can walk for throw/strike oki after back throwing opponent into corner
- Punish Counter: +19 HKD
Air Forward Throw (LPLK Air)
| Startup | Active | Recovery | Cancel | Damage | Guard | On Hit | On Block |
|---|---|---|---|---|---|---|---|
| 5 | 3 | 3 land | - | 1200 (2040) | T | KD +21(23) | - |
- Higher air throw gives slightly better KD Advantage
- Punish Counter: +23(25) HKD
Air Back Throw (4LPLK Air)
| Startup | Active | Recovery | Cancel | Damage | Guard | On Hit | On Block |
|---|---|---|---|---|---|---|---|
| 5 | 3 | 3 land | - | 1200 (2040) | T | KD +15 | - |
- Side switches
- Punish Counter: +16 HKD
Drive System
Drive Impact (HPHK)
| Startup | Active | Recovery | Cancel | Damage | Guard | On Hit | On Block |
|---|---|---|---|---|---|---|---|
| 26 | 2 | 35 | - | 800 | LH | KD +35 / Wall Splat KD +65 | -3 / Wall Splat HKD +72 |
See Drive Impact
When cancelled from a normal, these are the important blockstring gaps; a gap of N will trade with an N-frame startup attack; [] = Burnout
- 5HP, 4HP, 5MP~4HP: 7[3]
- 5MP: 9[5]
- 2MP, 2MP~2MP: 14[10]
- Note: A gap ≥ 6f can be thrown, and a gap ≥ 9f can be jumped out of by most characters
Drive Reversal (6HPHK)
| Startup | Active | Recovery | Cancel | Damage | Guard | On Hit | On Block |
|---|---|---|---|---|---|---|---|
| 20 | 3 | 26(31) | - | 500 recoverable | LH | KD +23 | -6 |
See Drive Reversal
- Full Invuln: 1-22f; Armor Break
Drive Parry (MPMK)
| Startup | Active | Recovery | Cancel | Damage | Guard | On Hit | On Block |
|---|---|---|---|---|---|---|---|
| 1 | 12 or until released | 33(1)(11) | - | - | - | - | - |
See Drive Parry
- Perfect Parry has only 1f recovery, and disables the opponent from canceling their attack
- Perfect Parry vs. projectiles puts you into a fixed 11f recovery
Drive Rush (66)
No results
See Drive Rush. Frame data shown in (parentheses) refers to Parry Drive Rush.
- Distance:
- 0.805 (min, cancel into immediate Throw)
- 1.898 (min, earliest blocking/movement frame)
- 3.461 (max, final DR frame)
- See Strategy page for Blockstring Gaps and Combo Routes
Special Moves
Sonic Boom ([4]6P)
| Startup | Active | Recovery | Cancel | Damage | Guard | On Hit | On Block |
|---|---|---|---|---|---|---|---|
| 10 | - | 30 | SA3 | 550 (600) | LH | +3(+4) | -3 |
- 45f charge time; charge lasts up to 10f after releasing back direction
- Cancel Hitconfirm Window: 11f (Super)
| Startup | Active | Recovery | Cancel | Damage | Guard | On Hit | On Block |
|---|---|---|---|---|---|---|---|
| 10 | - | 30 | SA3 | 550 (600) | LH | +3(+4) | -3 |
- 45f charge time; charge lasts up to 10f after releasing back direction
- Cancel Hitconfirm Window: 11f (Super)
| Startup | Active | Recovery | Cancel | Damage | Guard | On Hit | On Block |
|---|---|---|---|---|---|---|---|
| 10 | - | 30 | SA3 | 550 (600) | LH | +3(+4) | -3 |
- 45f charge time; charge lasts up to 10f after releasing back direction
- Cancel Hitconfirm Window: 11f (Super)
| Startup | Active | Recovery | Cancel | Damage | Guard | On Hit | On Block |
|---|---|---|---|---|---|---|---|
| 10 | - | 28 | SA2 SA3 | 500x2 (1000) | LH | KD +48 | +3 |
- 2 hits; 45f charge time; charge lasts up to 10f after releasing back direction
- Cancel Hitconfirm Window: 11f (Super)
- xx Lv.2 Super: KD+65/+25
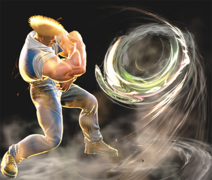
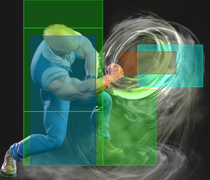
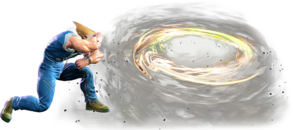
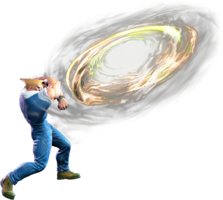
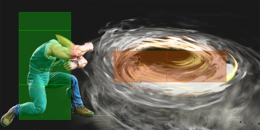
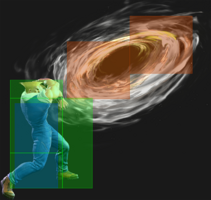
Sonic Boom is a strong projectile with fast startup and very low recovery. The speed of the projectile increases with higher strength buttons; LP Boom is great to walk behind as a moving shield, and HP Boom's fast travel speed makes it hard to beat in fireball wars. While safe on block, Guile does not get frame advantage at close range like in some previous Street Fighter games. Boom is hard for most characters to punish without a hard read; even a Drive Impact timed on the first visible projectile frame would be too slow due to the armor hit freeze.
All meterless Sonic Booms have a "Perfect" version that occurs when inputting 6+P together within a 3-frame window. Guile will yell "PERFECT!" when successful, causing Sonic Boom to become +4 on hit with extra damage. This is easy to do in neutral, but in special cancels the timing can be a little trickier to find. Perfect Booms are required in order to link 2LP afterward, so they are especially important for corner combos.
OD Sonic Boom is very powerful, with fast travel speed, 2 hits, and higher projectile priority. It knocks down on hit, instantly giving Guile great screen position when used in fireball battles. In the corner, he can also juggle 2HK afterward if he's not too close to the corner; it helps to space it out so that Guile's foot is hitting directly under the opponent.
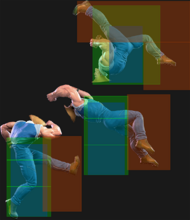
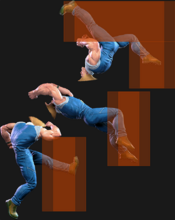
Somersault Kick ([2]8K)
| Startup | Active | Recovery | Cancel | Damage | Guard | On Hit | On Block |
|---|---|---|---|---|---|---|---|
| 5 | 6 | 26+15 land | SA3 | 1000 (1200) | LH | KD +36 | -30 |
- Anti-Air Invuln: 1-7f; Airborne 8-36f (Forced Knockdown state)
- 45f charge time; charge lasts up to 14f after releasing down direction
- Cancel Hitconfirm Window: 17f (Super)
| Startup | Active | Recovery | Cancel | Damage | Guard | On Hit | On Block |
|---|---|---|---|---|---|---|---|
| 6 | 6 | 27+15 land | SA3 | 1100 (1300) | LH | KD +37 | -31 |
- Anti-Air Invuln: 1-8f; Airborne 8-38f (Forced Knockdown state)
- 45f charge time; charge lasts up to 14f after releasing down direction
- Cancel Hitconfirm Window: 17f (Super)
| Startup | Active | Recovery | Cancel | Damage | Guard | On Hit | On Block |
|---|---|---|---|---|---|---|---|
| 7 | 6 | 28+15 land | SA3 | 1200 (1400) | LH | KD +39 | -32 |
- Anti-Air Invuln: 1-9f; Airborne 8-40f (Forced Knockdown state)
- 45f charge time; charge lasts up to 14f after releasing down direction
- Cancel Hitconfirm Window: 17f (Super)
| Startup | Active | Recovery | Cancel | Damage | Guard | On Hit | On Block |
|---|---|---|---|---|---|---|---|
| 6 | 4,2 | 26+20 land | - | 1000(700),600 | LH | KD +29 | -33(-37) |
- Full Invuln: 1-11f; Airborne 8-36f (Forced Knockdown state)
- 45f charge time; charge lasts up to 14f after releasing down direction
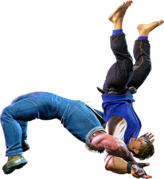
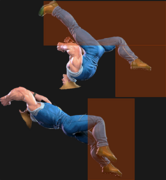
Somersault is Guile's main anti-air, combo ender, and OD reversal. Requiring a down charge limits his ability to position himself, but it can come out consistently even when it's unclear which direction he will be facing. It pairs well with Sonic Boom and pokes like 2MK that can help hide his charge. HK Somersault has surprisingly long range, making it useful as a punish against many sweeps and similar attacks that can be hard to reach.
Like Sonic Boom, there is a meterless "Perfect" version when inputting 8+K within a 3-frame window. Guile will shout "FLASH KICK!" instead of "Somersault" when this happens, but the only difference is slightly more damage. Meterless Somersault can cancel into Lv.3 Super by inputting the move as [1]9K, followed by a quick 46+K to finish the motion. In some juggles or anti-air situations, LK Somersault can launch high enough to follow up with another Somersault or Super.
Sonic Blade (214P)
| Startup | Active | Recovery | Cancel | Damage | Guard | On Hit | On Block |
|---|---|---|---|---|---|---|---|
| 16 | [45] | 26 | SA3 | 400 | LH | -3 | -4 |
- 1 hit
| Startup | Active | Recovery | Cancel | Damage | Guard | On Hit | On Block |
|---|---|---|---|---|---|---|---|
| 21 | [85] | 29 | SA3 | 400 | LH | -6 | -7 |
- 1 hit
| Startup | Active | Recovery | Cancel | Damage | Guard | On Hit | On Block |
|---|---|---|---|---|---|---|---|
| 31 | [100] | 23 | SA3 | 250x2 (500) | LH | +1 | -1 |
- 2 hits
| Startup | Active | Recovery | Cancel | Damage | Guard | On Hit | On Block |
|---|---|---|---|---|---|---|---|
| 15 | [100] | 24 | SA2 SA3 | 300x2 | LH | KD +57 | -4 |
- 2 hits; 1st hit knocks down on hit, while 2nd hit remains active to cover opponent's wakeup
- Either hit put opponent into a limited juggle state
- Cancel Hitconfirm Window: 6f (Super)
- xx Lv.2 Super: KD+68/+11
Guile throws out an almost stationary projectile; higher strength versions are slower but last much longer ([] refers to the stationary projectile's active time). Inputting 6P or 6PP immediately afterwards will throw a Sonic Boom of the corresponding strength (and can still become a Perfect Boom with proper input timing). If the Sonic Boom passes through the active Sonic Blade, it becomes a more powerful Sonic Cross (this will not happen if the Blade dissipates on hit/block, or from running out of active frames). Guile can delay the Sonic Boom to make his Sonic Cross timing less predictable, but this requires the usual 45f charge time.
While the meterless versions are cancellable to Lv.3 Super, there is not enough time to build charge naturally; the cancel is possible to perform if the opponent activates something like an install Super that freezes the screen while Sonic Blade is already in startup.
Sonic Cross (214P_6P)
| Startup | Active | Recovery | Cancel | Damage | Guard | On Hit | On Block |
|---|---|---|---|---|---|---|---|
| 10 | - | 28 | SA3 | 600(800),400 | LH | KD +44~ | -1 |
- Cancel Hitconfirm Window: 11f (Super)
| Startup | Active | Recovery | Cancel | Damage | Guard | On Hit | On Block |
|---|---|---|---|---|---|---|---|
| 10 | - | 28 | SA2 SA3 | 400x2,500 (1300) | LH | KD +48~ | +3 |
- Cancel Hitconfirm Window: 11f (Super)
- xx Lv.2 Super: KD+65/+25
| Startup | Active | Recovery | Cancel | Damage | Guard | On Hit | On Block |
|---|---|---|---|---|---|---|---|
| 10 | - | 28 | SA2* SA3 | 400x2,500 (1300) | LH | KD +47 | -3 |
- Cancel Hitconfirm Window: 11f (Super)
- xx Lv.2 Super: KD+64/+24
- If the Blade dissipates before the projectile is enhanced, it is no longer cancellable to Lv.2 Super
| Startup | Active | Recovery | Cancel | Damage | Guard | On Hit | On Block |
|---|---|---|---|---|---|---|---|
| 10 | - | 28 | SA2 SA3 | 400x3,500 (1700) | LH | KD Spin + Splat | +3 |
- Wall Splats on hit in the corner (KD Advantage varies based on positioning)
- Cancel Hitconfirm Window: 11f (Super)
- xx Lv.2 Super: KD+65/+25
The powered up projectile after it passes through an active Sonic Blade; compared to Sonic Boom, a Sonic Cross does more damage, more hits, and knocks down. The speed of the meterless followup depends on which button is pressed, just like regular Sonic Boom. If the Blade dissipates, refer to Sonic Boom data. Inputting 6+P within a 3f timing window still results in a "Perfect" version that does more damage.
The OD Blade~OD Cross version costs 4 Drive bars total (2 Drive for each part); the other two OD versions (OD Blade~Cross or Blade~OD Cross) only cost 2 Drive bars. The 4-bar version is too expensive to use often in neutral, but the Wall Splat gives great damage and positioning if you can reliably land it.
Super Arts
Level 1 Super ([4]646P)
| Startup | Active | Recovery | Cancel | Damage | Guard | On Hit | On Block |
|---|---|---|---|---|---|---|---|
| 8(11) | 51 | 81 | - | 200x6,800 (2000) | LH | KD +41 | -26 |
- Strike/Throw Invuln: 1-10f; Armor Break
- 45f charge time; depletes 1/2 Drive bar from opponent on hit
- 30% minimum damage scaling
| Startup | Active | Recovery | Cancel | Damage | Guard | On Hit | On Block |
|---|---|---|---|---|---|---|---|
| 7 | 52 | 68 | - | 200x6,600 (1800) | LH | KD +70 | -2 |
- Whiffs on crouching opponents; allows followup juggles on hit (KD Adv. varies based on height)
- 45f charge time; Armor Break; depletes 1/2 Drive bar from opponent on hit
- 30% minimum damage scaling
Sonic Hurricane can be used effectively against projectiles, completely dissipating any other non-Super projectile; however, it doesn't have projectile invincibility, so Guile can get hit out of startup if not spaced out properly. The HP version is mostly used as a combo tool, as it launches the opponent upward into a limited juggle state. Note that the HP version is not invincible at all, so it should not be used as a reversal.
Level 2 Super (214214P)
| Startup | Active | Recovery | Cancel | Damage | Guard | On Hit | On Block |
|---|---|---|---|---|---|---|---|
| 1 | (1500) | 5 | - | - | - | - | - |
- 1500f active timer (25 seconds), drains by 200f for each Sonic Break (maximum of 7)
Guile's install Super allows him to access his Sonic Break projectile. It is also great for getting frame advantage from cancellable moves like 5HK and OD Sonic Boom. The Super freeze lets Guile build charge for his followup combo if applicable. In fireball wars, Guile becomes nearly unbeatable when this Super is active.
Sonic Break (PP)
| Startup | Active | Recovery | Cancel | Damage | Guard | On Hit | On Block |
|---|---|---|---|---|---|---|---|
| 11 | - | 25 | - | 600 each | LH | +2 | -2 |
- Can be thrown without charge, up to 5 in one sequence (max of 7 per Super)
- Depletes a small amount of drive gauge from the opponent on hit (~0.1 bar)
- Holding forward (6PP/3PP) increases each projectile's speed
- Holding back (4PP/1PP) decreases each projectile's speed
| Startup | Active | Recovery | Cancel | Damage | Guard | On Hit | On Block |
|---|---|---|---|---|---|---|---|
| 11 | - | 25 | - | 600 each | LH | +2 | -2 |
- Can throw up to 4 followups in one sequence (max of 7 per Super)
- Depletes a small amount of drive gauge from the opponent on hit (~0.1 bar)
- Button strength determines each projectile's speed (LP slowest, HP fastest)
| Startup | Active | Recovery | Cancel | Damage | Guard | On Hit | On Block |
|---|---|---|---|---|---|---|---|
| 11 | - | 24 | - | 500x2 (1000) | LH | KD +54~ | +3 |
- Can throw up to 2 followups in one sequence (max of 7 per Super)
- Depletes a small amount of drive gauge from the opponent on hit (~0.1 bar)
- Does not cost any additional Drive meter for each followup
Only available after Solid Puncher is activated; each Sonic Break drains the 1500f timer by 200f. The followup versions work after Sonic Boom or Sonic Cross. Guile does not build any additional Super meter from connecting a Break while his install timer is active, but he will build some if it connects after the timer has expired. It is possible to create gaps in the projectile blockstrings by mixing between fast and slow Sonic Breaks; this will also depend on the distance from the opponent.
Level 3 Super ([4]646K)
| Startup | Active | Recovery | Cancel | Damage | Guard | On Hit | On Block |
|---|---|---|---|---|---|---|---|
| 9 | 6 | 30+40 land | - | 4000(3000) | LH | HKD +16 | -59 |
- Full Invuln: 1-14f; Airborne 12-44f (Forced Knockdown state); Armor Break
- 45f charge time; depletes 1.5 Drive bars from opponent on hit
- Cinematic time regenerates ~1.8 Drive bars for Guile
- 50% minimum damage scaling
No results
- Full Invuln: 1-14f; Airborne 12-44f (Forced Knockdown state); Armor Break
- 45f charge time; depletes 2 Drive bars from opponent on hit
- Cinematic time regenerates ~2 Drive bars for Guile
- 50% minimum damage scaling; available at 25% HP or below
Guile's Lv.3 Super gives a cinematic cutscene on a normal hit, but if it connects late in its active frames (such as an early anti-air) it will skip the cutscene. This results in lower damage and less depletion of the opponent's Drive gauge. It can be easily cancelled from Sonic Boom on reaction, and cancelled from Somersault Kick in combos or after a late anti-air. To perform this cancel, input the Somersault as [1]7K to maintain back charge, then quickly transition to 646K to finish the Super motion.
Taunts
Neutral Taunt (5PPPKKK)
| Startup | Active | Recovery | Cancel | Damage | Guard | On Hit | On Block |
|---|---|---|---|---|---|---|---|
| 116 (total) | - | - | - | - | - | - | - |
Forward Taunt (6PPPKKK)
| Startup | Active | Recovery | Cancel | Damage | Guard | On Hit | On Block |
|---|---|---|---|---|---|---|---|
| 225 (total) | - | - | - | - | - | - | - |
Back Taunt (4PPPKKK)
| Startup | Active | Recovery | Cancel | Damage | Guard | On Hit | On Block |
|---|---|---|---|---|---|---|---|
| 325 (total) | - | - | - | - | - | - | - |
Down Taunt (2PPPKKK)
| Startup | Active | Recovery | Cancel | Damage | Guard | On Hit | On Block |
|---|---|---|---|---|---|---|---|
| 73 (total) | - | - | - | - | - | - | - |
