| Pre-release information
This page is under construction based on pre-release data. Join the SF6 Resource Hub for info on editing. |
Introduction
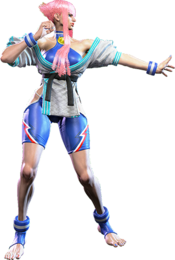
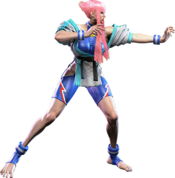
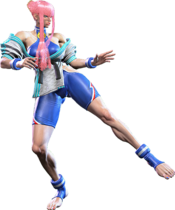
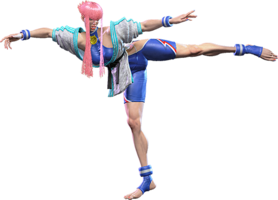
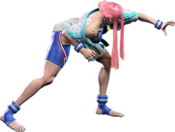
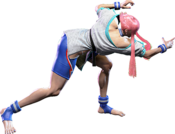
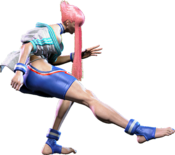
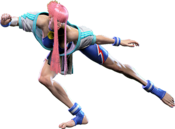
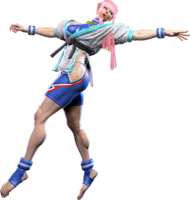
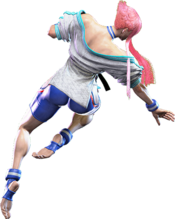
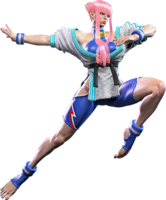
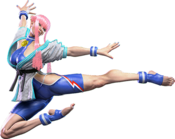
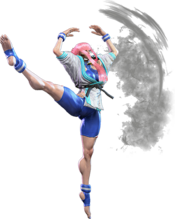
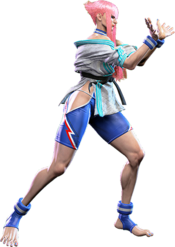
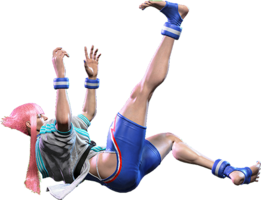
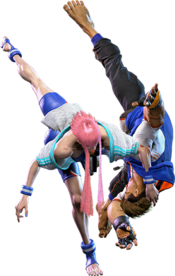
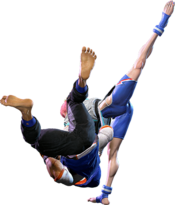
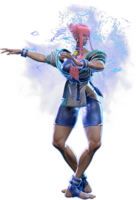
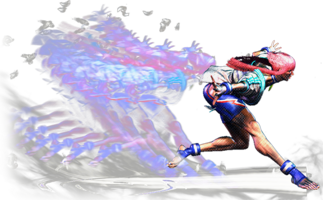
A super model and world champion judoka, Manon is an idealist, forever seeking self-improvement in the pursuit of beauty. She struts the catwalk of street fighting to become the world's strongest model.
Manon's distinct playstyle features center around long, far reaching normals that control the opponent's position and enhance her strike/throw game, mixed with command throws that scale up in damage every time she manages to hit with them, which gives her a lot of power once she has the momentum.
The centerpoint of Manon's gameplan is based on medals. Landing her Manège Doré command throw or her Renversé hitgrab will grant her an additional medal, up to a maximum of 5. Each medal gained increases the damage of both these moves by a notable amount, and also increases the damage of her Level 3 Super Art, Pas de Deux; Manège Doré itself becomes one of the strongest command grabs in the game if Manon manages to hit 5 medals. Additionally, these medals are carried over between rounds, giving Manon incredible potential to mount powerful comebacks and dominate a match-point game with a well-placed Manège Doré or Pas de Deux; this is especially dangerous when Manon has enough Drive Meter to go for a Drive Rush Manège Doré, as its effective range increases drastically when used this way.
To complement these two moves and her medal system, Manon's long limbs let her play a strong mid-range game to poke and prod the opponent, with quite a few of her grounded and jumping normals having long reach, and several moves having target combo follow-ups that pull the opponent in or otherwise reposition them for Manon to throw them. Many of her special moves and even a few of her Super Arts are also built for callouts or helping Manon to maneuver past tricky situations; Renversé can be feinted for projectile invulnerability, or canceled into a fairly far reaching kick that retains a little of that invulnerability too. She can also use Dégagé to either duck under attacks with the light version, use the medium version punish opponents at long range or end combos, or go for an advancing overhead with the heavy and Overdrive versions. Her 2HP is one of her moves with a target combo follow-up, allowing her to turn anti-air situations to her advantage by dropping the opponent right in front of her, and both her Level 1 and Level 2 Super Arts (Arabesque and Étoile) function as powerful reversals for the ground and against air attacks respectively.
Manon mainly struggles if she lacks Drive Meter, as many of her strongest conversions and pokes or oki setups may require her to Drive Rush Cancel her normals in order to be a threat. Some of her neutral tools also have noticeable recovery windows in exchange for their speed and reach, meaning that a wary opponent can punish her for them if they make the right call on what she's going to do; this is especially true when trying to land Manège Doré, as it has a notable recovery time on whiff. If you like to dance around opponents and see them fly through the sky, then pirouette into place with Manon.
| Pick if you like: | Avoid if you dislike: |
|---|---|
|
|
Classic & Modern Versions Comparison
| Missing Normals |
|
|---|---|
| Missing Command Normals |
|
| Shortcut-Only Specials |
|
| Miscellaneous Changes |
|
| Manon | |
|---|---|
| Vitals | |
| Life Points | 10000 |
| Ground Movement | |
| Forward Walk Speed | 0.0452 |
| Backward Walk Speed | 0.031 |
| Forward Dash Speed | 21 |
| Backward Dash Speed | 25 |
| Forward Dash Distance | 1.499 |
| Backward Dash Distance | 1.254 |
| Drive Rush Min. Distance (Throw) | 0.506 |
| Drive Rush Min. Distance (Block) | 1.417 |
| Drive Rush Max Distance | 2.347 |
| Jumping | |
| Jump Speed | 4+38+3 |
| Jump Apex | 2.115 |
| Forward Jump Distance | 1.90 |
| Backward Jump Distance | 1.52 |
| Throws | |
| Throw Range | 0.8 |
| Throw Hurtbox | 0.33 |
| Frame Data Glossary - SF6 | |
|---|---|
| Hitbox Images |
🟥 (Red): Attack hitbox
🟩 (Green): Vulnerable hurtbox that can be hit by strikes/projectiles
🟦 (Blue): Vulnerable throw hurtbox
|
| Active |
How many frames a move remains active (can hurt opponents) for. For projectiles with a maximum active period, a value may be listed in [brackets], but this number is not factored into the move's total frame count.
|
| Cancel |
Available options for canceling one move into another move.
|
| Cancel Hitconfirm Windows |
Hitconfirm reaction windows into Special Moves, Target Combos, and Super Arts.
|
| Damage |
Attack damage on hit. Multi-hit moves may have the damage listed for individual hits as X,Y (or sometimes X*Y). Sometimes a move's damage changes depending on which active frame connects, or on cinematic vs. non-cinematic hits; in this case, multiple values may be listed, and it will be clarified in the move description.
|
| Damage Scaling |
Some moves cause additional damage scaling in combos. Refer to Game Data page for a more detailed breakdown. Scaling Types:
|
| Drive Rush Cancel Advantage |
Refers to the frame advantage when canceling a normal, command normal, or Target Combo into Drive Rush on hit or block (abbreviated as DRC for Drive Rush Cancel). This is calculated at the moment a follow-up attack can be input, not at the moment the character can block or perform movement options. An attack that with DRC +8 on Hit can link into an 8-frame attack, and DRC +4 on Block can create a true blockstring into a 4-frame attack. Note that any DRC on Block worse than +4 cannot form a true blockstring, allowing the opponent to interrupt with an invincible reversal. Most light normals are slightly negative after a DRC on block, meaning the opponent can mash their fastest normal to guarantee a counter-hit (though this requires fast reactions). The attacking character could punish this with Light > DRC into an immediate invincible attack, but this would be an incredibly expensive and high-risk gambit.
|
| Forced Knockdown |
Most airborne command normals, special moves, and Super Arts put the user in a "Forced Knockdown" state. While in this state, an air knockdown will occur when being hit by any attack, even if it would otherwise cause an air reset. As an example, Ryu's 2HP causes an air reset when used as an anti-air. Against a move like Cammy's Hooligan Combination, however, the 2HP puts her into an air knockdown state. This allows Ryu to successfully cancel 2HP into Shoryuken for a juggle, similar to how a Drive Impact wall splat works. Taking advantage of Forced Knockdown juggles is important for dealing with moves like Ken's Dragonlash, Dhalsim's Air Teleport, or Kimberly's 6HK~Hop sequence. Moves that already cause an air knockdown, like most j.MP air-to-airs, will not display the "Forced Knockdown" message.
|
| Guard |
Refers to the direction an attack must be blocked. L is for Low attacks (must be blocked crouching), H is for High attacks/overheads (must be blocked standing), LH is for attacks that can be blocked crouching or standing. T is for Throw attacks which cannot be blocked.
|
| Juggles |
When a character is put into an Air Knockdown state, it is often possible to follow up with a Juggle attack before they hit the ground. In the simplest terms, there are 2 main juggle states:
The following is a more detailed overview of the SF6 juggle system:
Juggle Start (JS): When starting a juggle, the opponent's JC will be set to this value. May be different vs. standing and airborne opponents.
Juggle Increase (JI): When opponent is already in a juggle state, attacks will increase the opponent's JC by this amount.
Juggle Limit (JL): Property of an attack hitbox that determines whether it connects on a juggled opponent. The JL must be ≥ the opponent's JC to hit successfully.
An example to tie everything together:
Drive Rush notes:
|
| On Hit/Block |
These are frame advantage values when the attack hits or is blocked. If the number is positive, then the move will recover before the defender can act again. If the number is negative, the defender will be able to act before the attacker and maybe even punish. KD refers to knockdown on hit, and the listed KD Advantage refers to how many frames the attacker can act before the defender finishes their wakeup animation.
|
| Recovery |
How many frames it takes for a move to finish after the active frames have finished. For projectiles, recovery is considered to begin after the first active frame.
|
| Startup |
How many frames it takes before the move becomes 'active' or have a hit box. The last startup frame and the first active frame are the same frame, meaning all values are written as Startup + 1.
|
Normals
Standing Normals
5LP
| Startup | Active | Recovery | Cancel | Damage | Guard | On Hit | On Block |
|---|---|---|---|---|---|---|---|
| 4 | 3 | 10 | Chn Sp SA | 300 | LH | +4 | -1 |
5MP
| Startup | Active | Recovery | Cancel | Damage | Guard | On Hit | On Block |
|---|---|---|---|---|---|---|---|
| 7 | 4 | 14 | Sp SA TC | 600 | LH | +2 | -1 |
5HP
| Startup | Active | Recovery | Cancel | Damage | Guard | On Hit | On Block |
|---|---|---|---|---|---|---|---|
| 10 | 4 | 20 | SA TC | 800 | LH | 0 | -3 |
5LK
| Startup | Active | Recovery | Cancel | Damage | Guard | On Hit | On Block |
|---|---|---|---|---|---|---|---|
| 5 | 2 | 12 | Sp SA | 300 | LH | +2 | -2 |
5MK
| Startup | Active | Recovery | Cancel | Damage | Guard | On Hit | On Block |
|---|---|---|---|---|---|---|---|
| 10 | 3 | 18 | Sp SA | 600 | LH | -2 | -5 |
5HK
| Startup | Active | Recovery | Cancel | Damage | Guard | On Hit | On Block |
|---|---|---|---|---|---|---|---|
| 15 | 3 | 26 | - | 900 | LH | -2 | -6 |
Crouching Normals
2LP
| Startup | Active | Recovery | Cancel | Damage | Guard | On Hit | On Block |
|---|---|---|---|---|---|---|---|
| 4 | 2 | 11 | Chn Sp SA | 300 | LH | +3 | -2 |
2MP
| Startup | Active | Recovery | Cancel | Damage | Guard | On Hit | On Block |
|---|---|---|---|---|---|---|---|
| 7 | 3 | 11(13) | Sp SA | 600 | LH | +6 | -1 |
2HP
| Startup | Active | Recovery | Cancel | Damage | Guard | On Hit | On Block |
|---|---|---|---|---|---|---|---|
| 10 | 5 | 21 | TC | 600 | LH | -2 | -8 |
2LK
| Startup | Active | Recovery | Cancel | Damage | Guard | On Hit | On Block |
|---|---|---|---|---|---|---|---|
| 5 | 2 | 13 | Chn | 200 | L | -1 | -5 |
2MK
| Startup | Active | Recovery | Cancel | Damage | Guard | On Hit | On Block |
|---|---|---|---|---|---|---|---|
| 8 | 4 | 16 | - | 600 | L | +3 | -2 |
2HK
| Startup | Active | Recovery | Cancel | Damage | Guard | On Hit | On Block |
|---|---|---|---|---|---|---|---|
| 11 | 2 | 27 | - | 900 | L | HKD +29 | -12 |
Jumping Normals
j.LP
| Startup | Active | Recovery | Cancel | Damage | Guard | On Hit | On Block |
|---|---|---|---|---|---|---|---|
| 5 | 10 | 3 land | - | 300 | H | - | - |
j.MP
| Startup | Active | Recovery | Cancel | Damage | Guard | On Hit | On Block |
|---|---|---|---|---|---|---|---|
| 8 | 4 | 3 land | - | 700 | H | - | - |
j.HP
| Startup | Active | Recovery | Cancel | Damage | Guard | On Hit | On Block |
|---|---|---|---|---|---|---|---|
| 9 | 4 | 3 land | - | 800 | H | - | - |
j.LK
| Startup | Active | Recovery | Cancel | Damage | Guard | On Hit | On Block |
|---|---|---|---|---|---|---|---|
| 6 | 9 | 3 land | - | 300 | H | - | - |
j.MK
| Startup | Active | Recovery | Cancel | Damage | Guard | On Hit | On Block |
|---|---|---|---|---|---|---|---|
| 7 | 6 | 3 land | - | 500 | H | - | - |
j.HK
| Startup | Active | Recovery | Cancel | Damage | Guard | On Hit | On Block |
|---|---|---|---|---|---|---|---|
| 11 | 5 | 3 land | - | 800 | H | - | - |
Command Normals
4MK
| Startup | Active | Recovery | Cancel | Damage | Guard | On Hit | On Block |
|---|---|---|---|---|---|---|---|
| 10 | 4 | 19 | TC | 600 | LH | -1 | -3 |
4HP
| Startup | Active | Recovery | Cancel | Damage | Guard | On Hit | On Block |
|---|---|---|---|---|---|---|---|
| 8 | 6 | 17 | Sp SA | 800 | LH | +3 | +1 |
Combo filler, converts Drive Rush into a hitgrab for Medal Levels.
3HK
Target Combos
5MP~MK
No results
First of two vacuuming TCs.
4MK~MK
No results
Overhead follow-up to 4MK.
5HP~HP
No results
Easily hitconfirmable and vacuums opponents in on hit for a mixup. Less reliable at its max range than À Terre is at its max range, but starts from 5HP instead of 5MP.
2HP~HP
No results
Not great on grounded opponents, but shines as an anti-air. Drops airborne opponents right in front of Manon for free oki.
Throws
Forward Throw (LPLK)
| Startup | Active | Recovery | Cancel | Damage | Guard | On Hit | On Block |
|---|---|---|---|---|---|---|---|
| 5 | 3 | 23 | - | 1200 (2040) | T | KD +16 | - |
Back Throw (4LPLK)
| Startup | Active | Recovery | Cancel | Damage | Guard | On Hit | On Block |
|---|---|---|---|---|---|---|---|
| 5 | 3 | 23 | - | 1200 (2040) | T | KD +18 | - |
Drive System
Drive Impact (HPHK)
| Startup | Active | Recovery | Cancel | Damage | Guard | On Hit | On Block |
|---|---|---|---|---|---|---|---|
| 26 | 2 | 35 | - | 800 | LH | KD +35 / Wall Splat KD +65 | -3 / Wall Splat HKD +72 |
See Drive Impact
- Notable blockstring gaps (8f or less cannot be escaped by jumping):
- -
Drive Reversal (6HPHK)
| Startup | Active | Recovery | Cancel | Damage | Guard | On Hit | On Block |
|---|---|---|---|---|---|---|---|
| 20 | 3 | 26(31) | - | 500 recoverable | LH | KD +23 | -6 |
See Drive Reversal
- Full Invuln: 1-22f; Armor Break
Drive Parry (MPMK)
| Startup | Active | Recovery | Cancel | Damage | Guard | On Hit | On Block |
|---|---|---|---|---|---|---|---|
| 1 | 12 or until released | 33(1)(11) | - | - | - | - | - |
See Drive Parry
- Perfect Parry has only 1f recovery, and disables the opponent from canceling their attack
- Perfect Parry vs. projectiles puts you into a fixed 11f recovery
Drive Rush (66)
No results
See Drive Rush. Frame data shown in (parentheses) refers to the version used after Parry.
- Notable Drive Rush cancel combo routes:
- Notable Drive Rush cancel blockstring gaps:
Special Moves
Move Name (236P)
No results
No results No results No results
Super Arts
Level 1 Super (236236K)
| Startup | Active | Recovery | Cancel | Damage | Guard | On Hit | On Block |
|---|---|---|---|---|---|---|---|
| 10 | 4 | 65 | - | 2000 | L | KD +7(+10) | -49(-46) |
Level 2 Super (214214K)
| Startup | Active | Recovery | Cancel | Damage | Guard | On Hit | On Block |
|---|---|---|---|---|---|---|---|
| 7 | 3(11)6(45)9 | 38+34 land | - | 2800 | LH | KD +32(+37) | -61(-118) |
Level 3 Super (236236P)
Taunts
Neutral Taunt (5PPPKKK)
| Startup | Active | Recovery | Cancel | Damage | Guard | On Hit | On Block |
|---|---|---|---|---|---|---|---|
| 252 (total) | - | - | - | - | - | - | - |
Forward Taunt (6PPPKKK)
| Startup | Active | Recovery | Cancel | Damage | Guard | On Hit | On Block |
|---|---|---|---|---|---|---|---|
| 364 (total) | - | - | - | - | - | - | - |
Back Taunt (4PPPKKK)
| Startup | Active | Recovery | Cancel | Damage | Guard | On Hit | On Block |
|---|---|---|---|---|---|---|---|
| 582 (total) | - | - | - | - | - | - | - |
