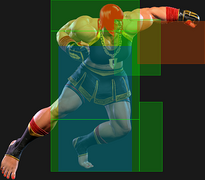
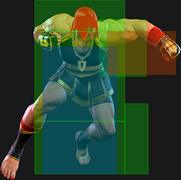
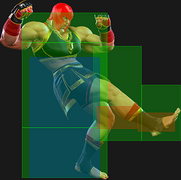
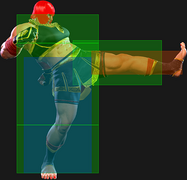
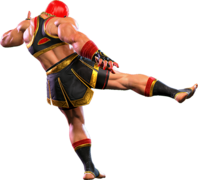
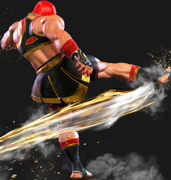
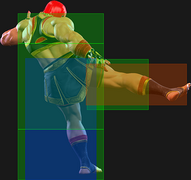
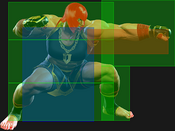
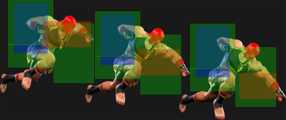
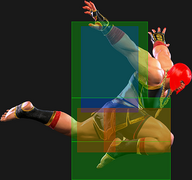
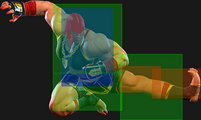
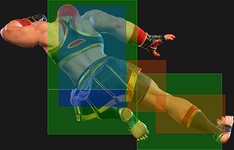
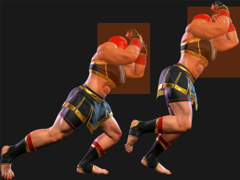
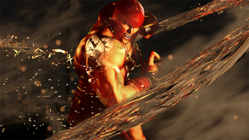
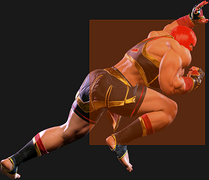
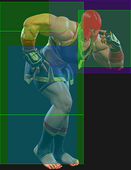
Street Fighter 6/Marisa: Difference between revisions

From SuperCombo Wiki
Line 18: Line 18:
Your standard jab. 6f makes this slower than most light options, so avoid using it as a mash over 2LP. Furthermore it's not special cancelable and doesn't link into anything besides its Target Combo follow-up on Counter-Hit.


You'll mostly never want to throw this out unless you intend to use the LP>LP Target Combo for a potential frame trap and its follow-up capabilities.
You'll mostly never want to throw this out unless you intend to use the LP>LP target combo for a potential frame trap and its follow-up capabilities.
}}
}}


Revision as of 00:11, 11 November 2023


Introduction

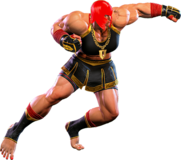
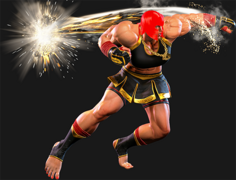
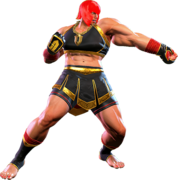
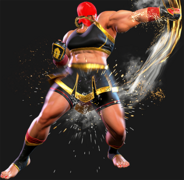
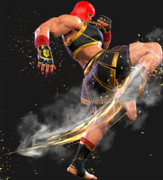
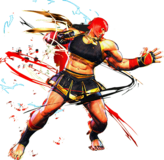
An up-and-coming jewelry designer from Italy who claims ancestry to ancient Greek warriors. As a child, she was inspired by a vision of the Colosseum in its prime. Today, she seeks glory with a smile—and an eye for beauty.

Marisa is a high-damage juggernaut with a variety of far-reaching normals. She excels once she gets her opponent into the corner where there's nowhere to go to escape her onslaught. She also has several moves with armor that allow her to bully through an opponent's attacks, including a unique ability to break Drive Impact attempts easily, as well has having slightly more health than most characters, allowing her to take more hits in a match.

Marisa is able to charge all of her heavy attacks and some of her specials by holding the associated button down. One of her shining normals in this regard is 5HP, a long range punch that leads to good damage, especially when used as a punish counter. Some of her other good normals are 5MP, 2MP, and 5HK, as these are all pokes that are either fast or have great range. Marisa's charged moves also deal significant chip to the opponent's drive bar if they are blocked, and some of them even recover quickly, allowing Marisa to continue pouring pressure on her opponent.

Her special moves are almost all used for getting in and staying in. Gladius is a chargeable straight punch with great damage and upper body armor, which allows her to quite literally punch right through her opponent's attacks. Phalanx is an armored superman punch that's great for going over fireballs or sneaking in after blockstrings to reset pressure, as all versions are plus on block. Quadriga is an extremely long range horizontal step kick with surprising safety, especially when spaced. The EX versions of Phalanx and Quadriga break right through armor, making it a bit difficult to drive impact these moves. She also has Dimachaerus, an uppercut and slam move which grants her a good knockdown to continue her pressure - and a combo extender with the HP version. Obviously, just striking isn't going to open a defensive opponent, which is why she has Scutum, an armored stance with access to an overhead, a low, and quite possibly her most frightening move, a command grab.

Although she has some of the most damaging combos in the game, Marisa's offense can be volatile. Charging a heavy attack can leave a large gap where an opponent can counter or jump away. Some of her moves have armor, but the armor does not protect against low-hitting attacks. She also has very few cancelable normals, and overall lacks tools that other characters have to keep defenders in check, often times relying on pure aggression to break through the opposing players confidence and forcing them into making a bad decision. In addition, her reversal options are extremely weak to throws; even though they are armored, none of them besides her Level 2 and Level 3 super arts have throw invulnerability. Her drive rush combos from lights are incredibly lackluster, that is to say she doesn't have anything other than repeated lights. Because of this, Marisa has a hard time abusing the system mechanics to aid in her offense.

While much of Marisa's offense is fairly straight forward and lacks consistency, she makes up for it in massive damage potential, having some of the highest damaging combos in the game, and a variety of other attacks that can quickly drain an opponent's health and/or drive bar, putting the fear of the gods into her adversaries.

If you like a big strong lady with big strong normals, or you just like hitting things really, really, REALLY hard, then put on your Spartan helmet and charge into battle with Marisa.


Pick if you like: Avoid if you dislike:
  • Absolutely incredible damage off of any non-light touch
  • A solid set of large or advancing buttons
  • A well-rounded pressure game with advantageous attacks, armor breaks, and a command grab
  • Access to unique armored tools to deal with all kinds of offense
  • Relying on a simple, straightforward strike/throw offense with few gimmicks
  • Having few ways to contest throws on offense
  • Being unable to effectively cash out resources during light confirms
  • Not having a fully invincible reversal outside of SA2 and SA3


Classic & Modern Versions Comparison

List of differences with Modern Marisa
Missing Normals
  • Standing Light Kick (5LK)
  • Crouching Medium Kick (2MK)
  • Standing Heavy Kick (5HK)
  • Jumping Light Punch (j.LP)
  • Jumping Medium Kick (j.MK)
  • Jumping Heavy Kick (j.HK)
Missing Command Normals
  • Overhead (3HP) and Malleus Breaker (3HP~3HP)
Shortcut-Only Specials
  • Scutum (6S)
    • 5XX or 6XX for P follow-ups, 4X for K follow-up, 2X for throw follow-up
Miscellaneous Changes
  • Novacule Swipe (6MP~HP) changed to 6MM, Novacule Thrust (6MP~HK) changed to 6MH
  • Medium Two Hitter (5MP~MP) is now the starter for M Auto Combo
  • 6HK is both 6H and the H Auto Combo starter. 6HH does the Falx Crusher (6HK~6HK) target combo but the Auto Combo does not
  • Quadriga (236K) unavailable outside of H Auto Combo


Players to Watch


Marisa
SF6 Marisa Portrait.png
Vitals
Life Points 10500
Ground Movement
Forward Walk Speed 0.039
Backward Walk Speed 0.027
Forward Dash Speed 22
Backward Dash Speed 25
Forward Dash Distance 1.40
Backward Dash Distance 0.90
Drive Rush Min. Distance (Throw) 0.544
Drive Rush Min. Distance (Block) 1.903
Drive Rush Max Distance 3.081
Jumping
Jump Speed 4+38+3
Jump Apex 2.115
Forward Jump Distance 1.90
Backward Jump Distance 1.52
Throws
Throw Range 0.9
Throw Hurtbox 0.38
Frame Data Glossary - SF6
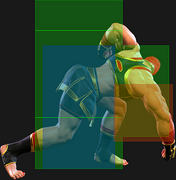
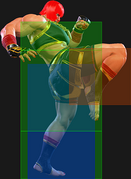
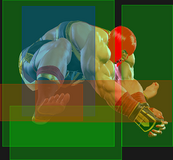
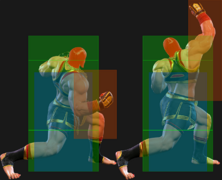
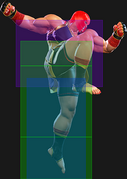
Hitbox Images

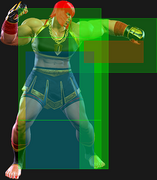
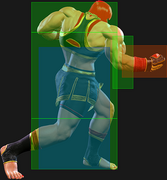
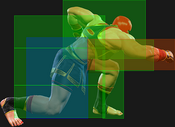
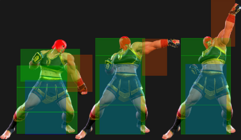
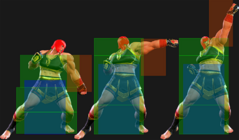
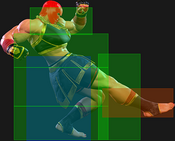
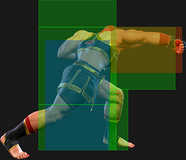
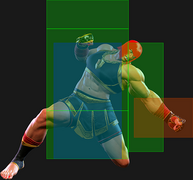
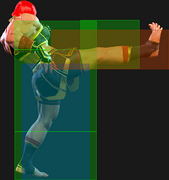
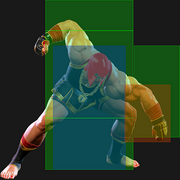
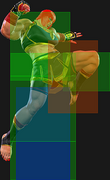
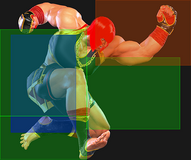
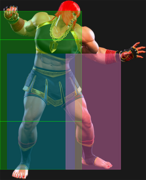
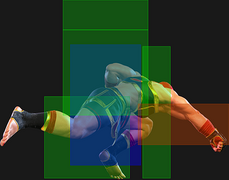
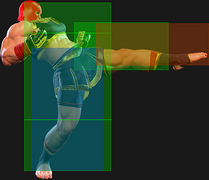
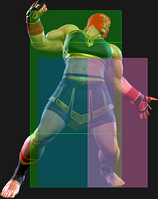
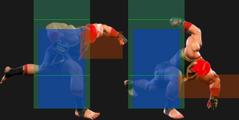
🟥 (Red): Attack hitbox

  • Appears pink for Throw hitboxes

🟩 (Green): Vulnerable hurtbox that can be hit by strikes/projectiles

  • If a move's hitbox and hurtbox overlap, the colors blend to appear orange

🟦 (Blue): Vulnerable throw hurtbox

  • Will be thrown if Pink throw hitbox touches Blue throw hurtbox


Active

How many frames a move remains active (can hurt opponents) for. For projectiles with a maximum active period, a value may be listed in [brackets], but this number is not factored into the move's total frame count.

  • For multi-hit moves with no gaps between the active hitboxes, active frames are listed as X,Y (or sometimes X*Y)
  • For multi-hit moves with gaps between hits, active frames are listed as X(n)Y where n = the frame gap between hitboxes.


Cancel

Available options for canceling one move into another move.

  • "Chn": Chain cancel (Light normals; specific chain options listed in Description)
  • "TC": Target Combo
  • "Sp": Special move
  • "SA": Super Art (if a number is listed, refers only to that specific Super; SA3 = Lv.3 Super Art)
  • "Jmp": Jump cancel (usually on hit only, if applicable)
  • "SS": Serenity Stream (Chun-Li's stance)
    • If one hit of a multi-hit attack is cancelable, this can be indicated with (1st), (2nd), etc.
    • Occasionally, a move can be canceled only into a specific follow-up (e.g. Dee Jay [4]6P > 22PP); this can be indicated by listing the move input in the Cancel field, or with an asterisk that is explained in the move notes (Sp*)


Cancel Hitconfirm Windows

Hitconfirm reaction windows into Special Moves, Target Combos, and Super Arts.

  • Refers to the amount of time (in frames) you have to cancel one attack into another attack on reaction
    • e.g. most cancelable 2MKs have a 13 frame window to cancel into a Special/Super on reaction, making them nearly impossible to hitconfirm
  • Counts from the first frame the attack connects until the final cancelable frame
    • Visual effects like hitsparks and HP drain do not actually occur until frame 2; the first frame is still counted to keep the numbers consistent with previous games, and because it is technically possible to start reacting to the character's reeling animation on frame 1
  • If a Target Combo is cancelable into another attack, the hitconfirm window will include the entire sequence starting from the first hit
    • If there is a frame gap on block between hits of the TC, the hitconfirm window may also be included for just the followup hit
    • Some sequences like Ken's 5MP~HP TC may have a range of values listed (43f~47f). In this example, inputting 5MP~HP at its usual timing gives a 43f hitconfirm into a Special/Super. Delaying the chain into HP gives more total time for the final hitconfirm.


Damage

Attack damage on hit. Multi-hit moves may have the damage listed for individual hits as X,Y (or sometimes X*Y). Sometimes a move's damage changes depending on which active frame connects, or on cinematic vs. non-cinematic hits; in this case, multiple values may be listed, and it will be clarified in the move description.

Damage Scaling

Some moves cause additional damage scaling in combos. Refer to Game Data page for a more detailed breakdown.

Scaling Types:

  • Starter: When a move begins the combo, the next attack is scaled by X percent
    • e.g. Ryu 2MK (20% Starter) > Hadoken: Hadoken is at 80% damage scaling
  • Combo: When a move is comboed into, the next attack is scaled by X percent or X number of hits
    • e.g. Ryu 2HP > OD High Blade Kick (2-Hit Combo Scaling) > Shoryuken: Shoryuken is at 70% damage scaling (100% > 100% > [skip 80%] > 70%)
    • e.g. Cammy 5HP > OD Spiral Arrow (5% Combo Scaling) > Cannon Spike: Cannon Spike is at 75% damage scaling (100% > 100% > [80-5 = 75%])
  • Immediate: When a move is comboed into, this attack is scaled by X percent
    • e.g. Drive Impact Crumple (20% Starter) > Throw (20% Immediate): Throw is at 60% damage scaling
  • Multiplier: A damage scaling multiplier applies after Perfect Parry (50%) and mid-combo Drive Rush (15%). Any hits in the combo continue their usual damage scaling, but reduced by these amounts. These can bring the minimum scaling below the usual 10%, and they stack with each other; as a result, the minimum scaling can reach 4% using a long Drive Rush combo after Perfect Parry.
  • Minimum Scaling: The lowest damage scaling that can be applied to an attack. Super Art Level 1/2/3 generally has 30%/40%/50% minimum scaling respectively. This ensures the attack will still do reasonable damage even at the end of a heavily scaled combo.


Drive Rush Cancel Advantage

Refers to the frame advantage when canceling a normal, command normal, or Target Combo into Drive Rush on hit or block (abbreviated as DRC for Drive Rush Cancel). This is calculated at the moment a follow-up attack can be input, not at the moment the character can block or perform movement options. An attack that with DRC +8 on Hit can link into an 8-frame attack, and DRC +4 on Block can create a true blockstring into a 4-frame attack.

Note that any DRC on Block worse than +4 cannot form a true blockstring, allowing the opponent to interrupt with an invincible reversal. Most light normals are slightly negative after a DRC on block, meaning the opponent can mash their fastest normal to guarantee a counter-hit (though this requires fast reactions). The attacking character could punish this with Light > DRC into an immediate invincible attack, but this would be an incredibly expensive and high-risk gambit.

Forced Knockdown

Most airborne command normals, special moves, and Super Arts put the user in a "Forced Knockdown" state. While in this state, an air knockdown will occur when being hit by any attack, even if it would otherwise cause an air reset.

As an example, Ryu's 2HP causes an air reset when used as an anti-air. Against a move like Cammy's Hooligan Combination, however, the 2HP puts her into an air knockdown state. This allows Ryu to successfully cancel 2HP into Shoryuken for a juggle, similar to how a Drive Impact wall splat works. Taking advantage of Forced Knockdown juggles is important for dealing with moves like Ken's Dragonlash, Dhalsim's Air Teleport, or Kimberly's 6HK~Hop sequence.

Moves that already cause an air knockdown, like most j.MP air-to-airs, will not display the "Forced Knockdown" message.

Guard

Refers to the direction an attack must be blocked. L is for Low attacks (must be blocked crouching), H is for High attacks/overheads (must be blocked standing), LH is for attacks that can be blocked crouching or standing. T is for Throw attacks which cannot be blocked.

Juggles

When a character is put into an Air Knockdown state, it is often possible to follow up with a Juggle attack before they hit the ground. In the simplest terms, there are 2 main juggle states:

  • Free Juggle: any attack can juggle, causing an Air Reset or an Air Knockdown
  • Limited Juggle: only specific attacks with juggle potential may juggle


The following is a more detailed overview of the SF6 juggle system:

Juggle Count (JC): The status of the character being juggled. A high JC limits which attacks can work in juggles.

  • JC0: free juggle state - any attack that can hit an airborne opponent will work
  • JC1+: limited juggle state - juggle only works if the attack's Juggle Limit ≥ defender's Juggle Count

Juggle Start (JS): When starting a juggle, the opponent's JC will be set to this value. May be different vs. standing and airborne opponents.

  • Attack with Juggle Start value of 3 will put opponent at JC3, so only attacks with Juggle Limit value ≥ 3 can follow up

Juggle Increase (JI): When opponent is already in a juggle state, attacks will increase the opponent's JC by this amount.

  • Airborne opponent at JC1 followed by attack with Juggle Increase value of 3 will set opponent to JC4

Juggle Limit (JL): Property of an attack hitbox that determines whether it connects on a juggled opponent. The JL must be ≥ the opponent's JC to hit successfully.

  • An uppercut with a JL value of 5 will connect on an opponent at JC5 or below, but will whiff on JC6 opponent
  • Most normals have a JL value of 0, meaning they only work in Free Juggle (JC0) states
  • Some multi-hit attacks have different JL values on each hit, so a 3-hit move may only hit twice in juggles

An example to tie everything together:

  • An attack (JS3) launches opponent into the air (Opponent now at JC3)
  • Followed up with an attack (JI2/JL4); it connects, because JL4 ≥ JC3 (Opponent now at JC5)
  • Attempts to juggle again with same attack (JL4), but whiffs because JL4 < JC5 (Opponent hits the ground)

Drive Rush notes:

  • DR normals have a Juggle Start/Increase value of 0
  • DR normals have +3 added to their usual Juggle Limit


On Hit/Block

These are frame advantage values when the attack hits or is blocked. If the number is positive, then the move will recover before the defender can act again. If the number is negative, the defender will be able to act before the attacker and maybe even punish. KD refers to knockdown on hit, and the listed KD Advantage refers to how many frames the attacker can act before the defender finishes their wakeup animation.

  • Note that generally, there is an extra +2 hit advantage on Counterhits and +4 hit advantage on Punish Counters (exceptions are noted in the description).


Recovery

How many frames it takes for a move to finish after the active frames have finished. For projectiles, recovery is considered to begin after the first active frame.

  • Moves with different recovery values on hit/block/whiff may have multiple values listed like X(Y), with specific details listed in the description.


Startup

How many frames it takes before the move becomes 'active' or have a hit box. The last startup frame and the first active frame are the same frame, meaning all values are written as Startup + 1.

  • Moves with multiple relevant startup values may be listed as X(Y); for example, a move that hits airborne first before hitting grounded opponents, or a 2-hit move where the first hit whiffs at some ranges.


Normals

Standing Normals

5LP
Standing Light Punch
5LP
SF6 Marisa 5lp.png
SF6 Marisa 5lp hitbox.png
Hitboxes Off
Hitboxes On

5LP
Standing Light Punch
Startup Active Recovery Cancel Damage Guard On Hit On Block
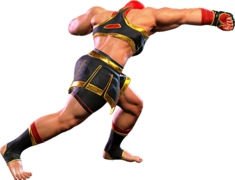
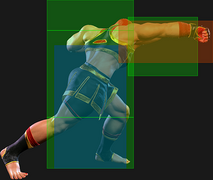
6 3 11 TC 400 LH 0 -2

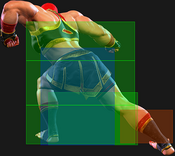
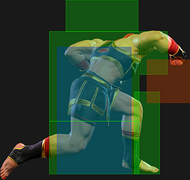
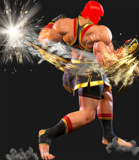
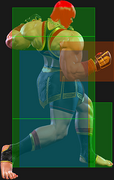
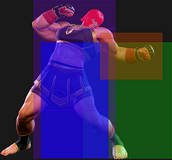
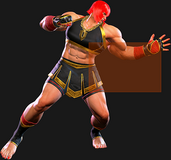
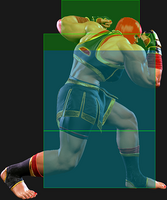
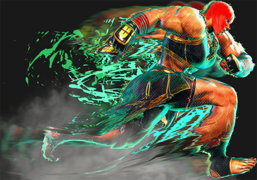
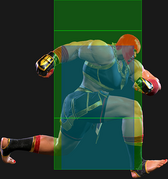
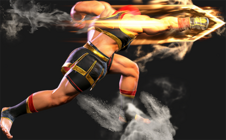
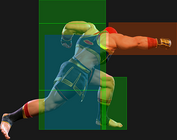
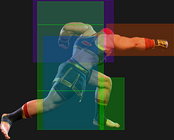
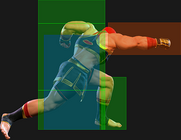
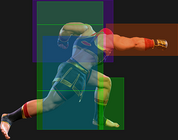
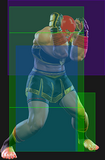
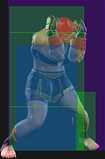
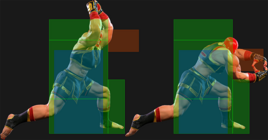
Your standard jab. 6f makes this slower than most light options, so avoid using it as a mash over 2LP. Furthermore it's not special cancelable and doesn't link into anything besides its Target Combo follow-up on Counter-Hit.

You'll mostly never want to throw this out unless you intend to use the LP>LP target combo for a potential frame trap and its follow-up capabilities.

5MP
Standing Medium Punch
5MP
SF6 Marisa 5mp.png
SF6 Marisa 5mp hitbox.png
Hitboxes Off
Hitboxes On

5MP
Standing Medium Punch
Startup Active Recovery Cancel Damage Guard On Hit On Block
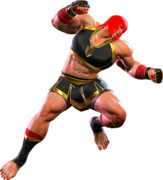
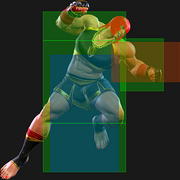
7 4 15(17) TC 700 LH +2 -1

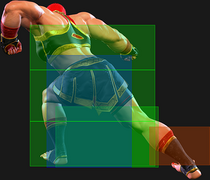
A stubby punch. Being in range to land this is one of your primary goals as it's fairly quick, very safe, leads to Marisa's most important target combo and is an important combo starter in general. At only -1 with not much pushback, using this for stagger pressure isn't the worst idea so long as you've conditioned the opponent to expect the follow-up.

5HP
Standing Heavy Punch
5HP (HOLD OK)
SF6 Marisa 5hp.png

SF6 Marisa 5hp hold.png
SF6 Marisa 5hp hitbox.png
SF6 Marisa 5hp2 hitbox.png
Hitboxes Off
Hitboxes On

5HP
Standing Heavy Punch
Startup Active Recovery Cancel Damage Guard On Hit On Block
12 2 23 TC 1000 LH +3 -3
5[HP]
Marisa Style (HP)
Startup Active Recovery Cancel Damage Guard On Hit On Block
26(5) 2 22 (21 on hit or block) TC 1200 LH +7 +4

An approaching downward hook. Not cancelable but has a notable followup like her other 5P buttons plus it can be charged to be + on block/combo on hit.

Charged 5HP is your biggest Punish Counter starter as it becomes +14 on PC, so be ready to let one rip anytime a blocked reversal presents you with an opportunity to punish.

5LK
Standing Light Kick
5LK
SF6 Marisa 5lk.png
SF6 Marisa 5lk hitbox.png
Hitboxes Off
Hitboxes On

5LK
Standing Light Kick
Startup Active Recovery Cancel Damage Guard On Hit On Block
6 2 14 Sp SA 400 LH 0 -2

A quick shin kick. Marisa's furthest reaching light. Unfortunately extremely limited follow-ups even with counter-hits; even 214LP can whiff/be blocked if 5LK hits close to the tip.

Useful as a lower commitment neutral check, particularly against DI with buffering (DR/DI/Gladius).

Despite not being a Low, this move will disrupt Marisa's armored moves like Gladius/Scutum.

5MK
Standing Medium Kick
5MK
SF6 Marisa 5mk.png
SF6 Marisa 5mk hitbox.png
Hitboxes Off
Hitboxes On

5MK
Standing Medium Kick
Startup Active Recovery Cancel Damage Guard On Hit On Block
11 4 16 - 800 LH +4 -2


An important normal for drive rush. 5MK generates the most frame advantage of any non-charged normal for Marisa. At +8 on hit, it can link into 2MP or (if close) 4HP.

You can also use 5MK as a low-risk meaty button on opponent's wakeup. It is easy to hit confirm, and at +4 links into 2LP, which combos into LP Dimachaerus (214LP).

A decent neutral poke, though it rarely creates follow-up pressure. At range, you cannot convert off +4 and 5MK cannot be special canceled.

5HK
Standing Heavy Kick
5HK (HOLD OK)
SF6 Marisa 5hk.png

SF6 Marisa 5hk hold.png
SF6 Marisa 5hk hitbox.png
Hitboxes Off
Hitboxes On

5HK
Standing Heavy Kick
Startup Active Recovery Cancel Damage Guard On Hit On Block
15 2 25 - 1000 LH +1 -3
5[HK]
Marisa Style (HK)
Startup Active Recovery Cancel Damage Guard On Hit On Block
27(10) 2 25 - 1200 LH KD +36 +1


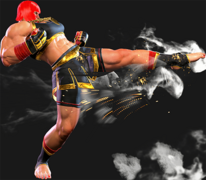
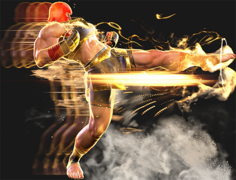
A slow roundhouse kick with good range. Moves Marisa forward, and the charged version moves further.

This move is most important for its punish counter properties. On punish counter, the opponent is knocked into the air and can be juggled, leading to high-damage combos. This juggle state lasts very long and so punish counter 5HK is an easy hit confirm.

At 15 frames (data above appears to be wrong, you can check that it's 15 frames in game), 5HK is too slow to whiff punish many moves on reaction, but it is a high-damage whiff punish against any move with a long recovery.

Drive rush 5HK is rarely used but can provide more range if you need extra reach to punish counter an opponent.


Crouching Normals

2LP
Crouching Light Punch
2LP
SF6 Marisa 2lp.png
SF6 Marisa 2lp hitbox.png
Hitboxes Off
Hitboxes On

2LP
Crouching Light Punch
Startup Active Recovery Cancel Damage Guard On Hit On Block
4 2 10 Chn Sp SA 300 LH +3 -3
  • Marisa's only grounded 4f normal

Standard crouching jab and Marisa's quickest attack.

Chains into itself and 2LK. Special cancelable so get used to buffering out of this.

2MP
Crouching Medium Punch
2MP
SF6 Marisa 2mp.png
SF6 Marisa 2mp hitbox.png
Hitboxes Off
Hitboxes On

2MP
Crouching Medium Punch
Startup Active Recovery Cancel Damage Guard On Hit On Block
8 3 16 Sp SA 700 LH +3 -2

Very nice range for a crouching poke and special cancelable, being at range to land this is very ideal for Marisa as it gives her a poke with a multitude of followups from either drive mechanics or her scary callout specials.

This is Marisa's only normal that doesn't move or extend her hurtbox forward before it's active.

2HP
Crouching Heavy Punch
2HP (HOLD OK)
SF6 Marisa 2hp.png

SF6 Marisa 2hp hold.png
SF6 Marisa 2hp hitbox.png

SF6 Marisa 2hp hold hitbox.png
Hitboxes Off
Hitboxes On

2HP
Crouching Heavy Punch
Startup Active Recovery Cancel Damage Guard On Hit On Block
9 5 23 - 900 LH KD +35 -6
2[HP]
Crouching Heavy Punch (Hold)
Startup Active Recovery Cancel Damage Guard On Hit On Block
21(4) 6 21 - 1000 LH KD +52 -3

A high uppercut. Your primary anti-air normal. Somewhat slow, so use it sooner than later and be sure not to hold the button as the attack may charge and force you to mistime this.

Charged 2HP is primarily combo filler as it leaves the opponent in juggle state. While charging can lead to big damage if it hits an aerial opponent, whiffing leaves you wide-open to an easy punish so it's not recommended unless you have a huge read on an opponent's jump habits.

2LK
Crouching Light Kick
2LK
SF6 Marisa 2lk.png
SF6 Marisa 2lk hitbox.png
Hitboxes Off
Hitboxes On

2LK
Crouching Light Kick
Startup Active Recovery Cancel Damage Guard On Hit On Block
5 3 12 Chn 300 L 0 -3

Your only conventional low combo starter, but a good one at least. Links into itself or 2LP for a special cancel.

2MK
Crouching Medium Kick
2MK
SF6 Marisa 2mk.png
SF6 Marisa 2mk hitbox.png
Hitboxes Off
Hitboxes On

2MK
Crouching Medium Kick
Startup Active Recovery Cancel Damage Guard On Hit On Block
9 3 18 - 600 L +2 -2

Your go to low poke as it's your only real low poke. Unlike most 2MKs, this cannot be special canceled, so your only combo options are extremely limited even with counter-hits/drive rush.

Still important to keep opponent movement in check at mid-range or prevent them from just walking back out of your offense.

2HK
Crouching Heavy Kick
2HK (HOLD OK)
SF6 Marisa 2hk.png

SF6 Marisa 2hk hold.png
SF6 Marisa 2hk hitbox.png

SF6 Marisa 2hk hold hitbox.png
Hitboxes Off
Hitboxes On

2HK
Crouching Heavy Kick
Startup Active Recovery Cancel Damage Guard On Hit On Block
11 3 26 - 1000 L HKD +29 -11
2[HK]
Crouching Heavy Kick (Hold)
Startup Active Recovery Cancel Damage Guard On Hit On Block
23(4) 3 23 (20 on hit or block) - 1200 L HKD +35 -3

Moves Marisa forward a bit. Not a particularly great sweep.

Bit on the slower side so be careful using this as a reactionary punish against blocked sweeps: Cammy, Chun, Honda, Kimberly are a few examples that all recover from their blocked sweeps fast enough to block and punish your own.


Jumping Normals

j.LP
Jumping Light Punch
j.LK
SF6 Marisa jlp.png
SF6 Marisa jlp hitbox.png
Hitboxes Off
Hitboxes On

j.LP
Jumping Light Punch
Startup Active Recovery Cancel Damage Guard On Hit On Block
4 7 3 land - 300 H - -

Aerial jab. Your fastest aerial normal, so your best bet for an improvised air-to-air when jumping alongside your opponent.

j.MP
Jumping Medium Punch
j.MP
SF6 Marisa jmp.png
SF6 Marisa jmp hitbox.png
Hitboxes Off
Hitboxes On

j.MP
Jumping Medium Punch
Startup Active Recovery Cancel Damage Guard On Hit On Block
7 4 3 land TC 700 H - -

An excellent air-to-air option with a target combo follow-up. Overall solid alternative to 2HP when it comes to checking jump-ins.

j.HP
Jumping Heavy Punch
j.HP
SF6 Marisa jhp.png

SF6 Marisa jhp hold.png
SF6 Marisa jhp hitbox.png

SF6 Marisa jhp hold hitbox.png
Hitboxes Off
Hitboxes On

j.HP
Jumping Heavy Punch
Startup Active Recovery Cancel Damage Guard On Hit On Block
10 7 3 land - 800 H - -
j.[HP]
Marisa Style (j.HP)
Startup Active Recovery Cancel Damage Guard On Hit On Block
28(5) 6 3 land - 1500 H HKD +66(+72) +9(+15)
  • Charged version has 6f of landing recovery when landing before the charge finishes

A hard-hitting downward punch that can be charged for more damage and deliver a hard knockdown. Be sure not to hold the button too long if you want the uncharged version, otherwise the attack may not come out before you land.

j.LK
Jumping Light Kick
Crossup
j.LK
SF6 Marisa jlk.png
SF6 Marisa jlk hitbox.png
Hitboxes Off
Hitboxes On

j.LK
Jumping Light Kick
Startup Active Recovery Cancel Damage Guard On Hit On Block
5 10 3 land - 300 H - -
  • +5/+8 on hit vs standing or crouching opponents respectively on earliest possible hit.
  • 11f on hit when connecting as close to the ground as possible.
  • Always + on block when hit from descent.
  • Can hit as fuzzy Instant Overhead


Marisa's primary crossup. Consistently confirms into a light combo. Can always link into 4HP if this lands on a crouching opponent, though MP>MP target combo also works if you need extra time to confirm and don't mind spending extra resources.

Also functions as a good anti-crossup for enemies trying to jump behind you frequently due to its speed and hitbox behind her.

j.MK
Jumping Medium Kick
j.MK
SF6 Marisa jmk.png
SF6 Marisa jmk hitbox.png
Hitboxes Off
Hitboxes On

j.MK
Jumping Medium Kick
Startup Active Recovery Cancel Damage Guard On Hit On Block
8 8 3 land - 500 H - -


Huge range makes this Marisa's best low commitment poke from the air. Can use as an air-to-air or a stray poke from a neutral/back-jump, but Marisa has better options for jump-ins.

j.HK
Jumping Heavy Kick
j.HK
SF6 Marisa jhk.png

SF6 Marisa jhk hold.png
SF6 Marisa jhk hitbox.png
Hitboxes Off
Hitboxes On

j.HK
Jumping Heavy Kick
Startup Active Recovery Cancel Damage Guard On Hit On Block
10 7 3 land - 800 H - -
j.[HK]
Marisa Style (j.HK)
Startup Active Recovery Cancel Damage Guard On Hit On Block
29(3) 6 3 land - 1500 H HKD +67(+72) +10(+15)
  • Charged version has 6f of landing recovery when landing before the charge finishes

A hard-hitting angled kick that can be charged for more damage. The range and angle makes this a solid jump-in option for air assaults. Be sure not to hold the button too long if you want the uncharged version, otherwise the attack may not come out before you land.


Command Normals

6MP
6MP
SF6 Marisa 6mp.png
SF6 Marisa 6mp hitbox.png
Hitboxes Off
Hitboxes On

6MP
Novacule 1
Startup Active Recovery Cancel Damage Guard On Hit On Block
10 2 20 TC 800 LH +2 -3

Marisa's furthest reaching medium poke as it moves her forward. A decent poke/whiff punish normal, especially when combined with drive rush as its forward movement allows for easy followups from 4HP on counthits.

Can be hit confirmed into one of two follow-up target combos, though both are very niche use.

4HP
Magna Bunker
4HP
SF6 Marisa 4hp.png

SF6 Marisa 4hp hold.png
SF6 Marisa 4hp hitbox.png
Hitboxes Off
Hitboxes On

4HP
Magna Bunker
Startup Active Recovery Cancel Damage Guard On Hit On Block
8 2 21(24) Sp SA 900 LH +3 -1
4[HP]
Magna Bunker (Hold)
Startup Active Recovery Cancel Damage Guard On Hit On Block
20(3) 2 19(24) Sp SA 1000 LH +13 +4

Lead uppercut. Marisa's most important normal for combos as she's capable of landing pretty much any special after this, including 214HP for big and meter efficient damage. Leading into this normal via punish counters and drive rushes is vital for Marisa's combo game.

3HP
Overhead
3HP
SF6 Marisa 3hp.png

SF6 Marisa 3hp hold.png
SF6 Marisa 3hp hitbox.png
Hitboxes Off
Hitboxes On

3HP
Malleus Breaker 1
Startup Active Recovery Cancel Damage Guard On Hit On Block
21 2 21 TC 900 H 0 -3
3[HP]
Malleus Breaker 1 (Hold)
Startup Active Recovery Cancel Damage Guard On Hit On Block
31(14) 2 19 TC 1000 H +5 +2

Your primary overhead. Fairly slow, especially if charged, but offset by being one of the only standing overheads in the game that leave you at an advantage with no meter use.

If Marisa's close enough (near point blank) after landing light Dimachaerus combo, charging into this overhead immediately will land meaty and catch both neutral and back-tech. Recovers in time to react to reversal Drive Impact, but loses to OD reversals and being meaty makes it susceptible to a perfect parry.

6HK
6HK
SF6 Marisa 6hk.png

SF6 Marisa 6hk hold.png
SF6 Marisa 6hk hitbox.png
Hitboxes Off
Hitboxes On

6HK
Falx Crusher 1
Startup Active Recovery Cancel Damage Guard On Hit On Block
14 4 21 Sp SA TC 900 LH 0 -3
6[HK]
Falx Crusher 1 (Hold)
Startup Active Recovery Cancel Damage Guard On Hit On Block
27(4~7) 4 19 Sp SA TC 1000 LH +10 +3


Marisa's longest range special cancelable normal. In combos it serves a very similar function to 4HP, although its higher hitstun allows it to combo into EX quadriga, enabling many of her corner optimals.

nj.2HP
Caelum Arc
nj.2HP
SF6 Marisa nj2hp.png

SF6 Marisa nj2hp hold.png
SF6 Marisa nj2hp hitbox.png
Hitboxes Off
Hitboxes On

nj.2HP
Caelum Arc
Startup Active Recovery Cancel Damage Guard On Hit On Block
9 9 3 land - 800 H - -
nj.2[HP]
Caelum Arc (Hold)
Startup Active Recovery Cancel Damage Guard On Hit On Block
28(4) 9 3 land - 1500 H HKD +68(+72) +11(+15)
  • Charged version has 6f of landing recovery when landing before the charge finishes

An interesting air command normal that has a wide range of attack. Natively is able to cross up the opponent if done close to them. Can only be done during a neutral jump, so you'll need to train the other player to respect your other normals before attempting to land this, otherwise it can make for a rewarding surprise strike.


Target Combos

5LP~LP
Light Two Hitter
5LP~LP
SF6 Marisa 5lp lp.png
Clef Cannon
SF6 Marisa 5lp lp hitbox.png
Clef Cannon
Hitboxes Off
Hitboxes On

5LP~LP
Light Two Hitter
Startup Active Recovery Cancel Damage Guard On Hit On Block
14 3 22 Sp SA 600 LH -3 -6


Light Punch Target Combo follow-up. Not a true combo unless the first hit was CH. Punishable on block so unless you are certain of a counter-hit then make sure to cancel into 236LP, which is gapless if the 2nd LP is blocked and a combo if hit.

Small gap between the two light punches make for a frame trap against mashers, but also an easy parry window, so be careful using this too predictably vs players who know how to parry effectively.

5MP~MP
Medium Two Hitter
5MP~MP
SF6 Marisa 5mp mp.png
SF6 Marisa 5mp mp hitbox.png
Hitboxes Off
Hitboxes On

5MP~MP
Medium Two Hitter
Startup Active Recovery Cancel Damage Guard On Hit On Block
14 2 23 Sp SA 600 LH -3 -8


Medium Punch target combo follow-up. Unlike her LP/HP target combos, MP>MP does not have a gap between both hits. Similar to LP target combo in that you'll always be throwing this out with the intention of canceling out of it, usually into a hit confirmed 214PP.

No special cancel is gapless barring 214LP, which is heavily punishable, and Drive Rush into a fast normal, which is expensive. Since the target combo is -8 on block, fast invincible reversals can beat most of Marisa's cancel options while punishing her if she does not cancel.

5HP~HP
Heavy Two Hitter
5HP~HP
SF6 Marisa 5hp hp.png
SF6 Marisa 5hp hp hitbox.png
Hitboxes Off
Hitboxes On

5HP~HP
Heavy Two Hitter
Startup Active Recovery Cancel Damage Guard On Hit On Block
24 3 19 - 1000 (900) LH KD +35 +2


Plus on block target combo. Primarily used to give 5HP a knockdown on normal hit.

It has a 5F gap on block, coupled with 5HP's forward movement it can be difficult to land outside of burnout. Starting this target combo with charged 5HP gives it a 0F gap, but Charged 5HP is more plus and has less pushback so it's not advisable.

6MP~HP
Novacule Swipe
6MP~HP
SF6 Marisa 6mp hp.png
SF6 Marisa 6mp hp hitbox.png
Hitboxes Off
Hitboxes On

6MP~HP
Novacule Swipe
Startup Active Recovery Cancel Damage Guard On Hit On Block
11 2 26 - 800 L KD +31 -12


Marisa's 1st possible follow-up from 6MP, a punching sweep. Just as punishable as most sweeps, so hit-confirm into this if you intend to use it.

6MP~HK
Novacule Thrust
6MP~HK
SF6 Marisa 6mp hk.png
SF6 Marisa 6mp hk hitbox.png
Hitboxes Off
Hitboxes On

6MP~HK
Novacule Thrust
Startup Active Recovery Cancel Damage Guard On Hit On Block
11 4 23 SA 800 LH KD +39 / (-21) -10(-26)
  • Cancelable into Supers
  • Whiffs crouching opponents


Marisa's 2nd possible followup from 6MP, ideally for if you want higher damage once you have a Super to burn. Despite being super cancelable, the combined startup of 6MP~HK make this impossible to use as a DI callout.

Avoid use entirely unless you're able to hit-confirm the initial hit as well as that the opponent standing or in a juggle state, as this is very punishable otherwise. As the second hit can maintain a juggle state if Marisa Drive Rushes into 6MP, this can allow for some unique confirms into SA1, such as after a Punish Counter 5HK.

3HP~3HP
Malleus Breaker
3HP~3HP
SF6 Marisa 3hp 3hp.png
SF6 Marisa 3hp 3hp hitbox.png
Hitboxes Off
Hitboxes On

3HP~3HP
Malleus Breaker 2
Startup Active Recovery Cancel Damage Guard On Hit On Block
18 2 24 - 900 H -3 -12


3HP Overhead follow-up. Tacks on 900 damage when used off her overhead. -3 on hit and and very punishable if blocked, making this a High-risk/Low-reward option. Has some use as a combo ender but ultimately a fairly limited use move altogether.

6HK~6HK
Falx Crusher
6HK~6HK
SF6 Marisa 6hk 6hk.png
SF6 Marisa 6hk 6hk hitbox.png
Hitboxes Off
Hitboxes On

6HK~6HK
Falx Crusher 2
Startup Active Recovery Cancel Damage Guard On Hit On Block
16 5 25 - 1000 LH KD +40 -12


A delayable target combo.

OK damage and very unsafe on block. Since 6HK is special cancelable and leads to 214HP, this target combo is often out classed by other routes against a grounded opponent. Notably, This target combo gives good midscreen oki after a drive rush 6HK juggle.

j.MP~MP
Volare Combo
j.MP~MP
SF6 Marisa jmp mp.png
SF6 Marisa jmp mp hitbox.png
Hitboxes Off
Hitboxes On

j.MP~MP
Volare Combo
Startup Active Recovery Cancel Damage Guard On Hit On Block
10 3 3 land - 800 H - -

Volare Combo deals 1500 damage and leads to consistent frame advantage and strong oki, making it a very strong air-to-air option. If your reactions are fast enough, this is generally stronger than Marisa's grounded anti-air options as well. If you haven't incorporated this into your game, you should as Marisa's anti-air options are otherwise mediocre.


Throws

Forward Throw (LPLK)
Forward Throw
LPLK
SF6 Marisa lplk.png
SF6 Marisa lplk hitbox.png
Hitboxes Off
Hitboxes On

LPLK
Mounted Grace
Startup Active Recovery Cancel Damage Guard On Hit On Block
5 3 23 - 1200 (2040) T KD +23 -


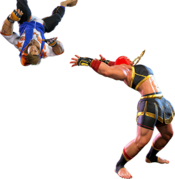
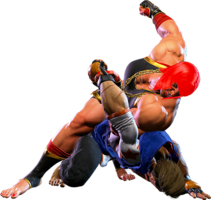
Marisa sweeps the opponent's feet from under them and bashes them in the face.

If you dash afterward, Marisa will be +1 and adjacent to the opponent. This is not a true throw loop (a follow-up throw loses to a 4-frame button) but this is still a strong offensive situation.

Marisa can hit confirm with 2LP > 2LP. You can also shimmy by holding back after the dash, allowing you to punish counter a whiffed throw.

Using drive rush after forward throw opens up many other offensive options. Drive rush 5MK and drive rush 5HP are common follow-ups.

Back Throw (4LPLK)
Back Throw
4LPLK
SF6 Marisa 4lplk.png
SF6 Marisa lplk hitbox.png
Hitboxes Off
Hitboxes On

4LPLK
Ponte Milvio
Startup Active Recovery Cancel Damage Guard On Hit On Block
5 3 23 - 1200 (2040) T KD +33 -

Standard back throw. Use this to switch sides with your opponent if you're getting cornered.

Unlike her forward throw, if Marisa throws the opponent into the corner, she can meaty throw without the use of Drive Rush.


Drive System

Drive Impact (HPHK)
Drive Impact
HPHK
SF6 Marisa hphk.png
SF6 Marisa hphk hitbox.png
Hitboxes Off
Hitboxes On

HPHK
Secutor
Startup Active Recovery Cancel Damage Guard On Hit On Block
26 2 35 - 800 LH KD +35 / Wall Splat KD +65 -3 / Wall Splat HKD +72

See Drive Impact

When canceled from a normal, these are the important blockstring gaps; a gap of N will trade with an N-frame startup attack; [] = Burnout

  • 4[HP], 6[HK]: 3[0]
  • 6HK: 5[1]
  • 4HP, 5LP~LP: 8[4]
  • 2MP: 10[6]
  • 5MP~MP: 12[8]
  • Note: A gap ≥ 6f can be thrown, and a gap ≥ 9f can be jumped out of by most characters

Drive Reversal (6HPHK)
Drive Reversal
6HPHK (in blockstun)
SF6 Marisa 6hphk.png
SF6 Marisa 6hphk hitbox.png
Hitboxes Off
Hitboxes On

6HPHK
Love Tap
Startup Active Recovery Cancel Damage Guard On Hit On Block
20(18) 3 26(31) - 500 recoverable LH KD +23 -6

See Drive Reversal

  • Full Invuln: 1-22f; Armor Break

Drive Parry (MPMK)
Drive Parry
MPMK
SF6 Marisa mpmk.png
SF6 Marisa mpmk hitbox.png
Hitboxes Off
Hitboxes On

MPMK
Drive Parry
Startup Active Recovery Cancel Damage Guard On Hit On Block
1 12 or until released 33(1)(11) - - - - -

See Drive Parry

  • Perfect Parry has only 1f recovery, and disables the opponent from canceling their attack
  • Perfect Parry vs. projectiles puts you into a fixed 11f recovery

Drive Rush (66)
Drive Rush
66
SF6 Marisa 66.png
SF6 Marisa 66 hitbox.png
Hitboxes Off
Hitboxes On

66
Drive Rush
Startup Active Recovery Cancel Damage Guard On Hit On Block
9(11) 45(46) 24(23) - - - - -

See Drive Rush. Frame data shown in (parentheses) refers to Parry Drive Rush.

  • Distance:
    • 0.544 (min, cancel into immediate Throw)
    • 1.903 (min, earliest blocking/movement frame)
    • 3.081 (max, final DR frame)
  • See Strategy page for Blockstring Gaps and Combo Routes


Special Moves

Gladius (236P)
Gladius
236P (HOLD OK)
SF6 Marisa 236p.png

SF6 Marisa 236pp.png
SF6 Marisa 236p hitbox.png
Armored Startup
SF6 Marisa 236p hitbox2.png
Unheld

SF6 Marisa 236pp hitbox.png
OD Unheld
Hitboxes Off
Hitboxes On

236LP
Gladius
Startup Active Recovery Cancel Damage Guard On Hit On Block
17 4 21 SA3 1200 LH KD +36 -5
  • Upper Body Armor (1-hit): 5-10f (loses to low attacks)
  • Cancel Hitconfirm Window: 21f (Super)
  • Can hold button to charge; armor time is extended, but ends upon early button release
  • Holding button 11-12f can extend armor time by 1-2f without increasing startup
  • Startup after partial charge release: 5f (frames 12-19); 4f (frames 20-25)
236MP
Gladius
Startup Active Recovery Cancel Damage Guard On Hit On Block
19 4 21 SA3 1400 LH KD +36 -5
  • Upper Body Armor (1-hit): 5-12f (loses to low attacks)
  • Cancel Hitconfirm Window: 21f (Super)
  • Can hold button to charge; armor time is extended, but ends upon early button release
  • Startup after partial charge release: 7f (frames 12-19); 6f (frames 20-28)
236HP
Gladius
Startup Active Recovery Cancel Damage Guard On Hit On Block
22 4 21 SA3 1600 LH KD +36 -5
  • Upper Body Armor (1-hit): 5-15f (loses to low attacks)
  • Cancel Hitconfirm Window: 21f (Super)
  • Can hold button to charge; armor time is extended, but ends upon early button release
  • Holding button 33-34f results in uncharged 236HP with slower startup than full-charge version
  • Startup after partial charge release: 10f (frames 12-19); 9f (frames 20-27), 8f (frames 28-34)
236PP
Gladius
Startup Active Recovery Cancel Damage Guard On Hit On Block
19 4 21 SA2 SA3 1700 LH KD +36 -2
  • Upper Body Armor (1-hit): 1-22f (loses to low attacks); Armor Break
  • Cancel Hitconfirm Window: 21f (Super)
  • Can hold button to charge; armor time is extended, but ends upon early button release
  • Startup after partial charge release: 8f (frames 11-12); 7f (frames 13-19), 6f (frames 20-28)


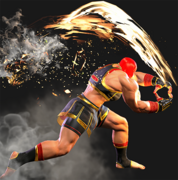
An armored straight punch that "stabs" the opponent, Gladius has multiple applications for offense, defense, and neutral.

Marisa can harass opponents in the mid-range and chip away at their Drive gauge while taking advantage of the high pushback to keep herself safe. This is fairly easy to do, as even a ranged 5MP~MP canceled into Gladius is usually safe on block. Higher strength versions have more range in exchange for slower startup; it's important not to whiff in neutral, as Gladius is easily whiff punished. If the opponent has a strong cancelable low poke, the lack of lower-body armor makes this move much risker to use in neutral; it still remains effective in combos and blockstrings, however.

The most important attribute of Gladius is its ability to charge into a more powerful version by holding the button. A fully charged Gladius breaks armor, rendering Drive Impact useless unless they predict an early release. The OD version even breaks armor without charge, making it the best version to use if you want to guarantee safety. Partially charging the attack also makes it harder for the opponent to Perfect Parry on reaction, somewhat mitigating one of Marisa's biggest weaknesses. Be aware that charging gives the opponent more time to react with something like an invincible Super, which will break Marisa's armor and interrupt any gap in the blockstring.

Marisa will lose any remaining armor the moment the button is released. The punch release starts up surprisingly fast after a partial charge, allowing Marisa to punish absorbed jump-ins or projectiles fairly consistently on reaction to the armor activation. This makes it a semi-consistent anti-air, though it's more easily baited by an empty jump than her other options like 214LP.

As a combo ender, Gladius is highly damaging, but pushes the opponent far away. Marisa thrives off momentum, so it's important to pick combo routes that will take you to the corner, or use an alternative ender midscreen. It is cancelable into SA3 (and SA2 for the OD version), and can potentially even be single-hit-confirmed on reaction. Be aware that these Super cancels can whiff midscreen from farther ranges, so they should only be done in guaranteed combo situations or in the corner.

Gladius
236P (HOLD OK)
SF6 Marisa 236p.png

SF6 Marisa 236pp.png
SF6 Marisa 236p hitbox.png
Armored Startup

SF6 Marisa 236p hold hitbox.png
Held

SF6 Marisa 236pp hold hitbox.png
OD Held
Hitboxes Off
Hitboxes On

236[LP]
Gladius (Hold)
Startup Active Recovery Cancel Damage Guard On Hit On Block
30 4 20 SA3 (1st) 1200,1000,200 (2400) LH HKD +40 +4
  • Upper Body Armor (1-hit): 5-26f (loses to low attacks); Armor Break
  • Cancel Hitconfirm Window: 17f (Super, 1st hit)
236[MP]
Gladius (Hold)
Startup Active Recovery Cancel Damage Guard On Hit On Block
35 4 20 SA3 (1st) 1400,1000,200 (2600) LH HKD +40 +4
  • Upper Body Armor (1-hit): 5-29f (loses to low attacks); Armor Break
  • Cancel Hitconfirm Window: 17f (Super, 1st hit)
236[HP]
Gladius (Hold)
Startup Active Recovery Cancel Damage Guard On Hit On Block
41 4 20 SA3 (1st) 1600,1000,200 (2800) LH HKD +40 +4
  • Upper Body Armor (1-hit): 5-35f (loses to low attacks); Armor Break
  • Cancel Hitconfirm Window: 17f (Super, 1st hit)
236[PP]
Gladius (Hold)
Startup Active Recovery Cancel Damage Guard On Hit On Block
35 4 20 SA2 SA3 (1st) 1700,1000,200 (2900) LH HKD +40 +4
  • Upper Body Armor (2-hit): 1-38f (loses to low attacks); Armor Break
  • Cancel Hitconfirm Window: 17f (Super, 1st hit)


The fully charged version of Gladius shuts down Drive Impact, which would otherwise be a potent counter to Marisa's moveset. The slow startup makes it easy to interrupt with a jump or a Super on reaction, so it's important to mix up the timing so that the opponent can't overly rely on any one defensive option. Many opponents will instead attempt to Perfect Parry in response to the slow startup. Mixing between slower and faster versions makes this hard to do on reaction, as it's not immediately obvious which strength Marisa is using (except for the OD version, of course). By making the opponent block or parry, you put yourself at excellent frame advantage and can continue enforcing your pressure at will.

The first hit of charged Gladius crumples the opponent before transitioning to a cinematic. If Marisa trades with the opponent as her armor runs out, the crumple still happens, allowing for a combo conversion. If the charged hit connects on an airborne opponent, the 2nd hit of the followup will drop, dealing 200 less damage and losing the Hard Knockdown status.

Dimachaerus (214P)
Dimachaerus
214P
SF6 Marisa 214lp.png

SF6 Marisa 214pp.png
SF6 Marisa 214lp hitbox.png
Hitboxes Off
Hitboxes On

214LP
Dimachaerus
Startup Active Recovery Cancel Damage Guard On Hit On Block
12 4 30 SA3 600 LH -3 -16
214MP
Dimachaerus
Startup Active Recovery Cancel Damage Guard On Hit On Block
16 4 30 SA3 700 LH 0 -16
214HP
Dimachaerus
Startup Active Recovery Cancel Damage Guard On Hit On Block
22 4 30 SA3 800 LH KD +38 -16
214PP
Dimachaerus
Startup Active Recovery Cancel Damage Guard On Hit On Block
16 4 26 SA2 SA3 600 LH KD +42 -12
  • Light and OD version have air invuln starting on frame 5

Your primary anti-air, combo ender for light confirms, and extension tool for most anything else. Extremely punishable if blocked, so make sure to properly confirm into this special. Each version can connect from a button of its corresponding strength (c.LP>(L)Dimachaerus/MP>MP>(M)Dimachaerus). OD version connects from any Medium cancelable normals.

Heavy version should be utilized wherever possible over the OD version. The heavy version allows for extensions similar to the Overdrive version that deal more damage and don't have the drawback of using Drive Meter.

Light version is, in theory, your best anti-air with air invuln, good damage, and the follow-up leaving the opponent close where Marisa wants them. In practice, Dimachaerus is somewhat slow, and an opponent jumping in close will cross Marisa up due to Dimachaerus's forward movement making this a less consistent anti-air as you'd like. Still an important Anti-Air tool to keep in the pocket, especially against moves that rely on air invulnerability (Such as Honda's Sumo Slam).

Dimachaerus Followup (214P~6P)
Dimachaerus Followup
214P~6P
Lua error in Module:MoveDataParser at line 119: attempt to index field '?' (a nil value).

SF6 Marisa 214pp 6p.png
Lua error in Module:MoveDataParser at line 117: attempt to index field '?' (a nil value).
Hitboxes Off
Hitboxes On

                  No results
214PP~6P
OD Dimachaerus Follow-up
Startup Active Recovery Cancel Damage Guard On Hit On Block
13 5 23 - 600 LH KD +58 Bounce -
  • Counts as a separate attack from Dimachaerus for damage scaling purposes

Dimachaerus follow-up. LP and MP versions lead to a knockdown. Heavy and OD versions ground bounce the opponent for combo extensions.

Provides practically no notable advantages if the follow-up isn't utilized on hit, and Marisa cannot follow-up if Dimachaerus is blocked. Thus, there's no real reason not to buffer into this every time Dimachaerus is used unless Marisa is canceling into SA3. She gets an underwhelming safe jump with j.LK from the first hit of the OD version, but this is never worth using.

Phalanx (623P)
Phalanx
623P
SF6 Marisa 623lp.png

SF6 Marisa 623pp.png
SF6 Marisa 623lp hitbox.png
SF6 Marisa 623lp hitbox2.png
Hitboxes Off
Hitboxes On

623LP
Phalanx
Startup Active Recovery Cancel Damage Guard On Hit On Block
25 3 2+16 land - 1500 LH KD +42(43) +2(3)
623MP
Phalanx
Startup Active Recovery Cancel Damage Guard On Hit On Block
28 3 2+16 land - 1600 LH KD +42(43) +2(3)
623HP
Phalanx
Startup Active Recovery Cancel Damage Guard On Hit On Block
32 3 2+16 land - 1700 LH KD +42(43) +2(3)
623PP
Phalanx
Startup Active Recovery Cancel Damage Guard On Hit On Block
28 3 2+16 land - 1400 LH KD +70 Tumble (HKD +138 Wall Splat) +4(5)
  • Armor Startup and Duration vary based on strength.
    • L (6f startup/5f active), M (6f/7f), H (9f/6f), OD (5f/7f)
  • Avoids most projectiles after armor duration's ended near the apex of the jump: Of note this includes Guile's Amplified Sonic Booms or JP's Torbalan/Embrace.
  • Overdrive version breaks enemy armor and wallsplats in the corner, but counts as 2 hits of scaling in combos.
  • Hits 1 frame later against crouching opponents making it +3 on crouch block.

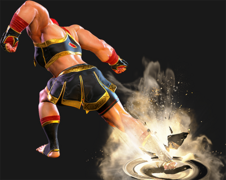
Marisa launches herself upward and swings down with a superman punch. A very versatile and important special as it can serve numerous uses for her: Advancing Poke, Pressure Starter/Reset, a Projectile Read, Combo Ender, and Combo Extension with Overdrive in the corner. While each version has the same frame advantage on block, the stronger versions leave Marisa closer to the opponent, letting her apply stronger pressure on block.

Marisa's best meterless combo ender in the corner for oki due to its 42f knockdown window, allowing for easy safe jumps, but which version gives her the safe jump setup depends on the preceding combo.

Quadriga (236K)
Quadriga
236K
SF6 Marisa 236lk.png

SF6 Marisa 236kk.png
SF6 Marisa 236lk hitbox.png
Hitboxes Off
Hitboxes On

236LK
Quadriga
Startup Active Recovery Cancel Damage Guard On Hit On Block
20 4 24 SA3 1400 LH KD +35 -6
236MK
Quadriga
Startup Active Recovery Cancel Damage Guard On Hit On Block
24 4 22 SA3 1500 LH KD +37 -4
236HK
Quadriga
Startup Active Recovery Cancel Damage Guard On Hit On Block
29 4 21 SA3 1600 LH KD +37 -3
236KK
Quadriga
Startup Active Recovery Cancel Damage Guard On Hit On Block
24 4 24 SA2 SA3 1500 LH KD +50(68) Wall Splat -6
  • Overdrive version Armor Breaks

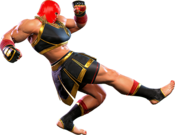
An approaching Spartan Kick. A very straightforward move used to approach with a poke and not much else. OD knocks the opponent full-screen and wallsplats. This wallsplat can be used for some optimal corner combos provided you can route into 6HK early in a combo, as it is her only launcher that counts as only one hit for combo scaling.

Light version is quickest but punishable if poorly spaced. Heavy version is slowest but doesn't require spacing to be safe. Overdrive this special to stay safe against DI attempts w/ Armor Break, but it shares the L version's spacing requirements.

Scutum (214K)
Scutum
214K
SF6 Marisa 214k.png
Mind the Achilles' Heel

SF6 Marisa 214kk.png
Fully dipped in the River Styx
SF6 Marisa 214k hitbox.png
Lua error in Module:MoveDataParser at line 117: attempt to index field '?' (a nil value).

SF6 Marisa 214kk hitbox.png
Lua error in Module:MoveDataParser at line 117: attempt to index field '?' (a nil value).
Hitboxes Off
Hitboxes On

214K
Scutum
Startup Active Recovery Cancel Damage Guard On Hit On Block
3(8) 26(116) 26 - - - - -

No results

  • Triggers automatically after absorbing attack
  • Recovery from this stance leave Marisa in a Punish Counter state
  • What can and cannot be armored is determined by hitbox position. Some lows can be absorbed and some mids and even a few overheads can not be absorbed.


Grants Marisa upper body armor. Has two frames of startup, so it loses to any proper meaties on wakeup. Decent for catching approaching specials on reaction or as an anti-air, but take care not to be baited and thrown out of this.

214KK
Scutum
Startup Active Recovery Cancel Damage Guard On Hit On Block
1 28(58) 29 - - - - -

No results

  • Triggers automatically after absorbing attack
  • Recovery from this stance leave Marisa in a Punish Counter state
    • NOTE: OD Scutum does not effect any of its follow-ups in any way.

Activates on frame 1 rather than the meterless version's frame 3. Armors everything including lows. Still loses to grabs though.

The OD version has two hits of armor, allowing it to absorb and counter some multi-hitting moves that would beat meterless Scutum.

This is one of the few reversals in the game that will beat a safe jump. The move's hitstop will freeze the opponent in midair, allowing the counter to hit them. Because the opponent is not grounded, they will fall out of the air. Assuming the opponent performed a safe jump correctly, Marisa will be +42 in this situation and can jump over the opponent with a safejump of her own. This can be a sneaky way to escape corner pressure and switch sides.

WARNING: This is still an armored move and not invincible; if you use it at very low HP, you will lose if you attempt to counter a move that brings you to zero health.

Tonitrus (214K~P~P)
Tonitrus
214K~P~P
SF6 Marisa 214k p.png

SF6 Marisa 214k p p.png
SF6 Marisa 214k p hitbox.png

SF6 Marisa 214k p p hitbox.png
Hitboxes Off
Hitboxes On

214K~P
Tonitrus 1
Startup Active Recovery Cancel Damage Guard On Hit On Block
8+15(16) 3 23(25) TC 900 H +1 -3
214K~P~P
Tonitrus 2
Startup Active Recovery Cancel Damage Guard On Hit On Block
20 3 36 - 1000 LH KD +31 -21

No results No results

  • 23f earliest possible startup w/ Scutum Startup included.

Marisa makes a heart shaped double handed punch. Scutum's overhead follow-up and your safest option from it provided your using it as a mix-up opportunity and didn't armor through anything. The 2nd hit must be input immediately, making it near impossible to actually hit confirm and fairly risky.

Procella (214K~K)
Procella
214K~K
SF6 Marisa 214k k.png
SF6 Marisa 214k k hitbox.png
Hitboxes Off
Hitboxes On

214K~K
Procella
Startup Active Recovery Cancel Damage Guard On Hit On Block
8+16 3 37 - 1200 L HKD +22 -24

No results

  • 24f earliest possible startup w/ Scutum Startup included.

A cutting sweep that travels forward. Low follow-up from Scutum. Their similar startup make reacting between overhead/low very difficult, but very unsafe if blocked/parried. Additionally, opponents jumping back expecting command grab may end up getting a free punish as this propels Marisa toward them, so use this only if you've 100% conditioned the opponent to expect an overhead and they're wary on parrying.

Enfold (214K~LPLK)
Enfold
214K~LPLK
SF6 Marisa 214k lplk.png
Pankration itself.
SF6 Marisa 214k lplk hitbox.png
Pankration itself.
Hitboxes Off
Hitboxes On

214K~LPLK
Enfold
Startup Active Recovery Cancel Damage Guard On Hit On Block
8+5 3 54 - 2500 (2875) T HKD +18 -

No results

  • Earliest possible startup 13f due to Scutum startup.

Command Grab Followup from Scutum. Though her fastest follow-up from Scutum, it is on the slower side for command grabs due to needing at least 8f initial startup of Scutum on top of the 5 to activate the grab, so don't go for this without conditioning the opponent to parry or stay put.


Super Arts

Level 1 Super (236236P)
Javelin of Marisa
Level 1 Super Art
236236P
SF6 Marisa 236236p.png
SF6 Marisa 236236p hitbox.png

SF6 Marisa 236236p hold hitbox.png
Hitboxes Off
Hitboxes On

236236P
Javelin of Marisa
Startup Active Recovery Cancel Damage Guard On Hit On Block
19 5 60 - 2200 LH KD +14 -43
236236[P]
Javelin of Marisa
Startup Active Recovery Cancel Damage Guard On Hit On Block
42 6 60 - 2900(2600) LH HKD +35 (KD +17) -42
  • Full Invuln: 1f (until flash); 2 Hit Armor: 2-23f; Armor Break
  • Charged version instead performs a cinematic counter attack when a strike (not a projectile) is absorbed 1-26f. Marisa can counter Armor Break moves during this window but cannot counter other supers. It no longer counters but still has standard 2 hit armor properties 27-46f.
  • Depletes 0.5 Drive bars from opponent on hit and ~0.75 Drive bars when fully charged
  • 30% minimum damage scaling
  • Cinematic counter version deals 2640 damage and fully charged version deals 2900 damage (870 minimum)


Armored haymaker Super Art.

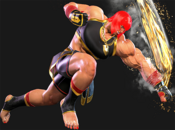
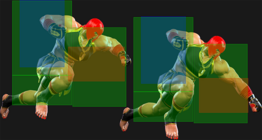
Fairly easy to route into as a combo ender for an easy and relatively cheap 3-4k damage from most common routes, just mind that it forces a reset to neutral if you're not in the corner. The charged version can always land after an OD Phalanx (623PP) wall slump. The uncharged version is too slow to use as a dependable reversal, so the charged version is usually preferred although it's not especially dependable for a reversal super. Like OD Scutum (214KK) it loses to throws and is reliant on absorbing an attack.
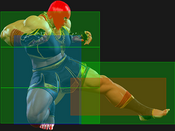
If her health is very low, Marisa can be K.O'd through the armor if a hit is absorbed during the attack portion of the super. However, if the cinematic counter is triggered by absorbing an attack while charging, Marisa takes no armor damage.
Level 2 Super (214214P)
Meteorite
Level 2 Super Art
214214P
SF6 Marisa 214214p.png

Lua error in Module:MoveDataParser at line 119: attempt to index field '?' (a nil value).
SF6 Marisa 214214p hitbox.png

Lua error in Module:MoveDataParser at line 117: attempt to index field '?' (a nil value).
Hitboxes Off
Hitboxes On

214214P
Meteorite
Startup Active Recovery Cancel Damage Guard On Hit On Block
9 7(33)3 59 - 3000(2500) LH HKD +17 -44(-77)

No results

  • Full Invuln: 1-15f; Armor Break
  • Depletes 1 Drive bar from opponent on hit
  • 40% minimum damage scaling
  • Forced Knockdown state while airborne


Marisa launches herself upward and slams down on the opponent; No animated super plays out if blocked or 1st hit doesn't connect, but Marisa will still launch the 2nd attack regardless.

Your go to reversal super as it's fully invuln until the first hit. An easy anti-air to buffer into as well since it's close to Dimachaerus' input, another other go-to anti-air.

Can also be used as a more expensive combo ender over SA1 for slightly better damage and positioning to the opponent (Particularly at mid-screen).

Level 3 Super (236236K)
Goddess of the Hunt
Level 3 Super Art
236236K
SF6 Marisa 236236k.png

SF6 Marisa 236236k(ca).png
CA version grants 500 extra damage
SF6 Marisa 236236k hitbox.png
CA version grants 500 extra damage
Hitboxes Off
Hitboxes On

236236K
Goddess of the Hunt
Startup Active Recovery Cancel Damage Guard On Hit On Block
13 7 60 - 4000 LH HKD +14 -39(-33)
  • Full Invuln: 1-19f
  • Depletes 1.5 Drive bars from opponent on hit
    • Cinematic time regenerates ~? Drive bars for Marisa
  • 50% minimum damage scaling
  • Always carries opponent to a fixed distance from the corner
236236K
Goddess of the Hunt (CA)
Startup Active Recovery Cancel Damage Guard On Hit On Block
13 7 60 - 4500 LH HKD +14 -39(-33)
  • Full Invuln: 1-19f
  • Depletes 2 Drive bars from opponent on hit
    • Cinematic time regenerates ~? Drive bars for Marisa
  • 50% minimum damage scaling; available at 25% HP or below
  • Always carries opponent to a fixed distance from the corner (slightly further away from corner compared to non-CA version)


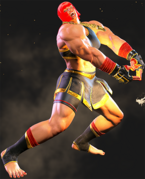
Marisa charges forward, shoving and clobbering the opponent into a wall once it connects.

Big damage super, especially with CA. Usually worth going into even if it doesn't KO since it puts the opponent's back near the corner, though ideally you want to convert at least around 5K minimum when routing into this. If you're already in the corner then routing into this should generally lead to 6k, useful for closing out rounds but the opponent will have more breathing space to escape if this doesn't kill so it's something to consider.
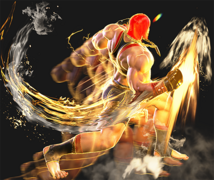
The initial forward charge makes this a decent fireball callout. Can be used as a reversal like any SA3, but SA2 is a cheaper option that leaves us with a spare meter to work with if it's successful.


Taunts

Neutral Taunt (5PPPKKK)
Neutral Taunt
5PPPKKK
SF6 Marisa 5pppkkk.png
"I may need a second helping of you!"

5PPPKKK
Neutral Taunt
Startup Active Recovery Cancel Damage Guard On Hit On Block
242 (total) - - - - - - -

Forward Taunt (6PPPKKK)
Forward Taunt
6PPPKKK
SF6 Marisa 6pppkkk.png
"Come on, the first hit's free."
SF6 Marisa 6pppkkk hitbox.png
"Come on, the first hit's free." (It is. She has 1 hit of armor)
Hitboxes Off
Hitboxes On

6PPPKKK
Forward Taunt
Startup Active Recovery Cancel Damage Guard On Hit On Block
85 [55] 72 - - - - -
  • Active frames refer to 1-hit armor
  • 211f total animation

Back Taunt (4PPPKKK)
Back Taunt
4PPPKKK
SF6 Marisa 4pppkkk.png
"This will be fun! *crack*"

4PPPKKK
Back Taunt
Startup Active Recovery Cancel Damage Guard On Hit On Block
184 (total) - - - - - - -


SF6 Navigation

General
FAQ
HUD
Characters
A.K.I.
Akuma
Blanka
Cammy
Chun-Li
Dee Jay
Dhalsim
Ed
E. Honda
Guile
Jamie
JP
Juri
Ken
Kimberly
Lily
Luke
Manon
Marisa
Rashid
Ryu
Zangief
Data
Akuma
Cammy
Ed
Guile
Jamie
JP
Juri
Ken
Lily
Luke
Manon
Ryu