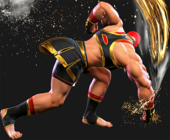
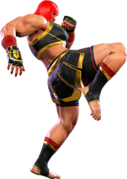
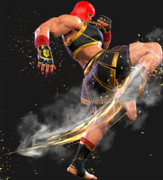
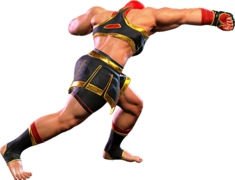
No edit summary |
|||
| Line 484: | Line 484: | ||
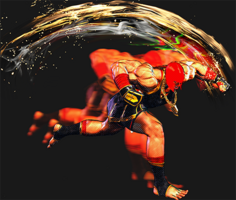
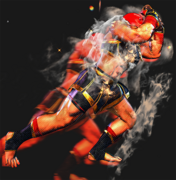
| input = 236P (HOLD OK) | | input = 236P (HOLD OK) | ||
| images = | | images = | ||
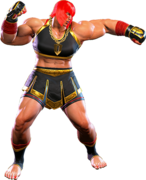
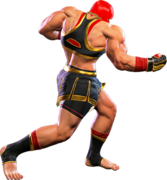
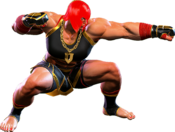
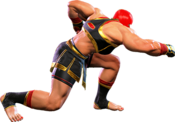
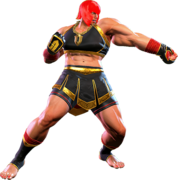
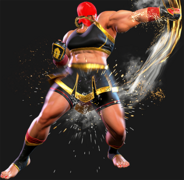
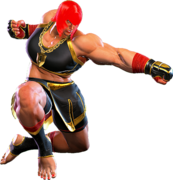
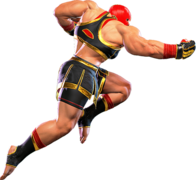
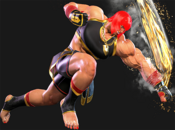
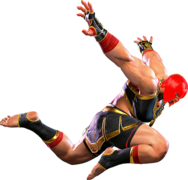
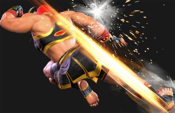
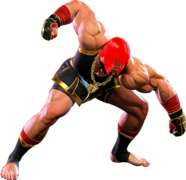
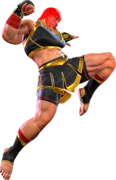
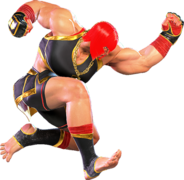
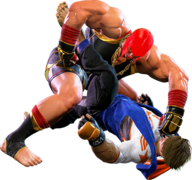
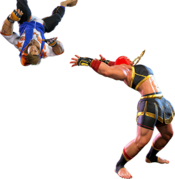
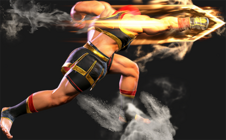
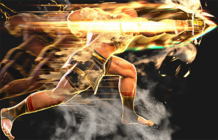
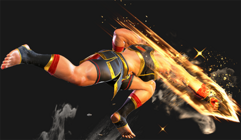
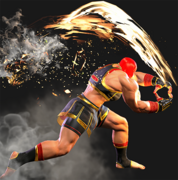
{{MoveDataCargoImage|imageHeight=140px| | {{MoveDataCargoImage|imageHeight=140px|marisa_236lp|caption=}} | ||
---- | ---- | ||
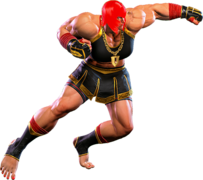
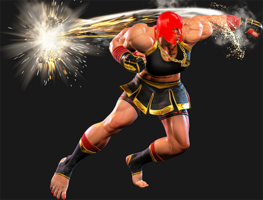
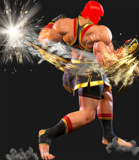
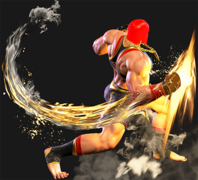
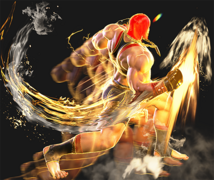
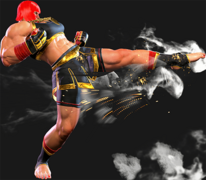
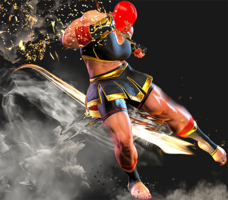
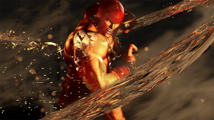
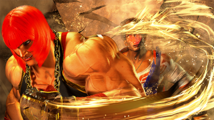
{{MoveDataCargoImage|imageHeight=140px|marisa_236pp|caption=}} | {{MoveDataCargoImage|imageHeight=140px|marisa_236pp|caption=}} | ||
| info = | | info = | ||
{{AttackDataCargo-SF6/Query| | {{AttackDataCargo-SF6/Query|marisa_236lp}} | ||
{{AttackDataCargo-SF6/Query| | {{AttackDataCargo-SF6/Query|marisa_236lp_hold}} | ||
{{AttackDataCargo-SF6/Query|marisa_236mp}} | |||
{{AttackDataCargo-SF6/Query|marisa_236mp_hold}} | |||
{{AttackDataCargo-SF6/Query|marisa_236hp}} | |||
{{AttackDataCargo-SF6/Query|marisa_236hp_hold}} | |||
{{AttackDataCargo-SF6/Query|marisa_236pp}} | {{AttackDataCargo-SF6/Query|marisa_236pp}} | ||
{{AttackDataCargo-SF6/Query|marisa_236pp_hold}} | {{AttackDataCargo-SF6/Query|marisa_236pp_hold}} | ||
Revision as of 13:19, 8 June 2023
| Pre-release information
This page is under construction based on pre-release data. Join the SF6 Resource Hub for info on editing. |
Introduction
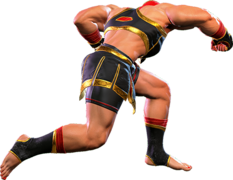
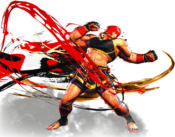
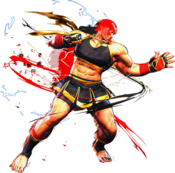
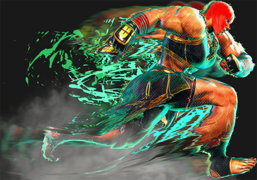
An up-and-coming jewelry designer from Italy who claims ancestry to ancient Greek warriors. As a child, she was inspired by a vision of the Colosseum in its prime. Today, she seeks glory with a smile—and an eye for beauty.
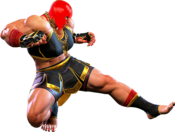
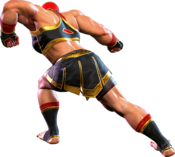
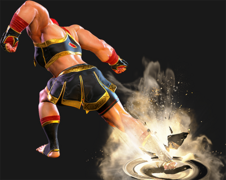
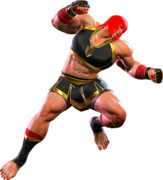
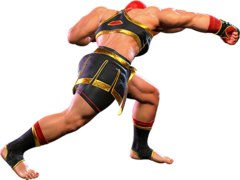
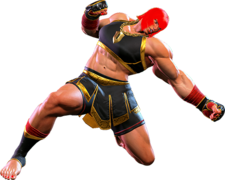
Marisa is a high-damage juggernaut with a variety of far-reaching normals. She excels once she gets her opponent into the corner where there's nowhere to go to escape her onslaught. She also has several moves with armor that allow her to bully through an opponent's attacks, including a unique ability to break Drive Impact attempts easily, as well has having slightly more health than most characters, allowing her to take more hits in a match.
Marisa is able to charge all of her heavy attacks and some of her specials by holding the associated button down. One of her shining normals in this regard is 5HP, a long range punch that leads to good damage, especially when used as a punish counter. Some of her other good normals are 5MP, 2MP, and 5HK, as these are all pokes that are either fast or have great range. Marisa's charged moves also deal significant chip to the opponent's drive bar if they are blocked, and some of them even recover quickly, allowing Marisa to continue pouring pressure on her opponent.
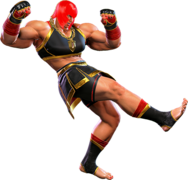
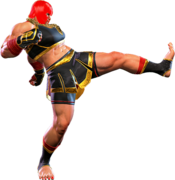
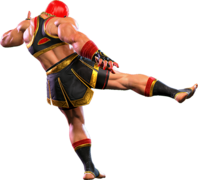
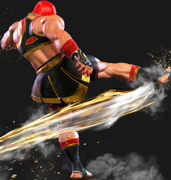
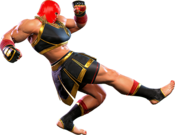
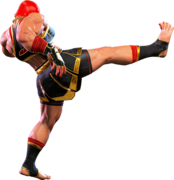
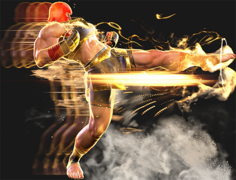
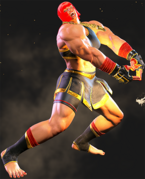
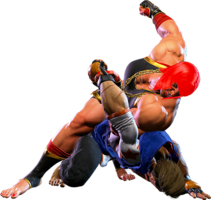
Her special moves are almost all used for getting in and staying in. Gladius is a chargeable straight punch with great damage and upper body armor, which allows her to quite literally punch right through her opponent's attacks. Phalanx is an armored superman punch that's great for going over fireballs or sneaking in after blockstrings to reset pressure, as all versions are plus on block. Quadriga is an extremely long range horizontal step kick with surprising safety, especially when spaced. The EX versions of Phalanx and Quadriga break right through armor, making it a bit difficult to drive impact these moves. She also has Dimachaerus, an uppercut and slam move which grants her a good knockdown to continue her pressure - and a combo extender with the HP version. Obviously, just striking isn't going to open a defensive opponent, which is why she has Scutum, an armored stance with access to an overhead, a low, and quite possibly her most frightening move, a command grab.
Although she has some of the most damaging combos in the game, Marisa's offense can be volatile. Charging a heavy attack can leave a large gap where an opponent can counter or jump away. Some of her moves have armor, but the armor does not protect against low-hitting attacks. She also has very few cancelable normals, and overall lacks tools that other characters have to keep defenders in check, often times relying on pure aggression to break through the opposing players confidence and forcing them into making a bad decision. In addition, her reversal options are extremely weak to throws; even though they are armored, none of them besides her Level 2 and Level 3 super arts have throw invulnerability. Her drive rush combos from lights are incredibly lackluster, that is to say she doesn't have anything other than repeated lights. Because of this, Marisa has a hard time abusing the system mechanics to aid in her offense.
While much of Marisa's offense is fairly straight forward and lacks consistency, she makes up for it in massive damage potential, having some of the highest damaging combos in the game, and a variety of other attacks that can quickly drain an opponent's health and/or drive bar, putting the fear of the gods into her adversaries.
If you like a big strong lady with big strong normals, or you just like hitting things really, really, REALLY hard, then put on your Spartan helmet and charge into battle with Marisa.
| Pick if you like: | Avoid if you dislike: |
|---|---|
|
|
Classic & Modern Versions Comparison
| Missing Normals |
|
|---|---|
| Missing Command Normals |
|
| Shortcut-Only Specials |
|
| Miscellaneous Changes |
|
Players to Watch
- Big Bird - (https://twitter.com/Bigbird_fgc)
| Marisa | |
|---|---|
| Vitals | |
| Life Points | 10500 |
| Ground Movement | |
| Forward Walk Speed | 0.039 |
| Backward Walk Speed | 0.027 |
| Forward Dash Speed | 22 |
| Backward Dash Speed | 25 |
| Forward Dash Distance | 1.40 |
| Backward Dash Distance | 0.90 |
| Drive Rush Min. Distance (Throw) | 0.544 |
| Drive Rush Min. Distance (Block) | 1.903 |
| Drive Rush Max Distance | 3.081 |
| Jumping | |
| Jump Speed | 4+38+3 |
| Jump Apex | 2.115 |
| Forward Jump Distance | 1.90 |
| Backward Jump Distance | 1.52 |
| Throws | |
| Throw Range | 0.9 |
| Throw Hurtbox | 0.38 |
| Frame Data Glossary - SF6 | |
|---|---|
| Hitbox Images |
🟥 (Red): Attack hitbox
🟩 (Green): Vulnerable hurtbox that can be hit by strikes/projectiles
🟦 (Blue): Vulnerable throw hurtbox
|
| Active |
How many frames a move remains active (can hurt opponents) for. For projectiles with a maximum active period, a value may be listed in [brackets], but this number is not factored into the move's total frame count.
|
| Cancel |
Available options for canceling one move into another move.
|
| Cancel Hitconfirm Windows |
Hitconfirm reaction windows into Special Moves, Target Combos, and Super Arts.
|
| Damage |
Attack damage on hit. Multi-hit moves may have the damage listed for individual hits as X,Y (or sometimes X*Y). Sometimes a move's damage changes depending on which active frame connects, or on cinematic vs. non-cinematic hits; in this case, multiple values may be listed, and it will be clarified in the move description.
|
| Damage Scaling |
Some moves cause additional damage scaling in combos. Refer to Game Data page for a more detailed breakdown. Scaling Types:
|
| Drive Rush Cancel Advantage |
Refers to the frame advantage when canceling a normal, command normal, or Target Combo into Drive Rush on hit or block (abbreviated as DRC for Drive Rush Cancel). This is calculated at the moment a follow-up attack can be input, not at the moment the character can block or perform movement options. An attack that with DRC +8 on Hit can link into an 8-frame attack, and DRC +4 on Block can create a true blockstring into a 4-frame attack. Note that any DRC on Block worse than +4 cannot form a true blockstring, allowing the opponent to interrupt with an invincible reversal. Most light normals are slightly negative after a DRC on block, meaning the opponent can mash their fastest normal to guarantee a counter-hit (though this requires fast reactions). The attacking character could punish this with Light > DRC into an immediate invincible attack, but this would be an incredibly expensive and high-risk gambit.
|
| Forced Knockdown |
Most airborne command normals, special moves, and Super Arts put the user in a "Forced Knockdown" state. While in this state, an air knockdown will occur when being hit by any attack, even if it would otherwise cause an air reset. As an example, Ryu's 2HP causes an air reset when used as an anti-air. Against a move like Cammy's Hooligan Combination, however, the 2HP puts her into an air knockdown state. This allows Ryu to successfully cancel 2HP into Shoryuken for a juggle, similar to how a Drive Impact wall splat works. Taking advantage of Forced Knockdown juggles is important for dealing with moves like Ken's Dragonlash, Dhalsim's Air Teleport, or Kimberly's 6HK~Hop sequence. Moves that already cause an air knockdown, like most j.MP air-to-airs, will not display the "Forced Knockdown" message.
|
| Guard |
Refers to the direction an attack must be blocked. L is for Low attacks (must be blocked crouching), H is for High attacks/overheads (must be blocked standing), LH is for attacks that can be blocked crouching or standing. T is for Throw attacks which cannot be blocked.
|
| Juggles |
When a character is put into an Air Knockdown state, it is often possible to follow up with a Juggle attack before they hit the ground. In the simplest terms, there are 2 main juggle states:
The following is a more detailed overview of the SF6 juggle system:
Juggle Start (JS): When starting a juggle, the opponent's JC will be set to this value. May be different vs. standing and airborne opponents.
Juggle Increase (JI): When opponent is already in a juggle state, attacks will increase the opponent's JC by this amount.
Juggle Limit (JL): Property of an attack hitbox that determines whether it connects on a juggled opponent. The JL must be ≥ the opponent's JC to hit successfully.
An example to tie everything together:
Drive Rush notes:
|
| On Hit/Block |
These are frame advantage values when the attack hits or is blocked. If the number is positive, then the move will recover before the defender can act again. If the number is negative, the defender will be able to act before the attacker and maybe even punish. KD refers to knockdown on hit, and the listed KD Advantage refers to how many frames the attacker can act before the defender finishes their wakeup animation.
|
| Recovery |
How many frames it takes for a move to finish after the active frames have finished. For projectiles, recovery is considered to begin after the first active frame.
|
| Startup |
How many frames it takes before the move becomes 'active' or have a hit box. The last startup frame and the first active frame are the same frame, meaning all values are written as Startup + 1.
|
Normals
Standing Normals
5LP
| Startup | Active | Recovery | Cancel | Damage | Guard | On Hit | On Block |
|---|---|---|---|---|---|---|---|
| 6 | 3 | 11 | TC | 400 | LH | 0 | -2 |
5MP
| Startup | Active | Recovery | Cancel | Damage | Guard | On Hit | On Block |
|---|---|---|---|---|---|---|---|
| 7 | 4 | 15(17) | TC | 700 | LH | +2 | -1 |
5HP
| Startup | Active | Recovery | Cancel | Damage | Guard | On Hit | On Block |
|---|---|---|---|---|---|---|---|
| 12 | 2 | 23 | TC | 1000 | LH | +3 | -3 |
| Startup | Active | Recovery | Cancel | Damage | Guard | On Hit | On Block |
|---|---|---|---|---|---|---|---|
| 26(5) | 2 | 22 (21 on hit or block) | TC | 1200 | LH | +7 | +4 |
5LK
| Startup | Active | Recovery | Cancel | Damage | Guard | On Hit | On Block |
|---|---|---|---|---|---|---|---|
| 6 | 2 | 14 | Sp SA | 400 | LH | 0 | -2 |
5MK
| Startup | Active | Recovery | Cancel | Damage | Guard | On Hit | On Block |
|---|---|---|---|---|---|---|---|
| 11 | 4 | 16 | - | 800 | LH | +4 | -2 |
5HK
| Startup | Active | Recovery | Cancel | Damage | Guard | On Hit | On Block |
|---|---|---|---|---|---|---|---|
| 15 | 2 | 25 | - | 1000 | LH | +1 | -3 |
| Startup | Active | Recovery | Cancel | Damage | Guard | On Hit | On Block |
|---|---|---|---|---|---|---|---|
| 27(10) | 2 | 25 | - | 1200 | LH | KD +36 | +1 |
Crouching Normals
2LP
| Startup | Active | Recovery | Cancel | Damage | Guard | On Hit | On Block |
|---|---|---|---|---|---|---|---|
| 4 | 2 | 10 | Chn Sp SA | 300 | LH | +3 | -3 |
2MP
| Startup | Active | Recovery | Cancel | Damage | Guard | On Hit | On Block |
|---|---|---|---|---|---|---|---|
| 8 | 3 | 16 | Sp SA | 700 | LH | +3 | -2 |
2HP
| Startup | Active | Recovery | Cancel | Damage | Guard | On Hit | On Block |
|---|---|---|---|---|---|---|---|
| 9 | 5 | 23 | - | 900 | LH | KD +35 | -6 |
| Startup | Active | Recovery | Cancel | Damage | Guard | On Hit | On Block |
|---|---|---|---|---|---|---|---|
| 21(4) | 6 | 21 | - | 1000 | LH | KD +52 | -3 |
2LK
| Startup | Active | Recovery | Cancel | Damage | Guard | On Hit | On Block |
|---|---|---|---|---|---|---|---|
| 5 | 3 | 12 | Chn | 300 | L | 0 | -3 |
2MK
| Startup | Active | Recovery | Cancel | Damage | Guard | On Hit | On Block |
|---|---|---|---|---|---|---|---|
| 9 | 3 | 18 | - | 600 | L | +2 | -2 |
2HK
| Startup | Active | Recovery | Cancel | Damage | Guard | On Hit | On Block |
|---|---|---|---|---|---|---|---|
| 11 | 3 | 26 | - | 1000 | L | HKD +29 | -11 |
| Startup | Active | Recovery | Cancel | Damage | Guard | On Hit | On Block |
|---|---|---|---|---|---|---|---|
| 23(4) | 3 | 23 (20 on hit or block) | - | 1200 | L | HKD +35 | -3 |
Jumping Normals
j.LP
| Startup | Active | Recovery | Cancel | Damage | Guard | On Hit | On Block |
|---|---|---|---|---|---|---|---|
| 4 | 7 | 3 land | - | 300 | H | - | - |
j.MP
| Startup | Active | Recovery | Cancel | Damage | Guard | On Hit | On Block |
|---|---|---|---|---|---|---|---|
| 7 | 4 | 3 land | TC | 700 | H | - | - |
j.HP
| Startup | Active | Recovery | Cancel | Damage | Guard | On Hit | On Block |
|---|---|---|---|---|---|---|---|
| 10 | 7 | 3 land | - | 800 | H | - | - |
| Startup | Active | Recovery | Cancel | Damage | Guard | On Hit | On Block |
|---|---|---|---|---|---|---|---|
| 28(5) | 6 | 3 land | - | 1500 | H | HKD +66(+72) | +9(+15) |
j.LK
| Startup | Active | Recovery | Cancel | Damage | Guard | On Hit | On Block |
|---|---|---|---|---|---|---|---|
| 5 | 10 | 3 land | - | 300 | H | - | - |
j.MK
| Startup | Active | Recovery | Cancel | Damage | Guard | On Hit | On Block |
|---|---|---|---|---|---|---|---|
| 8 | 8 | 3 land | - | 500 | H | - | - |
j.HK
Command Normals
6MP
| Startup | Active | Recovery | Cancel | Damage | Guard | On Hit | On Block |
|---|---|---|---|---|---|---|---|
| 10 | 2 | 20 | TC | 800 | LH | +2 | -3 |
4HP
| Startup | Active | Recovery | Cancel | Damage | Guard | On Hit | On Block |
|---|---|---|---|---|---|---|---|
| 8 | 2 | 21(24) | Sp SA | 900 | LH | +3 | -1 |
| Startup | Active | Recovery | Cancel | Damage | Guard | On Hit | On Block |
|---|---|---|---|---|---|---|---|
| 20(3) | 2 | 19(24) | Sp SA | 1000 | LH | +13 | +4 |
3HP
| Startup | Active | Recovery | Cancel | Damage | Guard | On Hit | On Block |
|---|---|---|---|---|---|---|---|
| 21 | 2 | 21 | TC | 900 | H | 0 | -3 |
| Startup | Active | Recovery | Cancel | Damage | Guard | On Hit | On Block |
|---|---|---|---|---|---|---|---|
| 31(14) | 2 | 19 | TC | 1000 | H | +5 | +2 |
6HK
| Startup | Active | Recovery | Cancel | Damage | Guard | On Hit | On Block |
|---|---|---|---|---|---|---|---|
| 14 | 4 | 21 | Sp SA TC | 900 | LH | 0 | -3 |
| Startup | Active | Recovery | Cancel | Damage | Guard | On Hit | On Block |
|---|---|---|---|---|---|---|---|
| 27(4~7) | 4 | 19 | Sp SA TC | 1000 | LH | +10 | +3 |
j.2HP
No results
- Can hit Crossup
Target Combos
5LP~LP
| Startup | Active | Recovery | Cancel | Damage | Guard | On Hit | On Block |
|---|---|---|---|---|---|---|---|
| 14 | 3 | 22 | Sp SA | 600 | LH | -3 | -6 |
5MP~MP
| Startup | Active | Recovery | Cancel | Damage | Guard | On Hit | On Block |
|---|---|---|---|---|---|---|---|
| 14 | 2 | 23 | Sp SA | 600 | LH | -3 | -8 |
5HP~HP
| Startup | Active | Recovery | Cancel | Damage | Guard | On Hit | On Block |
|---|---|---|---|---|---|---|---|
| 24 | 3 | 19 | - | 1000 (900) | LH | KD +35 | +2 |
6MP~HP
| Startup | Active | Recovery | Cancel | Damage | Guard | On Hit | On Block |
|---|---|---|---|---|---|---|---|
| 11 | 2 | 26 | - | 800 | L | KD +31 | -12 |
6MP~HK
| Startup | Active | Recovery | Cancel | Damage | Guard | On Hit | On Block |
|---|---|---|---|---|---|---|---|
| 11 | 4 | 23 | SA | 800 | LH | KD +39 / (-21) | -10(-26) |
3HP~3HP
| Startup | Active | Recovery | Cancel | Damage | Guard | On Hit | On Block |
|---|---|---|---|---|---|---|---|
| 18 | 2 | 24 | - | 900 | H | -3 | -12 |
6HK~6HK
| Startup | Active | Recovery | Cancel | Damage | Guard | On Hit | On Block |
|---|---|---|---|---|---|---|---|
| 16 | 5 | 25 | - | 1000 | LH | KD +40 | -12 |
j.MP~MP
Throws
Forward Throw (LPLK)
| Startup | Active | Recovery | Cancel | Damage | Guard | On Hit | On Block |
|---|---|---|---|---|---|---|---|
| 5 | 3 | 23 | - | 1200 (2040) | T | KD +23 | - |
Back Throw (4LPLK)
| Startup | Active | Recovery | Cancel | Damage | Guard | On Hit | On Block |
|---|---|---|---|---|---|---|---|
| 5 | 3 | 23 | - | 1200 (2040) | T | KD +33 | - |
Drive System
Drive Impact (HPHK)
| Startup | Active | Recovery | Cancel | Damage | Guard | On Hit | On Block |
|---|---|---|---|---|---|---|---|
| 26 | 2 | 35 | - | 800 | LH | KD +35 / Wall Splat KD +65 | -3 / Wall Splat HKD +72 |
See Drive Impact
When cancelled from a normal, these are the important blockstring gaps; a gap of N will trade with an N-frame startup attack; [] = Burnout
- -
- Note: gaps of 8f or less cannot be escaped by jumping
Drive Reversal (6HPHK)
| Startup | Active | Recovery | Cancel | Damage | Guard | On Hit | On Block |
|---|---|---|---|---|---|---|---|
| 20(18) | 3 | 26(31) | - | 500 recoverable | LH | KD +23 | -6 |
See Drive Reversal
- Full Invuln: 1-22f; Armor Break
Drive Parry (MPMK)
| Startup | Active | Recovery | Cancel | Damage | Guard | On Hit | On Block |
|---|---|---|---|---|---|---|---|
| 1 | 12 or until released | 33(1)(11) | - | - | - | - | - |
See Drive Parry
- Perfect Parry has only 1f recovery, and disables the opponent from canceling their attack
- Perfect Parry vs. projectiles puts you into a fixed 11f recovery
Drive Rush (66)
| Startup | Active | Recovery | Cancel | Damage | Guard | On Hit | On Block |
|---|---|---|---|---|---|---|---|
| 9(11) | 45(46) | 24(23) | - | - | - | - | - |
See Drive Rush. Frame data shown in (parentheses) refers to the version used after Parry.
- Notable Drive Rush cancel combo routes:
- Notable Drive Rush cancel blockstring gaps:
Special Moves
Gladius (236P)
| Startup | Active | Recovery | Cancel | Damage | Guard | On Hit | On Block |
|---|---|---|---|---|---|---|---|
| 17 | 4 | 21 | SA3 | 1200 | LH | KD +36 | -5 |
| Startup | Active | Recovery | Cancel | Damage | Guard | On Hit | On Block |
|---|---|---|---|---|---|---|---|
| 30 | 4 | 20 | SA3 (1st) | 1200,1000,200 (2400) | LH | HKD +40 | +4 |
| Startup | Active | Recovery | Cancel | Damage | Guard | On Hit | On Block |
|---|---|---|---|---|---|---|---|
| 19 | 4 | 21 | SA3 | 1400 | LH | KD +36 | -5 |
| Startup | Active | Recovery | Cancel | Damage | Guard | On Hit | On Block |
|---|---|---|---|---|---|---|---|
| 35 | 4 | 20 | SA3 (1st) | 1400,1000,200 (2600) | LH | HKD +40 | +4 |
| Startup | Active | Recovery | Cancel | Damage | Guard | On Hit | On Block |
|---|---|---|---|---|---|---|---|
| 22 | 4 | 21 | SA3 | 1600 | LH | KD +36 | -5 |
| Startup | Active | Recovery | Cancel | Damage | Guard | On Hit | On Block |
|---|---|---|---|---|---|---|---|
| 41 | 4 | 20 | SA3 (1st) | 1600,1000,200 (2800) | LH | HKD +40 | +4 |
| Startup | Active | Recovery | Cancel | Damage | Guard | On Hit | On Block |
|---|---|---|---|---|---|---|---|
| 19 | 4 | 21 | SA2 SA3 | 1700 | LH | KD +36 | -2 |
| Startup | Active | Recovery | Cancel | Damage | Guard | On Hit | On Block |
|---|---|---|---|---|---|---|---|
| 35 | 4 | 20 | SA2 SA3 (1st) | 1700,1000,200 (2900) | LH | HKD +40 | +4 |
Dimachaerus (214P)
| Startup | Active | Recovery | Cancel | Damage | Guard | On Hit | On Block |
|---|---|---|---|---|---|---|---|
| 12 | 4 | 30 | SA3 | 600 | LH | -3 | -16 |
| Startup | Active | Recovery | Cancel | Damage | Guard | On Hit | On Block |
|---|---|---|---|---|---|---|---|
| 16 | 4 | 30 | SA3 | 700 | LH | 0 | -16 |
| Startup | Active | Recovery | Cancel | Damage | Guard | On Hit | On Block |
|---|---|---|---|---|---|---|---|
| 22 | 4 | 30 | SA3 | 800 | LH | KD +38 | -16 |
| Startup | Active | Recovery | Cancel | Damage | Guard | On Hit | On Block |
|---|---|---|---|---|---|---|---|
| 16 | 4 | 26 | SA2 SA3 | 600 | LH | KD +42 | -12 |
Dimachaerus Followup (214P~6P)
No results
| Startup | Active | Recovery | Cancel | Damage | Guard | On Hit | On Block |
|---|---|---|---|---|---|---|---|
| 13 | 5 | 23 | - | 600 | LH | KD +58 Bounce | - |
Phalanx (623P)
| Startup | Active | Recovery | Cancel | Damage | Guard | On Hit | On Block |
|---|---|---|---|---|---|---|---|
| 25 | 3 | 2+16 land | - | 1500 | LH | KD +42(43) | +2(3) |
| Startup | Active | Recovery | Cancel | Damage | Guard | On Hit | On Block |
|---|---|---|---|---|---|---|---|
| 28 | 3 | 2+16 land | - | 1600 | LH | KD +42(43) | +2(3) |
| Startup | Active | Recovery | Cancel | Damage | Guard | On Hit | On Block |
|---|---|---|---|---|---|---|---|
| 32 | 3 | 2+16 land | - | 1700 | LH | KD +42(43) | +2(3) |
| Startup | Active | Recovery | Cancel | Damage | Guard | On Hit | On Block |
|---|---|---|---|---|---|---|---|
| 28 | 3 | 2+16 land | - | 1400 | LH | KD +70 Tumble (HKD +138 Wall Splat) | +4(5) |
Quadriga (236K)
| Startup | Active | Recovery | Cancel | Damage | Guard | On Hit | On Block |
|---|---|---|---|---|---|---|---|
| 20 | 4 | 24 | SA3 | 1400 | LH | KD +35 | -6 |
| Startup | Active | Recovery | Cancel | Damage | Guard | On Hit | On Block |
|---|---|---|---|---|---|---|---|
| 24 | 4 | 22 | SA3 | 1500 | LH | KD +37 | -4 |
| Startup | Active | Recovery | Cancel | Damage | Guard | On Hit | On Block |
|---|---|---|---|---|---|---|---|
| 29 | 4 | 21 | SA3 | 1600 | LH | KD +37 | -3 |
| Startup | Active | Recovery | Cancel | Damage | Guard | On Hit | On Block |
|---|---|---|---|---|---|---|---|
| 24 | 4 | 24 | SA2 SA3 | 1500 | LH | KD +50(68) Wall Splat | -6 |
Scutum (214K)
| Startup | Active | Recovery | Cancel | Damage | Guard | On Hit | On Block |
|---|---|---|---|---|---|---|---|
| 3(8) | 26(116) | 26 | - | - | - | - | - |
No results
- Triggers automatically after absorbing attack
| Startup | Active | Recovery | Cancel | Damage | Guard | On Hit | On Block |
|---|---|---|---|---|---|---|---|
| 1 | 28(58) | 29 | - | - | - | - | - |
No results
- Triggers automatically after absorbing attack
Tonitrus (214K~P~P)
| Startup | Active | Recovery | Cancel | Damage | Guard | On Hit | On Block |
|---|---|---|---|---|---|---|---|
| 8+15(16) | 3 | 23(25) | TC | 900 | H | +1 | -3 |
| Startup | Active | Recovery | Cancel | Damage | Guard | On Hit | On Block |
|---|---|---|---|---|---|---|---|
| 20 | 3 | 36 | - | 1000 | LH | KD +31 | -21 |
No results No results
Procella (214K~K)
| Startup | Active | Recovery | Cancel | Damage | Guard | On Hit | On Block |
|---|---|---|---|---|---|---|---|
| 8+16 | 3 | 37 | - | 1200 | L | HKD +22 | -24 |
No results
Enfold (214K~LPLK)
Super Arts
Level 1 Super (236236P)
| Startup | Active | Recovery | Cancel | Damage | Guard | On Hit | On Block |
|---|---|---|---|---|---|---|---|
| 19 | 5 | 60 | - | 2200 | LH | KD +14 | -43 |
Level 2 Super (214214P)
| Startup | Active | Recovery | Cancel | Damage | Guard | On Hit | On Block |
|---|---|---|---|---|---|---|---|
| 9 | 7(33)3 | 59 | - | 3000(2500) | LH | HKD +17 | -44(-77) |
No results
Level 3 Super (236236K)
| Startup | Active | Recovery | Cancel | Damage | Guard | On Hit | On Block |
|---|---|---|---|---|---|---|---|
| 13 | 7 | 60 | - | 4000 | LH | HKD +14 | -39(-33) |
| Startup | Active | Recovery | Cancel | Damage | Guard | On Hit | On Block |
|---|---|---|---|---|---|---|---|
| 13 | 7 | 60 | - | 4500 | LH | HKD +14 | -39(-33) |
Taunts
Neutral Taunt (5PPPKKK)
| Startup | Active | Recovery | Cancel | Damage | Guard | On Hit | On Block |
|---|---|---|---|---|---|---|---|
| 242 (total) | - | - | - | - | - | - | - |
Forward Taunt (6PPPKKK)
| Startup | Active | Recovery | Cancel | Damage | Guard | On Hit | On Block |
|---|---|---|---|---|---|---|---|
| 85 | [55] | 72 | - | - | - | - | - |
- Active frames refer to 1-hit armor
- 211f total animation
Back Taunt (4PPPKKK)
| Startup | Active | Recovery | Cancel | Damage | Guard | On Hit | On Block |
|---|---|---|---|---|---|---|---|
| 184 (total) | - | - | - | - | - | - | - |

