Introduction
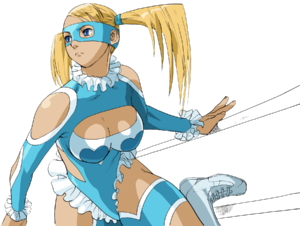
Rainbow Mika, a fan of Zangief, is a rookie wrestler who is ready to make a name for herself by traveling the world and participate in the street fighting circuit. In the end, she gains the patronage of Karin after a surprise defeat, meets her idol Zangief, and was sought by the IJWPW (Iwashigahama Japan Women's Pro-Wrestling).
| Pros | Cons |
|
|
Notes:
- full health meter and super meter = 144 points
- 1 frame = 1/60 of a second
- frame data = x(x)x (startup/hitframes/recovery)
- damage = D, not reflected to show increase/decrease in attack strength with X/V-ISM (# x 1.2 or 0.8, respectively, not taking damage scaling into account) or Counter Hits (# x 1.125 in most cases), or opponent's varying defense ratings
- dizzy = DZ
- gauge = how much meter you get for doing the move
- hit bonus = HB, additioal amount of meter you get for connecting with the move
Normals
Ground Normals
- Standing Jab:
| Damage | 6 | 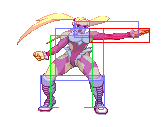
|
| Stun | 2 | |
| Chain Cancel | No | |
| Special Cancel | Yes | |
| Super Cancel | Yes | |
| Meter on whiff/hit | 0/1 | |
| Frame Count | 6/3/7 | |
| Block Stun | +4 | |
| Hit Stun/Counter Hit | +5/+10 |
- Good button to just throw out. Decent priority, and starts combos as an anti-air thanks to qcb+k or with CCs.
- Standing Strong
- 10 frames active makes this move a very easy meaty. The priority is great but it's very lenghty overall so take care in whiffing this.
- Standing Fierce:
| Damage | 18 | 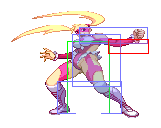
|
| Stun | 8 | |
| Chain Cancel | No | |
| Special Cancel | No | |
| Super Cancel | No | |
| Meter on whiff/hit | 1/4(A)6(XV) | |
| Frame Count | 18/4/11 | |
| Block Stun | +8 | |
| Hit Stun/Counter Hit | +9/Launch |
- At +8 on block, this makes for a really good meaty. Lenghty start-up makes this hard to use on neutral.
- Links into cr.hk on normal hit. on counter hit and in the corner, it is possible to do st.lp xx qcb+k
- Can kara cancel into any of her specials. This is specially important for her command grab, as it gives it a much needed range increase.
- The input for the kara cancel is 41236HP98K. It doesn't need to be frame adjacent, there is a lot of leniency.
- Standing Short:
| Damage | 6 | 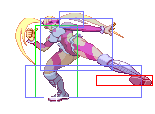
|
| Stun | 2 | |
| Chain Cancel | No | |
| Special Cancel | Yes | |
| Super Cancel | Yes | |
| Meter on whiff/hit | 0/1 | |
| Frame Count | 6/3/5 | |
| Block Stun | -4 | |
| Hit Stun/Counter Hit | -3/+2 |
- A kick to the shin. Not particularly useful outside of super confirms after cr.lp chains
- Standing Forward:
| Damage | 12 | 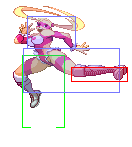
|
| Stun | 4 | |
| Chain Cancel | No | |
| Special Cancel | No | |
| Super Cancel | No | |
| Meter on whiff/hit | 1/3(A)4(XV) | |
| Frame Count | 10/4/14 | |
| Block Stun | +1 | |
| Hit Stun/Counter Hit | +2/+6 |
- Note: Low crush from frames 10 to 19
- Very important move for her neutral. Evading lows is essential for Mika as he otherwise has a lot of trouble against characters with good low pokes.
- Standing Roundhouse:
| Damage | 16 | 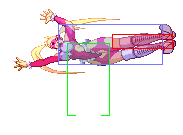
|
| Stun | 8 | |
| Chain Cancel | No | |
| Special Cancel | No | |
| Super Cancel | No | |
| Meter on whiff/hit | 1/4(A)6(XV) | |
| Frame Count | 11/2/25 | |
| Block Stun | -4 | |
| Hit Stun/Counter Hit | Launch/Launch |
- Note: Low crush from frames 7 to 16
- Is a low crush, but tends to whiff on crouchers.
- Crouching Jab:
| Damage | 5 | 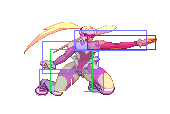
|
| Stun | 1 | |
| Chain Cancel | Yes | |
| Special Cancel | Yes | |
| Super Cancel | Yes | |
| Meter on whiff/hit | 0/1 | |
| Frame Count | 6/4/8 | |
| Block Stun | +2 | |
| Hit Stun/Counter Hit | +3/+8 |
- Her most important light. Chains into all other lights and can't be crouched compared to st.lp.
- Very oppresive in X-ISM thanks to being able to chain into cr.hp and st.hp, bot advancing plus on block buttons with great reward on hit.
- Crouching Strong:
| Damage | 13 | 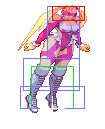
|
| Stun | 4 | |
| Chain Cancel | No | |
| Special Cancel | No | |
| Super Cancel | No | |
| Meter on whiff/hit | 1/3(A)4(XV) | |
| Frame Count | 6/1/22(AV)26(X) | |
| Block Stun | -4(AV)-8(X) | |
| Hit Stun/Counter Hit | -3(AV)-7(X)/+1(AV)-3(X) |
- Note: Above waist invul from frames 5 to 8
- Great anti-air against cross-ups, but the forward movement makes it somewhat unpredictable.
- Crouching Fierce:
| Damage | 16 | 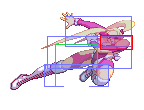
|
| Stun | 8 | |
| Chain Cancel | No | |
| Special Cancel | Yes | |
| Super Cancel | Yes | |
| Meter on whiff/hit | 1/4(A)6(XV) | |
| Frame Count | 11/18/19 | |
| Block Stun | +2 | |
| Hit Stun/Counter Hit | Launch/Launch |
- Note:Remains active until the opponent blocks or gets hit by it, then enters recovery inmediately after.
- Awesome button for her pressure. Acts as her best punish starter in a lot of cases.
- Crouching Short:
| Damage | 4 | 
|
| Stun | 2 | |
| Chain Cancel | No | |
| Special Cancel | Yes | |
| Super Cancel | Yes | |
| Meter on whiff/hit | 0/1 | |
| Frame Count | 6/4/15 | |
| Block Stun | -2 | |
| Hit Stun/Counter Hit | -1/+3 |
- Longest reaching light. Often used to end light chains.
- Crouching Forward:
| Damage | 11 | 
|
| Stun | 4 | |
| Chain Cancel | No | |
| Special Cancel | No | |
| Super Cancel | No | |
| Meter on whiff/hit | 2/3(A)4(XV) | |
| Frame Count | 7/1/20 | |
| Block Stun | -2 | |
| Hit Stun/Counter Hit | -1/+3 |
- Pretty solid mid poke. Not that good priority but there's a lot of pokes you can avoid with this.
- Crouching Roundhouse:
| Damage | 15 | 
|
| Stun | 8 | |
| Chain Cancel | No | |
| Special Cancel | No | |
| Super Cancel | No | |
| Meter on whiff/hit | 2/4(A)6(XV) | |
| Frame Count | 7/6/27 | |
| Block Stun | -10 | |
| Hit Stun/Counter Hit | - |
- Probably Mika's best button. Very quick slide. Very unsafe on block when done up close, but being able to threaten with this is very important.
Air Normals
- Neutral Jump Jab:
| Damage | 8 | 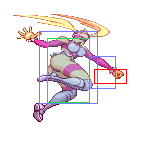
|
| Stun | 2 | |
| Meter on whiff/hit | 0/1 | |
| Frame Count | 6/6/4 |
- Quick air-to-air
- Diagonal Jump Jab:
| Damage | 8 | 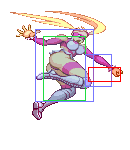
|
| Stun | 2 | |
| Meter on whiff/hit | 0/1 | |
| Frame Count | 7/6/8 |
- Not particularly useful compared to her other jump-ins
- Neutral Jump Strong:
| Damage | 13 | 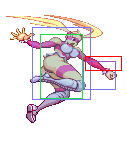
|
| Stun | 4 | |
| Meter on whiff/hit | 1/3(A)4(XV) | |
| Frame Count | 7/6/8 |
- Hits more upwards than it looks
- Diagonal Jump Strong:
| Damage | 13 | 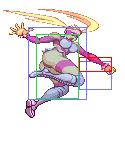 | |
|
| Stun | 4 | |
| Meter on whiff/hit | 1/3(A)4(XV) | |
| Frame Count | 6/6/8 |
- Solid priority, useful for when j.hp or j.hk would lose to an anti air for being too slow.
- Neutral Jump Fierce:
| Damage | 17 | 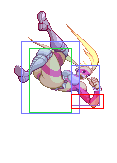
|
| Stun | 8 | |
| Meter on whiff/hit | 1/4(A)6(XV) | |
| Frame Count | 8/6/10 |
- Solid air-to-air but somewhat slow.
- Diagonal Jump Fierce:
| Damage | 17 | 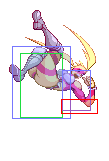
|
| Stun | 8 | |
| Meter on whiff/hit | 1/4(A)6(XV) | |
| Frame Count | 8/6/8 |
- Best jump-in in terms of hitbox, but not very good horizontal range. Great at stuffing most anti airs however.
- Neutral/Diagonal Jump Short:
| Damage | 6 | 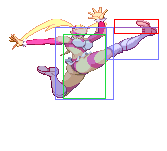
|
| Stun | 2 | |
| Meter on whiff/hit | 0/1 | |
| Frame Count | 5/8/10 |
- Great counter hit fisher. Blazing fast at 5 frames so you can win a lot of scrambles with it.
- Neutral Jump Forward:
| Damage | 11 | 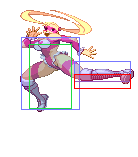
|
| Stun | 4 | |
| Meter on whiff/hit | 1/3(A)4(XV) | |
| Frame Count | 7/4/11 |
- Really good horizontal hitbox, which is otherwise a weak spot for her jumping attacks
- Diagonal Jump Forward:
| Damage | 11 | 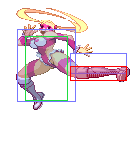
|
| Stun | 3 | |
| Meter on whiff/hit | 1/3(A)4(XV) | |
| Frame Count | 7/4/8 |
- Same uses as Neutral Jumping Forward
- Neutral Jump Roundhouse:
| Damage | 17 | 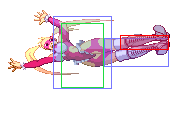
|
| Stun | 8 | |
| Meter on whiff/hit | 1/4(A)6(XV) | |
| Frame Count | 9/4/20 |
- Very good horizontal priority but comes out really slowly compared to her other options, sadly.
- Diagonal Jump Roundhouse:
| Damage | 17 | 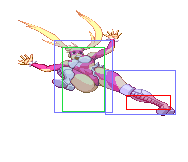
|
| Stun | 8 | |
| Meter on whiff/hit | 1/4(A)6(XV) | |
| Frame Count | 9/4/12 |
- Very far reaching jump-in. Can always combo into slide if if hit deep enough, so catching an extended limb can still mean a knockdown.
Command Normals
| Damage | 11 | 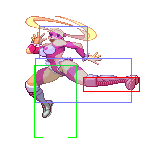
|
| Stun | 4 | |
| Chain Cancel | No | |
| Special Cancel | Yes | |
| Super Cancel | Yes | |
| Meter on whiff/hit | 1/3(A)4(XV) | |
| Frame Count | 13/4/14 | |
| Block Stun | +1 | |
| Hit Stun/Counter Hit | +2/+6 |
- Note: Low crush from frames 10 to 20
- A low crush that moves forward, great on that alone. Recovers more slowly compared to st.mk to compensate.
- Can cancel into super which is a great thing to have in a low crush to put more threath behind it.
| Damage | 6 | 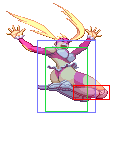
|
| Stun | 2 | |
| Meter on whiff/hit | 0/1 | |
| Frame Count | 6/3/11 |
- Okay-ish jump-in, but overlaps a bit with j.lp, and doesnt have that good of a priority.
| Damage | 17 | 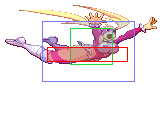
|
| Stun | 8 | |
| Meter on whiff/hit | 1/4(A)6(V) | |
| Frame Count | 8/8/9 |
- Typical grappler body press. Awesome cross-up, but pron to be anti aired due to its poor priority. Definetly no Gief, but still a great option.
[Throws]
[1] (XAV) German Suplex = b/f PP
5(1)18 // D: 20 // DZ+0 // Gauge+0 // Range: 31
[2] (XAV) Brain Buster = b/f KK
5(1)18 // D: 20 // Gauge+1 (VX+3) // Range: 31
[3] (XAV) Headbutt = db/df PP
5(1)18 // D: 8+2x(0-11)+4 // Gauge+1 (VX+3) // Range: 31
[4] (XAV) Hip Buster (air) = b/f PP
1(1)X // D: 20 // Gauge+1 (VX+3) // Range: 27 horizontal x 8 vertical (pixels 60-68) // MISC: Recovery time depends on height, airborne
[5] (XAV) Neck Breaker (air) = b/f KK
1(1)X // D: 20 // Gauge+1 (VX+3) // Range: 31 horizontal x 8 vertical (pixels 68-76) // MISC: Recovery time depends on height, airborne
Specials
[1] (XAV) Flying Peach = qcb P
[LP]
31(16)14 // D: 16 // Gauge+3 (VX+4) // HB+ 3 (VX+4) // MISC: Invulnerable as: [4|4](first eight frames), airborne from frames 5-18, and 28-50
[MP]
33(18)15 // D: 17 // Gauge+4 (VX+6) // HB+ 3 (VX+4) // MISC: Invulnerable as: [4|12] (first 16 frames), airborne from frames 5-20 and 30-55
[HP]
35(20)16 // D: 18 // Gauge+4 (VX+7) // HB+ 3 (VX+4) // MISC: Invulnerable as: [4|16] (first 20 frames), airborne from 5-22 and 32-60
[2] (XAV) Shooting Peach = qcb K
[LK]
12(16)65 // D: 16 // Gauge+3 (VX+4) // Dizzy: 8 // HB+ 3(VX+4) // MISC: airborne from frames 9-31
[MK]
12(18)67 // D: 17 // Gauge+4 (VX+7) // Dizzy: 8 // HB+ 3(VX+4) // MISC: airborne from frames 9-34
[HK]
12(20)70 // D: 18 // Gauge+4 (VX+7) // Dizzy: 8 // HB+ 3(VX+4) // MISC: airborne from frames 9-38
[3] (XAV) Paradise Hold = 360 P
[LP]
23(1)40 // D: 20 // Gauge+1 // Range: 32+31 // MISC: airborne from 3-19 and 23-51
[MP]
23(1)40 // D: 22 // Gauge+1 // Range: 48+31 // MISC: airborne from 3-19 and 23-51
[HP]
23(1)40 // D: 24 // Gauge+1 // Range: 64+31 // MISC: airborne from 3-19 and 23-51
[4] (XAV) Daydream Headlock = 360 K (tap P/K rapidly)
[LK]
4(1)18 // D: 3x(1~10)+10 // Gauge+1(VX+3) // Range: 31
[MK]
4(1)18 // D: 3x(1~13)+10 // Gauge+1(VX+3) // Range: 31
[HK]
4(1)18 // D: 3x(1~16)+10 // Gauge+1(VX+3) // Range: 31
[5] (XAV) Wingless Airplane (air) = hcb K
Supers
[1] (A) Heavenly Dyanamite = 720 P (tap P/K rapidly)
[Level 1]
4!1(1)22 // D: 3x(1~15)+21 // Range: 51 // MISC: invulnerable for the first 5 frames
[Level 2]
4!1(1)22 // D: 3x(1~18)+26 // Range: 51 // MISC: invulnerable for the first 5 frames
[Level 3]
4!1(1)22 // D: 3x(2-21)+32 // Range: 51 // MISC: invulnerable for the first 5 frames
[2] (A) Rainbow Hip Rush = qcf x2 P
[Level 1]
4!11(4)16(4)23(4|14)63 // D: 12x2+8+12 // MISC: knocks down, airborne from frames 58-80. Invulnerable for first 16 frames.
[Level 2]
4!11(4)16(4)15(3)24(4|4)15(6|13)63 // D: 10x4+9x3 // MISC: Invulnerable for first 24 frames, airborne from frames 100 to 123
[Level 3]
4!11 (4) 16 (4) 16 (4) 15 (3) 20 (4|4|4|) 9 (5|6|15) 63 // D: 12x3+8x7 // MISC: Invulnerable for first 36 frames, airborne 119-144
[3] (XA) Sardine's Beach Special = qcf x2 K
Level 1 SBS: 14 frames invulnerable Level 2 SBS: 18 frames Level 3 SBS: 22 frames
-> Hashiru = b/f (after S.B.S.)
--> Dageki 1: Ocean Drop Kick = LP (during Hashiru)
--> Dageki 2: Mika Sliding = MP (during Hashiru)
--> Dageki 3: Mika Lariat = HP (during Hashiru)
---> Moonsault Press = P / do nothing (after Dageki 1/2/3)
---> Missile Kick = K (after Dageki 1/2)
---> Paradise Hold = b/f or b/f P (after Dageki 1/2)
---> Wingless Airplane = b/f K (after Dageki 1/2)
--> Tobikoshi = K (during Hashiru)
--> Tobikoshi = run into enemy (during Hashiru)
---> Haigotori = tap P/K (during Tobikoshi)
---> Enzui Lariat = P (after Haigotori)
---> Enzui Drop Kick = K (after Haigotori)
---> Rainbow Suplex = b/f P (after Haigotori)
---> Daydream Headlock = b/f K (after Haigotori)
The Basics
Which Ism?
A-Ism
Lets her get the most out of f. MK and c. FP at the cost of losing customs and counter activate options.
V-Ism
Recommended
Easy VC with good damage. Generally her best option.
X-Ism
Loses access to her important level 1 and 2 supers. Avoid.
Combos
A-ISM combos
V-ISM combos
Advanced Strategy
Match-ups
Notable Players
Japan
Chikyuu (A/V-Mika)
Kayaman (A-Mika)
Kyofe (V-Mika)
Sarada (A-Mika)
VER (A/V-Mika)
North America
AMikelyStory (A/V-Mika)
Europe
Middlekick/s-e-h (A/V-Mika)
