Introduction
While growing up in Japan he always admired the art of sumo wrestling and he hoped to one day become the greatest sumo wrestler of all time. He spent the rest of his life dedicated to sumo, and eventually received the second-highest title of Ōzeki (the highest title is Yokozuna). He also acquires his own dojo where he teaches his students about discipline and respect for your opponent, which Honda believes are the marks of a true sumo wrestler. At some point, he went searching for worthy opponents of other fighting disciplines to prove that sumo wrestlers are the greatest fighters in the world. During this quest he was challenged by Sodom to join Mad Gear. Honda fought Sodom, won, and declined his invitation. He also fought Ryu at least once, and told Sakura (and maybe Juni found out from him, too) where to find Ryu. It is rumored that he teamed-up with Zangief to help take down the Shadaloo. He found some of the Dolls in the wake of Shadaloo's destruction that had amnesia due to the explosion and couldn't even remember their own names. He took pity on them, and brought them to his dojo, where they could be taken care of. He told them that they could leave if they wished once they regained their memory. Some time later he resumed his quest to prove the superiority of sumo in the fighting arts. It was at this time that he began actively competing in the World Warrior tournament. His star pupils at the time were Hatonoyama, Marunoumi, Yasuhanada, and Nishinofuji. He's still a sumo wrestler, as always. And training his students, of course.
|
|
| Pros |
Cons |
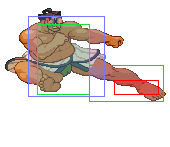
- Fierce headbutt is safe on block and can be very annoying in neutral
- Jab headbutt is a great anti-air
- Good range on air grab
- s. fierce is one of the best pre-emptive anti-air normals
- Many of his normals have decent priority
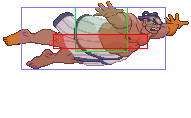
- Butt slam has a ton of start-up invincibility
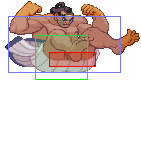
- Decent cross-up with splash
- Strong set of custom combos with high damage if finished with OTG command grab
- Fierce hands combo off c. LK if buffered fast enough
- j. LK has very good priority.
- Great meter build with one of the fastest whiff grabs. Is unique in that it can be done while crouching and holding charge
- Deceptively short hurtbox and can walk under many attacks
|
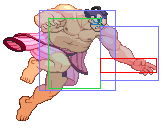
- Most of his normals are either stubby or slow
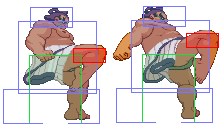
- Very wide hurtbox that makes it difficult to get around certain things and opens him up to char-specific combos. One of the fattest characters in the air.
- Slow movement speed
- Headbutt is very easily interrupted by jab spam
- Headbutt can be air-blocked and must be mixed in with other anti-air options
- Headbutt takes a while to get OTG and can be interrupted by lows
- Fierce headbutt does mediocre damage and doesn't knock down if done point blank
- Butt slam is punishable on block depending on when it hits. Always punishable against tall characters.
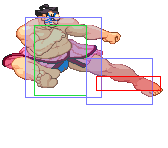
- Command grab lacks any sort of range
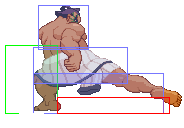
- Struggles if he can't sit on down-back with a lead
- Unique tech roll that is invincible to lows but vulnerable to mids. This is generally a bad thing, as cancellable mids can lead to more damage
- Very meter dependent character
|
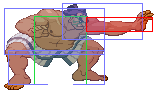
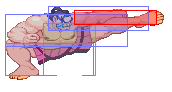
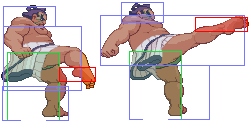
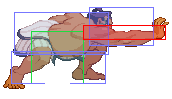
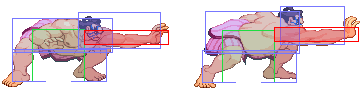
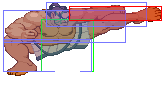
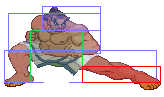
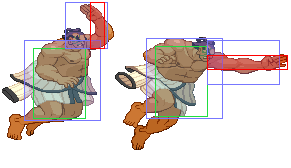
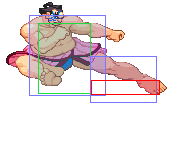
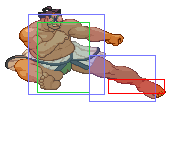
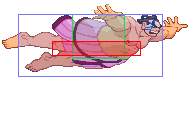
The rightmost image is his roll. For whatever reason instead of being vulnerable only to lows during a roll, Honda is instead only vulnerable to high/mid attacks.
Appearances
Street Fighter 2
Street Fighter 2: Championship Edition
Street Fighter 2 Turbo
Super Street Fighter 2
Super Street Fighter 2 Turbo
Street Fighter Alpha 3
Street Fighter Alpha 3 Max
Street Fighter Alpha Anthology
Capcom VS SNK
Capcom VS SNK: Pro
Capcom VS SNK 2
Card Fighters Clash
Card Fighters Clash 2
Street Fighter Alpha: Anthology
Moves List
Normal Moves
Ground Normals
| Damage |
7 |
|
| Stun |
2
|
| Chain Cancel |
No
|
| Special Cancel |
No
|
| Super Cancel |
No
|
| Meter on whiff/hit |
0/1
|
| Frame Count |
4/4/9
|
| Block Stun |
+1
|
| Hit Stun/Counter Hit |
+2/+7
|
- Close/Far Standing Strong:
| Damage |
13 |
|
| Stun |
4
|
| Chain Cancel |
No
|
| Special Cancel |
No
|
| Super Cancel |
No
|
| Meter on whiff/hit |
1/3/XV4
|
| Frame Count |
6/4/14
|
| Block Stun |
+1
|
| Hit Stun/Counter Hit |
+2/+6
|
- CStanding Fierce (A/V) /Close Fierce (X):
| Damage |
16 |
|
| Stun |
18/8
|
| Chain Cancel |
No
|
| Special Cancel |
No
|
| Super Cancel |
No
|
| Meter on whiff/hit |
1/4/XV6
|
| Frame Count |
7/6/20
|
| Block Stun |
-3
|
| Hit Stun/Counter Hit |
-2/Launch
|
- Far Standing Fierce (X) :
| Damage |
16 |
|
| Stun |
8
|
| Chain Cancel |
No
|
| Special Cancel |
No
|
| Super Cancel |
No
|
| Meter on whiff/hit |
1/6
|
| Frame Count |
8/3/33
|
| Block Stun |
-13
|
| Hit Stun/Counter Hit |
-12/Launch
|
- Close/Far Standing Short (A/V):
| Damage |
6 |
|
| Stun |
2
|
| Chain Cancel |
No
|
| Special Cancel |
No
|
| Super Cancel |
No
|
| Meter on whiff/hit |
0/1
|
| Frame Count |
4/4/11
|
| Block Stun |
-1
|
| Hit Stun/Counter Hit |
+0/+5
|
| Damage |
6 |
|
| Stun |
2
|
| Chain Cancel |
No
|
| Special Cancel |
No
|
| Super Cancel |
No
|
| Meter on whiff/hit |
0/1
|
| Frame Count |
5/2/17
|
| Block Stun |
-5
|
| Hit Stun/Counter Hit |
-4/+1
|
- Close Standing Short (X):
| Damage |
7 |
|
| Stun |
2
|
| Chain Cancel |
No
|
| Special Cancel |
No
|
| Super Cancel |
No
|
| Meter on whiff/hit |
0/1
|
| Frame Count |
4/3/13
|
| Block Stun |
+2
|
| Hit Stun/Counter Hit |
+3/+7
|
- Close/Far Standing Forward (A/V):
| Damage |
7+6 |
|
| Stun |
2x2
|
| Chain Cancel |
No
|
| Special Cancel |
No
|
| Super Cancel |
No
|
| Meter on whiff/hit |
1/1x2
|
| Frame Count |
4/2/4/12
|
| Block Stun |
+3
|
| Hit Stun/Counter Hit |
+4/+8
|
- Far Standing Forward (X):
| Damage |
7+13 |
|
| Stun |
2x2
|
| Chain Cancel |
No
|
| Special Cancel |
No
|
| Super Cancel |
No
|
| Meter on whiff/hit |
1/1+4
|
| Frame Count |
4/2/2/20
|
| Block Stun |
-3
|
| Hit Stun/Counter Hit |
-2/+2
|
- Close Standing Forward (X):
| Damage |
5 |
|
| Stun |
2
|
| Chain Cancel |
No
|
| Special Cancel |
No
|
| Super Cancel |
No
|
| Meter on whiff/hit |
1/4
|
| Frame Count |
6/4/13
|
| Block Stun |
+2
|
| Hit Stun/Counter Hit |
+3/+7
|
- Close/Far Standing Roundhouse:
| Damage |
10+8 |
|
| Stun |
4x2
|
| Chain Cancel |
No
|
| Special Cancel |
No
|
| Super Cancel |
No
|
| Meter on whiff/hit |
1/1x2/XV3x2
|
| Frame Count |
6/2/2/27
|
| Block Stun |
-6
|
| Hit Stun/Counter Hit |
-5/Launch
|
| Damage |
6 |

|
| Stun |
2
|
| Chain Cancel |
No
|
| Special Cancel |
No
|
| Super Cancel |
No
|
| Meter on whiff/hit |
0/1
|
| Frame Count |
4/4/11
|
| Block Stun |
-1
|
| Hit Stun/Counter Hit |
+0/+5
|
| Damage |
13 |
|
| Stun |
4
|
| Chain Cancel |
No
|
| Special Cancel |
No
|
| Super Cancel |
No
|
| Meter on whiff/hit |
1/3/XV4
|
| Frame Count |
5/5/17
|
| Block Stun |
-3
|
| Hit Stun/Counter Hit |
-2/+2
|
| Damage |
18 |
|
| Stun |
8
|
| Chain Cancel |
No
|
| Special Cancel |
No
|
| Super Cancel |
No
|
| Meter on whiff/hit |
1/4/V6
|
| Frame Count |
8/3/33
|
| Block Stun |
-13
|
| Hit Stun/Counter Hit |
-12/Launch
|
| Damage |
9+7 |
|
| Stun |
2+4
|
| Chain Cancel |
No
|
| Special Cancel |
No
|
| Super Cancel |
No
|
| Meter on whiff/hit |
1/3x2
|
| Frame Count |
5/4/6/5/16
|
| Block Stun |
+2
|
| Hit Stun/Counter Hit |
+3/Launch
|
| Damage |
6 |
|
| Stun |
2
|
| Chain Cancel |
No
|
| Special Cancel |
Yes
|
| Super Cancel |
Yes
|
| Meter on whiff/hit |
0/1
|
| Frame Count |
4/4/9
|
| Block Stun |
+1
|
| Hit Stun/Counter Hit |
+2/+7
|
| Damage |
7+5 |
|
| Stun |
2x2
|
| Chain Cancel |
No
|
| Special Cancel |
No
|
| Super Cancel |
No
|
| Meter on whiff/hit |
1/2x2
|
| Frame Count |
4/3/20
|
| Block Stun |
-2
|
| Hit Stun/Counter Hit |
-1/+3
|
| Damage |
12 |
|
| Stun |
2
|
| Chain Cancel |
No
|
| Special Cancel |
No
|
| Super Cancel |
No
|
| Meter on whiff/hit |
1/1
|
| Frame Count |
5/5/11
|
| Block Stun |
+3
|
| Hit Stun/Counter Hit |
+4/+8
|
| Damage |
17 |
|
| Stun |
8
|
| Chain Cancel |
No
|
| Special Cancel |
No
|
| Super Cancel |
No
|
| Meter on whiff/hit |
1/4/XV6
|
| Frame Count |
6/5/27
|
| Block Stun |
-9
|
| Hit Stun/Counter Hit |
Knockdown/Launch
|
Air Normals
| Damage |
7 |
|
| Stun |
2
|
| Chain Cancel |
No
|
| Special Cancel |
No
|
| Super Cancel |
No
|
| Meter on whiff/hit |
0/1
|
| Frame Count |
5/10/N/A
|
| Block Stun |
N/A
|
| Hit Stun/Counter Hit |
N/A
|
| Damage |
7 |
|
| Stun |
2
|
| Chain Cancel |
No
|
| Special Cancel |
No
|
| Super Cancel |
No
|
| Meter on whiff/hit |
0/1
|
| Frame Count |
5/10/N/A
|
| Block Stun |
N/A
|
| Hit Stun/Counter Hit |
N/A
|
- Neutral/Diagonal Jump Jab (X):
| Damage |
7 |
|
| Stun |
2
|
| Chain Cancel |
No
|
| Special Cancel |
No
|
| Super Cancel |
No
|
| Meter on whiff/hit |
0/1
|
| Frame Count |
9/10/N/A
|
| Block Stun |
N/A
|
| Hit Stun/Counter Hit |
N/A
|
| Damage |
12 |
|
| Stun |
11/4
|
| Chain Cancel |
No
|
| Special Cancel |
No
|
| Super Cancel |
No
|
| Meter on whiff/hit |
1/1
|
| Frame Count |
6/6/N/A
|
| Block Stun |
N/A
|
| Hit Stun/Counter Hit |
N/A
|
| Damage |
12 |
|
| Stun |
11/4
|
| Chain Cancel |
No
|
| Special Cancel |
No
|
| Super Cancel |
No
|
| Meter on whiff/hit |
1/A3/X1/V4
|
| Frame Count |
6/6/N/A
|
| Block Stun |
N/A
|
| Hit Stun/Counter Hit |
N/A
|
| Damage |
16 |
|
| Stun |
8
|
| Chain Cancel |
No
|
| Special Cancel |
No
|
| Super Cancel |
No
|
| Meter on whiff/hit |
1/4/XV6
|
| Frame Count |
7/6/N/A
|
| Block Stun |
N/A
|
| Hit Stun/Counter Hit |
N/A
|
| Damage |
16 |
|
| Stun |
8
|
| Chain Cancel |
No
|
| Special Cancel |
No
|
| Super Cancel |
No
|
| Meter on whiff/hit |
1/4/XV6
|
| Frame Count |
7/6/N/A
|
| Block Stun |
N/A
|
| Hit Stun/Counter Hit |
N/A
|
- Neutral Jump Short (A/V):
| Damage |
7 |
|
| Stun |
2
|
| Chain Cancel |
No
|
| Special Cancel |
No
|
| Super Cancel |
No
|
| Meter on whiff/hit |
0/1
|
| Frame Count |
5/10/N/A
|
| Block Stun |
N/A
|
| Hit Stun/Counter Hit |
N/A
|
| Damage |
6 |
|
| Stun |
2
|
| Chain Cancel |
No
|
| Special Cancel |
No
|
| Super Cancel |
No
|
| Meter on whiff/hit |
0/6
|
| Frame Count |
11/8/N/A
|
| Block Stun |
N/A
|
| Hit Stun/Counter Hit |
N/A
|
| Damage |
7 |
|
| Stun |
2
|
| Chain Cancel |
No
|
| Special Cancel |
No
|
| Super Cancel |
No
|
| Meter on whiff/hit |
0/1
|
| Frame Count |
4/16/N/A
|
| Block Stun |
N/A
|
| Hit Stun/Counter Hit |
N/A
|
- Neutral Jump Forward (A/V):
| Damage |
13 |
|
| Stun |
4
|
| Chain Cancel |
No
|
| Special Cancel |
No
|
| Super Cancel |
No
|
| Meter on whiff/hit |
1/A3/V4
|
| Frame Count |
9/12/N/A
|
| Block Stun |
N/A
|
| Hit Stun/Counter Hit |
N/A
|
- Diagonal Jump Forward (A/V):
| Damage |
12 |
|
| Stun |
4
|
| Chain Cancel |
No
|
| Special Cancel |
No
|
| Super Cancel |
No
|
| Meter on whiff/hit |
1/A3/V4
|
| Frame Count |
9/16/N/A
|
| Block Stun |
N/A
|
| Hit Stun/Counter Hit |
N/A
|
- Neutral Jump Forward (X):
| Damage |
13 |
|
| Stun |
2
|
| Chain Cancel |
No
|
| Special Cancel |
No
|
| Super Cancel |
No
|
| Meter on whiff/hit |
1/6
|
| Frame Count |
11/6/N/A
|
| Block Stun |
N/A
|
| Hit Stun/Counter Hit |
N/A
|
- Diagonal Jump Forward (X):
| Damage |
13 |
|
| Stun |
2
|
| Chain Cancel |
No
|
| Special Cancel |
No
|
| Super Cancel |
No
|
| Meter on whiff/hit |
1/6
|
| Frame Count |
11/7/N/A
|
| Block Stun |
N/A
|
| Hit Stun/Counter Hit |
N/A
|
Same hitbox/hurtbox properties as diagonal jump mk.
| Damage |
16 |
|
| Stun |
8
|
| Chain Cancel |
No
|
| Special Cancel |
No
|
| Super Cancel |
No
|
| Meter on whiff/hit |
1/4/XV6
|
| Frame Count |
10/6/N/A
|
| Block Stun |
N/A
|
| Hit Stun/Counter Hit |
N/A
|
- Diagonal Jump Roundhouse:
| Damage |
15 |
|
| Stun |
4
|
| Chain Cancel |
No
|
| Special Cancel |
No
|
| Super Cancel |
No
|
| Meter on whiff/hit |
1/4/XV6
|
| Frame Count |
10/4/N/A
|
| Block Stun |
N/A
|
| Hit Stun/Counter Hit |
N/A
|
Command Normals
| Damage |
8+6 |
|
| Stun |
2x2
|
| Chain Cancel |
No
|
| Special Cancel |
No
|
| Super Cancel |
No
|
| Meter on whiff/hit |
1/1x2
|
| Frame Count |
6/2/2/19
|
| Block Stun |
-2
|
| Hit Stun/Counter Hit |
-1/+4
|
- Sweep Kick:
 +
+
| Damage |
15 |
|
| Stun |
8
|
| Chain Cancel |
No
|
| Special Cancel |
No
|
| Super Cancel |
No
|
| Meter on whiff/hit |
1/4/XV6
|
| Frame Count |
14/4/27
|
| Block Stun |
-8
|
| Hit Stun/Counter Hit|{{STDiagramCell| -7/Launch}
|
- Splash (X):
 +
+ ( Air Only )
| Damage |
12 |
|
| Stun |
4
|
| Chain Cancel |
No
|
| Special Cancel |
No
|
| Super Cancel |
No
|
| Meter on whiff/hit |
1/4
|
| Frame Count |
9/16/N/A
|
| Block Stun |
N/A
|
| Hit Stun/Counter Hit |
N/A
|
Special Moves
Hyakuretsu Harite: Punch rapidly [X Z V]
-E.Honda will slap furiously in front of himself with his arms as blurs.
 Pressing LP rapidly will continue to slap until the button is neutral,
 while MP or HP rapidly will make E. Honda dash forward quickly with one
 quick flurry of slaps.
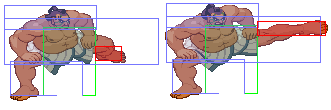
Super Zutsuki: CB,F+Punch [X Z V]
-E.Honda will shoot himself across the screen with a quick headbutt. The
 stronger the Punch button used, the faster and farther E.Honda will
 headbutt. Up close, using HP will hit twice.
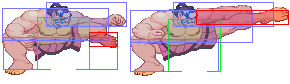
Super Hyakkan Otoshi: CD,U+Kick [X Z V]
-E.Honda leaps into the air with a Sumo Press attack, then drops straight
 down will a Bum Drop. The stronger the Kick button used, the higher and
 faster E.Honda leaps in the air. Up close, using LK or MK will hit twice,
 but HK will hit only once.
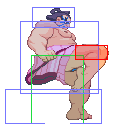
Ooichou Nage (throw): 360º Motion+Punch [X Z V]
-E.Honda will slam his opponent into the ground with one arm, then
 somersault into the air and land on them with his bum. This throwing attack
 must be done right next to the opponent.
Super Combos
Oni Musou: CB,F,B,F+Punch [X Z]
-A more powerful version of the Super Zutsuki, E.Honda will perform two
 headbutts in a row. At Level 3, he will perform two headbutts finished with
 a Hyakuretsu Harite slapping attack.
    Level 1: 2 Hits      Level 2: 2 Hits        Level 3: 8 Hits
Fuji Drop: CB,F,B,F+Kick [Z]
-E.Honda does a slightly rising Super Zutsuki forward, then scoops upward with
 both arms. If the scooping punch knocks the opponent into the air, he will
 follow and hit them with a Super Hyakkan Otoshi.
    Level 1: 4 Hits      Level 2: 5 Hits        Level 3: 6 Hits
Orochi Kudaki: 720º Motion+Punch [Z(LV3)]
-A much more powerful version of the Ooichou Nage, E. Honda will thrust his
 opponent into the ground twice, then leap high into the air and descend with
 a powerful bum drop. This must be done right next to the opponent.
    Level 3: 3 Hits


 +
+


