Introduction
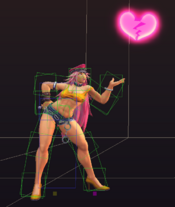
Hugo and Poison both joined the tournament for different reasons. Poison intends to kiss as many people as possible with her Poison Kiss. She doesn't know it's poison even though she shouts poison kiss when she does it.
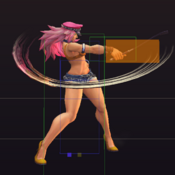
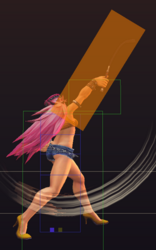
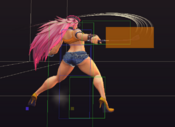
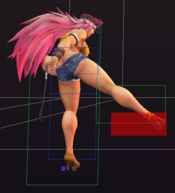
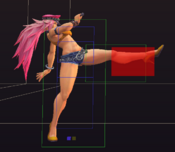
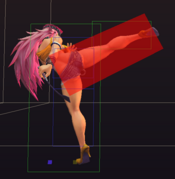
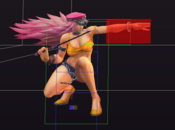
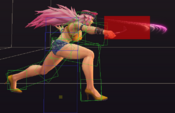
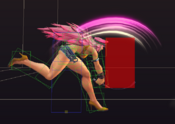
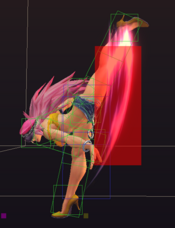
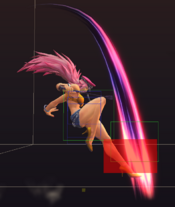
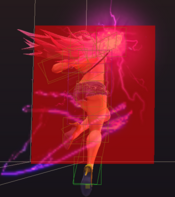
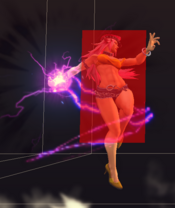
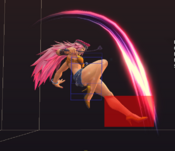
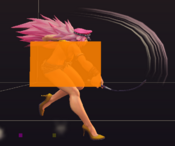
Poison is a dominant midrange and setplay character, sporting some of the best buttons in the game. All of her normals involving her whip are completely disjointed and delete projectiles, allowing her to safely control space without much threat of whiff punishes, or anti-air extremely consistently with simple buttons. Her 5LP is a standout fast jab that works great for low commitment poking, where 2MP can stuff their movement or buttons. 5MP and 2HP stick out as top tier anti-airs, and both lead to extremely consistent combos with HKD enders. Even outside of her whip normals, buttons like 5MK, 2MK, and 2HK have staggering range to work with.
Poison is more than just buttons however. Her dash carries a ton of momentum, allowing her to slide forward with ease and whiff punish from extremely far away. She also has a Hyperhop, which is done by tapping down quickly before jumping. This covers a ton of ground while staying very low, allowing her to jump over a ton of things and snipe the opponent. These two movement options are backed up by a top tier walk speed as well. Every hit can lead to a combo through 214P Whip of Love, ending in 214KM EX Love Me Tender and its followup, letting her easily secure hard knockdowns to run her amazing setplay with 236HP Aeolus Edge.
What truly sets Poison apart is her aforementioned setplay. Off of her extremely potent hard knockdowns or resets, she can use her Hyperhop to create an instant overhead j.HK, and cancel this j.236P Air Aeolus Edge to start a combo. She can mix this with a meaty 2MK cancelled to EX Rekka for extreme plus frames on both a high and a low, or her powerful normal throw which leads to her highest damage. Poison makes you guess on every knockdown, giving her an amazing vortex that can melt health quickly.
Poison is a great option if you want someone who can both play dominant neutral and skip over neutral entirely, with high reward in both situations. She has some of the best setplay, simple and fun combos, and amazing buttons.
| Strengths | Weaknesses |
|---|---|
|
|
| Poison | |
|---|---|
| [[File:|center|300px]] | |
| Character Data | |
| Health | 950 |
| Chains | None |
| Walkspeed | {{{walkspeed}}} |
| Forward Dash Duration | X frames |
| Forward Dash Distance | {{{dashdistance}}} |
| Backdash Duration | X frames |
| Backdash Invuln | {{{backdashinvuln}}} frames |
| Unique Movement | Hyperhop |
Normals
Dash Buttons Note
Some of Poison's buttons will change frame data if used during her dash. In the case of 5LK, it becomes a command normal. Data listed in parentheses is dash momentum frame data.
Standing Normals
5LP
| Damage | Guard | Cancel | Startup | Active | Recovery | On Hit | On Block |
|---|---|---|---|---|---|---|---|
| 30 | Mid | SP | 4 | - | - | +6(+7) | +3(+4) |
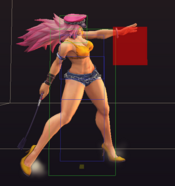
A very good jab. Disjointed and fast, and deletes a hit of projectiles as well, letting it easily swat single hit fireballs. It struggles in that it lacks active frames, and it can be crouched by a fair bit of the cast. On characters that cannot crouch it, it's very useful to bully with in close range and is a great tool for confirms to EX Rekka. | |||||||
5MP
| Damage | Guard | Cancel | Startup | Active | Recovery | On Hit | On Block |
|---|---|---|---|---|---|---|---|
| 60 | Mid | SP | 5 | 60 | 0 | -6(-5) | -10(-9) |
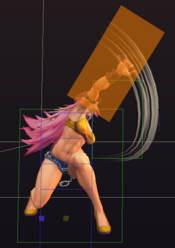
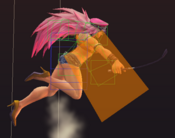
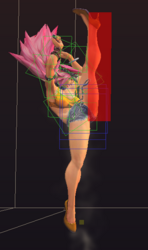
The Pillar. Dominant mid-range anti-air that snipes even the highest of jumps and the strongest of air normals. Easily confirms into a combo by cancelling into 236HP as well, and is extremely useful in both midscreen and corner combos to extend fireball loops or secure a 214K ender. Very unsafe on block, so be wary of using it on grounded opponents outside of combos. | |||||||
5HP
| Damage | Guard | Cancel | Startup | Active | Recovery | On Hit | On Block |
|---|---|---|---|---|---|---|---|
| 90 | Mid | SP | 0 | 60 | 0 | 0(+7) | -3(+4) |
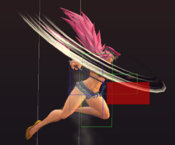
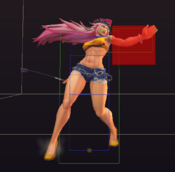
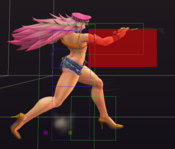
A huge swing of the whip. Fast for the range it has, which is extended by the step forward Poison takes during startup. She steps backwards after, retreating to a safe distance, making it hard to properly whiff punish. The step forward helps to secure a 214P combo, making it useful as a whiff punisher itself. Becomes extremely plus when used out of a dash and gets a huge range buff, but the pushback makes it hard to set much up. | |||||||
5LK
| Damage | Guard | Cancel | Startup | Active | Recovery | On Hit | On Block |
|---|---|---|---|---|---|---|---|
| 30 | Mid | SP | 0 | 60 | 0 | +4 | +1 |
|
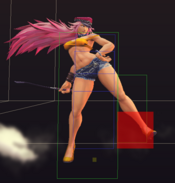
A fast kick to the shins. Extends no hurtbox at her legs, and her foot has some disjoint, letting it stuff other low pokes. It's also functionally her longest range light normal, making it great to confirm into 214PP. | |||||||
5MK
| Damage | Guard | Cancel | Startup | Active | Recovery | On Hit | On Block |
|---|---|---|---|---|---|---|---|
| 70 | Mid | SP | 0 | 60 | 0 | +1 | -3 |
|
A long range kick. Decent enough standing poke, with a nice mix of speed and range. You can use this as a link from her lights for a 214LP/MP combo at longer ranges, but if you're closer up you have better options. | |||||||
5HK
| Damage | Guard | Cancel | Startup | Active | Recovery | On Hit | On Block |
|---|---|---|---|---|---|---|---|
| 100 | - | - | 0 | 60 | 0 | -4 | -7 |
|
A large roundhouse kick. Not bad as an anti-air, but it is outclassed in this regard. Instead, this is Poison's highest damage heavy normal, and one of her longest range cancels in general. It's a bit on the slow end, but can still be used in her loop easily. | |||||||
Crouching Normals
2LP
| Damage | Guard | Cancel | Startup | Active | Recovery | On Hit | On Block |
|---|---|---|---|---|---|---|---|
| 30 | - | - | 0 | 60 | 0 | +5 | +2 |
|
Standard crouching jab. Slightly more plus than 2LK, but doesn't hit low in exchange, making it generally worse for pressure. It is faster to start up however, and links into higher damage buttons much easier, giving it usage on defense and in confirms. | |||||||
2MP
| Damage | Guard | Cancel | Startup | Active | Recovery | On Hit | On Block |
|---|---|---|---|---|---|---|---|
| 70 | - | - | 0 | 60 | 0 | -1 | -5 |
|
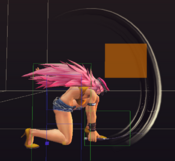
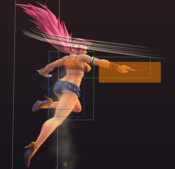
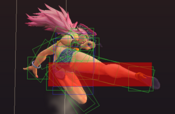
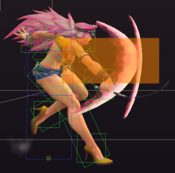
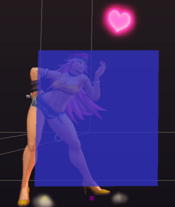
A button that doesn't hit where you think it does. While most of Poison's whip normals travel directly along the whip, 2MP hits at a square right above and in front of her head. This still is disjointed, and can be used to intercept grounded approaches or counterpoke certain normals. | |||||||
2HP
| Damage | Guard | Cancel | Startup | Active | Recovery | On Hit | On Block |
|---|---|---|---|---|---|---|---|
| 80 | - | - | 0 | 60 | 0 | -3 | -6 |
|
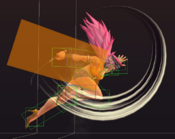
5MP's crouching cousin. Poison's other anti-air normal, it trades a lot with 5MP to make them both useful in other situations. 5HP is slower and doesn't go as high, but instead goes farther around and behind Poison while also dealing more damage. It's also crouching, making it less prone to trading, though you do have to be a bit faster. | |||||||
2LK
| Damage | Guard | Cancel | Startup | Active | Recovery | On Hit | On Block |
|---|---|---|---|---|---|---|---|
| 30 | - | - | 0 | 60 | 0 | +4 | +1 |
|
Primary offense normal to set up tick throws, frametraps, and hyperhop pressure. You can delay frametrap into itself, or get more real frametraps with 5MP or 2MK. You'll often meaty with this, or use it after an opponent blocks 236HP as a quick low. | |||||||
2MK
| Damage | Guard | Cancel | Startup | Active | Recovery | On Hit | On Block |
|---|---|---|---|---|---|---|---|
| 60 | - | - | 0 | 60 | 0 | -4 | -8 |
|
A staple of your kit in neutral. 2MK is an incredibly far reaching low which can easily be cancelled into 214MP for a combo or to start pressure. The speed and range make it ideal for whiff punishes, and it also acts as your primary low in corner 50/50's since it easily combos to rekka without the need for meter or links like 2LK. Also sees usage as a trip anti-air. | |||||||
2HK
| Damage | Guard | Cancel | Startup | Active | Recovery | On Hit | On Block |
|---|---|---|---|---|---|---|---|
| 90 | - | - | 0 | 60 | 0 | KD | -14 |
|
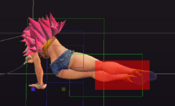
An unusually weak sweep in a game with amazing sweeps. It has great range and rewards Poison with an immediate hard knockdown, giving it similar use to a sweep in a normal Street Fighter game. It can also be used extremely late in combos as an ender, though 214K will always serve you better for this purpose. This is one of the extremely rare buttons that cannot cancel, and it is also extremely unsafe, so be careful when using this button in neutral. | |||||||
Jumping Normals
j.LP
| Damage | Guard | Cancel | Startup | Active | Recovery | On Hit | On Block |
|---|---|---|---|---|---|---|---|
| 30 | - | - | 0 | 60 | 0 | - | - |
|
Poison quickly swings the whip below her. Despite being a whip normal, this cannot delete projectiles, though it still has the disjoint of any whip normal. Useful as a fast option when doing retreating hyperhops or backdashes. | |||||||
j.MP
| Damage | Guard | Cancel | Startup | Active | Recovery | On Hit | On Block |
|---|---|---|---|---|---|---|---|
| 60 | - | - | 0 | 60 | 0 | +80 | -80 |
A much more standard whip normal. Great horizontal hitbox that comes out quite fast, making it a prime air-to-air for opponents at the same height as you. Can be used in niche matchup interactions to delete airborne projectiles safely. Not a bad poke when used out of hyperhop, though you have a better option here. | |||||||
j.HP
| Damage | Guard | Cancel | Startup | Active | Recovery | On Hit | On Block |
|---|---|---|---|---|---|---|---|
| 80 | - | - | 0 | 60 | 0 | +80 | -80 |
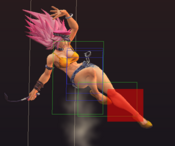
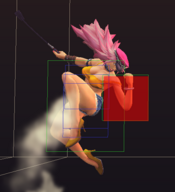
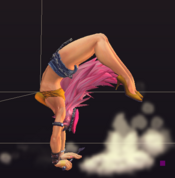
An extremely ignorant air button. Poison's j.HP travels in a massive disjointed circle from above her head to behind her legs, making it extremely hard to intercept from any angle. This is an oppressive poke when used in tandem with hyperhop, and punishing backdash j.HP is extremely difficult in some cases. It sends the opponent straight down on an air hit, but if you land first, you can usually link a 5MP or 2HP and pick up a combo anyway. Since it hits behind so deep, it acts as a primary crossup as well, which can be extremely ambiguous if timed well. | |||||||
j.LK
| Damage | Guard | Cancel | Startup | Active | Recovery | On Hit | On Block |
|---|---|---|---|---|---|---|---|
| 35 | - | - | 0 | 60 | 0 | +80 | -80 |
|
A quick light kick. Crosses up easily, though lacks the hitstun and backwards range of j.HP. It makes up for this in the speed it hits crossup. Done over a knockdown this can be extremely ambiguous, and if hit meaty you can easily get a combo. | |||||||
j.MK
| Damage | Guard | Cancel | Startup | Active | Recovery | On Hit | On Block |
|---|---|---|---|---|---|---|---|
| 70 | - | - | 0 | 60 | 0 | +80 | -80 |
|
An odd kick straight above Poison. Disjointed while rising, so you can use it as a fast anti-air, but you almost always have better options. This sees use largely in her rekka rejump combos, as it launches the opponent straight upwards, allowing a link to 5HK. | |||||||
j.HK
| Damage | Guard | Cancel | Startup | Active | Recovery | On Hit | On Block |
|---|---|---|---|---|---|---|---|
| 90 | - | - | 0 | 60 | 0 | +80 | -80 |
|
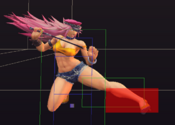
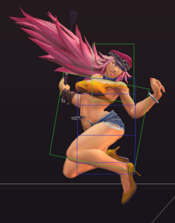
A big axe kick. Poison's primary overhead in her 50/50's, since it hits deeper and faster than j.HP while also doing more damage. Less useful in neutral due to not having the absurd hitbox of j.HP and not allowing combos as often, though if you jump a projectile or hyperhop over a poke, you can start with this for more damage. | |||||||
Command Normals
Dash Light Kick
| Damage | Guard | Cancel | Startup | Active | Recovery | On Hit | On Block |
|---|---|---|---|---|---|---|---|
| 25,25 | - | - | 0 | 60 | 0 | +6 | +3 |
|
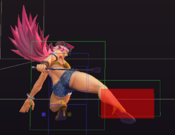
An extremely good pressure normal. You can easily enforce a dash to start this through 236HP or the plus frames from 214PP, and it leaves you +3 on block, allowing you to easily set up a tight frametrap to 2HP which will also link on hit. You can get an unmashable tick throw easily, or go for a hyperhop IOH or 6HP mixup. | |||||||
Double Slap
| Damage | Guard | Cancel | Startup | Active | Recovery | On Hit | On Block |
|---|---|---|---|---|---|---|---|
| 25,25 | - | - | 0 | 60 | 0 | -1(+6) | -5(+2) |
|
fuckin terrible man | |||||||
Elbow Drop
| Damage | Guard | Cancel | Startup | Active | Recovery | On Hit | On Block |
|---|---|---|---|---|---|---|---|
| 80 | - | - | 0 | 60 | 0 | +3 | -5 |
|
fuckin terrible man | |||||||
Hyperhop
| Damage | Guard | Cancel | Startup | Active | Recovery | On Hit | On Block |
|---|---|---|---|---|---|---|---|
| 30 | - | - | 0 | 60 | 0 | +80 | -80 |
|
fuckin terrible man | |||||||
Backflip
| Damage | Guard | Cancel | Startup | Active | Recovery | On Hit | On Block |
|---|---|---|---|---|---|---|---|
| 30 | - | - | 0 | 60 | 0 | +80 | -80 |
|
fuckin terrible man | |||||||
Special Moves
Aeolus Edge
| LP | Damage | Guard | Cancel | Startup | Active | Recovery | On Hit | On Block |
|---|---|---|---|---|---|---|---|---|
| 70 | - | - | 0 | 60 | 0 | +80 | -80 | |
| MP | Damage | Guard | Cancel | Startup | Active | Recovery | On Hit | On Block |
| 70 | - | - | 0 | 60 | 0 | +80 | -80 | |
| HP | Damage | Guard | Cancel | Startup | Active | Recovery | On Hit | On Block |
| 70 | - | - | 0 | 60 | 0 | +80 | -80 | |
| EX | Damage | Guard | Cancel | Startup | Active | Recovery | On Hit | On Block |
| 50,50 | - | - | 0 | 60 | 0 | +80 | -80 |
Whip of Love
| LP | Damage | Guard | Cancel | Startup | Active | Recovery | On Hit | On Block |
|---|---|---|---|---|---|---|---|---|
| 30 | - | - | 0 | 60 | 0 | +1 | -3 | |
| MP | Damage | Guard | Cancel | Startup | Active | Recovery | On Hit | On Block |
| 30 | - | - | 0 | 60 | 0 | +1 | -3 | |
| HP | Damage | Guard | Cancel | Startup | Active | Recovery | On Hit | On Block |
| 30 | - | - | 0 | 60 | 0 | +1 | -3 | |
| EX | Damage | Guard | Cancel | Startup | Active | Recovery | On Hit | On Block |
| 30 | - | - | 0 | 60 | 0 | +12 | +8 |
Whip of Love Followups
| 214P~4P | Damage | Guard | Cancel | Startup | Active | Recovery | On Hit | On Block |
|---|---|---|---|---|---|---|---|---|
| 50 | - | - | 0 | 60 | 0 | -4 | -8 | |
| 214P~4P~4P | Damage | Guard | Cancel | Startup | Active | Recovery | On Hit | On Block |
| 50 | - | - | 0 | 60 | 0 | KD | -12 | |
| 214P~4K | Damage | Guard | Cancel | Startup | Active | Recovery | On Hit | On Block |
| 30 | - | - | 0 | 60 | 0 | KD | -6 |
Love Me Tender
| LK | Damage | Guard | Cancel | Startup | Active | Recovery | On Hit | On Block |
|---|---|---|---|---|---|---|---|---|
| 70 (140) | - | - | 0 | 60 | 0 | 0 (KD) | -80 | |
| MK | Damage | Guard | Cancel | Startup | Active | Recovery | On Hit | On Block |
| 70 (140) | - | - | 0 | 60 | 0 | 0 (KD) | -80 | |
| HK | Damage | Guard | Cancel | Startup | Active | Recovery | On Hit | On Block |
| 70 (140) | - | - | 0 | 60 | 0 | 0 (KD) | -80 | |
| EX | Damage | Guard | Cancel | Startup | Active | Recovery | On Hit | On Block |
| 140 | - | - | 0 | 60 | 0 | KD | +2 | |
|
values in parentheses are the damage or frame data with the followup | ||||||||
Lovely Shoryuken
| LP | Damage | Guard | Cancel | Startup | Active | Recovery | On Hit | On Block |
|---|---|---|---|---|---|---|---|---|
| 80 | - | - | 0 | 60 | 0 | KD | -80 | |
| MP | Damage | Guard | Cancel | Startup | Active | Recovery | On Hit | On Block |
| 80 112 144 | - | - | 0 | 60 | 0 | KD | -80 | |
| HP | Damage | Guard | Cancel | Startup | Active | Recovery | On Hit | On Block |
| 80 112 144 | - | - | 0 | 60 | 0 | Kd | -80 | |
| EX | Damage | Guard | Cancel | Startup | Active | Recovery | On Hit | On Block |
| 80 112 144 | - | - | 0 | 60 | 0 | KD | -80 | |
|
the second and third damage numbers are the half mashed and full mashed damage respectively | ||||||||
Supers
Thunder Whip
| Damage | Guard | Cancel | Startup | Active | Recovery | On Hit | On Block |
|---|---|---|---|---|---|---|---|
| 230 262 294 | - | - | 0 | 60 | 0 | KD | -80 |
|
the second and third damage numbers are the half mashed and full mashed damage respectively | |||||||
Mistress Kick
| Damage | Guard | Cancel | Startup | Active | Recovery | On Hit | On Block |
|---|---|---|---|---|---|---|---|
| 210 | - | - | 0 | 60 | 0 | KD | -80 |
|
fuckin terrible man | |||||||
Love Storm
| Damage | Guard | Cancel | Startup | Active | Recovery | On Hit | On Block |
|---|---|---|---|---|---|---|---|
| 210 | - | - | 0 | 60 | 0 | KD | -80 |
|
fuckin terrible man | |||||||
Poison Kiss
| Damage | Guard | Cancel | Startup | Active | Recovery | On Hit | On Block |
|---|---|---|---|---|---|---|---|
| 240 | - | - | 0 | 60 | 0 | Crumple | -80 |
|
You can't jump it on reaction anymore, so it's actually a good mixup tool now. Sends the opponent fullscreen, but causes a crumple state, meaning you can actually convert off this in certain circumstances. | |||||||
Street Fighter IV Remix is a mod of Street Fighter IV developed by MiriamBurgers and Anotak.
