Normals
| Startup | Active | Recovery | Damage | Guard | ||||
|---|---|---|---|---|---|---|---|---|
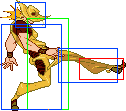
| 3 | 3 | 10 [8] | 4 (1 Stand) | Mid | ||||
| Hit Adv. | Block Adv. | Pushblock Adv. | Cancel | Properties | ||||
| +6 | +5 | +2 | Special/Super WC/CrC |
Air UB | ||||
|
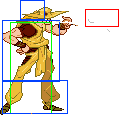
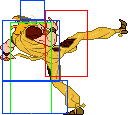
Short, fast kick. Okay to press after a roll, leads to decent damage and a knockdown by canceling into truck. Data in brackets is recovery on crouch cancel. | ||||||||
| Startup | Active | Recovery | Damage | Guard | ||||
|---|---|---|---|---|---|---|---|---|
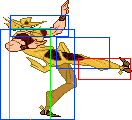
| 4 | 4 | 13 | 10 (4 Stand) | Mid | ||||
| Hit Adv. | Block Adv. | Pushblock Adv. | Cancel | Properties | ||||
| +3 | +1 | -7 | Special/Super | Air UB | ||||
|
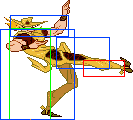
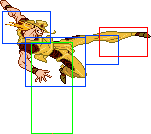
Stupid quick and has a great hitbox. Good at stopping reckless approaches and as a poke in neutral, very solid button all around. Finds occasional use as an antiair. | ||||||||
| Startup | Active | Recovery | Damage | Guard | ||||
|---|---|---|---|---|---|---|---|---|
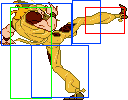
| 15 | 3 | 31 | 16 (5 Stand) | Mid | ||||
| Hit Adv. | Block Adv. | Pushblock Adv. | Cancel | Properties | ||||
| Launch (Knockdown after 2 hits) | -17 | -20 | Special/Super | Air UB Wallbounce | ||||
|
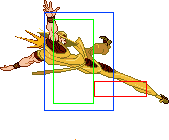
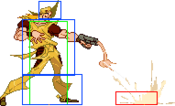
Slow, winding heel kick. Very slow to come out and recover, and the launch isn't too useful on a raw hit. Has an admittedly nice hitbox, but its speed prevents it from being an effective tool, relegating it to a niche antiair and pressure option. The forward movement on startup allows for kara cancels, which can be used to give Truck extra range. | ||||||||
| Startup | Active | Recovery | Damage | Guard | ||||
|---|---|---|---|---|---|---|---|---|
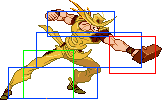
| 3 | 2 | 9 | 3 (6 Stand) | Low | ||||
| Hit Adv. | Block Adv. | Pushblock Adv. | Cancel | Properties | ||||
| +2 | 0 | -3 | Special/Super | Air UB | ||||
|
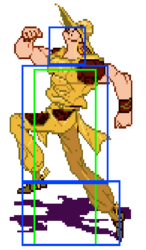
Quick low, doesn't have much range. Fast startup can let you mash out of some things, but the long recovery makes that risky. Doesn't lead to much, but you can try going into truck if you're sure it'll land. Chaka, Khan, BPol and SDio can use their counter against 2A but Rubber Soul and Old Joseph can't. | ||||||||
| Startup | Active | Recovery | Damage | Guard | ||||
|---|---|---|---|---|---|---|---|---|
| 4 | 4 | 17 | 8 (4 Stand) | Mid | ||||
| Hit Adv. | Block Adv. | Pushblock Adv. | Cancel | Properties | ||||
| -1 | -3 | -11 | Block (Frame 1 only) Special/Super |
Air UB | ||||
|
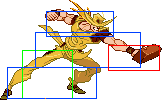
The Brick. You'll be using this a lot - it's a fantastic poke and is great at stopping dashes thanks to its fast startup and great hitbox. The recovery isn't great, so try not to whiff this. | ||||||||
| Startup | Active | Recovery | Damage | Guard | ||||
|---|---|---|---|---|---|---|---|---|
| 11 | 18 | 10 | 9 (5 Stand) | Low | ||||
| Hit Adv. | Block Adv. | Pushblock Adv. | Cancel | Properties | ||||
| Knockdown | -10 | -24 | Special/Super (Before frame 9) | Air UB | ||||
|
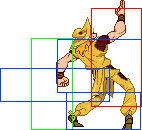
Lowers your hurtbox instantly and moves you forward about half a screen. The knockdown on hit can lead into a variety of strong setups, so the reward is nothing to scoff at. However, keep the mediocre frame data and the fact that it isn't cancelable in mind before you press this as you can be punished hard if the opponent sees this move coming. Overall, a pretty good move that you should still be cautious about using. | ||||||||
| Startup | Active | Recovery | Damage | Guard | ||||
|---|---|---|---|---|---|---|---|---|
| 4 | 4 | Until landing | 4 (3 Stand) | High | ||||
| Hit Adv. | Block Adv. | Pushblock Adv. | Cancel | Properties | ||||
| - | - | - | Special/Super | - | ||||
|
Decent air to air due to alright hitbox and fast startup. Reliable instant overhead on most of the cast, which you can convert off of with j.236AA for damage and a reset back to neutral. | ||||||||
| Startup | Active | Recovery | Damage | Guard | ||||
|---|---|---|---|---|---|---|---|---|
| 4 | 4 | Until landing | 4 (3 Stand) | High | ||||
| Hit Adv. | Block Adv. | Pushblock Adv. | Cancel | Properties | ||||
| - | - | - | Special/Super | - | ||||
|
Identical to j.A. | ||||||||
| Startup | Active | Recovery | Damage | Guard | ||||
|---|---|---|---|---|---|---|---|---|
| 6 | 4 | Until landing | 9 (5 Stand) | High | ||||
| Hit Adv. | Block Adv. | Pushblock Adv. | Cancel | Properties | ||||
| - | - | - | Special/Super | - | ||||
|
Your main jump in, but works well as an air to air if you need the extra range. Good button to press while doing backward hops to keep the opponent away. | ||||||||
Dashing Normals
| Startup | Active | Recovery | Damage | Guard | ||||
|---|---|---|---|---|---|---|---|---|
| 2 | 3 | 10 | - | Mid | ||||
| Hit Adv. | Block Adv. | Pushblock Adv. | Cancel | Properties | ||||
| +3 | +1 | -2 | Special/Super | Air UB | ||||
|
Pretty much 5A but with momentum. Can tag opponents unexpectedly, combo into truck to make the most out of the hit. Occasionally used to reestablish pressure against passive opponents. | ||||||||
| Startup | Active | Recovery | Damage | Guard | ||||
|---|---|---|---|---|---|---|---|---|
| 8 | 5 | 14 | - | Mid | ||||
| Hit Adv. | Block Adv. | Pushblock Adv. | Cancel | Properties | ||||
| +2 | 0 | -8 | Special/Super | Air UB | ||||
|
Dashing version of 5B. It's much slower than the standing version and only does half the damage. Not very useful, avoid it if you can, but there are times where you need a slower 5B on the move. | ||||||||
| Startup | Active | Recovery | Damage | Guard | ||||
|---|---|---|---|---|---|---|---|---|
| 10 | 3 | 33 | - | Mid | ||||
| Hit Adv. | Block Adv. | Pushblock Adv. | Cancel | Properties | ||||
| Launch (Knockdown after 5 hits) | -19 | -32 | Special/Super | Air UB | ||||
|
Looks like 5C, but much faster. Can be used as a niche antiair out of a run, but where it really shines is as a knockdown tool in your setups. If comboed into after 5 hits, d.5C knocks down, and because it's cancelable unlike 2C you have a lot more time to set up. Other than that, the launch doesn't offer much. | ||||||||
| Startup | Active | Recovery | Damage | Guard | ||||
|---|---|---|---|---|---|---|---|---|
| 3 | 2 | 9 | - | Low | ||||
| Hit Adv. | Block Adv. | Pushblock Adv. | Cancel | Properties | ||||
| 0 | -2 | -5 | Special/Super | Air UB | ||||
|
Dashing 2A. The hitbox doesn't follow you as you move, so running back extends and running forward decreases its range. Has some utility as a surprise low and can lead to truck, but not much else can be said about this move. | ||||||||
| Startup | Active | Recovery | Damage | Guard | ||||
|---|---|---|---|---|---|---|---|---|
| 7 | 4 | 13 | - | Mid | ||||
| Hit Adv. | Block Adv. | Pushblock Adv. | Cancel | Properties | ||||
| +3 | +1 | -7 | Special/Super | Air UB | ||||
|
A slower, dashing 2B with less recovery. Good for covering far off space whether you're dashing forwards or backwards. Can help to reset pressure with good conditioning and effective spacing. | ||||||||
| Startup | Active | Recovery | Damage | Guard | ||||
|---|---|---|---|---|---|---|---|---|
| 16 | 24 | 13 | - | Low | ||||
| Hit Adv. | Block Adv. | Pushblock Adv. | Cancel | Properties | ||||
| Knockdown | -18 | -31 | - | Low | ||||
|
A slower, more damaging 2C. Very little reason to use this move. | ||||||||
Command Normals
| Startup | Active | Recovery | Damage | Guard | ||||
|---|---|---|---|---|---|---|---|---|
| 1 | - | Total 70 | - | Throw | ||||
| Hit Adv. | Block Adv. | Pushblock Adv. | Cancel | Properties | ||||
| Launch (-19 on earliest tech) | - | - | - | Grab | ||||
|
Hol grabs the opponent by the nose and shoots them in the face. Punishable on hit by everyone except Rubber Soul and Young Joseph. Be extra careful when trying to input 4C as to not accidentally throw. Can be a surprise round ender if you're sure it'll kill. A genuinely strong tool against Rubber Soul, since it gives you enough frame advantage to set up a projectile. | ||||||||
| Startup | Active | Recovery | Damage | Guard | ||||
|---|---|---|---|---|---|---|---|---|
| 13 | 4 | 25 | - | Mid | ||||
| Hit Adv. | Block Adv. | Pushblock Adv. | Cancel | Properties | ||||
| -16 | -18 | -21 | Special/Super | Air UB | ||||
|
Smoke. Whiffs on all Stand OFF crouchers and a few in Stand ON. Slow startup and weird hitbox makes it tough to use as a poke or antiair. However, canceling the move 5 frames after it starts will cancel it as normal, but the smoke won't disappear. This lets you use it as an extra hitbox to protect you during the startup of your specials and supers, and is also your only reliable means of combos into 5S. Not used often, if at all. | ||||||||
| Startup | Active | Recovery | Damage | Guard | ||||
|---|---|---|---|---|---|---|---|---|
| 6 | 3 | 23 | - | Mid | ||||
| Hit Adv. | Block Adv. | Pushblock Adv. | Cancel | Properties | ||||
| -4 | -6 | -17 | Special/Super | Air UB | ||||
|
Fantastic antiair with a great combination of speed, hitbox and reward. Can reliably beat most jumps, but be careful since it might still lose against some exceptionally strong air normals such as Polnareff's Stand ON air buttons. Cancel into 623C on hit for extra damage and a nice techchase opportunity. Very briefly lifts your hurtbox off the ground, but this rarely matters. | ||||||||
| Startup | Active | Recovery | Damage | Guard | ||||
|---|---|---|---|---|---|---|---|---|
| 11 | 4 frames per shot, 5 frame gap between shots | 15 | - | Low | ||||
| Hit Adv. | Block Adv. | Pushblock Adv. | Cancel | Properties | ||||
| -7 | -5 | -2 | Special/Super | - | ||||
|
While slow to come out, this move is an exceptional pressure tool. You can vary the amount of shots on block before canceling to keep your opponent guessing. Due to being a projectile, it ignores pushblock. Canceling this move into 5S with the right timing will leave a very small gap between these two moves.
| ||||||||
Unique Moves
| Startup | Active | Recovery | Damage | Guard | ||||
|---|---|---|---|---|---|---|---|---|
| 22 (Ground) 26 (Air) |
Until offscreen | Total 33 | - | Mid | ||||
| Hit Adv. | Block Adv. | Pushblock Adv. | Cancel | Properties | ||||
| - | - | - | - | - | ||||
|
Hoingo’s main appeal as a character. A quick, 10-hit projectile that can have its movement preprogrammed. As strong as it is, exercise caution when using it. Using this move predictably can end badly for Hoingo, since the risk of getting blown up by moves like Stand ON Star Breaker, Tandem, or fast normals far outweighs the potential reward that successfully getting S-Bullet out on the field can give. You can start inputting directions after 6 frames of startup. Then you have a 15 frame window to input up to 8 directions. You can't input twice the same direction in a row, the only way to delay a direction is to input more directions before, waiting doesn't work. If you're on keyboard/hitbox and revision 990913, pressing 8 and 2 simultaneously during the startup will have the bullet stop in place with glitchy sprites for some demented reason in FBA. (See Trivia section) | ||||||||
| Startup | Active | Recovery | Damage | Guard | ||||
|---|---|---|---|---|---|---|---|---|
| - | - | - | - | - | ||||
| Hit Adv. | Block Adv. | Pushblock Adv. | Cancel | Properties | ||||
| - | - | - | - | - | ||||
|
Hol Horse starts running. Running isn't unique to Hoingo, but it's so important to him that it deserves its own section. You'll be doing this a lot: running back and forth to keep your opponent guessing, running away for some breathing room to set up, as a defensive option, and simply to just reposition. As important as an option as this is, you should remember how much space there is behind you: running away isn't always possible, so you should try not to overuse this. | ||||||||
| Startup | Active | Recovery | Damage | Guard | ||||
|---|---|---|---|---|---|---|---|---|
| 10 | 3 | 19 | - | Mid | ||||
| Hit Adv. | Block Adv. | Pushblock Adv. | Cancel | Properties | ||||
| Launch | -10 | -18 | - | Air UB | ||||
|
Hol performs a fast version of his 5C, launching the opponent away. Has a shorter, but taller hitbox that lets it reliably hit crouchers. Be careful with using this GC: if it's properly baited, you'll do a 623x, which is insanely punishable. Solid, if a bit risky. | ||||||||
Specials
| Startup | Active | Recovery | Damage | Guard | ||||
|---|---|---|---|---|---|---|---|---|
| 9 (A/B) 11 (C) |
- | 45 Total (A/B) 44 Total (C) |
- | Mid (A/B) Low (C) | ||||
| Hit Adv. | Block Adv. | Pushblock Adv. | Cancel | Properties | ||||
| - | - | - | - | - | ||||
|
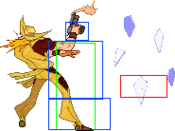
Gunshot, your most basic projectile. A and B have identical frame data, but B's bullet moves slightly faster. C version is a low, and Hoingo is crouched while shooting. | ||||||||
| Startup | Active | Recovery | Damage | Guard | ||||
|---|---|---|---|---|---|---|---|---|
| 9 (A) 11 (B/C) 5 (Air) |
Until hits ceiling (Bullet) Until hits groud (Glass) |
32 Total (A) 33 Total (B/C) Until Landing+1 (Air) |
- | Mid (Bullet) High (Glass) | ||||
| Hit Adv. | Block Adv. | Pushblock Adv. | Cancel | Properties | ||||
| - | - | - | - | - | ||||
|
Fires an upwards shot, which creates a shower of falling glass upon hitting the ceiling. A version fires straight up, B fires just in front of Hoingo, C fires around half a screen away. | ||||||||
Supers
| Startup | Active | Recovery | Damage | Guard | ||||
|---|---|---|---|---|---|---|---|---|
| 11 (AB) 13 (AC/BC) 7 (Air) |
- | 83 (AB) 73 (AC/BC) |
- | Mid (AB) Low (AC/BC) | ||||
| Hit Adv. | Block Adv. | Pushblock Adv. | Cancel | Properties | ||||
| - | - | - | - | - | ||||
|
A+B shoots while standing, B+C shoots while crouching. For those using the 3x Attack macro, you'll get the crouching version unless you negative edge, which will give you the standing version. | ||||||||
| Startup | Active | Recovery | Damage | Guard | ||||
|---|---|---|---|---|---|---|---|---|
| 7 | 45 | 26 | - | Mid (Pipe) Unblockable (Bullets) | ||||
| Hit Adv. | Block Adv. | Pushblock Adv. | Cancel | Properties | ||||
| - | - | - | - | Air UB (Pipe) Unblockable (Bullets) | ||||
|
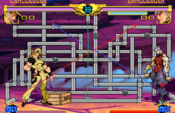
A pipe magically appears from the ground and Hol Horse shoots 7 bullets inside of it. Depending which combination of buttons was pressed while performing this super, the side from which they will come out will change. The pipe itself has a long air-unblockable hitbox which causes a Stand Crash but does no damage on its own. The bullets that fire from the pipe are all unblockable and build meter. It takes about 5 seconds for them to start firing from one of the ends, during that period Hol can freely walk around and perform any attack and special/super, with the exception of another Pipe Maze super. If Hol is hit before the bullets fire out from one of the sides of the pipe, the super will be canceled, which makes this super a big risk at times. Each version produces a different series of ricochet effects just before the bullets release. A+B version - bullets come from the left end 254 frames after the end of the recovery.(Red) B+C version - bullets come from the right end 226 frames after the end of the recovery. (Blue) A+C version - bullets come from the top end 265 frames after the end of the recovery. (Green) | ||||||||
| Startup | Active | Recovery | Damage | Guard | ||||
|---|---|---|---|---|---|---|---|---|
| 5 | 5 | 45 | - | Fusion Grab (still connects during hit/blockstun) | ||||
| Hit Adv. | Block Adv. | Pushblock Adv. | Cancel | Properties | ||||
| - | - | - | - | Fusion Grab | ||||
|
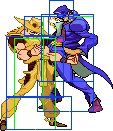
Once upon a time, there was a boy that could predict the future, so he told his friend to stick up his fingers in his nemesis' nose in order to defeat him. After doing so, the nemesis was hit by a truck. | ||||||||
