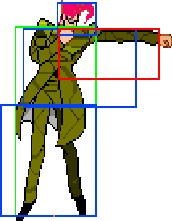
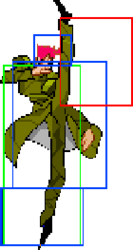
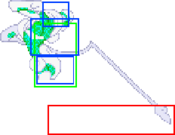
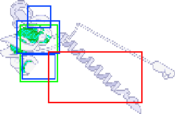
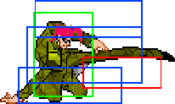
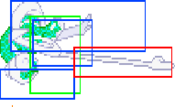
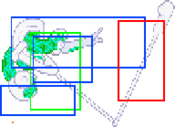
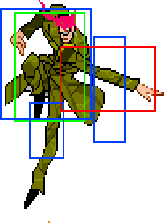
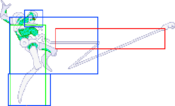
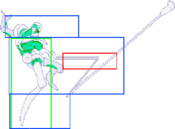
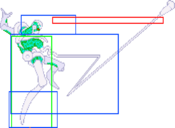
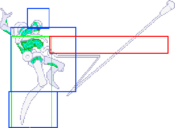
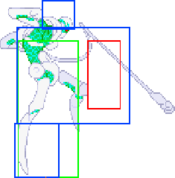
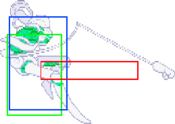
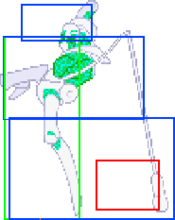
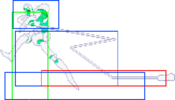
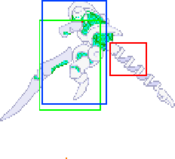
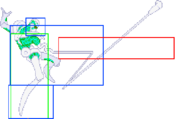
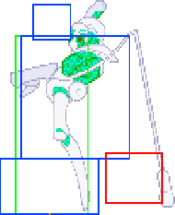
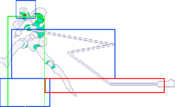
Movelist
Stand Off Normal Moves
Standing
| Startup | Active | Recovery | Damage | Guard | ||||
|---|---|---|---|---|---|---|---|---|
| 3 | 2 | 2 | 3 | - | ||||
| Hit Adv. | Block Adv. | Pushblock Adv. | Cancel | Properties | ||||
| +5 | +7 | +4 | SP, SU, TA | IPS=Yes Scales=Yes | ||||
| ||||||||
| Startup | Active | Recovery | Damage | Guard | ||||
|---|---|---|---|---|---|---|---|---|
| 8 | 3 | 4 | 5 | - | ||||
| Hit Adv. | Block Adv. | Pushblock Adv. | Cancel | Properties | ||||
| +8 | +9 | +1 | SP, SU, TA | IPS=No Scales=No | ||||
| ||||||||
| Startup | Active | Recovery | Damage | Guard | ||||
|---|---|---|---|---|---|---|---|---|
| 5 | 3 | 17 | 5 | - | ||||
| Hit Adv. | Block Adv. | Pushblock Adv. | Cancel | Properties | ||||
| -4 | -5 | -8 | SP, SU, TA | IPS=No Scales=No | ||||
| ||||||||
| Startup | Active | Recovery | Damage | Guard | ||||
|---|---|---|---|---|---|---|---|---|
| 6 | 3 | 3 | 4 | - | ||||
| Hit Adv. | Block Adv. | Pushblock Adv. | Cancel | Properties | ||||
| +7 | +9 | +1 | SP, SU, TA | IPS=No Scales=Yes | ||||
| ||||||||
| Hit 1 | Startup | Active | Recovery | Damage | Guard | ||
|---|---|---|---|---|---|---|---|
| 3 | 1 | 20 | 8 | - | |||
| Hit Adv. | Block Adv. | Pushblock Adv. | Cancel | Properties | |||
| -17 | -9 | -18 | SP, SU, TA | IPS=No Scales=No | |||
| |||||||
| Hit 2 | Startup | Active | Recovery | Damage | Guard | ||
| 10 | 2 | 20 | 4 | - | |||
| Hit Adv. | Block Adv. | Pushblock Adv. | Cancel | Properties | |||
| -4 | -5 | -22 | SP, SU, TA | IPS=No Scales=No | |||
|
| |||||||
| Startup | Active | Recovery | Damage | Guard | ||||
|---|---|---|---|---|---|---|---|---|
| 5 | 2 | 1 | 5 | +8 | ||||
| Hit Adv. | Block Adv. | Pushblock Adv. | Cancel | Properties | ||||
| +10 | - | - | SP, SU, TA | IPS=Yes Scales=Yes | ||||
| ||||||||
| Startup | Active | Recovery | Damage | Guard | ||||
|---|---|---|---|---|---|---|---|---|
| 4 | 1 | 16 | 6 | - | ||||
| Hit Adv. | Block Adv. | Pushblock Adv. | Cancel | Properties | ||||
| -1 | -3 | -6 | SP, SU, TA | IPS=No Scales=No | ||||
| ||||||||
| Hit 1 | Startup | Active | Recovery | Damage | Guard | ||
|---|---|---|---|---|---|---|---|
| 10 | 1 / 1 | 10 | 7 | - | |||
| Hit Adv. | Block Adv. | Pushblock Adv. | Cancel | Properties | |||
| -14 | +6 | -7 | SP, SU, TA | IPS=No Scales=No | |||
| |||||||
| Hit 2 | Startup | Active | Recovery | Damage | Guard | ||
| 10 | 1 | 10 | 5 | - | |||
| Hit Adv. | Block Adv. | Pushblock Adv. | Cancel | Properties | |||
| Sweep KD | +6 | -7 | SP, SU, TA | IPS=No Scales=No | |||
|
| |||||||
Aerial
| Startup | Active | Recovery | Damage | Guard | ||||
|---|---|---|---|---|---|---|---|---|
| 5 | 9 | (until landing) | 7 | - | ||||
| Hit Adv. | Block Adv. | Pushblock Adv. | Cancel | Properties | ||||
| +10 | +10 | +6 | None | IPS=No Scales=No | ||||
| ||||||||
| Startup | Active | Recovery | Damage | Guard | ||||
|---|---|---|---|---|---|---|---|---|
| 6 | 14 | (until landing) | 7 | - | ||||
| Hit Adv. | Block Adv. | Pushblock Adv. | Cancel | Properties | ||||
| +10 | +10 | +6 | None | IPS=Yes Scales=Yes | ||||
| ||||||||
| Hit 1 | Startup | Active | Recovery | Damage | Guard | ||
|---|---|---|---|---|---|---|---|
| 4 | 1 | (until landing) | 10 | - | |||
| Hit Adv. | Block Adv. | Pushblock Adv. | Cancel | Properties | |||
| +10 | +10 | +4 | None | IPS=No Scales=No | |||
| |||||||
| Hit 2 | Startup | Active | Recovery | Damage | Guard | ||
| 8 | 1 | (until landing) | 2 | - | |||
| Hit Adv. | Block Adv. | Pushblock Adv. | Cancel | Properties | |||
| +10 | +10 | +4 | None | IPS=No Scales=No | |||
|
| |||||||
Dashing
| Startup | Active | Recovery | Damage | Guard | ||||
|---|---|---|---|---|---|---|---|---|
| 3 | 2 | 8 | 3 | - | ||||
| Hit Adv. | Block Adv. | Pushblock Adv. | Cancel | Properties | ||||
| +2 | +1 | -2 | SP, SU, TA | IPS=Yes Scales=Yes | ||||
| ||||||||
| Startup | Active | Recovery | Damage | Guard | ||||
|---|---|---|---|---|---|---|---|---|
| 5 | 3 | 15 | 4 | - | ||||
| Hit Adv. | Block Adv. | Pushblock Adv. | Cancel | Properties | ||||
| -3 | -4 | -10 | SP, SU, TA | IPS=No Scales=No | ||||
| ||||||||
| Hit 1 | Startup | Active | Recovery | Damage | Guard | ||
|---|---|---|---|---|---|---|---|
| 3 | 1 | 20 | 8 | - | |||
| Hit Adv. | Block Adv. | Pushblock Adv. | Cancel | Properties | |||
| -17 | -13 | -22 | SP, SU, TA | IPS=No Scales=No | |||
| |||||||
| Hit 2 | Startup | Active | Recovery | Damage | Guard | ||
| 10 | 2 | 20 | 8 | - | |||
| Hit Adv. | Block Adv. | Pushblock Adv. | Cancel | Properties | |||
| -4 | -5 | -22 | SP, SU, TA | IPS=No Scales=No | |||
|
| |||||||
| Startup | Active | Recovery | Damage | Guard | ||||
|---|---|---|---|---|---|---|---|---|
| 5 | 2 | 6 | 5 | - | ||||
| Hit Adv. | Block Adv. | Pushblock Adv. | Cancel | Properties | ||||
| +2 | +3 | +0 | SP, SU, TA | IPS=Yes Scales=Yes | ||||
| ||||||||
| Startup | Active | Recovery | Damage | Guard | ||||
|---|---|---|---|---|---|---|---|---|
| 4 | 1 | 15 | 6 | - | ||||
| Hit Adv. | Block Adv. | Pushblock Adv. | Cancel | Properties | ||||
| -1 | -3 | -9 | SP, SU, TA | IPS=No Scales=No | ||||
| ||||||||
| Hit 1 | Startup | Active | Recovery | Damage | Guard | ||
|---|---|---|---|---|---|---|---|
| 10 | 1 / 1 | 17 | 7 | - | |||
| Hit Adv. | Block Adv. | Pushblock Adv. | Cancel | Properties | |||
| -21 | +6 | -13 | SP, SU, TA | IPS=No Scales=No | |||
| |||||||
| Hit 2 | Startup | Active | Recovery | Damage | Guard | ||
| 19 | 1 | 10 | 5 | - | |||
| Hit Adv. | Block Adv. | Pushblock Adv. | Cancel | Properties | |||
| Sweep KD | +6 | -14 | SP, SU, TA | IPS=No Scales=No | |||
|
| |||||||
Stand On Normal Moves
Standing
| Raw | Startup | Active | Recovery | Damage | Guard | ||
|---|---|---|---|---|---|---|---|
| 9 | 5 | 8 | 4 | - | |||
| Hit Adv. | Block Adv. | Pushblock Adv. | Cancel | Properties | |||
| +0 | -1 | -4 | SP, SU, TA, 236S | IPS=No Scales=Yes | |||
| |||||||
| Chained | Startup | Active | Recovery | Damage | Guard | ||
| 9 | 5 | 24 | 4 | - | |||
| Hit Adv. | Block Adv. | Pushblock Adv. | Cancel | Properties | |||
| -16 | -10 | -17 | SP, SU, TA, 236S | IPS=No Scales=No | |||
| |||||||
| Startup | Active | Recovery | Damage | Guard | ||||
|---|---|---|---|---|---|---|---|---|
| 7 | 6 | 16 | 5 | - | ||||
| Hit Adv. | Block Adv. | Pushblock Adv. | Cancel | Properties | ||||
| -9 | -10 | -13 | SP, SU, TA, 236S | IPS=No Scales=Yes | ||||
| ||||||||
| Raw | Startup | Active | Recovery | Damage | Guard | ||
|---|---|---|---|---|---|---|---|
| 9 | 6 | 10 | 10 | - | |||
| Hit Adv. | Block Adv. | Pushblock Adv. | Cancel | Properties | |||
| +0 | -1 | -7 | SP, SU, TA, 236S | IPS=No Scales=Yes | |||
| |||||||
| Chained | Startup | Active | Recovery | Damage | Guard | ||
| 8 | 6 | 9 | 6 | - | |||
| Hit Adv. | Block Adv. | Pushblock Adv. | Cancel | Properties | |||
| +1 | -1 | -7 | SP, SU, TA, 236S | IPS=No Scales=No | |||
| |||||||
| Raw | Startup | Active | Recovery | Damage | Guard | ||
|---|---|---|---|---|---|---|---|
| 11 | 4 | 18 | 11 | - | |||
| Hit Adv. | Block Adv. | Pushblock Adv. | Cancel | Properties | |||
| -6 | -7 | -15 | None | IPS=No Scales=Yes | |||
| |||||||
| Chained | Startup | Active | Recovery | Damage | Guard | ||
| 11 | 8 | 16 | 6 | - | |||
| Hit Adv. | Block Adv. | Pushblock Adv. | Cancel | Properties | |||
| -8 | -9 | -17 | None | IPS=No Scales=No | |||
| |||||||
| Hit 1 | Startup | Active | Recovery | Damage | Guard | ||
|---|---|---|---|---|---|---|---|
| 12 | 3 | - | 7 | - | |||
| Hit Adv. | Block Adv. | Pushblock Adv. | Cancel | Properties | |||
| -6 | -7 | -16 | SP, SU, TA, 236S | IPS=No Scales=Yes | |||
| |||||||
| Hit 2 | Startup | Active | Recovery | Damage | Guard | ||
| 16 | 8 | 13 | 7 | - | |||
| Hit Adv. | Block Adv. | Pushblock Adv. | Cancel | Properties | |||
| -1 | -1 | -7 | SP, SU, TA, 236S | IPS=No Scales=No | |||
| |||||||
| Chained | Startup | Active | Recovery | Damage | Guard | ||
| 8 | 9 | 14 | 5 | - | |||
| Hit Adv. | Block Adv. | Pushblock Adv. | Cancel | Properties | |||
| -1 | -2 | -11 | SP, SU, TA, 236S | IPS=No Scales=No | |||
| |||||||
| Hit 1 | Startup | Active | Recovery | Damage | Guard | ||
|---|---|---|---|---|---|---|---|
| 3 | 2 | - | 12 | -8 | |||
| Hit Adv. | Block Adv. | Pushblock Adv. | Cancel | Properties | |||
| -6 | - | - | SP, SU, TA, 236S | IPS=No Scales=Yes | |||
| |||||||
| Hit 2 | Startup | Active | Recovery | Damage | Guard | ||
| 11 | 8 | 5 | 12 | - | |||
| Hit Adv. | Block Adv. | Pushblock Adv. | Cancel | Properties | |||
| +6 | +5 | -8 | SP, SU, TA, 236S | IPS=No Scales=Yes | |||
| |||||||
| Raw | Startup | Active | Recovery | Damage | Guard | ||
|---|---|---|---|---|---|---|---|
| 5 | 4 | 16 | 4 | - | |||
| Hit Adv. | Block Adv. | Pushblock Adv. | Cancel | Properties | |||
| -7 | -8 | -11 | SP, SU, TA, 236S | IPS=No Scales=Yes | |||
| |||||||
| Chained | Startup | Active | Recovery | Damage | Guard | ||
| 9 | 2 | 24 | 8 | - | |||
| Hit Adv. | Block Adv. | Pushblock Adv. | Cancel | Properties | |||
| -10 | -14 | -17 | SP, SU, TA, 236S | IPS=No Scales=No | |||
| |||||||
| Raw | Startup | Active | Recovery | Damage | Guard | ||
|---|---|---|---|---|---|---|---|
| 9 | 2 | 21 | 8 | - | |||
| Hit Adv. | Block Adv. | Pushblock Adv. | Cancel | Properties | |||
| -7 | -8 | -16 | SP, SU, TA, 236S | IPS=No Scales=Yes | |||
| |||||||
| Chained | Startup | Active | Recovery | Damage | Guard | ||
| 9 | 2 | 24 | 8 | - | |||
| Hit Adv. | Block Adv. | Pushblock Adv. | Cancel | Properties | |||
| -10 | -14 | -17 | SP, SU, TA, 236S | IPS=No Scales=No | |||
| |||||||
| Raw | Startup | Active | Recovery | Damage | Guard | ||
|---|---|---|---|---|---|---|---|
| 14 | 10 | 16 | 13 | - | |||
| Hit Adv. | Block Adv. | Pushblock Adv. | Cancel | Properties | |||
| KD | -8 | -21 | SP*, SU*, TA* | IPS=No Scales=Yes | |||
| |||||||
| Chained | Startup | Active | Recovery | Damage | Guard | ||
| 14 | 8 | 18 | 12 | - | |||
| Hit Adv. | Block Adv. | Pushblock Adv. | Cancel | Properties | |||
| KD | -14 | -17 | SP*, SU*, TA* | IPS=No Scales=No | |||
| |||||||
Aerial
| Startup | Active | Recovery | Damage | Guard | ||||
|---|---|---|---|---|---|---|---|---|
| 7 | 3 | until landing | 4 | - | ||||
| Hit Adv. | Block Adv. | Pushblock Adv. | Cancel | Properties | ||||
| +11 | - | - | SP, SU | IPS=No Scales=Yes | ||||
| ||||||||
| Startup | Active | Recovery | Damage | Guard | ||||
|---|---|---|---|---|---|---|---|---|
| 9/11 | 3/2 | until landing | 10 | - | ||||
| Hit Adv. | Block Adv. | Pushblock Adv. | Cancel | Properties | ||||
| +16 | - | - | SP, SU | IPS=No Scales=Yes | ||||
| ||||||||
| Startup | Active | Recovery | Damage | Guard | ||||
|---|---|---|---|---|---|---|---|---|
| 12/17 | 3/4 | until landing | 13 | - | ||||
| Hit Adv. | Block Adv. | Pushblock Adv. | Cancel | Properties | ||||
| +8 | - | - | SP, SU | IPS=No Scales=Yes | ||||
| ||||||||
| Startup | Active | Recovery | Damage | Guard | ||||
|---|---|---|---|---|---|---|---|---|
| 11 | 28 | until landing | 4 | - | ||||
| Hit Adv. | Block Adv. | Pushblock Adv. | Cancel | Properties | ||||
| +11 | - | - | SP, SU | IPS=No Scales=Yes | ||||
| ||||||||
| Startup | Active | Recovery | Damage | Guard | ||||
|---|---|---|---|---|---|---|---|---|
| 5 | 85 | until landing | 4 | - | ||||
| Hit Adv. | Block Adv. | Pushblock Adv. | Cancel | Properties | ||||
| +11 | - | - | SP, SU | IPS=No Scales=Yes | ||||
| ||||||||
Dashing
| Startup | Active | Recovery | Damage | Guard | ||||
|---|---|---|---|---|---|---|---|---|
| 10 | 3 | 7 | 4 | - | ||||
| Hit Adv. | Block Adv. | Pushblock Adv. | Cancel | Properties | ||||
| +3 | +2 | -1 | SP, SU, TA, 236S | IPS=No Scales=Yes | ||||
| ||||||||
| Startup | Active | Recovery | Damage | Guard | ||||
|---|---|---|---|---|---|---|---|---|
| 11 | 4 | 17 | 10 | - | ||||
| Hit Adv. | Block Adv. | Pushblock Adv. | Cancel | Properties | ||||
| -5 | -6 | -12 | SP, SU, TA, 236S | IPS=No Scales=Yes | ||||
| ||||||||
| Startup | Active | Recovery | Damage | Guard | ||||
|---|---|---|---|---|---|---|---|---|
| 17 | 6 | 13 | 5 | - | ||||
| Hit Adv. | Block Adv. | Pushblock Adv. | Cancel | Properties | ||||
| +0 | -1 | -10 | SP, SU, TA, 236S | IPS=No Scales=Yes | ||||
| ||||||||
| Startup | Active | Recovery | Damage | Guard | ||||
|---|---|---|---|---|---|---|---|---|
| 5 | 4 | 16 | 4 | - | ||||
| Hit Adv. | Block Adv. | Pushblock Adv. | Cancel | Properties | ||||
| -7 | -8 | -11 | SP, SU, TA, 236S | IPS=Yes Scales=Yes | ||||
| ||||||||
| Startup | Active | Recovery | Damage | Guard | ||||
|---|---|---|---|---|---|---|---|---|
| 9 | 2 | 21 | 8 | - | ||||
| Hit Adv. | Block Adv. | Pushblock Adv. | Cancel | Properties | ||||
| -7 | -8 | -8 | SP, SU, TA, 236S | IPS=No Scales=Yes | ||||
| ||||||||
| Startup | Active | Recovery | Damage | Guard | ||||
|---|---|---|---|---|---|---|---|---|
| 14 | 10 | 16 | 12 | - | ||||
| Hit Adv. | Block Adv. | Pushblock Adv. | Cancel | Properties | ||||
| KD | -8 | -21 | SP*, SU*, TA* | IPS=No Scales=No | ||||
| ||||||||
Special Moves
Emerald Splash (Stand Off) 236 + X
| Startup | Active | Recovery | Damage | Guard | ||||
|---|---|---|---|---|---|---|---|---|
| 15 | 25 | 10/19* | 2x4 | All | ||||
| Hit Adv. | Block Adv. | Pushblock Adv. | Cancel | Properties | ||||
| ? | ? | ? | No | IPS=No Scales=No | ||||
|
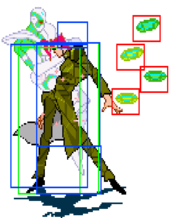
Hierophant Green unleashes his signature move, Emerald Splash, allowing New Kakyoin to instantly move after. This special sends out a smaller ranged emerald splash. It's great to push your opponents away with a quick ranged attack.
| ||||||||
Emerald Splash (Stand On, Air OK) 236 + X
| Startup | Active | Recovery | Damage | Guard | ||||
|---|---|---|---|---|---|---|---|---|
| 23 | 20 | 19 | 2x8 | All | ||||
| Hit Adv. | Block Adv. | Pushblock Adv. | Cancel | Properties | ||||
| ? | ? | ? | No | IPS=No Scales=No | ||||
|
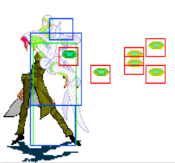
Hierophant Green unleashes his signature move, Emerald Splash, this time a volley of 8 projectiles while keeping New Kakyoin in place. Compared to his OG counterpart this move is extremely bad and underwhelming. | ||||||||
Mystic Cloak/Tie Wrap Snake (Stand OFF) - 214 + X
| Startup | Active | Recovery | Damage | Guard | ||||
|---|---|---|---|---|---|---|---|---|
| 18 | 17 | 10/19* | ? | Low | ||||
| Hit Adv. | Block Adv. | Pushblock Adv. | Cancel | Properties | ||||
| ? | ? | ? | ? | IPS=No Scales=No | ||||
|
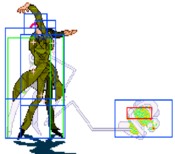
Hierophant wraps around the opponent if landed. It’s one of his greatest pressure tools. Nothing won’t affect the move depending on the buttons that were pressed. Note: It cannot be used during Stand ON, so setting up Nets and Tailwrap are possible in a stand crash combo. Leads to his biggest damaging combos and okizeme.
| ||||||||
Mystic Web/Hierophant Field (Stand ON, Air OK) - 214 + X
| Startup | Active | Recovery | Damage | Guard | ||||
|---|---|---|---|---|---|---|---|---|
| 21/15* | 3 | 15 | 1 | All | ||||
| Hit Adv. | Block Adv. | Pushblock Adv. | Cancel | Properties | ||||
| +71 | +23 | ? | No | IPS=No Scales=No | ||||
|
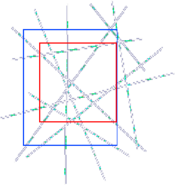
Hierophant sets up nets that can stun the opponent for a short period of time. Surprisingly enough, New Kak’s nets are similar to Kakyoin’s nets in JoJo’s Venture. s.214A Net just stuns the opponent. No stand crash included, but you can tandem off of it like Regular Kakyoin. s.214 + B/C are pretty similar (Minor differences is the hitboxes). s.214B/C are more situational in a match due to them taking away your s.6B>s.5c, and also send the opponent into the air. They can still be used in specific combos and for catching the opponent off guard with their slightly different placements. UNLIKE normal Kakyoin, New Kakyoin's nets *DO NOT* scale.
| ||||||||
236 + S (Stand OFF) or 6+AA (Stand ON)
Hierophant dashes out and is controlled via New Kakyoin. There’s nothing really much about it, except that It'll cause New Kakyoin to receive more damage if New Kakyoin is attacked. 236S Has invincibility on startup and can grab while activating. However, s.6AA is significantly faster.
Super Moves
Super Emerald Splash (Stand OFF) 236 + AA
Hierophant's Super Emerald Splash. Similar to OG Kakyoin's 236+AA, New Kak unleashes a full screen Emerald Splash, except a small tad slower. Use this super when they your opponent is launched after Tiewrap Snake or when they whiff with their Stand.
Shin/True 20 Meter Radius Emerald Splash (Stand ON, Air OK) 236 + AA
Hierophant fills the entire screen with Mystic Traps. If hit, Kakyoin will unleash a barrage of Emerald Splashes onto the screen. This super does less damage than stand off 236+AA against some characters. Only use this super to punish your enemies or when they're caught in your airborne net.
India's Arm (Stand OFF) 214 + AA or (Stand ON) 214 + AA
If done with Stand ON you can manually control Hierophant's arm. If with Stand OFF it forms different patterns according to the buttons used, as follows:
- A + B: Goes forward then up-forward
- A + C: Goes forward then does a U turn
- B + C: Does a wave trajectory
- A + B + C: Forms a five-pointed star
Oshioki no Jikan~/Punishment Time~ (Stand ON) 5A>5A>6>5B>5C
New Kakyoin's most coolest and stylish special, The Raging Demon. This special can only be used with Stand On. Comes out frame 1 after the superflash, and can be comboed into by anything as long as Hierophant's slow moving butt can catch the opponent before they recover from hitstun.
