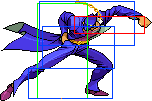
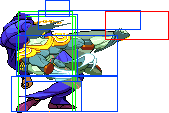
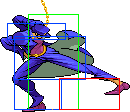
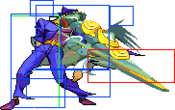
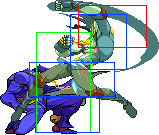
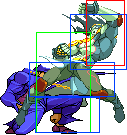
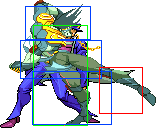
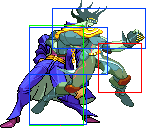
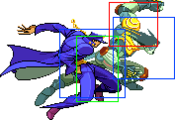
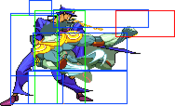
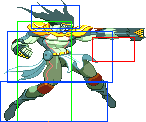
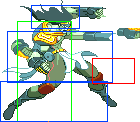
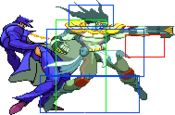
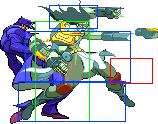
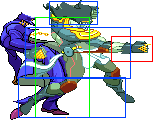
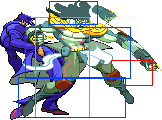
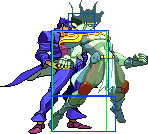
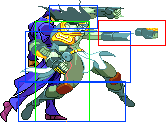
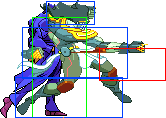
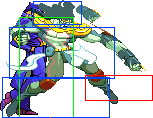
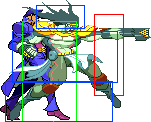
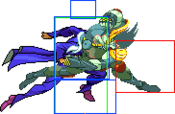
JoJo's Bizarre Adventure: Heritage for the Future/Jotaro/Movelist: Difference between revisions
From SuperCombo Wiki
m (made stand off special framedata readable. put block properties in "guard" sections) |
|||
| Line 15: | Line 15: | ||
|block=+5 | |block=+5 | ||
|pushblock=+2 | |pushblock=+2 | ||
|guard= | |guard=Mid | ||
|damage= | |damage= | ||
|cancel=SP, SU, TA | |cancel=SP, SU, TA | ||
|properties=IPS=Yes Scales=Yes | |properties=IPS=Yes Scales=Yes <br>Air-UB | ||
|description= | |description= | ||
*Can combo into 5A, 2A, 5B, 2B, 6B and s.5A. Useful as a combo starter. | *Can combo into 5A, 2A, 5B, 2B, 6B and s.5A. Useful as a combo starter. | ||
| Line 35: | Line 35: | ||
|block=-3 | |block=-3 | ||
|pushblock=-5 | |pushblock=-5 | ||
|guard= | |guard=Mid | ||
|damage= | |damage= | ||
|cancel=SP, SU, TA | |cancel=SP, SU, TA | ||
|properties=IPS=Yes Scales=Yes | |properties=IPS=Yes Scales=Yes <br>Air-UB | ||
|description= | |description= | ||
*Can combo from d.5C and 5A. | *Can combo from d.5C and 5A. | ||
| Line 56: | Line 56: | ||
|block=-4 | |block=-4 | ||
|pushblock=-4 | |pushblock=-4 | ||
|guard= | |guard=Mid | ||
|damage= | |damage= | ||
|cancel=SP, SU, TA | |cancel=SP, SU, TA | ||
|properties=IPS=No Scales=No | |properties=IPS=No Scales=No <br>Air-UB | ||
|description= | |description= | ||
*Surprisingly good as an anti-air for jump-ins that are farther away. | *Surprisingly good as an anti-air for jump-ins that are farther away. | ||
| Line 79: | Line 79: | ||
|block=+5 | |block=+5 | ||
|pushblock=+2 | |pushblock=+2 | ||
|guard= | |guard=Low | ||
|damage= | |damage= | ||
|cancel=SP, SU, TA | |cancel=SP, SU, TA | ||
|properties=IPS=Yes Scales=Yes | |properties=IPS=Yes Scales=Yes <br>Air-UB | ||
|description= | |description= | ||
*Hits incredibly low. | *Hits incredibly low. | ||
| Line 101: | Line 101: | ||
|block=-4 | |block=-4 | ||
|pushblock=-12 | |pushblock=-12 | ||
|guard= | |guard=Mid | ||
|damage= | |damage= | ||
|cancel=SP, SU, TA | |cancel=SP, SU, TA | ||
|properties=IPS=No Scales=No | |properties=IPS=No Scales=No <br>Air-UB | ||
|description= | |description= | ||
*Pretty ok "get off me" tool. | *Pretty ok "get off me" tool. | ||
| Line 123: | Line 123: | ||
|block=-5 | |block=-5 | ||
|pushblock=-17 | |pushblock=-17 | ||
|guard= | |guard=Low | ||
|damage= | |damage= | ||
|cancel=SP, SU, TA | |cancel=SP, SU, TA | ||
|properties=IPS=No Scales=No | |properties=IPS=No Scales=No <br>Air-UB | ||
|description= | |description= | ||
*Allows you to get Star Finger oki on characters like Avdol or Vanilla Ice. | *Allows you to get Star Finger oki on characters like Avdol or Vanilla Ice. | ||
| Line 146: | Line 146: | ||
|block=-2 | |block=-2 | ||
|pushblock=-6 | |pushblock=-6 | ||
|guard= | |guard=Low | ||
|damage= | |damage= | ||
|cancel=SP, SU, TA | |cancel=SP, SU, TA | ||
|properties=IPS=Yes Scales=Yes | |properties=IPS=Yes Scales=Yes <br>Air-UB | ||
|description= | |description= | ||
*Your main Stand Off hitconfirm. | *Your main Stand Off hitconfirm. | ||
| Line 168: | Line 168: | ||
|block=-6 | |block=-6 | ||
|pushblock=-19 | |pushblock=-19 | ||
|guard= | |guard=Low | ||
|damage= | |damage= | ||
|cancel=SP, SU, TA | |cancel=SP, SU, TA | ||
|properties=IPS=No Scales=No | |properties=IPS=No Scales=No <br>Air-UB | ||
|description= | |description= | ||
*Not really useful. | *Not really useful. | ||
| Line 190: | Line 190: | ||
|block=-4 | |block=-4 | ||
|pushblock=-17 | |pushblock=-17 | ||
|guard= | |guard=Mid | ||
|damage= | |damage= | ||
|cancel=SP, SU, TA | |cancel=SP, SU, TA | ||
|properties=IPS=No Scales=No | |properties=IPS=No Scales=No <br>Air-UB | ||
|description= | |description= | ||
*Your best Stand Off anti air. | *Your best Stand Off anti air. | ||
| Line 211: | Line 211: | ||
|block=+11 | |block=+11 | ||
|pushblock=+8 | |pushblock=+8 | ||
|guard= | |guard=High | ||
|damage= | |damage= | ||
|cancel=None | |cancel=None | ||
|properties=IPS=No Scales=No | |properties=IPS=No Scales=No | ||
|description= | |description= | ||
*Solid air to air. | *Solid air to air. | ||
| Line 232: | Line 232: | ||
|block=+11 | |block=+11 | ||
|pushblock=+8 | |pushblock=+8 | ||
|guard= | |guard=High | ||
|damage= | |damage= | ||
|cancel=None | |cancel=None | ||
|properties=IPS=No Scales=No | |properties=IPS=No Scales=No | ||
|description= | |description= | ||
*Deals more damage and is more active than j.A | *Deals more damage and is more active than j.A | ||
| Line 254: | Line 254: | ||
|block=+11 | |block=+11 | ||
|pushblock=+8 | |pushblock=+8 | ||
|guard= | |guard=High | ||
|damage= | |damage= | ||
|cancel=None | |cancel=None | ||
|properties=IPS=No Scales=No | |properties=IPS=No Scales=No | ||
|description= | |description= | ||
*Your main Stand Off jump-in. | *Your main Stand Off jump-in. | ||
| Line 277: | Line 277: | ||
|block=+0 | |block=+0 | ||
|pushblock=-3 | |pushblock=-3 | ||
|guard= | |guard=Mid | ||
|damage= | |damage= | ||
|cancel=SP, SU, TA | |cancel=SP, SU, TA | ||
|properties=IPS=No Scales=Yes | |properties=IPS=No Scales=Yes <br>Air-UB | ||
|description= | |description= | ||
*Star Platinum jabs extremely fast. Good range but can be ducked under by most if not all characters with Stand Off. | *Star Platinum jabs extremely fast. Good range but can be ducked under by most if not all characters with Stand Off. | ||
| Line 301: | Line 301: | ||
|block=+2 | |block=+2 | ||
|pushblock=-6 | |pushblock=-6 | ||
|guard= | |guard=Mid | ||
|damage= | |damage= | ||
|cancel=SP, SU, TA | |cancel=SP, SU, TA | ||
|properties=IPS=No Scales=Yes | |properties=IPS=No Scales=Yes <br>Air-UB | ||
|description= | |description= | ||
*One of the best normals in the game. | *One of the best normals in the game. | ||
| Line 324: | Line 324: | ||
|block=0 | |block=0 | ||
|pushblock=-13 | |pushblock=-13 | ||
|guard= | |guard=Mid | ||
|damage= | |damage= | ||
|cancel=None | |cancel=None | ||
|properties=IPS=No Scales=Yes | |properties=IPS=No Scales=Yes <br>Air-UB | ||
|description= | |description= | ||
*Slow to come out but covers long range. Cannot be cancelled. | *Slow to come out but covers long range. Cannot be cancelled. | ||
| Line 345: | Line 345: | ||
|block=0 | |block=0 | ||
|pushblock=-7 | |pushblock=-7 | ||
|guard= | |guard=Mid | ||
|damage= | |damage= | ||
|cancel=SP, SU | |cancel=SP, SU | ||
|properties=IPS=No Scales=Yes | |properties=IPS=No Scales=Yes <br>Air-UB | ||
|description= | |description= | ||
*Proximity normal. | *Proximity normal. | ||
| Line 369: | Line 369: | ||
|block=-1 | |block=-1 | ||
|pushblock=-4 | |pushblock=-4 | ||
|guard= | |guard=Mid | ||
|damage= | |damage= | ||
|cancel=SP, SU | |cancel=SP, SU | ||
|properties=IPS=No Scales=Yes | |properties=IPS=No Scales=Yes <br>Air-UB | ||
|description= | |description= | ||
*Combos into s.5B, allowing it to be quite a functioning spacing tool against smaller characters. | *Combos into s.5B, allowing it to be quite a functioning spacing tool against smaller characters. | ||
| Line 390: | Line 390: | ||
|block=-7 | |block=-7 | ||
|pushblock=-12 | |pushblock=-12 | ||
|guard= | |guard=Low | ||
|damage= | |damage= | ||
|cancel=SP, SU | |cancel=SP, SU | ||
|properties=IPS=No Scales=Yes | |properties=IPS=No Scales=Yes <br>Air-UB | ||
|description= | |description= | ||
*Similar to s.2A. | *Similar to s.2A. | ||
| Line 413: | Line 413: | ||
|block=-7 | |block=-7 | ||
|pushblock=-20 | |pushblock=-20 | ||
|guard= | |guard=Mid | ||
|damage= | |damage= | ||
|cancel=SP, SU | |cancel=SP, SU | ||
|properties=IPS=No Scales=Yes | |properties=IPS=No Scales=Yes <br>Air-UB | ||
|description= | |description= | ||
*Quite a useful anti air, with a surprisingly functional grounded hitbox for pokes. | *Quite a useful anti air, with a surprisingly functional grounded hitbox for pokes. | ||
| Line 434: | Line 434: | ||
|block=-20 | |block=-20 | ||
|pushblock=-19 | |pushblock=-19 | ||
|guard= | |guard=Low | ||
|damage= | |damage= | ||
|cancel=None | |cancel=None | ||
|properties=IPS=No Scales=No | |properties=IPS=No Scales=No <br>Air-UB | ||
|description= | |description= | ||
*Causes knockdown, used to end autocombos like s.2ABAB s.2C | *Causes knockdown, used to end autocombos like s.2ABAB s.2C | ||
| Line 455: | Line 455: | ||
|block=-10 | |block=-10 | ||
|pushblock=-15 | |pushblock=-15 | ||
|guard= | |guard=High | ||
|damage= | |damage= | ||
|cancel=SP, SU, TA | |cancel=SP, SU, TA | ||
|properties=IPS=No Scales=No | |properties=IPS=No Scales=No <br>Air-UB | ||
|description= | |description= | ||
*Terrible move. Use IOH s.j.A instead, or just grab. | *Terrible move. Use IOH s.j.A instead, or just grab. | ||
| Line 478: | Line 478: | ||
|block=+11 | |block=+11 | ||
|pushblock=+8 | |pushblock=+8 | ||
|guard= | |guard=High | ||
|damage= | |damage= | ||
|cancel=SP, SU | |cancel=SP, SU | ||
|properties=IPS=No Scales=Yes | |properties=IPS=No Scales=Yes | ||
|description= | |description= | ||
*Your fastest aerial move. | *Your fastest aerial move. | ||
| Line 499: | Line 499: | ||
|block=+11 | |block=+11 | ||
|pushblock=+8 | |pushblock=+8 | ||
|guard= | |guard=High | ||
|damage= | |damage= | ||
|cancel=SP, SU | |cancel=SP, SU | ||
|properties=IPS=No Scales=Yes | |properties=IPS=No Scales=Yes | ||
|description= | |description= | ||
*Same as s.j.A but comes out slower while doing more damage. Your go to jump-in. | *Same as s.j.A but comes out slower while doing more damage. Your go to jump-in. | ||
| Line 522: | Line 522: | ||
|block=+11 | |block=+11 | ||
|pushblock=+8 | |pushblock=+8 | ||
|guard= | |guard=High | ||
|damage= | |damage= | ||
|cancel=SP, SU | |cancel=SP, SU | ||
|properties=IPS=No Scales=Yes | |properties=IPS=No Scales=Yes | ||
|description= | |description= | ||
*Does high damage and works very well as an air-to-air + tech chase tool. | *Does high damage and works very well as an air-to-air + tech chase tool. | ||
| Line 546: | Line 546: | ||
|block=+2 | |block=+2 | ||
|pushblock=-1 | |pushblock=-1 | ||
|guard= | |guard=Mid | ||
|damage= | |damage= | ||
|cancel=SP, SU, TA | |cancel=SP, SU, TA | ||
|properties=IPS=Yes Scales=Yes | |properties=IPS=Yes Scales=Yes <br>Air-UB | ||
|description= | |description= | ||
*Dashing version of 5A. Comes out much faster than 5A and has a long lasting hitbox. | *Dashing version of 5A. Comes out much faster than 5A and has a long lasting hitbox. | ||
| Line 569: | Line 569: | ||
|block=-1 | |block=-1 | ||
|pushblock=-9 | |pushblock=-9 | ||
|guard= | |guard=Mid | ||
|damage= | |damage= | ||
|cancel=SP, SU, TA | |cancel=SP, SU, TA | ||
|properties=IPS=Yes Scales=Yes | |properties=IPS=Yes Scales=Yes <br>Air-UB | ||
|description= | |description= | ||
*Does not have much use. | *Does not have much use. | ||
| Line 591: | Line 591: | ||
|block=+11 | |block=+11 | ||
|pushblock=-2 | |pushblock=-2 | ||
|guard= | |guard=Mid | ||
|damage= | |damage= | ||
|cancel=SP, SU, TA | |cancel=SP, SU, TA | ||
|properties=IPS=Yes Scales=Yes | |properties=IPS=Yes Scales=Yes <br>Air-UB | ||
|description= | |description= | ||
*Useful as a pressure tool and as a combo starter as you can link into most of Jotaro's stand-out normals after it connects. | *Useful as a pressure tool and as a combo starter as you can link into most of Jotaro's stand-out normals after it connects. | ||
| Line 613: | Line 613: | ||
|block=-2 | |block=-2 | ||
|pushblock=-5 | |pushblock=-5 | ||
|guard= | |guard=Low | ||
|damage= | |damage= | ||
|cancel=SP, SU, TA | |cancel=SP, SU, TA | ||
|properties=IPS=Yes Scales=Yes | |properties=IPS=Yes Scales=Yes <br>Air-UB | ||
|description= | |description= | ||
*Dashing version of 2A. Startup and recovery are much slower compared to the regular version. | *Dashing version of 2A. Startup and recovery are much slower compared to the regular version. | ||
| Line 634: | Line 634: | ||
|block=-4 | |block=-4 | ||
|pushblock=-17 | |pushblock=-17 | ||
|guard= | |guard=Mid | ||
|damage= | |damage= | ||
|cancel=SP, SU, TA | |cancel=SP, SU, TA | ||
|properties=IPS=Yes Scales=No | |properties=IPS=Yes Scales=No <br>Air-UB | ||
|description= | |description= | ||
*Dashing version of 2B. | *Dashing version of 2B. | ||
| Line 658: | Line 658: | ||
|block=-2 | |block=-2 | ||
|pushblock=-15 | |pushblock=-15 | ||
|guard= | |guard=Low | ||
|damage= | |damage= | ||
|cancel=SP, SU, TA | |cancel=SP, SU, TA | ||
|properties=IPS=No Scales=No | |properties=IPS=No Scales=No <br>Air-UB | ||
|description= | |description= | ||
*Dashing version of 2C. Slower startup and recovery. | *Dashing version of 2C. Slower startup and recovery. | ||
| Line 681: | Line 681: | ||
|block=+2 | |block=+2 | ||
|pushblock=-1 | |pushblock=-1 | ||
|guard= | |guard=Mid | ||
|damage= | |damage= | ||
|cancel=SP, SU, TA | |cancel=SP, SU, TA | ||
|properties=IPS=Yes Scales=Yes | |properties=IPS=Yes Scales=Yes <br>Air-UB | ||
|description= | |description= | ||
*Links into s.5A, is easily combo'd into from a jumpin. | *Links into s.5A, is easily combo'd into from a jumpin. | ||
| Line 703: | Line 703: | ||
|block=-4 | |block=-4 | ||
|pushblock=-12 | |pushblock=-12 | ||
|guard= | |guard=Mid | ||
|damage= | |damage= | ||
|cancel=SP, SU, TA | |cancel=SP, SU, TA | ||
|properties=IPS=Yes Scales=Yes | |properties=IPS=Yes Scales=Yes <br>Air-UB | ||
|description= | |description= | ||
*On the move version of s.5B. | *On the move version of s.5B. | ||
| Line 725: | Line 725: | ||
|block=-3 | |block=-3 | ||
|pushblock=-16 | |pushblock=-16 | ||
|guard= | |guard=Mid | ||
|damage= | |damage= | ||
|cancel=SP, SU, TA | |cancel=SP, SU, TA | ||
|properties=IPS=Yes Scales=Yes | |properties=IPS=Yes Scales=Yes <br>Air-UB | ||
|description= | |description= | ||
*Cancellable version of far 5C. | *Cancellable version of far 5C. | ||
| Line 746: | Line 746: | ||
|block=0 | |block=0 | ||
|pushblock=-11 | |pushblock=-11 | ||
|guard= | |guard=Low | ||
|damage= | |damage= | ||
|cancel=SP, SU, TA | |cancel=SP, SU, TA | ||
|properties=IPS=No Scales=No | |properties=IPS=No Scales=No <br>Air-UB | ||
|description= | |description= | ||
*Low version of s.2A, slightly slower. | *Low version of s.2A, slightly slower. | ||
| Line 770: | Line 770: | ||
|block=-6 | |block=-6 | ||
|pushblock=-14 | |pushblock=-14 | ||
|guard= | |guard=Low | ||
|damage= | |damage= | ||
|cancel=SP, SU, TA | |cancel=SP, SU, TA | ||
|properties=IPS=No Scales=No | |properties=IPS=No Scales=No <br>Air-UB | ||
|description= | |description= | ||
*Inferior version of s.d.2A. | *Inferior version of s.d.2A. | ||
| Line 791: | Line 791: | ||
|block=-13 | |block=-13 | ||
|pushblock=-20 | |pushblock=-20 | ||
|guard= | |guard=Low | ||
|damage= | |damage= | ||
|cancel=None | |cancel=None | ||
|properties=IPS=No Scales=No | |properties=IPS=No Scales=No <br>Air-UB | ||
|description= | |description= | ||
*Slow startup and punishable on block. Evade using it. | *Slow startup and punishable on block. Evade using it. | ||
| Line 816: | Line 816: | ||
|recovery=A=61 <br> B=62 <br> C=61 | |recovery=A=61 <br> B=62 <br> C=61 | ||
|hit=A=+33 <br> B=+42 <br> C=+42 | |hit=A=+33 <br> B=+42 <br> C=+42 | ||
|block= | |block=A=+32 <br> B=+29 <br> C=+29 | ||
|pushblock | |pushblock=A=+29 <br> B=+26 <br> C=+26 | ||
|guard=Mid | |||
|damage= | |damage= | ||
|cancel=None | |cancel=None | ||
|properties=IPS=No Scales=No | |properties=IPS=No Scales=No <br>Air-UB | ||
|description= | |description= | ||
*Depending on the button used, Star Platinum travels a longer distance and takes longer to start attacking. | *Depending on the button used, Star Platinum travels a longer distance and takes longer to start attacking. | ||
| Line 839: | Line 839: | ||
|recovery=A=61 <br> B=60 <br> C=58 | |recovery=A=61 <br> B=60 <br> C=58 | ||
|hit=A=+30 <br> B=+34 <br> C=+36 | |hit=A=+30 <br> B=+34 <br> C=+36 | ||
|block= | |block=A=+18 <br> B=+18 <br> C=+18 | ||
|pushblock | |pushblock=A=+16 <br> B=+16 <br> C=+16 | ||
|guard=Mid | |||
|damage= | |damage= | ||
|cancel=None | |cancel=None | ||
|properties=IPS=No Scales=No | |properties=IPS=No Scales=No <br>Air-UB | ||
|description= | |description= | ||
*Depending on the button pressed, Star Platinum will cover a longer distance, but the move will also come out slower. | *Depending on the button pressed, Star Platinum will cover a longer distance, but the move will also come out slower. | ||
| Line 862: | Line 862: | ||
|recovery=45 | |recovery=45 | ||
|hit=+41 | |hit=+41 | ||
|block= | |block=+43 | ||
|pushblock= | |pushblock=+18 | ||
|guard= | |guard=Mid | ||
|damage= | |damage= | ||
|cancel=None | |cancel=None | ||
|properties=IPS=No Scales=No | |properties=IPS=No Scales=No <br>Air-UB | ||
|description= | |description= | ||
*Star Platinum moves its arm behind Jotaro and after a short charge, attacks the opponent with an extended finger while dragging them towards itself. | *Star Platinum moves its arm behind Jotaro and after a short charge, attacks the opponent with an extended finger while dragging them towards itself. | ||
| Line 888: | Line 888: | ||
|block=+2 | |block=+2 | ||
|pushblock=-7 | |pushblock=-7 | ||
|guard= | |guard=Mid | ||
|damage= | |damage= | ||
|cancel=s.214X | |cancel=s.214X | ||
|properties=IPS=No Scales=No | |properties=IPS=No Scales=No <br>Air-UB | ||
|description= | |description= | ||
*Jotaro's easiest hitconfirm out of pretty much any Stand Off normal. | *Jotaro's easiest hitconfirm out of pretty much any Stand Off normal. | ||
| Line 915: | Line 915: | ||
|recovery=A=18<br>B=18<br>C=17 | |recovery=A=18<br>B=18<br>C=17 | ||
|hit=A=Launch<br>B=Launch<br>C=Launch | |hit=A=Launch<br>B=Launch<br>C=Launch | ||
|block=A=-7 | |block=A=-7 <br>B=-2 <br>C=-2 | ||
|pushblock=-13 | |pushblock=A=-13 <br> B=-13 <br> C=-13 | ||
|guard= | |guard=Mid | ||
|damage= | |damage= | ||
|cancel=s.214X | |cancel=s.214X | ||
|properties=IPS=No Scales=No | |properties=IPS=No Scales=No <br>Air-UB | ||
|description= | |description= | ||
*Barrage except in Stand On. | *Barrage except in Stand On. | ||
| Line 944: | Line 944: | ||
|recovery=A=6<br>B=5<br>C=5 | |recovery=A=6<br>B=5<br>C=5 | ||
|hit=A=-1<br>B=-1<br>C=-1 | |hit=A=-1<br>B=-1<br>C=-1 | ||
|block=A=-5 | |block=A=-5 <br>B=-5 <br>C=-5 | ||
|pushblock=-14 | |pushblock=A=-14 <br>B=-14 <br>C=-14 | ||
|guard= | |guard=Mid | ||
|damage= | |damage= | ||
|cancel=s.214X (ender) | |cancel=s.214X (ender) | ||
|properties=IPS=No Scales=No | |properties=IPS=No Scales=No <br>Air-UB | ||
|description= | |description= | ||
*Depending on the button pressed, Star Platinum will cover a longer distance, but the move will also come out slower.<br>This special is the ideal combo ender in Stand On for Jotaro and allows him to either launch or cause hard knockdown. <br>There are three types of follow-ups which you can perform. <br>Note that when done fast enough, you can actually skip the animation of the first attack and instantly perform the follow-up. | *Depending on the button pressed, Star Platinum will cover a longer distance, but the move will also come out slower.<br>This special is the ideal combo ender in Stand On for Jotaro and allows him to either launch or cause hard knockdown. <br>There are three types of follow-ups which you can perform. <br>Note that when done fast enough, you can actually skip the animation of the first attack and instantly perform the follow-up. | ||
| Line 972: | Line 972: | ||
|block=+2 | |block=+2 | ||
|pushblock=-23 | |pushblock=-23 | ||
|guard= | |guard=Mid | ||
|damage= | |damage= | ||
|cancel=None | |cancel=None | ||
|properties=IPS=No Scales=No | |properties=IPS=No Scales=No <br>Air-UB | ||
|description= | |description= | ||
*Unlike the Stand Off version, Jotaro cannot move while performing this move. | *Unlike the Stand Off version, Jotaro cannot move while performing this move. | ||
| Line 999: | Line 999: | ||
|block=+18 | |block=+18 | ||
|pushblock=-45 | |pushblock=-45 | ||
|guard= | |guard=Mid | ||
|damage= | |damage= | ||
|cancel=None | |cancel=None | ||
|properties=IPS=No Scales=No | |properties=IPS=No Scales=No <br>Air-UB | ||
|description= | |description= | ||
*Its alright but not the best. | *Its alright but not the best. | ||
| Line 1,022: | Line 1,022: | ||
|block=-7 | |block=-7 | ||
|pushblock=-13 | |pushblock=-13 | ||
|guard= | |guard=Mid | ||
|damage= | |damage= | ||
|cancel=None | |cancel=None | ||
|properties=IPS=No Scales=No | |properties=IPS=No Scales=No <br>Air-UB | ||
|description= | |description= | ||
*Pretty fast and can get you out of some strings you don't know how to deal with. | *Pretty fast and can get you out of some strings you don't know how to deal with. | ||
| Line 1,048: | Line 1,048: | ||
|block=+159 | |block=+159 | ||
|pushblock=+154 | |pushblock=+154 | ||
|guard= | |guard=Mid | ||
|damage= | |damage= | ||
|cancel=None | |cancel=None | ||
|properties=IPS=No Scales=Yes | |properties=IPS=No Scales=Yes | ||
|description= | |description= | ||
*Can be combo'd into from d.2B xx 236AA 6B, where 6B hits after superflash, but before 236AA. | *Can be combo'd into from d.2B xx 236AA 6B, where 6B hits after superflash, but before 236AA. | ||
| Line 1,070: | Line 1,070: | ||
|block=+25 | |block=+25 | ||
|pushblock=+14 | |pushblock=+14 | ||
|guard= | |guard=Mid | ||
|damage= | |damage= | ||
|cancel=With S to cancel the attack | |cancel=With S to cancel the attack | ||
|properties=IPS=No Scales=No | |properties=IPS=No Scales=No | ||
|description= | |description= | ||
*This super comes out quick and is very useful as a hitconfirm for some easy damage. | *This super comes out quick and is very useful as a hitconfirm for some easy damage. | ||
| Line 1,159: | Line 1,159: | ||
|block=-1 | |block=-1 | ||
|pushblock=-1 | |pushblock=-1 | ||
|guard= | |guard=Mid | ||
|damage= | |damage= | ||
|cancel=None | |cancel=None | ||
| Line 1,187: | Line 1,187: | ||
|block=-10 | |block=-10 | ||
|pushblock=-4 | |pushblock=-4 | ||
|guard= | |guard=Mid | ||
|damage= | |damage= | ||
|cancel=None | |cancel=None | ||
|properties=IPS=No Scales=No | |properties=IPS=No Scales=No | ||
|description= | |description= | ||
*Can be combo'd into from s.j.B/s.j.A | *Can be combo'd into from s.j.B/s.j.A | ||
| Line 1,210: | Line 1,210: | ||
|block=-3 | |block=-3 | ||
|pushblock=-20 | |pushblock=-20 | ||
|guard= | |guard=Mid | ||
|damage= | |damage= | ||
|cancel=Into itself | |cancel=Into itself | ||
|properties=IPS=No Scales=No | |properties=IPS=No Scales=No | ||
|description= | |description= | ||
*Star Platinum moves its arm back and charges up for a powerful flashy strike. | *Star Platinum moves its arm back and charges up for a powerful flashy strike. | ||
Revision as of 09:13, 23 October 2022
Movelist
Normals
Stand Off
| Startup | Active | Recovery | Damage | Guard | ||||
|---|---|---|---|---|---|---|---|---|
| 3 | 3 | 3 | - | Mid | ||||
| Hit Adv. | Block Adv. | Pushblock Adv. | Cancel | Properties | ||||
| +6 | +5 | +2 | SP, SU, TA | IPS=Yes Scales=Yes Air-UB | ||||
| ||||||||
| Startup | Active | Recovery | Damage | Guard | ||||
|---|---|---|---|---|---|---|---|---|
| 6 | 2 | 15 | - | Mid | ||||
| Hit Adv. | Block Adv. | Pushblock Adv. | Cancel | Properties | ||||
| -2 | -3 | -5 | SP, SU, TA | IPS=Yes Scales=Yes Air-UB | ||||
| ||||||||
| Startup | Active | Recovery | Damage | Guard | ||||
|---|---|---|---|---|---|---|---|---|
| 7 | 5 | 17 | - | Mid | ||||
| Hit Adv. | Block Adv. | Pushblock Adv. | Cancel | Properties | ||||
| -3 | -4 | -4 | SP, SU, TA | IPS=No Scales=No Air-UB | ||||
| ||||||||
| Startup | Active | Recovery | Damage | Guard | ||||
|---|---|---|---|---|---|---|---|---|
| 3 | 1 | 5 | - | Low | ||||
| Hit Adv. | Block Adv. | Pushblock Adv. | Cancel | Properties | ||||
| +6 | +5 | +2 | SP, SU, TA | IPS=Yes Scales=Yes Air-UB | ||||
| ||||||||
| Startup | Active | Recovery | Damage | Guard | ||||
|---|---|---|---|---|---|---|---|---|
| 3 | 2 | 17 | - | Mid | ||||
| Hit Adv. | Block Adv. | Pushblock Adv. | Cancel | Properties | ||||
| -3 | -4 | -12 | SP, SU, TA | IPS=No Scales=No Air-UB | ||||
| ||||||||
| Startup | Active | Recovery | Damage | Guard | ||||
|---|---|---|---|---|---|---|---|---|
| 7 | 2 | 20 | - | Low | ||||
| Hit Adv. | Block Adv. | Pushblock Adv. | Cancel | Properties | ||||
| Knockdown | -5 | -17 | SP, SU, TA | IPS=No Scales=No Air-UB | ||||
| ||||||||
| Startup | Active | Recovery | Damage | Guard | ||||
|---|---|---|---|---|---|---|---|---|
| 5 | 5 | 11 | - | Low | ||||
| Hit Adv. | Block Adv. | Pushblock Adv. | Cancel | Properties | ||||
| -1 | -2 | -6 | SP, SU, TA | IPS=Yes Scales=Yes Air-UB | ||||
| ||||||||
| Startup | Active | Recovery | Damage | Guard | ||||
|---|---|---|---|---|---|---|---|---|
| 8 | 3 | 22 | - | Low | ||||
| Hit Adv. | Block Adv. | Pushblock Adv. | Cancel | Properties | ||||
| -5 | -6 | -19 | SP, SU, TA | IPS=No Scales=No Air-UB | ||||
| ||||||||
| Startup | Active | Recovery | Damage | Guard | ||||
|---|---|---|---|---|---|---|---|---|
| 8 | 7 | 24 | - | Mid | ||||
| Hit Adv. | Block Adv. | Pushblock Adv. | Cancel | Properties | ||||
| -3 | -4 | -17 | SP, SU, TA | IPS=No Scales=No Air-UB | ||||
| ||||||||
| Startup | Active | Recovery | Damage | Guard | ||||
|---|---|---|---|---|---|---|---|---|
| 3 | 13 | - | - | High | ||||
| Hit Adv. | Block Adv. | Pushblock Adv. | Cancel | Properties | ||||
| +12 | +11 | +8 | None | IPS=No Scales=No | ||||
| ||||||||
| Startup | Active | Recovery | Damage | Guard | ||||
|---|---|---|---|---|---|---|---|---|
| 3 | 16 | - | - | High | ||||
| Hit Adv. | Block Adv. | Pushblock Adv. | Cancel | Properties | ||||
| +12 | +11 | +8 | None | IPS=No Scales=No | ||||
| ||||||||
| Startup | Active | Recovery | Damage | Guard | ||||
|---|---|---|---|---|---|---|---|---|
| 6 | 6 | - | - | High | ||||
| Hit Adv. | Block Adv. | Pushblock Adv. | Cancel | Properties | ||||
| +12 | +11 | +8 | None | IPS=No Scales=No | ||||
| ||||||||
Stand On
| Startup | Active | Recovery | Damage | Guard | ||||
|---|---|---|---|---|---|---|---|---|
| 2 | 2 | 2 | - | Mid | ||||
| Hit Adv. | Block Adv. | Pushblock Adv. | Cancel | Properties | ||||
| +1 | +0 | -3 | SP, SU, TA | IPS=No Scales=Yes Air-UB | ||||
| ||||||||
| Startup | Active | Recovery | Damage | Guard | ||||
|---|---|---|---|---|---|---|---|---|
| 5 | 3 | 11 | - | Mid | ||||
| Hit Adv. | Block Adv. | Pushblock Adv. | Cancel | Properties | ||||
| +3 | +2 | -6 | SP, SU, TA | IPS=No Scales=Yes Air-UB | ||||
| ||||||||
| Startup | Active | Recovery | Damage | Guard | ||||
|---|---|---|---|---|---|---|---|---|
| 7 | 2 | 15 | - | Mid | ||||
| Hit Adv. | Block Adv. | Pushblock Adv. | Cancel | Properties | ||||
| -2 | 0 | -13 | None | IPS=No Scales=Yes Air-UB | ||||
| ||||||||
| Startup | Active | Recovery | Damage | Guard | ||||
|---|---|---|---|---|---|---|---|---|
| 5 | 2 | 25 | - | Mid | ||||
| Hit Adv. | Block Adv. | Pushblock Adv. | Cancel | Properties | ||||
| +5 | 0 | -7 | SP, SU | IPS=No Scales=Yes Air-UB | ||||
| ||||||||
| Startup | Active | Recovery | Damage | Guard | ||||
|---|---|---|---|---|---|---|---|---|
| 4 | 3 | 9 | - | Mid | ||||
| Hit Adv. | Block Adv. | Pushblock Adv. | Cancel | Properties | ||||
| 0 | -1 | -4 | SP, SU | IPS=No Scales=Yes Air-UB | ||||
| ||||||||
| Startup | Active | Recovery | Damage | Guard | ||||
|---|---|---|---|---|---|---|---|---|
| 6 | 2 | 16 | - | Low | ||||
| Hit Adv. | Block Adv. | Pushblock Adv. | Cancel | Properties | ||||
| -3 | -7 | -12 | SP, SU | IPS=No Scales=Yes Air-UB | ||||
| ||||||||
| Startup | Active | Recovery | Damage | Guard | ||||
|---|---|---|---|---|---|---|---|---|
| 8 | 6 | 18 | - | Mid | ||||
| Hit Adv. | Block Adv. | Pushblock Adv. | Cancel | Properties | ||||
| Launch | -7 | -20 | SP, SU | IPS=No Scales=Yes Air-UB | ||||
| ||||||||
| Startup | Active | Recovery | Damage | Guard | ||||
|---|---|---|---|---|---|---|---|---|
| 16 | 5 | 26 | - | Low | ||||
| Hit Adv. | Block Adv. | Pushblock Adv. | Cancel | Properties | ||||
| Knockdown | -20 | -19 | None | IPS=No Scales=No Air-UB | ||||
| ||||||||
| Startup | Active | Recovery | Damage | Guard | ||||
|---|---|---|---|---|---|---|---|---|
| 25 | 2 | 11 | - | High | ||||
| Hit Adv. | Block Adv. | Pushblock Adv. | Cancel | Properties | ||||
| -8 | -10 | -15 | SP, SU, TA | IPS=No Scales=No Air-UB | ||||
| ||||||||
| Startup | Active | Recovery | Damage | Guard | ||||
|---|---|---|---|---|---|---|---|---|
| 2 | 2 | Until you land | - | High | ||||
| Hit Adv. | Block Adv. | Pushblock Adv. | Cancel | Properties | ||||
| +12 | +11 | +8 | SP, SU | IPS=No Scales=Yes | ||||
| ||||||||
| Startup | Active | Recovery | Damage | Guard | ||||
|---|---|---|---|---|---|---|---|---|
| 3 | 2 | Until you land | - | High | ||||
| Hit Adv. | Block Adv. | Pushblock Adv. | Cancel | Properties | ||||
| +12 | +11 | +8 | SP, SU | IPS=No Scales=Yes | ||||
| ||||||||
| Startup | Active | Recovery | Damage | Guard | ||||
|---|---|---|---|---|---|---|---|---|
| 5 | 4 | Until you land | - | High | ||||
| Hit Adv. | Block Adv. | Pushblock Adv. | Cancel | Properties | ||||
| +12 | +11 | +8 | SP, SU | IPS=No Scales=Yes | ||||
| ||||||||
Dashing normals
Stand Off
| Startup | Active | Recovery | Damage | Guard | ||||
|---|---|---|---|---|---|---|---|---|
| 2 | 4 | 5 | - | Mid | ||||
| Hit Adv. | Block Adv. | Pushblock Adv. | Cancel | Properties | ||||
| +3 | +2 | -1 | SP, SU, TA | IPS=Yes Scales=Yes Air-UB | ||||
| ||||||||
| Startup | Active | Recovery | Damage | Guard | ||||
|---|---|---|---|---|---|---|---|---|
| 6 | 3 | 12 | - | Mid | ||||
| Hit Adv. | Block Adv. | Pushblock Adv. | Cancel | Properties | ||||
| 0 | -1 | -9 | SP, SU, TA | IPS=Yes Scales=Yes Air-UB | ||||
| ||||||||
| Startup | Active | Recovery | Damage | Guard | ||||
|---|---|---|---|---|---|---|---|---|
| 8 | 3 | 16 | - | Mid | ||||
| Hit Adv. | Block Adv. | Pushblock Adv. | Cancel | Properties | ||||
| +12 | +11 | -2 | SP, SU, TA | IPS=Yes Scales=Yes Air-UB | ||||
| ||||||||
| Startup | Active | Recovery | Damage | Guard | ||||
|---|---|---|---|---|---|---|---|---|
| 7 | 1 | 12 | - | Low | ||||
| Hit Adv. | Block Adv. | Pushblock Adv. | Cancel | Properties | ||||
| -1 | -2 | -5 | SP, SU, TA | IPS=Yes Scales=Yes Air-UB | ||||
| ||||||||
| Startup | Active | Recovery | Damage | Guard | ||||
|---|---|---|---|---|---|---|---|---|
| 8 | 2 | 11 | - | Mid | ||||
| Hit Adv. | Block Adv. | Pushblock Adv. | Cancel | Properties | ||||
| -3 | -4 | -17 | SP, SU, TA | IPS=Yes Scales=No Air-UB | ||||
| ||||||||
| Startup | Active | Recovery | Damage | Guard | ||||
|---|---|---|---|---|---|---|---|---|
| 12 | 2 | 19 | - | Low | ||||
| Hit Adv. | Block Adv. | Pushblock Adv. | Cancel | Properties | ||||
| Knockdown | -2 | -15 | SP, SU, TA | IPS=No Scales=No Air-UB | ||||
| ||||||||
Stand On
| Startup | Active | Recovery | Damage | Guard | ||||
|---|---|---|---|---|---|---|---|---|
| 2 | 3 | 13 | - | Mid | ||||
| Hit Adv. | Block Adv. | Pushblock Adv. | Cancel | Properties | ||||
| +3 | +2 | -1 | SP, SU, TA | IPS=Yes Scales=Yes Air-UB | ||||
| ||||||||
| Startup | Active | Recovery | Damage | Guard | ||||
|---|---|---|---|---|---|---|---|---|
| 8 | 2 | 19 | - | Mid | ||||
| Hit Adv. | Block Adv. | Pushblock Adv. | Cancel | Properties | ||||
| -4 | -4 | -12 | SP, SU, TA | IPS=Yes Scales=Yes Air-UB | ||||
| ||||||||
| Startup | Active | Recovery | Damage | Guard | ||||
|---|---|---|---|---|---|---|---|---|
| 11 | 3 | 19 | - | Mid | ||||
| Hit Adv. | Block Adv. | Pushblock Adv. | Cancel | Properties | ||||
| -3 | -3 | -16 | SP, SU, TA | IPS=Yes Scales=Yes Air-UB | ||||
| ||||||||
| Startup | Active | Recovery | Damage | Guard | ||||
|---|---|---|---|---|---|---|---|---|
| 4 | 3 | 9 | - | Low | ||||
| Hit Adv. | Block Adv. | Pushblock Adv. | Cancel | Properties | ||||
| 0 | 0 | -11 | SP, SU, TA | IPS=No Scales=No Air-UB | ||||
| ||||||||
| Startup | Active | Recovery | Damage | Guard | ||||
|---|---|---|---|---|---|---|---|---|
| 6 | 2 | 16 | - | Low | ||||
| Hit Adv. | Block Adv. | Pushblock Adv. | Cancel | Properties | ||||
| -6 | -6 | -14 | SP, SU, TA | IPS=No Scales=No Air-UB | ||||
| ||||||||
| Startup | Active | Recovery | Damage | Guard | ||||
|---|---|---|---|---|---|---|---|---|
| 20 | 5 | 26 | - | Low | ||||
| Hit Adv. | Block Adv. | Pushblock Adv. | Cancel | Properties | ||||
| Knockdown | -13 | -20 | None | IPS=No Scales=No Air-UB | ||||
| ||||||||
Specials
Stand Off
| Startup | Active | Recovery | Damage | Guard | ||||
|---|---|---|---|---|---|---|---|---|
| A=15 B=33 C=13 |
A=33 B=33 C=33 |
A=61 B=62 C=61 |
- | Mid | ||||
| Hit Adv. | Block Adv. | Pushblock Adv. | Cancel | Properties | ||||
| A=+33 B=+42 C=+42 |
A=+32 B=+29 C=+29 |
A=+29 B=+26 C=+26 |
None | IPS=No Scales=No Air-UB | ||||
| ||||||||
| Startup | Active | Recovery | Damage | Guard | ||||
|---|---|---|---|---|---|---|---|---|
| A=15 B=20 C=26 |
A=2 B=2 C=2 |
A=61 B=60 C=58 |
- | Mid | ||||
| Hit Adv. | Block Adv. | Pushblock Adv. | Cancel | Properties | ||||
| A=+30 B=+34 C=+36 |
A=+18 B=+18 C=+18 |
A=+16 B=+16 C=+16 |
None | IPS=No Scales=No Air-UB | ||||
| ||||||||
| Startup | Active | Recovery | Damage | Guard | ||||
|---|---|---|---|---|---|---|---|---|
| 28 (Can be held) | 3 | 45 | - | Mid | ||||
| Hit Adv. | Block Adv. | Pushblock Adv. | Cancel | Properties | ||||
| +41 | +43 | +18 | None | IPS=No Scales=No Air-UB | ||||
| ||||||||
| Startup | Active | Recovery | Damage | Guard | ||||
|---|---|---|---|---|---|---|---|---|
| 6 | 2 | 10 | - | Mid | ||||
| Hit Adv. | Block Adv. | Pushblock Adv. | Cancel | Properties | ||||
| +3 | +2 | -7 | s.214X | IPS=No Scales=No Air-UB | ||||
| ||||||||
Stand On
| Startup | Active | Recovery | Damage | Guard | ||||
|---|---|---|---|---|---|---|---|---|
| A=7 B=9 C=11 |
A=11 B=11 C=11 |
A=18 B=18 C=17 |
- | Mid | ||||
| Hit Adv. | Block Adv. | Pushblock Adv. | Cancel | Properties | ||||
| A=Launch B=Launch C=Launch |
A=-7 B=-2 C=-2 |
A=-13 B=-13 C=-13 |
s.214X | IPS=No Scales=No Air-UB | ||||
| ||||||||
| Startup | Active | Recovery | Damage | Guard | ||||
|---|---|---|---|---|---|---|---|---|
| A=11 B=15 C=23 |
A=3 B=3 C=3 |
A=6 B=5 C=5 |
- | Mid | ||||
| Hit Adv. | Block Adv. | Pushblock Adv. | Cancel | Properties | ||||
| A=-1 B=-1 C=-1 |
A=-5 B=-5 C=-5 |
A=-14 B=-14 C=-14 |
s.214X (ender) | IPS=No Scales=No Air-UB | ||||
| ||||||||
| Startup | Active | Recovery | Damage | Guard | ||||
|---|---|---|---|---|---|---|---|---|
| 18 (Can be held) |
11 | 28 | - | Mid | ||||
| Hit Adv. | Block Adv. | Pushblock Adv. | Cancel | Properties | ||||
| +3 | +2 | -23 | None | IPS=No Scales=No Air-UB | ||||
| ||||||||
Guard Cancel
Stand Off
| Startup | Active | Recovery | Damage | Guard | ||||
|---|---|---|---|---|---|---|---|---|
| 9 | 2 | 64 | - | Mid | ||||
| Hit Adv. | Block Adv. | Pushblock Adv. | Cancel | Properties | ||||
| Launch | +18 | -45 | None | IPS=No Scales=No Air-UB | ||||
| ||||||||
Stand On
| Startup | Active | Recovery | Damage | Guard | ||||
|---|---|---|---|---|---|---|---|---|
| 10 | 3 | 28 | - | Mid | ||||
| Hit Adv. | Block Adv. | Pushblock Adv. | Cancel | Properties | ||||
| Launch | -7 | -13 | None | IPS=No Scales=No Air-UB | ||||
| ||||||||
Supers
Stand Off
| Startup | Active | Recovery | Damage | Guard | ||||
|---|---|---|---|---|---|---|---|---|
| 28 | 94 | 60 | - | Mid | ||||
| Hit Adv. | Block Adv. | Pushblock Adv. | Cancel | Properties | ||||
| +185 | +159 | +154 | None | IPS=No Scales=Yes | ||||
| ||||||||
| Startup | Active | Recovery | Damage | Guard | ||||
|---|---|---|---|---|---|---|---|---|
| 14 | 3 | 39 | - | Mid | ||||
| Hit Adv. | Block Adv. | Pushblock Adv. | Cancel | Properties | ||||
| Launch | +25 | +14 | With S to cancel the attack | IPS=No Scales=No | ||||
| ||||||||
| Startup | Active | Recovery | Damage | Guard | ||||
|---|---|---|---|---|---|---|---|---|
| - | - | - | - | - | ||||
| Hit Adv. | Block Adv. | Pushblock Adv. | Cancel | Properties | ||||
| - | - | - | With S to cancel the attack | IPS=Reset Scales=Yes | ||||
| ||||||||
| Startup | Active | Recovery | Damage | Guard | ||||
|---|---|---|---|---|---|---|---|---|
| 73 s.Off 78 s.On |
53 extra frames per full bar of meter | 152 | - | - | ||||
| Hit Adv. | Block Adv. | Pushblock Adv. | Cancel | Properties | ||||
| Wallbounce (if hit) / 0 (if not hit) | - | - | None | Timestop | ||||
| ||||||||
Stand On
| Startup | Active | Recovery | Damage | Guard | ||||
|---|---|---|---|---|---|---|---|---|
| 14 | 61 | 15 | - | Mid | ||||
| Hit Adv. | Block Adv. | Pushblock Adv. | Cancel | Properties | ||||
| Launch | -1 | -1 | None | IPS=No Scales=No Mid | ||||
| ||||||||
| Startup | Active | Recovery | Damage | Guard | ||||
|---|---|---|---|---|---|---|---|---|
| 1 | 60 | 13 (not counting height) | - | Mid | ||||
| Hit Adv. | Block Adv. | Pushblock Adv. | Cancel | Properties | ||||
| -7 | -10 | -4 | None | IPS=No Scales=No | ||||
| ||||||||
| Startup | Active | Recovery | Damage | Guard | ||||
|---|---|---|---|---|---|---|---|---|
| 7 | 11 | 18 | - | Mid | ||||
| Hit Adv. | Block Adv. | Pushblock Adv. | Cancel | Properties | ||||
| Launch | -3 | -20 | Into itself | IPS=No Scales=No | ||||
| ||||||||

