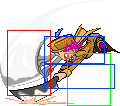
JoJo's Bizarre Adventure: Heritage for the Future/Devo/Movelist: Difference between revisions
| Line 581: | Line 581: | ||
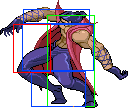
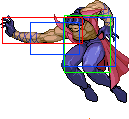
{{MoveData | {{MoveData | ||
|image= | |image= | ||
|caption= | |caption= Bonk | ||
|name=s.4C/6C (Close) | |name=s.4C/6C (Close) | ||
|data= | |data= | ||
| Line 593: | Line 593: | ||
|cancel= | |cancel= | ||
|properties= | |properties= | ||
|description= | |description= | ||
* Isn't punishable. | |||
* Definitely worth using because it can get you off of tight situations and let the opponent know that he is respecting your options too much. | |||
* USE IT. | |||
}} | }} | ||
}} | }} | ||
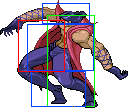
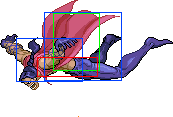
{{MoveData | {{MoveData | ||
|image=HFTF_Devo_s6a.png | |image=HFTF_Devo_s6a.png | ||
|caption= | |caption= The Cloudskipper Confirm | ||
|name=s.6A | |name=s.6A | ||
|data= | |data= | ||
| Line 610: | Line 613: | ||
|cancel= | |cancel= | ||
|properties= | |properties= | ||
|description= | |description= | ||
* Can be linked up to 4 times. | |||
* It does its job as a niche tandem confirm. | |||
* Drops on smaller characters like S.off Iggy, Alessi, and Khan. | |||
}} | }} | ||
}} | }} | ||
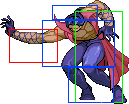
{{MoveData | {{MoveData | ||
|image=HFTF_Devo_s6b.png | |image=HFTF_Devo_s6b.png | ||
|caption= | |caption= Big Boss Deleted Scene be like | ||
|name=s.6B | |name=s.6B | ||
|data= | |data= | ||
| Line 627: | Line 633: | ||
|cancel= | |cancel= | ||
|properties= | |properties= | ||
|description= | |description= | ||
* One of your most effective tandem confirms | |||
* Can be done after ebony loop or even IAD with the simple s6a s6b to tandem. | |||
* Most optimal tandem route aside from s22c. | |||
}} | }} | ||
}} | }} | ||
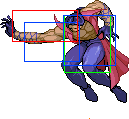
{{MoveData | {{MoveData | ||
|image=HFTF_Devo_s4b.png | |image=HFTF_Devo_s4b.png | ||
|caption= | |caption= Bottle | ||
|name=s.4B | |name=s.4B | ||
|data= | |data= | ||
| Line 644: | Line 653: | ||
|cancel= | |cancel= | ||
|properties= | |properties= | ||
|description= | |description= | ||
* Works as a tandem confirm. | |||
* You won't be using this in a real match. | |||
* Can make some fancy and stylish SC combos. | |||
}} | }} | ||
}} | }} | ||
{{MoveData | {{MoveData | ||
|image=HFTF_Devo_s3b.png | |image=HFTF_Devo_s3b.png | ||
|caption= | |caption= THE TWO-WAY MIXUP | ||
|name=s.3B | |name=s.3B | ||
|data= | |data= | ||
| Line 661: | Line 673: | ||
|cancel= | |cancel= | ||
|properties= | |properties= | ||
|description= | |description= | ||
* This is mostly used for schmixing the opponent when jumping as you can do a jump then s+3b to tandem. | |||
* I believe Cloudskipper was the one who found this confirm. | |||
* Effective but risky to do in a real match. | |||
}} | }} | ||
}} | }} | ||
{{MoveData | {{MoveData | ||
|image=HFTF_Devo_s3c.png | |image=HFTF_Devo_s3c.png | ||
|caption= | |caption= Lame s.3B | ||
|name=s.3C | |name=s.3C | ||
|data= | |data= | ||
| Line 678: | Line 693: | ||
|cancel= | |cancel= | ||
|properties= | |properties= | ||
|description= | |description= | ||
* Its s.3b but it gives a hard knockdown. | |||
* Just use 2c or 663c when u wanna do this. | |||
}} | }} | ||
}} | }} | ||
{{MoveData | {{MoveData | ||
|image=HFTF_Devo_sj6b.png | |image=HFTF_Devo_sj6b.png | ||
|caption= | |caption= The IOH of Doom | ||
|name=j.s.6B | |name=j.s.6B | ||
|data= | |data= | ||
| Line 695: | Line 712: | ||
|cancel= | |cancel= | ||
|properties= | |properties= | ||
|description= | |description= | ||
* Vital to his gameplan as this will be his main S.on pressure tool | |||
* Can be used to give the opponent an unexpected attack to do babycombos like s5a s5a s22c, s5a s5a s5a s5a s236aa, etc. | |||
* It can also be used for setting up tandem confirms like s22c or s6b. | |||
}} | }} | ||
}} | }} | ||
{{MoveData | {{MoveData | ||
|image=HFTF_Devo_sGC.png | |image=HFTF_Devo_sGC.png | ||
|caption= | |caption= No | ||
|name=Guard Cancel (Stand ON) | |name=Guard Cancel (Stand ON) | ||
|data= | |data= | ||
| Line 712: | Line 732: | ||
|cancel= | |cancel= | ||
|properties= | |properties= | ||
|description= | |description= | ||
* Don't | |||
* Can get you out of failed tandems but No | |||
* Use his S.off GC instead. | |||
}} | }} | ||
}} | }} | ||
=Special Moves= | =Special Moves= | ||
{{MoveData | {{MoveData | ||
Revision as of 11:49, 26 March 2021
Stand OFF
Normals
| Startup | Active | Recovery | Damage | Guard | ||||
|---|---|---|---|---|---|---|---|---|
| - | - | - | - | - | ||||
| Hit Adv. | Block Adv. | Pushblock Adv. | Cancel | Properties | ||||
| - | {{{block}}} | - | - | - | ||||
| ||||||||
| Startup | Active | Recovery | Damage | Guard | ||||
|---|---|---|---|---|---|---|---|---|
| - | - | - | - | - | ||||
| Hit Adv. | Block Adv. | Pushblock Adv. | Cancel | Properties | ||||
| - | {{{block}}} | - | - | - | ||||
| ||||||||
| Startup | Active | Recovery | Damage | Guard | ||||
|---|---|---|---|---|---|---|---|---|
| - | - | - | - | - | ||||
| Hit Adv. | Block Adv. | Pushblock Adv. | Cancel | Properties | ||||
| - | {{{block}}} | - | - | - | ||||
| ||||||||
| Startup | Active | Recovery | Damage | Guard | ||||
|---|---|---|---|---|---|---|---|---|
| 4 | 2 | 8 | - | - | ||||
| Hit Adv. | Block Adv. | Pushblock Adv. | Cancel | Properties | ||||
| +3 | {{{block}}} | - | - | Low | ||||
| ||||||||
| Startup | Active | Recovery | Damage | Guard | ||||
|---|---|---|---|---|---|---|---|---|
| - | - | - | - | - | ||||
| Hit Adv. | Block Adv. | Pushblock Adv. | Cancel | Properties | ||||
| - | {{{block}}} | - | - | - | ||||
| ||||||||
| Startup | Active | Recovery | Damage | Guard | ||||
|---|---|---|---|---|---|---|---|---|
| - | - | - | - | - | ||||
| Hit Adv. | Block Adv. | Pushblock Adv. | Cancel | Properties | ||||
| - | {{{block}}} | - | - | - | ||||
| ||||||||
| Startup | Active | Recovery | Damage | Guard | ||||
|---|---|---|---|---|---|---|---|---|
| - | - | - | - | - | ||||
| Hit Adv. | Block Adv. | Pushblock Adv. | Cancel | Properties | ||||
| - | {{{block}}} | - | - | - | ||||
| ||||||||
| Startup | Active | Recovery | Damage | Guard | ||||
|---|---|---|---|---|---|---|---|---|
| - | - | - | - | - | ||||
| Hit Adv. | Block Adv. | Pushblock Adv. | Cancel | Properties | ||||
| - | {{{block}}} | - | - | - | ||||
| ||||||||
| Startup | Active | Recovery | Damage | Guard | ||||
|---|---|---|---|---|---|---|---|---|
| - | - | - | - | - | ||||
| Hit Adv. | Block Adv. | Pushblock Adv. | Cancel | Properties | ||||
| - | {{{block}}} | - | - | - | ||||
| ||||||||
Dashing Normals
| Startup | Active | Recovery | Damage | Guard | ||||
|---|---|---|---|---|---|---|---|---|
| - | - | - | - | - | ||||
| Hit Adv. | Block Adv. | Pushblock Adv. | Cancel | Properties | ||||
| - | {{{block}}} | - | - | - | ||||
| ||||||||
Command Normals
| Startup | Active | Recovery | Damage | Guard | ||||
|---|---|---|---|---|---|---|---|---|
| - | - | - | - | - | ||||
| Hit Adv. | Block Adv. | Pushblock Adv. | Cancel | Properties | ||||
| - | {{{block}}} | - | - | - | ||||
| ||||||||
| Startup | Active | Recovery | Damage | Guard | ||||
|---|---|---|---|---|---|---|---|---|
| - | - | - | - | - | ||||
| Hit Adv. | Block Adv. | Pushblock Adv. | Cancel | Properties | ||||
| - | {{{block}}} | - | - | - | ||||
| ||||||||
| Startup | Active | Recovery | Damage | Guard | ||||
|---|---|---|---|---|---|---|---|---|
| - | - | - | - | - | ||||
| Hit Adv. | Block Adv. | Pushblock Adv. | Cancel | Properties | ||||
| - | {{{block}}} | - | - | - | ||||
| ||||||||
| Startup | Active | Recovery | Damage | Guard | ||||
|---|---|---|---|---|---|---|---|---|
| - | - | - | - | - | ||||
| Hit Adv. | Block Adv. | Pushblock Adv. | Cancel | Properties | ||||
| - | {{{block}}} | - | - | - | ||||
| ||||||||
Stand ON
Normals
| Startup | Active | Recovery | Damage | Guard | ||||
|---|---|---|---|---|---|---|---|---|
| - | - | - | - | - | ||||
| Hit Adv. | Block Adv. | Pushblock Adv. | Cancel | Properties | ||||
| - | {{{block}}} | - | - | - | ||||
| ||||||||
| Startup | Active | Recovery | Damage | Guard | ||||
|---|---|---|---|---|---|---|---|---|
| - | - | - | - | - | ||||
| Hit Adv. | Block Adv. | Pushblock Adv. | Cancel | Properties | ||||
| - | {{{block}}} | - | - | - | ||||
| ||||||||
| Startup | Active | Recovery | Damage | Guard | ||||
|---|---|---|---|---|---|---|---|---|
| - | - | - | - | - | ||||
| Hit Adv. | Block Adv. | Pushblock Adv. | Cancel | Properties | ||||
| - | {{{block}}} | - | - | - | ||||
| ||||||||
| Startup | Active | Recovery | Damage | Guard | ||||
|---|---|---|---|---|---|---|---|---|
| - | - | - | - | - | ||||
| Hit Adv. | Block Adv. | Pushblock Adv. | Cancel | Properties | ||||
| - | {{{block}}} | - | - | - | ||||
| ||||||||
| Startup | Active | Recovery | Damage | Guard | ||||
|---|---|---|---|---|---|---|---|---|
| - | - | - | - | - | ||||
| Hit Adv. | Block Adv. | Pushblock Adv. | Cancel | Properties | ||||
| - | {{{block}}} | - | - | - | ||||
| ||||||||
| Startup | Active | Recovery | Damage | Guard | ||||
|---|---|---|---|---|---|---|---|---|
| - | - | - | - | - | ||||
| Hit Adv. | Block Adv. | Pushblock Adv. | Cancel | Properties | ||||
| - | {{{block}}} | - | - | - | ||||
| ||||||||
| Startup | Active | Recovery | Damage | Guard | ||||
|---|---|---|---|---|---|---|---|---|
| - | - | - | - | - | ||||
| Hit Adv. | Block Adv. | Pushblock Adv. | Cancel | Properties | ||||
| - | {{{block}}} | - | - | - | ||||
| ||||||||
| Startup | Active | Recovery | Damage | Guard | ||||
|---|---|---|---|---|---|---|---|---|
| - | - | - | - | - | ||||
| Hit Adv. | Block Adv. | Pushblock Adv. | Cancel | Properties | ||||
| - | {{{block}}} | - | - | - | ||||
| ||||||||
Dashing Normals
| Startup | Active | Recovery | Damage | Guard | ||||
|---|---|---|---|---|---|---|---|---|
| - | - | - | - | - | ||||
| Hit Adv. | Block Adv. | Pushblock Adv. | Cancel | Properties | ||||
| - | {{{block}}} | - | - | - | ||||
| ||||||||
| Startup | Active | Recovery | Damage | Guard | ||||
|---|---|---|---|---|---|---|---|---|
| - | - | - | - | - | ||||
| Hit Adv. | Block Adv. | Pushblock Adv. | Cancel | Properties | ||||
| - | {{{block}}} | - | - | - | ||||
| ||||||||
| Startup | Active | Recovery | Damage | Guard | ||||
|---|---|---|---|---|---|---|---|---|
| - | - | - | - | - | ||||
| Hit Adv. | Block Adv. | Pushblock Adv. | Cancel | Properties | ||||
| - | {{{block}}} | - | - | - | ||||
| ||||||||
| Startup | Active | Recovery | Damage | Guard | ||||
|---|---|---|---|---|---|---|---|---|
| - | - | - | - | - | ||||
| Hit Adv. | Block Adv. | Pushblock Adv. | Cancel | Properties | ||||
| - | {{{block}}} | - | - | - | ||||
| ||||||||
| Startup | Active | Recovery | Damage | Guard | ||||
|---|---|---|---|---|---|---|---|---|
| - | - | - | - | - | ||||
| Hit Adv. | Block Adv. | Pushblock Adv. | Cancel | Properties | ||||
| - | {{{block}}} | - | - | - | ||||
| ||||||||
| Startup | Active | Recovery | Damage | Guard | ||||
|---|---|---|---|---|---|---|---|---|
| - | - | - | - | - | ||||
| Hit Adv. | Block Adv. | Pushblock Adv. | Cancel | Properties | ||||
| - | {{{block}}} | - | - | - | ||||
| ||||||||
Command Normals
| Startup | Active | Recovery | Damage | Guard | ||||
|---|---|---|---|---|---|---|---|---|
| - | - | - | - | - | ||||
| Hit Adv. | Block Adv. | Pushblock Adv. | Cancel | Properties | ||||
| - | {{{block}}} | - | - | - | ||||
| ||||||||
| Startup | Active | Recovery | Damage | Guard | ||||
|---|---|---|---|---|---|---|---|---|
| - | - | - | - | - | ||||
| Hit Adv. | Block Adv. | Pushblock Adv. | Cancel | Properties | ||||
| - | {{{block}}} | - | - | - | ||||
| ||||||||
| Startup | Active | Recovery | Damage | Guard | ||||
|---|---|---|---|---|---|---|---|---|
| - | - | - | - | - | ||||
| Hit Adv. | Block Adv. | Pushblock Adv. | Cancel | Properties | ||||
| - | {{{block}}} | - | - | - | ||||
| ||||||||
| Startup | Active | Recovery | Damage | Guard | ||||
|---|---|---|---|---|---|---|---|---|
| - | - | - | - | - | ||||
| Hit Adv. | Block Adv. | Pushblock Adv. | Cancel | Properties | ||||
| - | {{{block}}} | - | - | - | ||||
| ||||||||
| Startup | Active | Recovery | Damage | Guard | ||||
|---|---|---|---|---|---|---|---|---|
| - | - | - | - | - | ||||
| Hit Adv. | Block Adv. | Pushblock Adv. | Cancel | Properties | ||||
| - | {{{block}}} | - | - | - | ||||
| ||||||||
| Startup | Active | Recovery | Damage | Guard | ||||
|---|---|---|---|---|---|---|---|---|
| - | - | - | - | - | ||||
| Hit Adv. | Block Adv. | Pushblock Adv. | Cancel | Properties | ||||
| - | {{{block}}} | - | - | - | ||||
| ||||||||
| Startup | Active | Recovery | Damage | Guard | ||||
|---|---|---|---|---|---|---|---|---|
| - | - | - | - | - | ||||
| Hit Adv. | Block Adv. | Pushblock Adv. | Cancel | Properties | ||||
| - | {{{block}}} | - | - | - | ||||
| ||||||||
| Startup | Active | Recovery | Damage | Guard | ||||
|---|---|---|---|---|---|---|---|---|
| - | - | - | - | - | ||||
| Hit Adv. | Block Adv. | Pushblock Adv. | Cancel | Properties | ||||
| - | {{{block}}} | - | - | - | ||||
| ||||||||
Special Moves
| Startup | Active | Recovery | Damage | Guard | ||||
|---|---|---|---|---|---|---|---|---|
| - | - | - | - | - | ||||
| Hit Adv. | Block Adv. | Pushblock Adv. | Cancel | Properties | ||||
| - | {{{block}}} | - | - | - | ||||
|
Ebony Devil runs toward the opponent, lunges outward, and attacks with its teeth while spinning its body. Ebony Devil's wake-up time, running distance, and hit count are determined by which attack button you press. The stronger the attack, the longer wakeup time, the further Ebony Devil runs, and the more hits the attack lands. Despite Devo being able to perform this special in the air, the attack is the same. Good for pressure, but can be easy to read when attacking the opponent up front from the mid screen. The Stand On version of this attack cannot be used mid-air. Devo cannot move while the puppet attacks, leaving him vulnerable for a significant amount of time. This attack is very useless so use the Stand Off version instead. | ||||||||
| Startup | Active | Recovery | Damage | Guard | ||||
|---|---|---|---|---|---|---|---|---|
| - | - | - | - | - | ||||
| Hit Adv. | Block Adv. | Pushblock Adv. | Cancel | Properties | ||||
| - | {{{block}}} | - | - | - | ||||
|
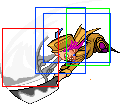
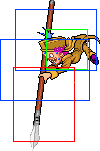
Ebony Devil jumps up with a spear and thrusts the spear downward. Ebony Devil's wake-up time and jumping distance are determined by which attack button you press. The stronger the attack, the longer wakeup time and the more distance Ebony Devil covers. Despite Devo being able to perform this special in the air, the attack is the same. This attack hits high. Good for alternating high/low mixups and pressure. The Stand On version of this move makes Devo unable to move while the puppet attacks, leaving him vulnerable for a significant amount of time. You can hold down and tap buttons to deal more hits to the opponent. It is sometimes useful during blockstrings as it can surprise the enemy, but doesn't get much use outside of that. The Stand On version can also be canceled into the 214+AA super(If you cancel 214x into 214aa, it will make devo go back to Stand off while the move is performed) | ||||||||
| Startup | Active | Recovery | Damage | Guard | ||||
|---|---|---|---|---|---|---|---|---|
| - | - | - | - | - | ||||
| Hit Adv. | Block Adv. | Pushblock Adv. | Cancel | Properties | ||||
| - | {{{block}}} | - | - | - | ||||
|
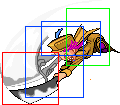
Ebony Devil takes a spear and spins it around above his head. Ebony Devil's wake-up time and hit count are determined by which attack button you press. The stronger the attack, the longer wakeup time and the more hits this move does. Despite Devo being able to perform this special in the air, the attack is the same. This move can work fine as a very situational anti-air or to harras the opponent that's right behind your doll, still, it leaves Devo wide open for a counter attack, so avoid using it at random. Devo cannot move during the Stand On version of this move, leaving him vulnerable for a significant amount of time. Tapping attack buttons will make this move last longer and hit more. Holding a horizontal directional input will make Ebony Devil slowly move that way. This move is good for getting damage in. The first frame of the first hit can be canceled into a guaranteed tandem. Can be canceled at later hits into tandem for a mixup and to just keep it safe, as even on hit this move can be punished. | ||||||||
| Startup | Active | Recovery | Damage | Guard | ||||
|---|---|---|---|---|---|---|---|---|
| - | - | - | - | - | ||||
| Hit Adv. | Block Adv. | Pushblock Adv. | Cancel | Properties | ||||
| - | {{{block}}} | - | - | - | ||||
|
Ebony Devil takes a spear and spins it around above his head. This attack is technically the same as s.22+A but it cannot be canceled, making it highly punishable even on hit. Despite Devo being able to perform this special in the air, this move is nearly useless. Avoid using it at all costs. | ||||||||
Super Moves
| Startup | Active | Recovery | Damage | Guard | ||||
|---|---|---|---|---|---|---|---|---|
| - | - | - | - | - | ||||
| Hit Adv. | Block Adv. | Pushblock Adv. | Cancel | Properties | ||||
| - | {{{block}}} | - | - | - | ||||
|
Ebony Devil lunges forward with a spear and unleashes a flurry of attacks while jumping around the opponent. 15 hits total. Devo cannot move during this super as he's busy laughing at the opponent. This move comes out fairly quick which may surprise the opponent. After this move is finished, Ebony Devil will launch itself back to the edge of the screen behind Devo. A great whiff punisher, but can be punished on block when performed up close. The Stand On version of this move starts immediately, making it even better. Great to end combos with as it causes hard knockdown too. | ||||||||
| Startup | Active | Recovery | Damage | Guard | ||||
|---|---|---|---|---|---|---|---|---|
| - | - | - | - | - | ||||
| Hit Adv. | Block Adv. | Pushblock Adv. | Cancel | Properties | ||||
| - | {{{block}}} | - | - | - | ||||
|
Ebony Devil launches himself forward identical to Dummy Dive without the running. 12 hits total. This move has a moderate wakeup time. Despite Devo being able to perform this super in the air, the attack is the same. Amazing during reversals, hits for a high amount of damage too, as Devo can hit the opponent while the super's taking place. The Stand On version comes out much faster but leaves Devo wide open for a counter attack if it whiffs. | ||||||||
| Startup | Active | Recovery | Damage | Guard | ||||
|---|---|---|---|---|---|---|---|---|
| - | - | - | - | - | ||||
| Hit Adv. | Block Adv. | Pushblock Adv. | Cancel | Properties | ||||
| - | {{{block}}} | - | - | - | ||||
|
Ebony Devil flies upward and spins around with its cleaver like a ballerina. 11 hits total. This move has a small startup time and starts out almost instantly in Stand On. There are no setups to have this move hit guaranteed. The opponent can tech out of this super if the super isn't close enough. Avoid using this at all costs. | ||||||||
| Startup | Active | Recovery | Damage | Guard | ||||
|---|---|---|---|---|---|---|---|---|
| - | - | - | - | - | ||||
| Hit Adv. | Block Adv. | Pushblock Adv. | Cancel | Properties | ||||
| - | {{{block}}} | - | - | - | ||||
|
Tandem Attack is a universal command for all Active Stand users. Devo's most optimal tandems mostly use his 2B or 2A>2B. Devo should roll behind the opponent and jab with 2A for most damage. You can also use his Special attacks like Dummy Dive and Dummy Hunter to inflict more damage. For bonus meter, you can also use Barrel Roll Crusher to inflict even more damage during the duration of the tandem. Unlike any other Active Stand user, Devo can perform a tandem in the air. | ||||||||
