Introduction
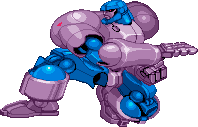
Once thought of as far and away the best character of the game, Sentinel is still very strong but far from unbeatable. Sentinel controls space very well and is a threat from almost anywhere on the screen. With float and fly cancels, he also moves through space pretty well. His downsides are being the biggest/tallest target, an OTG penalty (only if you don't roll), and a blockstun trap in flight. There's also a potential blocking vulnerability (either unblockable or crossup) if an attack (upward striking in particular) hits the far back lower quadrant of hit air guard.
Ground Chain: Weak Start
Normal Jump Chain: Kick to Punch (any)
Super Jump Chain: Zig Zag 2
| Strengths | Weaknesses |
|---|---|
|
|
Moves List
Normal Moves
All of Sentinel's Normal Moves chip (except the fanblade).
Ground-
s.lp/c.lp - Can be chained onto itself, good for poking/pestering and not much else.
Startup: 6f
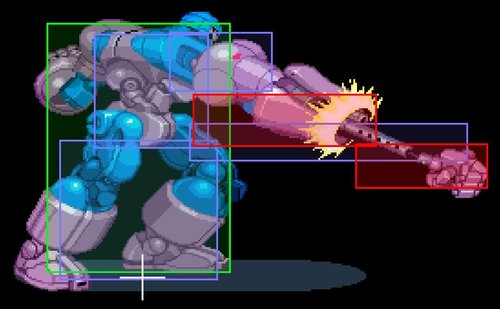
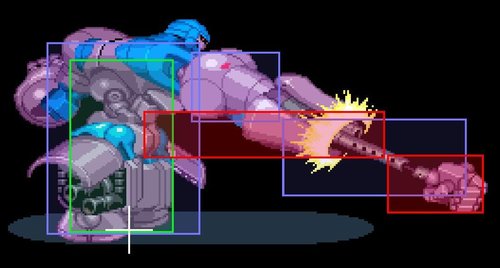
s.mp/c.mp - Fires a pair of missiles with some startup, hold longer to delay the firing. These have good use vs a cornered dizzy opponent as an alternate launcher string (stand a slight distance away, s.mp xx LP Rocket Punch (RP hits before missiles), dash s.MK). Their angle can also be good for stopping slide happy Wolverines. If the opponent is close to the missiles as they fire, they can get hit with unblockable frames.
Startup: 33f standing, 31f crouching (can be longer if held)
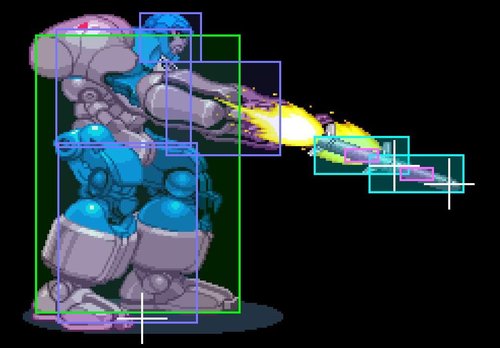
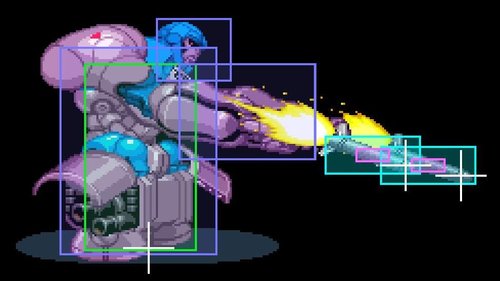
s.hp - The laser spit. Short characters and ones with low dashes can go right under it.
Startup: 21f
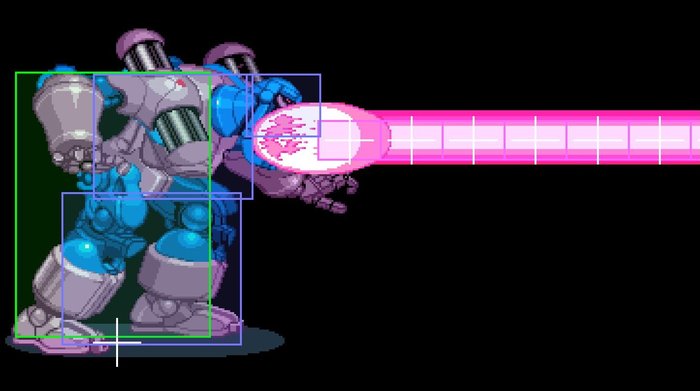
c.hp - While a little slow to come out, it can be combo'd into (off dashing LK), puts the opponent in alot of hitstun, and because it's a projectile normal, you don't get pushed back as much. Dash LK, c.HP xx Fly gives you a big window for flying combos. It also gives a big window for xx Float combos/tactics (see sj.d+mp). For space control, once it's out call drones depending on what the opponent does, or fly and follow it in for some pressure.
Startup: 18f
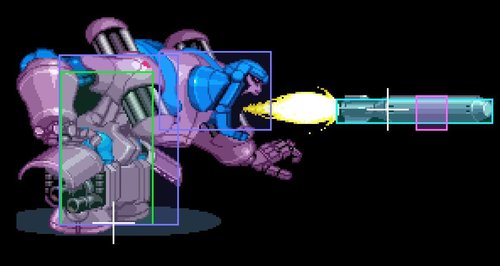
s.lk/c.lk - Better for starting combos (off of dashing) than jabs, since these have more hitstun. s.LK has more pushback however, but it's height/range and the wait it juggles is essential for some corner link combos. (oddly enough, if you mash this move it's considered a self-chain as you don't go back to neutral when mashing it. It's not fast enough to be a useful trick, though).
Startup: 3f standing, 5f crouching
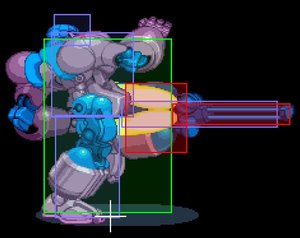
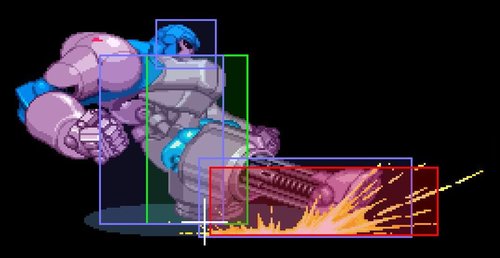
s.mk - One of the best launchers in the game, a great anti-air and the bombs eat some projectiles too if timed right. It's multi-hit properties cause damage to scale down quickly however.
Startup: 8f
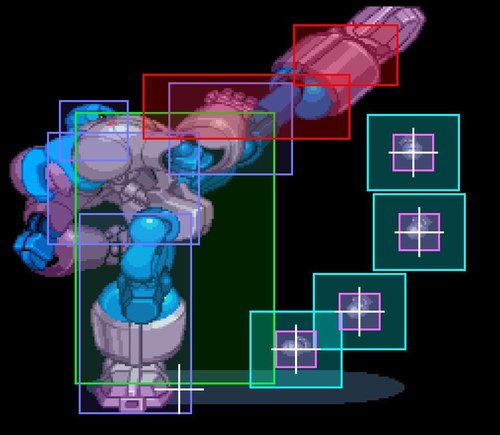
c.mk - A low poke with OK range but kinda slow.
Startup: 9f
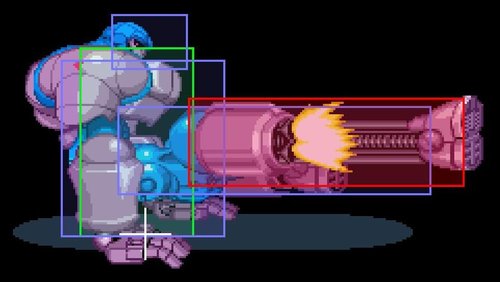
s.hk - Big damage kick most used in dizzy combos.
Startup: 12f
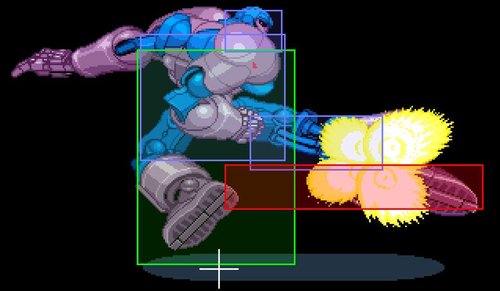
c.hk - More range than c.MK, is a low hitting sweep and hits twice. If the character has a long OTG time, you can hit them with this as a juggle (likely off of s.lk in the corner), fly/unfly, then OTG throw and potentially have it combo. The recovery is bad so it needs to be canceled with something. Usually players do a jab rocketpunch to try and catch people mashing the roll, then hit them when wake up and attack. If Sent is too close the opponent can attack and hit him before the rocketpunch fires (so SJ and low jab rocketpunch may be better).
Startup: 12f
Air-
j.lp - Pokes under and in front, juggles downwards.
Start: 7f
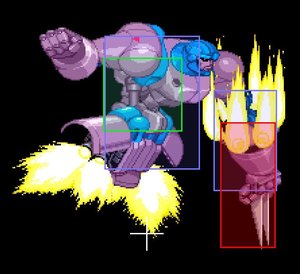
j.mp - Good for opponents directly above you, juggles downwards.
Start: 10f
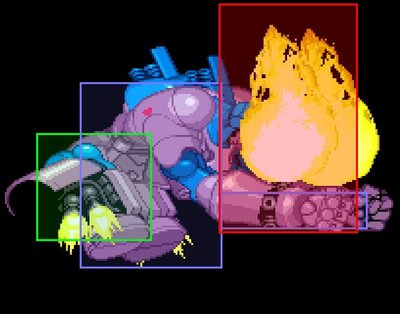
sj.d+mp - You do the same animation as j.mp, but it starts slower, and you shoot down afterwards. What's most important about this, is your upward momentum COMPLETELY STOPS immediately. You can also guide yourself forward and back a little bit. Since the attack itself is useless, you cancel into the rest of the chain. This is the Float cancel. It allows for many combo/infinite and pressure opportunities.
Start: 38f
j.hp - A big long range club, juggles downwards.
Start: 14f
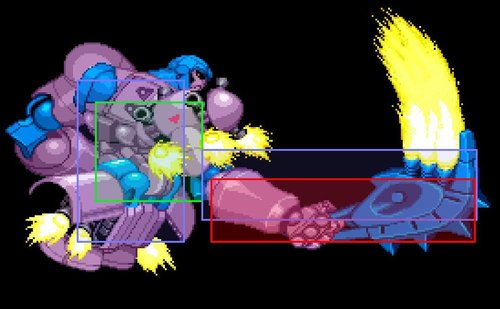
j.d+hp - Your upward motion stops and you spin in place before diving. This has extra dizzy power and if it's the dizzying hit in a combo, puts the opponent dizzy on their back. Hit, block or miss, you bounce off backwards as if you had jumped backwards. You cannot do a normal attack here or Rocket Punch, but you can still block and cancel to Fly. There's a minimum height for this move to register, although once you pass it you can do it below that on a normal jump (but not super jump)
Start: 16f
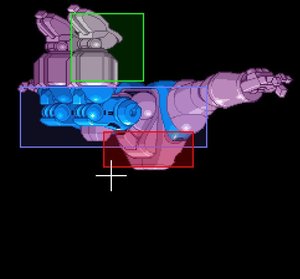
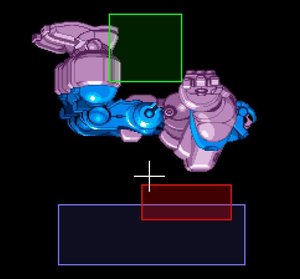
j.lk - Much like j.LP, with a more outward angle, less range and juggles downwards.
Start: 7f
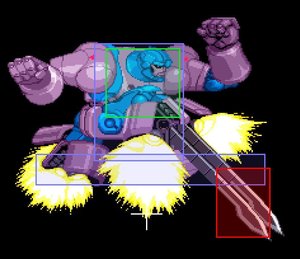
j.mk - A long range stomp with 4 possible angles. Up-forward, forward, neutral (down-forward), down-forward (a more downward angle than neutral). This comes out fast, and opponents who habitually block low can get surprised by a quick normal jumping MK, that acts almost as a quick overhead. All angles juggle downward.
Start: 6f (all)
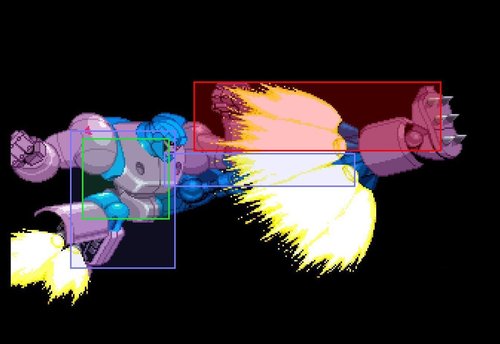
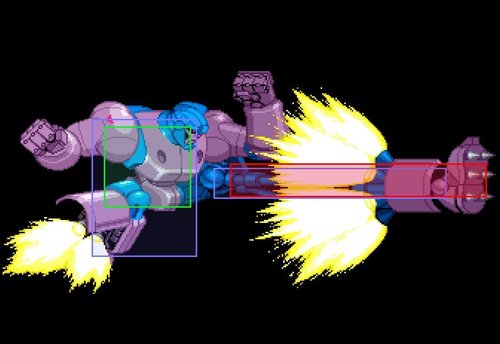
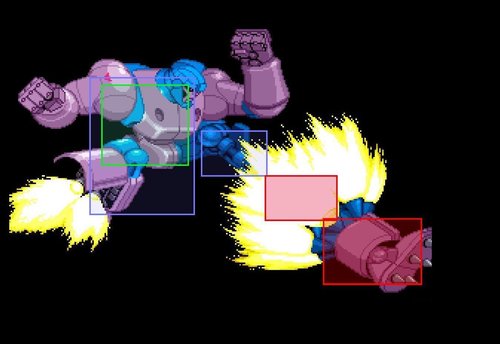
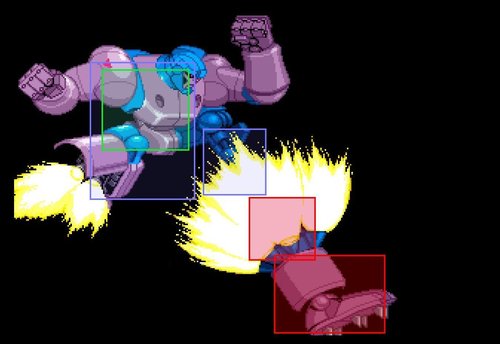
j.hk - Long range air version of his s.HK which is fairly quick, and known for being whore'd out. It's juggle properties are somewhat inherited from your momentum (eg, if you hit on the way up of an SJ, they'll go on an upward-out angle before falling).
Start: 9f
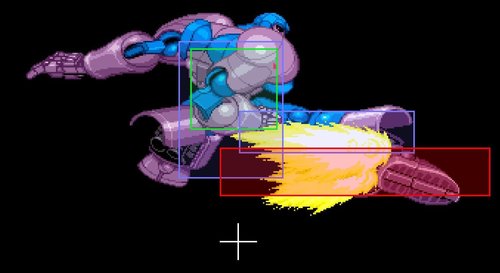
j.d+hk - Longer startup, a large fanblade comes out that hits up to 6 times and does no chip on block. This scales the damage of a combo down quickly. If you hit a standing character with this, you can combo a ground to ground throw on the proper frames/spacing.
Start: 15f
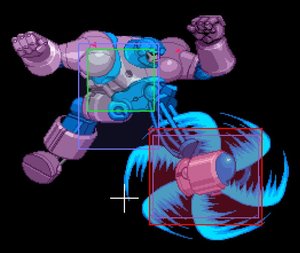
Throws-
MP - Hold up to make them stay in the air longer. Great for combos. When you counter-tech, this is the throw you do.
HP - The rocket punch throw, not as good for combos but still useable vs characters with long OTG times.
OTG throw - Down + MP or HP, then any punch to throw. This will drain any meter you have, and requires at least a small amount to perform. You can walk, dash, jump and SJ while carrying the opponent.
Special Moves
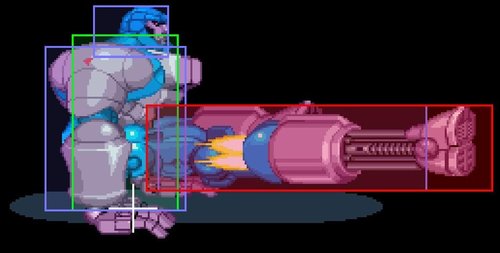
Rocket Punch - D,DF,F+ Punch (ground and air)
LP - Downward angle. | Start: 13f (G/A)
MP - Straight ahead | Start: 15f(G) 13f(A)
HP - Upward angled | Start: 13f (G/A)
Rocket Punch has a projectile collision box that when hit, causes Sentinel to go in to stun.
Drones - D,DF,F+ Kick (ground only)
Start: 16f for move to be considered active.
LP - Row of 3, controlled by directionals. | Drone hitboxes start appearing at 21f.
MP - Column of 3, controlled by hitting attack (they try to home in on opponent if you tap) | Drone hitboxes start appearing at 21f
HP - Carpet Bomb, the longer HK is held, the farther the go (slow). | Drone hitboxes start appearing at 29f
Drones' are good for space control, defense (HK immediate release if a jumpin is anticipated, depending on the opponent), and in some cases combos.
X-Special
Flight - D,DB,B+ 3P (ground and air, same command to unfly)
You can cancel any normal with flight, and any flying normal with unfly. When in Flight mode, you have your 2-attack normal jump chain and Rocket Punch which you can do for as long as you are flying. When you unfly, you have normal jump restrictions (2-attack NJ chain + 1 special) and fall straight down. If you have the meter however, you can fly again. You do gain meter when in flight mode.
- Blockstun trap warning* - In this game, you can block while flying, but it's proven to be a mixed blessing. If you are flying too low to the ground (about the height where most character's jabs can put you in blockstun) and in the corner, you can be kept in blockstun forever. If the character has a chipping jab, they can wear you down to nothing and then kill you easily. This is pretty easy to avoid, but the worst case scenario would be you get throw in the corner without the meter to tech.
- All flying normals can be blocked low, but unfly'd normals must be blocked high.
"Unfly Mode" as it's known in the later games doesn't really exist (you can always attack/block/special in NJ rules) on the way down, but when you are knocked to the ground in flight mode, strange things can happen.
- When it's not a hard knockdown, you appear to be standing but any movement makes you fly again, and any hit bounces you as you are actually flying. There are frames where you can get the ground-based movement described below, but it's harder.
- When it's a hard knockdown, you can wakeup and do a single continuous ground-based action (normal jump, dash, walk a direction without changing, ground attack/chain or crouch), then you are flying again after. If you crouch, you can remain crouching, or partially stand up (enough to do a standing normal, but not enough to dash. Once the standing normal ends, you are flying again, except for s.LP which can be crouch cancelled). If you dash, you can ground attack or crouch attack (and remain crouching after), but you cannot wavedash (dash, crouch, dash). Any ground based attack can be unfly cancelled. You'll know if you're in a flight-but-grounded state as your attacks/dash/anything that has a "rocket flame" animation will be blue instead of yellow.
- If you super jump in grounded fly mode, when you unfly, you will be within super jump rules as opposed to normal jump
- All low hitting grounded normals can be blocked standing during this glitch!
- There is also a pushbox change in the state where you stand but take no action (either soft or hard knockdown), your legs will have a hitbox but your pushbox remains the flying one, meaning the opponent can run through your legs if they can make themselves small enough. The pushbox won't do this if you go into a continuous ground-based action.
Super Attacks
Plasma Storm - D,DF,F + 3P (ground only)
Mash to charge longer and repeat the motion to fire another, up to three total. It's best use is as a situational guard cancel anti-air, or in a corner combo. Because the recovery is long, this is best done if doing so would kill the opponent. Mashing it has little use since pushback will kill the combo, only real use it has is as a fake out/mindgame to new players(with low health) not used to it. Overall, your meter is best kept for tech hitting and flying.
The Basics
Most of your damage and openings are going to come from counter hits, space control and throws (which lead to dizzies/combos). If you can master fly stomp cancels (and good meter management) as well as Float movement, then you can actually have some consistent forward moving pressure. All of this can be blocked high, so throw lows once in awhile so people remember they actually have to block low sometimes.
OTG Penalty
Of all the characters, Sentinel has the least amount of time to be OTG'd from any kind of knockdown before he is capable of rolling to escape. It seems to balance this out, he was given a penalty if he doesn't roll. If he doesn't roll, he can be hit more times than other characters. This can mean taking a full super or worse. Worse would be, if you're cornered and knocked down in a way where your feet are facing the corner (if your head is in the corner, the opponent will be pushed out). In this position:
Omega Red can get a 48 hit Omega Destroyer.
Akuma can mash a jab or short infinite off of an HP or HK throw
Storm is also capable of a jab/short infinite but the setup takes an unrealistic amount of time(sweep, IAD over, dash in and start mashing).
All of this is avoidable, because a true OTG combo would stand Sentinel up in hitstun. If he's being hit on his back, it's not a true combo and can be rolled. The most dangerous one of the above situations would be Akuma off an HP throw. Simply never delay rolling in the corner against Akuma.
Sentinel takes less damage from regular hits (on average) but higher damage from throws.
Advanced Strategy
Combos
BnB Combo (anywhere, feather to superheavy):
s.MK sj sj.HK xx MP Rocket Punch
Works on all but superheavys, off of an MP throw this should dizzy anyone. In the corner if you dash just before the sj, you'll be close enough to continue the combo on the way down.
Example vs Wolv (corner)-
s.MK, dash, sj, sj.HK xx MP Rocket Punch, sj.HK, sj.HP (land) dash s.LK, c.HP xx MP Rocket Punch.
an alternate launcher would be - step back s.MK xx LP Rocket Punch (punch hits before rockets do, rockets must fire) dash s.MK
Once you juggle the with s.LK, c.HP you've got some combo options.
sj d.f. + MP (float cancel, watch the height) xx MP Rocket Punch, sj.HK, land s.LK, c.HP and repeat..some characters need a sj.HK before the Rocket punch.
Match-ups
General
Your throw range is incredible. Anyone trying to do blockstrings that require links may have windows where you can throw them out of it. You may be able to throw characters that have invulnerability after their tech hits by standing outside of their throw range as they recover, then throw with your superior range.
Vs. Sentinel (self):
Rocket Punch
Vs. Akuma:
Sentinel can particularly fall victim to Akuma's air fireball unblockable. His "hands" won't trigger guarding if they hit you and nothing else has you in blockstun already, so be aware when he is close.
Vs. Colossus:
It shouldn't be too hard to keep him out. Keep distance and wear him down, he will likely make a mistake in desperation as he tries to get in. If not, then you can chip him to death. Shoulder charge can hit air-rocket punches at odd angles, and j.HP is something to watch out for. Brave/desperate Colossus players will go for trades in hopes of getting the dizzy, usually a bad idea against Sentinel.
Vs. Cyclops:
Beware of unblockable j.MK. It's more of a threat in the air but it can hit you standing as well. Upon safe fall tech hit, make sure you are outside of his throw range. If still within yours, you might be able to grab his throw attempt after his invulnerability ends. Aggressive Cykes may try to use Gene Splice's invulnerability to attack through your strings.
Vs. Iceman:
Iceman's large, distended hitboxes can put a lot of crap on the screen, and you're a big target. His ground rush is also particularly fast and can take him under things. It's a careful game of trying to fend him off as well as finding open attack vectors at range.
Vs. Omega Red:
Coils can make it very dangerous to move around and commit to anything. It takes some patience to see what they're going to do. When they go on offense and stop fishing for coils, you can usually launch or sj.down+MK through offense to start pecking away at their life.
Vs. Psylocke:
Psylocke can dash right under a straight (s.MP) ground Rocket Punch.
s.MK can nullify Psi-blasts clean if the bombs hit it, as can any of his projectile (but not beam) based normals.
Her fast jump and downward striking normals give her an easy jump pattern on Sentinel where she can lock him down (or combo him) with j.HP, j.HK and repeat. The main ways out of this are throwing through poorly timed and spaced chains (especially if they are trying to mix it up with c.LKs), duck one attack then try to s.MK launch the next jump (dangerous, because the pattern can hit you low although they are likely timing to hit you standing), or try to jump out (also dangerous because the next j.HP is likely going to throw you).
Meter management is particularly important so you can counter throw, as she is a counter throw as well. Expect a lot of trades (especially with Psi-flashes) although damage-wise this is hugely in your favor. Poorly thought out Rocket Punches are likely going to get Psi-blasted clean.
Battling Psylocke is a matter of weathering the fast paced assault and trying to take maximum advantage of any opening she leaves you. Building meter as fast as possible is essential because it will come down to tech wrestling (if your opponent is good at teching).
Vs. Silver Samurai:
He can control space decently, poke which causes chip, and lightning super is a threat (although really doesn't damage Sentinel that much). Keeping him out should not be difficult, and punching through his stuff/trading is heavily in your favor.
Vs. Spiral:
Don't give her breathing room to start sword shenanigans. Watch the player's patterns to know where to throw a predictive Rocket Punch when they try to take distance to call swords.
Vs. Storm:
Typhoon spam can make it hard to move around, but if she's spam happy, you'll eventually get her. She has some long, easy combos and can be very fast, but she often runs into things. She can escape dizzy faster than anyone else, so don't give her breathing room once she's dizzy.
Vs. Wolverine:
Try to punish blocked drill claws with up+j.MK
Wolverines that try to go for j.HK, j.HP infinite...duck the j.HK on the way up and try to s.MK launch them either on the backswing or between the kick/punch transition.
