Introduction/Summary
A favorite of beginners for being on the masher-friendly side, but deadly in the hands of an expert. Possibly the best character in the game, but not without tough matchups.
Attack Chain
Ground Chain: Kick to Punch (any)
Normal Jump Chain: Kick to Punch (any)
Super Jump Chain: Zig Zag 2
| Strengths | Weaknesses |
|---|---|
|
|
Moves List
Normal Moves
LP: Extremely fast, self-chainable.
Startup: 2 frames : Active: 4 frames
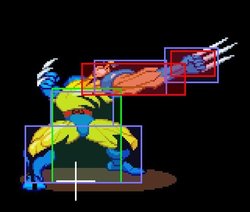
MP: Can be crouch canceled, as well as self-chained to a second animation.
Startup: 4 frames
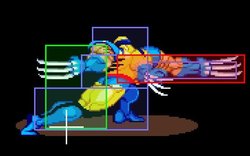
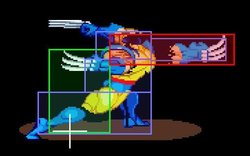
HP: A large, decently quick attack that knocks the opponent away on hit. Not quite as good as it may look due to preceding blue boxes and may trade a lot.
Startup: 6 frames
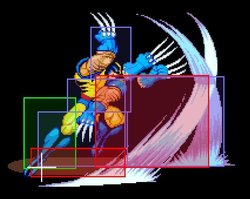
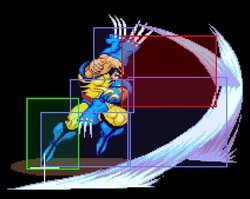
LK: Slightly slower than s.LP but lower hitbox (still can be blocked high) and longer range.
Startup: 3 frames
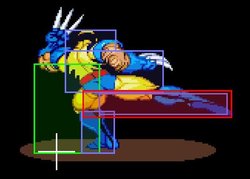
MK: 2nd hit will micro launch.
Startup: 2 frames
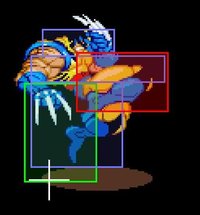
HK: Launcher and good anti-air. Cancel with jab to lessen recovery.
Startup: 2 frames
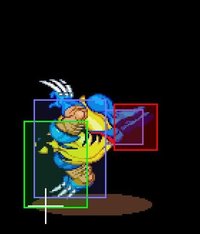
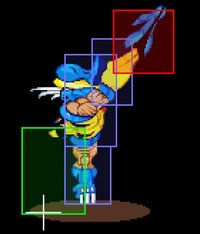
c.LP: Extremely fast, self-chainable.
Startup: 2 frames
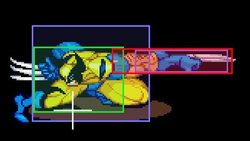
c.MP: Doesn't micro launch on it's own, but will juggle slightly if it hits an airborne opponent.
Startup: 5 frames
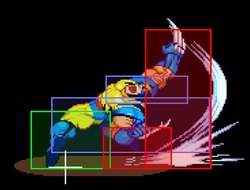

c.HP: 2-hit slash that moves slightly forward (can be blocked high). If it hits as a juggle the opponent will slip downwards.
Startup: 6 frames
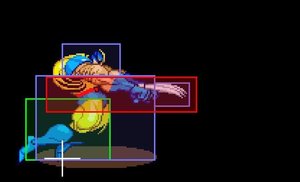
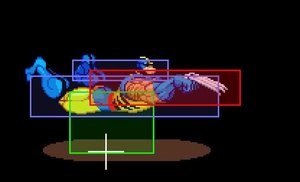
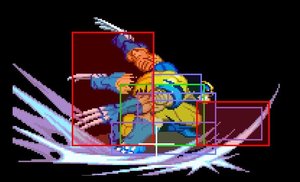
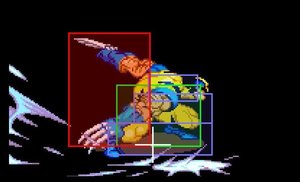
c+f.HP: Claw Slide (belly slide). This is a low-hitting knockdown (not a sweep), that's good for going under attacks, and sliding across the screen quickly when dashing. As it's not a sweep, you can combo off of it normally. It can hit some characters as a juggle.
Startup: 6 frames
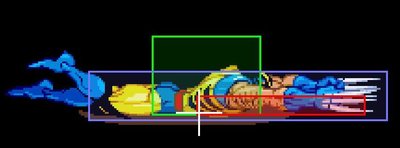
c.MK: Sweep. Can hit some characters on a very low juggle and be comboed off of in that fashion.
Startup: 5 frames
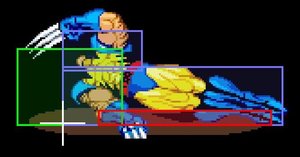
c.HK: Will juggle slightly if it hits an airborne opponent. It also moves you forward so it can be useful in blockstrings.
Startup: 8 frames
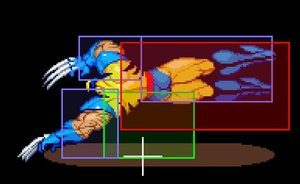
j.LP: Very quick and the move of choice for fast normal jump stomp overheads. (jump, down+mk and quickly xx to j.LP. If done too fast, j.LP will not have time to activate but the overhead fake can scare the opponent to blocking high.
Startup: 2 frames
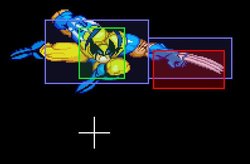
j.MP: Self-chainable. Wolviecopter, except it doesn't build meter (unless you're making contact with it).
Startup: 4 frames
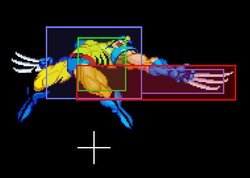
j.HP: A downwards attack that can be very difficult to anti-air.
Startup: 6 frames
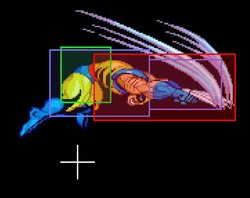
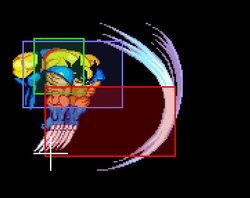
j.LK: Very fast. Normal jump instant j.LK then kickoff to surprise big crouchers with an overhead
Startup: 2 frames
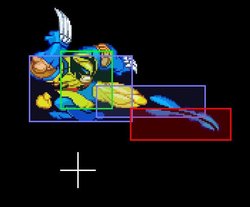
j.MK: Upkick that juggles somewhat upwards but doesn't have a ton of stun. Interesting quirk is if you kickoff during this, you always bounce a bit more upwardish than kickoffs of other moves.
Startup: 6 frames
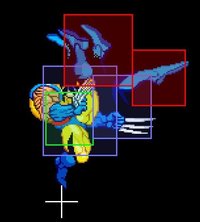
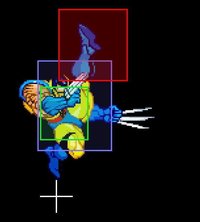
j+down.MK: Stomp. This can be done extremely low to the ground, allowing for crazy cancels and quick overheads (with whiff cancels, the d+mk itself can be blocked low). If done in a normal jump, it can be chained to a punch, but if done in a superjump, it'll bounce off the opponent unless extremely close to the ground. In SJ mode, it can't be chained, but you can use kickoff (you'll still be bouncing away, but can do another stomp).
Startup: 6 frames
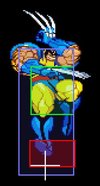
j.HK: Can hit multiple times. Usually twice but if you're very deep into the opponent, you may get around 4 hits. Hits swing in front and behind him.
Startup: 6 frames
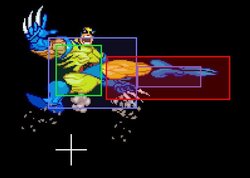
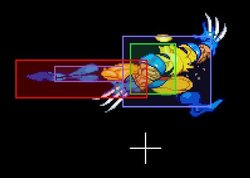
Wall Rebound - Jump/SJ near a wall and push the opposite direction to hop off of it.
An example use for runaway: SJ in the corner to your maximum height, rebound, at the height of the rebound jump, drill claw up-back and rebound up-forward, off the top of the screen.
Kickoff - After a Jump/SJ attack that's blocked/hit, hold back and hit attack again. Can be used for poke/run strats and in combos. In a normal jump, it acts like a "double jump" rule modifier, in that you can toss out two more normal attacks. If it crosses up, it can also confuse the opponent as you start flying back. Kickoff sends you further away when in normal jump mode compared to SJ mode and goes back at different angles depending on what you held (back or up-back, down-back doesn't trigger it). Back in a normal jump goes furthest/deepest. Up-back in either is shallow and sends you up slightly. Kickoff on MK (not stomp) bounces like a double jump.
Taunt - LP, MK, MK, HP, MP. Builds meter and cancels normals (usually the HP you do when attempting it). That's about it.
Builds 20+ meter
Throws:
MP throw: Mashable throw that tosses them after, with a little follow up time (weight dependent)
HP throw: Mashable throw that kicks them into the ground after, with no follow up time at all except for extremely rare/specific setups
Air throw (MP/HP): Looks like an air version of the MP ground throw but you can't follow up after in most cases.
Escape Tech: Wolverine is invincible for a bit, then has normal jump rule actions and can block on the way down
Safe Fall: Wolverine is invincible from the tech point until he flips off the landing. If timed as soon as possible, he can get out a jab or s.MK with invincible startup frames, or go right into Tornado Claw (which has startup invincibility anyway).
Special Moves
Drill Claw -- Same strength Punch + Kick + Direction (ground/air)
Startup: Ground 14 frames | Air 16 frames
Active frames: 27 (all)
Meter gain: +5 | +10 Block | +20 Hit
The stronger the attacks you use, the further Wolverine travels. Can rebound off of floors and the walls. Drill claw rebound doesn't build any extra meter. You can only drill claw once per jump (rebound is still the same one), then you must land before you can do another.
Drill claw is not as safe on block as it may seem. Many characters can jump up and hit him before he recovers , or jump up and throw if he is close enough. Odd angle Drill Claws are a bit harder to punish than straight ground ones.
Tornado Claw: F,D,DF+P, then mash P for more hits
Startup: 1 frame, 6 frames invulnerable.
Fast startup with invincibility. Active frames and recovery vary with mashing
Your typical dragon punch type move. Easy as heck to combo into. Not safe to spam, unless the opponent is turtling/running away. If you're far enough away, it's a faster means of building meter than runaway drill claws, but still not as safe.
Mashing for extra hits is best reserved for dizzying, otherwise you land/recover quicker and get a run under/throw opportunity that's usually in your favor.
X-Specials
Healing Factor: D,DB,B+3K
Startup: 18 frames until meter drain/healing begin
Meter used: 71
Health regained: 20 (all damage settings)
Regain a small amount of life while completely defenseless. Good to frustrate turtlers and runaways, or to cancel a successful belly slide if you REALLY need the health (only vs characters with longer OTG times).
Berserker Charge: D,DB,B+3P
Ground speed and normals greatly increased. Combo freestyle. You don't gain meter while in speed up mode. Don't run into stuff.
Super Attacks
Berserker Barrage: D,DF,F+2P
Startup: 3 frames, 8 frames invulnerable
With little startup and lots of invulnerability, it's one of the most effective guard cancel supers in the game. At point-blank range, it will go through almost anything, or at the very least, trade. Has a few frames of 100% invincibility. Combo-wise, unless it's done very early in a combo, it'll be heavily damage scaled. Smart players will know not to rush carelessly when Wolverine has full meter, so don't end up getting baited.
Once it hits, you can mash for more hits, but this may sometimes cause the final hit to not cause flyaway knockdown. If the last hit causes flyaway knockdown, it's very easy to combo after. If you're in the corner almost brush up against the wall and juggling the opponent, the wall will "cancel" the super, and you won't lose all your meter. This was the basis for one of Mofojo's Wolverine combos in Mofojo Volume 3. (vs Cyclops in corner: Jumpin HP, dash HK, LPx3, Berserker Barrage, dash LP, LP, Berserker Barrage, etc).
The Basics
General when Playing Wolverine
Get comfortable with his ability to both rush down and run away. Kickoff is great for poking and running in the air, and confusion tactics, in the corner especially. Because kickoff gives you extra attacks in the air, you could catch them trying to block low while you can still attack in the air.
General when Fighting Against Wolverine
When Wolverine gets full meter, how you fight the match changes. Guard cancel super is a serious threat (on/near the ground), and the super can stuff many things outright. If the opponent tends to jump the gun, you may be able to bait it out of them with run up and block. But if they wait for something to block, you might be able to get away with run up and throw. Another option is dash-in with a normal attack, but back-SJ cancel just outside of the super's startup range. If they attack, you'll either block on the ground (if you cancelled after their super starts), block in the air, or be out of range in the air.
If you're getting pegged with numerous overheads, just jump backward. This leaves you vulnerable to potential crossunders and throw attempts, however.
Don't stand next to Wolverine as he's landing from a safe fall tech, he has lingering invulnerability and will beat any throw attempt that's too soon.
Useful Attack Strings
st.HK, crouch or stand jab. Not even the shortest croucher can duck the first hitbox of st.HK.
c.HK, c.LP.. c.HK, s.MP (crouch cancelable)... throw in some c.LKs for a low hit. c.HK keeps you moving forward but beware of getting thrown if you are too close, since c.HK does have a bit of startup, there's a gap.
Any gaps in strings have a danger potential of you getting thrown, especially against characters with obnoxious throw range like Sentinel and Colossus.
Advanced Strategy
Corner throw reset
Feather to heavy: d.s.mk-mk, c.mp, walk up (or dash up if need be) and throw. This can combo, but generally you don't want that in a match.
Heavy: st.HK (launch) xx c.LP (whiff), move in and throw. Add extra lanches the heavier they are.
Stomp Tactics (Utilizing air D+MK to it's fullest)
Normal jump, then quickly j.D+MK (whiff cancel) to j.LP. This can be done very low to the ground, and surprise defending players blocking low, and can even hit the super-low crouchers like Storm/Wolv/Red. If done low enough, you can combo off of it (except on stronger characters with less hitstun), but if done TOO low, the jab won't get a chance to come out (although this could fake the opponent out, thinking an attack will come high and then doesn't). Kickoff is possible off of this, including kicking off into another stomp xx punch attack, if you're fast enough.
A more difficult tactic (and one that doesn't work as well on super-low crouchers) is sj.LK, sj.d+mk (whiff, aka stomp cancel), then continue to attack low (or repeat high if they tend to block low after). This can combo, and if done off a neutral SJ, you can use kickoff to get in more attacks in the air after the LK, before you stomp cancel (kickoff tactics best done on taller characters). Normal jump LK(or j.LP depending on angle), kickoff stomp xx jab is also possible on non-superlow crouchers, although the jab will often miss if done too quick (but if done quick enough you can combo a fast hit when you land).
If you can't reliably get LK out fast enough using the 3K jump method, tiger knee LK works well too.
Match-ups
- Vs. Wolverine (self):
Jump forward j.HK to punish blocked ground Drill Claw. j.MK for ground blocked Drill Claws from the air.
Remember all of your own gimmicks and tricks. Don't stand next to him on safe fall. Jump back if he's getting aggressive with overheads and blockstrings that you can't seem to throw out of.
- Vs. Akuma:
- Vs. Colossus:
He's slow, but don't underestimate him. Any gap in your strings will get you thrown. He can punish straight blocked drill claws with a jump attack. His guard cancel super is almost as dangerous as yours. Shoulder Charge can beat Drill Claw outright, but Shoulder Charge has an odd extended vulnerable box at the bottom.
- Vs. Cyclops:
- Vs. Iceman:
- Vs. Omega Red :
You can duck LK Omega Strike without even needing to block. If he pulls back, he'll actually drag your sprite with him.
- Vs. Psylocke :
Berserker Barrage goes under ground MP Psy-Flash (straight). You can also dash belly slide under them if she's spamming. If she superjumps up to Psy-Flash spam, heal.
- Vs. Sentinel:
Normal jumping j.HK, j.HP can infinite. Be careful if you're doing this as a pressure tactic since he can try ducking a swing of the j.HK then standup and launch you with s.MK. He's another one with a massive throw range that will be trying to throw you if there are gaps in your pressure.
- Vs. Silver Samurai:
Don't underestimate Mr Low Tier. A poorly timed or positioned s.HK will lose or trade with his j.HP. It can be tough to get in on him if he's smart enough.
- Vs. Spiral:
- Vs. Storm:
If she tries her top of the screen runaway, heal.
Combos
Simple, dizzy anywhere ones: c.hk, c.hp(2 hits) xx hard drill claw (feather to Omega Red)
j.d + mk, j.hp, c.hk, c.f + hp xx hard drill claw (feather to Colossus)
Colossus only: c.hk, s.hp xx hard drill claw (also works off an mp throw)
Sentinel only: jumpin down+mk, j.hp, land, c.hk, c.hp(2 hits) xx tornado claw(mash).
On standing Sent - jump toward j.hk (2 hits), j.hp xx drill claw.. jump toward j.hk (2 hits), j.hp is also an infinite.
Corner juggle loops, walk/dash forward as needed:
s.mk-mk, c.mp, [s.mk-mk] x N (or s.mk, c.mp) - Feather to Heavy
d.c.f + HP [xx Berserker Barrage, d.mp-mp (until meter full)] x 2~ - Feather to Heavy
[s.hk (whiff c.lp)] x N (Silver Samurai to Sentinel)
Air combo corner loops, feather to heavy:
launcher/relauncher A. s.hk
launcher B. s.hk (whiff c.lp), s.hk
aircombo A. sj.lk, sj.mp x4, sj.hk (2 hits), land, relaunch with s.hk or s.hk, c.lp (whiff), s.hk if need be. If you're not low enough by the last sj.hk, you can use kickoff to add another sj.lk, sj.hk but you need to be deep when doing so.
∗ if you're really deep on certain characters, you'll hit more than twice.
aircombo B. [sj.lk, sl.lp, sj.mp] x2, sj.hk(2 hits)
aircombo C. sj.hk(2 hits/+)*.. sj.lk, sl.lp, sj.mp, sj.hk(usually 1 hit)
aircombo D. sj.mp x2, sj.hk (2 hits).. sj.lk, sj.mk
Speedup Combos
Walking s.LP xN - Congrats, you probably didn't even dizzy them let alone do any real damage. Same with walking s.LK.
[c.HK, c.HP (2hit)]x N - Works on most characters anywhere. Hardest on the superheavies as they have the least stun.

