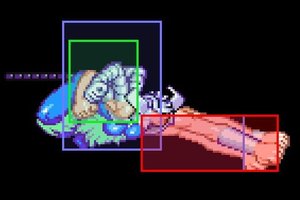
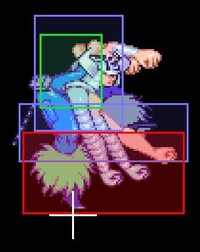
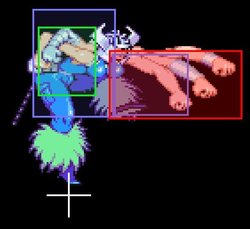
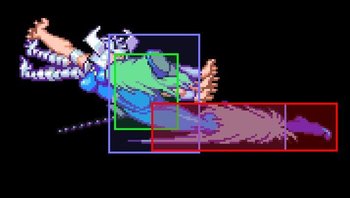
Introduction/Summary
Very low vitality, but unblockable traps, switch and fast fall tricks make her very unpredictable. Sword pressure is good, but can be attacked through.
Attack Chain
Ground Chain: Kick to Punch (any)
Normal Jump Chain: Kick to Punch (any)
Super Jump Chain: Zig Zag 2
Dizzy Bar: 50 points
| Strengths | Weaknesses |
|---|---|
|
|
Moves List
Normal Moves
Spiral's normal jump is very slow. She also has no sweep, but she does have low-hitting moves.
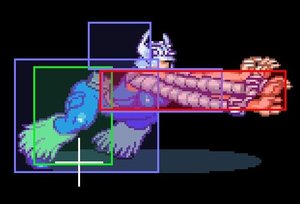
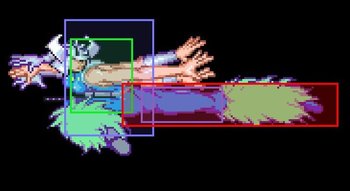
LP: Fairly quick startup jab that has a pretty high hitbox (only where the arms are). If it hits as a juggle, opponent falls downwards after. One of the few jabs that can't be mashed/chained onto itself
Start: 3f
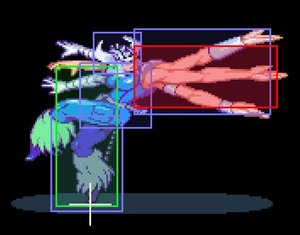
MP: Meh poke. Recovery kinda long. Juggles slightly but they will recover quick.
Start: 6f
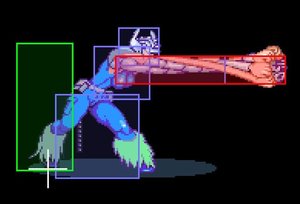
HP: Has a long recovery, even if it hits, so always cancel it with something.
Start: 10f
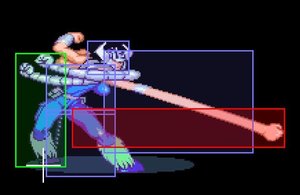
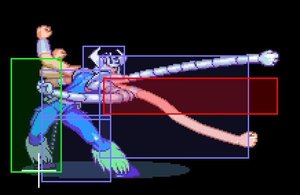
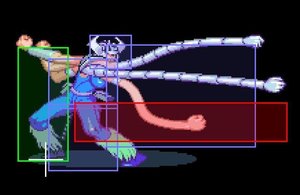
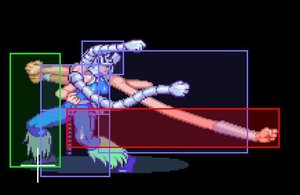
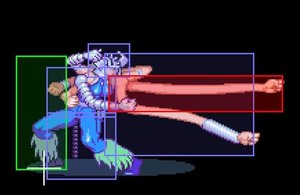
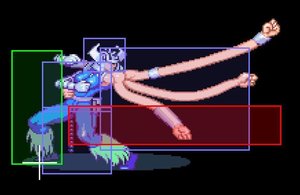
LK: Decent range, feels a little slower than s.LP. If it hits as a juggle, they will go up ever so slightly. Vs some characters in speedup, as a corner juggle this can be a semi-infinite. See speedup combos for examples below.
Start: 4f
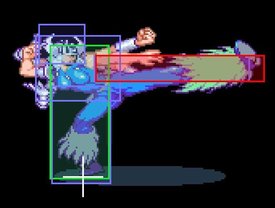
MK: A straight vertical launcher that lacks stun (they recover in the air quickly, so follow it up fast). Good to setup Grapple resets. Pretty good for anti-air if you can get the timing down. You can also launch them, cancel with c.LP, dash under, and launch again if they try to attack on the way down.
Start: 6f
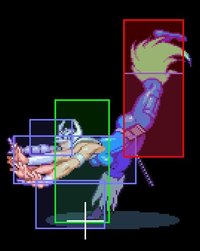
HK: Knocks opponent away. On the 5th frame, your feet are off the ground.
Start: 10f
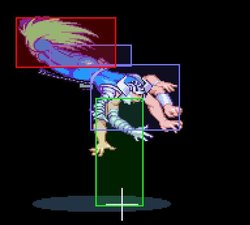
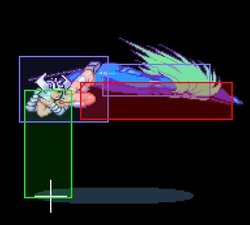
c.LP: Very fast and mashable. However if self-chaining this with swords active, you'll only throw one while self-chaining/mashing. In speedup or with super active, this doesn't apply.
Start: 3f
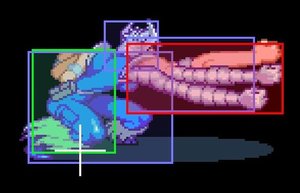
c.HP: Knocks opponent away. Your hitbox gets pulled back at the startup, so this can make a good counter-poke as it has a very respectable attack box once it fires itself.
Start: 10f
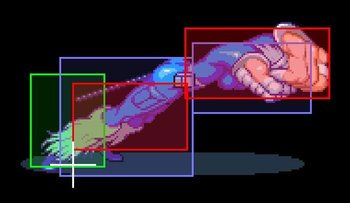
c.LK: Hits low. Slightly slower than c.LP
Start: 4f
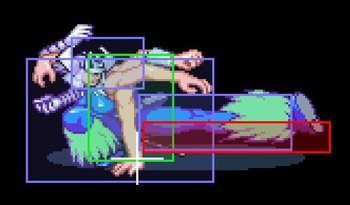
c.HK: Launcher. Fairly slow but good hitbox to anti-air with.
Start: 10f
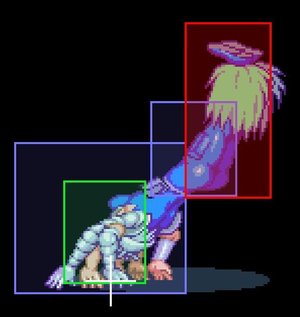
j.HP: Lots of range on this big hitbox, but also lots of recovery. You can combo after it, but be careful in air-to-air battles with this because it's your chain ender.
Start: 10f
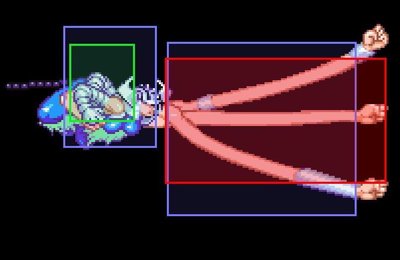
j+down.HP: It looks like this would knock downward in the air, but it doesn't. Very good to OTG an opponent crashing into the floor from a throw.
Start: 10f
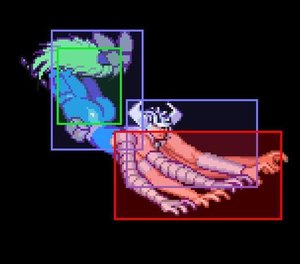
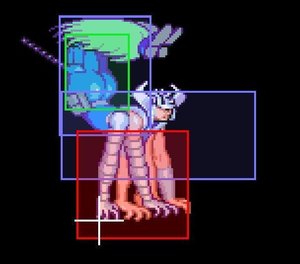
j+up.MK: Upkick good for going after people above you. Useful in SJ combos against heavier characters.
Start: 6f
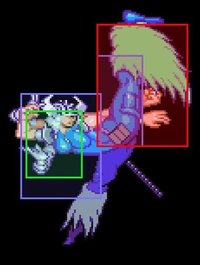
j.HK: Launcher. Also good for hitting people above you and has a ton of stun.
Start: 10f
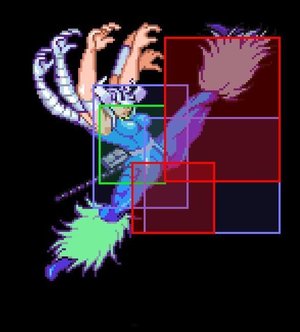
Special Moves
Fast Fall: QCB + HP (air only, doesn't build meter)
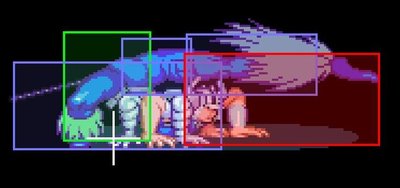
Cancels your upward motion and cancel normal moves with a quick pose, then you fall back to the ground quickly. When done in normal jump mode, you regain your actions. In super jump mode, once it's done you only have your normal jump chain. This can be "tiger knee'd" (QCB, UB + HP), which is a good way to cancel s.HP but there's overlap with the 6 hand grapple if done too fast, so it's not very reliable. If you manage to get 2 of these in a super jump, you can't do another after or call swords.
6 Hand Grapple: down, up + punch. Ground only, but delaying the punch can give you some height with it. Unblockable throw
Meter gain: 4, + another 4 if you mash to keep it open (Max 8). | +10 on grab | +varies depending which throw you use after
Grabs the opponent when they're above you, essential for reset traps.
Mash punch to keep your hands open longer.
If you do nothing after the grab, or hit hard punch, you will get an air throw. If you hit MP after grabbing, you will get her mashable throw. For the toss throw, you can throw them left or right, up or down. Lighter characters will recover before landing when tossed upwards, heavier will not. Omega Red is the cutoff (Siver Sam and higher will fall all the way to the ground).
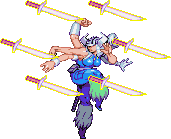
Dancing Swords (Call): HCB + 2P (ground/air)
Meter gain: 18+ first call, varies if other swords are around you already. +3 per sword.
Calls a ring of 6 swords around you, press punch to throw one. Strength of punch determines the speed the sword moves.
Swords will fire off in the same order regardless of which way you're facing, starting bottom-left then clockwise.
Normal sword toss is about 1f before the attack hitbox is active.
Mashing c.LP won't cause swords to rapid-fire shoot unless you're in speedup or super mode. But you can do c.LP, s.LP. (or c.LP, stand, c.LP).
When super-jumping, a quick stronger punch chain will throw out 3 swords quickly.
Swords can be "swatted" away somewhat similar to Silver Samurai's star.
When you are hit, you lose all of your swords.
Sword Tosses (after call): (no meter) forms a circle of swords with however many are left in your ring
Meter gain: 4
QCF + LP: Down (air only)
QCF + MP: Forward (ground/air)
QCF + HP: Up(ground/air)
Normal punches will cause one sword to go out, the harder the punch, the faster the sword moves.
X-Specials
Sword Tosses (after call): (L2+ required) uses however many swords are left in your ring, all are ground/air
Stronger buttons use more meter.
QCF + LK (Sword Blast): Swords go down-forward, straight out, and up-forward. Meter cost: 10
QCF + MK (Sword Spiral): Swords spiral out in an expanding ring
QCF + HK (Seekers): Swords go out in all directions and attempt to "seek/follow" the opponent
Switch: QCB + LP (air/ground)
After a small startup dance, you switch positions with the opponent. If they have an attack coming out (like Sentinel's drones are near him), you could end up switching right into the attack. Switching a character out of dizzy immediately recovers and resets them.
Teleport: QCB + MP, + attack for position (air/ground)
Much like Pyron's teleports in Night Warriors, the attack button layout corresponds to where you'll appear. Default is MP, right above the opponent. Your teleport is vulnerable at the end, much like Dhalsim's teleports in verson1/2 XvSF. This move is also your tech hit (including control of where you appear), and as the tech hit, still has the vulnerability.
Power Up Dances: QCB + Kicks (air/ground)
Dances can be "stacked", in that you can do one power up, then another.
QCB + LK: Power up, vitality down. Not really worth the risk of dying faster.
QCB + MK: Ground Speed up, normal jump speed and height greatly reduced. Combo time!
QCB + HK: Invisibility. When used alone, you can still build meter. Not worth it and you'll probably only do it by accident.
Super Attacks
Metamorphosis: QCF + 2P (air/ground, unblockable)
Starts with an instant attack (blockable), then you must grab the opponent with punch (unblockable). Since it counts as a throw, you cannot grab the opponent in hitstun, they must be in their fall reel in order to combo into it.
The grab will miss if all throws are used up in the combo/juggle, however if you do the super first, you can still do 2 throws afterwards; or do throw, super, throw.
Because of it's instant hit regions on startup, it makes a great guard cancel, as well as being able to stuff attacks due to super startup invincibility.
When in super mode, you can still call dancing swords/do normal sword tosses, and can throw single swords quickly by mashing LP. You can actually jump forward and mash jab like you would on the ground to get repeated sword tosses as well. You cannot grab a grounded opponent with an air grab super. You don't build any meter in super mode, and Spiral's super damage isn't scaled in a combo.
The Basics
Combos
Basic Dizzy Anyone Anywhere
HP Throw (guide towards them after), OTG j.HP (on way down) d.s.MK, sj, sj.LP, sj.HK, sj.HP
Wolv, Sent and Spiral - OTG must be j.d.HP, Sent substitute sj.LP for sj.LK
Notes: s.MK doesn't have a lot of follow up time, so the followup attack must be VERY fast.
Easy corner ground loop vs Cyclops:
c.HP [ dash s.LK, c.HP ] xN
Easy corner air loop vs Cyclops:
Jump in, j.HK, land, c.HK to launch, [superjump j.LP, j.HK, slight wait, j.LP, j.HK on the way down, land] x N
This combo can also be started off an HP throw towards the corner( if they have no meter)
Air corner relaunch loop variant (Iceman/Cyclops/Omega Red tested):
HP throw in corner, j.LK, j.HK, land c.HK launch
[superjump and slight wait to get high, j.LK, j.MK, j.HK, j.HP, slight wait, j.LK, j.HK, land, c.HK to relaunch] xN
The key to this one is the wait to hit as you're going up, if you hit j.LK too early, you won't jump quite as high, and they'll get away from you at the top. However too long of a wait and they can slip out the bottom, although if that looks like it's going to happen, you can try for a throw near the ground to reset. As he flips head down to fall, you can usually combo a grab if you feel the combo is getting a way from you. Quite easy on Omega Red as he won't get too high.
Silver Samurai corner relaunch variant:
HP throw in corner, j.LK, j.HK, land
[sj j.LP, j.HK, Fastfall, j.HK, land] xN
Sam's size and weight make other versions tricky on him, this one seems to be the most stable.
Air corner relaunch loop variant (Superheavys):
HP throw in corner, j.LK, j.HK, land c.HK launch
[superjump holding towards j.LK, j.MK, j.HK, Fastfall cancel, j.HK, land, c.HK relaunch] xN
Versus Sentinel on his stage, the pillars can cause unpredictable changes in hitstun, especially if they hit after a light attack. Holding forward can also cause you to end up behind the opponent on the right side of the screen.
Colossus being overall smaller, tends to fall out because there's less of him to hit. You can also be too deep in the corner and c.HK will miss him.
Colossus rejump corner variant:
s.MK launch (dashing forward helps and your follow up hit must be IMMEDIATE)
[superjump j.LK, j.MK, j.HK, Fastfall, j.HK, land] xN
Hold toward on your way up, but in the right corner you have to be careful about holding forward too much or you end up behind them.
Corner rejump variant on Light characters (moderately difficult on Psy and Spiral):
Jump in, j.HK to pop up, c.HK to launch (hold towards when jumping up and doing the combo)
[sj j.LK, j.MK, j.HK, j.HP, slight wait, j.LK, j.HK. Re-SJ and repeat]
The timing needs to be tight and consistent on Psylocke, and you need to hold forward for the whole thing once the superjumps start. Otherwise she'll get too high on the way up or fall out on the bottom. Spiral will tend to get too high. Due to Storm's larger hurtboxes on hit, the combo is much easier on her. Basically this is the above combo without the relauncher on the ground.
- It can work on Wolverine but his small size means he can slip at at numerous points. It's also dangerous to try and throw reset him as his throwable box disappears at points where other characters' don't, making the attempt unreliable. HP throw, falling j.LK, j.HK, then superjump after landing seems the best starter on him.
Dancing Swords Usage
Swords will be the crux of Spiral's game, and how you build your much needed meter. They can help cover her fairly slow moves, although the first one tossed is generally the most useful for that since it starts the lowest, and most people are going to block low on the ground.
Take some distance, call swords, then c.LP, s.LP to make it hard for people to approach you on the ground. If you can "tiger knee" (HCB, UB +2P or 632147 +2P for you new schoolers) the motion, you'll get it fairly low and can attack on the way down, having some swords going out around jump high and making it harder to normal jump at you.
When you superjump, you can cover some space by pianoing LP to HP on the way up, but characters with long range moves that have good hitboxes (Sentinel) can kick you out if they chase up after you.
While it's good to have some swords on you, they can throw off your expected juggle trajectories and timing in air combos.
Seeker swords (QCF + HK) is one of her more useful sword tosses, but costs meter. Since 3 swords will chase the opponent, you'll usually have some breathing room to summon more swords provided they don't attack through, or you're not too close when throwing.
Throw/Grapple Trapping
The grapple is restricted to the "two throws per combo/juggle" limit EXCEPT if the opponent is trying to attack as they come down. This means if they're trying to hit you out as they fall (weight allowing), you'll catch them in the grapple if their attack doesn't hit. If they do nothing however, they'll land harmlessly right next to you. You can also mess around with s.MK launching, c.LP whiff cancel, dash under and try to catch them blocking the wrong way with s.MK again.
Midscreen
s.MK xx sj'd grapple, toss upward, grapple again or s.MK again. Against heavier characters, grappling after an up-throw will combo.
In the Corner:
Throw towards the corner, then hit the opponent upwards so the grapple WON'T combo. Example:
If throw, (falling) j.LK, j.HK \/ Grapple all combos, stick a c.HK or s.MK in there, or whatever's needed.
Switch Usage
Since startup in the Switch is slow, it's best to use it when they're being knocked away, or at a distance. Setups that make Switch fire when they are bouncing off a wall/floor are optimal, since it can cross them up in unexpected ways. Some situations:
- HP throw, j.HP to knock them away xx Switch. They will bounce off the ground as the switch is occurring, you'll end up below them and they will likely be facing the wrong way. How far away they are from you will depend upon where you are on the screen when you threw them, and their weight (lighter bounces more). Beware of mashing if they bounce back close to you, but you can also surprise them with a throw.
- c.HP XX Switch. If you hit it as a poke, anti-air, punish or in a combo you can use switch afterward to cross up and confuse the opponent. This works best on middle and heavyweights, but not superheavys. Optimally, it'll be on a character and in a position where they are juggled a bit, then hit the wall then bounce off the floor. It can work on lighter characters, but they must be in a position where they will fly back a bit then hit a wall so you can get the bounce, otherwise you just trade positions far apart from each other.
- HP throw, down+j.HP (OTG), dash.c.LK, c.HP xx Switch. The faster the switch, the better. Depending on how fast you switched, their weight, and how close to the corner you are, they should bounce under you while you're in the air, making for a confusing crossup. j.MP should hit them if they end up under and behind you. If they are heavy, they will likely just bounce next to you and be facing the wrong way. This combo is just a guaranteed way to hit c.HP.
- If you SJ up and go for a Switch, you can't see what the opponent is doing and may Switch into an attack. There's also the risk of them following up after you and hitting you out of startup. Switching into attacks is a matchup dependent risk. If you have some swords, SJ above their head and QCF + Jab toss down a circle of swords, then switch. This should prevent them from coming up after you as they'll have to block if they do, or get hit. Then you are above them and they're at risk for getting grappled with you below.
- If you Switch an opponent out of an attack that has a long duration (say, Omega Destroyer), they will be stuck doing the move until it's finished. Example, they go for chip kill Omega Destroyer, but you have the time to SJ up back and switch at the top of the screen. They'll remain up there doing the move until it is finished (so don't jump into it early when trying to punish!)
Speed Up Combos
Super mega ultra basic and lame (and universal/anywhere)
- Hold forward, steadily mash s.LP. I don't think it's humanly possible to mash so fast that pushback will get you out of range, but a steady rhythm will be more reliable than a frantic mash.
Easy
- (Universal/anywhere) Hold forward, [s.LK, s.LP]xN. Not as braindead but still pretty easy.
- (Light/anywhere) Dash c.MK [s.MP holding toward]xN. Needs some timing so pushback is overcome by simply holding forward, but still easy. This seems easier on lighter characters (like Storm) and more difficult on mediums (like Iceman), and may not be possible on heavies and up. Wolverine may be the cutoff.
Moderate
- (Corner vs Omega Red) dash.s.HK (hold toward), s.MP, (slight wait) link into s.LK and (walking toward. s.LK) x N
dash s.MK, s.LP(must be fast) is another way to get him into position for a s.LK juggle, and doesn't require the slight wait.
- If you want to be fancy, you can throw c.HPs in here provided you aren't so close and he is so high that he goes under them. c.HP is also a way to start the s.LK juggle vs Red.
- c.HP alone can juggle Red repeatedly in speedup, but you must be careful to keep some distance as you will miss if he is too close or too high. Maximize damage with a few walk forward c.HPs (don't dash), then walk in and maximize hits with juggling s.LK!
- (Hard Hits Juggle in Corner vs Various)
- Light character version: At point blank range, s.HK, c.HP, [dash, s.HK x2, c.HP] xN
- You can dash at the start, but then you must delay the c.HP or it will be too far behind to hit. Dashing may make it miss entirely on some
- The above can work on Psylocke, Akuma, Spiral and Cyclops. It will also work on Wolverine and Iceman, but they can slip out
- Storm you can get 3 s.HKs in the juggle portion, and that's most stable on her.
- Omega Red variant: s.HK, c.HP [dash s.HK, slight pause, c.HP] xN
- Being all hard hits, this is a very damaging combo. If you know speedup is ending soon, you can try to stick a 6-hand grapple in there to combo, or s.MK to pop them up then grapple and attempt a reset.
- (Corner vs Superheavies)
c.HK x2, c.HK repeatedly and walk forward as needed.
After about 14 hits if you kept a reasonable pace, speedup will nearly be over and you can 6 hand grapple (if they have no meter), it should combo and you can transition to a regular corner loop infinite. They should also be high enough that superjumping and going in to one of the corner strings after the launcher would work. While this works on Colossus, if you get "too deep" under him, there's a chance the c.HK will miss.
Hard
- (Universal/anywhere) [dash c.MK, c.MP] xN. A bit more damage before the scaling hits, but tougher because the dashing must be accurate to overcome pushback.
Speed Up Glitch: Versus some smaller characters midscreen, if you are right up against them as you are dashing in speedup and push an attack, you end up passing right through them.
Advanced Strategy
Fastfall tricks - Get them blocking low, jump MP (which can hit lowest), xx fastfall j.lk, j.punches (HP may not have time to come out, depending on position/timing). Somewhat dangerous due to the risk of doing a 6 hand grapple in someone's face while they're grounded. Best used on people who are overly defensive and don't mash.
A quick jab-version 6 hand grapple can be used to cancel s.HP as opposed to dancing swords, a sword toss or getting predictable with superjump. It's still not that fast or safe, and best done at max distance. If you can get out the low superjump version, you can attack on the way down. Be CAREFUL not to mash this or it will make a trick that's already unsafe a disaster. Use as a once in awhile surprise only, and never against someone who likes to mash.
Matchup difficulty for Spiral tends to correlate with how well a character can keep her from getting swords going. If the opponent can put a lot of attacks on screen, or stay in her face to hit Spiral out of swords, she's going to have a hard time and take LOTS of damage due to her low stamina. Almost every character will beat her in damage output on trades, except maybe Storm (her j.HP being an exception).
Matchups
- vs Omega Red
As someone who can control space very well, Red is going to give you a hard time. Calling swords at the wrong time can lead to getting coiled or Omega Striked. Omega is probably going to give Spiral the most problems when it's a ground game or anti-airing her. When he's above her, her upward striking normals and 6-hand grapple can beat his attacks, if you go deeper towards his body.
- Do not perform Switch during Omega Strike, there's a large chance you'll be hit by it.
+ If Omega "safe fall" techs (handstand), he's vulnerable to a Grapple.
- Immediate jump MP usually won't overhead a crouching Red (sometimes it'll hit)
+ Switch as Omega's super is starting up, and he'll be in the air until the super ends.
+ If you duck an LK Omega Strike and he pulls it back, his pushbox will drag you back towards him.
- vs Sentinel
Sentinel's range means it can be very difficult to get enough breathing room to start throwing swords. Especially when j.HK can just bat through them and hit you. His massive throw range also means people who try and mash throw through blockstrings will throw you if you leave any opening. This will probably be your hardest matchup.
-Beware of trading hits and counter hits, you could lose 60% of life or more before you know it.
-Never do a Power Dance vs Sentinel since he can kill you in around 6 hits or less in that mode.
+ Switch as Sentinel's super is starting up, and he'll be in the air until the super ends (easy to hit him out of it from behind)
- vs Colossus
Colossus can hurt you bad at close range and if you're cornered without meter. Force him to block attacks so you can build meter, or run to build some at a distance. Then if you can get him in the corner before he has any, he will likely have a very hard time escaping grapple traps. Be wary of getting thrown through blockstrings if your opponent likes to mash for throw, particularly when landing near him and attempting to link blockstrings together. Not every Colossus will just stand there and block, plenty will be happy to try and punch through your swords and trade hits since that's in his advantage.
- Be careful of down+j.HP during grapple traps.
- Beware of trading hits and counter hits, you could lose 60% of life or more before you know it (counter super especially).
- Be careful of switching during the shoulder charge, there's a large chance you'll switch into it.
- vs Psylocke
Psylocke's speed and Psi-flash spamming can make it hard to get swords going. A sword and a Psi-flash will cancel each other out. c.HP will be your friend on ground battles.
- On the ground, Psylocke's like to lead with dashing s.HK which can hurt a lot.
- Psylocke does more damage than Spiral in general, so trades are going to be in her advantage. Overall, the match is in Psylocke's advantage.
- vs Iceman
Iceman can fill the screen with crap and control space well, meaning you have to be patient or you'll get hit out of swords, possibly with a huge damage/dizzying ice avalanche.
s.HK has a very long range and distended hitbox, and will likely be spammed quite a bit. Also expect j.HP spam. He also has an annoying tendency to drop out of combos.
- vs Wolverine
It's tough to keep Wolverine off of you, and he can escape the normal grapple traps pretty easily thanks to drill claw and walljumps.
- Dashing belly slide claw will go under your wall of swords, or he may try to mash s.HP through them.
- If you have full meter, try to bait him into guard cancelling/firing off Berserker Barrage when he has full meter (run up and block), then guard cancel it with Metamorph! If you're not in a position to combo (and you likely won't be unless he was cornered), he will likely start running away or mashing insanely. Call and start throwing jab mash swords at high speed until and watch for a committed drill claw that you can jump up after and grab.
- On safe fall, he has some extra invulnerability on the ground. Enough to mash out a jab or invincible startup Tornado Claw. Most likely though, if you are standing too close to him when he safe falls, he will simply throw you as you cannot re-throw him until the invulnerability wears off. Give him space or try to have swords on him as he's recovering.
- He has normals with faster startup than your jab (several, in fact) so at the start of the round, it's not a good idea to challenge them by pushing a button. You won't necessarily always lose out because human execution isn't perfect, but you don't have the advantage here. It's generally best to block low, jump neutral and block or jump back.
- vs Cyclops
-Know the trajectories of optic blasts, so you don't get shot out of sword startups.
-Be wary of his downward striking attacks as they are extremely difficult to anti-air. His hitboxes in general are very dominating.
- Expect ground HP bullets xx SJ into j.HK spam.
- Don't try to re-throw him on tech hit, he is invulnerable (not as long as Wolverine though) and will likely win any same-time throw attempt there. He can also go right in to invincible Gene Splice.
- vs Silver Samurai
Hey look, someone lower tier than you! Stars and his range can be tricky, but not if you're patient. He's slow and when he has to commit to something, he's pretty much stuck due to his lack of mobility. When he has full meter, be careful with superjumps or committing to anything in the air as he can zap you before you realize he's started the super.
- j.MK has a lot of range (pokes up toward) and he'll likely be chasing you with this to hit you out of Sword startup.
- Remember, he has no low-hitting attacks.
- vs Storm
TYPHOON. Floatdown j.HP mash is something to be careful of. That normal in general can't really be stopped if she's above you in the right place. Like vs Silver Sam, be careful in there air when she's at full meter, although her Lightning Storm startup is slower. If you are in the air and block it as you're coming down, you risk getting guard broken by the last sparks.
- Storm's ground dash has invulnerability frames, so if she is coming at you on the ground, she can go through some of your attacks.
- If you're in the air trying to get swords going, she will try and chase you down with j.MK. j.MP electric balls can also be a problem as she can control some space with those. Getting Swords active and throwing them is critical though, since it pins her down and can keep her from attempting trijumps, as well as cancelling out typhoons. Swords + s.HP being as active as it is makes it very difficult for her to try and use her ground dash invincibility to get in.
- Like Wolverine, Storm has normals faster than yours that will beat you if you attempt to get the first attack, face to face at the start of the round.
- vs Self
Going to be lots of j.HP's trying to hit each other out of sword startups.
- vs Akuma
Congratulate your opponent on remembering the code. Air hurricanes are a serious problem because they can be a near-instant dizzy if all swings hit, thus it's not a great idea to SJ before he does.
