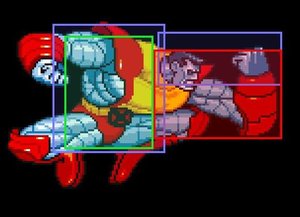
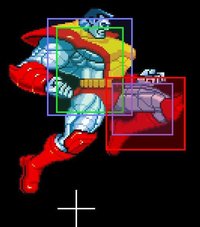
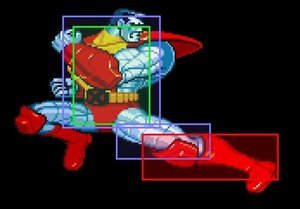
Introduction/Summary
Colossus is a slow, powerful character who emphasizes on using his large buttons to control space and pressure his opponents into allowing him to start his potentially deadly throw combos. Colossus is easy to pick up and play with a simple game plan which is why he is considered strong but suffers when opponents can keep him away or out prioritize his normals. Colossus has one of the best supers in the game for guard cancelling and can sit on a life lead with full meter effectively walling out opponents who can not open him up without committing to a risky strategy.
Tech hit type: Counter Throw.
Weight Class: Super-Heavy.
Pros:
- All normals chip on block.
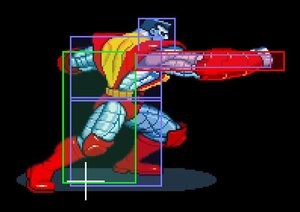
- Strong long rage buttons, j.HP and cr.HK notably.
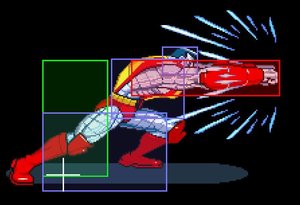
- Shoulder tackle can neutralize projectiles up to 3 hits, can be stopped after hitting for combos/safe block strings and can stop a lot of Storm's normals.
- Very large throw range and the ability to reposition the opponent where he likes depending on the throw used. Can also pick opponents up off of the ground (a bit gimmicky but effective on opponents who can't roll away from it like Cyclops.)
- Effective super for instant guard cancelling an over aggressive opponent, invincible on startup and can be done in the air.
- Counter throw can force the opponents into making poor decisions and narrow their options to open you up.
Cons:
- Counter throw depends on meter, and can only be performed in the first tech window. Colossus has a hard time generating meter without taking risks.
- Throw game is drastically weakened against other heavy characters.
- Long start up on his forward dash (about 6 frames) means you have to commit to your movement, can not wavedash forwards but can wavedash backwards.
- Has trouble hitting the air above his head which makes chasing flying/double jumping characters a pain.
- Has hard matchups against the big 3 (Wolverine, Omega Red, Sentinel).
Special Notes -- It appears that throwing is effectively disabled for Colossus after his hit recovery flip in the air. He is able to attack, but not throw, until his spin animation stops and his legs straighten out. Even then it's still disabled for several frames after. Throwing is re-enabled immediately upon landing. *#test_info
Normal Moves and Throws
Ground Chain: Colossus can chain any light button into any button of greater strength. Colossus can not combo middle buttons into buttons of a higher strength.
Normal Jump Chain: Any kick to any punch.
Super Jump Chain: Any kick to any punch.
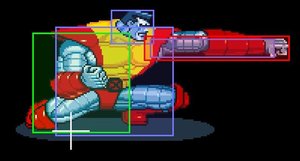
| 2LP | Start Up | Hit Stun | Dashing Hit Stun | Description |
|---|---|---|---|---|
|
4F | TBD | TBD | Very similar use to 5LP, Simple poke, mashable and chips. Great for pressuring defensive opponents. |
c.LP: Mashable
Start: 4f
c.MP: Launcher, can loop onto itself in the corner against medium and heavy charaters (to an extent). Good for a dashback AA.
Start: 6f
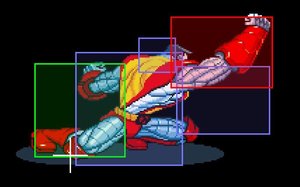
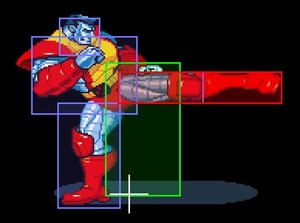
c.HP: Another slow poke but good hitbox. Quicker than standing.
Start: 12f
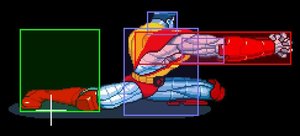
c.MK: Hits low. Not much reason to use?
Start: 5f
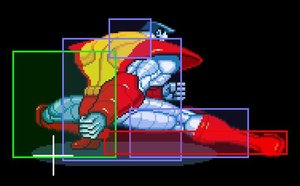
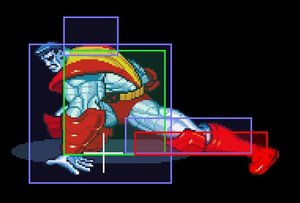
c.HK: Low hitting sweep
Start: 8f
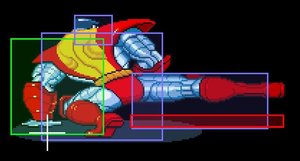
j.HP:
Will trade or beat with most attacks in front of it, also messes with your jump arc
Start: 8f
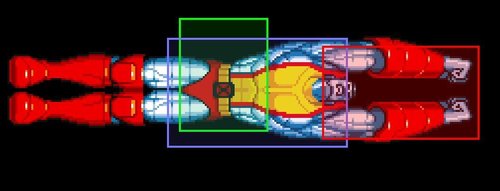
j.down+HP:
A downward striking punch that's immensely hard to anti-air. However when you hit someone in the air down near the ground, they will bounce off the ground and may very likely recover (in the air) faster than you and be able to punish if you haven't landed.
Start: 11f
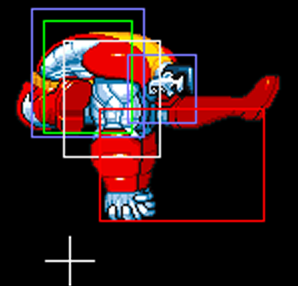
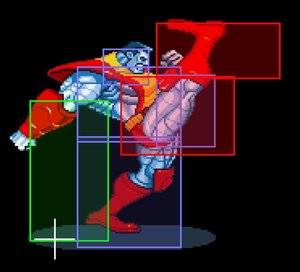
j.HK: Swinging kick that hits behind then in front. Good for air juggles
Start: 8f(behind), 11f(front)
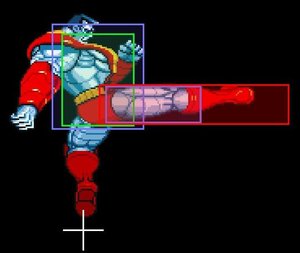
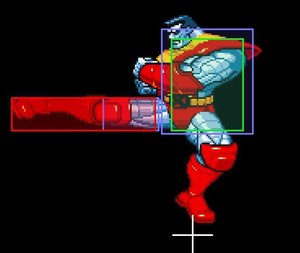
F+HP (toward + hard punch): A swinging punch with less range than his usual HP, but much more dizzy power. If it's the move that dizzies the opponent, they will be dizzy on their back (except Akuma) , and you can start off a combo by picking them up OTG for a throw.
Start: 16f
(see below.)
--Throws--
MP Piledriver - Toward or Back + MP, then toward or back for the direction to throw them:
A Piledriver in the direction you held. After the piledriver the opponent will bounce a little and allow for follow ups (weight depending). The bounce can change depending on the direction held (or not held).
Holding back/forward/up gets you a closer bounce, neutral a far one and down either a far or quicker fall depending on the weight.
HP Suplex Toss - Toward or Back + HP, then hold direction:
-Toward + HP and Toward or Neutral throws them in front of you
-Back + HP and Back or Neutral throws them behind
-Direction + HP and Opposite Direction or Up throws them above you
Tossing the opponent up is almost always the best option, but how high they go is weight dependent (so Sentinel/Colossus don't go very high at all, leaving fewer follow up options).
- The "Counter Throw" Tech Hit throws them similar to the Up + HP toss.
Air Throws - Toward/Back/Down + MP or HP:
Grab opponent then accelerate straight towards the ground in a piledriver (with a slightly further bounce, they bounce out from the direction you face). There's less of a window to combo after compared to his ground piledriver and no direction influence.
OTG Throw - Down + MP or HP to pickup an opponent off of the ground, options follow:
Once you have your opponent over your head, your allowed movements are:
-Walk forward or backwards
-Dash forward (double tap forward only, no 2P, you cannot jump while dashing, hold back to stop the dash early)
-Normal jump (any direction)
-Super Jump (you'll only go straight up)
Kick buttons do nothing, but any punch will result in a throw, such as:
-LP throws the opponent in the direction you're facing at a medium (less than normal jump) height and a far arc, vs superheavys the arc/height/distance (seem) lower, and the animation is different.
-MP is your MP piledriver in whatever direction you were holding.
-HP is your HP toss in whatever direction you were holding. To throw upwards and not get a jump by accident, dash then hold up and hit HP.
-All normal jumping punches toss the opponent in whatever direction your were holding, in the same way. If you land close to the opponent you should have enough time to combo hit OTG except maybe vs Sentinel. You also cannot toss upward, but you can toss straight down.
-Super jumping throws are similar to normal jumping, except if you throw the opponent early in your jump, you continue the rest of your super jump path up and down afterwards. Not a good idea, and neither is waiting till the top of your SJ, since the opponent can mash out.
Limitations - You can only have 2 throw types per combo in this game, so if you do throw, OTG throw (escapable as it doesn't combo), you can't do another OTG throw, or combo another throw. You also cannot OTG throw at all if you start a combo with a Tornado Grab.
-OTG pickup can be mashed out of (as well as Tech Hit), so throw ASAP.
"Command" Normals
-Elbow-Knee: LP, MK, HP
Start: 8f
--Causes a little elbow-knee move. The knee hit will knock the opponent up slightly and away. This move can cancel normals, but you can't cancel the move into a super. To get a super or anything else after it, the knee has to just barely knick them at the very end of it, and they have to be cornered. The Elbow won't even combo into the Knee if you're not close enough. The knee is extremely active and there's maybe 1 frame of landing after, although if it hits early you will be vulnerable until landing.
Special Moves
Tornado Grab (Giant Swing): D,DF,F + P -(ground only)
Start: 15f
A blockable throw special. Once the opponent is grabbed, spin the stick and mash the buttons to throw them higher. Strength determines the distance he goes forward and how long it's active. If blocked, he'll go in to a somewhat short recovery. Generally safer on block than whiffing entirely, especially for the harder versions. Usually, this move is used as a frame trap.
Limitations
-Tornado Grab can only grab an opponent with their feet on the ground. If they are considered airborne in any fashion, even if it *looks* like the grab should hit, it will pass right through them.
(example): Iceman jumps, and does an Ice Avalache right before he lands. Even though his feet appear to touch the ground, he's still considered airborne, and the Tornado Grab won't connect.
-You are not allowed to OTG Lift after the Tornado Grab. You're only allowed to OTG lift again after they've been reset by a dizzy or the combo stopped.
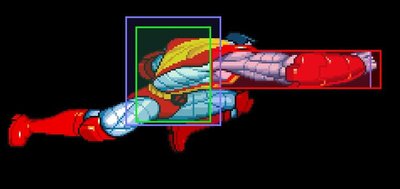
Shoulder Charge (Power Tackle): D,DF,F + K -(ground only)
Start: 12f (all)
--Back + Any Kick to cancel all versions, before or after they hit. Even if it hits, cancel right after, or it will go a little further and then into recovery.
--LK: Travels along the ground, knocks opponent very slightly up and away.
--MK: Travels at an angle up to a little above jump height, knocks opponent up and away. *Tiger kneeing this version lowers it's juggle trajectory.
--HK: Travels at a sharp angle up to (about) the top of the playfield, knocks opponent in a similar(?) arc to MK but higher
--Juggles are relative to the opponents current position, and as usual height varies by character weight.
Canceling the MK and HK versions immediately reduces the recovery significantly compared to the LK version, or letting the air versions go even slightly high. 13 frames compared to about 26~!
Best method it to do 2364(or 1) and keep tapping between MK and HK.
Shoulder Charge Armor
Normals will generally trade or can beat this move depending on the hitboxes, but projectile types will often "ping" off it and merely slow him down. This include normals classified as projectiles like Iceman's standing hard attacks and Storm's almost everything.
X-Special
Super Armor - D,DB,B + 3P
Meter usage: 71
Armor is immediately active, but you can't move for roughly 55 frames.
After a significant startup delay, you become shiny and don't go into hitstun, but can still be thrown. Throws don't cause the super armor to end by themselves, but the next comboed hit (that isn't a throw) will. Super Armor also doesn't stop Omega's Coils, they will hit and you will immediately lose the armor, effectively wasting you meter. Same with Colossus' Tornado Grab. You can still be dizzed, and if you are, Super Armor will end.
Regular damage will be slightly reduced, but stun damage has absolutely no reduction.
All of those setbacks make it's uses pretty limited. You will still need it when facing skilled zoners and runaways. Super Armor in conjunction with Shoulder Charge armor should make "getting in" less of a headache. Because you still need meter to Tech Hit, it's best not to use unless you are at full meter. You also don't build meter when powered up (wtf). Keep in mind this isn't a mode like Iron Body Zangief, you still can block.
Super Attack
Super Dive - D,DF,F + 2P, D+P to dive (ground and air)
Practically instant startup but huge recovery, even if it hits.
2,3,6,2+PP Will cause and instant dive without any upward animation at all.
This Super has no throwable box during startup or while traveling in the air. It returns upon the long ground recovery.
Uses:
Use as a Guard Cancel, anti-air or even to stuff many moves as they come out. Or to "hop" over an opponent's missed attack, and into the opponent.
Use as a Wakeup vs opponents trying to keep the pressure on.
Does alot of chip for a 1 (or 2) hit move, so it can chip-kill opponents with a few pixels of life left. (DOES NOT CHIP-KILL ON SUDDEN DEATH!)
Outside of that, it's easy to use in combos, but generally you'll want to use it early in the combo or the damage gets scaled down (eventually to nothing) the later it comes in.
Just don't get baited. Once your opponent sees you using it as a guard cancel/wakeup, they'll come to expect it.. and may run up and block, or jump in and do nothing, expecting you to super. Beware of Master Baiters.
Unless it kills, this super is not safe to use vs Sentinel, he recovers first.
The Basics
Tactics
Colossus generally wants to get in and throw. The main way he does that is either pushing through holes in the opponent's offense, or punching his way through with his strong hitboxes.
Learn your hitboxes and attack timings so that you can beat or trade with opponent's who actively zone.
j.HP has a property where it moves you forward slightly. This may help you advance on an opponent. The downside is the long recovery, so if you air-to-air punch someone and are still moving in, you can be thrown on the recovery. If you have meter to tech, then it's advantageous and you can start inputting as you do it so you don't miss the tech window.
Basic Combos and Resets
MP Ground Throw, Sweep, Reset:
- MP Throw, c.HK xx MK Shoulder Charge and immediately cancel -> OTG throw.
Works on everyone but Sentinel. If the opponent doesn't immediately roll or try to reversal getup, they will be picked up.
Ground Dizzy Setups: (so you can start a combo with the OTG lift)
The "Ground Dizzier" is F+HP. By itself this move is enough to put any character in Yellow. In a combo, it'll ground dizzy any character only a few hits in*.
--Easiest setup is Tornado Grab near the corner (mash hard), and combo F+HP (doesn't work if it doesn't combo). It'll dizzy anyone, even Sentinel, though you do have to mash harder for it to work on him.
--MP throw, F+HP (must combo). Works anywhere.
(dizzies Cyclops, Omega Red and Akuma**)
--(variation) HP throw up, HK launch, sj, MP/HP throw (combo), F+HP (dizzy) works on:
Omega Red, Silver Samurai, Akuma (near corner), Cyclops (anywhere).
--(corner) Jump in D+HP, dash in (as deep as possible) C.MP, F+HP. Works on:
Psylocke, Cyclops, Iceman, Omega Red, Wolverine (right corner only?)
For Silver Samurai, add in dashing standing LK, C.MP before the F+HP.
--dash jump-in D+HP, F+HP
(works on everyone up to and including Omega Red.)
-- (anywhere) Jumpin d + HP, dash s.LK, f+HP quick dizzy anywhere, feather to lightweights.
For medium to heavy use dash s.LP instead of s.LK
∗ May not work if the character is in "extended dizzy" state, which basically would be (EXAMPLE): Character is dizzied, you jab them but jab doesn't combo, then you go into infinite, it will take FAR more hits than usual to re-dizzy the opponent. (Another Example) You start your combo/infinite on them, but they recovered from the dizzy (but didn't block). This puts them in "extended dizzy" as well.
∗ ∗ Akuma won't be ground dizzied (guess they forgot to give him that state), he'll simply stand up in a normal dizzy animation.
Toss Up, Knock Down Mixup:
(won't work on superheavies)
- HP Throw (Hold LEFT for the grab then hold up to toss upwards), s.HK ^ sj.down+HP, come down on them as they bounce recover for a potential mixup or another difficult to AA sj.down+HP
You can leave out the launcher and just jump up and knock them down after the grab, it's generally easier (and getting another big hit in) with the s.HK. Because of the way the screen scrolls as he grabs the opponent, you are much more likely to get a crossup chance when you grab them holding left as opposed to right, provided your back isn't near the wall. A crossup may occur when initially grabbing with right, but seems to be more character/timing/positioning specific.
Advanced Strategy
- General
When characters try to pin you down with chains and staggers, you may have a small window between their attacks to throw them if their links aren't tight enough. If you have full meter, you can do a super, but characters with short OTG times (Sentinel) can recover before you do, even on a successful hit.
In matchups where you are getting zoned badly, you may be forced to make trades.
Throw Baiting
If you have more meter than the opponent, you can try to bait the opponent in to throwing you and tech it for the counter-throw opening.
Moving forward with j.HP in an air-to-air situation will likely leave you recovering next to them, and most will try to get the throw. Prepare for it in situations like that (start inputting/mashing to tech) to get the counter throw. Against other counter-throwers, this does not work on equal meter since the first to burn meter loses the tech war. You must have more, thus it's not wise to do when you are both at full.
- vs Wolverine
Don't stand next to him on tech hit, he will be able to throw you first. He'll likely be rushing in, dashing and pushing buttons, attempting long blockstrings and possible overheads. Try and throw any gap in the blockstring, and/or SJ out if he's trying to put on overhead pressure.
- vs Psylocke
Her fast jump and downward angled normals mean she can put repeating jumping pressure on you, as well as pressure you very hard from the ground. If she's linking normals in ground pressure, there's potentially a chance to throw her in-between. Shoulder charge can go through Psy-blast, but you pause as it pings off so you need to be close enough for it to hit her before she recovers.
- vs Cyclops
Don't stand next to him on tech hit, he will likely be able to throw you first, however you might be able to outrange him.
- vs Sentinel
A very hard matchup, possibly his worst. Sent can easily keep you out and wear you down. You need every bit of damage you can get in this matchup, even if it's just pinning him with jabs so you can get some block damage and build meter. Be careful of getting thrown through gaps in your attack strings, which is why it's critical to have meter for tech wrestling matches. A saving grace is that Sentinel takes more damage from throws.
Sentinel has a very short OTG time, so be careful when trying to get extra damage while he's on his back. He can quickly get behind an attack you try and punish you. This does mean you can pick him up off the ground quicker provided he didn't roll, just make sure you have the meter for tech wrestling. Head-dive super is never safe on Sentinel, only use it for kills.
This may be the worst matchup to use Super Armor in, since you can't build meter and Sentinel can counter throw, on top of his hits doing so much dizzy damage.
Trick: If you manage to pin a flight mode Sentinel at his lowest point near the corner, you can mash jab blockstun infinite him. There is no pushback and he can't unfly, he will be pinned until your jabs wear him down to nothing, then you can Super Dive him for the kill.
- vs Silver Samurai
Sam has decent range and chip, but if you force trades and attempt to punch through his stars, you'll come out ahead. His pressure may seem good, but there are holes to jump and attack through.
- vs Omega Red
Coil grabs will immediately end super armor.
Coils will however ping off the Shoulder Charge armor.
Omega Red can duck (neutral or defensive) Colossus crouching jab completely.
- vs Colossus (self)
After an MK shoulder charge combo in the corner, the defending Colossus with his back to the wall has little to no option to escape a throw follow up outside of mashing and praying the attacker timed/positioned himself wrong. This means the attack can combo, throw reset, combo again to dizzy and do it all over until the defender is dead. First match in this video is an example : http://www.youtube.com/watch?v=Y92utntL7Mc
Trap and potential escapes frame by frame : https://www.youtube.com/watch?v=CYXEZePVroA
Mashing throw generally does not work. In fact it may be impossible because his throwing seems disabled during his air recovery flip completely.
Mashing jab may or may not work (unless they mistimed). If they have equal meter to you, you'll lose the tech war since you burned meter first, unless they didn't mash all the way though. The only escape option is to try and super the throw reset if you are at full meter. This means if they try and set it up with a throw in the corner, don't tech that throw, instead wait for the reset if they're going for the Shoulder Charge corner reset.
Head-dive super is also not safe on Colossus should you land next to him, he can shoulder charge or super (if he has meter) for wakeup before you recover, although the timing can be strict. If it hits in the air and you land sooner than him + far away, then it's more safe.
Combos
These combos are a basic guide, and written in mind with being humanly possible in a real match. Tons of variations exist for almost everything, but the goal is combos for real game play. A few exceptions would be versus characters where there are no practical combos, only difficult ones.
Dizzy any feather to heavyweight anywhere except Iceman and Spiral (and is quirky on Silver Samurai)-
HP toss up, s.HK xx sj, air throw, land, LK shoulder charge
Silver Samurai variant:
HP toss up, jump up and air throw down, dash.c.LK, s.f+HP
Corner Juggle Loops (Middle to Heavy):
d.c.mp, [d.s.lk, c.mp] x N, replace the s.LK with s.LP-LP if they get too high.
Corner Relaunch Loop 1 (Feather to Heavy)
Initial Launcher: Dash.c.MP, s.HK ^
Air Combo: sj.HK (slight wait) sj.HP (land)
Relaunch: s.LK, c.MP, s.HK ^ (repeat air combo)
When you superjump after the launcher, there's a slight delay as you're going up with the HK so they doesn't get popped too high. The HP should hit them a little in to their flip animation.
Akuma/Gouki and Iceman may require timing adjustments. Gouki can often be popped too high and require more delay, and possible omitting of the ground s.LK. Iceman folds a bit during his hitstun and may sometimes slip out.
For Silver Samurai, Initial Launcher is Dash.c.MP, c.MP, s.HK ^ . Relauncher may also be s.LK, c.MP, s.LK, s.HK ^ (repeat air combo). Sam requires more consistent timing or he will fall out.
Versus Sentinel/Colossus Infinite:
[MK shoulder charge (cancel immediately after hit), jump toward j.HK, land s.LK, s.HK, tiny wait] xN
This is very difficult to keep going. Sentinel's stage (pillars) requires a s.HK once before the first shoulder charge to start the loop.
Hold back and mash kick to cancel the shoulder charge ASAP (has to register after the hitstop), but don't mash so much you end up kicking on the ground.
You can add in a throw after the s.HK and it may combo or it may cause a hard to escape reset.
An even more difficult variant of above -
[Tiger-knee'd MK shoulder charge (cancel immediately after hit), dash s.LK, s.HK, tiny wait] xN
Testing Method: Tests using FBA-RR hitbox script show no potential throw range after the recovery flip at all until well in to his long recovery flip animation (when he's no longer a ball). Frame by frame tests of putting characters next to him on the way down for him to throw all failed to trigger one. He just attacks and doesn't throw.

