Basic Game Mechanics
These are basic mechanics, which are rules of the game.
Video: Basic game mechanics
Combos
As explained in the glossary, combos are sequences. There are a few types and differences between them.
Combos, cancels and links
- Combos: Combos allow you to attack in sequence. Once hit, your opponent cannot block it. The sequence of hits are usually executed by cancelling moves into specials or supers. You can also link normal moves.
- Cancels: Some normal moves can be cancelled into special moves on hit or block. When a move is cancelled, the recovery animation is switched to a new animation.
Note: Not all moves are cancelable. For instance, Ryu can cancel his c.HK, but not Chun-li. This balances the game and creates a character's individuality. Pay attention to these to understand how each character is supposed to be played. If it is there, it is because it has an important function. See each character for details.
- Links: Links are normals comboed into normals. Some are easy, such as Rose's c.lp, c.lk, c.mp, and some are hard, such as Chun-Li's st.hp, cr.mk.
Chain combos
Chain combos are a special mechanic introduced in the Alpha series, but it is character specific in Alpha 2. Gen and Guy can do much easier links as the buttons can be pressed much sooner with a larger room for error, cancelling the end of the current animation into the next move in sequence. Those are called chain combos. As these sequences are specific, visit these characters sections for more information.
Meaty attacks
- Meaty: Meaties are not combos, but "fat" attacks, in a sense of a longer duration that can be used for link combos. They are attacks of more than 1 frame duration on the active part, executed on a downed or landing opponent. Since all attacks will leave the opponent in a hitstun animation of fixed duration, hitting your opponent on your last active frame can create new combo opportunities, otherwise not doable if it hits on the first active frame, or just facilitate to combo a harder link.
Damage scaling
[Damage scaling explanation in the works.] -Veri7as
After thorough testing, it is confirmed that the losing player of Round 2 gets a damage boost of 1 per hit. The more hits that occur during a combo, the more damage output. If the match continues on to Round 3, both players are on an even playing field with no damage boosting.
<https://twitter.com/AZsabre/status/1353889413953069056?s=20>
--SpryteMix 20:26, 26 January 2021
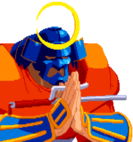
Dizzy
When stun damage is dealt to a character a stun timer is set for 210 frames. This timer resets to 210 frames anytime stun damage is dealt (throws do not reset the timer). If the stun timer ever reaches 0 or CC damage is dealt, all stun damage is reset back to 0. A character is dizzied when the amount of stun dealt to them meets their Stun Threshold.
The icons that spin around the character's head (stars, ducks, & fish) are random and don't correlate to a particular stun length. The length of the dizzy is randomized from the table below.
| Dizzy Duration | ||||
|---|---|---|---|---|
| Frames | 30 | 60 | 120 | 180 |
| % Chance | 6.25% | 43.75% | 43.75% | 6.25% |
A dizzy can be shortened by mashing out of it with any of the following inputs.
| Input | Dizzy Reduction |
|---|---|
| Any buttons^ | 1 frame |
| Any direction from neutral | 2 frames |
| Cardinal direction from adjacent diagonal | 0 frames |
| Cardinal direction from nonadjacent diagonal | 1 frame |
| Cardinal direction from any other cardinal direction | 1 frame |
| Diagonal from any other direction | 1 frame |
^ Multiple buttons pressed on the same frame count as only 1.
Mashing out of a dizzy optimally would be going back and forth from opposite diagonal directions; while mashing buttons. Spinning the stick isn't optimal.
After a character has been dizzied, their Stun Threshold is increased by 5 for the remainder of the round, making it harder to stun them again.
While dizzied any stun damage dealt to the character will count towards the next dizzy.
--Veri7as October 2023
Throws and tech-throws
Throws
Press ![]() /
/![]() +
+ ![]() /
/![]() or
or ![]() /
/![]() to throw an opponent who is blocking. Not all characters can throw with these buttons. For example Rose and Sagat only have
to throw an opponent who is blocking. Not all characters can throw with these buttons. For example Rose and Sagat only have ![]() throws.
throws.
Some throws juggle and can be followed up. See the "juggles" section.
Throw Invul
Characters cannot be thrown for 4 frames after coming out of blockstun, hitstun, or a hard-knockdown.
NOTE: This throw invul does not apply to Zangief's command grabs.
Tech-throws, a.k.a. throw escape
Basically, when thrown, you have a 4 frame window to escape and avoid most damage. Press any forward or back direction + any medium or strong P or K. Some throws do no damage at all when teched, for example, Rolento's ![]() throw (Dan too, but because of a glitch). Some throws are "mash type" throws, and you can get more damage from them by repeatedly press the button.
throw (Dan too, but because of a glitch). Some throws are "mash type" throws, and you can get more damage from them by repeatedly press the button.
A softened throw does very little damage except for vs. mash type throws. Mash type throw takes the entire damage of the first hit, but avoid the remaining ones. Example: Sagat.
Notes:
- Despite not being able to throw with any medium or strong buttons, any character can escape with these four buttons.
- If you play Super SF2 Turbo, there is something called "throw for the win" (TFW) because the damage for a throw is calculated before the game checks if there was an escape or not. This does not occur in the Alpha series.
- Some throws have such a long animation that they are punishable when softened/teched. More on it later.
Throws Against Invincible Moves
If a throw occurs on the first frame of an invincible move (ex: DP, CC activation), the game will randomly pick who wins the exchange. With half the time the throw winning and the other half the invincible move avoiding the throw. Much like when both players throw each other on the exact same frame, a winner is randomly chosen while the loser will tech the throw. This coin flip happens with normal throws and command grabs (ex: SPD).
--Veri7as April 2022
List of punishable throws when teched
- In progress - to be populated.
Charging
It takes 60 frames of charge to preform charge specials and supers.
Pre round charge
You can charge special moves before a round begins. This works for supers sonic booms, Birdie's Bull horn headbutt and Gen's stance/style switch. You can execute these moves immediately after the round starts.
Super Moves and super meter
The meter in alpha 2 has 3 levels and is of paramount importance due to alpha counter, CC, and supers.
Supers (super moves) are very damaging attacks that cost meter. They are usually the special move done 2x. Example: ![]() +
+ ![]() is the Hadouken, but
is the Hadouken, but ![]() ,
, ![]() +
+ ![]() is the Shinkuu Hadouken.
is the Shinkuu Hadouken.
Supers can done in 1, 2 or 3 levels. Some or doable only with 3 stocks, like Akuma's Raging Demon.
- Press 1, 2 or 3 punches or kicks to use 1, 2 or 3 stocks of your meter, respectively.
Super levels have different properties and animations, and therefore, usages, depending on the level.
For instance, Rose's ![]() ,
, ![]() +
+ ![]() level 1 is an anti-air, but levels 2 and 3 must be used on the ground, although the final portion of it can be used as anti-air, and the same goes for her
level 1 is an anti-air, but levels 2 and 3 must be used on the ground, although the final portion of it can be used as anti-air, and the same goes for her ![]() ,
, ![]() +
+ ![]() , which is just a fireball, but level 3 is also a counter fireball that rebounds an incoming fireball at a super-fast speed, guaranteeing that all your hits will connect against a fireballer, indicating that she has been designated to counter fireball characters.
, which is just a fireball, but level 3 is also a counter fireball that rebounds an incoming fireball at a super-fast speed, guaranteeing that all your hits will connect against a fireballer, indicating that she has been designated to counter fireball characters.
Similarly, different levels will impart different invincibility durations. It goes from barely any invincibility on level 1 to very long invincibility on level 3.
So, naturally, connecting three level 1 supers will do more damage than a level 3, and besides, meter management is important, but if you want to finish a match or use the added invincibility or effects, go ahead and do it.
Air block
In the alpha series, you can block things in the air, but there are some rules and exceptions.
- You can block fireballs in the air, but not super fireballs.
- You can block air-to-air attacks, whether special or normals, such as air tatsumakis, and air-to-air normals, even if they are to hit multiple times, such as diagonal j. HK (2 hits).
- You cannot block grounded normals when you are in the air (the opponent is grounded).
- You cannot block specials for the part they are grounded. Although they may look grounded, they may be actually air-to-air. Examples: Akuma's and Ken's mp and HP dragon punch are 3 hits special moves. They grounded during the first hit, which you cannot block, but you can block the final 2 hits because they are aired, which falls into the air-to-air category. That is why some anti-air moves must be done very late and may seem hard to hit at first, because they have a long startup and a short duration of the grounded portion, such as Charlie's HK flash kick.
- Special throws only work against aired opponents such as Zangief's slam dunk, Dhalsim AA super, Rose's Soul throw. They are not escapable unless you can time a CC activation that leaves you invincible, but their bodies you also push you up a bit.
IMPORTANT: If you block something in the air, you can land with a tech roll.
Tech rolls a.k.a. quick stand
They are not really "also known as" quick stand in alpha 2, but it is an equivalent of that from other games, like KOF.
Immediately after a knockdown, do ![]() +
+![]() , or
, or ![]() , or
, or ![]() . This will roll you towards your opponent depending on strength used, with
. This will roll you towards your opponent depending on strength used, with ![]() getting up in place and
getting up in place and ![]() rolling far. These are punishable by any LOW enough hit as the hurtboxes are quite small during roll, so be careful when using. You can also use it after blocking air attacks or after some juggles.
rolling far. These are punishable by any LOW enough hit as the hurtboxes are quite small during roll, so be careful when using. You can also use it after blocking air attacks or after some juggles.
Tech roll distances
There are three distances available for the roll (pay attention to the visuals in the background as an example):
![]() : rolls in-place 0 pixels forward.
: rolls in-place 0 pixels forward.
![]() : rolls 96 pixels forward. (≈ 2.4 character widths)
: rolls 96 pixels forward. (≈ 2.4 character widths)
![]() : rolls 168 pixels forward. (≈ 4.2 character widths)
: rolls 168 pixels forward. (≈ 4.2 character widths)
- Note: Birdie, Sodom, and Zangief roll a shorter distance.
![]() ; an on-the-spot tumble - useful for when you want to be on your feet as quick as possible.
; an on-the-spot tumble - useful for when you want to be on your feet as quick as possible.

![]() ; travels a few characters spaces forward, enough to cross to the other side at point-blank (like in Vampire Savior). Used when you want to avoid rush-down and need a bit of breathing room.
; travels a few characters spaces forward, enough to cross to the other side at point-blank (like in Vampire Savior). Used when you want to avoid rush-down and need a bit of breathing room.

![]() ; the heavy punch version travels farther, almost two medium distances, or about half-screen. Good against opponents who throw a projectile immediately after you’ve been floored. It allows you to get right back in their faces. Somewhat useful for grapplers.
; the heavy punch version travels farther, almost two medium distances, or about half-screen. Good against opponents who throw a projectile immediately after you’ve been floored. It allows you to get right back in their faces. Somewhat useful for grapplers.

Keyword: MIX IT UP!
Air block and juggles tech roll
After blocking an air attack, like a fireball, execute it slightly before you land. It is useful in a fireball battle.
Rolling can also be used to alter your falling trajectory and thus escape specific juggles. Ryu’s air ![]() -> j
-> j ![]() and Gen’s kiryu (
and Gen’s kiryu (![]() style) cr.
style) cr.![]() xx Jakouha are two examples. The most common use is escaping Akuma's Tatsu into shoryuken combo.
xx Jakouha are two examples. The most common use is escaping Akuma's Tatsu into shoryuken combo.
Tech rolls exceptions
You cannot tech roll in three situations. After being hit by:
- 1- a Throw
- 2- Alpha counter
- 3- A super of any level that results in a knockdown, regardless of how it hit you
Sodom being an exception to this rule with his Tengu Walk.
Alpha counter(AC)
Execute the inputs during the blockstun animation to do an alpha counter at the cost of 1 meter. The blocking animation is cancelled into a pre-determined attack, which has some invincibility and temporarily creates a freeze effect (about 16 frames, the same duration of a parry freeze in 3s, to be confirmed).
Knockdowns from ACs have a special animation and cannot be tech rolled except, by Sodom's Tengu Walking. Therefore, some ACs take you from a defensive position to an opportunity to turn the tables with cross ups and additional pressure options. Check the strategy sections for more information.
INPUT: ![]() ,
, ![]() ,
, ![]() +
+![]() or
or ![]() .
.
AC Usages
The animation, usefulness and effects vary per character. Some just leat you escape pressure and do some damage, while are very strong. Examples:
- ROSE:
 AC allows damaging combos and great pushback with a fireball, while she switches sides with the opponent. If cornered, she will reverse the corner situation and may drain your health with a soul illusion set up even if you block, and she has unblockables. Plus, she regains meter during the combo she does afterwards.
 - Ken/Sagat:
 AC hits at middle height, being fast enough to work as both high and low ACs, and are far-reaching. As those are fireball characters, the strong fireball game makes these AC even more powerful.
 - Sodom: AC Very far-reaching and knocks down close to you, so you can follow up with a damaging ambiguous cross up.
Juggles
Some moves have juggle properties. Some start a juggle state while some will hit someone in a juggle state and function as juggle follow-ups. Usually, juggles are pre-programmed moves to work as the developers imagined, but a few moves seem to be accidentally left there, such as Adon's grounded normal.
Juggles list
Juggle and juggle follow-ups list (some are follow-ups only):
- Ryu: j.mp
- Akuma: Tatsumaki, mp and HP shoryuken, air fireball.
- Ken: mp and HP shoryuken.
- Adon: s.lp, s.mp vs. aired opponents (useless, seems accidentally left there), rising Jaguar DP. Example: s.lp/mp into rising Jaguar as anti-air. Useless due to how bad the hitxboes of s. lp and s. mp are, but can be used if you cross under a jumping opponent.
- Rose: C.HP (first active hitbox) xx Soul Throw super (DP super).
- Sagat's Tiger Uppercut
- Guy: QCF+P throw, QCFx2 + P in corner. Tatsumaki is also technically a juggle but cannot be used as a follow-up.
- Chun-li: Upkicks, super upkicks, super puffball,
 +
+ in the air,
  +
+ - follow up with super puffball or upkicks, charge
  ,
, ,+ super - follow up with upkicks.
 - Dan: Tatsumaki, Kouryuu rekka super (qcfx2 + k).
- All fireball supers*
Notes:
- Fireball supers only juggle for 3 hits, so, best if used only lvl 1. Ex.: Ryu's air-to-air mp, land, lvl 1 Shinkuu Hadouken.
- DP follow-ups will only hit twice for those hits that are aired, for instance, Akuma and Ken mp and HP dps, which normally hit 3 times against grounded opponents, will do 2 hits only at the right height, including during custom combos.
Tech rolls from juggles
- After being hit by Akuma's
 hurricane you can execute a tech roll motion (b, d/b, d + P) in the air and Akuma's follow-up DP will miss. Any juggle that is not a real combo can be escaped.
Throw juggles
Some throws leave the opponent in a juggle state and can be juggled by follow-ups. Dan, Gen, Guy, Sodom, Akuma and Zangief (A2 Gold only) have them.
Buttons Priority & Special Move priority
When two buttons are pressed together, the system prioritizes light attacks before heavy, and punches before kicks. That priority will be sustained for special moves, and supers.
It is important to understand button priority to take advantage of it in matches, as they provide you with some of the best outcomes automatically. For instance, this knowledge is very useful to escape tick throw attempts or for combos. It also means that if you do not "piano" right but end up pressing two buttons at the same time, the weaker button will have priority and may come off accidentally.
Button Priority Rules
When you press more than a button or do more than a thing, the game defines a priority of what action will occur. The priority of normal attacks in A2 DOES NOT FOLLOW A ZIG-ZAG pattern on an arcade stick as it is with other Capcom games. Don't ask me why.
PRIORITY ORDER: ![]() >
> ![]() >
> ![]() >
> ![]() >
> ![]() >
> ![]() .
.
- Special attacks take this order: super moves > special moves > normals.
- Buttons have priority over unique normals, so
 +
+ +
+ with Ryu will give you a light punch instead of the overhead.
 - Throws are special hitboxes. If it appears and the opponent is grounded and within range, it will throw no matter what, as it has priority over normals, with a few exceptions, discussed later.
SPECIAL/UNIQUE NORMALS & THROWS
As mentioned, special normals, also known as unique normals or unique attacks, such as Ryu's ![]() +
+![]() will not have the priority over the normal moves. In this game, they are just normal moves.
Throws are just a hitbox that shows up early a d briefly during the startup of some medium and hard buttons, so with Ryu,
will not have the priority over the normal moves. In this game, they are just normal moves.
Throws are just a hitbox that shows up early a d briefly during the startup of some medium and hard buttons, so with Ryu, ![]() +
+![]() in the right distance will get a throw, not an overhead. The overhead animations starts, but is then switched to a throw.
Finally if Ryu press
in the right distance will get a throw, not an overhead. The overhead animations starts, but is then switched to a throw.
Finally if Ryu press ![]() +
+![]() +
+![]() at throw range, the
at throw range, the ![]() will come out, and not a throw, because, again, the
will come out, and not a throw, because, again, the ![]() throw is a hitbox of the
throw is a hitbox of the ![]() . It must be executed to actually exist.
There is no "Kara
. It must be executed to actually exist.
There is no "Kara ![]() throw" or "Kara priority." If the moves are not executed perfectly together, whatever came first will be executed.
throw" or "Kara priority." If the moves are not executed perfectly together, whatever came first will be executed.
SPECIAL MOVES
Some moves have priority over other moves and may require strict timing or off accidentally. Shoryukens have the priority over fireballs.
Example: Ryu tries to walk forward, cr.![]() xx hadouken, but accidentally gets a shoryuken instead, as the game accepts
xx hadouken, but accidentally gets a shoryuken instead, as the game accepts ![]() ,
,![]() +
+![]() as a dragon punch.
The solution is waiting a bit before pressing the button so that the first "forward" inputted is out of a watched a list of stored inputs the game keeps for a period to define whether or not a special move was executed.
as a dragon punch.
The solution is waiting a bit before pressing the button so that the first "forward" inputted is out of a watched a list of stored inputs the game keeps for a period to define whether or not a special move was executed.
SUPER MOVES
Obviously, when you do two circle motions and punch, the game will accept and prioritize the two circular motions instead of the last one, provided it is done within a time limit. Even if there are some wrong directions in-between, the super will be executed. E.g., ![]() ,
, ![]() ,
, ![]() ,
, ![]() ,
, ![]() ,
, ![]() ,
, ![]() - A super such as shinkuu hadouken will be executed because the two qcf required are withing this window, and the game has some leniency for when you press the button at before the end of motion, which is also executed when released.
- A super such as shinkuu hadouken will be executed because the two qcf required are withing this window, and the game has some leniency for when you press the button at before the end of motion, which is also executed when released.
THROWS VS. THROWS
There is no priority in throws vs. throws. When you both throw at the same time, the result of who wins is apparently random, with a guaranteed throw softening. Since can escape/soften throws by inputting any medium or hard button with a ![]() or
or ![]() direction, but the throw escape will occur even if you press it with another button.
direction, but the throw escape will occur even if you press it with another button.
Importance of button priority and examples
Button priority are important but are diverse and character-specific. Here are some examples.
- THROW ESCAPE: Mash c.lk+HK to poke your opponent while blocking to escape a tick throw or poke. If you are thrown, you will escape. If you mash c.lk+HP, HP will come out instead, as HP has priority over lk. You will not hit your opponent before you are thrown.
- AUTO-CONFIRM: An easy combo with Chun-li: J.mk -start pressing c.mp+mk (c.mp has priority over mk) xx mk legs (specials have priority over normals). Not a very useful combo, but an example of the system priority.
- AVOID MISTAKES: Sagat j.HK, c.mp xx HK tiger shot. If you do not release c.mp fast enough, you get a high tiger shot accidentally when you release mp (negative edge). Holding mp in this case would prevent this. The high tiger shot will cost you the match. In A2, since there is no zig-zag priority on buttons, you cannot get around overlapping moves with say, qcf+mp+HK. Mp will always beat the kicks.
- AUTO-CONFIRM AFTER AMBIGUOUS CROSS-UPS: In ambiguous deep cross ups, not all characters can hit confirm,.but you can risk safe moves.
With Ryu, after a knockdown: Deep j.mk, c.hp, qcf (or qcb, you are not sure which side you landed) + HP+HK. Since you do a qcf w/ P+K, you finish the combo with a Tatsumaki or a Hadouken. You don't need to know which side you landed or whether it hit or not during the j.mk or c.HP part. You just have to finish the sequence with a move that is whether safe on block or hard to punish. The game does not care about your initial intention, only the final result. Tatsumakis are pretty safe and abusable.
Notice how useful the priority of buttons is when special moves do not overlap (Ryu) vs. how bad it is when it overlaps for characters that cannot confirm hits into damaging combos (Sagat). Therefore, knowing this it is also useful for reversals.
--Raf (talk) 08:26, 29 October 2019 (MSK)
Custom Combo (CC)
Known in Japan as Oricom (short for "Original Combo"), CC plays a huge part in the game. It allows you to do multiple normal or special moves in a row, cancelling their recovery animations. The higher the level, the longer invincibility and duration you get. Generally for a normal-sized character, at levels 2 and 3 you can go through a fireball. You cannot block, jump or walk back in CC state. However, characters with a special move that involves physical movement can be used (i.e Teleports, and Rolento's Super Jump).
CC is a "super state," invincible at the initial frames after the freeze animation that automatically moves your character forward, non-stop, with a faster-than-normal walk speed.
ACTIVATION INPUT
- Press at least 2 punches and 1 kick (++) or 2 kicks and 1 punch (++) when you have at least 1 super meter stock.
The game has very little leniency for buttons to be pressed together, so press 3P+K, or PP+KK if you are using an arcade stick. On emulators, Fightcade and GGPO, you can bind PPP+KKK to one button, but currently (2019), all main tournaments that are kept by aficionados of the fighting game community (props to you, heroes!) are played on CPS2 original boards, so there is no easy CC and you may miss some activations, so try to practice it as it will be on real tournaments. Also, remember the button priorities as a safeguard to use custom as a free out of jail card during block strings, to get a c.lp/s.lp/CC/throw escape "option select" since you can escape a throw by inputting a CC. Home versions and emulators accept 8 buttons, so you can bind PPP to one button and KKK to the other and become an absolute monster with Zangief.
Blowout CC

When around point-blank to your opponent, when cc is activated and the opponent did any normal attack or was not blocking, they go into a stun animation and are dragged closer to you. This allows you to hit them with pretty much anything for free.
Note* Evil Ryu can blowout anywhere on screen if you're not blocking or in the air.
Blowout CC stun glitch
If you stun an opponent and use the CC after their wake-up animation, instead of a blowout you will end the stun animation. You can still hit your opponent after that, but for around about 8 frames (unknown, this is how it feels like), so make sure you use a fast move or you can blow the CC a bit sooner, or after a jump-in attack.
CC Rules
Damage and scaling
[Damage scaling explanation in the works.] -Veri7as
CC resets the stun
After you hit with a CC, the stun counter is immediately reset. Also, moves that hit during CC deals no stun damage AT ALL. So if you have an opponent ready to be stunned, consider not using a CC and stun him first. To-Do: Add video link.
Broken game rules
Custom combos temporarily break some rules of the game, while itself is especially limited by a 28f special rule (maybe a glitch, more on it later). The direction lock may cause some oddities, such as forcing you to block using the wrong direction. If you don't learn about it, it may cost you dearly. The two main glitches it causes is the block inversion (bad to who activated) and the high knockdown ("HKD", good to who activated). Some other situations will also force you to block or reversal inverted. More on it later.
Four important rules CC changes:
- 1) how fast you need to press repeated attacks of the same strength is alleviated, allowing you to easily start HK legs with Chun-li, and,
- 2) Charge time for everything is disregarded, so you can do standing flash kicks and sonic booms moving forward,
- 3) Exclusively to Birdie, "turn-around" headbutt charge time is lowered to an unknown amount allowing you to "Final, Final, Final, Final..." headbutts for massive damage,
- 4) Hit stun into command throws are allowed, allowing Zangief to end combos or block strings with inescapable SPDs.
CC Invincibility duration
- Level 1: 3 frames
- Level 2: 6 frames, 3 with an attack
- Level 3: 9 frames, 5 with an attack
- Aired: A minimum of 3,6,9 frames depending on the level which carry over to the ground if landing before the minimum invul frames are complete. All Levels, 8 with an attack. Without an attack, entire duration of jump.
CC invincibility works against throws. This is very important to know when playing against Sodom and Zangief. The invincibility of a CC occurs on the first frame of it's start up, vs jumping away from a throw, which takes 4 frames on the pre-jumping frames, making it a better option to escape throws.
--Veri7as April 2022
CC applications
INVINCIBILITY APPLICATIONS
Invincibility on CC can be used to:
- Blow through tick throws
- Blow through fireballs
- Pass through fireballs on blockstrings
- Avoid anti-airs, especially useful against characters with no good anti-airs, so you can jump a lot and be random against them, and they will never know when to block a string, AC, or anti-air, or block a confusing high/whiff/low CC activation.
- Save yourself from chip death from super
- Throw escapes - your hitboxes disappear entirely
- Anti-air when grounded
- Air-to-air disputes
- Counter CC - a CC activated immediately after your opponent activates a CC.
Other CC applications
- Run away, move faster and take positional advantage (Zangief), chase someone (e.g: a runaway air tatsumaki or a runaway CC)
- Fill the screen with fireballs for some chip damage (barely does any damage, except for Akuma's Shakunetsu, but it does)
- Use a fireball and move faster behind it to get closer
- Punish whiffs in the absence of faster moves
- Maximize damage from a good opportunity at a maximum distance (i.e., Valle CC)
Basically, having one meter stored allows you to take better control of the match. At a high level, it may considerably change footsies.
Due to its importance, CC will have a session dedicated to it.
CC 28 frames denial glitch
For some reason, you cannot wake up and activate a custom combo in situations relating to throws for 28 frames, and this count starts differently for both players depending on the animation. This is half a second or a bit more than a strong button (HP or HK). If you try a custom combo during this period, a normal move obeying the button priority will come out. These are the situations:
- After throws
- After you tech/soften throws
- After Guy's qcf+P command throw
- For command throws, supers and special moves, only who was thrown is affected.
Command throws/special moves:
Command throws are different. Who executed the throw is not affected, but who got thrown is affected. Example:
- Zangief's command throws (360+P or K)
- If you are Zangief, you can activate CC right after the animation.
- If you are the defender, you cannot activate CC and have to count 28f after you get up.
- Guy: Guy is an exception. He still has to wait (because his throw is technically a hit, not a throw, in the game code).
Super throws:
Super throws like Zangief's Final Atomic Buster, or even Anti-air supers such as Rose's Soul Throw follow the same rule as the command throws. The one who used the super is not affected.
Note on rapid fire (Guy, Ryu):
If you mash CC in this period you will NOT activate the CC, but instead, the mashing will initiate the rapid fire state and CC cannot be activated in between. Avoid light attacks around this 28f area.
All characters can be negatively affected.
This greatly limits the wake-up options of some characters, especially those who lack good reversals or depend on the super meter, like Dhalsim, Bison, Birdie, Rose, and so on. Use that to your advantage.
Video - 28 frames CC denial glitch.
--Raf (talk) 21:05, 29 October 2019 (MSK)
CC specific notes
Credit goes to Bunnyconda on the A2 discord for the following findings
- If you activate CC and you BOTH are on the ground, and your opponent is not in hitstun, they are frozen for 10 frames (11 if blown out) and cannot do anything during that time
- If you activate CC and your opponent is in the air, they are not frozen and can immediately counter CC
- If you activate mid-air, you are completely invincible until you land or do a move
--SpryteMix 16:23, 15 October 2019 (EST)
Credit goes to the 1996 Versus Book Alpha 2 Strategy Guide. Written by 13 tournament champion players: Graham Wolfe, Tom Cannon, David Sirlin, Mike Watson, Alex Valle, John Choi, Jason Cole, David Sirlin, Jeff Schaefer, Tony Ngo, Marco Alvarado, Martin Vega and John N. For the following findings
- After the "lockout" period of CC there is still a frame that's unblockable, this unblockable sweep frame is escapable with the Technique known as "Reversal CC" or "Counter Activate"
Character Specific Data
Defensive Rating
All characters have 144 HP but some characters will take more or less damage from hits depending on a damage threshold. Positive rating means they take less damage and negative rating means they take more damage per hit.
- +4 Zangief
- +2 Birdie
- +1 Sodom
- 0 Everyone Else
- -1 Gen
- -2 Rose & Sakura
- -3 Dhalsim
- -4 Akuma & Evil Ryu
Complete breakdown of the starting Defensive Ratings below.
| +4 | Damage | 1-4 | 5-12 | 13-20 | 21-28 | 29-36 | 37-44 | 45-52 | 53-60 |
|---|---|---|---|---|---|---|---|---|---|
| Delta | 0 | -1 | -2 | -3 | -4 | -5 | -6 | -7 |
| +2 | Damage | 1-8 | 9-24 | 25-40 | 41-56 | 57-72 |
|---|---|---|---|---|---|---|
| Delta | 0 | -1 | -2 | -3 | -4 |
| +1 | Damage | 1-16 | 17-48 | 49-80 |
|---|---|---|---|---|
| Delta | 0 | -1 | -2 |
| +0 | Damage | 1-144 |
|---|---|---|
| Delta | 0 |
| -1 | Damage | 1-31 | 32-64 |
|---|---|---|---|
| Delta | 0 | +1 |
| -2 | Damage | 1-15 | 16-31 | 32-47 | 48-61 |
|---|---|---|---|---|---|
| Delta | 0 | +1 | +2 | +3 |
| -3 | Damage | 1-9 | 10-20 | 21-31 | 32-42 | 43-53 | 54-64 |
|---|---|---|---|---|---|---|---|
| Delta | 0 | +1 | +2 | +3 | +4 | +5 |
| -4 | Damage | 1-7 | 8-15 | 16-23 | 24-31 | 32-39 | 40-47 | 48-55 | 56-63 |
|---|---|---|---|---|---|---|---|---|---|
| Delta | 0 | +1 | +2 | +3 | +4 | +5 | +6 | +7 |
Notes:
- Damage = Incoming damage before defensive modifier.
- Delta = Change to incoming damage.
--Veri7as December 2021
Stun Threshold
The higher the stun, the harder it is to stun the character. After a character is dizzied, their stun threshold is raised by 5 for the rest of the round.
- 50 - Zangief
- 48 - Birdie
- 46 - Sodom
- 40 - Everyone Else
- 34 - Akuma
Walk Speeds
Speed = Pixels per 100 frames. The higher the number, the faster the walk speed.
Forward
- 600 - All Characters while in CC
- 400 - Chun-Li, M.Bison
- 350 - Gen(K Stance), Guy, Rolento
- 337.5 - Charlie-Nash
- 300 - Adon, Akuma, Dan, Evil Ryu, Gen(P Stance), Ken, Rose, Ryu, Sakura, Sodom
- 250 - Sagat
- 225 - Zangief
- 206.25 - Birdie
- 200 - Dhalsim
Backward
- 300 - Chun-Li, Gen(K Stance), M.Bison, Sagat
- 250 - Charlie-Nash, Gen(P Stance), Guy, Rolento, Sakura
- 225 - Birdie
- 200 - Adon, Akuma, Dan, Evil Ryu, Ken, Rose, Ryu, Sodom
- 125 - Dhalsim
- 112.5 - Zangief
--Veri7as February 2021
Regular Throw Ranges
The distance in pixels each character can throw from. The higher the number, the further away the character can grab.
| Characters | Distance | Visual |
|---|---|---|
| Rolento | 7 | ======= |
| Birdie | 8 | ======== |
| Chun-Li, Gen | 14 | ============== |
| Charlie, Guy | 16 | ================ |
| Adon, Sakura | 17 | ================= |
| Rose, Zangief | 19 | =================== |
| Akuma, Bison, Dan, Dhalsim, Ken, Ryu, Evil Ryu | 20 | ==================== |
| Sagat, Sodom | 22 | ====================== |
Air-Throw Ranges
Horizontal Air-Throw Ranges
The range in pixels each character can throw Horizontally. The following characters with an air-throw all have the same horizontal range:
- 26 - Charlie-Nash, Chun-Li, Guy, Ken, M. Bison
Vertical Air-Throw Ranges
The range in pixels each character can throw vertically. The higher the number, the wider the character can grab vertically.
- 40 - Guy
- 20 - Charlie-Nash, Chun-Li, Ken, M. Bison
Notes:
- Air-Throwboxes interact with a character's axis, unlike grounded throwboxes, which interact with a character's pushbox.
- See the exact throwboxes on the character pages.
--Veri7as June 2022
Wake Up Timing
This is calculated from a Ken sweep, from the moment the character hits the ground, until the character is in their neutral stance. The shorter the frames are numerically, the faster the character gets up. This is crucial if you're going for cross-up combos, or if you're expecting the opponent to use a wake-up tactic such as a Shoryuken, Flash Kick, a super, CC activation, etc.
- 37 frames - Birdie
- 41 frames - M. Bison, Sodom
- 44 frames - Dan
- 47 frames - Adon, Charlie, Dhalsim, Gen, Rolento
- 49 frames - Sagat
- 51 frames - Akuma, Chun-Li, Dhalsim, Evil Ryu, Guy, Ken, Rose, Ryu, Sakura, Zangief
--Veri7as November 2021
Quick Rise Timing
This is calculated from a Ken sweep, from the moment the character hits the ground, until the character is in their neutral stance. The shorter the frames are numerically, the faster the character gets up.
- 20 frames - Everyone Else
- 26 frames - Sodom
- 29 frames - Birdie & Zangief
--Veri7as November 2021
Tech Roll Distance
While not as varied like in Capcom vs SNK, it still is good reference material against certain characters. For ![]() and
and ![]() roll, the speed is universal with the exception of Birdie, Sodom, and Zangief being slower and shorter.
roll, the speed is universal with the exception of Birdie, Sodom, and Zangief being slower and shorter.
Birdie and Zangief
![]() : rolls in-place 0 pixels forward.
: rolls in-place 0 pixels forward.
![]() : rolls 48 pixels forward.
: rolls 48 pixels forward.
![]() : rolls 111 pixels forward.
: rolls 111 pixels forward.
Sodom
![]() : rolls in-place 0 pixels forward.
: rolls in-place 0 pixels forward.
![]() : rolls 58 pixels forward.
: rolls 58 pixels forward.
![]() : rolls 140 pixels forward.
: rolls 140 pixels forward.
Everyone else
![]() : rolls in-place 0 pixels forward.
: rolls in-place 0 pixels forward.
![]() : rolls 96 pixels forward. (≈ 2.4 character widths)
: rolls 96 pixels forward. (≈ 2.4 character widths)
![]() : rolls 168 pixels forward. (≈ 4.2 character widths)
: rolls 168 pixels forward. (≈ 4.2 character widths)
--Veri7as February 2021
Jumps
This is the total frame count for backward, neutral, and forward jump [total (prejump, jump, recovery)].
- 41f (5+36+0), 43f (3+40+0), 39f (3+36+0) Birdie
- 44f (5+39+0), 44f (5+39+0), 44f (5+39+0) Sodom
- 45f (3+42+0), 44f (3+41+0), 43f (3+40+0) M. Bison
- 45f (3+42+0), 45f (3+42+0), 45f (3+42+0) Adon
- 47f (3+44+0), 47f (3+44+0), 47f (3+44+0) Chun-Li, Rose
- 47f (3+44+0), 47f (3+44+0), 47f (3+44+0) Gen(K Stance)
- 48f (3+45+0), 48f (3+45+0), 48f (3+45+0) Gen(P Stance)
- 48f (6+42+0), 46f (6+40+0), 45f (6+39+0) Zangief
- 48f (3+45+0), 47f (3+44+0), 45f (3+42+0) Sagat
- 49f (3+46+0), 49f (3+46+0), 49f (3+46+0) Charlie
- 51f (3+48+0), 50f (3+47+0), 49f (3+46+0) Akuma, Evil Ryu, Dan, Ken, Rolento, Ryu, Sakura
- 53f (3+50+0), 54f (3+51+0), 53f (3+50+0) Guy
- 70f (3+67+0), 69f (3+66+0), 69f (3+66+0) Dhalsim
--Veri7as November 2021
Overheads
| Startup | Frame Adv | |
|---|---|---|
| Birdie | 20 | +9 |
| Guy | 23 | -3 |
| Gen | 23 | -6 |
| Ryu/Evil Ryu | 23 | -7 |
| Chun-Li (LK) | 26 | -1 |
| Akuma | 27 | +1 |
| Sakura | 28 | +4 |
| Chun-Li (HK) | 29 | -1 |
| Adon | 29 | -2 |
| Charlie-Nash | 29 | -7 |
| Chun-Li (MK) | 30 | -1 |
| Ken | 33 | +3 |
| Dhalsim | 57 | -1 |
Framedata Notes:
- Startup = The frame the move hits on (1st active frame).
- Frame Adv = The OnBlockAdv value. (Add +1 frame to all OnBlockAdv values for the move's OnHitAdv value; Ex: +2oB/+3oH, -4oB/-3oH)
--Veri7as February 2021
Fireballs
| Startup | Recovery | Speed | Notes | ||||||
|---|---|---|---|---|---|---|---|---|---|
| L | M | H | L | M | H | ||||
| Charlie-Nash | 9 | 38 | 38 | 38 | 300 | 375 | 450 | Requires a 60 frame charge. | |
| Dan | 11 | 52 | 53 | 54 | 300 | 300 | 300 | Only lasts 3/6/9 frames. | |
| Ryu/Evil Ryu | 12 | 51 | 52 | 53 | 300 | 375 | 450 | H version knocks down up close. | |
| M. Bison | 13 | 57 | 59 | 61 | 350 | 400 | 450 | Requires a 60 frame charge. | |
| Ken | 14 | 51 | 52 | 53 | 300 | 375 | 450 | ||
| Akuma | 14 | 54 | 55 | 56 | 300 | 375 | 450 | ||
| Dhalsim | 14 | 56 | 57 | 58 | 300 | 350 | 400 | Slows to half speed near the end. | |
| Sagat (P) | 16 | 48 | 49 | 50 | 300 | 425 | 512.5 | Smaller hitbox than Shoto fireball. | |
| Sagat (K) | 16 | 49 | 50 | 51 | 300 | 425 | 512.5 | ||
| Rose | 16L 22M 28H | 58 | 62 | 70 | 350 | 400 | 500 | Wider hitbox than Shoto fireball; H version starts at half-screen length. | |
| Chun-Li | 17 | 51 | 52 | 53 | 300 | 400 | 500 | ||
| Sakura | 21 | 56 | 56 | 56 | 450 | 450 | 450 | Each charged level goes slower and has a bigger hitbox. | |
| Akuma (Red) | 24 | 72 | 73 | 74 | 325 | 400 | 475 | M version hits twice; H version hits 3 times. | |
Framedata Notes:
- Startup = The frame the move hits on (1st active frame).
- Recovery = Total frames of the fireball's animation.
- Speed = Pixels per 100 frames. (The higher the number, the faster the fireball's speed.)
--Veri7as February 2021
Counter Hits
A counter hit in Alpha 2 is when a character is hit anytime during the startup, active, or recovery frames of a move. Some moves take additional damage when counter hit, or do more damage when they counter hit an opponent.
| Move | Damage | Notes | |
|---|---|---|---|
| Akuma | Zanku Hadoken (aka Air Fireball) | 125% | Only receives counter hit damage. |
| Zenpou Tenshin (aka Shoto Roll) | 125% | ||
| Ashura Senku (aka Teleport) | 125% | ||
| Dan | Chohatsu Densetsu (aka Super Taunt) | 125% | Counter hit only after landing from jump. |
| Evil Ryu | Hado no Kamae (aka Fake Fireball) | 125% | |
| Ashura Senku (aka Teleport) | 125% | ||
| Gen | cr. |
200% | Deals & receives counter hit damage. |
| Jasen | 125% | Counter hit only during roll. Only receives counter hit damage. | |
| Ken | Zenpo Tenshin (aka Shoto Roll) | 125% | |
| Zento (aka Fake Roll) | 125% | ||
| M. Bison | Psycho Crusher | 125% | Deals & receives counter hit damage. |
| Ryu | Hado no Kamae (aka Fake Fireball) | 125% | |
| Sodom | Shiraha Catch (aka Counter) | 150% |
--Veri7as October 2023
Random Damage Tables
Most attacks in Street Fighter Alpha 2 have variable damage. These are the lookup tables for the random variance. Each table contains 32 values and a random number determines which is applied to an attacks base damage. The number in the [] next to an attack's base damage indicates which random damage table it uses.
| 0 | Damage | 0 |
|---|---|---|
| % Chance | 100% |
| 1 | Damage | 0 | +1 | +2 |
|---|---|---|---|---|
| % Chance | 75% | 12.5% | 12.5% |
| 2 | Damage | 0 | +1 | +2 | +3 | +4 |
|---|---|---|---|---|---|---|
| % Chance | 62.5% | 18.75% | 9.375% | 6.25% | 3.125% |
| 3 | Damage | 0 | +1 | +2 | +3 | +4 | +5 | +6 |
|---|---|---|---|---|---|---|---|---|
| % Chance | 50% | 18.75% | 12.5% | 6.25% | 6.25% | 3.125% | 3.125% |
| 4 | Damage | -2 | -1 | 0 | +1 | +2 |
|---|---|---|---|---|---|---|
| % Chance | 3.125% | 6.25% | 81.25% | 6.25% | 3.125% |
| 5 | Damage | -2 | -1 | 0 | +1 | +2 | +3 | +4 |
|---|---|---|---|---|---|---|---|---|
| % Chance | 6.25% | 6.25% | 62.5% | 12.5% | 6.25% | 3.125% | 3.125% |
| 6 | Damage | -4 | -3 | -2 | -1 | 0 | +1 | +2 | +3 | +4 | +5 | +6 |
|---|---|---|---|---|---|---|---|---|---|---|---|---|
| % Chance | 3.125% | 3.125% | 6.25% | 6.25% | 50% | 12.5% | 6.25% | 3.125% | 3.125% | 3.125% | 3.125% |
| 7 | Damage | -2 | -1 | 0 | +1 | +2 |
|---|---|---|---|---|---|---|
| % Chance | 3.125% | 9.375% | 75% | 9.375% | 3.125% |
| 8 | Damage | -2 | -1 | 0 | +1 | +2 | +3 | +4 |
|---|---|---|---|---|---|---|---|---|
| % Chance | 6.25% | 6.25% | 56.25% | 15.625% | 9.375% | 3.125% | 3.125% |
| 9 | Damage | -4 | -3 | -2 | -1 | 0 | +1 | +2 | +3 | +4 | +5 | +6 |
|---|---|---|---|---|---|---|---|---|---|---|---|---|
| % Chance | 3.125% | 3.125% | 6.25% | 12.5% | 37.5% | 18.75% | 6.25% | 3.125% | 3.125% | 3.125% | 3.125% |
| 10 | Damage | 0 | +6 |
|---|---|---|---|
| % Chance | 87.5% | 12.5% |
| 11 | Damage | 0 | +6 |
|---|---|---|---|
| % Chance | 68.75% | 31.25% |
| 12 | Damage | 0 | +1 | +2 | +3 | +4 |
|---|---|---|---|---|---|---|
| % Chance | 68.75% | 12.5% | 9.375% | 6.25% | 3.125% |
| 13 | Damage | 0 | +1 | +2 | +3 | +4 | +5 |
|---|---|---|---|---|---|---|---|
| % Chance | 56.25% | 18.75 | 12.5% | 6.25% | 3.125% | 3.125% |
| 14 | Damage | 0 | +1 | +2 | +3 | +4 | +5 | +6 | +7 | +8 |
|---|---|---|---|---|---|---|---|---|---|---|
| % Chance | 43.75% | 18.75% | 15.625% | 6.25% | 3.125% | 3.125% | 3.125% | 3.125% | 3.125% |
--Veri7as December 2021