| Guy | |
|---|---|
| |
| Health: | 144 |
| Defensive Rating: | 0 |
| Stun: | 40 |
| Walk Speed Forward: | 350 |
| Walk Speed Backward: | 250 |
| Jump Backward: | 53f (3+50+0) |
| Neutral Jump: | 54f (3+51+0) |
| Jump Forward: | 53f (3+50+0) |
| Wake-Up: | 51f |
| Quick Rise: | 20f |
| Throw Range: | 16 |
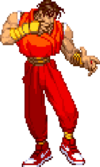
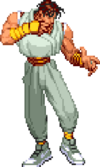
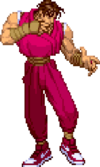
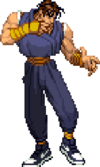
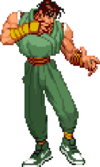
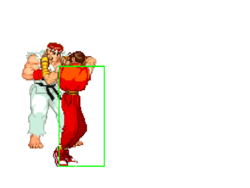
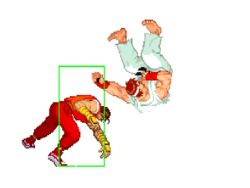
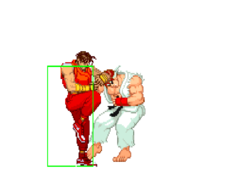
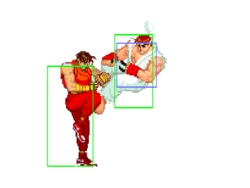
Guy's command of ninjitsu fuels his belief that he is a descendant of a ninja. An intelligent fighter, Guy balances street smarts with the ninjitsu tradition. Instrumental in the downfall of the Mad Gear Gang, Guy trounces evil wherever it lurks.
Players to watch: Alex Valle, bunnyconda
Obviously Guy was an overpowered character in SFA1 with crazy redizzy combos, so it was only natural that Capcom nerfed him in SFA2. I believe he's got to be somewhere in the middle. He may be at disadvantages against some characters, but he can still win if you know what you're doing.
| Strengths | Weaknesses |
|---|---|
|
|
Normal Moves
| SFA2 Framedata Glossary | |
|---|---|
| Damage |
Units of base damage inflicted by the move (100% life bar = 144 units of health). Most moves have a damage range; the number inside the square brackets indicates which Random Damage Table the move uses to look up any additional damage and the % chance of doing so. |
| Stun |
Units of stun inflicted by the move. |
| Startup |
The frame the move hits on (1st active frame). Super moves with a screen freeze will separate pre- and post-screen freeze startup frames by a '+' (Ex: 5+0). |
| Active |
The portion of a move that can hit. How many frames a move remains active for. ()=Inactive frames in-between active frames. [xN]=Repeated sequences. |
| Frame Adv |
The frame advantage values when the attack is blocked. (Add +1 frame to all OnBlockAdv values for the move's OnHitAdv value; Ex: +2oB/+3oH, -4oB/-3oH) |
| Meter |
The units of meter gained on whiff/block/hit. (48, 96, and 144 units of meter are required for 1, 2, and 3 bars of meter respectively) |
| Block |
Low attacks must be blocked crouching. High attacks must be blocked standing. Mid attacks can be blocked either way. |
| Properties |
|
| Frames |
All framedata collected with the game speed set to normal, where the game tickrate and framerate are the same(60fps). |
| Speed |
All framedata collected with the game speed set to normal. |
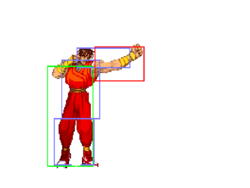
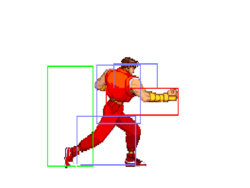
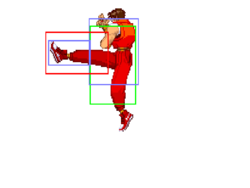
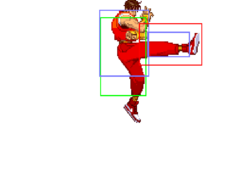
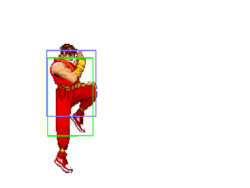
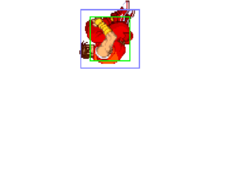
| Hitboxes |
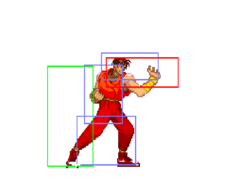
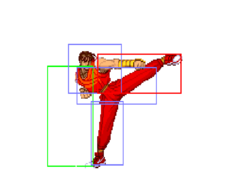
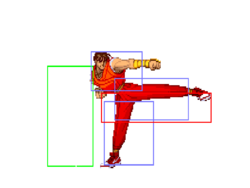
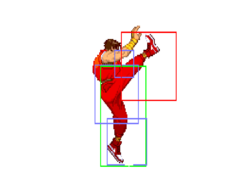
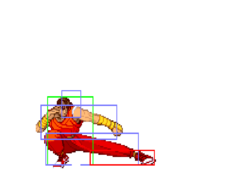
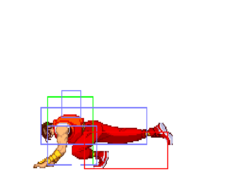
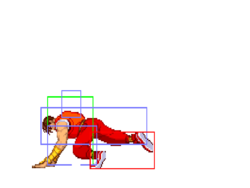
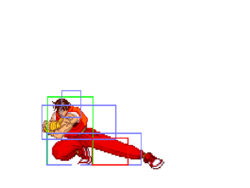
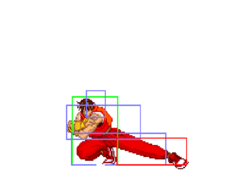
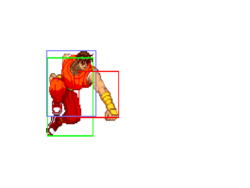
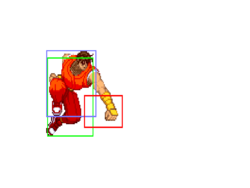
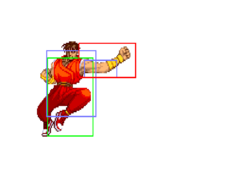
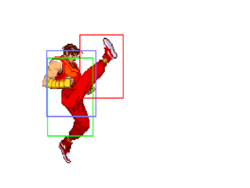
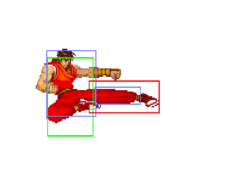
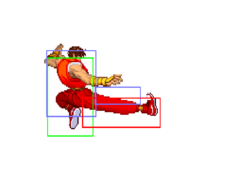
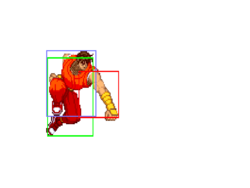
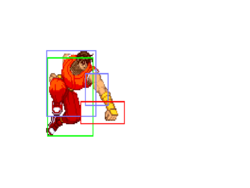
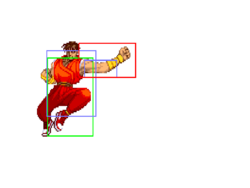
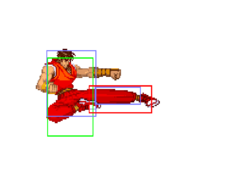
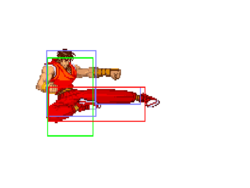
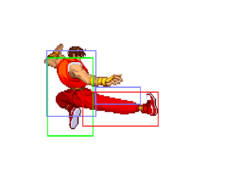
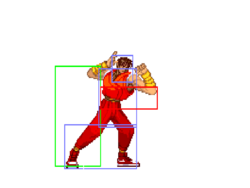
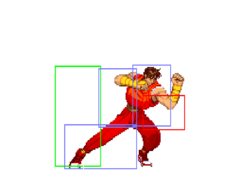
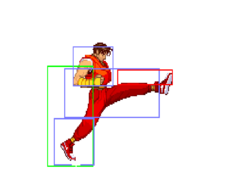
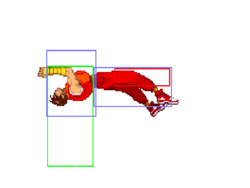
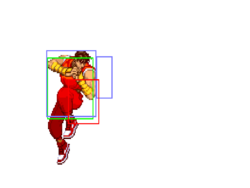
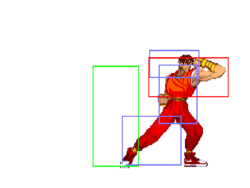
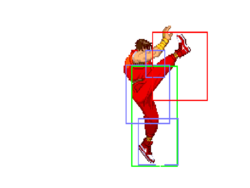
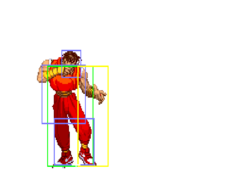
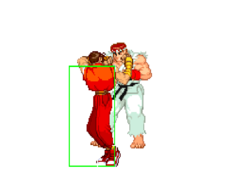
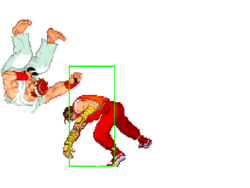
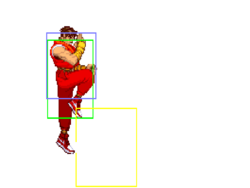
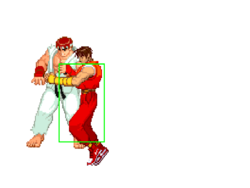
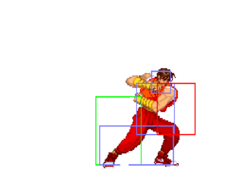
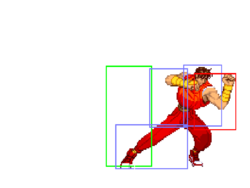
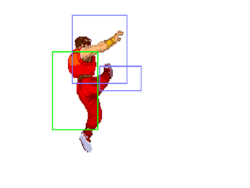
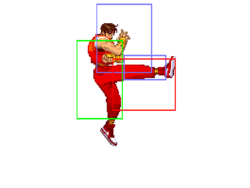
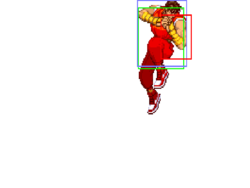
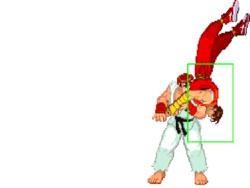
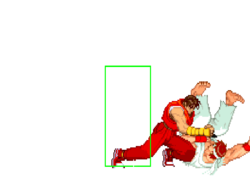
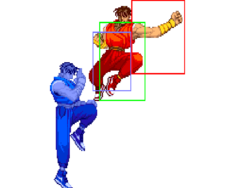
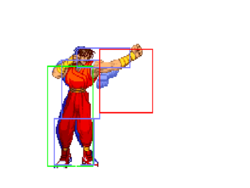
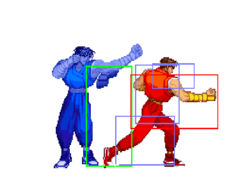
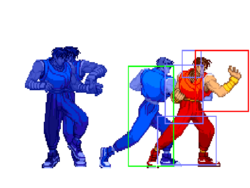
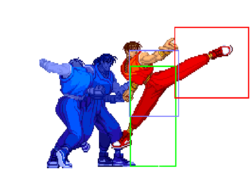
All hitbox images have the character standing/jumping in the exact same position, so hitbox distances can be easily compared.
|
| Credit | Damage, stun, framedata, meter, and updated hitboxes collected by |
Standing
Crouching
Neutral Jumping
Diagonal Jumping
Command Normals
Kubi Kudaki
Overhead, Neck Breaker![]() +
+ ![]()
| Damage | Stun | Startup | Active | Frame Adv | Meter | Block | Properties |
|---|---|---|---|---|---|---|---|
| 13[1], 5[1] | 3, 3 | 23 | 4(0)4 | -3 | 1/1+2 per hit/1+5 per hit | - |
- Hits 2 times.
- Tied for 2nd fastest overhead in the game. (Alpha2Overheads).
A fast two-hit overhead that is unreactable on Turbo 2. After it hits, try doing a standing MP into qcf+LK, K to close the distance, or try a qcb+MK since people often tend to throw out an attack after getting hit by an overhead.
Hiji Otoshi
Elbow Drop
(in air) ![]() +
+ ![]()
| Damage | Stun | Startup | Active | Frame Adv | Meter | Block | Properties |
|---|---|---|---|---|---|---|---|
| 9[1] | 8 | 5 | 32 | - | 0/2/5 | - |
- Changes jump trajectory.
- Can be done with any down direction:
 ,
,  , or
, or 
Definitely has its uses since you can use it to stop your jump short, which is good since Guy’s jump is so floaty. Getting tired of shotos Dragon Punching you? Do an early jumping d+MP to stop short and make them whiff. The problem with this move is that if it hits, it’s very difficult to land it “deep” and combo after it, so you might get thrown after one connects. Use it with caution.
Target Combos
Bushin Gokusaken
Bushin Chain![]() ,
,![]() ,
,![]() ,
,![]()
| Damage | Stun | Startup | Active | Frame Adv | Meter | Block | Properties |
|---|---|---|---|---|---|---|---|
| 5[0], 8[1], 13[2], 15[2] | 1, 3, 1, 6 | N/A | N/A | +5, +2, -5, -2 | 0/10/22 |
- Last hit is a hard knockdown.
His classic attack combo from Final Fight. Unfortunately, it’s not quite as useful in this game. For one thing Standing LP whiffs against 14 of the 18 characters in this game when they’re crouching. That’s not good. Since most opponents are going to be in crouch block when you’re close, this means you won’t have a chance of even starting the chain up unless something forces them to stand.
And of course, the timing on this chain isn’t easy. It’s hard to properly explain the timing, so I would recommend practicing the timing on your own against a dummy opponent until you can get it down. There’s a certain rhythm to it and the only way to get a feel for that rhythm is by practicing it a lot. Of course, you’ll then have to recompensate your timing a little bit for GGPO lag, but it’s still better to get a general feel for the timing on your own first.
Another problem is that the last hit often whiffs entirely if you’re not close enough. Even worse, if done in the corner, the last hit misses most characters for no reason at all, even if you started it from point-blank range!
If you can’t get the timing down, don’t worry about it too much, because it’s not an absolutely vital part of Guy’s game. It’s just there for fun (and Final Fight fanservice, I guess)
So why bother doing the Bushin Chain in the first place? STYLE. Well, I think it looks stylish anyway. Keep in mind it does about 25% damage and a lot of stun too. If you don’t have meter and someone whiffs a DP or super or something, bust out with the Bushin Chain!
Normal Throws
| Damage | Stun | Startup | Active | Frame Adv | Meter | Block | Properties |
|---|---|---|---|---|---|---|---|
| 17[0] | 0 | 1 | N/A | N/A | -/-/3 | N/A |
- Deals 8 damage when opponent tech throws.
- Guy has below average throw range (Alpha2ThrowRanges).
| Damage | Stun | Startup | Active | Frame Adv | Meter | Block | Properties |
|---|---|---|---|---|---|---|---|
| 9[0]+1xN = 13-18 | 0 | 1 | N/A | N/A | -/-/3 | N/A |
- Mashable throw from both sides to add or reduce the number of hits. With a min of 4 and a max of 9 hits.
- Does not side switch.
- Deals 10 damage when opponent tech throws.
- Guy has below average throw range (Alpha2ThrowRanges).
Tsukami Nage -> Bushinryu Seoi Nage
Kick Throw -> Shoulder Throw![]() /
/![]() +
+ ![]() /
/![]() ,
, ![]() +
+ ![]() /
/![]()
Izuna Otoshi
Air Throw
(in air) ![]() /
/![]() +
+ ![]() /
/![]()
Alpha Counters
Punch Alpha Counter
(while in blockstun)![]() +
+ ![]()
Kick Alpha Counter
(while in blockstun)![]() +
+ ![]()
Special Moves
Useful for applying pressure. Buffer into it off a blocked normal move and you might hit them if they flinch. Unfortunately it's only a guaranteed combo after a standing or crouching HP, or a standing MP-HP chain. Whenever you get an opening and you don't have meter, always do Standing HP into qcb+HP to punish, or Standing MP-HP into qcb+HP if you're close enough. Even if you screw up your timing and they block, you'll be safe.
- Hits 1 time.
- Unscaled damage in CC.
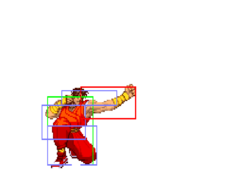
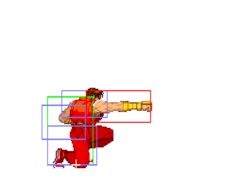
![]() - [Hitboxes pictured]
- [Hitboxes pictured]
![]()
![]()
Bushin Senpukyaku
Whirlwind Kick, Hurricane Kick, Tatsu![]() +
+ ![]()
![]()
- Hits 1 time.
Isn't very useful, it goes through fireballs but usually whiffs against crouching opponents, and even if it hits you only get one hit.
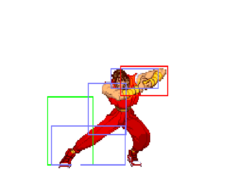
![]() - [Hitboxes pictured]
- [Hitboxes pictured]
- Hits 2 times.
Best version to use. It beats so many normal moves on the ground clean, it's an excellent counter. It even makes for a great AC reversal if you're expecting one of your normal moves to be AC'ed (although it mostly only works against Kick ACs). Problem is it leaves you vulnerable to a sweep or CC if they block it. The ![]() version does go through fireballs also if the kick hits.
version does go through fireballs also if the kick hits.
![]()
- Hits 3 times.
Practically always misses crouchers because it goes so high. Use it only in juggles (especially if you can buffer into it off an anti-air normal move) and CC's.
Izuna no Hiji Otoshi
Bushin Flip -> Elbow Drop![]() +
+ ![]() ,
, ![]()
| Version | Damage | Stun | Startup | Active | Frame Adv | Meter | Block | Properties |
|---|---|---|---|---|---|---|---|---|
| 4[4] | 4 | 11 | 15 | - | 0/2/5 | - |
If you're out of throw range you will get an elbow instead that does pitiful damage. If you land it against a crouching opponent, you can actually combo after it if you're fast enough. Try crouching LK into qcb+MK for a 4-hit combo that knocks them down. Be careful though, if your timing is off or the elbow gets blocked, whiffing the qcb+MK will leave you vulnerable.
Bushin Izuna Otoshi
Bushin Flip -> Throw![]() +
+ ![]() ,
, ![]()
| Version | Damage | Stun | Startup | Active | Frame Adv | Meter | Block | Properties |
|---|---|---|---|---|---|---|---|---|
| 19[0] | 0 | 1 | N/A | N/A | 7/-/- | N/A |
- Can't throw an opponent who's at the edge of the screen or crouching.
I generally don't use all that much, because you're a sitting duck during the jump. If you use the wrong strength button you'll usually stop short or fly past them, the latter of which is always dangerous. Nonetheless, it looks cool if you can successfully predict a fireball with it and grab them out of it. Remember that it doesn't grab if they're stationary in the corner, but if you can grab them out of certain moves (such as... well, a fireball) you will get the grab. Plus you have a potential juggle in the corner!
Hayagake: Kyuuteishi
Run -> Stop![]() +
+ ![]() ,
, ![]()
| Version | Damage | Stun | Startup | Active | Frame Adv | Meter | Block | Properties |
|---|---|---|---|---|---|---|---|---|
| N/A | N/A | N/A | N/A | N/A | 5/-/- | N/A | - |
Very, very useful. Buffering into it off a normal move is almost always a good idea since it gives you an opportunity to get back in their face, instead of getting pushed back by the normal move. Of course, a great thing to do after a cancelled dash is to throw since you're so close to them. If you think they're going to reverse, use qcb+MK or CC. Or just do a crouching MK cancelled off the first hit into ANOTHER dash, etc. Whenever you throw someone across the screen and they're not in the corner, use the dash to get close to them. Remember, using the dash cancel is free super meter!
Another thing to keep in mind about the qcf+LK dash is that you do NOT have to push LK again to cancel the dash. Either MK or HK will cancel it, as long as you started the dash with qcf+LK. I find it easier to "piano" the buttons and hit MK immediately after the qcf+LK, instead of hitting LK twice in a row. Your mileage may vary, see what method works best for you.
Frame Advantage after cancelling from a:
- Light attack: -8
- Medium attack: -3
- Heavy attack: +1
Hayagake: Kage Sukui
Run -> Slide![]() +
+ ![]() ,
, ![]()
Hayagake: Kubikari
Run -> Overhead![]() +
+ ![]() ,
, ![]()
| Version | Damage | Stun | Startup | Active | Frame Adv | Meter | Block | Properties |
|---|---|---|---|---|---|---|---|---|
| 10[10], 4[8] | 9, 1 | 25 | 4(2)9 | -8 at worst 0 at best |
5/7+1/9+3 |
- Punishable on hit.
- Hits 2 times.
This move is garbage. Don't ever use it, unless they're almost dead and blocking low. There is no reason to ever use this if they have a lot of life, because it's punishable on hit.
Super Moves
Startup Invulnerability Notes:
- At the end of a super screen freeze, projectiles will start moving before the opponent's character is unfrozen, giving the supers more projectile invul. frames than hit invul. frames.
Can juggle it after a Bushin Izuna Otoshi in the corner. For the most part, Guy shouldn’t be using meter on super moves. Save the meter for CC’s or AC’s.
- A full 2 quarter-circles isn't required. Required inputs:


 +
+ 
Level 1
- 6 frames of startup hit invul.; 0 of which while active.
- 11 frames of startup projectile invul.
- Hits 4 times.
Don’t bother at level 1, it trades hits most of the time.
Level 2 - [Hitboxes pictured]
- 6 frames of startup hit invul.; 1 of which while active.
- 12 frames of startup projectile invul.
- Hits 5 times.
Level 2 is a guaranteed anti-air because of it's invul.
Level 3
- 6 frames of startup hit invul.; 2 of which while active...kinda.
- 13 frames of startup projectile invul.
- Hits 6 times.
Level 3 is a guaranteed anti-air because of it's invul.
Bushin Goraikyaku
Shadow Barrage![]()
![]() +
+ ![]()
Garbage, unless you’re really good at hit-confirming. Depending on the distance you’re at, some parts of the super will whiff sometimes. You can get much more damage with a CC. Pretty much the only time it's ever use is to kill someone with chip damage. For the most part, Guy shouldn’t be using meter on super moves. Save the meter for CC’s or AC’s.
- A full 2 quarter-circles isn't required. Required inputs:


 +
+ 
Level 1 - [Hitboxes pictured]
- 4 frames of startup hit invul.; 0 of which while active.
- 8 frames of startup projectile invul.
- Hits 4 times.
There is a gap before the last hit that the opponent can act within.
Level 2
- 5 frames of startup hit invul.; 1 of which while active.
- 9 frames of startup projectile invul.
- Hits 6 times.
Level 3
- 6 frames of startup hit invul.; 2 of which while active...kinda.
- 10 frames of startup projectile invul.
- Hits 7 times.
The Basics
one word - rushdown.
Your general plan of attack should be to land knockdowns. Knocking the opponent down starts a wakeup guessing game that is mostly in Guy’s favor. Look at the things he can do to someone getting up from a knockdown:
- Crouching MK (if they don’t block, they get knocked down again)
- f+MP overhead
- Throw out a crouching LP or LK, then throw (another knockdown)
- Do nothing, then throw
- Do a crouching LP or LK, and if you think they’re going to try to reverse your throw, activate CC instead
- If in the corner, jump straight up and come down with a jumping HK or d+mp, then proceed to do any of the above options (or if you fear an AC, don’t do an attack on the way down and throw when you land)
- Do nothing and bait their wake-up move/super/CC
etc, etc. He has so many options on what to do to someone getting up, so the most important thing to do is to keep all these options in mind and MIX THEM UP! Don’t just alternate between crouching MK and f+MP every time, toss in some throws too. Sooner or later they’re going to pull off some sort of reversal and turn the tide so you’ll have to know when to back off too.
I initially thought an ACR was just an option select, and I think for certain characters you’ll be definitely be going for the OS. However, there are times when I am able to simply react to the AC and enter the motion with fairly slow timing. It might be the PS2’s slower speed setting or being my too used to online play to be so surprised about this, but I think in most situations you can simply watch for the AC and quickly input your reversal move. Any thoughts? I read something like this literally a decade ago on A.G.S.F.2 - reacting to the AC rather than buffering/using an OS.
Everybody knows that Guy can combo his punch super after a Bushin Chain against a cornered M.Bison - but how well-known is the fact that he can do this against regular characters like Ken? The timing is really severe and I’ve only actually done this a handful of times, but it could be worth looking into. I think the idea is to delay the Roundhouse input as late as you can, allowing a slightly higher bounce, then do the super as fast as possible. I was only able to connect the Level 2 punch super on the left side corner, if that helps.
His running slide (QCF+Forward,Forward), although laggy and slow and hard to combo, does a lot of stun (I forget the numbers, but standing Strong-> standing Fierce-> Forward slide x 2 will stun most of the cast). I think it’s well worth learning the timing, i.e when to press kick a second time so that the slide will combo after the Fierce. I’m almost certain there is a little more technique required than simply mashing kick as fast as possible.
Punch throw versus kick throw when not in the corner: punch throw does more damage than the kick throw when teched; kick throw allows you to follow-up with a cross-up (and possibly into a tick attempt etc.).
Cross-up loop: combo into his [Forward Hurricane Kick-> walk backwards till they land/bounce-> cross-up Forward-> crouching Short->] x N. The cross-up can be difficult to judge/block, which makes whoever is familiar with this loop more likely to recovery roll after being hit with a Hurricane Kick, which you can punish with crouching Forward-> Forward Hurricane Kick-> loop; crouching Forward-> punch super, or a CC. You can use his jumping D+Strong in similar ways, and that move can be even more ambiguous as a cross-up. For Zangief, the loop is cross-up Forward-> standing Jab x 2-> standing Strong-> Roundhouse Hurricane Kick x N. I think his wake-up Lariat can be safe-jumped by Guy’s cross-up, which you can then punish with a walk-in CC.
Advanced Strategy
High Knockdown Juggles
Now the easiest way to land an HKD is to hit them when they ground recovery roll after a CC. So whenever you land a CC, ALWAYS follow it up with a Crouching MK (both hits). If they roll, they get knocked up into HKD state.
If you manage to land an HKD, a qcb+MK (1 hit) or qcb+HK (2 hits) hurricane kick is guaranteed on every character. The HK version is harder to land since it has to be timed perfectly, but obviously it does do more damage than the MK version. I find that the HK version is easier to land on bigger characters like Zangief or Sagat. For the most part I would recommend sticking with the MK version unless you’re sure of your timing - if you whiff the HK version and they recovery roll, you’re in trouble.
Sample of a qcb+MK HKD at approx 87 seconds left in the 1st round of this video. (I’ll replace this with a link of one showing a qcb+HK later probably)
An alternate means of doing the HKD is to do a qcb+P before they hit the ground - if they roll, the qcb+P will knock them out of it and send them HELLA HIGH up into the air, which looks pretty amusing. A qcb+HK is easy as pie to juggle in this situation, if you can actually get the HKD off the qcb+P in the first place. I always forget about it and just do a crouching MK when they’re getting up instead.
Other Juggles
Besides the HKD’s, Guy can also use the qcb+MK/qcb+HK and even his qcfx2+P super in certain instances to juggle people.
As mentioned before, if you land a qcf+P Bushin Grab that puts them in the corner, you can do a juggle afterwards. qcb+MK is guaranteed on every character, qcb+HK seems to work on “big” characters. Or of course you can juggle any level of the qcfx2+P punch super! This looks very stylish and does great damage overall. The timing on this is pretty hard though. I would definitely recommend practicing this offline to get a feel for the timing on these juggles, because it isn’t easy.
Here is a video of B-IzM landing the qcfx2+P super after the grab TWICE in one match (both times are in the 2nd round)
In the corner, Guy’s kick grab (the knee bash) can also be juggled after! But this is pretty pointless because timing a juggle after it is nearly impossible - you don’t know when Guy is going to let go of the opponent, it all depends on how well both you and your opponent mash during it. Generally, Guy usually lets go after the 6th or 7th knee bash if you’re doing a good job of mashing. The same moves juggle here, the qcb+MK/HK or the qcfx2+P super. I would seriously recommend against ever trying for the super though - with the timing being so random, it’s a waste of a super level. Try for a qcb+MK if you’re feeling saucy, and if the moon and the stars align, you might just land that extra juggle hit!
Here is a video of the one and only time I’ve ever been able to land qcfx2+P super after a kick grab in the corner. I’m sorry, VariantX. :frowning:
Another thing that should always be kept in mind is that buffering into any of the aforementioned juggle moves against an airborne opponent will also cause a juggle! Say the opponent jumps at you, and you use Guy’s crouching HP as anti-air. Don’t stop there, buffer into a qcb+HK. You might score an extra 1 or 2 hits, and more importantly it’ll knock them down, as opposed to making them land on their feet. Always try to get into the habit of doing this if they jump at you.
RSX note* grab your opponent with mk everytime and count the hits, dont mash thoough. This should lead to the same amount of hits each time, allowing you to know when to super.
Small/Big Characters
There are 4 characters in the game that should be considered “small characters” because of how small their sprite is when they’re crouching, and then 4 “tall characters” who have problems ducking under specific attacks. This has a huge effect on Guy because the small characters are disastrous for him and the tall characters give him a couple advantages he doesn’t have against the rest of the cast.
Let’s start with the small characters. The 4 small characters are:
Charlie, Rose, Sakura, [another] Guy
So what is the problem Guy has with these characters? It’s just one thing - Standing HP whiffs against any of these characters when they’re in crouch block. This is a huge problem, because Guy’s Standing HP is an incredibly useful ground move, because of the fact that it has good range/priority, and is bufferable (and is one of only two moves that is guaranteed to combo into a qcb+P on the ground). This also affects his Standing MP-HP chain, as the MP will hit a croucher and then the HP whiffs. Another unfortunate side effect of this is that if you go for a throw with Fierce, and it whiffs because you were either out of range or they were in blockstun/hitstun, you’ve just whiffed a standing move at close range and are in prime position to get thrown or CC’ed back. So basically, against any of these characters, you need to get out of the habit of using Standing HP as a poke when fighting them.
Now, the tall characters. These 4 are:
Dhalsim, Sagat, Sodom, Zangief
Yeah, I don’t know why Dhalsim qualifies as a tall character in crouch block and Birdie isn’t, but that’s SFA2 for you. Against any of these characters, Guy’s Standing Jab hits them when they crouch block. This isn’t a very significant advantage, but it means that these are the only 4 characters he’s guaranteed to be able to connect a Bushin Chain on when they’re ducking. Even if they block, you can use the Bushin Chain as a way to keep the pressure on and build meter (although beware of AC’s).
Another nice perk against these characters is that if you connect a qcf+P Bushin Grab against any of them in the corner, you can juggle with an HK hurricane kick instead of an MK one so you get two juggle hits instead of one. Of course, timing the juggle in the first place is really hard to land consistently, and the HK version will leave you a lot more vulnerable if you whiff, so maybe it’s not that great an advantage anyway! (it MIGHT be possible to connect the HK hurricane kick juggle against other characters, but I haven’t found any)
Combos
Custom Combos
This is where your super meter should be going. Although his CC's aren't anywhere close to being the most damaging in the game, they are very solid and give him the potential for an HKD juggle afterwards. Standard CC's activated against a ground opponent:
Level 1 CC - Activate, Crouching MK, qcb+hp, qcb+hp, qcb+HK - 35% damage or so.
You have to be fast to get two qcb+hp - if you're not fast enough, the meter will run out before the qcb+HK can juggle. If you're not sure you can connect two qcb+LP's, do one instead and then the qcb+HK. It's highly recommended to go for two though, especially if you have about 1.5 meters.
Level 2 CC - Activate, Crouching MK, qcb+HP, qcb+HK, qcb+HK - 45% damage
I think the qcb+HP gives slightly more damage than qcb+LP but is also slightly slower - although it's nearly impossible to tell in a CC.
Level 3 CC - Activate, Crouching MK, qcb+HP, qcb+HK, qcb+HK, qcb+HK - around 60% damage!
You have to be fast to get three qcb+HK's in. If you're not sure you can do it, try substituting a qcb+MK for one of the HK's - the damage will end up roughly the same anyway.
RSX note* If you get a blow out of punishing a whiff dp etc, do this cc at lvl 3:
df+hk (1 hit), qcb+hp x5, qcb+hk (about 75%) (lvl 3)
An alternate means of starting the CC is to do it with a Standing MK instead of a Crouching MK - this is useful if they whiff a move from a distance. They might think they're out of range from retaliation, but you can suck them in from half-screen distance with this! Only use a Standing MK if you're sure they can't block it though - in any other circumstance it's wiser to start with Crouching MK because of the whole "Valle CC" effect of catching an opponent in standing block.
RSX note* s.mk cc is nasty, it allows you to punish a lot of shit like blocked fireball or sagats s.mk on block/hit.
However, let's say they anticipated your CC and were blocking low ahead of time when you activate. Whoops! What you can now do is his f+MP overhead to break their guard, then do a crouching/standing MK into a qcb+P, possibly followed by a qcb+HK if you have enough meter. This isn't as good as it sounds though, as the f+MP is still pretty slow, and after you land this once, your opponent will be more likely to be on the lookout for this and poke you out of it. If that starts happening, try to keep doing crouching MK's to try to trip them up. Don't do them rapid-fire, wait a little bit between each one. If it doesn't work and you blow all your meter... well, that's life.
You can also use CC’s as anti-air, but it’s pretty tricky. Unfortunately most of Guy’s normals are too slow to be able to properly use the short invincibility from the CC. I’ve had some success with starting anti-air CC’s with Standing Jab though. If you get an anti-air CC started, don’t bother with the qcb+P, since they’re already airborne. Go straight into qcb+HK’s. If they’re already in the air, you can get two qcb+HK’s even at level 1!
His AA cc is too good, Ive never seen it trade, basically there are a few variation at lvl 3, lower lvls just hk hurricane.
AA CC 1: s.lp, qcf+hp, qcb+hp x3, qcb+hk AA CC 2: s.lp, qcb+lk x3, qcb+hk AA CC 3: s.lp, qcb+hk x3 or qcb+lk x3, qcb+hp OR s.lp qcf+hp,p, qcb+hp x3, qcb+hk
Another reason landing a CC is important is because Guy is one of the few characters that can take full advantage of the “High Knockdown Juggle” glitch! See the "Advanced Strategy" section for more on the HKJ glitch.
Guy:
lvl 1- c.mk xx hp shoulder x2, hk hurricane
lvl 2- c.mk xx hp shoulder x3, hk hurricane
lvl 2- c.mk xx hp shoulder, hk hurricane x2
lvl 3- c.mk xx hp shoulder x4, hk hurricane
lvl 3- c.mk xx hp shoulder x3, hk hurricane x2
lvl 3- df+rh xx hp shoulder x5, hk hurricane
aa cc- s.lp xx hk hurricane xN
aa cc lvl 3- s.lp xx qcf+hp,p, hp shoulder x 3, hk hurricane
Near corner on standing tall opponent- c.fp xx qcf+p, grab, mk hurricane, hk hurricane
Match-ups
Ryu can fireball in his face and keep him out with footsies and AC Guy when Ryu has meter. Usually Ryu likes to be in a position where it’s hard for Guy to react to fireballs(hard to lightning drop) and Guy likes to be within range where his pokes are most effective such his standing forward. For this reason, putting ACs and Fireballs into Guy’s face makes it difficult for Guy to win. Either he gets ACed when ryu is blocking or Guy gets hit by fireball while sticking out a move or Guy just blocks the fireball. He almost has to guess when Ryu will fireball and he can hurricane kick through the fireball. Guy cannot jump at this range because his jump is so high. If guy misses with the hurricane kick, then Ryu can retaliate with combos.
Gief beats a lot of what Guy does. The Guy player has to really, really be on point to handle him. For one, Guy has no real answer to gief jumping in…without spending meter. If you see he has none it’s free jump ins more than likely into a 360, or block if you expect a reversal hurricane. It’s kinda obvious saying it, but I figure I’ll mention it anyway. You don’t have to go for a 360 everytime you jump in. Just the fact that it’s such a threat is a metagame in itself. You can jump in and then block, if you see they activated you can KKK lariat on reaction (or CC their CC if you have the timing.) You can also jump in and go for a CC yourself. A lot of people get nervous with gief in close, and it’s a really easy way to land CCs with him since people more than likely won’t be sitting there. Just some stuff to think about.
I wouldn’t try to 360 his run, it’s safe as long as they are executing it correctly. What I would attempt to 360 though is a flip into elbow, it’s 360 bait most of the time. I remember playing you a while back, basically don’t be so predictable with lariats. Guy is gonna try to run a real tight poking and harrassing with shoulder game on gief. You can’t really punish the shoulder unless it’s a fierce shoulder point blank maybe. Just stick to basics and win with gief’s solid normals, antiairs, and mixup.
Guy does fine unless he gets knocked down. You can c.mp, s.lk, s.lp and cc a lot of Gief jump ins, you just have to know the ranges, but he can get him knocked out the air at most ranges. Pretty much a poke fest and abuse s.fp.
Zangief’s kick AC will beat all versions of the ACR Hurricane kick, but will lose to the (Level 2 and above) punch super. Zangief’s kick AC will also whiff against Guy if Guy uses any crouching attack to trigger the move. Zangief’s punch AC is fairly easy to reverse with any strength Hurricane Kick from a mid-to-far distance, but will consistently beat Guy’s Roundhouse Hurricane Kick when very close.
Backwards jumping Strong is an instead overhead against Zangief and possibly Sagat. You need to hit Strong the instant you leave the ground, but is completely safe if blocked, beats any wake-up 360 attempt, and can occasionally tag the wake-up Lariat. Entice your opponent into this anticipating the overhead, and then start throwing Zangief when he wakes up.
