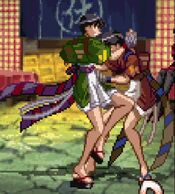
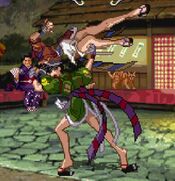
Advanced V.G. 2/Kyoko/Move List

From SuperCombo Wiki


Move List

Normals

Lp.png
AVG2 Kyoko stLP.jpg
Damage Guard Startup Active Recovery Frame Adv
Mid - - -

A short elbow jab, the speed and recovery on this bad boy is insane, it has no chains but due to how fast it is it can link into every other standing or crouching normal she has. The range is also much better than what it looks like, albeit still a short jab. Special cancelable.


Lk.png
AVG2 Kyoko stLK.jpg
Damage Guard Startup Active Recovery Frame Adv
Mid - - -

A long front kick, one of Kyoko's best space control tools as she link it into itself and special cancel it (although linking multiple times will put you out of range for an Ominaeshi)


Hp.png
AVG2 Kyoko stHP.jpg
Damage Guard Startup Active Recovery Frame Adv
Mid - - -

An upward palm strike, awful horizontal range means this is primarily used in juggle combos. Special cancelable.

Chains to:
Hk.png / D.pngHk.png

Hk.png
AVG2 Kyoko stHK.jpg
Damage Guard Startup Active Recovery Frame Adv
Mid - - -

A reverse kick, kinda useless as it actually has less range than stLK and has so much pushback that special canceling it into Ominaeshi will whiff anywhere but point blank. This will move Kyoko forward a little bit after recovering.


D.pngLp.png
AVG2 Kyoko crLP.jpg
Damage Guard Startup Active Recovery Frame Adv
Mid - - -

A quick punch, much like its standing version it too can link into every other standing or crouching normal and is special cancelable.


D.pngLk.png
AVG2 Kyoko crLK.jpg
Damage Guard Startup Active Recovery Frame Adv
Low - - -

A quick low kick with good range and good recovery, can link into itself and 2LP but does not offer enough hitstun for anything else. Is special cancelable.


D.pngHp.png
AVG2 Kyoko crHP.jpg
Damage Guard Startup Active Recovery Frame Adv
Mid - - -

A rising palm strike from crouching position, Kyoko's launcher. The goal is to link into this because this is what starts her damage and thusly starts her gameplan.


D.pngHk.png
AVG2 Kyoko crHK.jpg
Damage Guard Startup Active Recovery Frame Adv
Low - - -

A good sweep, acceptable range, special cancelable, and is her OTG pickup.


j.Lp.png
AVG2 Kyoko jLP.jpg
Damage Guard Startup Active Recovery Frame Adv
High - - -

Kyoko adds a little spice to her palm strike by using her sandal as a weapon. A very fast air normal with a good hitbox and active length.

Chains to:
j.Lk.png > j.Hp.png > j.Hk.png
Any button may be omitted, HP/HK may be swapped

j.Lk.png
AVG2 Kyoko jLK.jpg
Damage Guard Startup Active Recovery Frame Adv
High - - -

A downward angled kick, better range than j.LP and chains into all other air normals.

Chains to:
j.Lp.png > j.Hp.png > j.Hk.png
Any button may be omitted, HP/HK may be swapped

nj.Lk.png
AVG2 Kyoko njLK.jpg
Damage Guard Startup Active Recovery Frame Adv
High - - -

An upward angled kick, shorter range than the diagonal version but is her only air normal made for catching someone your height or higher.

Chains to:
j.Lp.png > j.Hp.png > j.Hk.png
Any button may be omitted, HP/HK may be swapped

j.Hp.png
AVG2 Kyoko jHP.jpg
Damage Guard Startup Active Recovery Frame Adv
High - - -

The sandal is back! The range is a little too shallow to use as a jump in but otherwise a good enough button for air control.

Chains to:
j.Hk.png

j.Hk.png
AVG2 Kyoko jHK.jpg
Damage Guard Startup Active Recovery Frame Adv
High - - -

Now THAT'S a jump-in! Kyoko puts her ankles into it as this move will hit anything below her. This can instant overhead a crouching opponent.

Chains to:
j.Hp.png

Command Normals

B.pngHp.png
AVG2 Kyoko 4HP.jpg
Damage Guard Startup Active Recovery Frame Adv
Mid - - -

A short-range hook slap. Special cancels, but doesn't really do a whole lot for you. Kinda slow and short and overall just dumpy.


Special Moves

Ominaeshi
AVG2 Kyoko Ominaeshi.jpg
Qcf.pngP.png ~ P.png
Version Damage Guard Startup Active Recovery Frame Adv
Lp.png Mid 8 - -

A short-range lackadaisical uppercut attack. Has an advancing elbow follow-up called Otokoeshi, performed by pressing P again. The strength of Otokoeshi is determined by the version of Ominaeshi used. The LP version stays in place. Can also be performed with SP1, but the follow up still requires pressing P.

Hp.png Mid 9 - - -

the HP version moves forward slightly. You want to use HP Ominaeshi in combos. Near and at max range, Otokoeshi will not connect on the ground.

Lp.pngHp.png Mid - - -

EX version has both hits come out automatically, deals strong damage and has some defensive utility due to it being an instant super at close range, so it's worth keeping a bar stocked for this if you need it.

Hcf.png + Hp.pngHk.png 1 Mid - - -

SECRET (No Flash): Essentially HP Ominaeshi, but with a notable difference to Otokoeshi: in exchange for a smaller hitbox and incredibly reduced damage (only dealing 1pt), it builds significantly more meter than other versions of the move -- a quarter of a bar on whiff, and half a bar on hit! Unlike most other secret moves, this is extremely useful for Kyoko, since meter is so important to the rest of her gameplan. However, bear in mind that when in range, Jinchouge will take priority over this move. Also unlike a lot of other secret moves, this does not overlap with an EX or Super, meaning you can continue to use it after you build 1 bar.


Shakunage
AVG2 Kyoko Shakunage.jpg
Rdp.pngP.png
Version Damage Guard Startup Active Recovery Frame Adv
Lp.png N/A 4 - - -

A series of three catch counters. LP version catches jumping normals and overheads. All versions launch for a juggle follow-up, good way to catch people out for being too predictable with their buttons in neutral.

Hp.png N/A 4 - - -

HP version catches grounded mids/highs.

Lp.pngHp.png N/A 4 - - -

LP+HP version also catches grounded mids/highs. Shakunage cannot catch lows or projectiles, but the LP+HP version side swaps.


Sazanka
AVG2 Kyoko Sazanka.jpg
Dp.pngK.png
Version Damage Guard Startup Active Recovery Frame Adv
Lk.png N/A - - -

Leaping anti-air grab. Even though it's unblockable, the lack of invincibility makes this move difficult to use as an anti-air. Its use in combos is highly valuable, though, since it provides a hard knockdown, setting up Kyoko's incredibly scary okizeme. Can also be performed with SP2.

Hk.png N/A - - -

the HP version leaps higher.

Lk.pngHk.png M/A - - -

The EX version is particularly useful since it deals more damage and is easily confirmable as a super cancel from Ominaeshi.

F.pngHcf.pngHp.pngHk.png Mid - - -

SECRET (no Flash): Effectively the same as HK Sazanka, except it travels the same height as the EX version. Jinchouge will take priority at close range (Housenka if you have 2 or more meters), while EX Sazanka will take priority if you have at least one meter.


Jinchouge
AVG2 Kyoko Jinchouge.jpg
cl.Hcf.pngHk.png
Version Damage Guard Startup Active Recovery Frame Adv
Hk.png N/A - - -

Kyoko's command grab. A nice option to have against people who are turtling up too much against your offense. In the corner, this can net you a combo with an OTG pickup, so it becomes doubly useful there. Bear in mind, though, that you need to be careful when executing this move from a dash -- if you have no meter you'll often get Sazanka, and if you have two bars you might accidentally let Hosenka rip. Best to try and tick into it.


Guard Cancels

Lp.png Guard Cancel
AVG2 Kyoko stHP.jpg
Damage Guard Startup Active Recovery Frame Adv

Uses Kyoko's Hp.png. A very good guard cancel option to use against airborne opponents, since its high angle will catch them and launch for a juggle.


Lk.png Guard Cancel
AVG2 Kyoko stHK.jpg
Damage Guard Startup Active Recovery Frame Adv

Uses Kyoko's Hk.png. More reliable against grounded opponents than LP guard cancel due to its horizontal range. Cancel into Ominaeshi for a combo afterwards.


Hp.png Guard Cancel
AVG2 Kyoko Ominaeshi.jpg
Damage Guard Startup Active Recovery Frame Adv

Uses Kyoko's Lp.png Ominaeshi.


Hk.png Guard Cancel
AVG2 Kyoko Sazanka.jpg
Damage Guard Startup Active Recovery Frame Adv

Uses Kyoko's Lk.png Sazanka.


Super Moves

Housenka
AVG2 Kyoko Housenka.jpg
cl.F.pngHcf.pngK.png
Damage Guard Startup Active Recovery Frame Adv
N/A 1 - - -

1F command grab super that's unjumpable after the flash. Because of the way the final group of hits work, the best damage will often come from landing this in the center of the screen (not the center of the stage). However, you can combo after this in the corner by following up with Ominaeshi (it will whiff, but Otokoeshi will hit), which you can then extend with a super cancel if you feel like dumping meter. Can also be performed with SP1+SP2.


Game Navigation

General
Controls
HUD
System
Advanced Mechanics
FAQ
Characters
Kyoko
Chiho
Tamao
Yuka
Satomi
Manami
Saki
Ayako
Elirin
Jun
Kaori
Reimi
Boss Characters
Material
Miranda