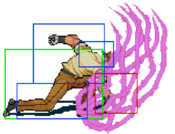
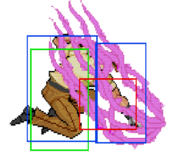
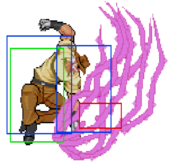
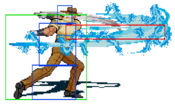
JoJo's Bizarre Adventure: Heritage for the Future/Old Joseph/Movelist: Difference between revisions
No edit summary |
(Updated descriptions of buttons and specials.) |
||
| (9 intermediate revisions by 2 users not shown) | |||
| Line 18: | Line 18: | ||
|damage= 3 | |damage= 3 | ||
|cancel= Special/Super | |cancel= Special/Super | ||
|properties= | |guard=Mid | ||
|properties=IPS=No Scales=Yes | |||
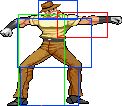
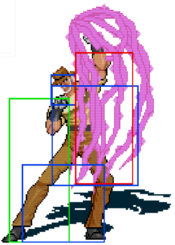
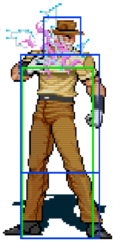
|description= Kinda high-hitting jab you can anti-air with rarely. Combos into almost every other button. Misses most crouchers. | |description= Kinda high-hitting jab you can anti-air with rarely. Combos into almost every other button. Misses most crouchers. | ||
}} | }} | ||
| Line 39: | Line 40: | ||
|damage= 6 | |damage= 6 | ||
|cancel= Special/Super | |cancel= Special/Super | ||
|properties= | |guard= Mid | ||
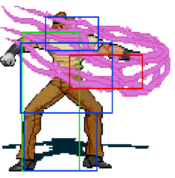
|description= Acts as a poke and as a situational anti-air. Extends forward so good reach. Don't expect it to beat much outright, better to punish start-ups and recoveries at long range. Being cancellable makes the not-so-great frame data somewhat negligible. Low-profiled by quite a few crouching characters but otherwise important for hitconfirming from jabs. | |properties= IPS=No Scales=Yes | ||
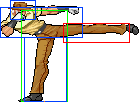
|description= Acts as a poke and as a situational anti-air. Extends forward so it has good reach. Don't expect it to beat much outright, better to punish start-ups and recoveries at long range. Being cancellable makes the not-so-great frame data somewhat negligible. Low-profiled by quite a few crouching characters but otherwise important for hitconfirming from jabs. | |||
}} | }} | ||
}} | }} | ||
| Line 60: | Line 62: | ||
|damage= 10 | |damage= 10 | ||
|cancel= Special/Super | |cancel= Special/Super | ||
|properties= | |guard= Mid | ||
|properties= IPS=No Scales=Yes | |||
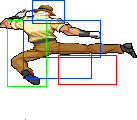
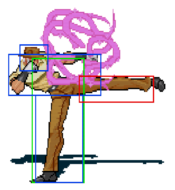
|description= Slow startup but a solid disjoint, making it one of his better anti-airs when you're spaced far enough, also good counterpoke. Opponents that are hit in the air are knocked away. Hits more crouchers than 5B but cannot be comboed into from jabs. | |description= Slow startup but a solid disjoint, making it one of his better anti-airs when you're spaced far enough, also good counterpoke. Opponents that are hit in the air are knocked away. Hits more crouchers than 5B but cannot be comboed into from jabs. | ||
}} | }} | ||
| Line 78: | Line 81: | ||
|block= -14 | |block= -14 | ||
|pushblock=-27 | |pushblock=-27 | ||
|guard= | |guard= High | ||
|damage= 9 | |damage= 9 | ||
|cancel= N/A | |cancel= N/A | ||
|properties= | |properties= IPS=No Scales=Yes | ||
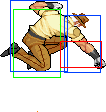
|description= Awful. The worst. Hits overhead, but is also punishable on hit. Never use this move. You might accidentally get this when trying to grab so do that with 4C instead. | |description= Awful. The worst. Hits overhead, but is also punishable on hit. Never use this move. You might accidentally get this when trying to grab so do that with 4C instead. | ||
}} | }} | ||
| Line 99: | Line 102: | ||
|damage=17 | |damage=17 | ||
|cancel= | |cancel= | ||
|properties= | |properties= | ||
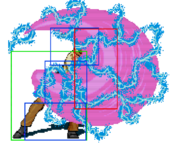
|description= | |description= IMPORTANT NOTE: The buttons that Old Joseph can get instead of grab (primarily 6C) are not very good, so you may like to try pressing S right before grabbing so if you do not get your grab you at least won't die for it. | ||
}} | }} | ||
}} | }} | ||
| Line 116: | Line 119: | ||
|block= +3 | |block= +3 | ||
|pushblock=0 | |pushblock=0 | ||
|guard= | |guard=Mid | ||
|damage= 3 | |damage= 3 | ||
|cancel= Special/Super | |cancel= Special/Super | ||
|properties= | |properties= IPS=No Scales=Yes | ||
|description= An unremarkable jab. Doesn't hit low. Still an OK combo starter and has decent range for poking.block= | |description= An unremarkable jab. Doesn't hit low. Still an OK combo starter and has decent range for poking.block= | ||
|pushblock= | |pushblock= | ||
}} | }} | ||
}} | }} | ||
| Line 139: | Line 141: | ||
|block= +4 | |block= +4 | ||
|pushblock=-4 | |pushblock=-4 | ||
|guard= | |guard=Low | ||
|damage= 4 | |damage= 4 | ||
|cancel= Special/Super | |cancel= Special/Super | ||
|properties= | |properties= IPS=No Scales=Yes | ||
|description= One of your more notable buttons. Low poke that is also used to build meter. Short range though. | |description= One of your more notable buttons. Low poke that is also used to build meter. Short range though. | ||
}} | }} | ||
| Line 160: | Line 162: | ||
|block= -10 | |block= -10 | ||
|pushblock=-18 | |pushblock=-18 | ||
|guard= | |guard=Low | ||
|damage= 6 | |damage= 6 | ||
|cancel= Special/Super | |cancel= Special/Super | ||
|properties= | |properties= IPS=No Scales=No | ||
|description= Similar to 2B but advances forward. As with most of your other dashing buttons, it is minus on hit, so you'll need to super or special cancel it to stay safe. | |description= Similar to 2B but advances forward. As with most of your other dashing buttons, it is minus on hit, so you'll need to super or special cancel it to stay safe. | ||
}} | }} | ||
| Line 181: | Line 183: | ||
|block= +4 | |block= +4 | ||
|pushblock=-9 | |pushblock=-9 | ||
|guard= | |guard=Mid | ||
|damage= 10 | |damage= 10 | ||
|cancel= Special/Super | |cancel= Special/Super | ||
|properties= | |properties= IPS=No Scales=Yes | ||
|description= Nice range and counterpoke, good hitstun that connects easily to custom combo. Also has other niche applications- primarily, hitconfirming into 236S 236C for a meterless command grab. | |description= Nice range and counterpoke, good hitstun that connects easily to custom combo. Also has other niche applications- primarily, hitconfirming into 236S 236C for a meterless command grab. | ||
}} | }} | ||
| Line 202: | Line 204: | ||
|block= -14 | |block= -14 | ||
|pushblock=-27 | |pushblock=-27 | ||
|guard= | |guard=Low | ||
|damage= 9 | |damage= 9 | ||
|cancel= Special/Super | |cancel= Special/Super | ||
|properties= | |properties= IPS=No Scales=No | ||
|description= Goes a little further than 3B and causes a hard knockdown. Seen most often as a part of Oldseph's strike/throw okizeme. | |description= Goes a little further than 3B and causes a hard knockdown. Seen most often as a part of Oldseph's strike/throw okizeme. | ||
}} | }} | ||
| Line 221: | Line 223: | ||
|recovery= | |recovery= | ||
|hit= | |hit= | ||
|block | |block= | ||
|pushblock= | |||
|damage=5 | |damage=5 | ||
|cancel= | |cancel= | ||
|properties=High | |properties= | ||
|description= | |guard=High | ||
|description= Pretty similar to S.J.A but has a better hitbox. Both make for good jump-ins. | |||
}} | }} | ||
}} | }} | ||
| Line 239: | Line 243: | ||
|recovery= | |recovery= | ||
|hit= | |hit= | ||
|block | |block= | ||
|pushblock= | |||
|damage=6 | |damage=6 | ||
|cancel= | |cancel= | ||
|properties= | |guard=High | ||
|description= | |properties= | ||
|description= Identical to J.A except for the slower startup. Use J.A. | |||
}} | }} | ||
}} | }} | ||
| Line 257: | Line 263: | ||
|recovery= | |recovery= | ||
|hit= | |hit= | ||
|block | |block= | ||
|pushblock= | |||
|damage=12 | |damage=12 | ||
|cancel= | |cancel= | ||
|properties= | |guard=High | ||
|description= | |properties= | ||
|description= A veritable classic. One of the best to ever to do it. Your best air button. Good range and very slight disjoint. It’s commonplace to see Joseph players pressing this constantly. Used in conjunction with shorthops to stuff the opponents attempts at approaching, as an air-to-air (sometimes into itself depending on the height and range to maximize damage, or as a jump-in that’s difficult to beat. Make this move your friend and it will reward you greatly. | |||
}} | }} | ||
}} | }} | ||
==Dashing== | ==Dashing== | ||
{{MoveData | {{MoveData | ||
| Line 275: | Line 284: | ||
|recovery=4 | |recovery=4 | ||
|hit=-1 | |hit=-1 | ||
|block | |block=-2 | ||
|pushblock=-17 | |||
|damage=3 | |damage=3 | ||
|cancel=Special/Super | |cancel=Special/Super | ||
|properties= | |guard=Mid | ||
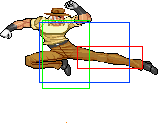
|description= | |properties= | ||
|description= Similar to D.5B but hits a little higher. | |||
}} | }} | ||
}} | }} | ||
| Line 293: | Line 304: | ||
|recovery=19 | |recovery=19 | ||
|hit=-16 | |hit=-16 | ||
|block | |block=-17 | ||
|pushblock=-34 | |||
|damage=6 | |damage=6 | ||
|cancel=Special/Super | |cancel=Special/Super | ||
|properties= | |guard=Mid | ||
|description= | |properties= | ||
|description= One of your better neutral tools. Covers a lot of space and can be cancelled at any point which makes it very useful. Primarily, D.5B 236A/B/ or 214S and D.5B 236S 236C. You’ll see Oldsephs fish for these often. | |||
}} | }} | ||
}} | }} | ||
| Line 311: | Line 324: | ||
|recovery=28 | |recovery=28 | ||
|hit=-23 | |hit=-23 | ||
|block | |block=-14 | ||
|pushblock=-27 | |||
|damage=10 | |damage=10 | ||
|guard=Mid | |||
|cancel= | |cancel= | ||
|properties= | |properties= | ||
|description= | |description= If this is blocked OR hits it’s over for you. Don’t use this! | ||
}} | }} | ||
}} | }} | ||
| Line 329: | Line 344: | ||
|recovery=5 | |recovery=5 | ||
|hit=-4 | |hit=-4 | ||
|block | |block=-5 | ||
|pushblock=-20 | |||
|damage=3 | |damage=3 | ||
|cancel=Special/Super | |cancel=Special/Super | ||
|properties=Mid | |properties= | ||
|description= | |guard=Mid | ||
|description= Another great button. Very similar to D.5B in function and application. Can also be used to go under projectiles such as Young Joseph’s clackers or Hol Horse’s standing gunshots. Unfortunately does not hit low. Has meaty applications as it is very plus when timed properly. | |||
}} | }} | ||
}} | }} | ||
| Line 347: | Line 364: | ||
|recovery=7 | |recovery=7 | ||
|hit=-17 | |hit=-17 | ||
|block | |block=-18 | ||
|pushblock=-26 | |||
|damage=10 | |damage=10 | ||
|cancel=Special/Super | |cancel=Special/Super | ||
|properties= | |guard=Low | ||
|description= | |properties= | ||
|description= Used during oki for strike/throw mix. | |||
}} | }} | ||
}} | }} | ||
| Line 365: | Line 384: | ||
|recovery=7 | |recovery=7 | ||
|hit=-18 | |hit=-18 | ||
|block | |block=-15 | ||
|pushblock=-28 | |||
|damage=10 | |damage=10 | ||
|cancel=Special/Super | |cancel=Special/Super | ||
|properties= | |guard=Low | ||
|description= | |properties= | ||
|description= Not safe as it does not provide HKD as 3C does. | |||
}} | }} | ||
}} | }} | ||
==Stand On Normal Moves== | ==Stand On Normal Moves== | ||
===Standing=== | ===Standing=== | ||
| Line 384: | Line 406: | ||
|recovery=7 | |recovery=7 | ||
|hit=+4 | |hit=+4 | ||
|block | |block=+3 | ||
|pushblock=0 | |||
|damage=3 | |damage=3 | ||
|cancel=Special/Super | |cancel=Special/Super | ||
|properties= | |guard=Mid | ||
|description= | |properties= | ||
|description= Used mostly to start or during combos. Pretty decent overall. | |||
}} | }} | ||
}} | }} | ||
| Line 402: | Line 426: | ||
|recovery=16 | |recovery=16 | ||
|hit=-3 | |hit=-3 | ||
|block | |block=-4 | ||
|pushblock=-12 | |||
|damage=10 | |damage=10 | ||
|cancel=Special/Super | |cancel=Special/Super | ||
|properties= | |guard=Mid | ||
|description= | |properties= | ||
|description= Marginally worse 5C. | |||
}} | }} | ||
}} | }} | ||
| Line 420: | Line 446: | ||
|recovery=15 | |recovery=15 | ||
|hit=0 | |hit=0 | ||
|block | |block=-3 | ||
|pushblock=-11 | |||
|damage=5 | |damage=5 | ||
|cancel= | |cancel= | ||
|properties= | |guard=Mid | ||
|description= | |properties= | ||
|description= Proximity normal. Little to no use besides perhaps the occasional tech chase. | |||
}} | }} | ||
}} | }} | ||
| Line 438: | Line 466: | ||
|recovery=24 | |recovery=24 | ||
|hit=-3 | |hit=-3 | ||
|block | |block=-20 | ||
|pushblock=-21 | |||
|damage=12 | |damage=12 | ||
|cancel=Special/Super | |cancel=Special/Super | ||
|properties= | |guard=Mid | ||
|description= | |properties= | ||
|description= Combo starter or slightly more niche anti-air option. Often comboed into S.236AA or 214S S.5C S.214A/B/C for decent damage. | |||
}} | }} | ||
}} | }} | ||
| Line 456: | Line 486: | ||
|recovery=20 | |recovery=20 | ||
|hit=-3 | |hit=-3 | ||
|block | |block=-4 | ||
|pushblock=-17 | |||
|damage=10 | |damage=10 | ||
|cancel= | |cancel= | ||
|properties= | |guard=High | ||
|description= | |properties= | ||
|description= Generally, very unsafe and not good at all. It’s worth noting that if this move is done as part of a chain such as S.2A > S.5B > S.6C or similar it actually becomes +3 on hit and +2 on block. This version of the move can also lead to a combo. Really only useful if you can [https://www.youtube.com/watch?v=1xgPehiVkAY&list=PLTjcORebgp_KfWIgGCPEUfMd6o3Xa-FAF&t=39s utilize it against the opponent during their wakeup as an okizeme option]. | |||
}} | }} | ||
}} | }} | ||
| Line 474: | Line 506: | ||
|recovery= | |recovery= | ||
|hit=+6 | |hit=+6 | ||
|block | |block= | ||
|damage=17 | |damage=17 | ||
|cancel= | |cancel= | ||
|properties= | |properties= | ||
|description= | |description= | ||
|guard=Grab | |||
}} | }} | ||
}} | }} | ||
===Crouching=== | ===Crouching=== | ||
{{MoveData | {{MoveData | ||
| Line 492: | Line 526: | ||
|recovery=5 | |recovery=5 | ||
|hit=+6 | |hit=+6 | ||
|block | |block=+5 | ||
|pushblock=+2 | |||
|damage=3 | |damage=3 | ||
|cancel=Special/Super | |cancel=Special/Super | ||
|properties= | |guard=Low | ||
|description= | |properties= | ||
|description= Decent low poke. | |||
}} | }} | ||
}} | }} | ||
| Line 510: | Line 546: | ||
|recovery=10 | |recovery=10 | ||
|hit=+6 | |hit=+6 | ||
|block | |block=+5 | ||
|pushblock=-3 | |||
|damage=11 | |damage=11 | ||
|cancel=Special/Super | |cancel=Special/Super | ||
|properties= | |guard=Low | ||
|description= | |properties= | ||
|description= Pretty alright low poke. Virtually identical to 2B but is one more frame plus on block and hit! Exciting stuff. | |||
}} | }} | ||
}} | }} | ||
| Line 528: | Line 566: | ||
|recovery=17 | |recovery=17 | ||
|hit=-8 | |hit=-8 | ||
|block | |block=-9 | ||
|pushblock=-17 | |||
|damage=6 | |damage=6 | ||
|cancel=Special/Super | |cancel=Special/Super | ||
|properties= | |guard=Low | ||
|description= | |properties= | ||
|description= Basically just 3B but with more startup. | |||
}} | }} | ||
}} | }} | ||
| Line 546: | Line 586: | ||
|recovery=13 | |recovery=13 | ||
|hit=+10 | |hit=+10 | ||
|block | |block=+5 | ||
|pushblock=-8 | |||
|damage=11 | |damage=11 | ||
|cancel=Special/Super | |cancel=Special/Super | ||
|properties=Mid | |properties= | ||
|description= | |guard=Mid | ||
|description= Quintessential combo starter. Hits smaller or crouching characters where other buttons would whiff. | |||
}} | }} | ||
}} | }} | ||
| Line 564: | Line 606: | ||
|recovery=20 | |recovery=20 | ||
|hit=KND | |hit=KND | ||
|block | |block=-5 | ||
|pushblock=-18 | |||
|damage=12 | |damage=12 | ||
|cancel= | |cancel= | ||
|properties= | |guard=Low | ||
|description= | |properties= | ||
|description= No reason to use this since command grab provides better damage and knockdown. | |||
}} | }} | ||
}} | }} | ||
===Jumping=== | ===Jumping=== | ||
{{MoveData | {{MoveData | ||
| Line 582: | Line 627: | ||
|recovery= | |recovery= | ||
|hit= | |hit= | ||
|block | |block= | ||
|pushblock= | |||
|damage=4 | |damage=4 | ||
|cancel= | |cancel= | ||
|properties= | |guard=High | ||
|description= | |properties= | ||
|description= Neutral jump punish. | |||
}} | }} | ||
}} | }} | ||
| Line 600: | Line 647: | ||
|recovery= | |recovery= | ||
|hit=+8 | |hit=+8 | ||
|block | |block= | ||
|pushblock= | |||
|damage= | |damage= | ||
|cancel= | |cancel= | ||
|properties= | |guard=High | ||
|description= | |properties= | ||
|description= Less popular S.J.A. | |||
}} | }} | ||
}} | }} | ||
| Line 618: | Line 667: | ||
|recovery= | |recovery= | ||
|hit= | |hit= | ||
|block | |block= | ||
|pushblock= | |||
|damage=11 | |damage=11 | ||
|cancel= | |cancel= | ||
|properties= | |guard=High | ||
|description= | |properties= | ||
|description= S.J.B but with more startup. | |||
}} | }} | ||
}} | }} | ||
===Dashing=== | ===Dashing=== | ||
{{MoveData | {{MoveData | ||
| Line 636: | Line 688: | ||
|recovery=6 | |recovery=6 | ||
|hit=-16 | |hit=-16 | ||
|block | |block=-17 | ||
|pushblock=-20 | |||
|damage=3 | |damage=3 | ||
|cancel= | |cancel= | ||
|properties= | |guard=Mid | ||
|description= | |properties= | ||
|description= Much like many of the dashing buttons available to this character, not good! | |||
}} | }} | ||
}} | }} | ||
| Line 654: | Line 708: | ||
|recovery=15 | |recovery=15 | ||
|hit=-23 | |hit=-23 | ||
|block | |block=-24 | ||
|pushblock=-32 | |||
|damage=10 | |damage=10 | ||
|cancel=Special/Super | |cancel=Special/Super | ||
|properties= | |guard=Mid | ||
|description= | |properties= | ||
|description= Pretty bad. Can be cancelled on hit or block and if it isn’t it’s very negative on hit. You will likely want to avoid this button. | |||
}} | }} | ||
}} | }} | ||
| Line 672: | Line 728: | ||
|recovery=20 | |recovery=20 | ||
|hit=-17 | |hit=-17 | ||
|block | |block=-8 | ||
|pushblock=-21 | |||
|damage=10 | |damage=10 | ||
|cancel= | |cancel= | ||
|properties= | |guard=Mid | ||
|description= | |properties= | ||
|description= Not as terrible as you may expect if you’re familiar with the other variations of this move such as 6C, but still not really worth using. | |||
}} | }} | ||
}} | }} | ||
| Line 690: | Line 748: | ||
|recovery=4 | |recovery=4 | ||
|hit=-14 | |hit=-14 | ||
|block | |block=-15 | ||
|pushblock=-18 | |||
|damage=3 | |damage=3 | ||
|cancel= | |cancel=N/A | ||
|properties= | |guard=Low | ||
|description= | |properties= | ||
|description= No good. Cannot be cancelled on hit or on block and is very negative unless it lands from max distance. | |||
}} | }} | ||
}} | }} | ||
| Line 708: | Line 768: | ||
|recovery=9 | |recovery=9 | ||
|hit=-14 | |hit=-14 | ||
|block | |block=-15 | ||
|pushblock=-23 | |||
|damage=11 | |damage=11 | ||
|cancel=Special/Super | |cancel=Special/Super | ||
|properties= | |guard=Low | ||
|description= | |properties= | ||
|description= Strike/Throw but less safe than Stand Off options as all you can realistically cancel into if you don't command grab is 214S. | |||
}} | }} | ||
}} | }} | ||
| Line 726: | Line 788: | ||
|recovery=31 | |recovery=31 | ||
|hit=KND | |hit=KND | ||
|block | |block=-19 | ||
|pushblock=-32 | |||
|damage=12 | |damage=12 | ||
|cancel= | |cancel= | ||
|properties= | |guard=Low | ||
|description= | |properties= | ||
|description= S.3C but worse. Don't use this. | |||
}} | }} | ||
}} | }} | ||
==Specials== | ==Specials== | ||
{{MoveData | {{MoveData | ||
| Line 743: | Line 808: | ||
|active=2(A)<br>6(B)<br>14(C) | |active=2(A)<br>6(B)<br>14(C) | ||
|recovery=26(A)<br>22(B)<br>14(C) | |recovery=26(A)<br>22(B)<br>14(C) | ||
|hit=+3 | |hit=+3(A)<br>+1(B)<br>KND(C) | ||
|block | |block=+2(A)<br>0(B)<br>+14(C) | ||
|pushblock=-26(A/B)<br>+14(C) | |||
|damage=8(A/B)<br>18(C) | |damage=8(A/B)<br>18(C) | ||
|cancel= | |cancel= | ||
|properties= | |guard=Mid | ||
|description= | |properties= | ||
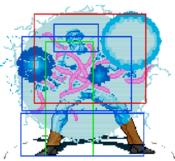
|description=Basic poke and combo ender only available in Stand Off. A and B versions are fast and have good range, but are very unsafe on pushblock. C version is much slower, but is very plus and gives a knockdown on hit. | |||
}} | }} | ||
}} | }} | ||
| Line 763: | Line 830: | ||
|active=7(A/B)<br>12(C) | |active=7(A/B)<br>12(C) | ||
|recovery=25(A/B)<br>27(C) | |recovery=25(A/B)<br>27(C) | ||
|hit= | |hit=+12/+7(A/B)<br>+14/+6(C) | ||
|block | |block=-20(A/B)<br>-24(C) | ||
|pushblock=-23(A/B)<br>-30(C) | |||
|damage= | |damage= | ||
|cancel= | |cancel= | ||
|properties= | |guard=Mid | ||
|description= | |properties= | ||
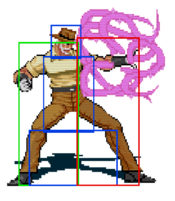
|description=Stand On exclusive hitgrab with very large range. After hitting the move, you can press 5x to send energy through Hermit Purple, dealing a small amount of damage to the enemy. You can also press 4x to pull the opponent back to you for a combo. The pull will give you more frame advantage if you initially hit the move from farther away. | |||
}} | }} | ||
}} | }} | ||
| Line 781: | Line 850: | ||
|active=6(s.Off)<br>8(s.On) | |active=6(s.Off)<br>8(s.On) | ||
|recovery=22(s.Off)<br>12(s.On) | |recovery=22(s.Off)<br>12(s.On) | ||
|hit= | |hit=Launch(s.Off A/B)<br>-16(s.Off C)<br>0(s.On) | ||
|block | |block=-17(s.Off)<br>0(s.On) | ||
|pushblock=-27(s.Off)<br>-13(s.On) | |||
|damage=14(s.Off)<br>16(s.On) | |damage=14(s.Off)<br>16(s.On) | ||
|cancel= | |cancel=s.236x | ||
|guard=High | |||
|properties= | |properties= | ||
|description= | |description=Slow overhead special move. Stand Off version hits once, while Stand On version hits 3 times and also does significantly more stand gauge damage. Can be cancelled into s.236x at any time. Can be used to install the 214X counter bug. | ||
}} | }} | ||
}} | }} | ||
| Line 798: | Line 869: | ||
|data= | |data= | ||
{{AttackData-HFTF | {{AttackData-HFTF | ||
|startup= | |startup=6(s.Off)<br>12(s.On) | ||
|active= | |active=19(s.On) | ||
|recovery= | |recovery=13(s.On) | ||
|hit= | |hit=Launch | ||
|block | |block=-14(s.On) | ||
|damage= | |pushblock=-17(s.On) | ||
|damage=Variable | |||
|cancel= | |cancel= | ||
|guard=Mid | |||
|properties= | |properties= | ||
|description= | |description=Not very useful on its own at all. The risk vs reward with this counter in a game where you can lose a round or match off a single hit is terrible. If this lands, you’ll receive extremely minor damage and no advantage, and you risk losing if it doesn’t. The Stand On version is also not very good; it can act as an anti-air but there are better options that are safer and deal more damage. The Stand Off counter becomes much more interesting if you utilize the 236S install “bug”. This will allow you to cancel the counter if you’re hit during it into S.236A/B/C, meaning you can combo and receive a much better reward for the risk. Still extremely risky against most characters due to the general high damage nature of the game, although this conversely means that it’s much less of a risk against the few characters with low combo damage like Khan. Important to note that you’ll have to reapply the install with 236S if you’ve already utilized the cancel or have been hit while in Stand On. You can be hit or knocked down in Stand Off or thrown and the install will remain. Additionally, S.623X can also apply the install (as they are essentially the same move). | ||
}} | }} | ||
}} | }} | ||
| Line 825: | Line 898: | ||
|damage=21(s.Off)<br>29(s.On) | |damage=21(s.Off)<br>29(s.On) | ||
|cancel= | |cancel= | ||
|properties= | |guard=Grab | ||
|description=The | |properties= | ||
|description=The character-defining special move in Old Joseph’s arsenal. Unscaled damage and generous plus frames mean that it is extremely important that anyone looking to play the character learns to use it well. Most commonly seen as a combo ender and a post-knockdown mix-up. Can also occasionally be used for [https://www.youtube.com/watch?v=1xgPehiVkAY&list=PLTjcORebgp_KfWIgGCPEUfMd6o3Xa-FAF&t=16s tick grab shenanigans] on unsuspecting opponents. S.360C is slightly different from the others as it has a longer on-hit animation, sends the opponent farther away and is slightly less plus on hit. | |||
Not as egregiously negative on whiff as you may expect at ~-17, but any keen opponent will certainly still punish it. | |||
All versions are +51 on hit except for S.360C which is +49. | |||
}} | }} | ||
}} | }} | ||
| Line 840: | Line 916: | ||
|recovery=12 | |recovery=12 | ||
|hit=0 | |hit=0 | ||
|block | |block=0 | ||
|pushblock=-13 | |||
|damage=16 | |damage=16 | ||
|cancel= | |cancel=s.236x | ||
|guard=High | |||
|properties= | |properties= | ||
|description= | |description=Exactly the same as s.623x. Used almost exclusively to set up the counter install bug. | ||
}} | }} | ||
}} | }} | ||
| Line 858: | Line 936: | ||
|recovery=24 | |recovery=24 | ||
|hit= | |hit= | ||
|block | |block=-19 | ||
|pushblock=-17 | |||
|damage=38 | |damage=38 | ||
|cancel= | |cancel= | ||
|guard=Mid | |||
|properties= | |properties= | ||
|description= | |description=Small ranged uppercut which leads into a cinematic on hit. Invincible frames 1-14. Used mainly as a reaction to jump-ins or comboed into with S.5C as an anti-air. Stand Off version does ever so slightly more damage. | ||
}} | }} | ||
}} | }} | ||
| Line 878: | Line 958: | ||
|block= | |block= | ||
|pushblock= | |pushblock= | ||
|guard= | |guard=Grab | ||
|damage=42 | |damage=42 | ||
|cancel= | |cancel= | ||
|properties= | |properties= | ||
|description=The 720 input refers to doing two full circle motions with your stick. Proper notation is 62486248x or 42684268x. | |description=The 720 input refers to doing two full circle motions with your stick. Proper notation is 62486248x or 42684268x.<br><br>Command grab super. Invincible frames 13-23. Does high damage, but is also very hard to combo into. Not very useful. | ||
}} | }} | ||
}} | }} | ||
| Line 896: | Line 976: | ||
|recovery= | |recovery= | ||
|hit= | |hit= | ||
|block | |block= | ||
|damage= | |damage= | ||
|cancel= | |cancel= | ||
|properties= | |properties= | ||
|description= | |description=Almost always Joseph's preferred way of spending meter. Using CC in combos will generally yield good damage and allow you to end your combos in 360, giving good okizeme. | ||
}} | }} | ||
}} | }} | ||
{{NavboxHFTF}} | {{NavboxHFTF}} | ||
[[Category:JoJo's Bizarre Adventure]] | [[Category:JoJo's Bizarre Adventure]] | ||
Latest revision as of 19:31, 9 July 2023
Movelist
Stand Off Normal Moves
Standing
| Startup | Active | Recovery | Damage | Guard | ||||
|---|---|---|---|---|---|---|---|---|
| 4 | 2 | 5 | 3 | Mid | ||||
| Hit Adv. | Block Adv. | Pushblock Adv. | Cancel | Properties | ||||
| +7 | +6 | +3 | Special/Super | IPS=No Scales=Yes | ||||
|
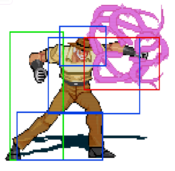
Kinda high-hitting jab you can anti-air with rarely. Combos into almost every other button. Misses most crouchers. | ||||||||
| Startup | Active | Recovery | Damage | Guard | ||||
|---|---|---|---|---|---|---|---|---|
| 5 | 2 | 20 | 6 | Mid | ||||
| Hit Adv. | Block Adv. | Pushblock Adv. | Cancel | Properties | ||||
| -5 | -6 | -14 | Special/Super | IPS=No Scales=Yes | ||||
|
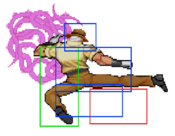
Acts as a poke and as a situational anti-air. Extends forward so it has good reach. Don't expect it to beat much outright, better to punish start-ups and recoveries at long range. Being cancellable makes the not-so-great frame data somewhat negligible. Low-profiled by quite a few crouching characters but otherwise important for hitconfirming from jabs. | ||||||||
| Startup | Active | Recovery | Damage | Guard | ||||
|---|---|---|---|---|---|---|---|---|
| 8 | 4 | 19 | 10 | Mid | ||||
| Hit Adv. | Block Adv. | Pushblock Adv. | Cancel | Properties | ||||
| -1 | -2 | -15 | Special/Super | IPS=No Scales=Yes | ||||
|
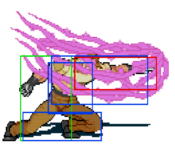
Slow startup but a solid disjoint, making it one of his better anti-airs when you're spaced far enough, also good counterpoke. Opponents that are hit in the air are knocked away. Hits more crouchers than 5B but cannot be comboed into from jabs. | ||||||||
| Startup | Active | Recovery | Damage | Guard | ||||
|---|---|---|---|---|---|---|---|---|
| 13 | 3 | 28 | 9 | High | ||||
| Hit Adv. | Block Adv. | Pushblock Adv. | Cancel | Properties | ||||
| -13 | -14 | -27 | N/A | IPS=No Scales=Yes | ||||
|
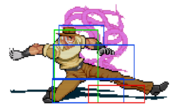
Awful. The worst. Hits overhead, but is also punishable on hit. Never use this move. You might accidentally get this when trying to grab so do that with 4C instead. | ||||||||
| Startup | Active | Recovery | Damage | Guard | ||||
|---|---|---|---|---|---|---|---|---|
| - | - | - | 17 | - | ||||
| Hit Adv. | Block Adv. | Pushblock Adv. | Cancel | Properties | ||||
| +5 | {{{block}}} | - | - | - | ||||
|
IMPORTANT NOTE: The buttons that Old Joseph can get instead of grab (primarily 6C) are not very good, so you may like to try pressing S right before grabbing so if you do not get your grab you at least won't die for it. | ||||||||
Crouching
| Startup | Active | Recovery | Damage | Guard | ||||
|---|---|---|---|---|---|---|---|---|
| 5 | 4 | 3 | 3 | Mid | ||||
| Hit Adv. | Block Adv. | Pushblock Adv. | Cancel | Properties | ||||
| +7 | +3 | - | Special/Super | IPS=No Scales=Yes | ||||
|
An unremarkable jab. Doesn't hit low. Still an OK combo starter and has decent range for poking.block= | ||||||||
| Startup | Active | Recovery | Damage | Guard | ||||
|---|---|---|---|---|---|---|---|---|
| 4 | 2 | 10 | 4 | Low | ||||
| Hit Adv. | Block Adv. | Pushblock Adv. | Cancel | Properties | ||||
| +5 | +4 | -4 | Special/Super | IPS=No Scales=Yes | ||||
|
One of your more notable buttons. Low poke that is also used to build meter. Short range though. | ||||||||
| Startup | Active | Recovery | Damage | Guard | ||||
|---|---|---|---|---|---|---|---|---|
| 4 | 17 | 7 | 6 | Low | ||||
| Hit Adv. | Block Adv. | Pushblock Adv. | Cancel | Properties | ||||
| -7 | -10 | -18 | Special/Super | IPS=No Scales=No | ||||
|
Similar to 2B but advances forward. As with most of your other dashing buttons, it is minus on hit, so you'll need to super or special cancel it to stay safe. | ||||||||
| Startup | Active | Recovery | Damage | Guard | ||||
|---|---|---|---|---|---|---|---|---|
| 7 | 3 | 13 | 10 | Mid | ||||
| Hit Adv. | Block Adv. | Pushblock Adv. | Cancel | Properties | ||||
| +5 | +4 | -9 | Special/Super | IPS=No Scales=Yes | ||||
|
Nice range and counterpoke, good hitstun that connects easily to custom combo. Also has other niche applications- primarily, hitconfirming into 236S 236C for a meterless command grab. | ||||||||
| Startup | Active | Recovery | Damage | Guard | ||||
|---|---|---|---|---|---|---|---|---|
| 8 | 21 | 10 | 9 | Low | ||||
| Hit Adv. | Block Adv. | Pushblock Adv. | Cancel | Properties | ||||
| HKD | -14 | -27 | Special/Super | IPS=No Scales=No | ||||
|
Goes a little further than 3B and causes a hard knockdown. Seen most often as a part of Oldseph's strike/throw okizeme. | ||||||||
Jumping
| Startup | Active | Recovery | Damage | Guard | ||||
|---|---|---|---|---|---|---|---|---|
| 5 | 14 | - | 5 | High | ||||
| Hit Adv. | Block Adv. | Pushblock Adv. | Cancel | Properties | ||||
| - | - | - | - | - | ||||
|
Pretty similar to S.J.A but has a better hitbox. Both make for good jump-ins. | ||||||||
| Startup | Active | Recovery | Damage | Guard | ||||
|---|---|---|---|---|---|---|---|---|
| 7 | 8 | - | 6 | High | ||||
| Hit Adv. | Block Adv. | Pushblock Adv. | Cancel | Properties | ||||
| - | - | - | - | - | ||||
|
Identical to J.A except for the slower startup. Use J.A. | ||||||||
| Startup | Active | Recovery | Damage | Guard | ||||
|---|---|---|---|---|---|---|---|---|
| 6 | 6 | - | 12 | High | ||||
| Hit Adv. | Block Adv. | Pushblock Adv. | Cancel | Properties | ||||
| - | - | - | - | - | ||||
|
A veritable classic. One of the best to ever to do it. Your best air button. Good range and very slight disjoint. It’s commonplace to see Joseph players pressing this constantly. Used in conjunction with shorthops to stuff the opponents attempts at approaching, as an air-to-air (sometimes into itself depending on the height and range to maximize damage, or as a jump-in that’s difficult to beat. Make this move your friend and it will reward you greatly. | ||||||||
Dashing
| Startup | Active | Recovery | Damage | Guard | ||||
|---|---|---|---|---|---|---|---|---|
| 5 | 23 | 4 | 3 | Mid | ||||
| Hit Adv. | Block Adv. | Pushblock Adv. | Cancel | Properties | ||||
| -1 | -2 | -17 | Special/Super | - | ||||
|
Similar to D.5B but hits a little higher. | ||||||||
| Startup | Active | Recovery | Damage | Guard | ||||
|---|---|---|---|---|---|---|---|---|
| 6 | 23 | 19 | 6 | Mid | ||||
| Hit Adv. | Block Adv. | Pushblock Adv. | Cancel | Properties | ||||
| -16 | -17 | -34 | Special/Super | - | ||||
|
One of your better neutral tools. Covers a lot of space and can be cancelled at any point which makes it very useful. Primarily, D.5B 236A/B/ or 214S and D.5B 236S 236C. You’ll see Oldsephs fish for these often. | ||||||||
| Startup | Active | Recovery | Damage | Guard | ||||
|---|---|---|---|---|---|---|---|---|
| 13 | 3 | 28 | 10 | Mid | ||||
| Hit Adv. | Block Adv. | Pushblock Adv. | Cancel | Properties | ||||
| -23 | -14 | -27 | - | - | ||||
|
If this is blocked OR hits it’s over for you. Don’t use this! | ||||||||
| Startup | Active | Recovery | Damage | Guard | ||||
|---|---|---|---|---|---|---|---|---|
| 5 | 25 | 5 | 3 | Mid | ||||
| Hit Adv. | Block Adv. | Pushblock Adv. | Cancel | Properties | ||||
| -4 | -5 | -20 | Special/Super | - | ||||
|
Another great button. Very similar to D.5B in function and application. Can also be used to go under projectiles such as Young Joseph’s clackers or Hol Horse’s standing gunshots. Unfortunately does not hit low. Has meaty applications as it is very plus when timed properly. | ||||||||
| Startup | Active | Recovery | Damage | Guard | ||||
|---|---|---|---|---|---|---|---|---|
| 4 | 25 | 7 | 10 | Low | ||||
| Hit Adv. | Block Adv. | Pushblock Adv. | Cancel | Properties | ||||
| -17 | -18 | -26 | Special/Super | - | ||||
|
Used during oki for strike/throw mix. | ||||||||
| Startup | Active | Recovery | Damage | Guard | ||||
|---|---|---|---|---|---|---|---|---|
| 4 | 25 | 7 | 10 | Low | ||||
| Hit Adv. | Block Adv. | Pushblock Adv. | Cancel | Properties | ||||
| -18 | -15 | -28 | Special/Super | - | ||||
|
Not safe as it does not provide HKD as 3C does. | ||||||||
Stand On Normal Moves
Standing
| Startup | Active | Recovery | Damage | Guard | ||||
|---|---|---|---|---|---|---|---|---|
| 3 | 2 | 7 | 3 | Mid | ||||
| Hit Adv. | Block Adv. | Pushblock Adv. | Cancel | Properties | ||||
| +4 | +3 | 0 | Special/Super | - | ||||
|
Used mostly to start or during combos. Pretty decent overall. | ||||||||
| Startup | Active | Recovery | Damage | Guard | ||||
|---|---|---|---|---|---|---|---|---|
| 9 | 3 | 16 | 10 | Mid | ||||
| Hit Adv. | Block Adv. | Pushblock Adv. | Cancel | Properties | ||||
| -3 | -4 | -12 | Special/Super | - | ||||
|
Marginally worse 5C. | ||||||||
| Startup | Active | Recovery | Damage | Guard | ||||
|---|---|---|---|---|---|---|---|---|
| 5 | 3 | 15 | 5 | Mid | ||||
| Hit Adv. | Block Adv. | Pushblock Adv. | Cancel | Properties | ||||
| 0 | -3 | -11 | - | - | ||||
|
Proximity normal. Little to no use besides perhaps the occasional tech chase. | ||||||||
| Startup | Active | Recovery | Damage | Guard | ||||
|---|---|---|---|---|---|---|---|---|
| 7 | 2 | 24 | 12 | Mid | ||||
| Hit Adv. | Block Adv. | Pushblock Adv. | Cancel | Properties | ||||
| -3 | -20 | -21 | Special/Super | - | ||||
|
Combo starter or slightly more niche anti-air option. Often comboed into S.236AA or 214S S.5C S.214A/B/C for decent damage. | ||||||||
| Startup | Active | Recovery | Damage | Guard | ||||
|---|---|---|---|---|---|---|---|---|
| 18 | 6 | 20 | 10 | High | ||||
| Hit Adv. | Block Adv. | Pushblock Adv. | Cancel | Properties | ||||
| -3 | -4 | -17 | - | - | ||||
|
Generally, very unsafe and not good at all. It’s worth noting that if this move is done as part of a chain such as S.2A > S.5B > S.6C or similar it actually becomes +3 on hit and +2 on block. This version of the move can also lead to a combo. Really only useful if you can utilize it against the opponent during their wakeup as an okizeme option. | ||||||||
| Startup | Active | Recovery | Damage | Guard |
|---|---|---|---|---|
| - | - | - | 17 | Grab |
| Hit Adv. | Block Adv. | Pushblock Adv. | Cancel | Properties |
| +6 | - | - | - | - |
Crouching
| Startup | Active | Recovery | Damage | Guard | ||||
|---|---|---|---|---|---|---|---|---|
| 5 | 2 | 5 | 3 | Low | ||||
| Hit Adv. | Block Adv. | Pushblock Adv. | Cancel | Properties | ||||
| +6 | +5 | +2 | Special/Super | - | ||||
|
Decent low poke. | ||||||||
| Startup | Active | Recovery | Damage | Guard | ||||
|---|---|---|---|---|---|---|---|---|
| 4 | 2 | 10 | 11 | Low | ||||
| Hit Adv. | Block Adv. | Pushblock Adv. | Cancel | Properties | ||||
| +6 | +5 | -3 | Special/Super | - | ||||
|
Pretty alright low poke. Virtually identical to 2B but is one more frame plus on block and hit! Exciting stuff. | ||||||||
| Startup | Active | Recovery | Damage | Guard | ||||
|---|---|---|---|---|---|---|---|---|
| 6 | 17 | 17 | 6 | Low | ||||
| Hit Adv. | Block Adv. | Pushblock Adv. | Cancel | Properties | ||||
| -8 | -9 | -17 | Special/Super | - | ||||
|
Basically just 3B but with more startup. | ||||||||
| Startup | Active | Recovery | Damage | Guard | ||||
|---|---|---|---|---|---|---|---|---|
| 7 | 3 | 13 | 11 | Mid | ||||
| Hit Adv. | Block Adv. | Pushblock Adv. | Cancel | Properties | ||||
| +10 | +5 | -8 | Special/Super | - | ||||
|
Quintessential combo starter. Hits smaller or crouching characters where other buttons would whiff. | ||||||||
| Startup | Active | Recovery | Damage | Guard | ||||
|---|---|---|---|---|---|---|---|---|
| 14 | 3 | 20 | 12 | Low | ||||
| Hit Adv. | Block Adv. | Pushblock Adv. | Cancel | Properties | ||||
| KND | -5 | -18 | - | - | ||||
|
No reason to use this since command grab provides better damage and knockdown. | ||||||||
Jumping
| Startup | Active | Recovery | Damage | Guard | ||||
|---|---|---|---|---|---|---|---|---|
| 6 | 10 | - | 4 | High | ||||
| Hit Adv. | Block Adv. | Pushblock Adv. | Cancel | Properties | ||||
| - | - | - | - | - | ||||
|
Neutral jump punish. | ||||||||
| Startup | Active | Recovery | Damage | Guard | ||||
|---|---|---|---|---|---|---|---|---|
| 6 | 10 | - | - | High | ||||
| Hit Adv. | Block Adv. | Pushblock Adv. | Cancel | Properties | ||||
| +8 | - | - | - | - | ||||
|
Less popular S.J.A. | ||||||||
| Startup | Active | Recovery | Damage | Guard | ||||
|---|---|---|---|---|---|---|---|---|
| 8 | 6 | - | 11 | High | ||||
| Hit Adv. | Block Adv. | Pushblock Adv. | Cancel | Properties | ||||
| - | - | - | - | - | ||||
|
S.J.B but with more startup. | ||||||||
Dashing
| Startup | Active | Recovery | Damage | Guard | ||||
|---|---|---|---|---|---|---|---|---|
| 3 | 23 | 6 | 3 | Mid | ||||
| Hit Adv. | Block Adv. | Pushblock Adv. | Cancel | Properties | ||||
| -16 | -17 | -20 | - | - | ||||
|
Much like many of the dashing buttons available to this character, not good! | ||||||||
| Startup | Active | Recovery | Damage | Guard | ||||
|---|---|---|---|---|---|---|---|---|
| 9 | 24 | 15 | 10 | Mid | ||||
| Hit Adv. | Block Adv. | Pushblock Adv. | Cancel | Properties | ||||
| -23 | -24 | -32 | Special/Super | - | ||||
|
Pretty bad. Can be cancelled on hit or block and if it isn’t it’s very negative on hit. You will likely want to avoid this button. | ||||||||
| Startup | Active | Recovery | Damage | Guard | ||||
|---|---|---|---|---|---|---|---|---|
| 18 | 6 | 20 | 10 | Mid | ||||
| Hit Adv. | Block Adv. | Pushblock Adv. | Cancel | Properties | ||||
| -17 | -8 | -21 | - | - | ||||
|
Not as terrible as you may expect if you’re familiar with the other variations of this move such as 6C, but still not really worth using. | ||||||||
| Startup | Active | Recovery | Damage | Guard | ||||
|---|---|---|---|---|---|---|---|---|
| 4 | 23 | 4 | 3 | Low | ||||
| Hit Adv. | Block Adv. | Pushblock Adv. | Cancel | Properties | ||||
| -14 | -15 | -18 | N/A | - | ||||
|
No good. Cannot be cancelled on hit or on block and is very negative unless it lands from max distance. | ||||||||
| Startup | Active | Recovery | Damage | Guard | ||||
|---|---|---|---|---|---|---|---|---|
| 4 | 23 | 9 | 11 | Low | ||||
| Hit Adv. | Block Adv. | Pushblock Adv. | Cancel | Properties | ||||
| -14 | -15 | -23 | Special/Super | - | ||||
|
Strike/Throw but less safe than Stand Off options as all you can realistically cancel into if you don't command grab is 214S. | ||||||||
| Startup | Active | Recovery | Damage | Guard | ||||
|---|---|---|---|---|---|---|---|---|
| 14 | 6 | 31 | 12 | Low | ||||
| Hit Adv. | Block Adv. | Pushblock Adv. | Cancel | Properties | ||||
| KND | -19 | -32 | - | - | ||||
|
S.3C but worse. Don't use this. | ||||||||
Specials
| Startup | Active | Recovery | Damage | Guard | ||||
|---|---|---|---|---|---|---|---|---|
| 13(A/B) 32(C) |
2(A) 6(B) 14(C) |
26(A) 22(B) 14(C) |
8(A/B) 18(C) |
Mid | ||||
| Hit Adv. | Block Adv. | Pushblock Adv. | Cancel | Properties | ||||
| +3(A) +1(B) KND(C) |
+2(A) 0(B) +14(C) |
-26(A/B) +14(C) |
- | - | ||||
|
Basic poke and combo ender only available in Stand Off. A and B versions are fast and have good range, but are very unsafe on pushblock. C version is much slower, but is very plus and gives a knockdown on hit. | ||||||||
| Startup | Active | Recovery | Damage | Guard | ||||
|---|---|---|---|---|---|---|---|---|
| 20(A/B) 19(C) |
7(A/B) 12(C) |
25(A/B) 27(C) |
- | Mid | ||||
| Hit Adv. | Block Adv. | Pushblock Adv. | Cancel | Properties | ||||
| +12/+7(A/B) +14/+6(C) |
-20(A/B) -24(C) |
-23(A/B) -30(C) |
- | - | ||||
|
Stand On exclusive hitgrab with very large range. After hitting the move, you can press 5x to send energy through Hermit Purple, dealing a small amount of damage to the enemy. You can also press 4x to pull the opponent back to you for a combo. The pull will give you more frame advantage if you initially hit the move from farther away. | ||||||||
| Startup | Active | Recovery | Damage | Guard | ||||
|---|---|---|---|---|---|---|---|---|
| 18(s.Off) 17(s.On) |
6(s.Off) 8(s.On) |
22(s.Off) 12(s.On) |
14(s.Off) 16(s.On) |
High | ||||
| Hit Adv. | Block Adv. | Pushblock Adv. | Cancel | Properties | ||||
| Launch(s.Off A/B) -16(s.Off C) 0(s.On) |
-17(s.Off) 0(s.On) |
-27(s.Off) -13(s.On) |
s.236x | - | ||||
|
Slow overhead special move. Stand Off version hits once, while Stand On version hits 3 times and also does significantly more stand gauge damage. Can be cancelled into s.236x at any time. Can be used to install the 214X counter bug. | ||||||||
| Startup | Active | Recovery | Damage | Guard | ||||
|---|---|---|---|---|---|---|---|---|
| 6(s.Off) 12(s.On) |
19(s.On) | 13(s.On) | Variable | Mid | ||||
| Hit Adv. | Block Adv. | Pushblock Adv. | Cancel | Properties | ||||
| Launch | -14(s.On) | -17(s.On) | - | - | ||||
|
Not very useful on its own at all. The risk vs reward with this counter in a game where you can lose a round or match off a single hit is terrible. If this lands, you’ll receive extremely minor damage and no advantage, and you risk losing if it doesn’t. The Stand On version is also not very good; it can act as an anti-air but there are better options that are safer and deal more damage. The Stand Off counter becomes much more interesting if you utilize the 236S install “bug”. This will allow you to cancel the counter if you’re hit during it into S.236A/B/C, meaning you can combo and receive a much better reward for the risk. Still extremely risky against most characters due to the general high damage nature of the game, although this conversely means that it’s much less of a risk against the few characters with low combo damage like Khan. Important to note that you’ll have to reapply the install with 236S if you’ve already utilized the cancel or have been hit while in Stand On. You can be hit or knocked down in Stand Off or thrown and the install will remain. Additionally, S.623X can also apply the install (as they are essentially the same move). | ||||||||
| Startup | Active | Recovery | Damage | Guard | ||||
|---|---|---|---|---|---|---|---|---|
| 7 | 4 | 17 | 21(s.Off) 29(s.On) |
Grab | ||||
| Hit Adv. | Block Adv. | Pushblock Adv. | Cancel | Properties | ||||
| - | - | - | - | - | ||||
|
The character-defining special move in Old Joseph’s arsenal. Unscaled damage and generous plus frames mean that it is extremely important that anyone looking to play the character learns to use it well. Most commonly seen as a combo ender and a post-knockdown mix-up. Can also occasionally be used for tick grab shenanigans on unsuspecting opponents. S.360C is slightly different from the others as it has a longer on-hit animation, sends the opponent farther away and is slightly less plus on hit. Not as egregiously negative on whiff as you may expect at ~-17, but any keen opponent will certainly still punish it. All versions are +51 on hit except for S.360C which is +49. | ||||||||
| Startup | Active | Recovery | Damage | Guard | ||||
|---|---|---|---|---|---|---|---|---|
| 27 | 8 | 12 | 16 | High | ||||
| Hit Adv. | Block Adv. | Pushblock Adv. | Cancel | Properties | ||||
| 0 | 0 | -13 | s.236x | - | ||||
|
Exactly the same as s.623x. Used almost exclusively to set up the counter install bug. | ||||||||
Supers
| Startup | Active | Recovery | Damage | Guard | ||||
|---|---|---|---|---|---|---|---|---|
| 8 | 6 | 24 | 38 | Mid | ||||
| Hit Adv. | Block Adv. | Pushblock Adv. | Cancel | Properties | ||||
| - | -19 | -17 | - | - | ||||
|
Small ranged uppercut which leads into a cinematic on hit. Invincible frames 1-14. Used mainly as a reaction to jump-ins or comboed into with S.5C as an anti-air. Stand Off version does ever so slightly more damage. | ||||||||
| Startup | Active | Recovery | Damage | Guard | ||||
|---|---|---|---|---|---|---|---|---|
| 13 | 4 | 17 | 42 | Grab | ||||
| Hit Adv. | Block Adv. | Pushblock Adv. | Cancel | Properties | ||||
| - | - | - | - | - | ||||
|
The 720 input refers to doing two full circle motions with your stick. Proper notation is 62486248x or 42684268x. | ||||||||
| Startup | Active | Recovery | Damage | Guard | ||||
|---|---|---|---|---|---|---|---|---|
| - | - | - | - | - | ||||
| Hit Adv. | Block Adv. | Pushblock Adv. | Cancel | Properties | ||||
| - | - | - | - | - | ||||
|
Almost always Joseph's preferred way of spending meter. Using CC in combos will generally yield good damage and allow you to end your combos in 360, giving good okizeme. | ||||||||
