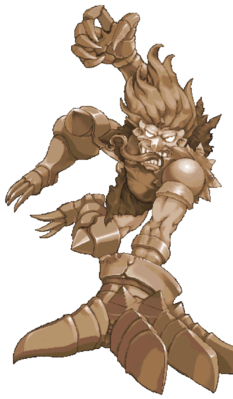
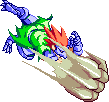
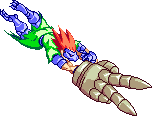
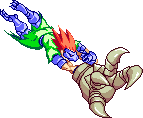
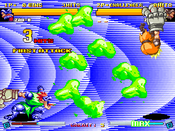
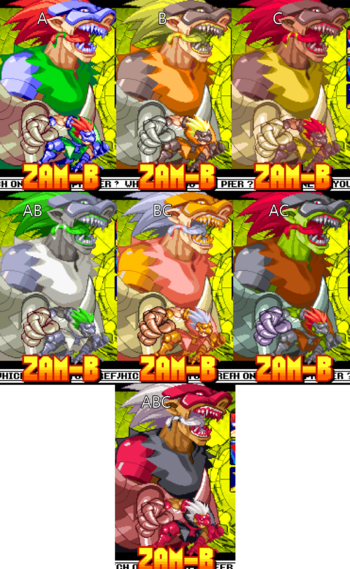
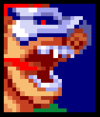
A strange hunchbacked man that wears a mask and a massive gauntlet that he uses as his primary weapon. He also has the ability to vomit acid onto his opponents in the form of a goop projectile.
Failing in his mission of finding both the "Sword of Dynasty" and bringing Alice back home, Zam-B has since been locked up in prison.
However, Alice's father has given Zam-B one last chance to do his job and has ordered him to find and bring Alice back home once and for all while investigating the mystery of the lost continent.
Zam-B is a rushdown character with great range, good combos, a great mixup game and a tricky toolkit.
OverviewZam-B is a tricky and mobile character who can run circles around his opponent. |
|
| Pros | Cons |
|
|
| Play Style | Rushdown |
| Dash Type | Run |
| Backdash Type | Grounded |
| Defense Modifier | 1.0625 |
| Air Options | Double Jump Walljump |
| Meter Gauge | {{{meter}}} |
Normals
Standing normals
| Damage | Startup | Active | Recovery | Guard | Cancel | Adv. Hit | Adv. Block | |
|---|---|---|---|---|---|---|---|---|
| - | 6 | - | - | M | normals | 1 | 0 | |
|
quick chop | ||||||||
| Damage | Startup | Active | Recovery | Guard | Cancel | Adv. Hit | Adv. Block | |
|---|---|---|---|---|---|---|---|---|
| - | 7 / 11 | - | - | M | normals | 3 | 2 | |
|
Zam-B points at the opponent, menacingly | ||||||||
| Damage | Startup | Active | Recovery | Guard | Cancel | Adv. Hit | Adv. Block | |
|---|---|---|---|---|---|---|---|---|
| - | 12 | - | - | M | O | -9 | -10 | |
|
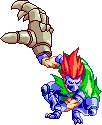
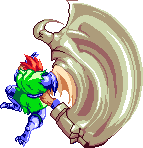
Zam-B leans back then straight up covers the entire screen with his hand | ||||||||
Crouching normals
| Damage | Startup | Active | Recovery | Guard | Cancel | Adv. Hit | Adv. Block | |
|---|---|---|---|---|---|---|---|---|
| - | 6 | - | - | L | normals | 3 | 2 | |
|
5A but low | ||||||||
| Damage | Startup | Active | Recovery | Guard | Cancel | Adv. Hit | Adv. Block | |
|---|---|---|---|---|---|---|---|---|
| - | 8 | - | - | L | normals | 0 | -1 | |
|
2 quick donkey kicks | ||||||||
| Damage | Startup | Active | Recovery | Guard | Cancel | Adv. Hit | Adv. Block | |
|---|---|---|---|---|---|---|---|---|
| - | 11 | - | - | H | O | Knocks down | -17 | |
|
Zam-B trips you with his pinky finger | ||||||||
Jumping normals
| Damage | Startup | Active | Recovery | Guard | Cancel | Adv. Hit | Adv. Block | |
|---|---|---|---|---|---|---|---|---|
| - | 4 | - | - | H | special | O | O | |
|
Zam-B just sticks out 2 fingers and waits for his opponents to touch them and die | ||||||||
| Damage | Startup | Active | Recovery | Guard | Cancel | Adv. Hit | Adv. Block | |
|---|---|---|---|---|---|---|---|---|
| - | 6 | - | - | H | special | O | O | |
|
Zam-B punches | ||||||||
| Damage | Startup | Active | Recovery | Guard | Cancel | Adv. Hit | Adv. Block | |
|---|---|---|---|---|---|---|---|---|
| - | 6 | - | - | H | O | O | O | |
|
Zam-B straight up just slaps the opponent so hard they go offscreen | ||||||||
Command normals
| Damage | Startup | Active | Recovery | Guard | Cancel | Adv. Hit | Adv. Block | |
|---|---|---|---|---|---|---|---|---|
| - | 17 | - | - | H | special | -3 | -4 | |
|
quick claw swipe downward
| ||||||||
Universal mechanics
| Damage | Startup | Active | Recovery | Guard | Cancel | Adv. Hit | Adv. Block | |
|---|---|---|---|---|---|---|---|---|
| - | 7 | - | - | M | O | Launches | inconsistent | |
|
on hit, Causes a big wall bounce and puts the opponent in indefinite hitstun until they hit the ground or use meter to tech it | ||||||||
| Damage | Startup | Active | Recovery | Guard | Cancel | Adv. Hit | Adv. Block | |
|---|---|---|---|---|---|---|---|---|
| - | 7 | - | - | M | O | Launches | inconsistent | |
|
No difference from the ground version, but some characters have air launchers with slightly less recovery frames | ||||||||
| Damage | Startup | Active | Recovery | Guard | Cancel | Adv. Hit | Adv. Block | |
|---|---|---|---|---|---|---|---|---|
| - | 6 | - | - | don't | O | Stun | O | |
|
This replaces grab, a quick attack that stuns blocking opponents. | ||||||||
Special moves
| Damage | Startup | Active | Recovery | Guard | Cancel | Adv. Hit | Adv. Block | |
|---|---|---|---|---|---|---|---|---|
| - | 24 / 26 / 28 | - | - | M | O | Knocks down | 4 / 3 / 2 | |
|
Zam-B shoots a small acid ball. but we just call it goop | ||||||||
| Damage | Startup | Active | Recovery | Guard | Cancel | Adv. Hit | Adv. Block | |
|---|---|---|---|---|---|---|---|---|
| - | 29 / 29 / 29 | - | - | H | O | Knocks down | - | |
|
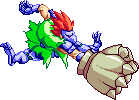
Zam-B flies across the screen holding his hand out | ||||||||
| Damage | Startup | Active | Recovery | Guard | Cancel | Adv. Hit | Adv. Block | |
|---|---|---|---|---|---|---|---|---|
| - | 29 / 29 / 29 | - | - | H | O | Knocks down | - | |
|
Easily his best move, contender for best advancing move in the game
| ||||||||
Supers
| Damage | Startup | Active | Recovery | Guard | Cancel | Adv. Hit | Adv. Block | |
|---|---|---|---|---|---|---|---|---|
| - | 62(53+9) | - | - | M | O | Knocks down | inconsistent | |
|
Zam-B opens his mouth and unleashes a tsunami. | ||||||||
Boost mode (22+ABC)
Ability Boost :
- goop shoots two projectiles with angle varying on button
- Piercing Fist acts as a launcher
- B version of Claw Dive launches vertically
- C version of Claw Dive acts as a launcher
- j.C launches acts as a launcher for ground and airborne opponents
- 5C has more hits and acts as a launcher
- 2B Mule Kick has more hits and acts as a launcher (still useless tho)
Combos
| Combos | Dmg | Notes |
| 5A > 5B > 5AB > j.A > j.B > j.AB > j.A > j.B > j.C | 36 | Universal combo. |
| 2A > 5B > 5AB > j.A > j.B > j.3B > j.214A > j.A > j.B > j.C > j.B j.214A | 42 | Meterless bnb. Video -> https://www.youtube.com/watch?v=Gf8-zVkazeY |
| 5A > 5B > 5AB > j.A > j.B > j.3C > 214A > j.Ax3 > JC > j.Ax3 > j.B > j.214AB > j.Ax2 > j.B > j.3C > j.214A | 50 | Zam-B bnb 2 (not optimal damage). Video -> https://youtu.be/yNEg5xjpsVM |
| j.B > j.C > 5B > 214C | 55 | Zam-B bnb 3. Video -> https://youtu.be/u_fkWpXBUN4 |
| j.B > j.3C > j.214B > j.A > j.B > j.3C > j.214B | 55 | Zam-B bnb 4. Video -> https://youtu.be/HfyhAjm0o1Q |
| j.B > j.C > j.B > j.3C > j.214A | 57 | Zam-B bnb 5. Video -> https://youtu.be/i2-Fqh_xNzE |
| j.B > j.C > 5AB > j.Ax3 > JC > j.Ax3 > j.B > j.214AB > j.Ax3 > j.B > j.214C | 61 | Zam-B combo 1. Video -> https://youtu.be/kd-8a8OBtbc |
| j.B > j.C > 5AB > j.A > j.B > j.3C > j.214A > j.Ax3 > JC > j.Ax3 > j.B > j.214AB > j.Ax3 > j.B > j.C | 71 | Zam-B combo 2. Video -> https://youtu.be/dRy3MXcu9Q8 |
| j.B > j.3Cx5 > j.214B > j.A > j.B > j.3C > j.214B > j.Ax3 > JC > j.Ax3 > j.B > j.214AB > j.Ax3 > j.B > j.C > j.Ax3 > JC > j.Ax3 > j.B > j.214C | 75 | Zam-B combo 3. Video -> https://youtu.be/uLgwLxlH7Lg |
Color Palettes

