(Updated with infobox template) |
(Filled frame data tables for normals) |
||
| Line 7: | Line 7: | ||
|defmod=1.0625 | |defmod=1.0625 | ||
|airopts=None | |airopts=None | ||
|meter=80 | |||
}} | }} | ||
== Normals == | ==Movelist== | ||
=== Standing | === Normals === | ||
==== Standing Normals ==== | |||
{{MoveData | {{MoveData | ||
|image=AB_Leon_5a.png | |image=AB_Leon_5a.png | ||
|input=5A | |input=5A | ||
|data= | |data= | ||
{{AttackData-AB | {{AttackData-AB | ||
|guard=M | |guard=M | ||
|cancel= | |cancel=-A-, -B-, -C-, -SP-, -UM- | ||
|startup=6 | |damage=8 | ||
|advHit= | |startup=5 | ||
|advBlock= | |active=6 | ||
|recovery=3 | |||
|advHit=4 | |||
|advBlock=3 | |||
|description= quick jab<br>can be used as an abare<br>deals low damage | |description= quick jab<br>can be used as an abare<br>deals low damage | ||
}} | }} | ||
| Line 28: | Line 32: | ||
{{MoveData | {{MoveData | ||
|image=AB_Leon_5B.png | |image=AB_Leon_5B.png | ||
|input=5B | |input=5B | ||
|data= | |data= | ||
{{AttackData-AB | {{AttackData-AB | ||
|guard=M | |guard=M | ||
|cancel= | |cancel=C, SP, UM | ||
|startup= | |damage=16 | ||
|advHit= | |startup=9 | ||
|advBlock= | |active=6 | ||
|recovery=13 | |||
|advHit=-2 | |||
|advBlock=-3 | |||
|description= use this<br>fast and long kick<br>can be comboed into launcher if close enough for a big increase in damage<br>can be used to combo into his specials (if your hands are somehow fast enough) | |description= use this<br>fast and long kick<br>can be comboed into launcher if close enough for a big increase in damage<br>can be used to combo into his specials (if your hands are somehow fast enough) | ||
}} | }} | ||
| Line 44: | Line 50: | ||
|image=AB_Leon_5c.png | |image=AB_Leon_5c.png | ||
|image2=AB_Leon_5c2.png | |image2=AB_Leon_5c2.png | ||
|input=5C | |input=5C | ||
|data= | |data= | ||
{{AttackData-AB | {{AttackData-AB | ||
|guard=M | |guard=M | ||
| | |damage=12, 14 (23) | ||
|startup= | |startup=7 | ||
|advHit=- | |active=4 (14) 8 | ||
|advBlock=- | |recovery=31 | ||
|advHit=-16 | |||
|advBlock=-17 | |||
|description= Big defensive normal<br>laggy but damaging and big 2-hit attack<br>cannot cancel into specials nor launchers, but causes a lot of pushback<br>difficult ,if not impossible to punish on block for a few characters<br>often used to end combos, particularly air combos, sacrificing Okizeme for better damage<br>causes a HKD '''only when hitting both attacks on an aerial opponent that was already hit by a launcher''', otherwise all other situations share the same properties | |description= Big defensive normal<br>laggy but damaging and big 2-hit attack<br>cannot cancel into specials nor launchers, but causes a lot of pushback<br>difficult ,if not impossible to punish on block for a few characters<br>often used to end combos, particularly air combos, sacrificing Okizeme for better damage<br>causes a HKD '''only when hitting both attacks on an aerial opponent that was already hit by a launcher''', otherwise all other situations share the same properties | ||
}} | }} | ||
}} | }} | ||
=== Crouching | ==== Crouching Normals ==== | ||
{{MoveData | {{MoveData | ||
|image=AB_Leon_2a.png | |image=AB_Leon_2a.png | ||
|input=2A | |input=2A | ||
|data= | |data= | ||
{{AttackData-AB | {{AttackData-AB | ||
|guard=L | |guard=L | ||
|cancel= | |cancel=-A-, -B-, -C-, -SP-, -UM- | ||
|startup= | |damage=8 | ||
|advHit= | |startup=5 | ||
|advBlock= | |active=4 | ||
|recovery=5 | |||
|advHit=4 | |||
|advBlock=3 | |||
|description= 5A but low | |description= 5A but low | ||
}} | }} | ||
| Line 75: | Line 84: | ||
{{MoveData | {{MoveData | ||
|image=AB_Leon_2B.png | |image=AB_Leon_2B.png | ||
|input=2B | |input=2B | ||
|data= | |data= | ||
{{AttackData-AB | {{AttackData-AB | ||
|guard= | |guard=M | ||
|cancel= | |cancel=C, SP, UM | ||
|startup= | |damage=16 | ||
|advHit= | |startup=7 | ||
|advBlock=- | |active=4 | ||
|recovery=19 | |||
|advHit=-6 | |||
|advBlock=-7 | |||
|description=quick upward slash<br>most commonly used to hit-confirm into 2C | |description=quick upward slash<br>most commonly used to hit-confirm into 2C | ||
}} | }} | ||
| Line 91: | Line 102: | ||
|image=AB_Leon_2c.png | |image=AB_Leon_2c.png | ||
|image2=AB_Leon_2c2.png | |image2=AB_Leon_2c2.png | ||
|input=2C | |input=2C | ||
|data= | |data= | ||
{{AttackData-AB | {{AttackData-AB | ||
|guard= | |guard=M, L | ||
| | |damage=16, 8 (22) | ||
|startup=11 | |startup=9 | ||
|advHit= | |active=6 (4) 2 | ||
|advBlock=- | |recovery=11 | ||
|advHit=0, knocks down | |||
|advBlock=-1, 9 | |||
|description=Low double thrust and sweep to destroy the feet<br>can catch a lot of off guard opponents<br>deals very big damage<br>it's possible for the second attack to whiff while the first one hits if done far enough, keep this in mind | |description=Low double thrust and sweep to destroy the feet<br>can catch a lot of off guard opponents<br>deals very big damage<br>it's possible for the second attack to whiff while the first one hits if done far enough, keep this in mind | ||
}} | }} | ||
}} | }} | ||
=== | === Air Normals === | ||
{{MoveData | {{MoveData | ||
|image=AB_Leon_j.a.png | |image=AB_Leon_j.a.png | ||
|input=j.A | |input=j.A | ||
|data= | |data= | ||
{{AttackData-AB | {{AttackData-AB | ||
|guard=H | |guard=H | ||
|cancel= | |cancel=-A-, -B-, -C-, -SP-, -UM- | ||
|startup= | |damage=8 | ||
|advHit= | |startup=3 | ||
|advBlock= | |active=26 | ||
|recovery=6 | |||
|advHit=N/A | |||
|advBlock=N/A | |||
|description=Leon slashes his short-sword upward<br>fast but short combo starter<br>surprisingly a great normal for keeping up juggles | |description=Leon slashes his short-sword upward<br>fast but short combo starter<br>surprisingly a great normal for keeping up juggles | ||
| Line 124: | Line 138: | ||
{{MoveData | {{MoveData | ||
|image=AB_Leon_8.B.png | |image=AB_Leon_8.B.png | ||
|input=j8.B | |||
|input= | |||
|data= | |data= | ||
{{AttackData-AB | {{AttackData-AB | ||
|guard=H | |guard=H | ||
|cancel= | |cancel=C, UM | ||
|startup= | |damage=16 | ||
|advHit= | |startup=5 | ||
|advBlock= | |active=10 | ||
|description=Leon thrusts his sword<br>outshined by | |recovery=19 | ||
|advHit=N/A | |||
|advBlock=N/A | |||
|description=Leon thrusts his sword<br>outshined by j7/9.B but is great for situations where you need a neutral jump to continue a combo | |||
}} | }} | ||
}} | }} | ||
| Line 139: | Line 155: | ||
{{MoveData | {{MoveData | ||
|image=AB_Leon_7.B.png | |image=AB_Leon_7.B.png | ||
|input=j7/9.B | |||
|input= | |||
|data= | |data= | ||
{{AttackData-AB | {{AttackData-AB | ||
|guard=H | |guard=H | ||
|cancel= | |cancel=C, UM | ||
|startup= | |damage=16 | ||
|advHit= | |startup=7 | ||
|advBlock= | |active=8 | ||
|description=Same as | |recovery=21 | ||
|advHit=N/A | |||
|advBlock=N/A | |||
|description=Same as j8.B but at a diagonal angle<br>amazing angle allows for crazy combo extentions and seemingly impossible confirms<br>go wild with this | |||
}} | }} | ||
}} | }} | ||
| Line 154: | Line 172: | ||
{{MoveData | {{MoveData | ||
|image=AB_Leon_8.c.png | |image=AB_Leon_8.c.png | ||
|input=j8.C | |||
|input= | |||
|data= | |data= | ||
{{AttackData-AB | {{AttackData-AB | ||
|guard= | |guard= | ||
| | |damage=24 | ||
|startup= | |startup=7 | ||
|advHit= | |active=8 | ||
|advBlock= | |recovery=7 | ||
|advHit=N/A | |||
|advBlock=N/A | |||
|description=a powerful slice<br>comes out fairly quickly and is great for finishing combos<br>'''Surprisngly, can be used in juggle combos''', it seems this is the only j.C in the game that can be used in juggles without much difficulty | |description=a powerful slice<br>comes out fairly quickly and is great for finishing combos<br>'''Surprisngly, can be used in juggle combos''', it seems this is the only j.C in the game that can be used in juggles without much difficulty | ||
}} | }} | ||
| Line 169: | Line 188: | ||
{{MoveData | {{MoveData | ||
|image=AB_Leon_7-9.c.png | |image=AB_Leon_7-9.c.png | ||
|input=j7/9.C | |||
|input= | |||
|data= | |data= | ||
{{AttackData-AB | {{AttackData-AB | ||
|guard=H | |guard=H | ||
| | |damage=24 | ||
|startup=6 | |startup=15 | ||
|advHit= | |active=6 | ||
|advBlock= | |recovery=N/A | ||
|description=Leon | |advHit=N/A | ||
|advBlock=N/A | |||
|description=Leon pulls out the pac-man hitbox<br>comes out fairly quickly and is great for finishing combos, can be used for juggles but with more difficulty and without much reward | |||
}} | }} | ||
}} | }} | ||
=== Command | ==== Command Normals === | ||
{{MoveData | {{MoveData | ||
|image=AB_Leon_6b.png | |image=AB_Leon_6b.png | ||
|caption=Daniel | |caption=Daniel | ||
|input= | |input=6B | ||
|data= | |data= | ||
{{AttackData-AB | {{AttackData-AB | ||
|guard=H | |guard=H | ||
| | |damage=16 | ||
|startup= | |startup=23 | ||
|advHit= | |active=9 | ||
|advBlock= | |recovery=3 | ||
|advHit=5 | |||
|advBlock=4 | |||
|description= quick hop into overhead<br>Deals meh damage compared to other overhead command normals and can't combo into anything | |description= quick hop into overhead<br>Deals meh damage compared to other overhead command normals and can't combo into anything | ||
}} | }} | ||
}} | }} | ||
| Line 207: | Line 223: | ||
|image=AB_Leon_6c.png | |image=AB_Leon_6c.png | ||
|caption=The cooler Daniel | |caption=The cooler Daniel | ||
|input= | |input=6C | ||
|data= | |data= | ||
{{AttackData-AB | {{AttackData-AB | ||
|guard=H | |guard=H | ||
| | |damage=20 | ||
|startup= | |startup=11 | ||
|advHit=- | |active=8 | ||
|advBlock=- | |recovery=22 | ||
|advHit=-7 | |||
|advBlock=-8 | |||
|description= quick downward thrust<br>Deals great damage, has ''amazing'' range and can be used safely | |description= quick downward thrust<br>Deals great damage, has ''amazing'' range and can be used safely | ||
}} | }} | ||
}} | }} | ||
== Universal Mechanics == | |||
{{MoveData | {{MoveData | ||
|name=Launcher | |name=Launcher | ||
|image=AB_Leon_AB.png | |image=AB_Leon_AB.png | ||
|input=Any 2 buttons on the ground | |||
|input= | |||
|data= | |data= | ||
{{AttackData-AB | {{AttackData-AB | ||
|guard=M | |guard=M | ||
| | |damage=5 | ||
|startup=7 | |startup=7 | ||
|advHit= Launches | |active=2 | ||
|advBlock= | |recovery=11 | ||
|description=on hit, Causes a big wall bounce and puts the opponent in indefinite hitstun until they hit the ground or use meter to tech it<br>can be combo'd universally with A>B>C or A>B>Launcher combos.<br>most characters can add an air special or delay the launcher and do a ground special<br>if you hit an opponent with 3 launchers in the same combo they become completely invincible until waking up from the knockdown state | |advHit=Launches | ||
|advBlock=9 | |||
|description=on hit, Causes a big wall bounce and puts the opponent in indefinite hitstun until they hit the ground or use meter to tech it<br>can be combo'd universally with A>B>C or A>B>Launcher combos.<br>most characters can add an air special or delay the launcher and do a ground special<br>if you hit an opponent with 3 launchers in the same combo they become completely invincible until waking up from the knockdown state | |||
}} | }} | ||
}} | }} | ||
{{MoveData | {{MoveData | ||
|name=Air | |name=Air Launcher | ||
|image=AB_Leon_AB.png | |image=AB_Leon_AB.png | ||
|caption= | |caption= | ||
|input= | |input=Any 2 buttons in the air | ||
|data= | |data= | ||
{{AttackData-AB | {{AttackData-AB | ||
|guard= | |guard=H | ||
| | |damage=5 | ||
|startup= 7 | |startup=7 | ||
|advHit= Launches | |active=4 | ||
|advBlock= | |recovery=9 | ||
|description= | |advHit=Launches | ||
|advBlock=N/A | |||
|description=More active than the grounded version. Must be blocked standing. | |||
}} | }} | ||
}} | }} | ||
<br> | <br> | ||
{{MoveData | {{MoveData | ||
|name=Guard | |name=Guard Break | ||
|image=AB_Leon_GB.png | |image=AB_Leon_GB.png | ||
|input=22C | |input=22C | ||
|data= | |data= | ||
{{AttackData-AB | {{AttackData-AB | ||
|guard= | |guard=U | ||
| | |damage=1, 1 (2) | ||
|startup= | |startup=5 | ||
|advHit= | |active=4 | ||
|advBlock= | |recovery=33 | ||
|description= | |advHit=23 | ||
|advBlock=N/A | |||
|description=A quick, unblockable point blank attack that stuns grounded opponents. Throw function. | |||
}} | }} | ||
}} | }} | ||
== Special | == Special Moves == | ||
{{MoveData | {{MoveData | ||
|name= Storm | |name= Storm Ride<br>スピリットパーム | ||
|image=AB_Leon_236.gif | |image=AB_Leon_236.gif | ||
|image2=AB_Leon_236_range.png | |image2=AB_Leon_236_range.png | ||
| Line 282: | Line 302: | ||
|advHit=Knocks down | |advHit=Knocks down | ||
|advBlock=4 / 3 / 2 | |advBlock=4 / 3 / 2 | ||
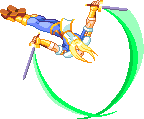
|description=Leon | |description=Leon performs a frontflip, then a cross slash<br>Button determines flip length and properties. | ||
* A : slightly longer reach than 5C, leaves them standing. is -3 on hit, rarely used | * A : slightly longer reach than 5C, leaves them standing. is -3 on hit, rarely used | ||
| Line 295: | Line 315: | ||
<br> | <br> | ||
{{MoveData | {{MoveData | ||
|name= Jolt | |name= Jolt Slice<br>炎のチー・ナックル | ||
|image=AB_Leon_46a.png | |image=AB_Leon_46a.png | ||
|image2=AB_Leon_46b.png | |image2=AB_Leon_46b.png | ||
| Line 357: | Line 377: | ||
}} | }} | ||
== Boost | == Boost Mode (22ABC) == | ||
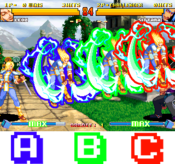
'''Lighting Fast:''' | '''Lighting Fast:''' | ||
Revision as of 17:01, 15 September 2023
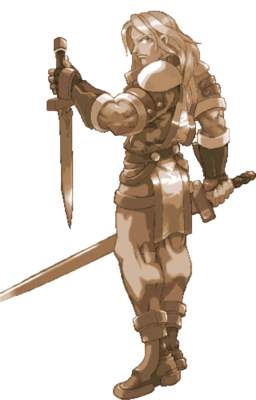
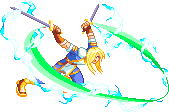
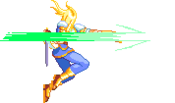
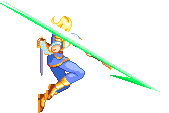
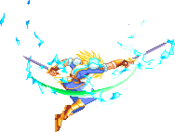
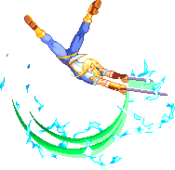
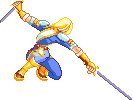
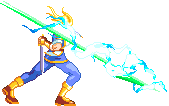
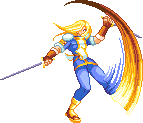
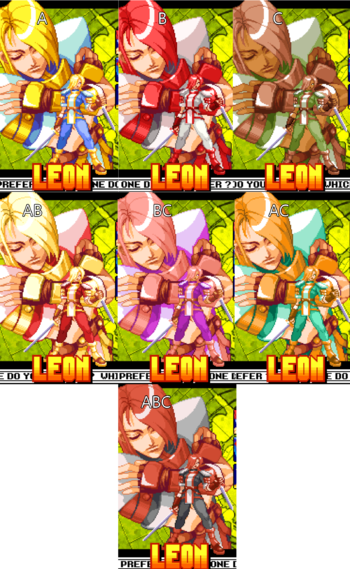
Leon is a swordsman with the power to imbue electricity into the twin blades he wields.
An arrogant and narcissistic knight who comes from the same noble yet reclusive kingdom as Lightning, Leon is ordered by his king to investigate the mystery of the lost continent.
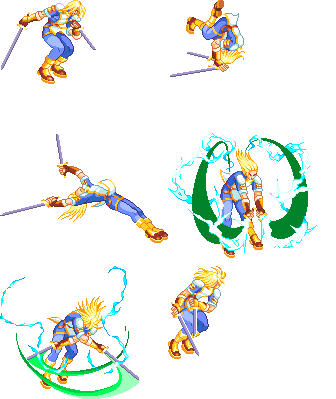
Leon plays similarly to Lightning in Asura Blade: Sword of Dynasty and is a defensive charge character with long reaching normals. He alternates between his shortsword for quick up-close attacks and his longsword at range, combining their use for his most iconic moves.
OverviewLeon is a charge character with solid range and disjoint. |
|
| Pros | Cons |
|
|
| Play Style | Charge |
| Dash Type | Run |
| Backdash Type | Airborne |
| Defense Modifier | 1.0625 |
| Air Options | None |
| Meter Gauge | 80 |
Movelist
Normals
Standing Normals
| Damage | Startup | Active | Recovery | Guard | Cancel | Adv. Hit | Adv. Block | |
|---|---|---|---|---|---|---|---|---|
| 8 | 5 | 6 | 3 | M | -A-, -B-, -C-, -SP-, -UM- | 4 | 3 | |
|
quick jab | ||||||||
| Damage | Startup | Active | Recovery | Guard | Cancel | Adv. Hit | Adv. Block | |
|---|---|---|---|---|---|---|---|---|
| 16 | 9 | 6 | 13 | M | C, SP, UM | -2 | -3 | |
|
use this | ||||||||
| Damage | Startup | Active | Recovery | Guard | Cancel | Adv. Hit | Adv. Block | |
|---|---|---|---|---|---|---|---|---|
| 12, 14 (23) | 7 | 4 (14) 8 | 31 | M | - | -16 | -17 | |
|
Big defensive normal | ||||||||
Crouching Normals
| Damage | Startup | Active | Recovery | Guard | Cancel | Adv. Hit | Adv. Block | |
|---|---|---|---|---|---|---|---|---|
| 8 | 5 | 4 | 5 | L | -A-, -B-, -C-, -SP-, -UM- | 4 | 3 | |
|
5A but low | ||||||||
| Damage | Startup | Active | Recovery | Guard | Cancel | Adv. Hit | Adv. Block | |
|---|---|---|---|---|---|---|---|---|
| 16 | 7 | 4 | 19 | M | C, SP, UM | -6 | -7 | |
|
quick upward slash | ||||||||
| Damage | Startup | Active | Recovery | Guard | Cancel | Adv. Hit | Adv. Block | |
|---|---|---|---|---|---|---|---|---|
| 16, 8 (22) | 9 | 6 (4) 2 | 11 | M, L | - | 0, knocks down | -1, 9 | |
|
Low double thrust and sweep to destroy the feet | ||||||||
Air Normals
| Damage | Startup | Active | Recovery | Guard | Cancel | Adv. Hit | Adv. Block | |
|---|---|---|---|---|---|---|---|---|
| 8 | 3 | 26 | 6 | H | -A-, -B-, -C-, -SP-, -UM- | N/A | N/A | |
|
Leon slashes his short-sword upward
| ||||||||
| Damage | Startup | Active | Recovery | Guard | Cancel | Adv. Hit | Adv. Block | |
|---|---|---|---|---|---|---|---|---|
| 16 | 5 | 10 | 19 | H | C, UM | N/A | N/A | |
|
Leon thrusts his sword | ||||||||
| Damage | Startup | Active | Recovery | Guard | Cancel | Adv. Hit | Adv. Block | |
|---|---|---|---|---|---|---|---|---|
| 16 | 7 | 8 | 21 | H | C, UM | N/A | N/A | |
|
Same as j8.B but at a diagonal angle | ||||||||
| Damage | Startup | Active | Recovery | Guard | Cancel | Adv. Hit | Adv. Block | |
|---|---|---|---|---|---|---|---|---|
| 24 | 7 | 8 | 7 | - | - | N/A | N/A | |
|
a powerful slice | ||||||||
| Damage | Startup | Active | Recovery | Guard | Cancel | Adv. Hit | Adv. Block | |
|---|---|---|---|---|---|---|---|---|
| 24 | 15 | 6 | N/A | H | - | N/A | N/A | |
|
Leon pulls out the pac-man hitbox | ||||||||
= Command Normals
| Damage | Startup | Active | Recovery | Guard | Cancel | Adv. Hit | Adv. Block | |
|---|---|---|---|---|---|---|---|---|
| 16 | 23 | 9 | 3 | H | - | 5 | 4 | |
|
quick hop into overhead | ||||||||
| Damage | Startup | Active | Recovery | Guard | Cancel | Adv. Hit | Adv. Block | |
|---|---|---|---|---|---|---|---|---|
| 20 | 11 | 8 | 22 | H | - | -7 | -8 | |
|
quick downward thrust | ||||||||
Universal Mechanics
| Damage | Startup | Active | Recovery | Guard | Cancel | Adv. Hit | Adv. Block | |
|---|---|---|---|---|---|---|---|---|
| 5 | 7 | 2 | 11 | M | - | Launches | 9 | |
|
on hit, Causes a big wall bounce and puts the opponent in indefinite hitstun until they hit the ground or use meter to tech it | ||||||||
| Damage | Startup | Active | Recovery | Guard | Cancel | Adv. Hit | Adv. Block | |
|---|---|---|---|---|---|---|---|---|
| 5 | 7 | 4 | 9 | H | - | Launches | N/A | |
|
More active than the grounded version. Must be blocked standing. | ||||||||
| Damage | Startup | Active | Recovery | Guard | Cancel | Adv. Hit | Adv. Block | |
|---|---|---|---|---|---|---|---|---|
| 1, 1 (2) | 5 | 4 | 33 | U | - | 23 | N/A | |
|
A quick, unblockable point blank attack that stuns grounded opponents. Throw function. | ||||||||
Special Moves
| Damage | Startup | Active | Recovery | Guard | Cancel | Adv. Hit | Adv. Block | |
|---|---|---|---|---|---|---|---|---|
| - | 24 / 26 / 28 | - | - | M | O | Knocks down | 4 / 3 / 2 | |
|
Leon performs a frontflip, then a cross slash
| ||||||||
| Damage | Startup | Active | Recovery | Guard | Cancel | Adv. Hit | Adv. Block | |
|---|---|---|---|---|---|---|---|---|
| - | 29 / 29 / 29 | - | - | H | O | Knocks down | - | |
|
Leon does a wide and fast horizontal slash
| ||||||||
| Damage | Startup | Active | Recovery | Guard | Cancel | Adv. Hit | Adv. Block | |
|---|---|---|---|---|---|---|---|---|
| - | 29 / 29 / 29 | - | - | M | O | Knocks down | - | |
|
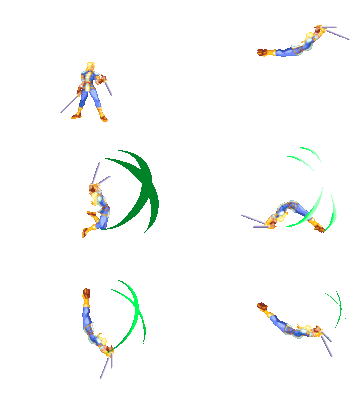
Leon backflips and does a cross slash, spinning around and effectively covering half the screen in his hitboxes
| ||||||||
Supers
| Damage | Startup | Active | Recovery | Guard | Cancel | Adv. Hit | Adv. Block | |
|---|---|---|---|---|---|---|---|---|
| - | 62(53+9) | - | - | M | O | Knocks down | inconsistent | |
|
Leon fills everything in a 5 mile radius with a hitbox. If he hits (not blocked) it deals enormous damage and causes a HKD.
| ||||||||
Boost Mode (22ABC)
Lighting Fast:
Leon becomes twice as fast and jumps higher.
Color Palettes

