|
|
| Line 1: |
Line 1: |
| [[File:Southerportrait.jpg|right]]
| | {{Infobox Character HNK |
| ==Introduction==
| | |name=Thouther |
| {| style="width:100%" cellpadding=10 border="0"
| | }} |
| |-
| |
| | [[Image:Thoutherportrait.png|left]]
| |
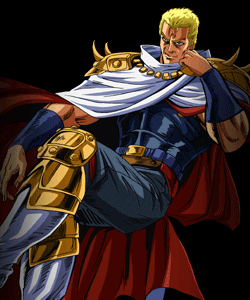
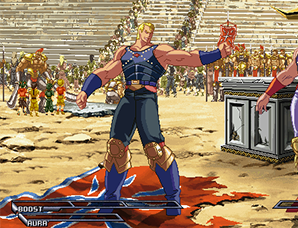
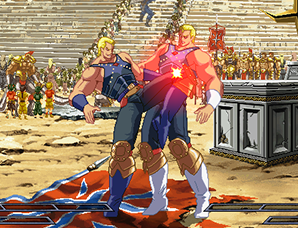
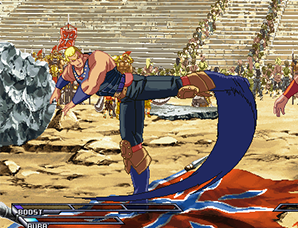
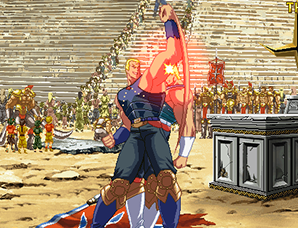
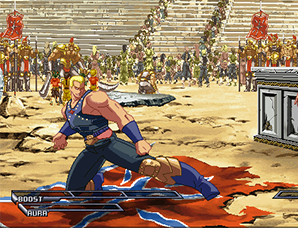
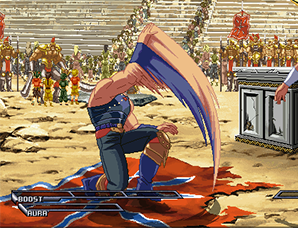
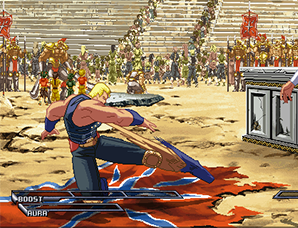
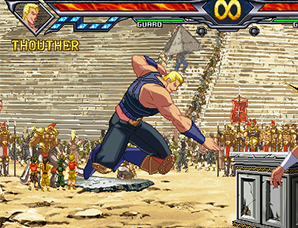
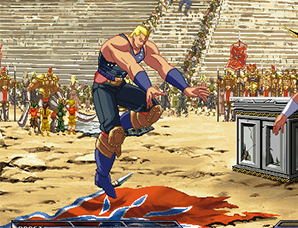
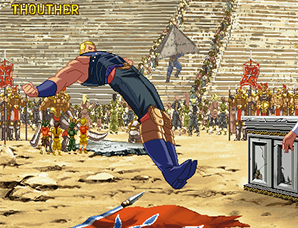
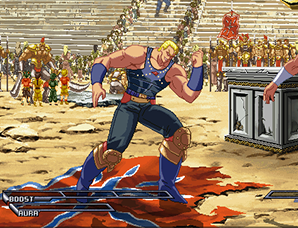
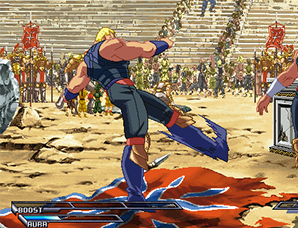
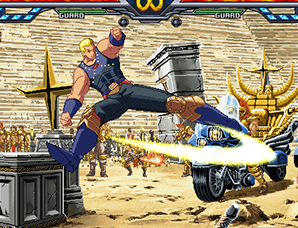
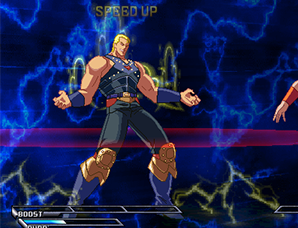
| | More than any other character in Hokuto no Ken, Thouther is all about being on the offensive. Thanks to his powerful Bakuseiha fireball, Thouther's mixups are perhaps the most devastating in the game. This coupled with his high star-removing ability can make him seem truly be unstoppable when he is on a roll. On the other hand however, his defense is without a doubt the worst in the game, on par with Mamiya - he has a Guard Gauge against all characters, no reliable reversal, and very low health. For these reasons Thouther is considered a "one chance" character and sometimes has trouble achieving a stable win rate. While easy to pick up his basic attack patterns and combos, the difficulty of his more advanced techniques coupled with the amount of work required to be able to win consistently can make Thouther a very frustrating character to play.
| |
| |}
| |
| <br><br><br>
| |
|
| |
|
| ==Normal Moves== | | ==Normal Moves== |
| Line 269: |
Line 264: |
| 11F Startup<br> | | 11F Startup<br> |
| <br> | | <br> |
|
| |
| ==Combos==
| |
| ==Technique==
| |
|
| |
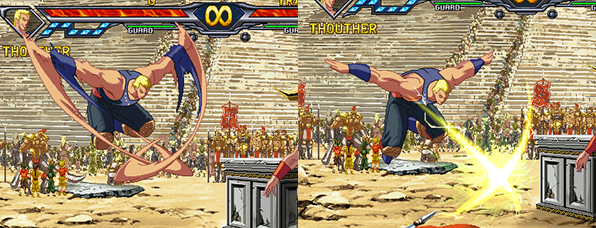
| Delay j.C air 214A
| |
|
| |
| Grave, delay chase jump, jC, air 214A (extreme delay required on Raoh)
| |
|
| |
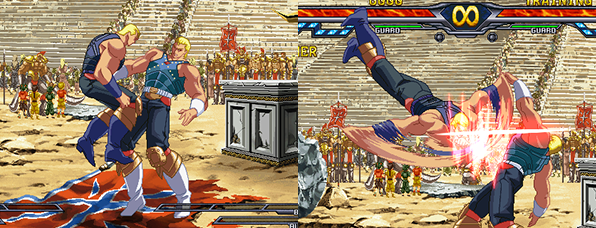
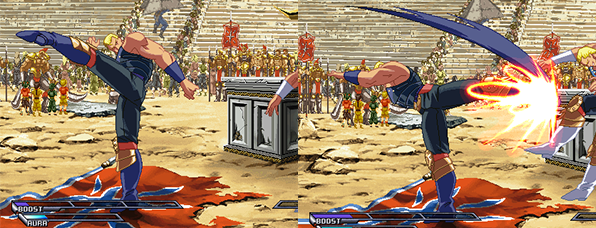
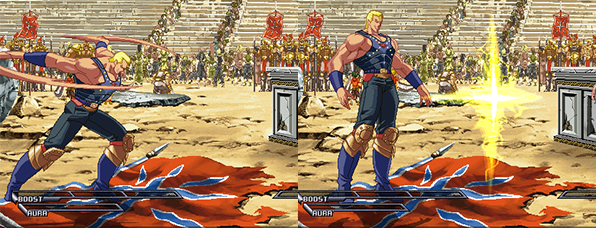
| Think of the timing as hitting the bottom of the opponent with jC, and having them "land" on the 214A projectile rather than its startup hit. Midscreen, you'll have to adapt your combo depending on whether air 214A hits once or twice.
| |
|
| |
|
| |
| Grave-TK 214A
| |
|
| |
| A combo part that's often used after CD or BD. Done easily with 2147A.
| |
|
| |
|
| |
| Close C Grave Install
| |
|
| |
| Souther's Close C has a special Grave Shoot property that allows him to perform a Grave Install without the use of any Boost.
| |
|
| |
| After a close C, if you TK your special properly, you will get the grounded version that now takes one star. Useful with Spear (62369A/C) and Gekiha (2147A). If you're too slow on the cancel, the chase jump will come out instead.
| |
|
| |
|
| |
|
| |
| 236A boost
| |
|
| |
| ~236A, boost on the second hit.
| |
|
| |
| -Won't become a boost cancel (will only take 20%) but you will recover faster.
| |
|
| |
| Close B>far D, or 2B will connect, and if your opponent guard cancels on 236A's second hit, you should be able to block it (even if it's Mamiya). It has to be linked though, so you need to get used to it.
| |
|
| |
| Can also be used during press.
| |
|
| |
|
| |
|
| |
| Cheap boost banishing
| |
|
| |
| There is a way to reduce the boost quantity used by the boost after a boost C+D.
| |
|
| |
| After 2C or far D, do E~C~D instead of E+C+D.
| |
|
| |
| If you do E+C+D, the boost after will cost 50%, but if you do E~C~D correctly, it will only cost 20%.
| |
|
| |
| Really useful when you only have 1 bar.
| |
|
| |
| ==Basic Combos==
| |
|
| |
| '''No meter, low starter combos'''
| |
|
| |
| {| style="width:100%" cellpadding=10 border="1"
| |
| |
| |
| 2B*n→236A→236C→236D (doesn't work on crouching Jagi)
| |
|
| |
| 2B*n→2C→far D , 236B→236D (doesn't work on crouching Jagi)
| |
|
| |
| tk 214A→far D, banishing strike combo (crouching Rei only)☆
| |
|
| |
| 2B*n→A+C, delay JC 214A, (1 hit midscreen) far C, 236C→236D ☆
| |
|
| |
| 2B*n→A+C, delay JC 214A, (1 hit midscreen), A+C, JA→214A, JB→214A (will meaty for oki)☆☆
| |
|
| |
| 2B*n→A+C, delay JC 214A (2 hit midscreen) close C, far C , 236C→236D ☆
| |
|
| |
| 2B*n→grave delay JC 214A (2 hit midscreen) close C 6239A, grave JA→JB→baku ☆☆
| |
|
| |
| 2B*n→A+C delay JC 214A →close C, JA→214A, JB→214A (will meaty for oki)☆☆
| |
|
| |
| 2B close D→JD→IAD JC , 214A , close A, close C , 2147A (near corner) ☆
| |
|
| |
| 2B close D→JD→IAD JC, 214A, far A, far C , 236A~
| |
|
| |
| 2B close D→HJ JAJBJCJD→close A, close C, 2147A, ☆
| |
|
| |
| 2B2D→623C, dash close A , close C 6329A, close A, close C 2147A ☆☆
| |
|
| |
| 2B2D→623C, dash close A close C,6239A, close A close C, JA→214A, JB→214A (will meaty for oki) ☆☆
| |
| |}
| |
|
| |
|
| |
| ==Overhead Combos==
| |
|
| |
| {| style="width:100%" cellpadding=10 border="1"
| |
| |
| |
| 6A> boost 2B close C 6239A, 5A> close C f.C A+C, tk air 214A☆☆
| |
|
| |
| 6A>boost 2B close C 6239A close D JACD> close B Close D A+C tk air 214A ☆☆( doesn't work on Toki Mamiya and Souther)
| |
| |}
| |
|
| |
| If 6A is guarded but 2B hits then go to close C to Grave combos
| |
|
| |
| If both 6A, 2B are guarded then go to close C Grave follow up
| |
|
| |
|
| |
| ==Banishing strike combo ( start with CDE outside of raw hit)==
| |
|
| |
|
| |
| '''Direct hit or A+B boost starter'''
| |
|
| |
| {| style="width:100%" cellpadding=10 border="1"
| |
| |
| |
| ~>[A+C tk 214A]*2, JBJD 214A, JBJC 214A, IAD j.B >214A or 214214C ☆☆☆
| |
| |}
| |
|
| |
| '''tk 214A or 2B2C f.D starter'''
| |
|
| |
| {| style="width:100%" cellpadding=10 border="1"
| |
| |
| |
| ~>[A+C tk 214A]*2>far A>214A ☆☆☆
| |
| |}
| |
|
| |
| '''236C (1hit) starter'''
| |
|
| |
| {| style="width:100%" cellpadding=10 border="1"
| |
| |
| |
| ~>A+C tk 214A>IAD JB, f.D, Geki ☆☆
| |
| |}
| |
|
| |
|
| |
| ==Cross down 2C combos (generally starting from raw C+D or A+B boost C+D)==
| |
|
| |
|
| |
| The 2C*n part will be done with Souther on the wall side. When you'll do tk 2141236A, the opponent will go to the other wall.
| |
|
| |
| {| style="width:100%" cellpadding=10 border="1"
| |
| |
| |
| C+D, boost, >2C*2~3>236A, boost, 2C*n> tk 21412236A (doesn't work on Heart)
| |
|
| |
| C+D, boost> close D far D, 236A, boost>2C*n> tk 2141236A (doesn't work on Heart)
| |
|
| |
| C+D, boost>2C*2>236A, C> 623A , boost, 2C*n>tk 2141236A (vs Heart but not stable)
| |
|
| |
| C+D, boost, > close C, close D, far D, 236A, boost>2C*n> tk 2141236A (vs Heart)
| |
|
| |
| C+D, boost >2C*2~3>236A 236C 236D, boost, 2C*n , tk 2141236A (good vs all char but need 1.5 boost)
| |
| |}
| |
|
| |
|
| |
| '''Cross down 2C 100%'''
| |
|
| |
| {| style="width:100%" cellpadding=10 border="1"
| |
| |
| |
| ~>cross down >2C*9~10>C>E~214214C>E>B>E>C+D>E>B>C>623A*3~4>tk 2141236A
| |
| |}
| |
|
| |
|
| |
| ==6B starter==
| |
|
| |
|
| |
| {| style="width:100%" cellpadding=10 border="1"
| |
| |
| |
| corner, 6B→(Non Boost) [A+C dash]*n
| |
| |}
| |
|
| |
| - You get a lot of boost but your opponent too. Mixing it with A+C tk 214A allows you take stars.
| |
|
| |
|
| |
| ==Grave combos, corner==
| |
|
| |
|
| |
| Juda、shin, mamiya, heart, sauza ~2B2C
| |
|
| |
| {| style="width:100%" cellpadding=10 border="1"
| |
| |
| |
| ~>A+C >delay JC 214A>A+C>tk 214A>B>C>C> 214A☆☆
| |
|
| |
| ~>A+C, delay JC 214A>A+C>tk 214A, B>C> C+D ☆☆☆
| |
| |}
| |
|
| |
| Toki, Kenshiro ~2B2C
| |
|
| |
| {| style="width:100%" cellpadding=10 border="1"
| |
| |
| |
| ~>A+C>delay JC 214A>JAJCJD(>jc>JAJCJD)>close C>214214C or 214A☆
| |
|
| |
| ~>A+C>delay JC 214A>JAJCJD(>jc>JAJCJD)>c.C>2Cf.C>214A ☆
| |
|
| |
| ~>A+C>delay JC 214A>JAJCJD(>jc>JAJCJD)>c.C>far C>2Cfar C>214A☆
| |
| |}
| |
|
| |
|
| |
| ==Jump Install Grave combos==
| |
|
| |
|
| |
| {| style="width:100%" cellpadding=10 border="1"
| |
| |
| |
| ~>A+C >delay JC 214A>close C>6239A>close A close C> 2147A ☆☆☆
| |
|
| |
| ~>A+C >delay JC 214A>close C>6239A>close A close C>C+D>E>2C*n> meaty 214A(vs Rei, Heart)
| |
|
| |
| ~>A+C>delay JC 214A>c.C>6239A>A+C>JA 214A>meaty 214A(vs Rei, Heart)
| |
| |}
| |
|
| |
| '''Banju route(doesn't work on Toki, Mamiya, Souther)'''
| |
|
| |
| {| style="width:100%" cellpadding=10 border="1"
| |
| |
| |
| ~>A+C, delay JC 214A, close C >6239A>close D>JACD>close B D>A+C>meaty tk 214A
| |
| |}
| |
|
| |
| '''(meaty tk 214A vs shin)'''
| |
|
| |
| {| style="width:100%" cellpadding=10 border="1"
| |
| |
| |
| ~>A+C, delay JC 214A, close C , 6239A, close D, JACD, close B C , meaty tk 214A
| |
| |}
| |
|
| |
| '''(low height pickup close D)'''
| |
|
| |
| {| style="width:100%" cellpadding=10 border="1"
| |
| |
| |
| ~>A+C, delay JC 214A, close C, 6239A, close D, JABC, jD whiff, 2B A+C meaty tk 214A
| |
| |}
| |
|
| |
|
| |
| '''(doesn't work on Toki)'''
| |
|
| |
| {| style="width:100%" cellpadding=10 border="1"
| |
| |
| |
| ~>A+C, delay JC, close C, 6239A, JACD, close B D, A+C, tk 214A
| |
| |}
| |
|
| |
| '''(Normal route when you cant normally land 214A on char like vs. Juda)'''
| |
|
| |
| {| style="width:100%" cellpadding=10 border="1"
| |
| |
| |
| ~>A+C, delay JC 214A, close C, 6239A, JACD, close B C, 2147A
| |
| |}
| |
|
| |
|
| |
| ==Bani Combos Concept==
| |
|
| |
| When to use Bani combos or Grave combos
| |
|
| |
|
| |
|
| |
| As Souther, you want to get boost then always press and push the opponent as much as possible into the corner and start your corner okizeme game. In order to optimize your corner carry you need to know when to use either combo.
| |
|
| |
|
| |
|
| |
| Generally you want to do:
| |
|
| |
| {| style="width:100%" cellpadding=10 border="1"
| |
| |
| |
| ~236C,E>2C*2>A+C, delay JC 214A, close C, 6239A, close A C, tk meaty 214A
| |
| |}
| |
|
| |
|
| |
| which is fine when you want guaranteed damage with three stars but when you want to corner the likes of Rei and Heart then:
| |
|
| |
| {| style="width:100%" cellpadding=10 border="1"
| |
| |
| |
| ~236C, boost C+D, A+C tk 214A, IAD JB, far D, meaty 214A
| |
| |}
| |
|
| |
| This will put them in corner and set up meaty Geki
| |
|
| |
| If you catch a crouching Rei then far D, C+D will combo
| |
|
| |
|
| |
| ==FKO Combos==
| |
|
| |
| '''☆-0'''
| |
|
| |
| You can do this from many normal moves but generally wouldn't recommend it.
| |
|
| |
| '''☆-1'''
| |
|
| |
| {| style="width:100%" cellpadding=10 border="1"
| |
| |
| |
| ~delay JC 214A(2HIT)→land (close C) FKO(possible midscreen)
| |
|
| |
| ~C+D→2C→FKO
| |
| |}
| |
|
| |
| '''☆-2'''
| |
|
| |
| {| style="width:100%" cellpadding=10 border="1"
| |
| |
| |
| ~delay Jc Baku, boost f.A f.C, bani, boost f.C, kill (midscreen, hit f.A low)
| |
|
| |
| ~Delay Jc Baku, c.C, install spearr, c.A, kill (corner)
| |
|
| |
| ~bani, grave baku,→IAD JB→kill
| |
| |}
| |
|
| |
| '''☆-3'''
| |
|
| |
| {| style="width:100%" cellpadding=10 border="1"
| |
| |
| |
| ~Delay Jc Baku, c.C, install spear, c.A c.C, Bani, E, c.A c.C , kill
| |
|
| |
| ~JC→Baku 2 hit, JA, JD, Boost Baku, land Bani, Boost cancel, kill
| |
|
| |
| ~JA→JB→baku 2 hit, JA JB, Boost Baku, land Bani, Boost Cancel, kill ( vs Toki, Jagi, Juda)
| |
|
| |
| 2B2Cf.D, Boost Bani, Grave Baku, E, c.C, IAD Baku, IAD JB, kill
| |
|
| |
| 2B2Cf.D, Boost Bani, Grave Baku x2, E, kill
| |
|
| |
| raw Bani, Grave Baku x 2, IAD JB, kill
| |
|
| |
| ~Kobinu, Boost Bani, Heavy, Grave Baku, IAD JB, kill (back to corner)
| |
|
| |
| 6A>boost 2B, c.C, install spear, Grave, JA JB, Boost Baku, Bani, boost kill ( boost 1.5 , corner)
| |
| |}
| |
|
| |
| '''☆-4'''
| |
|
| |
| {| style="width:100%" cellpadding=10 border="1"
| |
| |
| |
| Corner, lift/catch throw, grave IAD Baku loop x 2, c.AC , Bani, E, c.C, kill
| |
|
| |
| Corner, catch throw, grave, IAD Baku, c.C, install spear, Bani, boost c.AC, kill
| |
|
| |
| Corner, catch throw, grave, IAD Baku, c.C, install spear, c.AC, bani, boost kill ( Toki ok)
| |
|
| |
| Catch throw, boost grave (vs ken no boost) , JC ( vs Heart JD) , Baku, JAJD, boost baku, bani, boost kill ( vs ken, sauza, raoh, rei, heart, can do anywhere)
| |
|
| |
| Max charge Bani (guard)→E→2C→bani, E→grave baku (IAD), c.AC, kill
| |
| |}
| |
|
| |
|
| |
| ==Houou youko kaiten combos==
| |
|
| |
| {| style="width:100%" cellpadding=10 border="1"
| |
| |
| |
| 2B*n→grave, delay JC Baku, c.C, install spear, c.AC, youko
| |
|
| |
| C.D, HJABCD, c.AC, youko 近D→HJABCD
| |
|
| |
| Corner, c.D, neutral JD, IAD JC, c.C, install spear, c.AC, youko
| |
|
| |
| Corner, 2D, spear, dash c.AC, install spear, c.AC, youko
| |
|
| |
| Things to try after youko
| |
|
| |
| ~2B Grave Baku set up
| |
|
| |
| ~2B Geki set up
| |
|
| |
| ~2B low hitting hikanu/kobinu?
| |
| |}
| |
|
| |
| '''Okizeme from Youko'''
| |
|
| |
| {| style="width:100%" cellpadding=10 border="1"
| |
| |
| |
| IAD Baku, 2B, 6A, 2A, 5B, spear * 4, f.C, Geki
| |
|
| |
| 2B→6A、6A、from throw 2A→5A→spear*
| |
|
| |
| Kobinu Low, fastest Kaeriminu (unblockable)
| |
| |}
| |
|
| |
|
| |
| '''After Youko , from set up Baku or Geki'''
| |
|
| |
| {| style="width:100%" cellpadding=10 border="1"
| |
| |
| |
| ~ charge Bani, (no boost) hikanu, bani combo
| |
|
| |
| ~charge bani, (no boost), grave, dash grave, hikanu low hit, bani combo
| |
|
| |
| ~heavy, boost bani
| |
| |}
| |
|
| |
| '''Vs Juda, side switch'''
| |
|
| |
| Not in corner
| |
|
| |
| {| style="width:100%" cellpadding=10 border="1"
| |
| |
| |
| Grave, delay JC Baku, grave, JAB, switch sides, Baku
| |
|
| |
| Grave, delay Jc Baku 2hit, c.C, install spear, grave, JAB, switch, Baku ☆☆
| |
|
| |
| Grave, delay JC 2hit, c.C, grave, JAB, switch, Baku ☆
| |
| |}
| |
|
| |
| From Bani
| |
|
| |
| {| style="width:100%" cellpadding=10 border="1"
| |
| |
| |
| Bani combo→グレ剥がし(HSC)→JA→JB→JD→switch, baku
| |
| |}
| |
|
| |
|
| |
| ==Chikuseki Combos==
| |
|
| |
|
| |
| '''Midscreen'''
| |
|
| |
| {| style="width:100%" cellpadding=10 border="1"
| |
| |
| |
| close D>HJA>JB>JC>JD>A>close C , delay far C, A+C, 2B> A+C tk 214A
| |
|
| |
| close D>HJA>JB>JC>JD>A>close C>JA>214A, JB> 214A
| |
|
| |
| close D>JD>IAD JC, close C , 6239A, dash, OTG 2B , A+C tk 214A
| |
|
| |
| close D, JD>IAD JC, close D>JA>JC>JD>far C, 236C, 236D ( vs Ken, Rei)
| |
| |}
| |
|
| |
|
| |
| '''Corner'''
| |
|
| |
| {| style="width:100%" cellpadding=10 border="1"
| |
| |
| |
| close D, JD, IAD JC, close C, 6239A, close D, JABC, 214A, 2B, A+C tk 214A
| |
|
| |
| close D >HJA>JB>JC>JD>A>close C, JA>214A, JB> 214A set up
| |
|
| |
| close D>HJA>JB>JC>JD>close D, JA>JC>JD, close B D, A+C tk 214A
| |
|
| |
| Corner vs Ken Raoh Shin Souther (done on the side of Souther's health bar, both sides against Raoh)
| |
|
| |
| close D, JD , IAD JC, 2C*10, A+C, B, A+C tk 214A
| |
|
| |
| close D, JD, IAD JC, 2C *15, A+C, tk 214A setup
| |
| |}
| |
|
| |
|
| |
| '''Midscreen reliable chikuseki'''
| |
|
| |
| {| style="width:100%" cellpadding=10 border="1"
| |
| |
| |
| A+C, delay jC 214A 2Hit, close C, 6239A, (vs Ken, 5AC, 236A), 2B (if corner add A+C tk 214A)
| |
|
| |
| A+C, delay jC 214A 2hit, close C, 6239A, A+C, JAB, 214A setup
| |
|
| |
| (vs Ken Toki Shin Juda Souther)
| |
| |}
| |
|
| |
|
| |
| '''Dizzy chikuseki (1 boost)'''
| |
|
| |
| {| style="width:100%" cellpadding=10 border="1"
| |
| |
| |
| ~236A 236C, E2C, 2C, 2C, boost 2C, 2C, A+C, delay jC 214A 2hit, close C (if corner add far C), A+C, 2B, A+C tk 214A
| |
|
| |
| For toki, after close C, A+C use C tk 214A ender
| |
| |}
| |
|
| |
|
| |
| '''Rei dizzy(1 boost)'''
| |
|
| |
| {| style="width:100%" cellpadding=10 border="1"
| |
| |
| |
| ~236A, 236C, E~2C, 2C, 2C, boost 2C, 2C, A+C, delay jC 214A 2hit, falling JA, JC, 214A, JB, 214A
| |
| |}
| |
|
| |
|
| |
|
| |
| ==Debouncing Bani Chikuseki==
| |
|
| |
|
| |
| {| style="width:100%" cellpadding=10 border="1"
| |
| |
| |
| Rei Shin Mamiya Juda Toki
| |
|
| |
| 2B*3>2C boost C+D>close D A+C tk 214A boost>close D, forward jumpBB 214A>Debouncing A+C> far C A+C>JAB 214A>OTG with JB 214A set
| |
| |}
| |
|
| |
|
| |
| {| style="width:100%" cellpadding=10 border="1"
| |
| |
| |
| Raoh Jagi
| |
|
| |
| 2B*3>2C boost C+D>close D A+C tk 214A boost >close D forward JBB>forward JBB 214A, Debouncing A+C A+C>JAB 214A>OTG with JB 214A setup
| |
| |}
| |
|
| |
|
| |
| {| style="width:100%" cellpadding=10 border="1"
| |
| |
| |
| Heart
| |
|
| |
| 2B*3, 2C boost C+D, close D A+C tk 214A boost, close D forward JBB, dash JB air dash D 214A, Debouncing A+C A+C, JAB 214A
| |
| |}
| |
|
| |
|
| |
| {| style="width:100%" cellpadding=10 border="1"
| |
| |
| |
| Rei ken
| |
|
| |
| 2B*3, 2C boost C+D, close D A+C tk 214A boost, close D forward JBB, dash JBA 214A, Debouncing A+C A+C, JAB 214A
| |
| |}
| |
|
| |
|
| |
| Egure Style
| |
|
| |
| {| style="width:100%" cellpadding=10 border="1"
| |
| |
| |
| Charge bani, if it hits do close C or 2C), if charged bani is blocked, do close C close D or 2Cx2), A+C, tk 214A, JD air dash JD 214A, JBJD 214A, JD air dash JD 214A, iad jD 214A, A+C*2, JA 214A, OTG with 2B A+C, tk 214A okizeme
| |
| |}
| |
|
| |
| For Ken Toki Heart, take out the IAD D 214A
| |
|
| |
|
| |
|
| |
| For Juda, from JABD you take the side switch route
| |
|
| |
|
| |
|
| |
| Raoh Rei, doesnt matter if the bani hits or gets blocked, go into ~ close C close D starter
| |
|
| |
|
| |
|
| |
| Jagi and Heart, doesnt matter if hits or gets blocked, go into C+D, boost A+C starter
| |
|
| |
|
| |
|
| |
| For jagi, if bani hits then its fine with just going into C+D A+C, 214A, JD air dash JD ~
| |
|
| |
|
| |
|
| |
| If it's blocked then go into A+C, tk 214A, dash close D , JD ~
| |
|
| |
|
| |
|
| |
| ==1 boost, every char except Raoh Heart Juda, 3 star dizzy chikuseki==
| |
|
| |
| {| style="width:100%" cellpadding=10 border="1"
| |
| |
| |
| (Boost) 2Bx2-4, 2C, E~C~D (cheap bani), A+C tk 214A, 20% boost,
| |
|
| |
| C+D boost B close C 6239A
| |
|
| |
| Then
| |
|
| |
| 2C FKO
| |
|
| |
| Or
| |
|
| |
| close A C 623A, dash 2B A+C, tk 214A setup
| |
| |}
| |
|
| |
|
| |
| {| style="width:100%" cellpadding=10 border="1"
| |
| |
| |
| vs Rei
| |
|
| |
| close C close D, JABC 214A, dash 2B A+C, 214A
| |
| |}
| |
|
| |
| Since the period where you cannot get boost back after using it is not over yet, make sure that the meaty 214A is properly blocked then open them up so you can expect get a lot of meter, approximately 2 boost bars back maximum. If you open the guard, the opponent should get dizzy.
| |
|
| |
|
| |
| ==Basket/Dribble Combos==
| |
|
| |
|
| |
|
| |
|
| |
| ==Ken==
| |
|
| |
| '''Corner on the side of Souther's health bar'''
| |
|
| |
| {| style="width:100%" cellpadding=10 border="1"
| |
| |
| |
| close D JD air dash JC cross up, 2C*7 far C 2C 236C, boost 5A, 2A, 5AA,
| |
|
| |
| Boost 5A*10 , hyakuretsu
| |
| |}
| |
|
| |
|
| |
| '''1.6 boost starter'''
| |
|
| |
| {| style="width:100%" cellpadding=10 border="1"
| |
| |
| |
| close D JD air dash, some delay JC, 214A 2hit, close B C, far C 2C far C 236C, boost cancel 2A, 5A*4, 5A*10, dash 5A, dash 2A, hyakuretsu
| |
| |}
| |
|
| |
|
| |
| '''1 boost , just when getting it, if you have too much then you cant do it'''
| |
|
| |
| {| style="width:100%" cellpadding=10 border="1"
| |
| |
| |
| close D, JD,JC, close C, close D, JA, JC, JC, A*3, far C, 236C, A*10, 2B~
| |
| |}
| |
|
| |
|
| |
| '''B+D starter'''
| |
|
| |
| {| style="width:100%" cellpadding=10 border="1"
| |
| |
| |
| B+D, A+C, boost C, JAC, switch sides here, JD cancel E+214A 1hit, close B, close C, far C, 2C, far C, 236C, boost cancel 2A*3, 5A*2, Boost 5A*11, hyakuretsu
| |
| |}
| |
|
| |
| '''Easy version, corner, 2 boost'''
| |
|
| |
| {| style="width:100%" cellpadding=10 border="1"
| |
| |
| |
| Close D, JD air dash side switch JC, close C D, JACD, 5AAA, Boost A, C, 2C, C, Boost 5A*10, dash 5A, 2A, dash 5B, 2B*12, 14, 8, 16 , 236A, 236C, basket
| |
| |}
| |
|
| |
|
| |
| '''Midscreen'''
| |
|
| |
| {| style="width:100%" cellpadding=10 border="1"
| |
| |
| |
| Grave, JA, JB, JD, 214A+E, dash side switch, ACC2CC, 236C, E2A5AAAA>EA*11>2B*13>14>8>15> 236A 236C basket
| |
| |}
| |
|
| |
| '''Dribble'''
| |
|
| |
| {| style="width:100%" cellpadding=10 border="1"
| |
| |
| |
| close D JD air dash side switch j.C, 2C*7, far C 2C far C, boost cancel, 2A, 5A*6, Boost 5A*8, Boost 5A*2, 5B*5, dash 2A, dash [close B delay 2A]*11, dash 5A*5, dribble
| |
| |}
| |
|
| |
|
| |
|
| |
|
| |
| ==Raoh==
| |
|
| |
| '''Corner'''
| |
|
| |
| {| style="width:100%" cellpadding=10 border="1"
| |
| |
| |
| close D JD air dash JC cross up, 2C*8 , high hitting close D 236C, boost cancel 5A*5, Boost 5A*9-10, hyakuretsu
| |
| |}
| |
|
| |
|
| |
| {| style="width:100%" cellpadding=10 border="1"
| |
| |
| |
| close D, j.D, j.C, 2C*8, high hitting close D, 236C, E A*5, EA EA8-9, hyakuretsu (2B*13, 13, 8, 15)
| |
| |}
| |
|
| |
| '''Midscreen'''
| |
|
| |
| {| style="width:100%" cellpadding=10 border="1"
| |
| |
| |
| A+C, JA, JB, JD, 214A+E, dash change sides A, C*2, 2C, C, 236C, E, 2A,5A*4, boost cancel 5A*10, 2B*13, 13, 8,14, 236A 236C
| |
| |}
| |
|
| |
| '''Opponent corner~starting position,1 boost bar'''
| |
|
| |
| {| style="width:100%" cellpadding=10 border="1"
| |
| |
| |
| A+C, delay JBCD, HSC boost 214A, forward jump cross over JC or JD, 214A, 5A*20, A+C, close B, hyakuretsu (2B*9, 15, 8, 13, far D 236A 236C)
| |
| |}
| |
|
| |
|
| |
| '''Dribble, corner , 1 boost'''
| |
|
| |
| {| style="width:100%" cellpadding=10 border="1"
| |
| |
| |
| close D, JD, air dash cross JC, 2C*7, close D2D, boost cancel 5A*6, boost cancel 5A*8, boost cancel 5AAB*6, dash far A, [dash close B delay 2A]*5 , dash close 5A*5, dash far A*6,
| |
| |}
| |
|
| |
| At this point dribble already activated and the opponent is bouncing.
| |
|
| |
| Use this bounce pattern to finish him off:
| |
|
| |
| {| style="width:100%" cellpadding=10 border="1"
| |
| |
| |
| Jump AC*8, 5AC 623A, 5AC 214A, 5AC C+D, JABC, basket
| |
| |}
| |
|
| |
| '''Corner'''
| |
|
| |
| {| style="width:100%" cellpadding=10 border="1"
| |
| |
| |
| A+C, delay JBCD (ABD or ACD is fine too), HSC boost 214A, forwar jump cross up JD, 214A, close B*26 (or 5A*20,close B*6) , when the opponent is bounces 2C movement boost side switch, 5A, dash 2A*n, dribble
| |
| |}
| |
|
| |
|
| |
|
| |
|
| |
| ==Toki==
| |
|
| |
| '''Midscreen'''
| |
|
| |
| {| style="width:100%" cellpadding=10 border="1"
| |
| |
| |
| A+C, JABCD, 214A+E, dash side switch, ACC2CC, 236C, E2A5AAAA, EA*9, close B, 2B*12, E2B*12, strict small delay 2B, E2B*8, E2B*2, close B*6, 2B*9, dash 2B*n
| |
| |}
| |
|
| |
| '''Corner, over 1.8 boost meter'''
| |
|
| |
| {| style="width:100%" cellpadding=10 border="1"
| |
| |
| |
| ~A+C, delay JC 214A 1 hit, close C 623A, close A C C+D, HSC boost side switch close B, 2C*6 far C far D, boost A*5, boost A*2, close B*3, boost close B*5, 2A, close B, 2A*10
| |
| |}
| |
|
| |
| '''Near corner , 2 boost'''
| |
|
| |
| {| style="width:100%" cellpadding=10 border="1"
| |
| |
| |
| ~A+C, JCD, 214A, push lever to direction of corner JAD, boost 214A side switch, 2C*7, far C far D, boost A*5, boost A*6, boost A*2, boost close B*5 , 2A close B2A*10
| |
| |}
| |
|
| |
|
| |
| {| style="width:100%" cellpadding=10 border="1"
| |
| |
| |
| ~A+C, JCD, 214A, lever towards corner JAD, boost 214A side switch, CC2C far C 236C, boost, 5A*5, 5A*9, dash close B, 2B*12, 2B*12, 2B*8, 2B, close B*4, 2B*11. 236A or dash 2B,
| |
| |}
| |
|
| |
| '''Stable dribble recipe (around edge of midscreen, 1.8 boost)'''
| |
|
| |
| {| style="width:100%" cellpadding=10 border="1"
| |
| |
| |
| Close D, HJ.ABCD, close AC C+D, boost A, 2C*6, far C boost A*5, boost A*6, boost A*2, close B*3, boost close B*5 2A, close B 2A*10
| |
| |}
| |
|
| |
|
| |
|
| |
|
| |
| ==Rei==
| |
|
| |
| '''Corner on side of your health bar, 2 boost'''
| |
|
| |
| {| style="width:100%" cellpadding=10 border="1"
| |
| |
| |
| A+C, delayC JB A( side switch here) CD, 214A+E 1hit, land, let the opponent get lower while doing close C far C 2C far C 236C boost cancel 2A*4, boost A*9, dash close B2B*14, boost 2B*15, boost 2B*8, boost 2B*14, far D 236A 236C, basket
| |
| |}
| |
|
| |
| or
| |
|
| |
| {| style="width:100%" cellpadding=10 border="1"
| |
| |
| |
| A+C, delay C JB A(switch here) B, 214A, JAB, boost 214A land, close A*2, close C far C 2C 2C far C , boost A*4, boost Ax*0-14, dash close B2B*14, boost 2B*14, boost 2B*15, boost 2B*8,boost 2B*14, far D 236A 236C, basket
| |
| |}
| |
|
| |
| '''Dribble'''
| |
|
| |
| '''Corner, leave about one characters space between the wall and the opponent, 2.5 boost'''
| |
|
| |
| {| style="width:100%" cellpadding=10 border="1"
| |
| |
| |
| 6A, boost cancel 2A slight delay 2C*10, close D far D, boost cancel A*5, boost A*7, boost A*2 B*3, boost B*5, slight delay 2A, [close B 2A]*11, 5A
| |
| |}
| |
|
| |
| '''Stable dribble recipe (mid to start position, 2 boost)'''
| |
|
| |
| {| style="width:100%" cellpadding=10 border="1"
| |
| |
| |
| A+C, JC 214A, JABC boost 214A, dash side switch, close A close C, far C 2C 2C far C, boost, far A*4, 5A*8, 5A*2 close B*5, close B*2-3, dribble
| |
| |}
| |
|
| |
|
| |
| '''Starting position, 2 boost'''
| |
|
| |
| {| style="width:100%" cellpadding=10 border="1"
| |
| |
| |
| A+C, neutral JACD→E+214A, dash side switch close AC, far C 2C far C 236C, boost cancel 2A*4, movement boost 5A*9, dash close 2B*14, 15, 8, 15, 236A 236C, basket
| |
| |}
| |
|
| |
| '''Corner, 1.2 boost, keep one boost bar for hyakuretsu'''
| |
|
| |
| {| style="width:100%" cellpadding=10 border="1"
| |
| |
| |
| close D, HJ.ABCD, close D, JACD, move boost 5A*2, move boost 5A*16 , A+C side switch, 2A, [dash 2A]*2, dash close B or 2B, 2B*13, 236C boost, 2B*2-5 (changes depending on meter gained), 2B*18, 236C, 2B*3, move boost 2B
| |
| |}
| |
|
| |
|
| |
|
| |
|
| |
| ==Juda==
| |
|
| |
|
| |
| '''Corner, on side health bar side, 2 boost'''
| |
|
| |
| {| style="width:100%" cellpadding=10 border="1"
| |
| |
| |
| A+C, boost JABCD, E+214A whiff, close B close C, 2C far C, 236C, boost cancel 5A2A*3, boost 5A*10, 2B13, 2B15, 2B8, 2B15, 236A 236C, basket
| |
| |}
| |
|
| |
|
| |
| {| style="width:100%" cellpadding=10 border="1"
| |
| |
| |
| A+C, JB+E, side switch ACD, 214A+E, C2CC, 236C, E2A5AAAA, EA*10, 2B*13, E2B*16, E2B*8, E2B*16, 236A 236C
| |
| |}
| |
|
| |
|
| |
| '''Midscreen'''
| |
|
| |
| {| style="width:100%" cellpadding=10 border="1"
| |
| |
| |
| A+C, JABD, 214A+E, dash side switch, ACC2CC, 236C, E2A*4, EA*10,2B*13, E2B*16,E2B*8,E2B*16, 236A 236C
| |
| |}
| |
|
| |
|
| |
| {| style="width:100%" cellpadding=10 border="1"
| |
| |
| |
| A+C, neutral JCD, E+214A, dash side switch close CD, JACD, 5AAA, move boost AC2CC, boost cancel 5A*19, dash close 2B13, 15, 8, 15, 236A 236C, basket
| |
| |}
| |
|
| |
|
| |
|
| |
|
| |
| ==Shin==
| |
|
| |
|
| |
| '''Corner'''
| |
|
| |
| {| style="width:100%" cellpadding=10 border="1"
| |
| |
| |
| close D JD IAD JC cross up, 2C*7, close D far D 236C, boost cancel 5A*5, boost 5A*10, 2B13, 11, B*2 A*3 B*2, 2B*2 close B*8, far D 236A, close B renda, 236A 236C, basket
| |
| |}
| |
|
| |
| '''Midscreen'''
| |
|
| |
| {| style="width:100%" cellpadding=10 border="1"
| |
| |
| |
| A+C, JABD, 214A+E, dash side switch, ACC2CC, 236C, E2A5AAAA, EA*11, 2B*13, E2B*10, E2B*8, E2B, close B*8, 2A*6, far D 236A 236C
| |
| |}
| |
|
| |
|
| |
|
| |
|
| |
| ==Heart==
| |
|
| |
|
| |
|
| |
| '''Dribble, starting position~near corner, 2 boost'''
| |
|
| |
| {| style="width:100%" cellpadding=10 border="1"
| |
| |
| |
| A+C, neutral JACD, E 214A, dash 2C*6, close AD far D, boost cancel A*6, boost A*8, boost A*2, B*5, dash 2A, dash [close B 2A]*10, dribble
| |
| |}
| |
|
| |
|
| |
| '''Corner to back'''
| |
|
| |
| {| style="width:100%" cellpadding=10 border="1"
| |
| |
| |
| A+C, JC 214A delay 2hit, A+C or close C, JAB, HSC 214A, 5a close C far C 236C, E2A2A5A*2, A*7, 5A5A5B*4, B*6, basket
| |
| |}
| |
|
| |
| ==Matchups==
| |
| ===Kenshiro===
| |
| X
| |
|
| |
| ===Raoh===
| |
| X
| |
|
| |
| ===Toki===
| |
| X
| |
|
| |
| ===Shin===
| |
| X
| |
|
| |
| ===Rei===
| |
| X
| |
|
| |
| ===Juda===
| |
| X
| |
|
| |
| ===Thouther===
| |
| X
| |
|
| |
| ===Jagi===
| |
| X
| |
|
| |
| ===Mr. Heart===
| |
| X
| |
|
| |
| ===Mamiya===
| |
| X
| |
|
| |
|
| {{Navbox-HNK}} | | {{Navbox-HNK}} |
| [[Category:Hokuto no Ken]] | | [[Category:Hokuto no Ken]] |
