|
|
| Line 1: |
Line 1: |
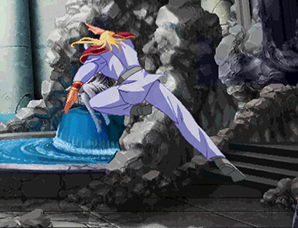
| [[File:Shinportrait.jpg|right]]
| | {{Infobox Character HNK |
| ==Introduction==
| | |name=Shin |
| | | }} |
| {| style="width:100%" cellpadding=10 border="0"
| |
| |-
| |
| | [[Image:Shinportrait.png|left]]
| |
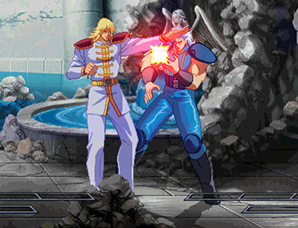
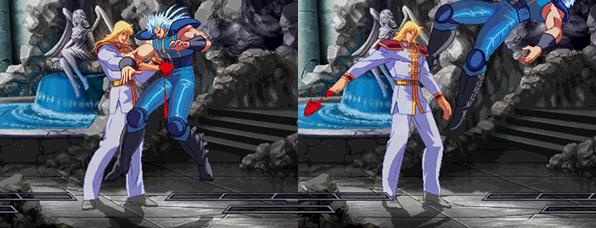
| | Shin is a hard-hitting power type character, and has the ability to Guard Crush any opponent. During the early days of the game's release he was considered the strongest character, but he has fallen greatly in the rankings as the other characters have become more and more developed while he has stayed mostly the same.
| |
| | |
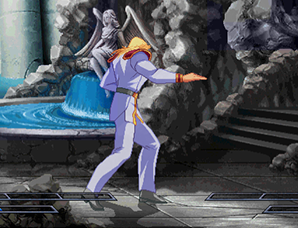
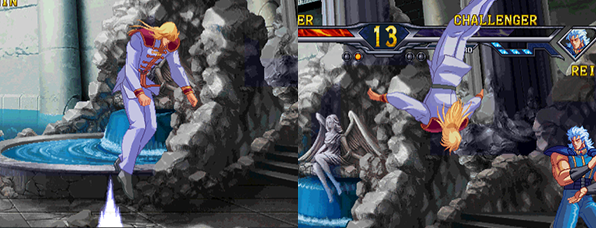
| Between his command grab, 2B, and instant air dash B, Shin has a very good wakeup game, especially in the corner. However, his ability to apply continued pressure is lacking in comparison to other characters, and he has a very tough time getting out of bad situations. The simplicity and high damage of his combos, as well as his general ease of use make him a very good starter character, much like Kenshiro. Unfortunately, he lacks the same potential - of all characters, Shin has the hardest and least practical 100% combos. That being said, let us start this section off by listing Shin's main strengths and weaknesses.
| |
| |}
| |
| | |
| | |
| '''Strengths:'''
| |
| * All characters have a Guard Crush gauge against him
| |
| * Very easy and powerful Banishing Strike combos
| |
| * Good mixup, especially in the corner
| |
| * Great star reducing ability
| |
| | |
| | |
| '''Weaknesses:'''
| |
| * Has difficulty getting out of pressure
| |
| * Is very easy to perform [[Hokuto_no_Ken/Advanced_Game_Mechanics#.27Hyakuretsu.27_Combos|Hyakuretsu]] combos on
| |
| * 100% combos are extremely difficult and unpractical for the most part
| |
| | |
|
| |
|
| Before diving right into the combos be sure to familiarize yourself with Shin's special/super moves and important normals. | | Before diving right into the combos be sure to familiarize yourself with Shin's special/super moves and important normals. |
| Line 259: |
Line 238: |
| [[Image:Shin-FKO.png]]<br> | | [[Image:Shin-FKO.png]]<br> |
| Shin does a high kick, then pokes his opponent to death while his underlings hold them. The kick move hits twice - the second hit must connect, or the FKO will fail. | | Shin does a high kick, then pokes his opponent to death while his underlings hold them. The kick move hits twice - the second hit must connect, or the FKO will fail. |
|
| |
| ==Combos==
| |
| ==Basic Combos==
| |
|
| |
| ===Hakuen Combos===
| |
| Shin is not able to jump cancel any of his attacks, and instead makes use of his Hakuen special move which allows him to cancel his normals and leap into the air.
| |
|
| |
| '''Basic Hakuen Combo #1'''
| |
| {| style="width:100%" cellpadding=10 border="1"
| |
| | ~2D > 236D > j.B or j.C > 623B
| |
| |}
| |
| Does not remove any stars but can be done anywhere on the screen and creates a favorable situation for Shin to continue pressuring his opponent. Using jump B does slightly less damage but is a good alternative to jump C if you are having difficulty with the timing.
| |
|
| |
| '''Basic Hakuen Combo #2'''
| |
| {| style="width:100%" cellpadding=10 border="1"
| |
| | ~2D > 236D > j.C > CD or 214C
| |
| |}
| |
| Takes off one star, but does not allow for a wakeup. The final hit will miss midscreen against some characters if you are too far away when connecting with 2D. Finishing with a Banishing Strike give better meter gain but does not work on Toki or Mamiya unless very close or in the corner, whereas using 214C does a bit more damage.
| |
|
| |
| '''Basic Hakuen Combo #3'''
| |
| {| style="width:100%" cellpadding=10 border="1"
| |
| | ~2D > 236D > j.C > 2C > CD or 214C or 236236C
| |
| |}
| |
| Must be close to your opponent when the 2D connects, or near the corner. On Kenshiro and Rei this combo can be performed anywhere regardless of distance from opponent.
| |
|
| |
| '''Basic Hakuen Combo #4'''
| |
| {| style="width:100%" cellpadding=10 border="1"
| |
| | ~2D > 236D > j.C > 2C > CD > E > B > 2C > 214C or 236236C
| |
| |}
| |
| Same requirements as above combo, uses 1 Boost to take off an extra star and do a little more damage.
| |
|
| |
| '''Basic Hakuen Corner Combo'''
| |
| {| style="width:100%" cellpadding=10 border="1"
| |
| | ~2D > 236D > j.C > 2C or c.D(1 hit) > AC > j.Axn > 623B
| |
| |}
| |
| A basic corner combo that makes use of the [[Hokuto_no_Ken/Advanced_Game_Mechanics#.27Chikuseki.27_Phenomenon|Chikuseki]] bug and causes the meter gain of your following wakeup attack to be increased significantly. Jump A can be used at least 5 times, with more hits possible against some characters. On Kenshiro, Rei, and Juda you should be able to do 7 easily.
| |
|
| |
|
| |
| ===Banishing Strike Combos===
| |
| Shin's basic Banishing Strike combos are extremely damaging and easy to perform. Unless you need the extra damage to finish off your opponent, it is always best to select a combo that allows you to go for a wakeup attack on your opponent.
| |
|
| |
| Note that close C will not combo into a Banishing Strike against Jagi when he is crouching, due to his fast recovery, and you will need to use Boost or go for a Hakuen combo instead.
| |
|
| |
| '''Basic Banishing Strike Combo'''
| |
| {| style="width:100%" cellpadding=10 border="1"
| |
| | 2B > c.C > CD > 6 > c.C > 236C > A or c.C > 236C > 214C
| |
| |}
| |
| Shin's most basic Banishing Strike combo, takes off 2 stars and does not require any meter. Has the downside of not being able to continue into a mixup due to the fact that 214C is an OTG hit.
| |
|
| |
| '''Optimal Basic Banishing Strike Combo #1'''
| |
| {| style="width:100%" cellpadding=10 border="1"
| |
| | 2B > c.C > CD > 6 > c.C > 214C > E > A or c.C > 236C > A > 214C
| |
| |}
| |
| For use when you are at midscreen or closer to the corner. Preferable to the above combo as you are able to dash in to mixup your opponent on wakeup. The last 214C must be delayed slightly so that it hits the opponent as they rebound off the wall. If the beginning of the combo before the Banishing Strike has more than 2 hits, ie. you did airdash j.B > 2A > c.C > CD, the knockback will be too great for the 214C to connect. In such cases it is best to end the combo at standing A and dash in to go for a wakeup attack.
| |
|
| |
| '''Optimal Basic Banishing Strike Combo #2'''
| |
| {| style="width:100%" cellpadding=10 border="1"
| |
| | 2B > c.C > CD > 6 > AB > (E >) E > C > 236C > A > 214C
| |
| |}
| |
| Takes off 3 stars and does not require any meter. For use when you are at midscreen or farther away from the corner. The first E in brackets is a Movement Boost, done during the charging animation of the Heavy Strike, and is only necessary when you are very far away from the corner.
| |
|
| |
|
| |
| ==Advanced Combos==
| |
|
| |
| ===Hakuen Combos===
| |
|
| |
| '''Grave Install Hakuen Corner Combo'''
| |
| {| style="width:100%" cellpadding=10 border="1"
| |
| | ~2D > 236D > C > 2C > (D >) CD > AC+E > 2147E~C
| |
| |}
| |
| Takes off 3 stars, requires 1 Boost.
| |
|
| |
|
| |
| ===Banishing Strike Combos===
| |
|
| |
| '''Grave Install Banishing Strike Combo'''
| |
| {| style="width:100%" cellpadding=10 border="1"
| |
| | [https://youtu.be/qUSi9O4EPQw 2B > c.C > CD > 6 > (2C >) AC > 2369E~C > A > 214C ]
| |
| |}
| |
| Takes off 3 stars and does not require any meter. For use when you are at midscreen or closer to the corner. Superior to the above Optimal Basic Banishing Strike Combo #1, but more difficult to perform. The trick to doing Grave Install is to input the 2369 motion before the Grave Strike hits, then quickly press E~C. This along with the Optimal Basic Banishing Strike Combo #2 should be your two bread and butter Banishing Strike combos.
| |
|
| |
| '''3-star Banishing Strike Finisher'''
| |
| {| style="width:100%" cellpadding=10 border="1"
| |
| | [https://youtu.be/LqfKofMYGkU 2B > c.C > CD > 6 > (2C >) AC > 2147E~C (> 2B or 2D)]
| |
| |}
| |
| A short Banishing Strike combo used to take off 3-stars and finish off an opponent with low health.
| |
|
| |
| '''New Chikuseki Banishing Strike Combo #1'''
| |
| {| style="width:100%" cellpadding=10 border="1"
| |
| | 2B > c.C > Mash 2CD > 6 > c.C > c.D > 214C > E > 236D > j.A > j.C > ((j.D)) > jump j.A > (j.A) > j.A > ((j.D)) > jump j.A > (j.A) > air dash j.B > ((j.D)) > 2C~A > 6239D
| |
| |}
| |
| For use when you are at midscreen or closer to the corner, takes off 2 stars and does not require any meter. A combo that makes use of the newly discovered fact that missed attacks and startup canceled moves count towards [[Hokuto_no_Ken/Advanced_Game_Mechanics#.27Chikuseki.27_Phenomenon|Chikuseki]]. Following the combo, if you are able to successfully score a hit on your opponent on wakeup you will gain a huge chunk of meter and almost instantly dizzy them.
| |
|
| |
| Attacks in (brackets) are done normally but do not hit the opponent, whereas attacks in ((brackets)) are performed just before landing and do not actually execute at all. 2C~A is simply a Grave Shoot canceled from the startup of 2C, which adds a 'hit' to the Chikuseki count.
| |
|
| |
| '''New Chikuseki Banishing Strike Combo #2'''
| |
| {| style="width:100%" cellpadding=10 border="1"
| |
| | [https://youtu.be/cq2b92vdVRg 2B > c.C > Mash 2CD > 6 > c.C > 214C > E > c.C > c.D(1 hit) > 236D > j.A > j.C > ((j.D)) > jump j.A > (j.A) > j.A > ((j.D)) > jump j.A > (j.A) > air dash j.B > ((j.D)) > 2C~A > 6239D]
| |
| |}
| |
| Alternate route. Optimized for use on Kenshiro, Toki, Jagi, and Heart, but will work on other characters.
| |
|
| |
| '''Tomono-shiki Gokuto Version'''
| |
| {| style="width:100%" cellpadding=10 border="1"
| |
| | 2B > c.C > CD > 6 > c.C > c.D > 214C > E > c.D > 236D > j.A > j.C > dash jump j.A > air dash j.C> AC > 6239D
| |
| |}
| |
| Takes off 3 stars and does not require any meter. For use when you are at midscreen or closer to the corner. A modified version of a combo discovered by famous Shin-user Tomono. Very stylish but a bit more difficult to perform than a normal Grave Install Banishing combo.
| |
|
| |
| ==Dribble Combos==
| |
|
| |
| ==Versus Raoh==
| |
|
| |
| '''Command Throw Starter'''
| |
| {| style="width:100%" cellpadding=10 border="1"
| |
| | 61234+A > j.Ax3 > j.C > 5D (2 hits) > 214+B > Boost~2B > 2A > 5Ax23 (around 33 hits total) > E > 5A > E > 5A > E > 2A > 2Ax3 > d.2A > Dribble
| |
| |}
| |
| Fairly practical dribble setup on Raoh at the cost of only one Boost bar in the corner.
| |
|
| |
| '''Sweep Starter'''
| |
| {| style="width:100%" cellpadding=10 border="1"
| |
| | 2B > 2B > 2D > 236+D > j.C > 5D (2 hits) > 214+B > Boost~2B > 2A > 5Ax26 (around 35 hits total) > E > 5A > E > 5A > E > 2A > 2Ax3 > d.2A > Dribble
| |
| |}
| |
|
| |
|
| |
| '''J.C Counter Hit Starter'''
| |
| {| style="width:100%" cellpadding=10 border="1"
| |
| | j.C (CH) > sj.Ax3 > sj.B > sj.C > 5D (2 hits) > 214+B > Boost~2B > 2A > 5Ax23 (around 33 hits total) > E > 5A > E > 5A > E > 2A > 2Ax3 > Dribble
| |
| |}
| |
|
| |
| ==Command Grab Combos==
| |
| '''Command Grab Combo #1'''
| |
| {| style="width:100%" cellpadding=10 border="1"
| |
| | 63214A > CD or 236236C
| |
| |}
| |
| Simple 2-star combo for use midscreen. Good for finishing off your opponent, but does pretty much the same damage as the below combo. Does not work on Raoh, Jagi, or Mamiya.
| |
|
| |
| '''Command Grab Combo #2'''
| |
| {| style="width:100%" cellpadding=10 border="1"
| |
| | 63214A > AC > jump j.C > j.D > 623B
| |
| |}
| |
| Works midscreen against Kenshiro, Toki, Rei, Shin, Juda, Thouther, and Heart. Possible on all characters if you add in a slight dash before the Grave Shoot, but a bit harder to perform.
| |
|
| |
| '''Corner Command Grab Combo #1'''
| |
| {| style="width:100%" cellpadding=10 border="1"
| |
| | 63214A > jump j.A > j.A > j.C > B > 2C > AC > jump j.A > 623B
| |
| |}
| |
| Easy no meter 2-star corner combo.
| |
|
| |
| '''Corner Command Grab Combo #2'''
| |
| {| style="width:100%" cellpadding=10 border="1"
| |
| | 63214A > slight dash c.C > c.D(1 hit) > AC > jump j.C > j.D > 623B
| |
| |}
| |
| Most damaging no-meter combo. Takes off 2-stars.
| |
|
| |
| '''Corner Command Grab Combo #3'''
| |
| {| style="width:100%" cellpadding=10 border="1"
| |
| | 63214A > jump j.B > slight delay j.C > AC > jump j.Axn > 623B
| |
| |}
| |
| A 2-star [[Hokuto_no_Ken/Advanced_Game_Mechanics#.27Chikuseki.27_Phenomenon|Chikuseki]] corner combo. Jump A can be used at least 5 times, with more hits possible against some characters. On Kenshiro, Rei, and Juda you should be able to do 7 easily. Difficult to perform on some character.
| |
|
| |
| '''Corner Command Grab Combo #4'''
| |
| {| style="width:100%" cellpadding=10 border="1"
| |
| | 63214A > 2C > 6A or 6B > 2A > 2C > CD > E > B > 2C or c.D > 214C or 236236C
| |
| |}
| |
| A 3-star corner combo that only requires 0.2 Boost. The 2C > 6A or 6B part must be done as quickly as possible.
| |
|
| |
|
| |
| ==Fatal KO Combos==
| |
|
| |
| '''0-star Hakuen FKO'''
| |
| {| style="width:100%" cellpadding=10 border="1"
| |
| | ~2D > 236D > j.C > FKO
| |
| |}
| |
| Works midscreen as long as you are not too far from your opponent when the 2D hits.
| |
|
| |
| '''1-star Command Grab FKO'''
| |
| {| style="width:100%" cellpadding=10 border="1"
| |
| | 63214A > (2C+E>) FKO
| |
| |}
| |
| Works midscreen on Kenshiro, Toki, Rei, Juda, Thouther, and Heart. Must be in the corner or add in a Boost 2C before the FKO against other characters.
| |
|
| |
| '''2-star Command Grab FKO'''
| |
| {| style="width:100%" cellpadding=10 border="1"
| |
| | 63214A > 2C+E > 214C > FKO+E
| |
| |}
| |
| Requires 1 Boost. Useful against characters that 63214A > CD doesn't connect on.
| |
|
| |
| '''2-star Corner Hakuen FKO'''
| |
| {| style="width:100%" cellpadding=10 border="1"
| |
| | ~2D > 236D > C > 2C > (D >) 214C > CD+E > E > D > FKO
| |
| |}
| |
| Requires 1 Boost.
| |
|
| |
| '''2-star Banishing Strike FKO'''
| |
| {| style="width:100%" cellpadding=10 border="1"
| |
| | 2B > c.C > CD > 6 > C > 214C > E > (A >) FKO
| |
| |}
| |
| Super easy no meter 2-star FKO combo. For use when at midscreen or closer to the corner.
| |
|
| |
| '''2-star Banishing Strike FKO'''
| |
| {| style="width:100%" cellpadding=10 border="1"
| |
| | 2B > c.C > CD > 6 > AB > (E >) E > (A >) FKO
| |
| |}
| |
| Super easy no meter 2-star FKO combo. For use when at midscreen or further from the corner.
| |
|
| |
| '''3-star Command Grab FKO'''
| |
| {| style="width:100%" cellpadding=10 border="1"
| |
| | 63214A > CD > E > B > 2C or c.D(1 hit) > 214C > FKO+E
| |
| |}
| |
| Requires 1 Boost. Does not work on Raoh, Jagi, or Mamiya. Against some characters you must delay the FKO or it will miss.
| |
|
| |
| '''3-star Corner Command Grab FKO'''
| |
| {| style="width:100%" cellpadding=10 border="1"
| |
| | 63214A > 2C > 214C > CD+E > E > D > FKO
| |
| |}
| |
| Requires 1 Boost. Against some characters you must delay or slightly charge the Banishing Strike or it will miss.
| |
|
| |
| '''3-star Banishing Strike FKO'''
| |
| {| style="width:100%" cellpadding=10 border="1"
| |
| | ~2B > c.C > CD > 6 > c.C > 214C > CD+E(Max charge) > E > D > 236CD
| |
| |}
| |
| Requires 1.2 Boost. Less meter efficient than Naori Special, but easier to pull off. Inputs must be performed as quickly as possible.
| |
|
| |
| '''Naori Special (3 stars)'''
| |
| {| style="width:100%" cellpadding=10 border="1"
| |
| | ~2B > 2C > 214C~E > CD+E > 6 > (2C >) AC > 2369E~C > 236C~D
| |
| |}
| |
| A 3-star FKO that requires only 1 Boost, and with 1.2 Boost can be hit confirmed from 2Bxn. The FKO is done by canceling the startup of the 236C followup move with a special input. While it may require some practice to get the hang of, this is without a doubt Shin's most important FKO combo.
| |
|
| |
| '''Naori Special 2 (3 stars)'''
| |
| {| style="width:100%" cellpadding=10 border="1"
| |
| | ~2B > 2C > 214C~E > CD+E > AB+E > E > FKO
| |
| |}
| |
| A modified and much easier to perform version of the above combo for use when far away from the corner. Required only 1 Boost.
| |
|
| |
| '''Naori Special 3 (3 stars)'''
| |
| {| style="width:100%" cellpadding=10 border="1"
| |
| | 623B > (air dash) j.B or j.D > A > 236C > A > 214C > CD+E(Max charge) > E > c.D(1 hit) > CD > E > B > 2C > FKO
| |
| |}
| |
| A 3-star FKO from a Gokutoken hit. Can be performed in a variety of situations but requires a great deal of ad-lib. As long as you keep in the end part the rest can be changed as needed to whatever works for you. Requires 1.2 Boost, but as this is gained during the beginning part of the combo, it is essentially free to do.
| |
|
| |
| ==Other Important Combos==
| |
|
| |
| '''6A Overhead Combo'''
| |
| {| style="width:100%" cellpadding=10 border="1"
| |
| | 6A > E > c.C > D > 214C > CD+E > E > D > 236236C or FKO
| |
| |}
| |
| Requires just under 2 full bars of Boost, making it an extremely wasteful combo, but still worth having in your repertoire.
| |
|
| |
| '''Gokutoken Air Hit Wall Combo'''
| |
| {| style="width:100%" cellpadding=10 border="1"
| |
| | 623B > (air dash) j.B > [dash jump j.A > j.C]x4~5 > [dash jump j.A > air dash j.C]x2 > (slight dash) CD > E > B > c.D > 236236C
| |
| |}
| |
| For use when you hit the opponent high in the air. Very situation dependent and open to ad-lib - this is just one example of a possible combo. Depending on the distance to the corner you may or may not need to air dash.
| |
|
| |
| '''Gokutoken Ground Hit Wall Combo'''
| |
| {| style="width:100%" cellpadding=10 border="1"
| |
| | 623B > (air dash) j.B or j.D > A > 236C > A > 214C
| |
| |}
| |
| For use when you hit an opponent on the ground or low in the air. Very situation dependent and open to ad-lib - this is just one example of a possible combo.
| |
|
| |
| '''Muteking'''
| |
| {| style="width:100%" cellpadding=10 border="1"
| |
| | ~2D > 236D > j.C > 2C > AC > 2369E~C > 623B
| |
| |}
| |
| Arcade version only. Discovered by Tomono, when successfully performed Shin becomes completely invulnerable to all striking moves. The Gokutoken must be done just before landing, so that the sound plays but the move does not actually execute. As there is only a one frame window for Muteking to activate, even with practice it is extremely difficult to consistently pull it off. An example of Muteking being performed can be seen [http://www.nicovideo.jp/watch/sm916821 here].
| |
|
| |
| Once you succeed and become invulnerable, there are several ways for this state to become undone:
| |
|
| |
| 1. Get thrown by your opponent(BD grabs do not work)<br>
| |
| 2. Get hit by a 'catch' move, like Kenshiro's Ryugekiko<br>
| |
| 3. Throw your opponent(Any type of throw)<br>
| |
| 4. Use a move with invulnerability(Gokutoken, Hakuen, both supers, backdash)
| |
|
| |
| Against most characters you can just mash 2A forever and there is nothing they can do about it. Mamiya has no throw and so she can't do anything at all, which means you can just stand there until time runs out. If the opponent is a character with a 'catch' move like Kenshiro or Toki things become a bit more tricky, but for the most part as long as you don't accidentally undo it yourself, succeeding with Muteking should be a guaranteed win.
| |
|
| |
| ==Matchups==
| |
| ===Kenshiro===
| |
| X
| |
|
| |
| ===Raoh===
| |
| X
| |
|
| |
| ===Toki===
| |
| X
| |
|
| |
| ===Shin===
| |
| X
| |
|
| |
| ===Rei===
| |
| X
| |
|
| |
| ===Juda===
| |
| X
| |
|
| |
| ===Thouther===
| |
| X
| |
|
| |
| ===Jagi===
| |
| X
| |
|
| |
| ===Mr. Heart===
| |
| X
| |
|
| |
| ===Mamiya===
| |
| X
| |
|
| |
|
| {{Navbox-HNK}} | | {{Navbox-HNK}} |
| [[Category:Hokuto no Ken]] | | [[Category:Hokuto no Ken]] |
Introduction
Shin is a hard-hitting power type character, and has the ability to Guard Crush any opponent. During the early days of the game's release he was considered the strongest character, but he has fallen greatly in the rankings as the other characters have become more and more developed while he has stayed mostly the same.
Between his command grab, 2B, and instant air dash B, Shin has very good okizeme, especially in the corner. However, his ability to apply continued pressure is lacking in comparison to other characters, and he has a very tough time getting out of bad situations. The simplicity and high damage of his combos, as well as his general ease of use make him a very good starter character, much like Kenshiro. Unfortunately, he lacks the same potential - of all characters, Shin has the hardest and least practical 100% combos. That being said, let us start this section off by listing Shin's main strengths and weaknesses.
|
|
| Pros |
Cons |
- All characters have a Guard Crush gauge against him
- Very easy and powerful Banishing Strike combos
- Good mixup, especially in the corner
- Great star reducing ability
|
- Has difficulty getting out of pressure
- Is very easy to perform Hyakuretsu combos on
- 100% combos are extremely difficult and unpractical for the most part
|
Before diving right into the combos be sure to familiarize yourself with Shin's special/super moves and important normals.
Normal Moves
Standing
Close A
5F Startup, 4F Active, +1 on block
A quick jab to the face. Used in some combos as well as as an anti-air.
Far A
5F Startup, 4F Active, +3 on block
A straight jab. Used in some combos.
Close B
6F Startup, 3F Active, +0 on block
A lazy-looking kick. Used in some combos.
Far B

8F Startup, 3F Active, +2 on block
A low kick. Good for zoning, and also used in some combos.
Close C
9F Startup, 3F Active, -2 on block
A strong low jab. Can chain into a Banishing Strike. Used in many combos.
Far C
14F Startup, 3F Active for both hits, -3 on block
A two-hit horizontal slash. Doesn't hit most crouching characters. Has great range which makes it useful for preventing opponents from jumping or for baiting an Air Recovery. Recovery is quite long so it is necessary to pick your spots carefully when using it.
Close D
First hit: 10F Startup, 3F Active
Second hit: 4F Active +1 on block
A knee followed by a kick to the head. Used in many combos.
Far D
15F Startup, 3F Active, -5 on block
A strong low kick. Mostly useless.
Crouching
A
5F Startup, 3F Active, +4 on block
A short crouching elbow jab. Has less range than 2B, but the startup is quicker, making it useful for getting out of pressure. Also possible to use as an anti-air in some situations.
B

7F Startup, 3F Active, +7 on block
A very low crouching kick. Long range, quick startup, and advantage on guard. Loses to most other characters' 2Bs, but beats high-hitting moves like Toki's 2D. Can low profile moves such as Kenshiro's 623A/C and Juda's Dam super, as well as having fast enough recovery to block moves like Toki's Sekkatsukou when used as a meaty. One of Shin's most important normals.
C
11F Startup, 4F Active, -4 on block
A strong upwards jab while crouching. Fairly slow startup limits its use as an anti-air. Mostly used in combos.
D
10F Startup, 4F Active, -4 on block
A long sweep kick. Fairly short range in comparison to other characters' 2Ds, but slightly longer than that of 2B. Hit causes the opponent to be knocked into the air.
Air
A
5F Startup, 6F Active
A downwards jab. Can be canceled into itself. Good air-to-air move.
B
10F Startup, 8F Active
A straight kick. Good reach and long active frames. Shin's main air-to-ground move.
C

11F Startup, 6F Active
A two-handed downward chop. Used in some combos.
D
11F Startup, 10F Active
A strong downward kick. Useful in combos, and sometimes as an air-to-ground move.
Other
6A
24F Startup, 4F Active, +0 on block
A horizontal slicing punch. Hits overhead. Follow up possible with the use of Boost. Good to throw into your mixup every now and again.
6B
21F Startup, 4F Active, +0 on block
A strong stomping kick. Hits low and takes off a star on Counter Hit. Mostly useless.
Throw
4F Active, 4F Active
Shin throws his opponent to the ground then jabs them quickly several times. Follow up not possible. Mostly useless, especially since Shin has a great command grab.
BD Throw
9F Startup, 4F Active
Shin slaps his opponent to the ground, stomps on their body, and then kicks them away. Follow up not possible. Will catch Rei at the start of the round if he opens with a Grave Shoot.
Grave Shoot
15F Startup, 6F Active, -7 on block
A slashing underhand chop. Not very reliable as an anti-air. Used in many combos.
Heavy Strike
41F Startup, 8F Active
Shin winds up then charges forward with a strong thrust. Very long reach, making this likely the best Heavy Strike in the game. That said its use is still limited to combos for the most part.
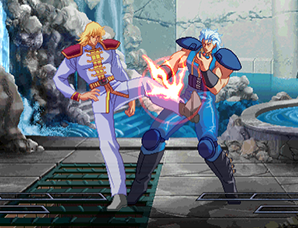
Banishing Strike

18-33F Startup, 4F Active, -5 on block
Shin winds up then does a powerful straight jab. Fairly short range. Important combo part.
Special Moves
Nanto Senkyakusou
214B
Shin performs a low sliding kick. Slow startup and recovery. Takes off a star on Counter Hit. Can be used to dodge some high-hitting moves. Overall it is very high-risk low-return move, and thus doesn't get much use.
Nanto Gokutoken
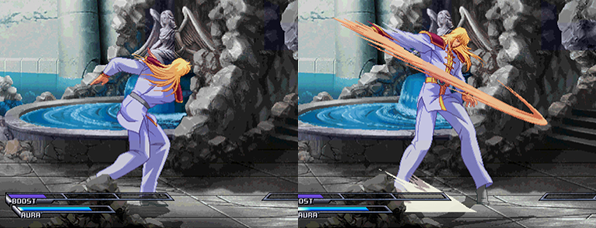
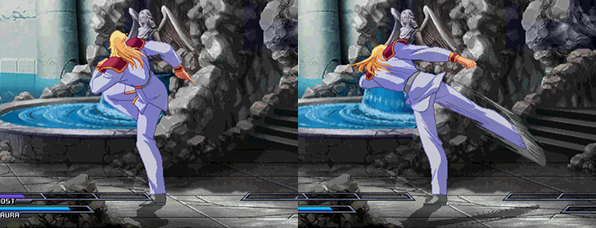
(Land or Air) 623B or D
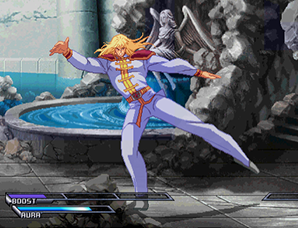
An air kick, similar to Kenshiro's Hieiken. The B land and air versions go diagonally upwards, while the D versions go horizontally across the screen. All versions take off a star on Counter Hit.
The land B version has invulnerability while rising, but not during startup, so cannot be used as a reversal. Causes wall bounce on hit, and it is possible to act in the air once the move has risen to it's peak. Misses all crouching characters except Heart. Very high return move, but often risky to use.
The land D version knocks the opponent into the air on normal hit, and causes wall bounce on Counter Hit. Hits overhead, but is generally never used because your opponent can easily get a guaranteed combo on you if they block it, which isn't that hard to do.
The air B version is mostly used as a combo ender. It does however hit overhead, so it is possible to use it after an air dash jump B as an alternative to landing and doing a 2B. This is quite hard to see, and effective to use every once in a while. Like the land D version, you will probably die if it is blocked, so caution is necessary when using it outside of combos.
The air D version is for the most part the same as the land D version. Has a few uses in some combos but otherwise is not very important.
Nanto Ryuuhayadan
236A (Can press A multiple times)
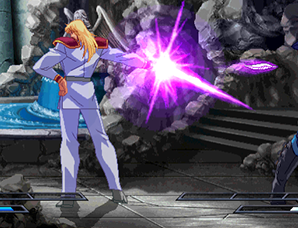
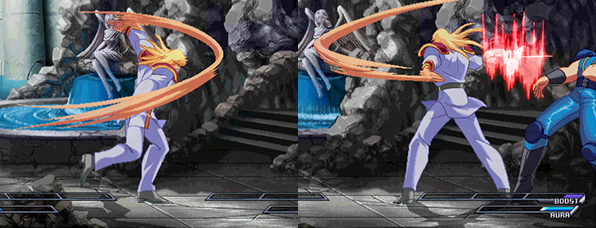
Shin strikes a pose and shoots feather-shaped blasts of power from his finger. Shoots two feathers upon executing the move, and one more for every time you press A. The feathers do no damage, but are unblockable and each hit adds to the opponent's unseen dizzy meter. Upon striking the opponent the word 'Faint' appears in a colored bubble, which ranges from yellow to red. The closer to red, the closer the opponent is to being dizzied - once it is fully red almost any hit will dizzy them. Feathers can also take out other projectiles and Juda's followers. This all sounds useful, but due to it's long recovery and the fact that your opponent can just run through your projectiles and hit you, this is a terrible move that you will only ever use by accident.
Nanto Hakuhazan
214C
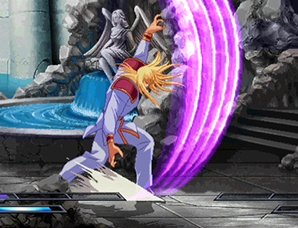
Shin does a big backhanded slash. Slow startup and long recovery, but has big range and upper-body invulnerability. Takes off one star on normal hit and two on Counter Hit. Can reflect most non-beam projectiles. Causes stun on grounded opponents. Mostly used in combos.
Nanto Senjuzan
236C, Follow-up with 236C
Shin rushes forwards a strikes his opponent rapidly. Takes off a star on Counter Hit. Slow startup, and doesn't hit crouching characters. The follow up move causes Shin to quickly turn around and attack his opponent while returning back to the side he started on. Takes a star on normal hit and two on Counter Hit. Used mostly in Banishing Strike combos.
Nanto Gyakushisou
63214A
Shin grabs his opponent, pokes them, then throws them away. A 4-frame startup command grab. Takes off one star, and follow up is possible. Very important part of Shin's mixup game.
Nanto Hakuen Tenshou
236 or 214D
Shin jumps up into the air and does a flip. The 236 version goes forwards, while the 214 version goes backwards. Can act midway through the jump. Mostly used in combos after a 2D. There is some invulnerability while jumping but it has no real use. It is also possible to triangle jump off of the wall if you come in contact with it while jumping, but once again this is completely useless.
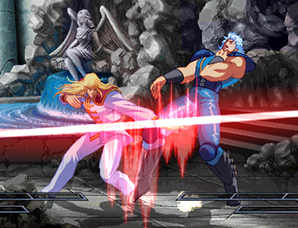
Nanto Raishinshou
236236C (Uses 1 Bar Aura)
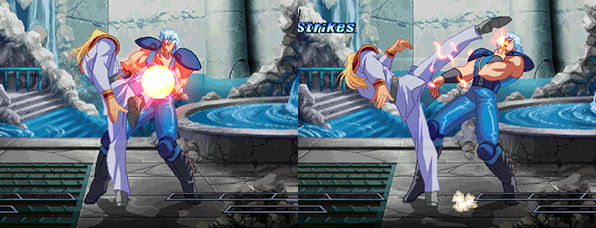
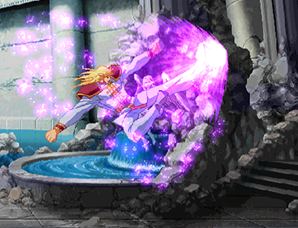
Shin hits the ground an a big geyser of power shoots out. Takes off one star on normal hit and two on Counter hit. Has full invulnerability until execution, but the startup is quite slow at 12 frames. Mostly used in combos, and very sparingly as a reversal.
Nanto Senshu Ryuugeki
214214C (Hold C to charge) (Uses 1 Bar Aura)
18F Startup pre flash, 3F Post flash
Shin charges up then rushes forward and stabs at his opponent rapidly. Can be charged by holding C. Charging increases the amount of hits and damage done - on some characters the max charge will instantly Guard Crush them if they block it. The last hit takes off one star, and the first hit will take off 2 stars on Counter Hit, for a total of 3 stars if the last hit connects. Has invulnerability, but the startup is even slower than that of Raishinshou. Does not see much use except in some obscure combos.
"Omae no Ken deha, Shinan!"
(With no stars left) 412363214A (Uses 1 Bar Aura)

Shin slowly retreats, then jumps to his death. Shin begins the next round with his stars restored to full. This could have been a very useful move, but unfortunately the startup animation is extremely long, making it impossible to use for all practical purposes.
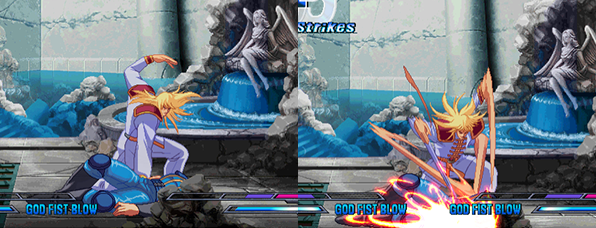
Nanto Shoushuu Tokyaku
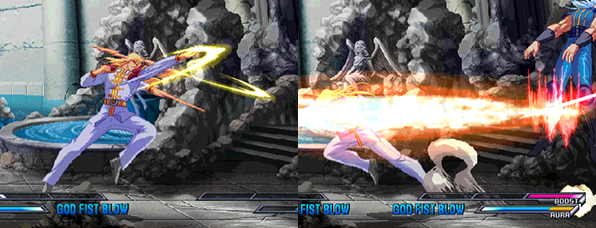
236CD (Fatal KO)
Shin does a high kick, then pokes his opponent to death while his underlings hold them. The kick move hits twice - the second hit must connect, or the FKO will fail.
Game Navigation


