

Unless otherwise noted, the most commonly picked super for Ken is SA3- Shipuujinrai Kyaku (![]()
![]() +
+![]() ), and will most often assume this super is selected. This matters not only due to the versatility of the super but also due to the number of EX special moves it allows ken access to, the speed at which ken has opportunities to DED, etc. You can read more about the super on Kens page!
), and will most often assume this super is selected. This matters not only due to the versatility of the super but also due to the number of EX special moves it allows ken access to, the speed at which ken has opportunities to DED, etc. You can read more about the super on Kens page!
Click 'Expand' on each characters box to unroll their information!
Select a character icon from the table below to jump to their matchup info! (redirections to be fixed as sections are added)
| Serious Advantage |
 
|
|---|---|
| Advantage |          
|
| Even |    
|
| Disadvantage | 
|
| Serious Disadvantage |
Ken is a good character :) |
Alex
Your text here!
Post-shippu mixups:
Always hold down to quick-recover after shippu!
The setup is: Whiff 2LP, super jump
If you jump immediately, you can whiff a jump-in and land behind Alex into a meaty 2LK or target combo.
Meterless: 2LK, 2LP, light shoryu OR target combo shoryu
Meter: 2LK, 2LP, 2LK shippu OR target combo shippu
If you slightly delay the super jump, you can hit Alex with a crossup j.MK, target combo, shippu.
If you delay it even more, you can hit him in the front with a j.MK or j.HK, target combo, shippu.
| block string | frame advantage |
|---|---|
| 2LK, 2LP, 2LK, UOH | 6 |
| 2LK, 2LP, 2LK, MK~UOH | 3 |
| 2LK, 2LK, 2LK, | 7 |
| 2LK, 2LK, 2LK, MK~UOH | 5 |
| 2LK, 2LK, 2LK, 4MK~UOH | 3 |
| 2LK, 2LK, 2MK, UOH | 7 |
| 2LK, 2LK, 2MK, MK~UOH | 5 |
| 2LK, 2LK, 2MK, 4MK~ | 4 |
| 2LK, 2LK, 5HK, | 7 |
| 2LK, 2LK, 5HK, MK~UOH | 4 |
| 2LK, 2LP, 2MP, 4MK~UOH | 7 |
| 2LK, 2LP, 2MP, 2MK~ | 7 |
| 2LK, 2LP, 2MK, UOH | 6 |
| 2LK, 2LP, 2MK, MK~UOH | 3 |
| 2LK, far MP, UOH | 7 |
| 2LK, far MP, MK~UOH | 4 |
| 2MP, 2MP, UOH | 7 |
| 2MP, 2MP, MK~UOH | 6 |
| 2MP, 2MP, 4MK~UOH | 5 |
| close MP, 2MP, UOH | 4 |
| close MP, far MP, MK~UOH | 7 |
| close MP, far MP, 4MK~UOH | 5 |
| close MP, far MP, 2MK~UOH | 3 |
| close MP, 2LK, 2LK, MK~UOH | 7 |
| close MP, 2LK, 2LK, 4MK~UOH | 6 |
| close MP, 2LK, 2LK, 2MK~UOH | 5 |
| target combo, UOH | 5 |
Chun-li
Your text here!
Post-shippu mixups:
Always hold down to perform a quick recovery after shippu.
Setup 1: dash, whiff 2MP, slight walk back, jump in whiff HK, land target combo or 2LK 2LK. The walk back is very short. Time spent walking back will determine if you land in front or crossup.
Setup 2: whiff 5MP, super jump
Setup 3: whiff throw / kara throw, super jump
Dudley
Your text here!
Elena
Your text here!
Gouki / Akuma

Your text here!
Hugo

Your text here!
Ibuki
Your text here!
Makoto

Your text here!
Necro
Your text here!
Oro

Your text here!
Q
Your text here!
Remy

Your text here!
Ryu
| block string | frame advantage |
|---|---|
| 2LK, 2LP, 2LK, 4MK~UOH | 6 |
| 2LK, 2LP, 2LK, 2MK~UOH | 5 |
| 2LK, 2LK, 2LK, 2MK~UOH | 7 |
| 2LK, 2LK, 2MK, 2MK~UOH | 7 |
| 2LK, 2LK, 5HK, 2MK~UOH | 6 |
| 2LK, 2LP, 2MK, 4MK~UOH | 7 |
| 2LK, 2LP, 2MK, 2MK~UOH | 5 |
| 2LK, 2MP, UOH | 5 |
| 2LK, 2MP, MK~UOH | 4 |
| 2LK, 2MP, 4MK~UOH | 3 |
| 2LK, far MP, 4MK~UOH | 7 |
| 2LK, far MP, 2MK~UOH | 6 |
| 2MP, 2LK, UOH | 6 |
| 2MP, 2LK, MK~UOH | 4 |
| 2MP, 2LK, 4MK~UOH | 3 |
| close MP, 2MP, MK~UOH | 6 |
| close MP, 2MP, 4MK~UOH | 5 |
| close MP, 2MP, 2MK~UOH | 4 |
| target combo, MK~UOH | 7 |
| target combo, 4MK~UOH | 5 |
| target combo, 2MK~UOH | 5 |
Sean
Your text here!
Twelve
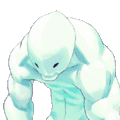
I know what you're thinking: "Why do you think I need help with Twelve??" Frankly, we're not here to judge, and we won't tell anyone if you came to the matchup list looking for Twelve advice, but players like Yamazaki/Yama exist, so nothing wrong with being overprepared.
{{#evt:
service=youtube
|id=https://youtu.be/eOf9SgBrp54
|alignment=center
|dimensions=480x320
|urlargs=start=1152&end=1266&loop=1
}}
tl;dr:
![]()
![]() is really good, obviously, but Twelve can stop their air dashes short and fake out if they can put the breaks on their squirrely movement. Against Ken, they want to fly, but they're scared to, and they should be (and you should make them scared). Not many high-damage options, even with meter, so with-meter, be prepped for cheeky single-hit confirms after Kokuu (the air dash). Better off going with cr.
is really good, obviously, but Twelve can stop their air dashes short and fake out if they can put the breaks on their squirrely movement. Against Ken, they want to fly, but they're scared to, and they should be (and you should make them scared). Not many high-damage options, even with meter, so with-meter, be prepped for cheeky single-hit confirms after Kokuu (the air dash). Better off going with cr.![]() confirms instead of cr.
confirms instead of cr.![]() when close, since some of Twelves better tools have awkward hitboxes and you run the risk of trading going for cr.
when close, since some of Twelves better tools have awkward hitboxes and you run the risk of trading going for cr.![]() . Mid-screen kara DP route is st.
. Mid-screen kara DP route is st.![]() xx
xx![]()
![]() xx Kara.
xx Kara.![]()
![]() . Don't get faked out by their sweep- it's a multi-hit on block, and all 3 hits can knockdown.
. Don't get faked out by their sweep- it's a multi-hit on block, and all 3 hits can knockdown.
- Twelve typically LOVES to take heavy advantage of both approaching and retreating with their air dash. A good Twelve will know when to stay grounded against ken, however. Recklessly air dashing is begging to be double-DP'd (2x

 ). Normally, in order for Ken to double-DP Twelve, the typical route is st.
 xx
xx
 xx Kara.
 . However, if Ken can DP characters while they're airborne, it's often fairly simple to successfully hit a 2nd DP, even without an added Kara due to the extra launching height. Twelves Air Dash makes for these perfect opportunities, though there are two specific moves you should be on the lookout for:
 J.
J. J.
J.- To begin, most of Twelves approaching tools revolve around his Air Dash, Kokuu.

- You want to punch him. Twelve is a giant square MADE for punching here, but a good Twelve will know when to properly cancel into their two most effective air normals, as well as Air Dash in Reverse against the wall to mix up their approach timings. If you read anything here, read: As Ken, it's more vital to be aware not of what moves Twelve is using, but more so their movement. Properly judging twelves movement in the air and reacting as opposed to predicting will reward you double-DP's with super-worthy damage in droves, and ample opportunities to chase with jumping Ex Tatsu (


 ) as well. Onto the moves:
- You want to punch him. Twelve is a giant square MADE for punching here, but a good Twelve will know when to properly cancel into their two most effective air normals, as well as Air Dash in Reverse against the wall to mix up their approach timings. If you read anything here, read: As Ken, it's more vital to be aware not of what moves Twelve is using, but more so their movement. Properly judging twelves movement in the air and reacting as opposed to predicting will reward you double-DP's with super-worthy damage in droves, and ample opportunities to chase with jumping Ex Tatsu (
- J.
 : While not necessarily a "good move" by 3S standards, it's certainly one of Twelves most used tools. Reach is pretty great, though only active for 2 frames, and its hurtbox still extends beyond its hitboxes. In fact, immediately following its two active frames, Twelves' arms are still vulnerable and fully extended for another 4 frames (Viewable in full on ensabehnur). Twelves Air Dash will swoop down slightly before it arcs back upwards, creating a rather strange angle to look for to time a well-placed DP or equivalent anti-air (i.e st.
 or c.
or c. ). In the case of Ken, Twelve would benefit more from opting not to airdash and instead stay at a safe distance and j.
 , hoping for the Ken player to whiff a DP in preparation for an Air Dash and then poking with Twelves j.
 at the expense of beginning a quick high-low mixup. Paying attention to both the height at which Twelve uses j.
 , as well as understanding just how few active frames it has will allow the Ken to better judge when to anti-air, or when to instead prepare to engage post-landing. Should Ken choose to stay on the defensive during an Air Dash, the other move to be aware of is:
- J.
 : Once again, viewable in full on ensabehnur, only the first frame of j.
 extends ever-so-slightly past his hurtbox, while the following 5 remaining active frames leave Twelve exposed from both at the tip of the spike, and slightly behind. While this may point to Twelve being incentivized to use it high and early, Twelve players are more likely to want to use this deep after an air dash, since this is typically one of the only ways for Twelve to begin his (rather weak) ground game. Without meter, Twelve is limited to deep j.
 > c.
> c. etc, or deep j.
 >
>  A.X.E. With meter, Twelve can opt to confirm deep j.
 xx SA1 (X.N.D.L), or "mixup" into close st.
 xx SA1, or close st.
 > sjc.SA2. This is to say, Twelve is incentivized to play a tad more squirely when there's meter to play with, so when judging whether to anti-air or stay on the defensive and gambling on whether j.
 or
or  is coming, understanding that Twelve is more likely to play at an anti-DP range when they don't have meter available is key to knowing when you're allowed to stay on the aggressive, even when they approach.
- Lastly, if it wasn't obvious, both of these tools have two distinct ranges in which they're typically used. While j.
 can be used as close as j.
 , you're unlikely to see it as the opportunity to take a pair of Mr.Masters knuckles to the chin rises dangerously for Twelve. In short, if Twelve looks to begin an Air Dash, and j.
 hasn't appeared on the screen a few frames later, it's fair to assume a j.
 is coming. If Ken has continuously parried Twelves ariel approaches, particularly his deep j.
 attempts, Twelve may opt for deep j.A.X.E (
 ). It's a multi-hit, so it's just the equivalent of "now parry THIS." Should they use its
  version, and assuming it hits, it hardly does much more than getting bopped with a j.
 , and it doesn't really lead into anything, so Twelve isn't much better off. EX will do a little less than double that of a single j.
 , and again, doesn't lead to much else. As you can see on Ensabehnur, Twelve is also wide open from below should they start this from the top of an Air-Dash, so use this knowledge responsibly.
 F/B
F/B
- cr.
 : Very quick note about cr.
 : It's a multi-hit on block, a single hit on-hit, or a single blue/red parry. Slightly similar to Remy in that one single sweep will result in multiple actions and a knockdown regardless of which hit lands, but this can be tricky to deal with when deciding to punish post-blocking; either with a normal, super, etc. Blocking the first two hits, then inputting a motion or other direction in anticipation of a punish may lead to you getting knocked down anyway by the third stray hit. Thankfully, when deciding to parry, it's important to note that it only requires a single parry to stop the remaining hits from continuing, and will usually result in Twelve being close enough for whatever punish the Ken player would like to go with. See the video below for a better example:
- st.
 : As usual, while not necessarily a "great" move by 3Ss standards, you'll be seeing this a lot as it is one of the few tools twelve has to rely on. Viewable in more detail on ensabehnur, only frames 15 and 16 have any real reach. With quite literally double the startup time compared to Kens st.
 , Twelve will be more likely to either throw this out preemptively in expectation of a jump-in and less so as a reactionary tool. Kens J.
 being much faster usually means you won't have much to worry about. It's a slow, single parry anyway, so no real hurdles there. Ken can actually stand absurdly close to Twelve while st.
 is swinging, though due to the lingering hitboxes towards Twelves waist, it's actually pretty difficult to time a cr.
 xx SA3 confirm since the cr.
 is likely to be hit by Twelves st.
 . cr.
. cr. reaches plenty far enough though, so make that your go-to when jumping in and staying just out of range of a st.
 . If Twelve is late to the shot and you block a st.
 deep, you can also just go straight into SA3 from block; similar to punishing a sweep in the Ken-Ken/Ken-Ryu/etc matchup.
- st.
 : The second of Twelves' most useful grounded normals. Routinely switching between st.
 and st.
 , while occasionally mixing in a
 /
/ makes for the cornerstone(s) of Twelves zoning game. If blocked deep can be punished with SA3. Active for a whopping 3 frames on ensabehnur, the last of which is hilariously small. cr.
 and st.
 will typically get beaten on a challenge, though cr.
 is a pretty good option here if you want to do a little extra damage without going in for a parry.
 is also an option here as well. Nevertheless, this move and the last tie moreso into Twelves overall grounded gameplan package, which as Ken, you're likely to see more of than other characters due to the threat you hold with DP damage. In summary:
- F/B
 +
+ &
& 
 : These final two moves are the cherry on top of Twelves grounded gameplan. As stated, Twelve doesn't have any significantly terrifying combos or confirms outside of sneakily flying in and confirming into a super, so these 5 grounded techniques will be the circle of life.
 +
+ Twelves directional throws actually bounce and toss the player across the screen, which even when teched, Twelve is still "in range" to dash forward and land a meaty ![]()
![]() Fierce Needle (example in the example matchup video above from TheShends archives). It's not the end-all-be-all for damage, but even as low-tier as Twelve is, it's still a tactic that will force you to parry for your life full-screen in a tough situation. Twelve can also opt to do EX Needle (
Fierce Needle (example in the example matchup video above from TheShends archives). It's not the end-all-be-all for damage, but even as low-tier as Twelve is, it's still a tactic that will force you to parry for your life full-screen in a tough situation. Twelve can also opt to do EX Needle (![]()
![]()
![]() ), which instead of having a redefined distance will track the opponent, so should you "choose" not to tech after the throw, the Twelve player won't have to decide to move prior to using Needle. Tying a nice bow on the whole thing: Just like with Kokuu and Twelves options out of it, it will pay you in dividends to be more aware of the Twelve players' movement and spacing choices, rather than assuming they have a concrete gameplan or dominant strategy.
), which instead of having a redefined distance will track the opponent, so should you "choose" not to tech after the throw, the Twelve player won't have to decide to move prior to using Needle. Tying a nice bow on the whole thing: Just like with Kokuu and Twelves options out of it, it will pay you in dividends to be more aware of the Twelve players' movement and spacing choices, rather than assuming they have a concrete gameplan or dominant strategy.
Urien
| block string | frame advantage |
|---|---|
| 2LK, 2LP, 2LK, UOH | 5-6 |
| 2LK, 2LP, 2LK, MK~UOH | 4-5 |
| 2LK, 2LK, 2LK, UOH | 5-6 |
| 2LK, 2LK, 2LK, MK~UOH | 5-6 |
| 2LK, 2LK, 2LK, 4MK~UOH | 4-5 |
| 2LK, 2LK, 2LK, 2MK~UOH | 3-5 |
| 2LK, 2LK, 2MK, UOH | 5-6 |
| 2LK, 2LK, 2MK, MK~UOH | 5-6 |
| 2LK, 2LK, 2MK, 4MK~UOH | 5-6 |
| 2LK, 2LK, 2MK, 2MK~UOH | 3-5 |
| 2LK, 2LK, 5HK, UOH | 5-6 |
| 2LK, 2LK, 5HK, MK~UOH | 5-6 |
| 2LK, 2LK, 5HK, 4MK~UOH | 4-5 |
| 2LK, 2LP, 2MP, 4MK~UOH | 5-7 |
| 2LK, 2LP, 2MP, 2MK~UOH | 5-6 |
| 2LK, 2LP, 2MK, UOH | 5-6 |
| 2LK, 2LP, 2MK, MK~UOH | 5-6 |
| 2LK, 2LP, 2MK, 4MK~UOH | 3-5 |
| 2LK, far MP, UOH | 5-6 |
| 2LK, far MP, MK~UOH | 5-6 |
| 2LK, far MP, 4MK~UOH | 3-5 |
| 2MP, 2MP, UOH | 5-7 |
| 2MP, 2MP, MK~UOH | 5-6 |
| 2MP, 2MP, 4MK~UOH | 5-6 |
| 2MP, 2MP, 2MK~UOH | 4-6 |
| close MP, 2MP, UOH | 5-6 |
| close MP, far MP, 4MK~UOH | 5-6 |
| close MP, far MP, 2MK~UOH | 5-6 |
| close MP, 2LK, 2LK, MK~UOH | 5-6 |
| close MP, 2LK, 2LK, 4MK~UOH | 5-6 |
| close MP, 2LK, 2LK, 2MK~UOH | 5-6 |
| target combo, UOH | 5-6 |
| target combo, MK~UOH | 3-5 |
Yang
Your text here!
Yun
Your text here!
Gill

- If you're fighting Gill, I'm assuming you're playing the arcade mode. Here's what to do, step by step:
- Get a knockdown.
- st.
 on Gills wakeup. They'll block it.
 - Wait just a moment; don't cancel into it, but then

 . It'll hit. So long as you timed the st.
 correctly, it'll hit.
 - 2x

 when you eventually drag Gill to the corner.
 - st.
 , delay, SA3, if you want to finish with a super.
- If Gill dies with enough meter to super, jump just before the resurrection freeze, then EX-Tatsu (


 ) him out of it. Rinse-and-repeat steps 1-5. Apply liberally to every other character in arcade mode, if you so choose.
Godspeed, friend.


