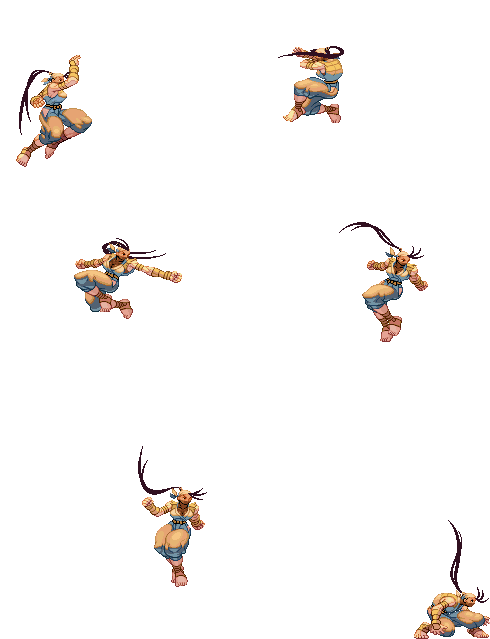
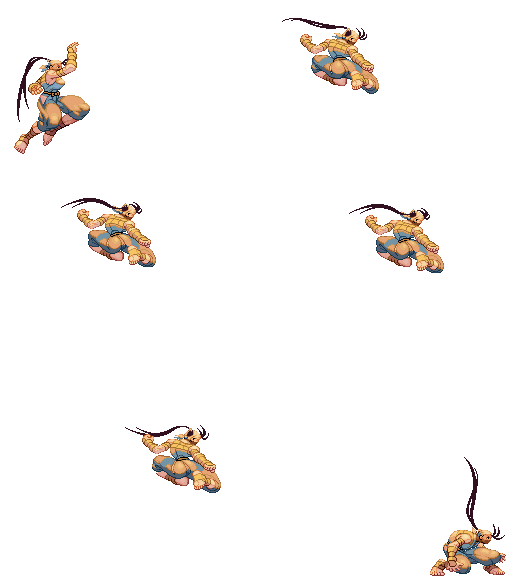
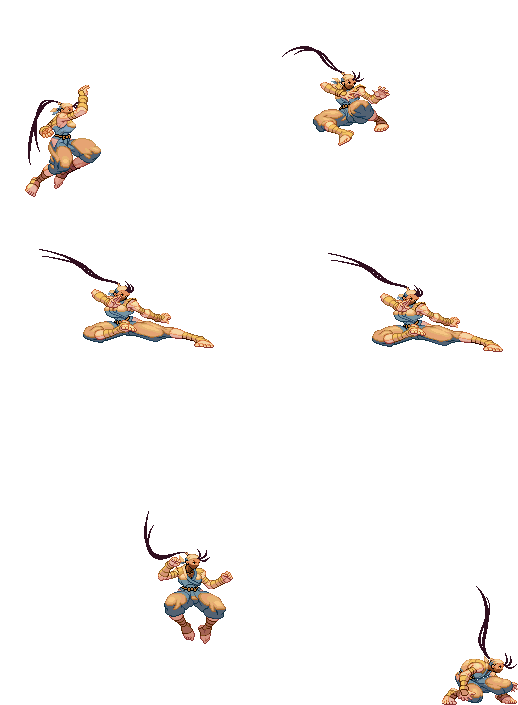
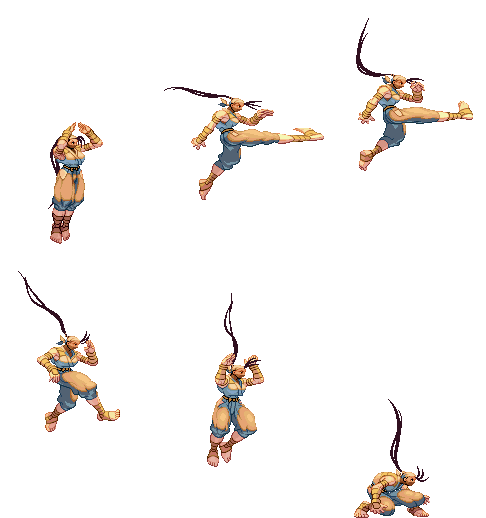
Introduction
Ibuki, High-School Senior Ninja
| Strengths | Weaknesses |
|---|---|
|
|
Specific Character Information
- Stamina: 1035
- Stun Bar Length (dots): 64 (Normal)
- Stun Bar Recovery (frames it takes to recover 1 dot): 24th
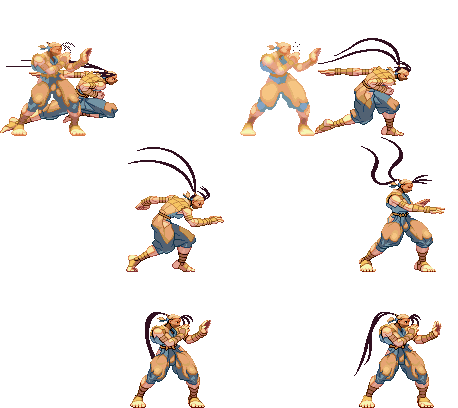
- Taunt: Increases damage for the next hit/combo/throw by 43.8% only if she gets the leapfrog. Otherwise you get nothing. Maximum one taunt.
- Best Kara-Throw: (Roundhouse) S.MK
- Standard Throw Range (pixels): 16
- Kara-Throw Range (pixels): 20
- Dash Forward (frames) / Moving Distance: 19 / 2
- Dash Backward (frames) / Moving Distance: 33 / 2,5
- Normal Wake up (frames): 68
- Quick Stand (frames): 53
Moves List
Normal Moves
Air Normals
SP Notes:
1) Turns standing opponent around on hit (except Elena and Urien).
2) Knocks down (slams) an air-born opponent if it hits.
Ground Normals
SP Notes:
1) Super Jump Cancelable on hit, parry, or block.
2) Chains into itself.
3) Super Jump Cancelable on second hit (hit, parry, or block). Launches opponent on hit, opponent can be juggled.
4) Super Jump Cancelable on hit only (not on block or parry).
Throws
SP Notes:
1) Ibuki's defensive, offensive, and neutral throws are all identical.
2) Horizontal range: 12. Vertical range: Top 44, Bottom 67. You can grab defense (air tech) Ibuki's airthrow
Command Normals
SP Notes:
1) Universal Over-Head. Block and Hit Advantage range: -5/0/+1 to +7/+8/+9
2) Personal Action. Opponent can tech out of with throw defense (LP+LK). Can be parried or blocked. Does not grab airborn opponents. Can be comboed. Opponent can not tech out if it is comboed. Sucsessful grab results in damage increase for 1 combo. Effects ware off if Ibuki is hit.
3) T.LK Chains into itself. Not Special or Super cancelable.
4) Knocks down (slams) an airborn opponent if it hits. Takes Ibuki off the ground. Can go over Remy's low LoV projectiles.
5) DT.MK Block and Hit Advantage range: -16/-6/-5 to -6/+4/+5. This move has a very small/low hitbox and can pass under high fireballs from: Akuma, Chun-Li, Ken, Oro, Remy (punch/high LoV only), Ryu, and Urien. It can also go under Ryu's SA.1, SA.3, and Sean's SA.1.
6) Toward+HK takes Ibuki off the ground. Can go over mid/low projectiles from: Akuma(ground), Chun-Li, Ken, Oro (LP/low only), Remy (kick/low LoV only), Ryu, and Urien. Ibuki will only pass over Urien's LP fireball if she hits him.
7) Follow-up hit for Ibuki's far standing HP.
Note: These air target combos can be performed while jumping diagonally toward the opponent. The ![]() ->
-> ![]() +
+ ![]() can also be performed while jumping vertically.
can also be performed while jumping vertically.
 ->
-> 
 +
+  ->
->  ->
-> 
- close
 ->
->  (1 hit) ->
- close
 ->
->  (2 hit) ->
  +
+  ->
->  *
*  +
+  (1 hit) ->
 +
+  (2 hit) ->
  +
+  ->
->  *
* +
+  -> close
 *
* +
+  ->
->  *
*- close
 (2 hit) ->
  +
+  ->
->  *
*  ->
->  ->
-> 
 ->
-> 
 ->
->  ->
->  +
+ 
- close
 ->
->  ->
->  ->
->  +
+ 
 +
+  ->
->  +
+  (does not combo)
SP Notes:
1) ![]() +
+ ![]() Does not chain into itself during this TC.
Does not chain into itself during this TC.
2) ![]() can knock down some air-born opponent if it hits, depending on the opponents distance from the ground (character specific). It will always reset (not knockdown): Ibuki, Oro, Yang, and Yun.
can knock down some air-born opponent if it hits, depending on the opponents distance from the ground (character specific). It will always reset (not knockdown): Ibuki, Oro, Yang, and Yun.
3) Super Jump Cancelable (on hit only).
Special Moves
SP Notes:
1) Kubi Ori can pass under mid/high projectiles from: Akuma, Chun-Li, Ken, Oro, Remy (punch/high LoV), Ryu, and Urien.
2) Kazekiri can be ground thrown during start-up. Ibuki will be knocked into the air if hit during start-up or while in the air. Available Super Cancel on the ground into SA.2 or SA.3, and in the air into SA.1 on hit, block, or parry (not whiff).
3) EX Kazekiri can Super Cancel into SA.1 on hit, block, parry, or whiff. It has 5 frames of full invulnerability on start-up and 1 frame of partial upper-body invulnerability. It does not launch or knock-down a standing or crouching opponent (unlike the non-EX versions). It temporarily forces crouching opponents into a standing posistion when it hits. It recovers in the air if it hits an opponent. During this time, Ibuki can perform any of her normal air attacks, any of her three air target combos, her qcf+P/2P (Kunai/EX Kunai), or SA.1 (Kasumi Suzaku). She can not air throw or air parry during the recovery state.
4) Kunai. Strength of button determines angle of knives thrown (not for EX). EX: Holding toward increases range. Knives can be destroyed by opponents attacks. Maintains jump momentum after the toss.
5) To get the 3rd hit of the MK Tsumuji, you must press MK again (timing is strict). In order to get the sweep, you must press down and MK
6) Raida can not be parried. The opponent can not quick-stand (ground recovery) if hit by it.
7) Hien can go over projectiles. Button strength determins distance. EX version auto-targets. If it hits or is blocked, Ibuki can cancel the recovery in the air with a Kunai (air qcf+P) or SA.1 (Kasumi Suzaku), but not while falling or landing.
8) Kasumi Gake is a command dash. It can cause Ibuki to take 50% extra damage from opponent attacks if she is hit during the move. Does not pass through opponents (unlike her normal dash).
9) Tsuiji Goe is a command jump. Attacks with knock Ibuki into the air during start-up. Can be thrown during start-up. During second half of jump arch, Ibuki can cancel into air qcf+P (Kunai) and/or SA.1 (Kasumi Suzaku).
Super Arts
SP Notes:
1) Kasumi Suzaku automatically turns Ibuki to face the opponent. Strength of button determines angle/distance of knives thrown. Rapidly pressing punch increases number of knives thrown and raises Ibuki higher into the air. Throws 12 knives by default, and up to a maximum of 20. Each knife does 35 attack for a maximum of 335 (scaled damage). The "recovery" listed for each strength refers to the ammount of recovery frames Ibuki has once she reaches the ground, it does not include the time it takes for her to reach the ground from the air.
2) Yoroi Doushi is an unblockable Command Grab Super. Occurs when it successfully grabs an opponent. Will not grab airborn opponents. Throw range: 35.
3) Yoroi Doushi, energy blast (fireball) version. Occurs when the Grab version fails. Does 13 hits, each hit has 32 attack for a maximum of 280 (scaled damage).
4) Yami Shigure, strength of button determines angle/distance of knives thrown. Block Advantage Range: -10 to -6.
Move Analysis
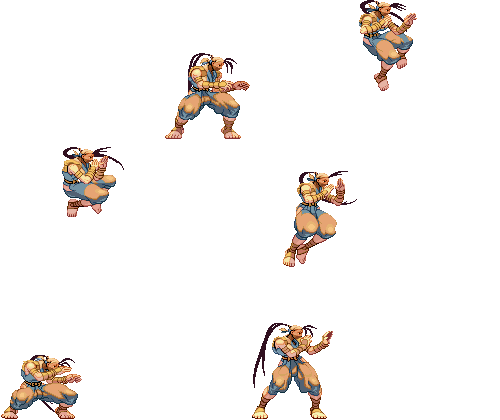
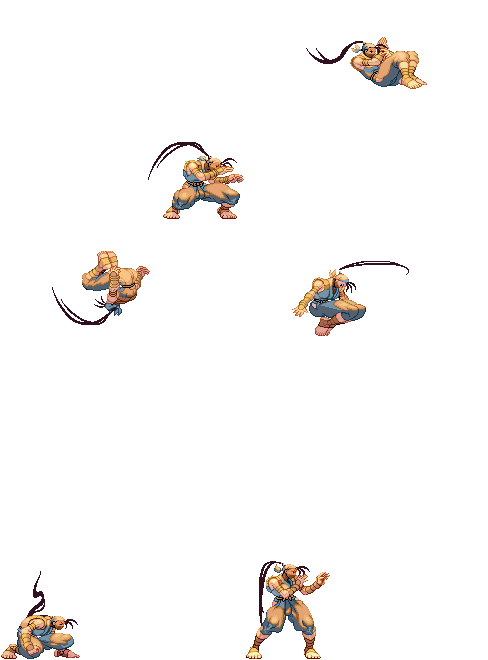
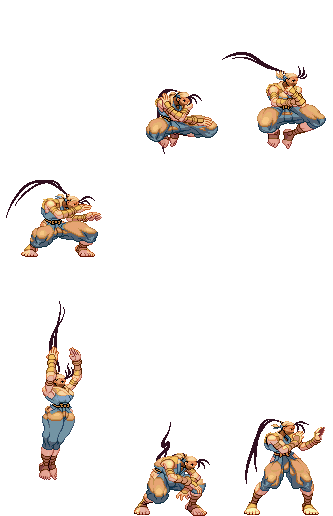
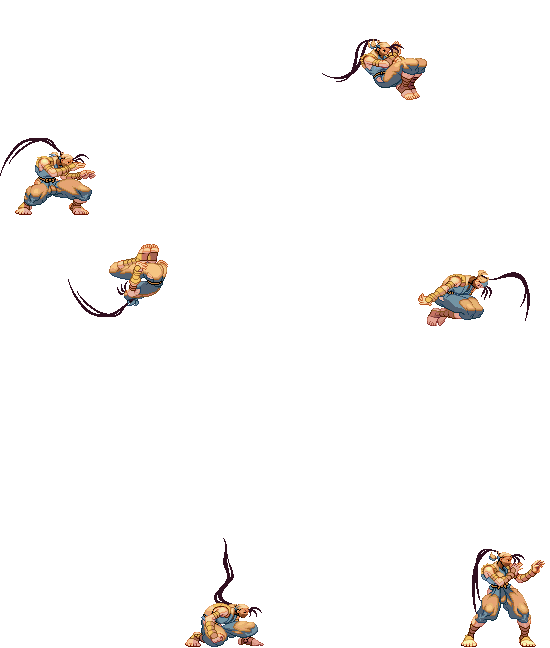
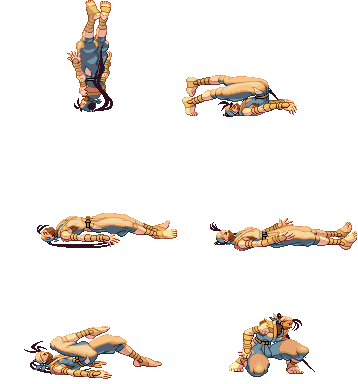
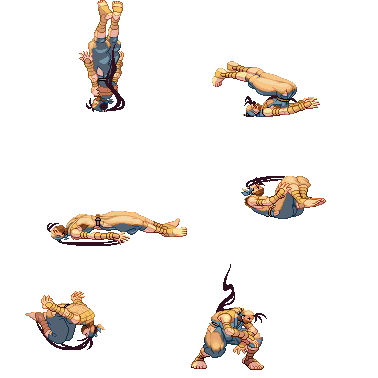
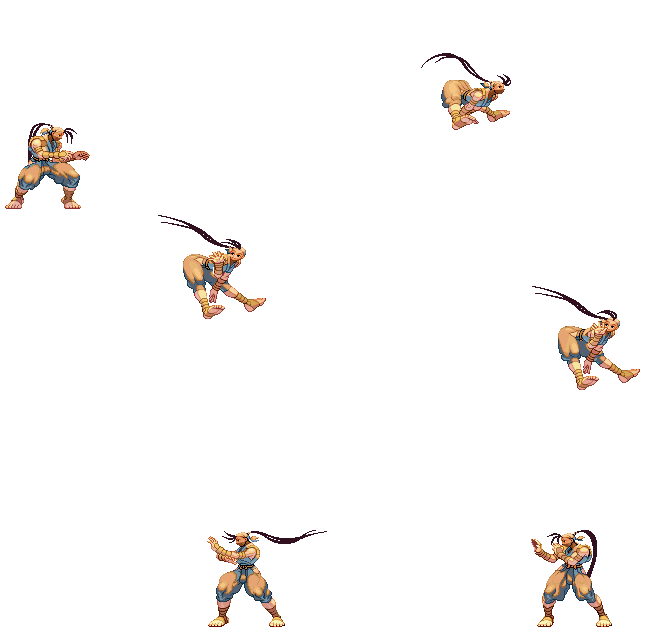
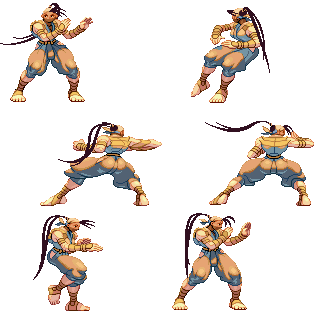
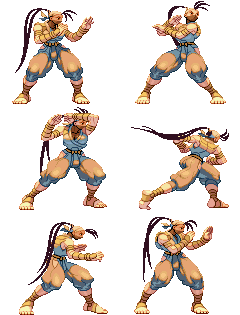
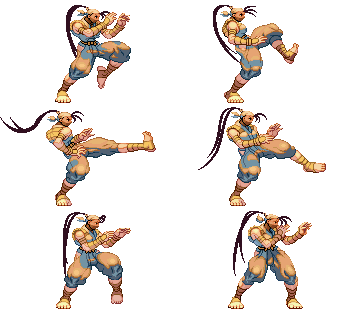
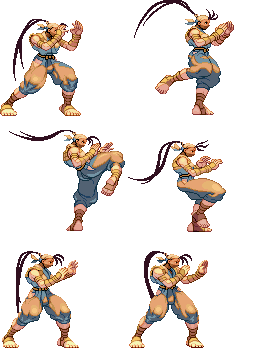
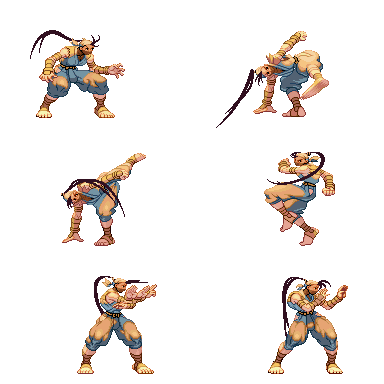
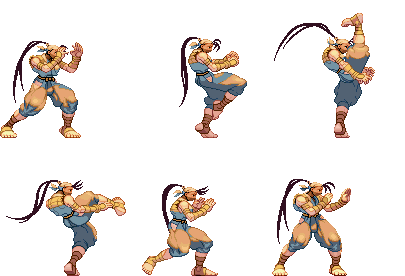
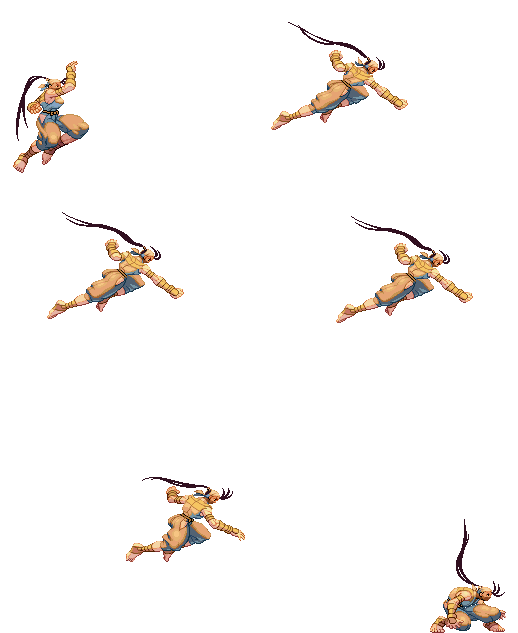
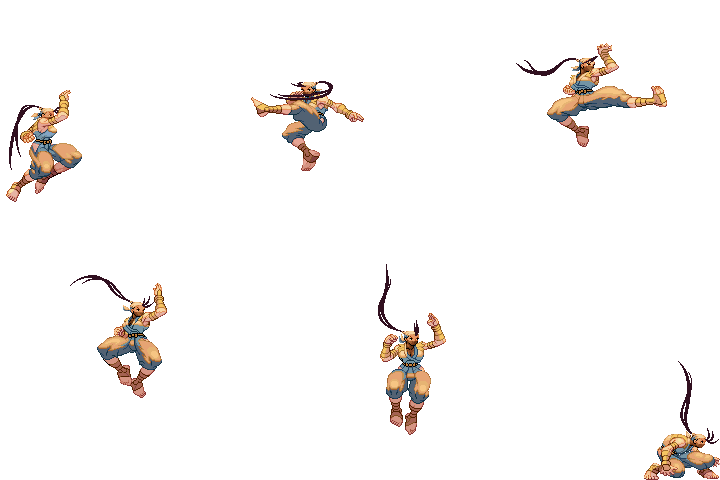
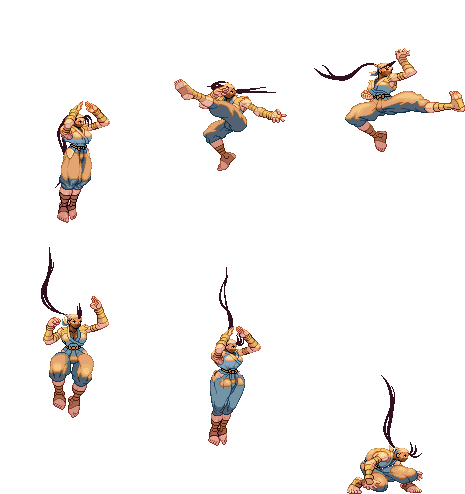
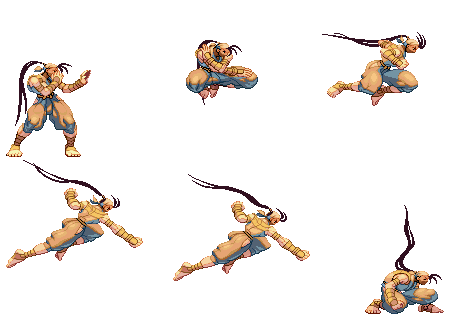
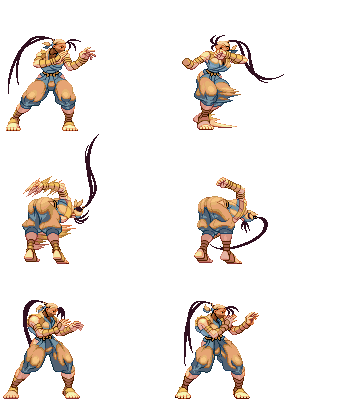
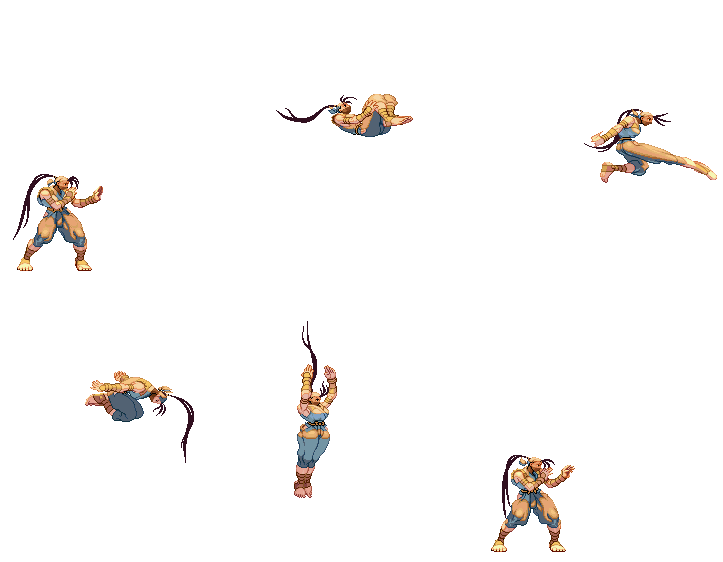
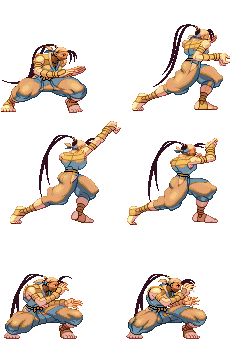
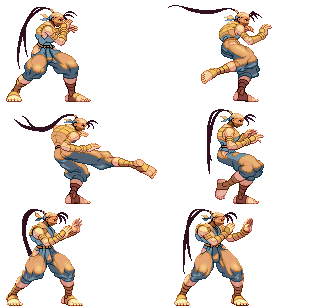
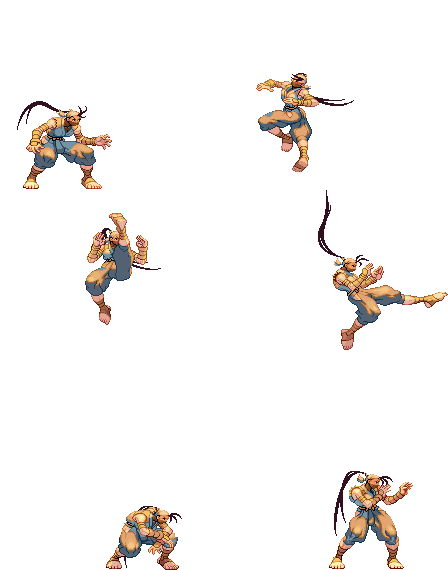
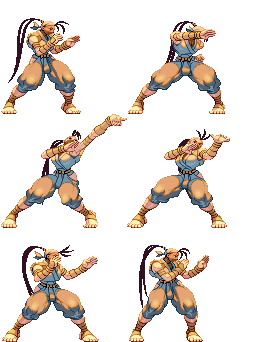
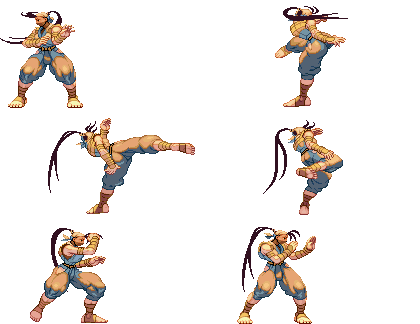
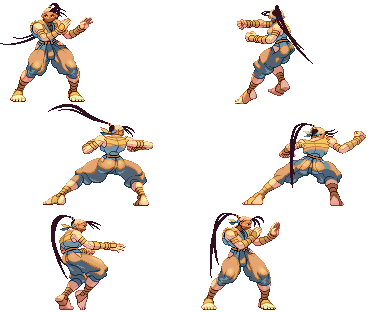
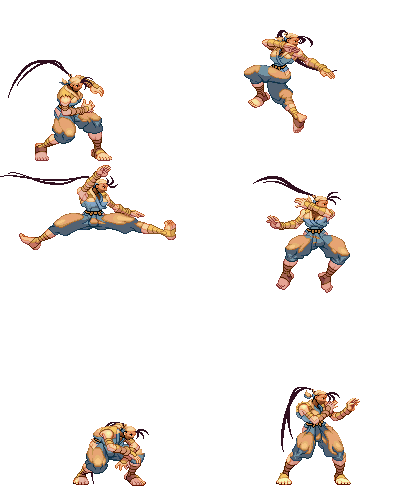
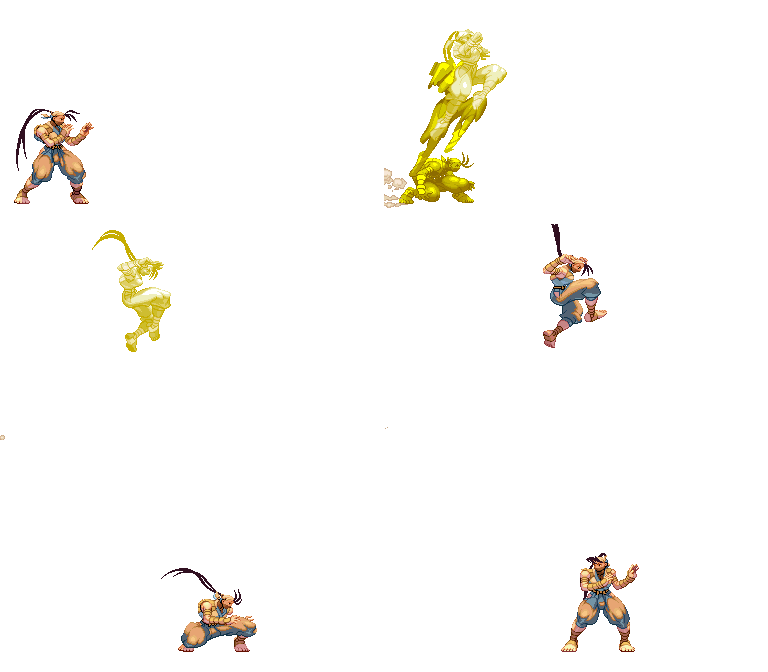
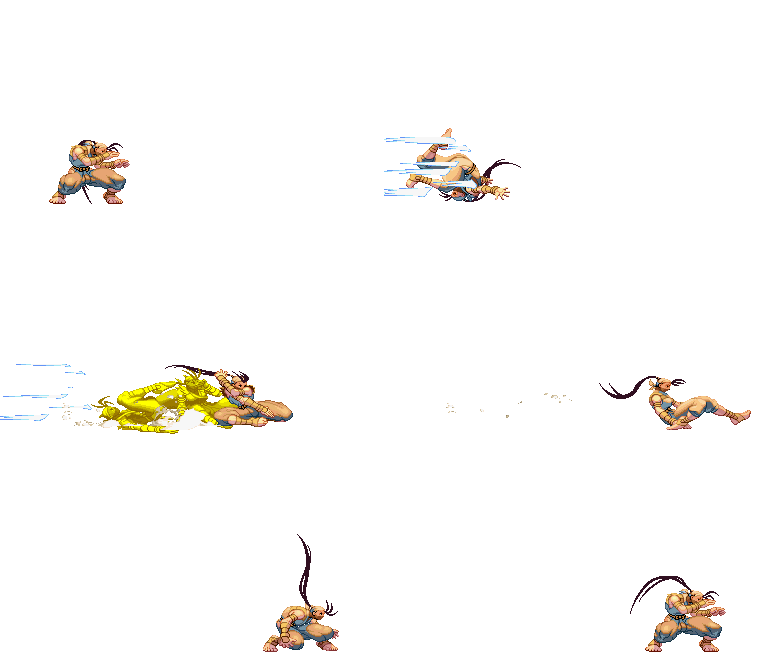
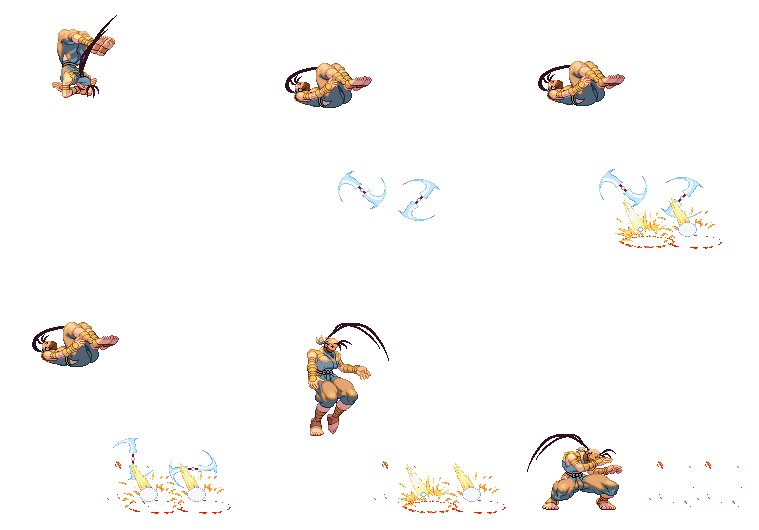
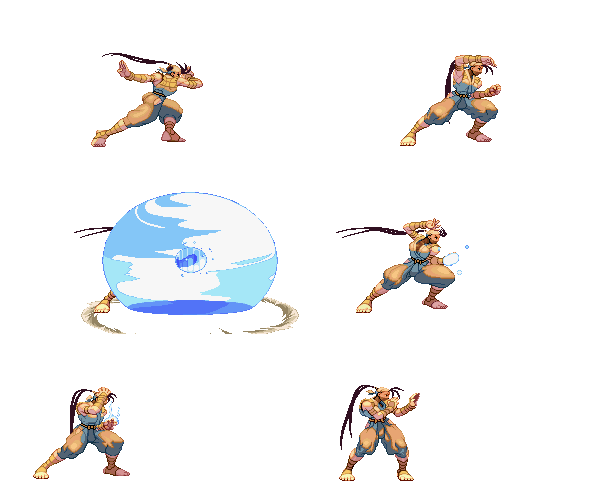
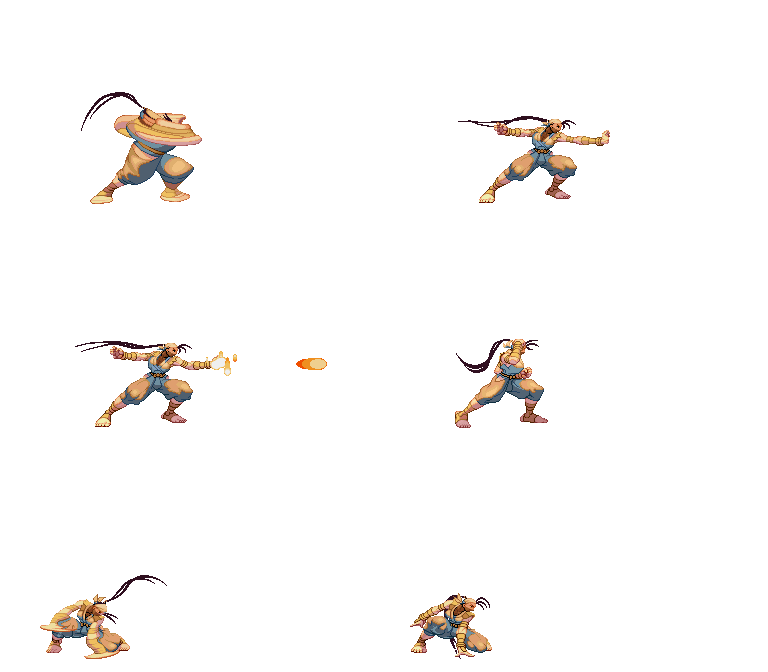
- All those sprites are taken from the site https://www.justnopoint.com/zweifuss/
- All Framedatas in "Move Analisys" section are taken from Game Restaurant , this means the Framedata isn't from the Dreamcast version like Karathrow site, it's from Arcade version.
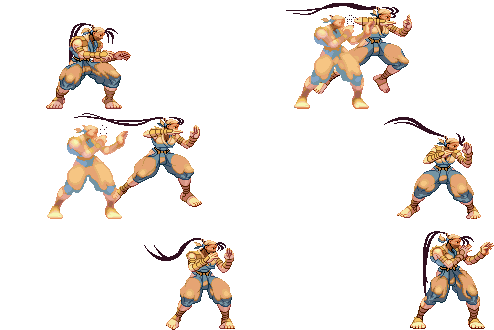
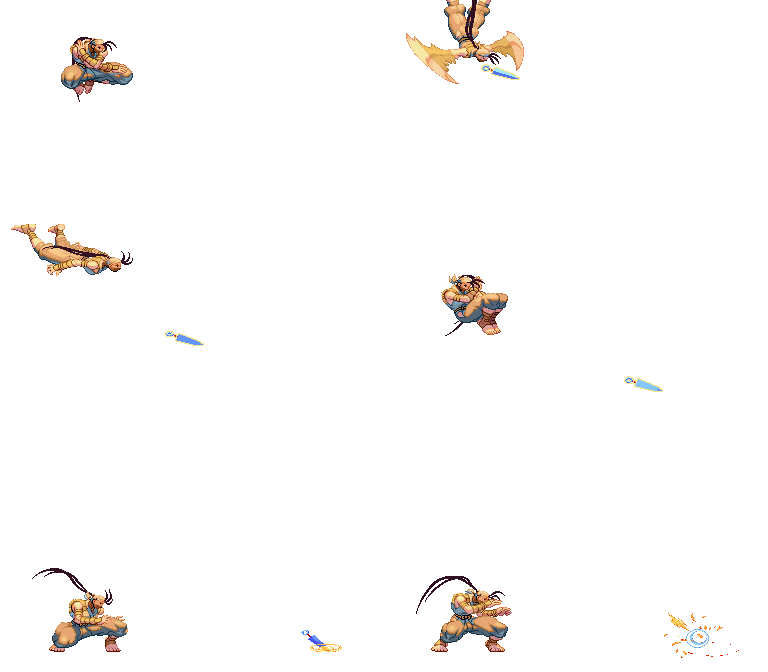
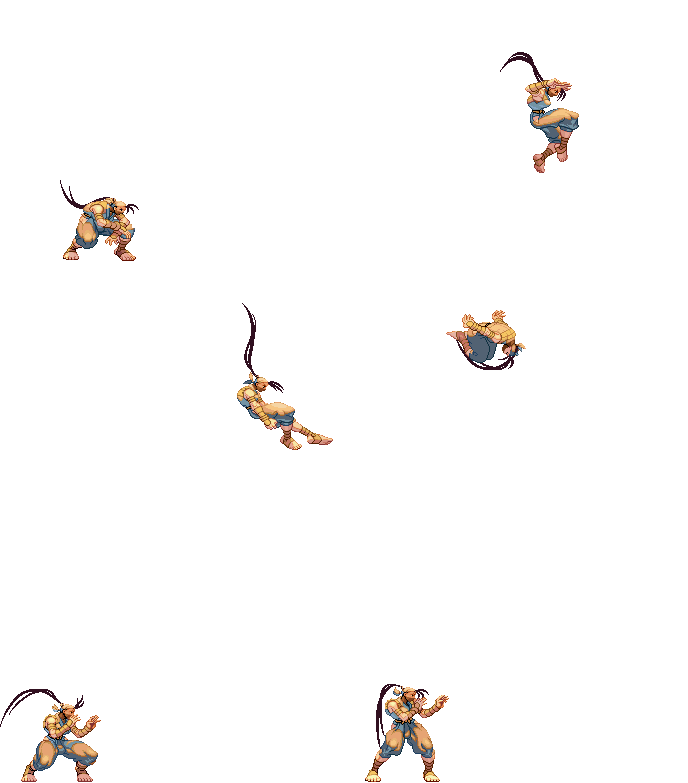
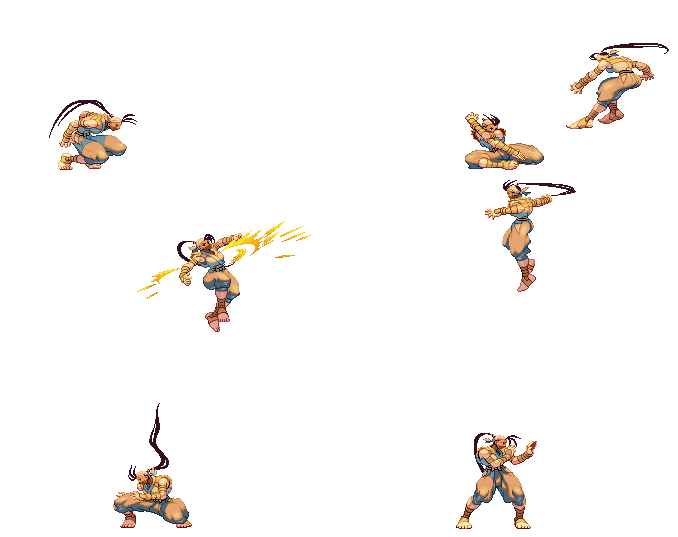
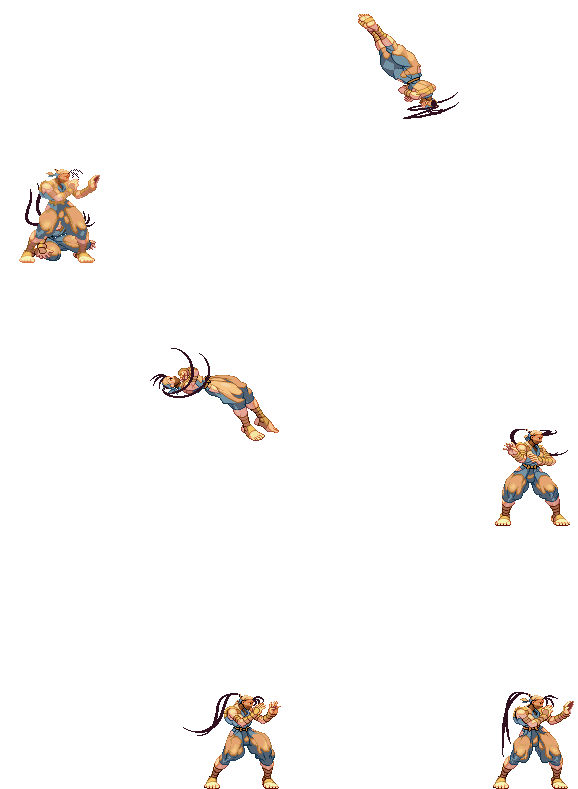
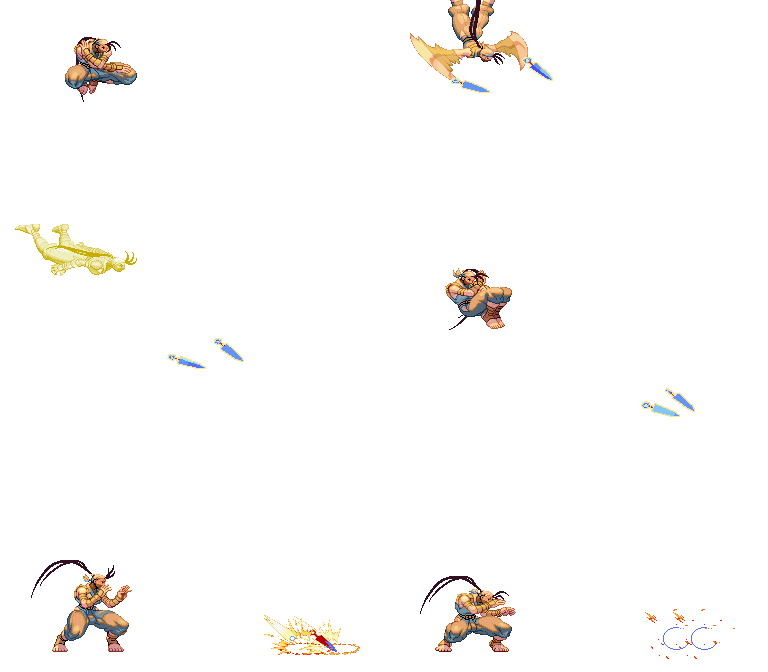
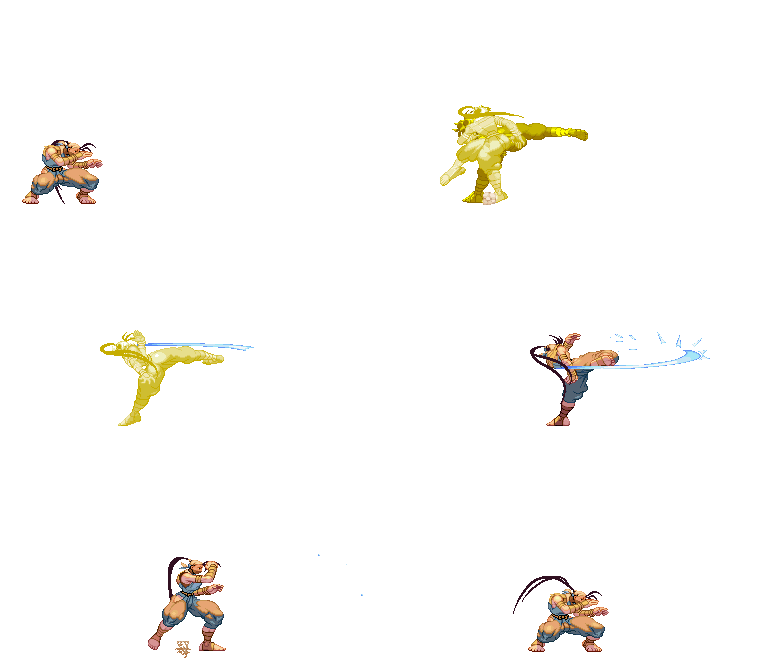
Please note that the images show in this section are for the 1st frame it hits, so this means the opponent is taking the hit in the image shown on the move. I use the 1st frame of every move (except taunt, dash, jump, wakeup and 2nd throw image sprites) because you will see the maximum range of every attack (mostly of the attacks). Note also that those images are ACCURATE, they are exactly the first frame it hits, so enemy takes damage but they still dont make the "pain" frame.
General
- Move: Move name
- Motion: What you must do to execute the move
- Damage: Damage it does (in pixels)
- Stun Damage: Stun Damage it does (in pixels)
- Chains into itself: If you can combo into the same movement
- Special Cancel: If you can cancel the move into a Special Move
- Super Cancel: If you can cancel the move into a Super Art
- Throw Range: Range of the throw (in pixels)
- Num.: Super Art number
- Super Art: Super Art name
- Super Art Stock: Number of Gauge Bars the Super Art have, also the lenght of each bar (in pixels)
Frame Data
- Startup: Number of frames it takes to start the move
- Hit: Number of frames that can hit the opponent
- Recovery: Number of frames it takes to recover from the move
- Blocked Advantage: Number of frames you are in advantage/disadvantage after opponent have been blocked the hit
- Hit Advantage: Number of frames you are in advantage/disadvantage after opponent have been take the hit
- Crouching Hit Advantage: Number of frames you are in advantage/disadvantage after opponent have been take the hit while he's crouching
- + # : You have # frames of advantage
- - # : You have # frames of disadvantage
- # ~ # : Advantage/disadvantage can vary from # to #
- Down: Enemy gets knocked down
- Guard: How opponent must guard the move, High (H), Low (L) or both (HL)
- Parry: How opponent must parry the move, High (H), Low (L) or both (HL)
Gauge Increase
- Miss: Gauge you gain if you miss the move (in pixels)
- Blocked: Gauge you gain if the move gets blocked (in pixels)
- Hit: Gauge you gain if you hit the opponent with the move (in pixels)
- Parry: Gauge opponent gains when he parry the move (in pixels)
Basic Moves
| Move | Start-up frames | In ground frames | In air frames | Recovery frames | Total frames |
|---|---|---|---|---|---|
| Dash Forward | 2 | - | - | - | 19 |
Comments here
| Move | Start-up frames | In ground frames | In air frames | Recovery frames | Total frames |
|---|---|---|---|---|---|
| Dash Backwards | 2,5 | - | - | - | 33 |
Comments here
| Move | Motion | Startup Frames |
| Jump | BU or U or FU | 3 |
Comments here
| Move | Motion | Startup Frames |
| Super Jump | DBU or DU or DFU | 5 |
Comments here
| Move | Motion | Frames |
| Normal Wakeup | - | 68 |
Comments here
| Move | Motion | Frames |
| Quick Stand | Tap D when hitting the ground | 53 |
Comments here
| Move | Motion | Damage | Stun Damage | Chains into itself | Special Cancel | Super Cancel | Juggle Value |
| Taunt | HP+HK | 5 | 7 | No | No | No |
Frame Data
| Startup | Hit | Recovery | Blocked Advantage | Hit Advantage | Crouching Hit Advantage | Guard | Parry |
| 14 | 9 | 8 | ? | ? | ? | HL | HL |
Gauge Increase
| Miss | Blocked | Hit | Parry (Gauge for opponent) |
| 4(6) | ? | ? | 8(4+4) |
This is the unfavorable distance after hit a character with the taunt
| Distance | 'Character |
| 23 | Alex, Remy, Chun Li, Urien |
| 22 | Shotos, Dudley, Q, Hugo, Necro, Twelve |
| 21 | Oro, Elena |
| 20 | Makoto |
| 19 | Ibuki |
| 18 | Yun,Yang |
| Move | Motion |
| Parry (High) | Tap F when about taking a hit |
| Parry (Low) | Tap D when about taking a hit |
| Parry (Air) | Tap F in air when about taking a hit |
Frame Data
| Move | Frames you're frozen | Frames opponent is frozen | Frame Advantage when parry is successful | Frames before you can try another parry |
| Parry (High) | 16 | 16 | +4(LP/LK) +3(MP/MK) +2(HP/HK) 0(Special/Super) -16(Fireball) | 24(19 when attack comes from the air)*,** |
| Parry (Low) | 16 | 16 | +4(LP/LK) +3(MP/MK) +2(HP/HK) 0(Special/Super) -16(Fireball) | 24(19 when attack comes from the air)*,** |
| Parry (Air) | 16 | 16 | +4(LP/LK) +3(MP/MK) +2(HP/HK) 0(Special/Super) -16(Fireball) | 21(19 when attack comes from the air)*,** |
| * (If a parry attempt is successful, the 19/21/24 frame restriction is taken away and you can attempt another parry immediately) |
| ** (If another attack connects within 2 frames of your parry, it will automatically be parried) |
Gauge Increase
| Move | Gauge Increase |
| Parry (High) | 4*** |
| Parry (Low) | 4*** |
| Parry (Air) | 4*** |
| *** (You gain 4 of gauge for whatever attack parried, and for whatever hit you parry during multihit attack) |
You can buffer any motion during High or Low parry, but NOT during Air parry, also parry resets the juggle count (and thus resets all scaling).
- Parry information is taken from Shoryuken Forums, more exactly, from user JinraiPVC. Thanks for this information dude
Normal Moves
Standing Normals
| Move | Motion | Damage | Stun Damage | Chains into itself | Special Cancel | Super Cancel | Juggle Value |
| Far Jab | LP | 30(5 life points) | 5 | No | No | No |
Frame Data
| Startup | Hit | Recovery | Blocked Advantage | Hit Advantage | Crouching Hit Advantage | Guard | Parry |
| 2 | 2 | 2 | +6 | +6 | +6 | HL | HL |
Gauge Increase
| Miss | Blocked | Hit | Parry (Gauge for opponent) |
| 0 | 1 | 2 | 4 |
Comments here
| Move | Motion | Damage | Stun Damage | Chains into itself | Special Cancel | Super Cancel | Juggle Value |
| Far Strong | MP | 70(12 life points) | 11 | No | No | No |
Frame Data
| Startup | Hit | Recovery | Blocked Advantage | Hit Advantage | Crouching Hit Advantage | Guard | Parry |
| 6 | 2 | 6 | +6 | +7 | +8 | HL | H |
Gauge Increase
| Miss | Blocked | Hit | Parry (Gauge for opponent) |
| 1 | 3 | 9 | 4 |
Comments here
| Move | Motion | Damage | Stun Damage | Chains into itself | Special Cancel | Super Cancel | Juggle Value |
| Far Fierce | HP | 70(60)(12 life points) | 5(3) | No | Yes | Yes |
Frame Data
| Startup | Hit | Recovery | Blocked Advantage | Hit Advantage | Crouching Hit Advantage | Guard | Parry |
| 13 | 4 | 14 | -1 | +1 | +3 | HL | H |
Gauge Increase
| Miss | Blocked | Hit | Parry (Gauge for opponent) |
| 2 | 4 | 10 | 4 |
Comments here
| Move | Motion | Damage | Stun Damage | Chains into itself | Special Cancel | Super Cancel | Juggle Value |
| Close Jab | (Close to opponent) LP | 25(4 life points) | 3 | No | Yes | Yes |
Frame Data
| Startup | Hit | Recovery | Blocked Advantage | Hit Advantage | Crouching Hit Advantage | Guard | Parry |
| 2 | 2 | 2 | +5 | +5 | +5 | HL | HL |
Gauge Increase
| Miss | Blocked | Hit | Parry (Gauge for opponent) |
| 0 | 1 | 2 | 4 |
Comments here
| Move | Motion | Damage | Stun Damage | Chains into itself | Special Cancel | Super Cancel | Juggle Value |
| Close Fierce | (Close to opponent) HP | 130(60+70)(18 life points) | 16(9+7) | No | Yes | Yes |
Frame Data
| Startup | Hit | Recovery | Blocked Advantage | Hit Advantage | Crouching Hit Advantage | Guard | Parry |
| 9 | 1,4 | 15 | -3 | -1 | +1 | HL | H |
Gauge Increase
| Miss | Blocked | Hit | Parry (Gauge for opponent) |
| 3 | 11 | 20 | 8(4+4) |
Comments here
| Move | Motion | Damage | Stun Damage | Chains into itself | Special Cancel | Super Cancel | Juggle Value |
| Short | LK | 20(3 life points) | 3 | No | No | No |
Frame Data
| Startup | Hit | Recovery | Blocked Advantage | Hit Advantage | Crouching Hit Advantage | Guard | Parry |
| 4 | 4 | 6 | +1 | +1 | +1 | HL | HL |
Gauge Increase
| Miss | Blocked | Hit | Parry (Gauge for opponent) |
| 0 | 1 | 2 | 4 |
Comments here
| Move | Motion | Damage | Stun Damage | Chains into itself | Special Cancel | Super Cancel | Juggle Value |
| Forward | MK | 100(17 life points) | 11 | No | Yes | Yes |
Frame Data
| Startup | Hit | Recovery | Blocked Advantage | Hit Advantage | Crouching Hit Advantage | Guard | Parry |
| 5 | 4 | 14 | +1 | +2 | +3 | HL | H |
Gauge Increase
| Miss | Blocked | Hit | Parry (Gauge for opponent) |
| 2 | 6 | 11 | 4 |
Comments here
| Move | Motion | Damage | Stun Damage | Chains into itself | Special Cancel | Super Cancel | Juggle Value |
| Roundhouse | HK | 110(19 life points) | 13 | No | No | No |
Frame Data
| Startup | Hit | Recovery | Blocked Advantage | Hit Advantage | Crouching Hit Advantage | Guard | Parry |
| 9 | 3 | 21 | -2 | -1 | +1 | HL | H |
Gauge Increase
| Miss | Blocked | Hit | Parry (Gauge for opponent) |
| 3 | 10 | 19 | 4 |
Comments here
| Move | Motion | Damage | Stun Damage | Chains into itself | Special Cancel | Super Cancel | Juggle Value |
| Close Roundhouse | (Close to opponent) HK | 120(50+70)(18 life points) | 12(3+9) | No | No | No |
Frame Data
| Startup | Hit | Recovery | Blocked Advantage | Hit Advantage | Crouching Hit Advantage | Guard | Parry |
| 5 | 1,6 | 22 | -11 | Down | Down | HL | H |
Gauge Increase
| Miss | Blocked | Hit | Parry (Gauge for opponent) |
| 3 | 8 | 18 | 4 |
Comments here
Jumping Normals
| Move | Motion | Damage | Stun Damage | Chains into itself | Special Cancel | Super Cancel | Juggle Value |
| Jump Jab | (Air) LP | 60(50 if neutral jump)(10/8 life points) | 5(7 if neutral jump) | No | No | No |
Frame Data
| Startup | Hit | Recovery | Blocked Advantage | Hit Advantage | Crouching Hit Advantage | Guard | Parry |
| 3 | 19(Until landing if neutral jump) | - | -4~+7/-1~+7 | -4~+7/-1~+7 | 0~+7/+5~+7 | H | H |
Gauge Increase
| Miss | Blocked | Hit | Parry (Gauge for opponent) |
| 0 | 1 | 2 | 4 |
Comments here
| Move | Motion | Damage | Stun Damage | Chains into itself | Special Cancel | Super Cancel | Juggle Value |
| Jump Strong | (Air) MP | 80(70 if neutral jump)(12 life points) | 11(9 if neutral jump) | No | No | No |
Frame Data
| Startup | Hit | Recovery | Blocked Advantage | Hit Advantage | Crouching Hit Advantage | Guard | Parry |
| 6(5 if neutral jump) | 13(7 if neutral jump) | - | -1~+10/+1~+10 | -1~+10/+1~+10 | +3~+10/+7~+10 | H | H |
Gauge Increase
| Miss | Blocked | Hit | Parry (Gauge for opponent) |
| 2 | 6 | 11 | 4 |
Comments here
| Move | Motion | Damage | Stun Damage | Chains into itself | Special Cancel | Super Cancel | Juggle Value |
| Jump Fierce | (Air) HP | 120 | 13(19/21 life points) | No | No | No |
Frame Data
| Startup | Hit | Recovery | Blocked Advantage | Hit Advantage | Crouching Hit Advantage | Guard | Parry |
| 11 | 5 | - | +2~+13/+1~+13 | +2~+13/+1~+13 | +8~+13/+7~+13 | H | H |
Gauge Increase
| Miss | Blocked | Hit | Parry (Gauge for opponent) |
| 3 | 10 | 19 | 4 |
Comments here
| Move | Motion | Damage | Stun Damage | Chains into itself | Special Cancel | Super Cancel | Juggle Value |
| Jump Short | (Air) LK | 50(40 if neutral jump)(7/8 life points) | 5 | No | No | No |
Frame Data
| Startup | Hit | Recovery | Blocked Advantage | Hit Advantage | Crouching Hit Advantage | Guard | Parry |
| 3(4 if neutral jump) | Until Landing | - | -9~+7 | -9~+7 | +1~+7 | H | H |
Gauge Increase
| Miss | Blocked | Hit | Parry (Gauge for opponent) |
| 0 | 1 | 2 | 4 |
Comments here
| Move | Motion | Damage | Stun Damage | Chains into itself | Special Cancel | Super Cancel | Juggle Value |
| Jump Forward | (Air) MK | 70(12 life points) | 9 | No | No | No |
Frame Data
| Startup | Hit | Recovery | Blocked Advantage | Hit Advantage | Crouching Hit Advantage | Guard | Parry |
| 7 | 13 | - | -3~+10 | -3~+10 | +3~+10 | H | H |
Gauge Increase
| Miss | Blocked | Hit | Parry (Gauge for opponent) |
| 2 | 6 | 11 | 4 |
Comments here
| Move | Motion | Damage | Stun Damage | Chains into itself | Special Cancel | Super Cancel | Juggle Value |
| Neutral Jump Forward | (Air) MK | 70(12 life points) | 9(7) | No | No | No |
Frame Data
| Startup | Hit | Recovery | Blocked Advantage | Hit Advantage | Crouching Hit Advantage | Guard | Parry |
| 5 | 7 | - | -6~+10 | -6~+10 | +4~+10 | H | H |
Gauge Increase
| Miss | Blocked | Hit | Parry (Gauge for opponent) |
| 2 | 6 | 11 | 4 |
Comments here
| Move | Motion | Damage | Stun Damage | Chains into itself | Special Cancel | Super Cancel | Juggle Value |
| Jump Roundhouse | (Air) HK | 110(95)(90)(19 life points) | 13(11) | No | No | No |
Frame Data
| Startup | Hit | Recovery | Blocked Advantage | Hit Advantage | Crouching Hit Advantage | Guard | Parry |
| 11 | 3 | - | +3~+13 | +3~+13 | +8~+13 | H | H |
Gauge Increase
| Miss | Blocked | Hit | Parry (Gauge for opponent) |
| 3 | 10 | 19 | 4 |
Comments here
| Move | Motion | Damage | Stun Damage | Chains into itself | Special Cancel | Super Cancel | Juggle Value |
| Neutral Jump Roundhouse | (Air) HK | 110(95)(90)(19 life points) | 13(11) | No | No | No |
Frame Data
| Startup | Hit | Recovery | Blocked Advantage | Hit Advantage | Crouching Hit Advantage | Guard | Parry |
| 10 | 3 | - | +2~+13 | +2~+13 | +10~+13 | H | H |
Gauge Increase
| Miss | Blocked | Hit | Parry (Gauge for opponent) |
| 3 | 10 | 19 | 4 |
Comments here
| Move | Motion | Damage | Stun Damage | Chains into itself | Special Cancel | Super Cancel | Juggle Value |
| Universal Overhead | MP+MK | 40(7 life points) | 3 | No | No | No |
Frame Data
| Startup | Hit | Recovery | Blocked Advantage | Hit Advantage | Crouching Hit Advantage | Guard | Parry |
| 15 | 10 | 5 | -5~+7 | 0~+8 | +1~+9 | H | H |
Gauge Increase
| Miss | Blocked | Hit | Parry (Gauge for opponent) |
| 0 | 1 | 2 | 4 |
Comments here
Throws
| Move | Motion | Damage | Stun Damage | Throw Range | Kara-Throw | Kara-Throw Range |
| Yamitsudzura | (B/F)+LP+LK | 140(21 life points) | 13 | 16 | Close S.LP / C.HP / S.MK / Close S.HK | 30 / 22 / 20 / 20 |
Frame Data
| Startup | Hit | Recovery | Blocked Advantage | Hit Advantage | Crouching Hit Advantage | Guard | Parry |
| 2 | 1 | 21 | - | - | - | (B/F)+LP+LK | - |
Gauge Increase
| Miss | Blocked | Hit |
| 0 | 7 (for the player who blocked) | 12(6x2) |
Comments here
| Move | Motion | Damage | Stun Damage | Throw Range | Kara-Throw | Kara-Throw Range |
| Tobizaru | (Air) LP+LK | 160(21 life points) | 18 | 12 Width x 44~67 Large | - | - |
Frame Data
| Startup | Hit | Recovery | Blocked Advantage | Hit Advantage | Crouching Hit Advantage | Guard | Parry |
| 6 | 1 | - | - | - | - | (Air) LP+LK | - |
Gauge Increase
| Miss | Blocked | Hit |
| 0 | 7 (for the player who blocked) | 15 |
Comments here
Crouching Normals
| Move | Motion | Damage | Stun Damage | Chains into itself | Special Cancel | Super Cancel | Juggle Value |
| Crouch Jab | D+LP | 20(3 life points) | 3 | No | Yes | Yes |
Frame Data
| Startup | Hit | Recovery | Blocked Advantage | Hit Advantage | Crouching Hit Advantage | Guard | Parry |
| 3 | 3 | 3 | +5 | +5 | +5 | HL | HL |
Gauge Increase
| Miss | Blocked | Hit | Parry (Gauge for opponent) |
| 0 | 1 | 2 | 4 |
Comments here
| Move | Motion | Damage | Stun Damage | Chains into itself | Special Cancel | Super Cancel | Juggle Value |
| Crouch Strong | D+MP | 70(12 life points) | 7 | No | Yes | Yes |
Frame Data
| Startup | Hit | Recovery | Blocked Advantage | Hit Advantage | Crouching Hit Advantage | Guard | Parry |
| 9 | 7 | 9 | +2 | +3 | +4 | HL | HL |
Gauge Increase
| Miss | Blocked | Hit | Parry (Gauge for opponent) |
| 2 | 4 | 10 | 4 |
Comments here
| Move | Motion | Damage | Stun Damage | Chains into itself | Special Cancel | Super Cancel | Juggle Value |
| Crouch Fierce | D+HP | 110(100)(19 life points) | 15 | No | No | Yes |
Frame Data
| Startup | Hit | Recovery | Blocked Advantage | Hit Advantage | Crouching Hit Advantage | Guard | Parry |
| 8 | 3 | 18 | -3 | -1 | +1 | HL | HL |
Gauge Increase
| Miss | Blocked | Hit | Parry (Gauge for opponent) |
| 3 | 10 | 19 | 4 |
Comments here
| Move | Motion | Damage | Stun Damage | Chains into itself | Special Cancel | Super Cancel | Juggle Value |
| Crouch Short | D+LK | 20(3 life points) | 3 | Yes | Yes | Yes |
Frame Data
| Startup | Hit | Recovery | Blocked Advantage | Hit Advantage | Crouching Hit Advantage | Guard | Parry |
| 5 | 3 | 5 | +3 | +3 | +3 | L | L |
Gauge Increase
| Miss | Blocked | Hit | Parry (Gauge for opponent) |
| 0 | 1 | 2 | 4 |
Comments here
| Move | Motion | Damage | Stun Damage | Chains into itself | Special Cancel | Super Cancel | Juggle Value |
| Crouch Forward | D+MK | 70(12 life points) | 3 | No | No | No |
Frame Data
| Startup | Hit | Recovery | Blocked Advantage | Hit Advantage | Crouching Hit Advantage | Guard | Parry |
| 6 | 5 | 11 | -2 | -1 | 0 | L | L |
Gauge Increase
| Miss | Blocked | Hit | Parry (Gauge for opponent) |
| 2 | 4 | 10 | 4 |
Comments here
| Move | Motion | Damage | Stun Damage | Chains into itself | Special Cancel | Super Cancel | Juggle Value |
| Crouch Roundhouse | D+HK | 100(17 life points) | 3 | No | No | No |
Frame Data
| Startup | Hit | Recovery | Blocked Advantage | Hit Advantage | Crouching Hit Advantage | Guard | Parry |
| 10 | 2 | 24 | -8 | Down | Down | L | L |
Gauge Increase
| Miss | Blocked | Hit | Parry (Gauge for opponent) |
| 3 | 7 | 17 | 4 |
Comments here
Command Normals
| Move | Motion | Damage | Stun Damage | Chains into itself | Special Cancel | Super Cancel | Juggle Value |
| Maki Geri | F + LK | 20(3 life points) | 3 | Yes | Yes | No |
Frame Data
| Startup | Hit | Recovery | Blocked Advantage | Hit Advantage | Crouching Hit Advantage | Guard | Parry |
| 5 | 4 | 8 | -1 | -1 | -1 | HL | HL |
Gauge Increase
| Miss | Blocked | Hit | Parry (Gauge for opponent) |
| 0 | 1 | 2 | 4 |
Comments here
| Move | Motion | Damage | Stun Damage | Chains into itself | Special Cancel | Super Cancel | Juggle Value |
| Koube Kudaki | F+MK | 80 | 13 | No | No | No |
Frame Data
| Startup | Hit | Recovery | Blocked Advantage | Hit Advantage | Crouching Hit Advantage | Guard | Parry |
| 27 | 3 | 3 | +9 | +10 | +11 | H | H |
Gauge Increase
| Miss | Blocked | Hit | Parry (Gauge for opponent) |
| 2 | 6 | 11 | 4 |
Comments here
| Move | Motion | Damage | Stun Damage | Chains into itself | Special Cancel | Super Cancel | Juggle Value |
| You Men | B + MP | 90(30+60/50)(13 life points) | 14(5+9/7) | No | Yes | No |
Frame Data
| Startup | Hit | Recovery | Blocked Advantage | Hit Advantage | Crouching Hit Advantage | Guard | Parry |
| 6 | 1,6 | 10 | -2 | -1 | 0 | HL | H |
Gauge Increase
| Miss | Blocked | Hit | Parry (Gauge for opponent) |
| 2 | 7 | 12 | 4 |
Comments here
| Move | Motion | Damage | Stun Damage | Chains into itself | Special Cancel | Super Cancel | Juggle Value |
| Ura Maki Geri | B + MK | 70(12 life points) | 5 | No | No | No |
Frame Data
| Startup | Hit | Recovery | Blocked Advantage | Hit Advantage | Crouching Hit Advantage | Guard | Parry |
| 13 | 2 | 13 | -2 | -1 | 0 | HL | H |
Gauge Increase
| Miss | Blocked | Hit | Parry (Gauge for opponent) |
| 2 | 6 | 11 | 4 |
Comments here
| Move | Motion | Damage | Stun Damage | Chains into itself | Special Cancel | Super Cancel | Juggle Value |
| Sazan | DF + MK | 70(12 life points) | 3 | No | No | No |
Frame Data
| Startup | Hit | Recovery | Blocked Advantage | Hit Advantage | Crouching Hit Advantage | Guard | Parry |
| 6 | 11 | 9 | -16 | -6 | -5 | L | L |
Gauge Increase
| Miss | Blocked | Hit | Parry (Gauge for opponent) |
| 3 | 7 | 17 | 4 |
Comments here
| Move | Motion | Damage | Stun Damage | Chains into itself | Special Cancel | Super Cancel | Juggle Value |
| Oiura Ken | Far HP,HP | 80(16 life points) | 17 | No | No | No |
Frame Data
| Startup | Hit | Recovery | Blocked Advantage | Hit Advantage | Crouching Hit Advantage | Guard | Parry |
| 2 | 3 | 31 | -1 | +1 | +3 | HL | H |
Gauge Increase
| Miss | Blocked | Hit | Parry (Gauge for opponent) |
| 3 | 5 | 13 | 4 |
Comments here
| Move | Motion | Damage | Stun Damage | Chains into itself | Special Cancel | Super Cancel | Juggle Value |
| Bonshou Geri | F+HK | 130(23 life points) | 17 | No | No | No |
Frame Data
| Startup | Hit | Recovery | Blocked Advantage | Hit Advantage | Crouching Hit Advantage | Guard | Parry |
| 12 | 1 | 20 | -1 | +1 | +3 | HL | H |
Gauge Increase
| Miss | Blocked | Hit | Parry (Gauge for opponent) |
| 3 | 10 | 19 | 4 |
Comments here
Target Combos
| Move | Motion | Damage | Stun Damage | Chains into itself | Special Cancel | Super Cancel | Juggle Value |
| Target Combo | Close LP -> Close MP (1 hit) -> Close HP | 25+40+20 | 5+6+3 | No/No/No | Yes/Yes/Yes | Yes/Yes/Yes |
Frame Data
| Startup | Hit | Recovery | Blocked Advantage | Hit Advantage | Crouching Hit Advantage | Guard | Parry |
| 2 | - | - | -2/+3 | -1/+5 | 0/+7 | HL/HL/HL | HL/H/HL |
Gauge Increase
| Miss | Blocked | Hit | Parry (Gauge for opponent) |
| 0+? | 1+1 | 2+1 | 12(4+4+4) |
Comments here
| Move | Motion | Damage | Stun Damage | Chains into itself | Special Cancel | Super Cancel | Juggle Value |
| Target Combo | Far LP -> Far MP -> F+LK | 25+40+20 | 5+6+3 | No/No/No | No/No/No | No/No/No |
Frame Data
| Startup | Hit | Recovery | Blocked Advantage | Hit Advantage | Crouching Hit Advantage | Guard | Parry |
| 2 | - | - | +6/+2 | +7/+3 | +8/+4 | HL/HL/HL | HL/H/HL |
Gauge Increase
| Miss | Blocked | Hit | Parry (Gauge for opponent) |
| 0+? | 1+1 | 2+1 | 12(4+4+4) |
Comments here
| Move | Motion | Damage | Stun Damage | Chains into itself | Special Cancel | Super Cancel | Juggle Value |
| Target Combo | Close LK -> Close MK -> Close HK | 20+50+50 | 3+5+5 | No | Yes/Yes/No | Yes/Yes/No |
Frame Data
| Startup | Hit | Recovery | Blocked Advantage | Hit Advantage | Crouching Hit Advantage | Guard | Parry |
| 4 | - | - | +4/-2 | +5/0 | +6/+2 | HL/HL/HL | HL/H/H |
Gauge Increase
| Miss | Blocked | Hit | Parry (Gauge for opponent) |
| 0+? | 1+1 | 2+1 | 12(4+4+4) |
Comments here
| Move | Motion | Damage | Stun Damage | Chains into itself | Special Cancel | Super Cancel | Juggle Value |
| Target Combo | Jump LP -> Jump Forward HP | 60+60 | 5+6 | No/No | No/No | No/No |
Frame Data
| Startup | Hit | Recovery | Blocked Advantage | Hit Advantage | Crouching Hit Advantage | Guard | Parry |
| - | - | - | - | - | - | HL/HL | H/H |
Gauge Increase
| Miss | Blocked | Hit | Parry (Gauge for opponent) |
| 0+? | 1+1 | 2+1 | 8(4+4) |
Comments here
| Move | Motion | Damage | Stun Damage | Chains into itself | Special Cancel | Super Cancel | Juggle Value |
| Target Combo | Jump LK -> Jump F+MK | 40+40 | 5+5 | No | No/No | No/No |
Frame Data
| Startup | Hit | Recovery | Blocked Advantage | Hit Advantage | Crouching Hit Advantage | Guard | Parry |
| 4 | - | - | -2 | 0 | +2 | HL/HL | H/H |
Gauge Increase
| Miss | Blocked | Hit | Parry (Gauge for opponent) |
| 0+? | 1+1 | 2+1 | 8(4+4) |
Comments here
| Move | Motion | Damage | Stun Damage | Chains into itself | Special Cancel | Super Cancel | Juggle Value |
| Target Combo | Jump HP -> Jump F+MK | 120+40 | 13+5 | No | No/No | No/No |
Frame Data
| Startup | Hit | Recovery | Blocked Advantage | Hit Advantage | Crouching Hit Advantage | Guard | Parry |
| 4 | - | - | - | - | - | HL/HL | H/H |
Gauge Increase
| Miss | Blocked | Hit | Parry (Gauge for opponent) |
| 3+? | 10+1 | 19+1 | 8(4+4) |
Comments here
| Move | Motion | Damage | Stun Damage | Chains into itself | Special Cancel | Super Cancel | Juggle Value |
| Target Combo | Close LP -> Close MP (1 hit) -> Crouch HK -< Close HK | 100+60 | 7+5 | No | Yes/Yes | Yes/Yes |
Frame Data
| Startup | Hit | Recovery | Blocked Advantage | Hit Advantage | Crouching Hit Advantage | Guard | Parry |
| 4 | - | - | -2 | 0 | +2 | HL/HL | H/H |
Gauge Increase
| Miss | Blocked | Hit | Parry (Gauge for opponent) |
| 0+? | 1+1 | 2+1 | 8(4+4) |
Comments here
| Move | Motion | Damage | Stun Damage | Chains into itself | Special Cancel | Super Cancel | Juggle Value |
| Target Combo | Close HP (2 hits) -> Crouch HK -> Far HK | 130(60+70)+50+40 | 16(9+7)+3+4 | No/No/No/No | Yes/No/No/No | Yes/No/No/No |
Frame Data
| Startup | Hit | Recovery | Blocked Advantage | Hit Advantage | Crouching Hit Advantage | Guard | Parry |
| 9 | - | - | -8/-2 | Down/-1 | Down/+1 | HL/HL/L/HL | HL/HL/L/H |
Gauge Increase
| Miss | Blocked | Hit | Parry (Gauge for opponent) |
| 3+? | 10+1 | 19+1 | 8(4+4) |
Comments here
| Move | Motion | Damage | Stun Damage | Chains into itself | Special Cancel | Super Cancel | Juggle Value |
| Target Combo | Close MP -> Close HP | 100+60 | 7+5 | No | Yes/Yes | Yes/Yes |
Frame Data
| Startup | Hit | Recovery | Blocked Advantage | Hit Advantage | Crouching Hit Advantage | Guard | Parry |
| 4 | - | - | -2 | 0 | +2 | HL/HL | H/H |
Gauge Increase
| Miss | Blocked | Hit | Parry (Gauge for opponent) |
| 1+? | 3+1 | 9+1 | 8(4+4) |
Comments here
| Move | Motion | Damage | Stun Damage | Chains into itself | Special Cancel | Super Cancel | Juggle Value |
| Target Combo | Back MK -> Forward MK | 70+70 | 5+13 | No/No | No/No | No/No |
Frame Data
| Startup | Hit | Recovery | Blocked Advantage | Hit Advantage | Crouching Hit Advantage | Guard | Parry |
| 13 | - | - | +9 | +10 | +11 | HL/HL | H/H |
Gauge Increase
| Miss | Blocked | Hit | Parry (Gauge for opponent) |
| 2+? | 6+1 | 11+1 | 8(4+4) |
Comments here
| Move | Motion | Damage | Stun Damage | Chains into itself | Special Cancel | Super Cancel | Juggle Value |
| Target Combo | Crouch HK -> Close HK | 100+60 | 3+10 | No/No | No/No | No/No |
Frame Data
| Startup | Hit | Recovery | Blocked Advantage | Hit Advantage | Crouching Hit Advantage | Guard | Parry |
| 10 | - | - | -2 | 0 | +2 | HL/H | H/H |
Gauge Increase
| Miss | Blocked | Hit | Parry (Gauge for opponent) |
| 3+? | 7+1 | 17+1 | 8(4+4) |
Comments here
Special Moves
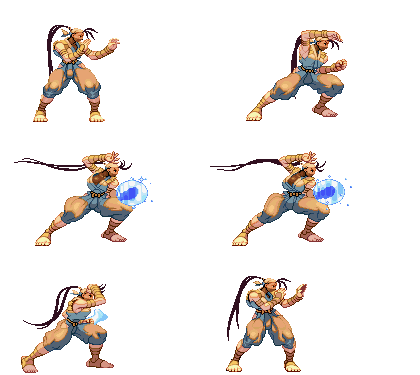
Please note that in this section you will see mainly 3 images for the special moves, this means the image on the left is done with LP (or LK), the image on the center is done with MP (or MK), and the image on the right is done with HP (or HK). Also its the same "rule" as the sections above, its the first frame it hits for every move.
| Move | Motion | Damage | Blocked Damage | Stun Damage | Super Cancel | Juggle Value |
| Kazekiri (Short) | F, D, DF+LK | 95(15 life points) | 18(3 life points) | 9 | Yes/Yes | |
| Kazekiri (Forward) | F, D, DF+MK | 115(19 life points) | 18(3 life points) | 11 | Yes/Yes | |
| Kazekiri (Roundhouse) | F, D, DF+HK | 140(23 life points) | 24(4 life points) | 15 | Yes/Yes |
Frame Data
| Move | Startup | Hit | Recovery | Blocked Advantage | Hit Advantage | Crouching Hit Advantage | Guard | Parry |
| Kazekiri (Short) | 4 | 12 | 27 | -19 | KD | KD | HL | HL |
| Kazekiri (Forward) | 6 | 10 | 30 | -20 | KD | KD | HL | HL |
| Kazekiri (Roundhouse) | 8 | 11 | 30 | -21 | KD | KD | HL | HL |
Gauge Increase
| Move | Miss | Blocked | Hit | Parry (Gauge for opponent) |
| Kazekiri (Short) | 3 | 18 | 29 | 4 |
| Kazekiri (Forward) | 3 | 18 | 29 | 4 |
| Kazekiri (Roundhouse) | 3 | 19 | 30 | 4 |
Comments here
| Move | Motion | Damage | Blocked Damage | Stun Damage | Super Cancel | Juggle Value |
| Kunai (Jab) | QCF+LP on air | 50(8 life points) | 3 | 3 | Yes | |
| Kunai (Strong) | QCF+MP on air | 50(8 life points) | 3 | 3 | Yes | |
| Kunai (Fierce) | QCF+HP on air | 50(8 life points) | 3 | 3 | Yes |
Frame Data
| Move | Startup | Hit | Recovery | Blocked Advantage | Hit Advantage | Crouching Hit Advantage | Guard | Parry |
| Kunai (Jab) | 8 | 1 | 9 | - | - | - | HL | H |
| Kunai (Strong) | 9 | 1 | 11 | - | - | - | HL | H |
| Kunai (Fierce) | 10 | 1 | 14 | - | - | - | HL | H |
Gauge Increase
| Move | Miss | Blocked | Hit | Parry (Gauge for opponent) |
| Kunai (Jab) | 0 | 1 | 2 | 4 |
| Kunai (Strong) | 0 | 1 | 2 | 4 |
| Kunai (Fierce) | 0 | 1 | 2 | 4 |
Comments here
| Move | Motion | Damage | Blocked Damage | Stun Damage | Super Cancel | Juggle Value |
| Raida (Jab) | Close HCB+LP | 150(28 life points) | 10 | 15 | No | |
| Raida (Strong) | Close HCB+MP | 150(30 life points) | 10 | 15 | No | |
| Raida (Fierce) | Close HCB+HP | 150(32 life points) | 10 | 15 | No |
Frame Data
| Move | Startup | Hit | Recovery | Blocked Advantage | Hit Advantage | Crouching Hit Advantage | Guard | Parry |
| Raida (Jab) | 4 | 3 | 28 | -5 | Down | Down | HL | Impossible |
| Raida (Strong) | 5 | 5 | 30 | -6 | Down | Down | HL | Impossible |
| Raida (Fierce) | 6 | 7 | 32 | -7 | Down | Down | HL | Impossible |
Gauge Increase
| Move | Miss | Blocked | Hit | Parry (Gauge for opponent) |
| Raida (Jab) | 2 | 6 | 10 | 4 |
| Raida (Strong) | 2 | 6 | 10 | 4 |
| Raida (Fierce) | 2 | 6 | 10 | 4 |
Comments here
| Move | Motion | Damage | Blocked Damage | Stun Damage | Super Cancel | Juggle Value |
| Hien (Short) | B, D, DB+LK | 115(19 life points) | 14 | 14 | Yes/Yes | |
| Hien (Forward) | B, D, DB+MK | 130(22 life points) | 15 | 14 | Yes/Yes | |
| Hien (Roundhouse) | B, D, DB+HK | 150(25 life points) | 16 | 16 | Yes/Yes |
Frame Data
| Move | Startup | Hit | Recovery | Blocked Advantage | Hit Advantage | Crouching Hit Advantage | Guard | Parry |
| Hien (Short) | 22・25 | 3・2 | 13 | -31 | -31 | -31 | H | H |
| Hien (Forward) | 25・29 | 3・2 | 13 | -38 | -38 | -38 | H | H |
| Hien (Roundhouse) | 28・32 | 4・2 | 11 | -35 | -35 | -35 | H | H |
Gauge Increase
| Move | Miss | Blocked | Hit | Parry (Gauge for opponent) |
| Hien (Short) | 3 | 13 | 19 | 4 |
| Hien (Forward) | 3 | 13 | 19 | 4 |
| Hien (Roundhouse) | 3 | 13 | 19 | 4 |
Comments here
| Move | Motion | Damage | Blocked Damage | Stun Damage | Super Cancel | Juggle Value |
| Tsumuji (Short) | QCB+LK, Press D | 110(60+50)(18 life points) | 7 | 3+3 | No/No | |
| Tsumuji (Forward) | QCB+MK, Press D | 160(60+50+50)(18 life points) | 10 | 3+3+5 | No/No/No | |
| Tsumuji (Roundhouse) | QCBF+HK, Press D | 190(60+50+80)(31 life points) | 12 | 3+5+5 | No/Yes/No |
Frame Data
| Move | Startup | Hit | Recovery | Blocked Advantage | Hit Advantage | Crouching Hit Advantage | Guard | Parry |
| Tsumuji (Short) | 11・26(31 D) | 1・1(2 D) | 19/21(30 D) | -4(12 D) | 0/+1(Down D) | +2/+3(Down D) | HL(L D) | H(L D) |
| Tsumuji (Forward) | 13・29(13・29・45)(50 D) | 1・1(1・1・1)(2 D) | 21/27(30 D) | -2/-7(12 D) | 0(Down D) | +2(Down D) | HL(L D) | H(L D) |
| Tsumuji (Roundhouse) | 14・28・44(47 D) | 1・1・1(2 D) | 24/30(30 D) | -8(12 D) | 0(Down D) | +2(Down D) | HL(L D) | H(L D) |
Gauge Increase
| Move | Miss | Blocked | Hit | Parry (Gauge for opponent) |
| Tsumuji (Short) | 3 | 13 | 19 | 8(4+4) |
| Tsumuji (Forward) | 3 | 13 | 19 | 12(4+4+4) |
| Tsumuji (Roundhouse) | 3 | 14 | 20 | 12(4+4+4) |
| Tsumuji (D) | 0 | 1 | 2 | 4 |
Comments here
| Move | Motion | Damage | Blocked Damage | Stun Damage | Super Cancel | Juggle Value |
| Kubiori | QCF+P | 150(26 life points) | 15 | 10 | Yes |
Frame Data
| Move | Startup | Hit | Recovery | Blocked Advantage | Hit Advantage | Crouching Hit Advantage | Guard | Parry |
| Kubiori | 14/15/17* | 11/12/14 | 15/18/19 | -10/-16/-19 | Down | Down | L | L |
Gauge Increase
| Move | Miss | Blocked | Hit | Parry (Gauge for opponent) |
| Kubiori | 2 | 6 | 10 | 4 |
- It Refers to Jab,Strong,Fierce respectively
| Move | Motion | Damage | Blocked Damage | Stun Damage | Super Cancel | Juggle Value |
| Kasumi Gake | QCF+K | - | - | - | No |
Frame Data
| Move | Startup | Hit | Recovery | Blocked Advantage | Hit Advantage | Crouching Hit Advantage | Guard | Parry |
| Kasumi Gake | 20/22/25* | 0 | 0 | 0 | - | - | - | - |
- It Refers to Short,Forward,Roundhouse respectively
| Move | Motion | Damage | Blocked Damage | Stun Damage | Super Cancel | Juggle Value |
| Tsuiji Goe | F, D, DF+P | - | - | - | Yes |
Frame Data
| Move | Startup | Hit | Recovery | Blocked Advantage | Hit Advantage | Crouching Hit Advantage | Guard | Parry |
| Tsuiji Goe | 42/44/48* | 2 | 0 | 0 | - | - | - | - |
Comments here
- It Refers to Jab,Strong,Fierce respectively
EX Moves
| Move | Motion | Gauge Needed | Damage | Blocked Damage | Stun Damage | Super Cancel | Juggle Value |
| Kunai (EX) | QCF+PP In Air | 40 | 120(60+60)(18 life points) | 7 | 6(3+3) | Yes |
Frame Data
| Move | Startup | Hit | Recovery | Blocked Advantage | Hit Advantage | Crouching Hit Advantage | Guard | Parry |
| Kunai (EX) | 7・9(11・13) | 1・1 | 12(14) | - | - | - | HL/HL | H/H |
Gauge Increase
| Move | Miss | Blocked | Hit | Parry (Gauge for opponent) |
| Kunai (EX) | - | - | - | 8(4+4) |
Comments here
| Move | Motion | Gauge Needed | Damage | Blocked Damage | Stun Damage | Super Cancel | Juggle Value |
| Kazekiri (EX) | F, D, DF+KK | 40 | 180(60+20+20+80(90))(28 life points) | 21(7+2+2+10(11)) | 18(3+3+5+7(7)) | Yes |
Frame Data
| Move | Startup | Hit | Recovery | Blocked Advantage | Hit Advantage | Crouching Hit Advantage | Guard | Parry |
| Kazekiri (EX) | 4・5・6・7 | 1・1・1・8 | 33 | -21(-18) | -15(-12) | -13(-10) | HLx4 | HLx4 |
Gauge Increase
| Move | Miss | Blocked | Hit | Parry (Gauge for opponent) |
| Kazekiri (EX) | - | - | - | 16(4+4+4+4) |
Comments here
| Move | Motion | Gauge Needed | Damage | Blocked Damage | Stun Damage | Super Cancel | Juggle Value |
| Tsumuji (EX) | QCB+KK (Press D) | 40 | 150(50+50+50)+70/(80(40+40)+60 D)(35 life points) | 9(3+3+3)+4/(4(2+2)+3 D) | 13(3+5+5)+3/(6(3+3)+3 D) | Yes/Yes/Yes/No (Yes/Yes/No D) |
Frame Data
| Move | Startup | Hit | Recovery | Blocked Advantage | Hit Advantage | Crouching Hit Advantage | Guard | Parry |
| Tsumuji (EX) | 7・17・27+38/(22・39+42 D) | 1・1・1+1/(2・2+2 D) | 28/(30 D) | -11(-16 D) | Down | Down | HLx3+HL/Lx3 Down | Hx4/Lx3 |
Gauge Increase
| Move | Miss | Blocked | Hit | Parry (Gauge for opponent) |
| Tsumuji (EX) | - | - | - | 8(4+4) |
Comments here
| Move | Motion | Gauge Needed | Damage | Blocked Damage | Stun Damage | Super Cancel | Juggle Value |
| Hien (EX) | B, D, DB+KK | 40 | 190(40+150)(32 life points) | 19(10+9) | 16(7+9) | No |
Frame Data
| Move | Startup | Hit | Recovery | Blocked Advantage | Hit Advantage | Crouching Hit Advantage | Guard | Parry |
| Hien (EX) | 26・30 | 4・2 | 11(12) | -30(31) | -30 | -30 | H/H | H/H |
Gauge Increase
| Move | Miss | Blocked | Hit | Parry (Gauge for opponent) |
| Hien (EX) | 3 | 13 | 19 | 8(4+4) |
Comments here
| Move | Motion | Gauge Needed | Damage | Blocked Damage | Stun Damage | Super Cancel | Juggle Value |
| Kubi Ori (EX) | QCF+PP | 40 | 200(26 life points) | 20 | 21 | No |
Frame Data
| Move | Startup | Hit | Recovery | Blocked Advantage | Hit Advantage | Crouching Hit Advantage | Guard | Parry |
| Kubi Ori (EX) | 15 | 10 | 19 | -15 | Down | Down | L | L |
Gauge Increase
| Move | Miss | Blocked | Hit | Parry (Gauge for opponent) |
| Kubi Ori (EX) | 2 | 6 | 10 | 4 |
Comments here
Super Arts
| Super Art | Super Art Name | Super Art Stock | Motion | Damage | Blocked Damage | Stun Damage | Damage/Gauge |
| I | Kasumi Suzaku | 3 bars (88 each bar) | Jump QCF QCF+P | 360*(45 life points) | 0 | 6x20 | 4,09 (x3) |
| * 35x20 Damage is when all hits connect. |
Frame Data
| Version | Startup | Hit | Recovery | Blocked Advantage | Hit Advantage | Crouching Hit Advantage | Guard | Parry |
| LP | 4 | 1 | 4 | 0 | 0 | 0 | H/Lx1~20 | Hx1~20 |
| MP | 6 | 1 | 6 | 0 | 0 | 0 | H/Lx1~20 | Hx1~20 |
| HP | 8 | 1 | 8 | 0 | 0 | 0 | H/Lx1~20 | Hx1~20 |
Ibuki's go- to Super. Low damage, and does not knock down, but gives her the most bar to work with for her very useful EX moves. This Super deals a LOT of chip damage and can easily close out rounds on opponents unable to parry it.
| Super Art | Super Art Name | Super Art Stock | Motion | Damage | Blocked Damage | Stun Damage | Damage/Gauge |
| II | Yoroi Doushi | 1 bar (104) | QCF QCF+P (close) | 435*(77 life points) | 13** | 0 | 4,47 |
Frame Data
| Startup | Hit | Recovery | Blocked Advantage | Hit Advantage | Crouching Hit Advantage | Guard | Parry |
| 1 | 1 | 65 | 0 | Down | Down | Impossible | Impossible |
Command grab that does absurd damage. If they are in grab range by the time the super freeze begins, they cannot escape after it ends.
| Super Art | Super Art Name | Super Art Stock | Motion | Damage | Blocked Damage | Stun Damage | Damage/Gauge |
| II | Yoroi Doushi | 1 bar (104) | QCF QCF+P (miss) | 280*(48 life points) | 0 | 18 | 2,69 |
| * frames 13,15,16,18,19,21,24,27,28,29,31,32,34,35,37 connects and makes 20x2+40+3+20+30+40+30x2+60x4 |
Frame Data
| Startup | Hit | Recovery | Blocked Advantage | Hit Advantage | Crouching Hit Advantage | Guard | Parry |
| (12x2)+0+2+0+2+3+3+(1x2)x(2x2) | 2+1+1+1+1+1+2+(1x3)x(2x1) | 65 | -54 | Down | Down | HLx1~15 | HLx1~15 |
Comments here
| Super Art | Super Art Name | Super Art Stock | Motion | Damage | Blocked Damage | Stun Damage | Damage/Gauge |
| III | Yami Shigure | 1 bar (80) | QCF QCF+P | 335*(55 life points) | 25** | 21 | 4,19 |
Frame Data
| Version | Startup | Hit | Recovery | Blocked Advantage | Hit Advantage | Crouching Hit Advantage | Guard | Parry |
| LP | 2・3・6 | 1 | 32 | -10 ~ -6 | Down | Down | L | L |
| MP | 3・4・7 | 1 | 32 | -10 ~ -6 | Down | Down | L | L |
| HP | 4・5・8 | 1 | 32 | -10 ~ -6 | Down | Down | L | L |
This super is actually pretty good and applicable to multiple situations, such as being able to be used to punish fireballs. Also, unlike Super 1, it can be comboed into off of Ibuki's bnb starters, such as st. MK. It's downside comes from the fact that it is a short bar with no stocks, heavily hampering her EX move usage. For this reason, players usually forego this Super for Super 1, which isn't as useful offensively but has much more meter to work with.
Basic Standing Combos
| 1st Move | 2nd Move | 3rd Move | 4th Move | 5th Move |
| rdp+K (Hien) | (link) qcf+P (Kunai) | |||
| close LP | hcb+P (Raida) | |||
| close LP | MP (1 hit) | hcb+P (Raida) | ||
| close LP | MP (1 hit) | HP | hcb+P (Raida) (23%) | |
| close LP | MP (1 hit) | HP | qcb+HK (Tsumuji) (22%) | |
| close LP | MP (1 hit) | HP | qcf+2P (EX Kubi Ori) (24%) | |
| close LP | MP (1 hit) | HP | (link) LP | |
| close LP | MP (2 hit) | c.HK | ||
| close LP | MP (2 hit) | c.HK | HK (18%) | |
| LP | MP | |||
| LP | MP | toward+LK | ||
| c.LP | hcb+P (Raida) | |||
| back+MP (1 hit) | hcb+P (Raida) | |||
| back+MP (1 hit) | HP | hcb+P (Raida) | ||
| HP | hcb+P (Raida) | |||
| close HP (1st hit) | hcb+P (Raida) (20%) | |||
| LK | MK | hcb+P (Raida) (20%) | ||
| LK | MK | HK | ||
| c.LK | hcb+P (Raida) (15%) | |||
| c.LK | qcb+2K (EX Tsumuji) (19%) | |||
| MK | hcb+P (Raida) (24%) | |||
| MK | qcb+MK (MK Tsumuji) (18%) | |||
| MK | qcb+2K (EX Tsumuji) (25%) | |||
| MK | HK | |||
| close HK | SJC j.HP | j.toward+MK (21%) | ||
| close HK | (link) back+MP (1st hit) | HP | dp+K (Kazekiri) (19%) | |
| close HK | (link) back+MP (1st hit) | HP | (link) lp | |
| c.HK | close HK | SJC | j.HP | j.toward+MK (28%) |
| c.HK | close HK | (link) back+MP (1st hit) | HP | (link) LP |
| dp+2K | j.LP | j.toward+HP | (land) MK* | |
| *(Only works on Alex, Dudley ,Hugo ,Q , Remy and Urien.) | ||||
Super-Jump Cancellable Standing Combos
| 1st Move | 2nd Move | 3rd Move | 4th Move |
| c.HK | HK | - | - |
| close HP (2 hit) | c.HK | - | - |
| close HP (2 hit) | c.HK | HK | - |
Note: hcb+P (Raida) , dp+LK/MK/2X (LK/MK/EX Kazekiri),and qcb+2K (EX Tsumuji) combo from any cancelable attack. qcb+LK/MK (LK/MK Tsumuji) dp+HK (HK Kazekiri) combo from cancelable medium and heavy attacks. qcb+HK combos from cancelable heavy attacks only.
Super Art Combos
SA1
| 1st Move | 2nd Move | 3rd Move | 4th Move | 5th Move |
| close HK | SJC | SA.1 (30%) | - | - |
| c.HK | close HK | SJC | SA.1 | - |
| air qcf+LP (LP Kunai) from front | cross up SA.1 | - | - | - |
| rdp+K (Hien) | SA.1 (25%) | - | - | - |
| dp+2K (EX Kazekiri) | SC-SA.1 (27%) | - | - | - |
| MK | dp+2K (EX Kazekiri) | SC-SA.1 (34%) | - | - |
| close LP | MP (1 hit) | HP | dp+2K (EX Kazekiri) | SC-SA.1 |
SA2
| 1st Move | 2nd Move | 3rd Move | 4th Move | 5th Move |
| j.HP | SA.2 (grab version Yoroi Doushi) | - | - | |
| j.LP | j.toward+HP | SA.2 (grab version Yoroi Doushi) | - | (49%) |
| close LP | MP (1hit) | HP | qcb+HK (2 hit) | SC-SA.2 (fireball version) (29%) |
SA3
| 1st Move | 2nd Move | 3rd Move | 4th Move | 5th Move |
| c.LP | SA.3 | - | - | - |
| close LP | SA.3 | - | - | - |
| c.LK | SA.3 (30%) | - | - | - |
| MP | (link) SA.3 | - | - | - |
| LP | MP | (link) SA.3 | - | - |
| back+MP | SA.3 | - | - | - |
| back+MP | HP | SA.3 | - | - |
| c.MP | SA.3 | - | - | - |
| MK | SA.3 (34%) | - | - | - |
| c.HP | SJC (cancel superjump) SA.3 | - | - | |
| HK | SJC (cancel superjump) SA.3 | - | - | - |
| qcb+HK (2 hit) (HK Tsumuji) | SA.3 | - | - | - |
| LP | MP (1 hit) | HP | qcb+HK (2 hit) | SC-SA.3 |
| dp+K (Kazekiri) | SC-SA.3 | - | - | - |
Links
Against Standing
| 1st Move | 2nd Move | 3rd Move | 4th Move | 5th Move |
| LP | (link) LK | |||
| c.LP | (link) LP | |||
| c.LP | (link) c.LP | |||
| c.LP | (link) c.LP | qcb+2K (EX Tsumuji) | ||
| c.LK | (link) LP | |||
| c.LK | (link) c.LK | |||
| c.LK | (link) c.LK | qcb+2K (EX Tsumuji) (19%) | ||
| UOH (LP+LK) | c.LK | qcb+2K (EX TSumuji) (19%) | ||
| toward+MK | (link) LP | |||
| toward+MK | (link) LK | |||
| toward+MK | (link) c.LP | |||
| toward+MK | (link) c.LP | qcb+2K (EX Tsumuji) | ||
| toward+MK | (link) c.LK | |||
| toward+MK | (link) c.LK | qcb+2K (EX Tsumuji) | ||
| toward+MK | (link) MP | |||
| toward+MK | (link) MK | |||
| toward+MK | (link) MK | qcb+K (Tsumuji) | ||
| toward+MK | (link) MK | qcb+2K (EX Tsumuji) (29%) | ||
| toward+MK | (link) c.MK | |||
| toward+MK | (link) close HK | (add follow up) | ||
| toward+MK | (link) close HK | SCJ j.HP | j.toward+MK | |
| toward+MK | (link) HK | |||
| c.LK | (link) LP | MP | (link) SA.3 (34%) | |
| toward+MK | (link) SA.3 (33%) | |||
| toward+MK | (link) MP | (link) SA.3 | ||
| toward+MK | (link) MK | SA.3 |
Against Crouching
Basic
| 1st Move | 2nd Move | 3rd Move | 4th Move |
| toward+MK | (link) c.MP | ||
| toward+MK | (link) c.MP | qcb+K (Tsumuji) |
Akuma,Dudley, Hugo, Q and Urien specific
| 1st Move | 2nd Move | 3rd Move | 4th Move | 5th Move |
| back+MP (1st hit) | HP | (link) MK | ||
| back+MP (1st hit) | HP | (link) MK | qcb+K (Tsumuji) | |
| close LP | MP (1 hit) | HP | (link) MK | |
| close LP | MP (1 hit) | HP | (link) MK | qcb+K (Tsumuji) |
Strategies
Overview
Basics
Wake-up Options
- DP+LK (LK Kazekiri), SC-SA.1 (Kasumi Suzaku)
- DP+2K, SC-SA.1 (Kasumi Suzaku)
- DP+2K, j.LP, j.t.HP (or other air target combo)
- DP+P (Tsuiji Goe) -> air qcf+P (Kunai) / SA.1 (Kasumi Suzaku)
- SA.2 (grab version of Yoroi Doushi)
- LP
- hcb+LP (Raida)
Aside from blocking, parrying, throwing, and option selecting, Ibuki has other viable wake-up options that can be useful in certain situations.
1) DP+LK (LK Kazekiri) has a very fast start-up speed (4 frame). It is vulnerable during it's start-up to attacks and throws. However, it's considered partially off the ground, which means that Ibuki will be knocked into the air if she is hit during this move. An example of this is if Ken attempts to do a meaty close MP->HP->SA.3 combo: If Ibuki does a reversal dp+LK move on wake-up she will be knocked into the air by Ken's close MP. Next, Ken's HP will then whiff because Ibuki will be put into an air recovery state. It can also be super canceled if it hits, is blocked, or is parried -- which gives Ibuki additional recovery options. It also has a large vertical hit area which is useful for hitting opponents who jump vertically.
2) DP+2K (EX Kazekiri) has 5 frames of full invulerability and a 6th frame of partial upper body invulnerability. During the full invulnerability, Ibuki is immune to attacks and throws. It also has a very quick start-up (4 frame), which means it hits before the invulnerability wares off. It can always be super canceled (in the air into SA.1) weather it whiffs, hits, is blocked, or is parried, which gives it an option for safe recovery (or damage). And like the normal Kazekiri, it has a large hit area. When combined with SA.1, this is a very safe and versitile wake-up move. Though, it can be beaten by moves with more invulnerability frames than it, or if the opponent parries while staying outside of the line of fire for SA.1, so remember not to abuse this tactic recklessly.
4) DP+P (Tsuiji Goe - command jump) is similar to the dp+K (Kazekiri) in that it is considered partially off the ground during start-up. If it trades with a meaty attack, it will knock Ibuki into the air. It also has limited use for getting out of the corner if the opponents attack is delayed (not meaty), a feint, a throw, or if the opponent does nothing. It has the extra added benefit of being cancelable after the peak of the arch into an air qcf+P (Kunai) and/or SA.1 (Kasumi Suzaku). It is somewhat useful for situations when you're not sure if dp+K (Kazekiri) will whiff or not, since dp+K (Kazekiri) can't be super canceled on whiff. However, it is a risky move if the opponent jumps or anticipates your landing.
5) If the opponent is within range for the grab version of SA.2 (grab version of Yoroi Doushi -- range: 35 pixels), it can be used as a reversal to grab meaty attacks. It has almost instant start-up (1 frame), will blow through meaty attacks, and can not be blocked or parried. It is, however, very risky because it will not grab airborn opponents, or attacks with invulnerability frames, or opponents out of it's grab reach.
6) Far LP and close LP both have a 2 frame start-up and have very good frame advantage (+5 for close, +6 for far). Which can make them some-what useful as wake-ups, stuffing pseudo-meaty attacks and throw attempts. In situations where standing LP can whiff small crouching opponents (eg. Chun c.MK), you may wish to do an option select low block into c.LP (or c.LP+c.LK for grap defense option select) on wake up. The idea behind the option select is that you will block if the attack is meaty, or stuff the attack if it's not meaty, or tech-hit (grap defense) if the opponent throws. Of course, this isn't perfect since the opponent can still hit you with moves that stuff c.LP, like an UOH, or DP, or parry.
7) HCB+LP can catch players who attempt to parry meaty attacks. Although it runs the risk of getting punished by meaties and people who jump vertically.
Super Art Selection
Super Art 1 because it have 3 short stocks and adds air projectile,unblockables and with most EX moves capacity.
- SA1
- 3 Short stocks,air ublockables and lot of EX Moves
- Hard to Parry
- Short Damage
- Use on: Everyone
- SA2
- Decent Throw Range
- Large Stock and lack of Ex Moves Capacity
- Use on: N/A
- SA3
- 1 short stock and ground mix ups
- Strenght Button specific
- Use on: N/A
Kara-Techniques
Zoning
Pokes
- c.MK
- MK
- dt.MK
- t.HK
- t.MK
- vertical j.HP, j.t.MK
- c.LP
- c.LK
Air-to-Air
- j.MK
- j.HK
- j.LP, j.t.HP
- j.LK, j.t.MK
- j.HP, j.t.MK
- airthrow
Anti-Air
- c.HP -> SJC -> air target combo / air throw / SA.1
- b.MP (2nd hit)
- b.MP (1st hit), HP, qcf+LK
- b.MP (1st hit), HP, DP+K, SA.1
- dt.MK
- close HK
- dp+K
- far HK
- MK
- c.MK
1) c.HP -> SJC -> air target combo / air throw / SA.1. The c.HP has an extremely good hit box. It will stuff most jump-ins. However, it's also very good against air parries, since you can super-jump cancel it on reaction to an air parry, which will allow you to get out of harms way, or you can attempt to hit them with an air attack or air throw. If your opponent was jumping toward you at the time and they were very close to you, there's a good chance you will cross them up as soon as you leave the ground, making this very hard to punish -- and remember, SA.1 will automatically turn you around in the air if you're facing the wrong way. The only real disadvantage to this move is it's slow start-up
2) b.MP (2nd hit). This move has a surprisingly good hitbox. If done early enough, it will stuff quite a lot of jump-in's. Probably not as good as c.HP in terms of priority. It also isn't cancelable on the second hit, which limits its uses and increases the risk factor by quite a lot. But still, it's speed and vertical range alone make it a very useful anti-air.
3) b.MP (1st hit), HP, qcf+LK. A pretty good option for when your opponent is air parrying a lot. It's really only useful if they are high enough in the air that you can dash under them and out of harms way. Of course, this is a terrible option to use against an opponent Ibuki, due to the risk of getting nailed with an SA.1
4) b.MP (1st hit), HP, DP+K, SA.1. Another good option for dealing with air parries. If they manage to parry all the hits leading up to SA.1, then you're still able to cancel into SA.1, which is really difficult to parry. It should also be noted that the dp+K upper body invincibility can help avoid attacks. Alternately, you can skip the HP if you're afraid that the opponent will immediately retaliate after the first parry, which is very likely if the opponent has an air target combo or 2-hit jumping attack (like Elena, Ibuki, Ryu, etc).
5) dt.MK. The upper body invicibility on this move makes it a worthy anti-air option. It's also useful for sliding under opponents while they are in the air, and throwing or attacking from the other side, a'la Dhalsim's slide. Ideally, you'll want to time it very early so that the move is just ending as they are landing, that way if you do hit with it, you'll reduce the odds of getting punished for it.
Parry Reaction Buffers
- dp+2K (EX Kazekiri)
- SA.2 (grab version of Yoroi Doushi)
- hcb+LP (LP Raida)
- dp+LK (LK Kazekiri)
- SA.1 (Kasumi Suzaku after a parried air qcf+P)
- Close HK -> SJC
PRB (Parry Reaction Buffers): If the opponent parries one of your cancelable attacks, you can try to cancel it on reaction to the parry into something that has a high probability of stuffing your opponents attack. This tactic is called Parry Reaction Buffering (PRB), and is executed by performing an attack and buffering the directional inputs before the hit, then confirming the hit/parry and executing the final input of the attack (and executing nothing on reaction to a block or whiff).
For example, with Ibuki you can attack with far HP and execute the directional inputs for SA.2, then wait and see if the attack gets parried or not. If the attack is parried, immediately input the final command for the super. If the HP isn't parried, then do nothing.
If your opponent has a delayed reaction after the parry, or attempts to counter with a slow/laggy move, there is a chance that you can stuff their attack with your own as soon as the parry-freeze ends and your character returns to active frames. Although this tactic certainly isn't unpunishable, since your opponent can still hit you before the parry freeze ends or before you're able to act after the freeze. It can still be rather useful for recovering from a situation where you would normally take damage.
1) dp+2K (EX Kazekiri). The advantage of dp+2K (EX Kazekiri) is that it initially has 5 frames of full invulerability and a 6th frame of partial upper body invulnerability. During the full invulnerability, Ibuki is immune to attacks and throws. It also has a very quick start-up (4 frame), which means it hits before the invulnerability wares off. It can always be super canceled (in the air into SA.1) weather it whiffs, hits, is blocked, or is parried, which gives it an option for safe recovery (or damage). Using this move as a PRB, the invulnerability will blow through attacks with 3 to 8 frames of start-up (and potentially 9 frames due to hit box size). This is a rather ideal move as a PRB because of the invulnerability frames, the number of hits (which can deter further parries), and the ability to cancel into SA.1 once airborn.
2) If using SA.2 (Yoroi Doushi), the grab version can be a very effective PRB, since it has an extremely fast start-up (1 frame) and can not be blocked or parried. Although it's important to remember that some attacks that take the opponent off the ground or grant invulnerability will cause the grab to fail and the fireball version to occur. This set-up will grab attacks with 3 frame start-up or slower (provided they are not off the ground or invulnerable).
However, using the pre-buffering technique (see below), this has the potential of being nearly impossible to escape. Pre-buffering c.HP, into SJ, into SJ-cancel will allow Ibuki to stuff nearly anything, making this a very deadly technique.
3) hcb+LP (LP Raida) is can not be parried and has a very quick start-up (4 frame). It can easily catch opponents who react slowly to parries, or attempt to counter with a laggy move, or attempt to parry twice (in order to parry a multi-hit move). This set-up will grab moves with 7 frames of start-up or slower (provided the attack is not off the ground or invulnerable). Being that it is only -5 on block, it's also a rather safe move to pre-buffer.
4) dp+LK (Kazekiri) also has a very quick start-up (4 frame) and during the start-up, Ibuki is considered partially air-born. She can still be ground thrown during this start-up, but if she is knocked out of this move during the start up with an attack, she will be knocked into the air. This can be very useful in the sense that it can disrupt a lot of ground combos that don't work on air-born/juggled opponents (such as Chun b.HP xx SA.2, or Ken c.MK xx SA.3). Another advantage is that it can be super canceled (in the air into SA.1 and on the ground into SA.2 or SA.3) if it hits, is blocked, or is parried. In the case of it getting blocked or parried, the ability to super cancel it can compensate for the recovery time which makes it rather safe to pre-buffer if you have enough meter to cancel it. Ibuki will be knocked into the air by moves 3 frames or slower, and will trade with attacks 8 frames or slower (provided the attack has no invulnerability), and will counter attacks 9 frames or slower (provided the attack has no invulnerability).
6) Super Jump Canceling is another useful way to escape potential damage. Close HK is an attack that must be parried high, and hits twice. The second hit is Super Jump Cancelable on hit, block, or parry. If the opponent parries, you still have a chance of escaping ground throws by SJC away (since SJ's are immune to throws). It has the added bonus that if the opponent blocks, you can SJC to compensate for the recovery. Although it's not particularly safe, since you are still vulnerable to ground combos during the SJ start-up frames.
Pre-Buffering
- c.HP -> SJ -> SC
- close HK -> SJ -> SC
- c.MP
- far HP
- close HP
- toward + MK
Pre-buffering or "pre-buff". Unlike Parry Reaction Buffers, these are executed before the parry occurs. Where as PRB's are executed on reaction to the parry. The technique of pre-buffering (or "pre-buff") involves using a laggy, cancelable attack, that has enough start-up time to execute the command for a special or super before the hit connects. The importance of executing a move prior to the hit connection is that if the move is parried, the game will still register the input for the move prior to the parry. Thus, the move will execute as soon as the parry-freeze ends. While this technique normally only shaves off a frame or two, it can make a huge difference, and may mean the difference of weather or not you will stuff the opponents attack, especially when pre-buffering SA.2 or dp+2K.
If you want to know if you're executing the technique properly try ending the round with a pre-buff into special move or super art, where the normal move is the hit that KO's the opponent. If you input the command before the hit connection occurs, the special or super will still execute. If you performed it too late, then the special or super will not execute, because you can't execute specials or supers after the round is over. Note, however, that this test does not work with super jump cancels or toward+MK (because toward+MK isn't cancelable).
For suggestions on what moves to cancel into, refer to the Parry Reaction Buffers section above.
6) Toward+MK. One of the great things about this move is that it works very similarly to a Parry Safe Jump-in. This makes it a very difficult to punish move, even off a parry. Of course, it isn't a cancelable attack so it's usefulness as a pre-buff varies, since you have to account for the ammount of frames it takes for Ibuki to recover before she can act.
Mixups
High parries
Cancelable:
- MK
- back+MP
- close HP (1st hit)
- HP
Other:
- MP
- toward+MK
- HK
- close HK
- toward+HK
- MP+MK (UOH)
- qcb+K (Tsumuji)
- rdp+K (Hien)
- air qcf+P (Kunai)
Overheads:
- toward+MK
- MP+MK (UOH)
- rdp+K (Hien)
Note: All three of Ibuki's overheads are linkable to other attacks. And are, of course, high parries.
Low parries
Cancelable:
- c.LK
Other:
- c.MK
- c.HK
- qcf+P (Kubi Ori)
- qcb+K (hold down, low Tsumuji)
Unparryable:
- LP+LK (throw)
- hcb+P (Raida)
Miscellaneous:
- dp+K/2K (Kazekiri/EX), SC-SA.1 (Kasumi Suzaku)
- Toward dash
First when using a meaty attack against an opponent, there's a chance the opponent might parry in the wrong direction if you use an attack that can only be parried either high or low. This is why attacks that can't be parried both high and low can be useful as meaty attacks. Of course, your opponent could block or reversal your attempt. But, if you're going for a meaty attack it's a good idea to use an attack that can't be parried both directions.
Additionally, feints (fake-outs) can be thrown into the mix, in order to safely bait out reversals. Normal throw option selectss and tick-throws can also be effective when thrown into the mix, in order to punish blocking.
For example, a basic Ibuki mix-up would be :
A) High Parry: MK, hcb+LP
B) Low Parry: c.LK, hcb+LP
C) Unparryable: hcb+LP
D) Unblockable: LP+LK (throw)
E) Whiff an early fake-meaty, block (to bait reversals)
F) Overhead (UOH/t+MK/rdp+K)
G) Dash
And obviously, the advantage to using over-head attacks has the added benefit of potentially hitting a low-blocking opponent.
Ibuki has the added benefit of being able to pass through opponents with her ground dash, which can give her additional mix-ups by changing the direction that is needed to block hits. For example, against a cornered Alex, Ibuki can dash through him and hit him from the other side.
Throw Traps
- far LP, walk toward, throw
- MK, qcf+LK, throw
- c.MP, qcf+LK, throw
- close LP, MP (1-hit), HP, qcf+LK, throw
- Toward+MK, qcf+LK (Kasumi Gake), throw
- Toward+MK, regular dash, throw
- MP, qcf+LK (Kasumi Gake), throw
- Close HK, SJC toward, j.HP, (land) regular dash, throw
- Close HK, SJC toward, j.HP, toward+j.MK, (land) regular dash, throw
- Close HK, (link) late MK, qcf+MK (Kasumi Gake), throw
- Close HK, (link) late MK, qcf+HK (Kasumi Gake), throw
- Close HK, (link) early back+MP (1-hit), HP, qcf+LK (Kasumi Gake), throw
- Deep air qcf+P/2P (Kunai /EX), walk forward, throw.
- Deep air qcf+P/2P (Kunai /EX), qcf+LK (Kasumi Gake), throw.
- Cross-up j.MK, throw.
- UOH, throw.
- Cross-up whiff toward+MK on downed opponent, throw.
1) Far LP, "Advancing Jabs". Because Ibuki's far LP is +6 advantage, it is very useful for ticking into throws or setting up high/low mix-ups. The general strategy is to walk toward after one or more far LP's (walking toward in between each LP) and throw the opponent. This technique should be avoided against Chun-Li, Elena, Ibuki, Oro, Yang, and Yun because they can crouch under Ibuki's Far LP.
8) (Close HK, SJC toward, j.HP, regular dash, throw) *Note, the dash sometimes crosses up on the ground.
9) (Close HK, SJC toward, j.HP, toward+j.MK, regular dash, throw) *Note, crosses up on the ground. Does not work on Chun-Li. toward+j.MK whiffs Alex and Elena.
11) (Close HK, late MK, qcf+HK, throw) Note, crosses up.
12) (Close HK, early back+MP (1-hit), HP, qcf+LK, throw) Note, if done late, the HP may knock down the opponent instead of resetting. Crosses up. By walking backward after the qcf+LK (Kasumi Gake) you will return to your original side and not cross up. This is a useful left/right mix-up.
17) (Cross-up whiff toward+MK on downed opponent, throw.) Note, this is done on a knocked-down opponent, and can be spaced and timed in a way that it appears as though it will hit.
18 & 19) (Air qcf+P) note, if the Kunai is parried, you can throw immediately when landing to throw the opponent out of the parry.
Jump-ins
- j.HP, j.t.MK
- j.LK, j.t.MK
- j.LP, j.t.HP
- j.MK
-Note: Ibuki's j.LK and j.MK can both hit crossing up.
2) (j.LK, j.t.MK) Note, One trick to use with this air target combo against opponents who can be cross-up in the corner, is to jump into the corner (crossing the opponent up) and perform this air chain by holding the direction away from the corner.
3) (j.LP, j.t.HP), Note, the HP can turn standing opponents around on hit (except Elena and Urien).
Parry-Safe Jump-ins
- j.HK
- air qcf+P
Parry-safe jump-ins. When certain jump-in attacks are parried very low to the ground, you will land on the ground instantly after a parry freeze ends and enter a ground-recovery state. These jump-in's are considered "parry-safe" jump-in's, because they have a very short recovery period and will enable you to act very quickly after the parry freeze.
1) j.HK (vertical and diagonal) can be used as a parry-safe jump-in. When done as deep as possible (as late as possible), Ibuki will have no air-to-ground movement after the parry-freeze (she will be grounded instantly), and then enter a ground recovery state as soon as the parry-freeze ends. The ground recovery state will only last for 3 frames after the freeze, which means Ibuki will be able to block or parry opponent attacks with 4 frames of start-up or slower. The recovery state can not be canceled by anything, although Ibuki has the option to be either standing or crouching during this recovery state.
2) Air qcf+P (Kunai) acts differently because they are projectiles. When an opponent parries one of these, Ibuki will not enter a parry-freeze state, but the opponent will. When done very deep with air qcf+LP (LP Kunai), Ibuki will recover on the ground before the opponent's parry-freeze state ends. This enables Ibuki to attack or move before the opponent. The opponent will only be able to cancel the parry-freeze state with a block or another parry, and they are also able to tech normals throws (LP+LK throw guard). However, they are not able to cancel the parry-freeze state with an attack or throw untill after the freeze ends. And thus, Ibuki will be safe from the opponents attacks because you are able to block, parry, move (or jump) out of throw range, or hit them with another attack or throw, since you recover before they are able to act.
Additionally, because the opponent can only block or parry during the parry-freeze, the grab SA.2 (grab version Yoroi Doushi) becomes inescapable due to the fact that it can not be blocked or parried. This is because you can grab them with it while they are still stuck in parry-freeze from the air qcf+P (Kunai).
Additional Notes
- Ibuki's forward dash can pass through opponents
- Ibuki can not cross up against cornered Ibuki, Q, Remy, Yang, or Yun.
- Diagonal j.MK can cross up, but has a fairly narrow hitbox.
- Diagonal j.LK can cross up in the corner. She can follow up with her air TC (f.MK) by pressing away from the corner
- Ibuki's standing parries move her backwards. Her crouching parries don't move her.
- Ibuki has the 4th lowest stamina rating, ahead of Akuma, Yun, and Yang
- Ibuki has an average (64 pt.) stun gauge and a slow stun recovery rate
- Ibuki's hitbox is slightly extended forward while crouching, and is very short
- Close LP whiffs on crouching Chun-Li, Elena, Ibuki, and Oro.
- Far LP and st.MP whiff on crouching Chun-Li, Elena, Ibuki, Oro, Yang, and Yun.
- Chun-Li's SA2 hits Ibuki 17 times. It must be parried 8-8-1. Ibuki can dash through Chun-Li after the first set of 8 parries for an easier punish.
- Can hop over Remy's low projectiles with f.MK, f.HK, MP+MK (UOH), HP+HK (Taunt), or RDP+K (Hien)
- Close HK and cr.HP can be super jump canceled even on block/parry, making them good against air parries
- Far HK can also be super jump canceled, but only on hit (making it much more risky against air parries)
- Close HK can be super jump canceled towards the opponent for a j.HP > f.MK target combo followup, except against Alex, Elena, and Chun-Li
- Against Alex and Elena, Ibuki can still hit with just diagonal j.HP.
- Against Chun-Li, Ibuki will always cross-up from any distance.
- Against all opponents (including Chun), Ibuki can super jump straight up and hit with j.HP > f.MK (but has much worse positioning afterward)
- Special Cancel combo routes (from most lenient to most restrictive)
- HCB+P (Raida), QCB+KK (EX Tsumuji), DP+LK/MK/KK (LK/MK/EX Kazekiri): From all cancelable normals
- QCB+LK/MK (LK/MK Tsumuji), DP+HK (HK Kazekiri): From all cancelable medium/heavy normals
- QCB+HK (HK Tsumuji), QCF+LP/MP/PP (Kubi Ori): From cancellable heavy normals
- If crouching, these also combo from all cancellable medium normals
- DF+MK (Sazan/Slide):
- Can go under high projectiles from Akuma, Chun-Li, Ken, Oro, Remy (high only), Ryu, and Urien
- Can go under Ryu's SA1/SA3 and Sean's SA1, even after the super flash at point blank range.
- It can also go under Ryu SA1/SA3 after parrying/red parrying a hit (especially useful after parrying the first hit of Denjin Hadouken)
- It can stuff Chun-Li's SA2 if timed perfectly after the super flash (or preemptively), by going under the first hit.
- F+HK:
- Can go under mid/low projectiles from Akuma, Chun-Li, Ken, Oro (LP only), Remy (low only), Ryu, and Urien
- Can only hop over Urien's projectiles if she hits him (strict timing), as the hitstop allows the projectile to move past Ibuki
- Whiffs on most crouching opponents, as well as Oro's forward dash
- Overheads (must be blocked high): f.MK, MP+MK (UOH), RDP+K (Hien, 2 hits)
- Throws:
- Ibuki's normal throw range is 16 pixels, the shortest in the game
- Ibuki's best kara throws are st.MK and cr.HP (still the shortest kara throw range in the game)
- Ibuki has an Air Throw, which can be teched in the air by anyone
- Air throw range: 12 pixels horizontally. Vertical range: Top 44 pixels, Bottom 67 pixels
- HCB+P (Raida):
- Cannot be parried
- Opponent cannot quick stand if knocked down
- Relatively safe, except to some Supers. Makes it a useful meaty against people who like to guess parry.
- DP+K (Kazekiri):
- Can be super canceled into SA1 in the air on hit, block, or parry (not whiff)
- Can be super canceled into SA2/SA3 on the ground on hit, block, or parry (not whiff)
- Ibuki is considered airborne during the startup of Kazekiri, so she will flip out if hit by a meaty attack.
- While Ibuki can be thrown out of Kazekiri startup, the usual 6f of throw invulnerability on wakeup still applies when used as a reversal, making it a strong option. Just be wary of meaty normals that launch Ibuki like Oro close MP, Yun close MK, etc.
- DP+KK (EX Kazekiri):
- Has 5 frames of full startup invulnerability, and 1 frame of partial upper-body invulnerability.
- It can always be super canceled into SA1 in the air on whiff, block, hit, or parry (making it an excellent wake up reversal).
- Does not launch or knockdown against a grounded opponent
- Forces the opponent into a standing position on hit
- Recovers in the air if it hits an opponent. Ibuki can perform any air normal, air target combo, kunai, or SA1. She can not air throw or air parry during this recovery, so some characters can always punish with a reversal if not canceled into SA1.
- Against Alex, Dudley, Hugo, Q, Remy, and Urien: Ibuki can combo EX Kazekiri into j.LP > f.HP target combo, with potential followups on the ground
- QCB+LK (LK Tsumuji):
- You can hold down to make the 2nd hit a low
- QCB+MK (MK Tsumuji):
- You can hit MK after the 2nd hit to perform a followup kick (and hold down to make it a low)
- The low ender can combo only on crouching opponents
- QCB+HK (HK Tsumuji):
- The third hit will come out automatically. You can hold down to make it a low.
- The 3rd high kick whiffs on crouching Chun-Li, Elena, and Oro at close range.
- The 2nd hit can be cancelled into SA2 Fireball or SA3.
- QCB+KK (EX Tsumuji):
- The 2nd, 3rd, or 4th hits can be made low by holding down.
- The 2nd and 3rd hits (high or low) would theoretically be cancelable into SA2 or SA3, but this is impossible because they are both 1-bar supers.
- RDP+K (Hien):
- Hits overhead, and can combo to SA1 (must input very quickly after hitting)
- MK/HK/EX versions can be used to hop over projectiles
- QCF+P (Kubi Ori/Neckbreaker):
- If used preemptively, can go under mid/high projectiles from Akuma, Chun-Li, Ken, Oro, Remy (high only), Ryu, and Urien
- Can be low parried, despite looking like a hitgrab
- The LP/MP/EX versions can combo from close HP, LP>MP>HP, and b.MP>HP
- j.QCF+P (Air Kunai):
- Can be cancelled into SA1 in the air
- Kunai are destroyed by the opponent's attack hitboxes (normals, specials, or supers)
- There is a bug where if an attack destroys a kunai right when SA1 super freeze occurs, the opponent can move freely during the freeze
- j.QCF+PP (EX Air Kunai):
- The range can be extended by holding forward
- If done very low to the ground, Ibuki has incredible frame advantage (can even link into EX Neckbreaker)
- QCF+K (Kasumi Gake/Command Dash):
- Ibuki takes 50% extra damage if hit out of this dash
- LK version is the fastest/least distance, HK version is the slowest/most distance
- Can be used after juggles like close HK, st.MK xx QCF+K (usually, MK stays on same side and HK crosses up)
- DP+P (Tsujigoe/Flip):
- Airborne frame 1, giving it similar defensive use to Kazekiri or Hien
- Ibuki can throw a kunai in the opposite direction that she was originally facing. SA1 can be thrown in either direction.
- SA1 (Kasumi Suzaku):
- Mashing punch buttons will make Ibuki throw up to 20 knives, and raises her higher into the air making it less safe. This is useful for chipping out at the end of the round.
- Without mashing, she throws 12 knives.
- The strength of the attack button determines the angle of the knives (LP = close, HP = far)
- Higher strength versions also have more landing recovery and a higher float when mashed.
- Does not launch/knock down a grounded opponent, but will knock down if it juggles an airborne opponent
- Can combo from: close HK (SJC), Hien (RDP+K, quickly cancelled), or EX Kazekiri (DP+KK)
- Will autocorrect to face the opponent, even after DP+P or Air Kunai facing the wrong way
- SA2 (Yoroi Doushi):
- At close range, it is an unblockable command throw. Cannot be escaped after the super freeze (1f startup, 35 pixel range)
- Throw version can combo after early j.HP or j.LP > f.HP TC on standing opponents (except Elena and Urien)
- Projectile version can juggle opponents that are reset in the air (but usually only hits once and is unsafe)
- Can combo into projectile version with far.HK/cr.HP (SJC)
- SA3 (Yami Shigure):
- Very fast startup that can punish many attacks, or be used as a mid-range whiff punish tool
- Must be blocked or parried low
- The strength of the button determines the distance of the knives thrown (LP = close, HP = far)
- If the wrong version is used, it may not connect at all (i.e. HP version won't hit close opponents)
- Can combo from any cancelable normal, or link after attacks like f.MK overhead. st.MP, or far.HK/cr.HP (SJC)
- Taunt (HP+HK):
- Airborne on frame 1, giving it some defensive utility after a parry (i.e. vs Urien unblockables)
- Can only connect on grounded opponents
- If it hits, increases Ibuki's damage by 43.8% on the next hit, combo, or throw
- No bonus damage if the taunt is blocked, parried, or throw teched
- Can combo from close HP, LP>MP>HP, and b.MP>HP
- Very unsafe on hit or block, as Ibuki bounces for a long period of time
- If stand blocked from close range, Ibuki will drop straight down for much less frame disadvantage (but still unsafe, since she lands right next to the opponent).
Match-ups
Serious Advantage Match-ups
Advantage Match-ups
- Alex
- Hugo
- Q
- Remy
- Twelve
- Urien
Fair Match-ups
- Akuma
- Dudley
- Elena
- Necro
- Oro
- Sean
Disadvantage Match-ups
- Chun-Li
- Ken
- Makoto
- Ryu
- Yang
- Yun
