Introduction
Competitive Overview
Chun is ranked high tier. There are certain characters that she beats, certain characters she has even matches with, and certain characters who beat her. Some of her "even" matches are not even in the traditional sense. For example, against Fei she does really well as long as she's not in the corner. However, if Chun gets put in the corner and Fei starts doing st.Fierce xx Chicken Wing (his 3-hit spin kick), it is a nightmare for Chun, and she has no easy way out.
The same is true against Claw. Chun does well if she can keep the game on the ground, but if Claw can get his wall dive shenanigans going, Chun has no escape, and she must guess correctly which way to block, and that can be very difficult.
--NKI
Strengths & Weaknesses
Strengths
- st.Strong is an extremely good poke.
- Cr.mk is an incredible multi purpose move.
- j.Forward is a great jumping move.
- Can store her super.
- Lightning Legs will cleanly beat nearly every ground move in the game.
- Good throw range.
- Throw does a lot more damage than it probably should.
- Good dizzy combos.
- Fast walking speed.
- Very agile (can jump off walls, do attacks after head stomp).
- Is good at both turtling and rushing down.
- Has normal moves that can cause full knockdowns.
Weaknesses
- Has no solid anti-air.
- Upkicks will sometimes completely whiff, even at point blank range.
- Has no solid reversal to escape things like Claw's wall dives or Fei's Chicken Wing trap.
- Has a big jump arc which is easy to see and punish.
- Has a hard time with fireball traps.
--NKI 20:04, 8 May 2006 (CDT)
New & Old Versions Comparison
To select O.Chun Li, choose Chun Li and then press ↓ ↓ ↓ ↑ Jab/Fierce, pressing Short simultaneously with the punch button for the alternate color.
Here is the list of differences:
- Obvious stuff: O.Chun Li can not tech throws, does not have a new Upkicks special move and does not have a Super;
- O.Chun Li has some differences in some of her normals:
- Close Standing Jab has a 1 frame slower startup;
- Crouching Jab has a 1 frame slower startup;
- Far Standing Strong hits high and so whiffs on crouching characters;
- Far Standing Fierce has special cancel properties;
- Close Standing Short has a 3 frames slower startup and can't be special canceled;
- Far Standing Short hits high and so whiffs on crouching characters;
- Crouching Short has a 2 frames slower startup and can't be special canceled;
- Close Standing Forward has a 3 frames slower startup and can't be special canceled;
- Far Standing Forward have better priority;
- Diagonal Jumping Fierce has a much fatter hitbox, though the priority doesn't change much;
- Diagonal Jumping Short have much better priority but do a little less damage;
- Neutral Jumping Forward has much better priority plus 6 more active frames;
- Diagonal Jumping Forward have much better priority but can not be used as a cross up attack;
- Neutral Jumping Roundhouse have much better priority;
- Diagonal Jumping Roundhouse hits lower;
- O.Chun Li's Head Stomp can be performed with any downward direction;
- O.Chun Li's flip kick and neck breaker command normals have proximity requirements;
- O.Chun Li's neckbreaker and flip kick are performed with forward/back/any upwards direction instead of df;
- O.Chun Li's flip kick combo for two hits, the start-up is faster by 2 frames and can be special cancelled;
- O.Chun Li can kara-cancel Kikoukens from Roundhouse easily (for the shorter recovery), where N.Chun Li has trouble with this due to the different command for the Spinning Bird Kick;
- O.Chun's Spinning Bird Kick becomes active and knocks down before the spinning part during her handspring, and demands a "down" charge instead of a "back/away" one.
Basically, O.Chun Li has better aerial tools but worse ground ones, mainly for standing strong whiffing on crouched characters and the lack of super. Choose whichever version you think it's best suited for your style.
Color Options
| Jab | Strong | Fierce | Start | Old |
 |
 |
 |
 |

|
 |
 |
 |
 |

|
| Short | Forward | Roundhouse | Hold | Old Alternative |
--Born2SPD
Moves Analysis
Disclaimer: To better understand the diagrams, read this.
Normal Moves
Ground Normals
- Close Standing Jab: (Base max activation range: 21)
| Damage | 18[0] |  |
 |
 |
 |

|
| Stun | 0~5 | |||||
| Stun Timer | 40 | |||||
| Chain Cancel | Yes | |||||
| Special Cancel | Yes | |||||
| Super Cancel | Yes | |||||
| Frame Advantage | +5 | |||||
| Frame Count | 2 | 1 | 4 | 3 | 1 | |
| Simplified | 1 + 3 | 4 | 4 | |||
A quick rapid-fire jab, mainly used for combos and as a tick vs characters that can't crouch it. This does massive damage for a jab, sometimes as a trade anti air, the trade can be in Chun's favour.
- Far Standing Jab:
| Damage | 4[0] |  |
 |
 |
 |

|
| Stun | 0~5 | |||||
| Stun Timer | 40 | |||||
| Chain Cancel | Yes | |||||
| Special Cancel | Yes | |||||
| Super Cancel | Yes | |||||
| Frame Advantage | +3 | |||||
| Frame Count | 2 | 2 | 4 | 3 | 1 | |
| Simplified | 1 + 2 | 2 | 8 | |||
Similar to close jab in some aspects, the priority is good, so you can rapid fire it (mash) to beat some moves like Blanka ball, and Honda headbutt. Can work as an anti air from far away in some situations.
- Crouching Jab:
| Damage | 4[0] |  |
 |
 |
 |

|
| Stun | 0~5 | |||||
| Stun Timer | 40 | |||||
| Chain Cancel | No | |||||
| Special Cancel | Yes | |||||
| Super Cancel | Yes | |||||
| Frame Advantage | +4 | |||||
| Frame Count | 2 | 1 | 4 | 4 | 1 | |
| Simplified | 1 + 3 | 4 | 5 | |||
Good priority, but not mashable like other jabs. And as a tick, it's outclassed by moves like cr mk and close/far mp. One nice trick is to kara cancel this into anti air upkicks to remove her standing frame.
- Close Standing Strong: (Base max activation range: 36)
| Damage | 22[1] |  |
 |
 |
 |

|
| Stun | 5~11 | |||||
| Stun Timer | 60 | |||||
| Chain Cancel | No | |||||
| Special Cancel | Yes | |||||
| Super Cancel | Yes | |||||
| Frame Advantage | +10 | |||||
| Frame Count | 2 | 2 | 4 | 3 | 1 | |
| Simplified | 1 + 4 | 4 | 4 | |||
Ok as a trade anti air, but mainly used for the awesome frame advantage, you can mix them up really well after this, either with throw, or sweep/cr mk to hit them low. Links into just about anything. Only Cammy and Blanka can crouch under this.
- Far Standing Strong:
| Damage | 22[0] |  |
 |
 |
 |

|
| Stun | 5~11 | |||||
| Stun Timer | 60 | |||||
| Chain Cancel | No | |||||
| Special Cancel | Yes | |||||
| Super Cancel | Yes | |||||
| Frame Advantage | +10 | |||||
| Frame Count | 2 | 2 | 4 | 3 | 1 | |
| Simplified | 1 + 4 | 4 | 4 | |||
Excellent rushdown poke. Hits mid against most (all?) of the cast (so, doesn't matter if they are couching or standing), special/super cancelable, and is essentially an option select into Chun's damaging MP throw.
- Crouching Strong:
| Damage | 18[1] |  |
 |
 |
 |

|
| Stun | 5~11 | |||||
| Stun Timer | 60 | |||||
| Chain Cancel | No | |||||
| Special Cancel | Yes | |||||
| Super Cancel | Yes | |||||
| Frame Advantage | +9 | |||||
| Frame Count | 2 | 2 | 4 | 4 | 1 | |
| Simplified | 1 + 4 | 4 | 5 | |||
Good range and frame advantage, not much reason to use this over standing versions of mp though. The priority is also much worse than cr lp.
- Close Standing Fierce: (Base max activation range: 41)
| Damage | 24[1] |  |
 |

|
| Stun | 10~16 | |||
| Stun Timer | 80 | |||
| Chain Cancel | No | |||
| Special Cancel | Yes | |||
| Super Cancel | Yes | |||
| Frame Advantage | -9 | |||
| Frame Count | 3 | 20 | 11 | |
| Simplified | 1 + 3 | 20 | 11 | |
This move should be used in combos, or as a meaty, otherwise it is quite unsafe. Cancel to fireball or super in combos, or use as a meaty for massive frame advantage, and to set up frame traps. This can usually work as a ground crossup if you are behind them when grounded, but it's not much use in that aspect.
- Far Standing Fierce:
| Damage | 24[0] |  |
 |
 |
 |
 |

|
| Stun | 10~16 | ||||||
| Stun Timer | 80 | ||||||
| Chain Cancel | No | ||||||
| Special Cancel | No | ||||||
| Super Cancel | Yes | ||||||
| Frame Advantage | -2 | ||||||
| Frame Count | 2 | 3 | 6 | 10 | 7 | 1 | |
| Simplified | 1 + 5 | 6 | 18 | ||||
Deceptively fast startup, decent for punishment, and a surprisingly good anti air.
- Crouching Fierce:
| Damage | 22[2] |  |
 |
 |
 |

|
| Stun | 10~16 | |||||
| Stun Timer | 80 | |||||
| Chain Cancel | No | |||||
| Special Cancel | No | |||||
| Super Cancel | No | |||||
| Frame Advantage | -3 | |||||
| Frame Count | 3 | 3 | 6 | 8 | 11 | |
| Simplified | 1 + 6 | 6 | 19 | |||
Good range with decent priority, but very sluggish, punishable if whiffed. Probably best to use safer attacks.
- Close Standing Short: (Base max activation range: 36)
| Damage | 20[1] |  |
 |
 |
 |

|
| Stun | 0~5 | |||||
| Stun Timer | 40 | |||||
| Chain Cancel | No | |||||
| Special Cancel | Yes | |||||
| Super Cancel | Yes | |||||
| Frame Advantage | +3 | |||||
| Frame Count | 2 | 1 | 5 | 4 | 1 | |
| Simplified | 1 + 3 | 5 | 5 | |||
Ok for ticks into throw, but Chun usually has better options for this. Does unusually high damage for a light attack.
- Far Standing Short:
| Damage | 20[0] |  |
 |
 |
 |

|
| Stun | 0~5 | |||||
| Stun Timer | 40 | |||||
| Chain Cancel | No | |||||
| Special Cancel | No | |||||
| Super Cancel | No | |||||
| Frame Advantage | +3 | |||||
| Frame Count | 3 | 3 | 5 | 4 | 1 | |
| Simplified | 1 + 6 | 5 | 5 | |||
Has decent priority, and hits at a nice angle. Useful for setting up frame traps. Does unusually high damage for a light attack.
- Crouching Short:
| Damage | 14[0] |  |
 |
 |
 |

|
| Stun | 0~5 | |||||
| Stun Timer | 40 | |||||
| Chain Cancel | No | |||||
| Special Cancel | Yes | |||||
| Super Cancel | Yes | |||||
| Frame Advantage | +4 | |||||
| Frame Count | 3 | 1 | 4 | 4 | 1 | |
| Simplified | 1 + 4 | 4 | 5 | |||
Good priority, and ok reach for a crouch lk, but pretty slow. Works ok as an occasional tick. Does above average damage for a light attack.
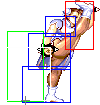
- Close Standing Forward: (Base max activation range: 41)
| Damage | 24[1] |  |
 |
 |
 |
 |
 |

|
| Stun | 5~11 | |||||||
| Stun Timer | 60 | |||||||
| Chain Cancel | No | |||||||
| Special Cancel | Yes / No | |||||||
| Super Cancel | Yes / No | |||||||
| Frame Advantage | +1 / +4 | |||||||
| Frame Count | 2 | 1 | 3 | 6 | 3 | 4 | 1 | |
| Simplified | 1 + 3 | 9 | 8 | |||||
Good anti air if you are at the right range to use it. Will beat moves like j hk from N Ryu for example. The first part can be cancelled, and is very easy to combo into legs, since you can just mash kick.
- Far Standing Forward:
| Damage | 24[0] |  |
 |
 |
 |

|
| Stun | 5~11 | |||||
| Stun Timer | 60 | |||||
| Chain Cancel | No | |||||
| Special Cancel | No | |||||
| Super Cancel | No | |||||
| Frame Advantage | +5 | |||||
| Frame Count | 3 | 3 | 5 | 4 | 4 | |
| Simplified | 1 + 6 | 5 | 8 | |||
Mediocre anti air, can be ok to counter some high/mid attacks. Deceptively good range, useful for stuffing fireball startup.
- Crouching Forward:
| Damage | 18[1] |  |
 |

|
| Stun | 5~11 | |||
| Stun Timer | 60 | |||
| Chain Cancel | No | |||
| Special Cancel | Yes | |||
| Super Cancel | Yes | |||
| Frame Advantage | +9 | |||
| Frame Count | 4 | 5 | 4 | |
| Simplified | 1 + 4 | 5 | 4 | |
Easily one of the best pokes in the game. Spammable AND special/super cancelable. One of the main reasons it's very annoying playing against a competent chun.
- Close Standing Roundhouse: (Base max activation range: 56)
| Damage | 28[1] |  |
 |
 |
 |
 |
 |
 |
 |

|
| Stun | 10~16 | |||||||||
| Stun Timer | 80 | |||||||||
| Chain Cancel | No | |||||||||
| Special Cancel | No | |||||||||
| Super Cancel | No | |||||||||
| Frame Advantage | -5 | |||||||||
| Frame Count | 1 | 1 | 6 | 1 | 6 | 4 | 6 | 4 | 7 | |
| Simplified | 1 + 9 | 6 | 21 | |||||||
Chun's panty teasing high sidekick. It's a trade anti air(no pre projected hurtboxes before becoming active but poor priority with big hit/hurtboxes afterwards) so if you want to beat a move cleanly you have to use Close Forward instead, which has good priority up close. But against some high priority air normals your only option may be a trade so this move is useful, and it can be used that way against most air normals as long as you time it correctly, minus against some very high priority normals like Cammy's Aerial Strong or against characters with very low jumps, like Boxer. Another difference to keep in mind is that the hitbox of this move is more centered than Close Forward, this is important against ambiguous crossup moves like a crossing up air tatsu for example. This also allows Chun to actually beat/trade with FeiLong's Chicken Wing corner trap, but it's difficult to use because the timing is very strict: you have a 1 frame window (with "reversal timing") for it to beat it cleanly and another 1 frame window to get a trade, anything slower than that and the move will come out too late and Chun will eat the Chicken Wing and probably a combo as well. And since you'll most likelly be playing on a frame-skipping turbo speed, the timing becomes even more strict, leaving Chun with only one usable counter to the Chicken Wing corner trap: kara-cancelled low normal into UpKicks.
- Far Standing Roundhouse:
| Damage | 28[0] |  |
 |
 |
 |
 |

|
| Stun | 10~16 | ||||||
| Stun Timer | 80 | ||||||
| Chain Cancel | No | ||||||
| Special Cancel | No | ||||||
| Super Cancel | No | ||||||
| Frame Advantage | +0 | ||||||
| Frame Count | 3 | 3 | 4 | 8 | 7 | 7 | |
| Simplified | 1 + 10 | 8 | 14 | ||||
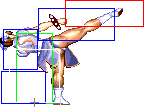
Good anti air, but takes a while to come out.
- Crouching Roundhouse:
| Damage | 22[2] |  |
 |
 |
 |

|
| Stun | 5~11 | |||||
| Stun Timer | 130 | |||||
| Chain Cancel | No | |||||
| Special Cancel | No | |||||
| Super Cancel | No | |||||
| Frame Advantage | -3 | |||||
| Frame Count | 3 | 3 | 6 | 8 | 11 | |
| Simplified | 1 + 6 | 6 | 19 | |||
Good range, useful for beating/trading with fireballs, and a good punish in general. Just try not to whiff it, as it leaves Chun quite open.
Aerial Normals
- Neutral Jumping Jab:
| Damage | 18[2] |  |
 |
 |

|
| Stun | 1~7(-2) | ||||
| Stun Timer | 40 | ||||
| Special Cancel | No | ||||
| Frame Count | 3 | 3 | 2 | ∞ | |
| Simplified | 8 | ∞ | |||
Stays active the whole jump, ok to shield yourself from lower priority attacks.
- Diagonal Jumping Jab:
| Damage | 16[2] |  |
 |

|
| Stun | 1~7(-2) | |||
| Stun Timer | 40 | |||
| Special Cancel | No | |||
| Frame Count | 3 | 3 | ∞ | |
| Simplified | 6 | ∞ | ||
Safejumps aside, this isn't much use, outclassed by j mp.
- Neutral Jumping Strong:
| Damage | 22[2] |  |
 |
 |
 |
 |
 |
 |

|
| Stun | 5~11 | ||||||||
| Stun Timer | 50(+10) | ||||||||
| Special Cancel | No | ||||||||
| Frame Count | 3 | 3 | 2 | 16 | 2 | 3 | 4 | ∞ | |
| Simplified | 8 | 16 | ∞ | ||||||
Good priority, but aside from having double the active frames, neutral jump hp outclasses this.
- Diagonal Jumping Strong:
| Damage | 20[2] |  |
 |
 |
 |
 |

|
| Stun | 5~11 | ||||||
| Stun Timer | 50(+10) | ||||||
| Special Cancel | No | ||||||
| Frame Count | 3 | 3 | 8 | 3 | 4 | ∞ | |
| Simplified | 6 | 8 | ∞ | ||||
Good air to air, and good jump in from the right range. Can usually beat some normals that anti air your jump mk.
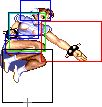
- Neutral Jumping Fierce:
| Damage | 26[2] |  |
 |
 |
 |
 |
 |
 |

|
| Stun | 11~17(-1) | ||||||||
| Stun Timer | 60(+20) | ||||||||
| Special Cancel | No | ||||||||
| Frame Count | 3 | 3 | 2 | 8 | 2 | 3 | 4 | ∞ | |
| Simplified | 8 | 8 | ∞ | ||||||
Great horizontal priority and reach, fantastic air to air, and works as an anti air in some situations if you react in time.
- Diagonal Jumping Fierce:
| Damage | 24[2] |  |
 |
 |
 |
 |

|
| Stun | 11~17(-1) | ||||||
| Stun Timer | 60(+20) | ||||||
| Special Cancel | No | ||||||
| Frame Count | 3 | 3 | 8 | 3 | 4 | ∞ | |
| Simplified | 6 | 8 | ∞ | ||||
Like jump mp but a different hitbox, in some situations it may be better to use this instead.
- Neutral Jumping Short:
| Damage | 18[2] |  |
 |

|
| Stun | 1~7(-2) | |||
| Stun Timer | 40 | |||
| Special Cancel | No | |||
| Frame Count | 3 | 3 | ∞ | |
| Simplified | 6 | ∞ | ||
Good priority, beats a handful of moves, and is a great defensive tool.
- Diagonal Jumping Short:
| Damage | 20[2] |  |
 |

|
| Stun | 1~7(-2) | |||
| Stun Timer | 40 | |||
| Special Cancel | No | |||
| Frame Count | 3 | 3 | ∞ | |
| Simplified | 6 | ∞ | ||
Aside from safejumps, this isn't too special, it gives dictator trouble, but otherwise, favour j mk.
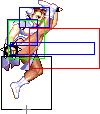
- Neutral Jumping Forward:
| Damage | 22[2] |  |
 |
 |
 |

|
| Stun | 5~11 | |||||
| Stun Timer | 50(+10) | |||||
| Special Cancel | No | |||||
| Frame Count | 3 | 3 | 10 | 3 | ∞ | |
| Simplified | 6 | 10 | ∞ | |||
Ok range, but unlike O.Chun's version of this move the lowest hurtbox got stretched horizontaly so the overall priority is kinda bad, favour Neutral Jumping Short. That hurtbox was also reduced downwards though, this allows this move to do something that no other of her neutral jump moves can (with exception of Head Stomp, but that forces a bounce which can be very bad on a neutral jump): it can beat Honda's Headbutts, of course this requires Chun to land right top of him, because the horizontal priority is not enough to beat Headbutts from the front.
- Diagonal Jumping Forward:
| Damage | 20[2] |  |
 |
 |
 |

|
| Stun | 5~11 | |||||
| Stun Timer | 50(+10) | |||||
| Special Cancel | No | |||||
| Frame Count | 3 | 3 | 16 | 3 | ∞ | |
| Simplified | 6 | 16 | ∞ | |||
Chuns crossup, and also her best jump in for the most part.
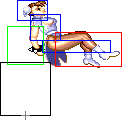
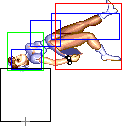
- Neutral Jumping Roundhouse:
| Damage | 26[2] |  |
 |
 |
 |
 |
 |
 |

|
| Stun | 10~16 | ||||||||
| Stun Timer | 80 | ||||||||
| Special Cancel | Yes | ||||||||
| Frame Count | 1 | 2 | 5 | 4 | 4 | 4 | 6 | ∞ | |
| Simplified | 3 | 9 | ∞ | ||||||
This has a good horizontal range, and trades with most attacks if you time it right. It can also be used against grounded opponents on the way up. This is a rare case of normal moves that cause a full knockdown.
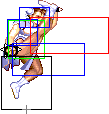
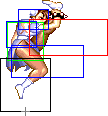
- Diagonal Jumping Roundhouse:
| Damage | 24[2] |  |
 |
 |
 |
 |
 |

|
| Stun | 11~17(-1) | |||||||
| Stun Timer | 60(+20) | |||||||
| Special Cancel | No | |||||||
| Frame Count | 3 | 3 | 6 | 4 | 6 | 6 | ∞ | |
| Simplified | 6 | 6 | 4 | 6 | ∞ | |||
Can be a decent air to air in some situations, just be careful as it leaves you quite vulnerable to air to airs, and anti airs.
Strangely enough, the frame in between kicks can hit too: if you look closely, you'll noticed a red dot around her waist, thats a 1x1 px hitbox!
Command Normals
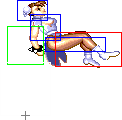
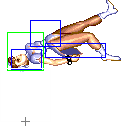
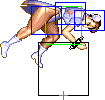
- Flip Kick: (On ground, ↘ + Forward)
| Damage | 22[0] |  |
 |
 |
 |
 |
 |
 |

|
| Stun | 0~5 | ||||||||
| Stun Timer | 40 | ||||||||
| Frame Count | 3 | 3 | 5 | 4 | 4 | 4 | 6 | 29 | |
| Simplified | 1 + 6 | 9 | 43 | ||||||
This move does not combo into itself anymore: the second active part knocks down, but it is unlikely that it would hit. Even though you use the Forward kick to obtain this move, it returns the same super meter as a Jab or Short. Avoid this move.
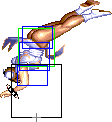
- Neck Breaker: (On ground, ↘ + Roundhouse)
| Damage | 20[0] |  |
 |
 |
 |
 |
 |
 |

|
| Stun | 10~16 | ||||||||
| Stun Timer | 80 | ||||||||
| Frame Count | 4 | 4 | 5 | 6 | 7 | 8 | 2 | 14 | |
| Simplified | 1 + 36 | 14 | |||||||
This move is good for shenannigans, or to simply force the enemy to block on wake-up, as it can avoid many moves in that situation. It does high stun, but the timer bonus is very short, so odds are it will hit and dizzy, or the enemy will recover from any dizzy damage by the time he gets up again. Despite chun being airborne for the active part, it is treated like a ground normal, thus, in addition to standing block, it can also be crouch blocked, if chun lands the active part deep, then it actually has to be blocked low.
- Head Stomp: (On air, ↓ + Forward)
| Damage | 20[0] |  |
 |
 |
 |
 |
 |

|
| Stun | 2~8 | |||||||
| Stun Timer | 60 | |||||||
| Special Cancel | Yes | |||||||
| Frame Count | 1 | 2 | 16 | 8 | 4 | 5 | ∞ | |
| Simplified | 3 | 16 | ∞ | |||||
It is possible to use this move as an instant overhead. Simply jump and immediately do a head stomp, and the enemy will have to block high to avoid getting hit. Note that this move has "trip-guard". If you use it and someone tries to sweep (or low tiger) you, you'll ether beat it or land in a blocking position.
Throws
Holding towards or back and pressing Strong or Fierce punch will produce Chun Li's throw. She can also air-throw this way. The direction on the joystick determines the direction the enemy gets thrown at.
- Shoulder Throw: (←/↖/↑/↗/→ + Strong/Fierce)
| Damage | 38 / 32 |  |
 |

| |
| Stun | 7~13 | ||||
| Stun Timer | 100 | ||||
| Range | (from axis) | 48 | |||
| (from throwable box) | 23 | ||||
Although both the Strong and Fierce ground throws look identical, they're actually quite different for some weird reason. The Fierce throw deals an ordinary 22% damage, but the Strong throw does 26% damage, which is unusually high. Since the Strong throw has no other drawbacks, use it instead of the Fierce whenever possible. Be careful when throwing a cornered opponent at the corner, if they tech most characters can actually punish you as Chun Li is still recovering.
- Air Shoulder Throw: (Min activation height: 48/48 upwards/downwards, ←/↖/↙/↓/↘/↗/→ + Strong/Fierce)
| Damage | 34 | 
| |
| Stun | 7~13 | ||
| Stun Timer | 100 | ||
| Range | (from axis) | 58 | |
| (from throwable box) | 33 | ||
The air-throw versions are the same and do approximately 23.5% damage. Very good range for an air throw.
--Raisin (March 12, 2007), some info courtesy T.Akiba
Special Moves
- Hyakuretsu Kyaku a.k.a. Lightning Legs: (Press K five times in quick succession)
Detailed Input: (The maximum time between each input is 15/12/9f (Short/Forward/Rh). Every K input of the same strenght is added to the input counter and everytime the counter is updated the timer is also reseted to its maximum value. The timer is decremented each frame. If the timer reaches 0, the counter is reseted to 0. To get the move out, first you need 5+ inputs within the required frequency, then the move will come out on the 5th or later K input that is within that frequency and is also entered during a moment in which a special move can come out i.e. with no move out or during a normal move startup frames so it can come out as a kara cancel)
- Startup:
 |

| |
| Frame Count (Short) | 1 | 3 |
| Simplified (Short) | 4 | |
| Frame Count (Forward) | 3 | 4 |
| Simplified (Forward) | 7 | |
| Frame Count (Rh) | 4 | 6 |
| Simplified (Rh) | 10 | |
- Active:
| Short | Forward | Rh |  |
 |
 |

| |
| Damage | 28[2] | 30[2] | 32[2] | ||||
| Stun | 5~11 | ||||||
| Stun Timer | 100 | ||||||
| Super Meter | 4 | ||||||
| Frame Count (Short) | 4 | 4 | 4 | 4 | |||
| Frame Count (Forward) | 2 | 2 | 2 | 2 | |||
| Frame Count (Rh) | 1 | 1 | 1 | 1 | |||
 |
 |
 |

| |
| Frame Count (Short) | 4 | 4 | 4 | 4 |
| Frame Count (Forward) | 2 | 2 | 2 | 2 |
| Frame Count (Rh) | 1 | 1 | 1 | 1 |
NOTE: What I put there as the active part is a complete cycle but not the minimal duration (if you keep mashing, after the last animation frame it will go back to the first one, and this will be repeated while you keep the mashing). The minimal durations (if you only input the 5 Kick presses needed) are: a full cycle plus the 3 next animation frames for Short Version, 2 full cycles minus the last animation of a cycle for the Forward Version and almost 3 full cycles for the Roundhouse Version, lacking only the last animation like the Forward version.
- Recovery:
 |

| |
| Frame Count (Short) | 2 | 2 |
| Simplified (Short) | 4 | |
| Frame Count (Forward) | 4 | 4 |
| Simplified (Forward) | 8 | |
| Frame Count (Rh) | 6 | 6 |
| Simplified (Rh) | 12 | |
Chun Li unleashes several kicks. This move is a very important tool in her arsenal: since her leg is invulnerable and her vulnerability is moved backwards, it will beat most other attacks in melee range. Thus, in important strategy is to engage melee combat and, while your opponent is worried about throws, Strong punches and Forward kicks, which should pressure him to prevent you from gaining ground with him own attacks, use Lightning Legs, punishing his attempt to attack you. If the Lightning Legs become active, almost every attack will probably be defeated. It can be used in a similar fashion as a safe wake-up attack, if you adjust your distance according to the enemy character so as to avoid his reversal.
This move has a special property in the sense that it will never combo into itself. This is to say that, regardless of one of the kicks hitting the opponent (read "not blocked"), further hits will simply whiff, and as he recovers from hitstun, he will always be able to block the remaining kicks. However, if blocked, further attacks will not whiff. This means this move does relatively more damage than other attacks on block.
This move looks like the Hyakuretsu Harite (Hundred Hands Slap) from E. Honda, but it works differently. The main advantage is that Chun Li's legs are fully invulnerable, thus giving the move priority over any attack that does not have a very long range. However, it has three disadvantages: it cannot be steered horizontally (as O.Honda can), it cannot work as a horizontal dash that keeps charge, and it demands five presses to come out, instead of just four. This makes it much harder to use in combos.
- Kikouken a.k.a. Fireball: (Charge ←, → P)
Detailed Input: (Charge ←/↙/↖ for at least 61f, [7~14f] → [10/9/7f] Jab/Strong/Fierce. It is needed to wait at least 1 frame after leaving the charge direction to enter with the P button)
- Startup:
 |
 |
 |
 |

| |
| Frame Count | 1 | 1 | 1 | 1 | 1 |
| Simplified | 5 | ||||
- Active:
- Jab Version:
| Damage | 17[1] |  |
 |
 |
 |
 |

|
| Stun | 7~13 | ||||||
| Stun Timer | 90 | ||||||
| Super Meter | 5 | ||||||
| Frame Count | 1 | 1 | 1 | 1 | 1 | 1... | |
| Simplified | 42 | ||||||
- Strong Version:
| Damage | 18[1] |  |
 |
 |
 |
 |

|
| Stun | 7~13 | ||||||
| Stun Timer | 90 | ||||||
| Super Meter | 5 | ||||||
| Frame Count | 1 | 1 | 1 | 1 | 1 | 1... | |
| Simplified | 40 | ||||||
- Fierce Version:
| Damage | 20[1] |  |
 |
 |
 |
 |

|
| Stun | 7~13 | ||||||
| Stun Timer | 90 | ||||||
| Super Meter | 5 | ||||||
| Frame Count | 1 | 1 | 1 | 1 | 1 | 1... | |
| Simplified | 38 | ||||||
- Total Distance Traveled:
| Jab: 222 pixels after 75 frames | Strong: 176 pixels after 45 frames | Fierce: 150 pixels after 31 frames |
 |
 |

|
Chun Li throws a blue ball of energy that dissipates in the air after some time. This move works very well as an anti-air tool. Even if it trades, you score a full knockdown, which you can use to apply your strong wake-up game. Chun has the best startup for a fireball in the game by far, which helps tremendously stopping advance moves like Honda's headbutt.
You can change the recovery of any Kikouken to that of a Jab by kara-canceling a Jab or Short. Similarly to Strong Kikouken with Strong or Forward. The fastest recovery is obtained by kara-canceling a Fierce or Roundhouse.
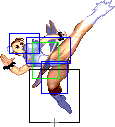
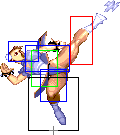
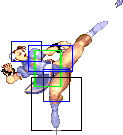
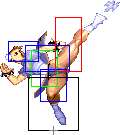
- Tenshou Kyaku a.k.a. Up Kicks: (Charge ↓, ↑ K)
Detailed Input: (Charge ↓/↙/↘ for at least 60f, [7~14f] ↑/↖/↗ [10/9/7/2f] Short/Forward/Roundhouse/any K if you are at a jumpable state. It is needed to wait at least 1 frame after leaving the charge direction to enter with the K button)
- Short Version:
| Damage | 12[2] * 3 |  |
 |
 |
 |
 |
 |
 |
 |
 |
|
| Stun | 0~4 * 3 | ||||||||||
| Stun Timer | 20 * 3 | ||||||||||
| Super Meter | 8 | ||||||||||
| Frame Count | 6 | 4 | 1 | 1 | 2 | 4 | 2 | 2 | 2 | 2 | |
| Simplified | 6 | 4 | 4 | 4 | 8 | ||||||
 |
 |
 |
 |
 |

| |
| Frame Count | 4 | 3 | 3 | 3 | 24 | 4 |
| Simplified | 4 | 37 | ||||
- Forward Version:
| Damage | 12[2] * 3 |  |
 |
 |
 |
 |
 |
 |
 |
 |

|
| Stun | 0~4 * 3 | ||||||||||
| Stun Timer | 20 * 3 | ||||||||||
| Super Meter | 8 | ||||||||||
| Frame Count | 4 | 4 | 1 | 1 | 2 | 4 | 2 | 2 | 2 | 2 | |
| Simplified | 4 | 4 | 4 | 4 | 8 | ||||||
 |
 |
 |
 |
 |
| |
| Frame Count | 4 | 2 | 2 | 2 | 2 | 4 |
| Simplified}} | 4 | 8 | 4 | |||
 |
 |
 |
 |

| |
| Frame Count | 2 | 2 | 3 | 21 | 6 |
| Simplified | 34 | ||||
- Roundhouse Version:
| Damage | 12[2] * 3 |  |
 |
 |
 |
 |
 |
 |
 |
 |

|
| Stun | 0~4 * 3 | ||||||||||
| Stun Timer | 20 * 3 | ||||||||||
| Super Meter | 8 | ||||||||||
| Frame Count | 2 | 2 | 2 | 2 | 4 | 2 | 2 | 2 | 2 | 4 | |
| Simplified | 2 | 2 | 4 | 4 | 8 | 4 | |||||
 |
 |
 |
 |
 |
 |
 |
 |

| |
| Frame Count | 2 | 2 | 2 | 2 | 4 | 2 | 2 | 2 | 2 |
| Simplified | 8 | 4 | 8 | ||||||
 |
 |
 |
 |
 |

| |
| Frame Count | 4 | 3 | 3 | 3 | 7 | 7 |
| Simplified | 4 | 23 | ||||
The RH version of Chun's upkicks is your go-to reversal outside of super. Due to the 2 frame startup it cannot be safe-jumped and can also thwart meaty crossups. Also note that all versions of upkick recovery have 0 grounded recovery landing frames, meaning you'll never face a ground punish combo or throw for wiffing. The game considers Chun "airborne" for the entire move. If your opponent seems keen on trying to grab you out of recovery, a counter-throw will almost always land assuming they're in your throw range.
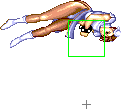
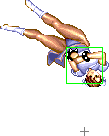
- Spinning Bird Kick: (Charge ←, → K)
Detailed Input: (Charge ←/↙/↖ for at least 60f, [7~14f] → [10/9/7f] Short/Forward/Roundhouse. It is needed to wait at least 1 frame after leaving the charge direction to enter with the K button)
- Startup:
| Super Meter | 8 |  |
 |
 |
 |
 |
 |

| |
| Frame Count | 1 | 4 | 3 | 2 | 3 | 4 | 4 | 2 | |
| Simplified | 23 | ||||||||
- Active:
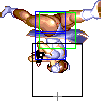
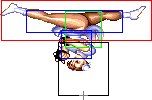
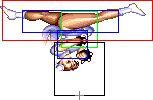
- Short Version:
| Damage | 14[1] / 12[1] |  |
 |
 |
 |
 |
 |
 |
|
| Stun | 7~13 | ||||||||
| Stun Timer | 90 | ||||||||
| Frame Count | 4 | 3 | 2 | 2 | 1 | 1 | 1 | 1 | |
| Simplified | 15 | ||||||||
 |
 |
 |
 |
 |
 |
 |

| |
| Frame Count | 2 | 1 | 2 | 2 | 3 | 4 | 4 | 2 |
| Simplified | 20 | |||||||
- Forward Version:
| Damage | 16[1] / 14[1] |  |
 |
 |
 |
 |
 |
 |

|
| Stun | 7~13 | ||||||||
| Stun Timer | 90 | ||||||||
| Frame Count | 4 | 4 | 3 | 3 | 2 | 2 | 1 | 1 | |
| Simplified | 4 | 16 | |||||||
 |
 |
 |
 |
 |
 |
 |

| |
| Frame Count | 1 | 1 | 1 | 1 | 1 | 1 | 1 | 1 |
| Simplified | 1 | 7 | ||||||
 |
 |
 |
 |
 |
 |
 |

| |
| Frame Count | 2 | 1 | 1 | 2 | 2 | 3 | 3 | 4 |
| Simplified | 2 | 16 | ||||||

| |
| Frame Count | 2 |
- Roundhouse Version:
| Damage | 18[1] / 16[1] |  |
 |
 |
 |
 |
 |
 |

|
| Stun | 7~13 | ||||||||
| Stun Timer | 90 | ||||||||
| Frame Count | 5 | 4 | 4 | 3 | 3 | 2 | 2 | 2 | |
| Simplified | 25 | ||||||||
 |
 |
 |
 |
 |
 |
 |

| |
| Frame Count | 1 | 1 | 1 | 1 | 1 | 1 | 1 | 1 |
| Simplified | 8 | |||||||
 |
 |
 |
 |
 |
 |
 |

| |
| Frame Count | 1 | 1 | 1 | 1 | 1 | 1 | 1 | 1 |
| Simplified | 8 | |||||||
 |
 |
 |
 |
 |
 |
 |

| |
| Frame Count | 1 | 1 | 1 | 1 | 1 | 2 | 1 | 1 |
| Simplified | 9 | |||||||
 |
 |
 |
 |
 |

| |
| Frame Count | 2 | 2 | 3 | 3 | 3 | 3 |
| Simplified | 16 | |||||
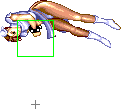
NOTE: This move has some oddities... First of all: in the active part, you see that little red dot near the center of the pushbox? At fist i thought it was just an imperfection in the sprites but that is actually a 1x1 sized active hitbox. So, in that cyclic(Active) part, the move is active all the time. The only exception is the Forward version, which has some gaps, all in the same animation frame(first one in the tables), so in that case i separated the cells in the Simplified Frame count. There is some oddities as well in the recovery part, like for the Short version it has a different pushbox in the second animation frame, and the Rh version having an extra animation frame before the landing frame. My guess is that this move was probably implemented in the game by a capcom Trainee or the programmer was lazy that day, lol. This move can be used as an anti-tick throw special since most of the startup is invulnerable. You're probably better off using upkicks or super instead due to this move's unpredictable nature.
- Recovery:
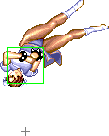
- Short Version:
 |
 |
 |
 |
 |
 |

| |
| Frame Count | 2 | 3 | 2 | 2 | 3 | 3 | 6 |
| Simplified | 21 | ||||||
- Forward Version:
 |
 |
 |
 |
 |
 |

| |
| Frame Count | 2 | 3 | 2 | 2 | 3 | 3 | 6 |
| Simplified | 21 | ||||||
- Roundhouse Version:
 |
 |
 |
 |
 |
 |

| ||
| Frame Count | 2 | 3 | 2 | 2 | 3 | 3 | 4 | 6 |
| Simplified | 25 | |||||||
The damage is different depending on which way Chun Li is facing. The higher damage values are related to the attack boxes when she is facing backwards during the spinning part.
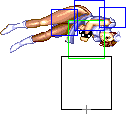
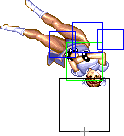
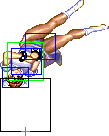
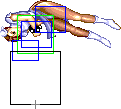
- Aerial Spinning Bird Kick: (Charge ←, →, K in air)
Detailed Input: (Charge ←/↙/↖ for at least 60f, [7~14f] → [10/9/7f] Short/Forward/Roundhouse. It is needed to wait at least 1 frame after leaving the charge direction to enter with the K button)
| Super Meter | 8 |  |
 |
 |
 |

|
| Frame Count | 2 | 4 | 3 | 2 | 4 | |
| Simplified | 15 | |||||
 |
 |
 |
 |

| |
| Frame Count | 3 | 2 | 3 | 3 | ∞ |
| Simplified | ∞ | ||||
NOTE: Just like the ground version of the move, it has some active frames with a 1x1 sized hitbox.
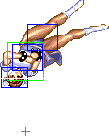
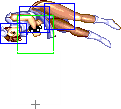
- Landing, partial: (When Chun lands before the last hitting frame)
 |
 |
 |
 |
 |
 |
 |

| |
| Frame Count | 3 | 3 | 2 | 2 | 3 | 3 | 4 | 5 |
| Simplified | 25 | |||||||
- Landing, complete: (When Chun lands after the last hitting frame)
 |
 |

| |
| Frame Count | 2 | 5 | 3 |
| Simplified | 10 | ||
Pretty much only used for building meter, or to avoid specific attacks. Unlike in hyper fighting/turbo, you can't do this after a headstomp.
Super Move
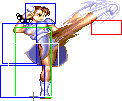
- Senretsu Kyaku: (Charge ←, → ← → K)
Detailed Input: (Charge ←/↙/↖ for at least 61f, [7~14f] →/↘/↗ [7~14f] ←/↙/↖ [7~14f] →/↘/↗ [11f] K)
NOTE: That above is the fixed motion from HSF2. In ST, there is a bug in the input of this move which allows you to keep it stored as much as you want if you keep holding ↗, → or ↘. You have a window of 12 frames to go to any other direction and then go back to ↗, → or ↘ and still keep it stored. In HSF2 this was fixed, but it has a "hidden" version of Chun-Li which still has this bug. To select it, hold start while choosing the character version, if done right you'll hear a different sound.
- Invincible part:
| Damage | 16[0] * 6 |  |
 |
 |
 |
 |

|
| Stun | 0~4 * 6 | ||||||
| Stun Timer | 20 * 6 | ||||||
| Frame Advantage | +9 | ||||||
| Frame Count | 1 + [18] + 1 | 2 | 2 | 2 | 2 | 4 | |
| Simplified | 10 | 4 | |||||
- Non-invincible part:
 |
 |
 |
 |
 |

| |
| Frame Count | 1 | 2 | 2 | 2 | 2 | 6 |
| Simplified | 9 | 6 | ||||
 |
 |
 |
 |
 |

| |
| Frame Count | 3 | 3 | 1 | 1 | 1 | 1 |
| Simplified | 6 | 1 | 1 | 1 | 1 | |
 |
 |
 |
 |
 |

| |
| Frame Count | 1 | 1 | 1 | 1 | 6 | 7 |
| Simplified | 1 | 1 | 1 | 14 | ||
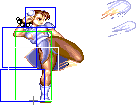
Considered one of the best, if not the best supers in the game due to a bug that gives the ability to "store" it and the damage that it deals. In most cases, upkicks following a landed super will yield an additional two hits. If you only get a few hits of the super (due to an early anti-air for example) near the corner, you can still attempt upkicks for one or two tacked on hits.
Misc Animations
Jump Animations
- Neutral Jump:
 |
 |
 |
 |
 |
 |
 |
 |
 |
 |

| |
| Frame Count | 2 | 1 | 12 | 5 | 4 | 8 | 4 | 5 | 7 | 1 | 7* |
| Simplified | 2 | 1 | 45 | 1 | 7* | ||||||
- Back Jump:
 |
 |
 |
 |
 |
 |
 |
 |
 |
 |
 |
 |

| |
| Frame Count | 2 | 1 | 10 | 6 | 5 | 4 | 3 | 4 | 5 | 6 | 3 | 1 | 7* |
| Simplified | 2 | 1 | 46 | 1 | 7* | ||||||||
- Forward Jump:
 |
 |
 |
 |
 |
 |
 |
 |
 |
 |
 |
 |

| |
| Frame Count | 2 | 1 | 10 | 6 | 5 | 4 | 3 | 4 | 5 | 6 | 1+ | 1 | 7* |
| Simplified | 2 | 1 | 44+ | 1 | 7* | ||||||||
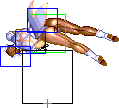
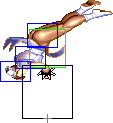
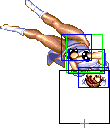
Chun has a considerably fast prejump. In contrast to it, she has a huge arc on her jump which does make her a little easier to react. This is specially true against characters with DP moves: Ryu for instance can punish her with his DP most of the time.
Chun, just like Claw, has the abillity to do wall jumps. Thats why the Forward Jump has a '+' on the final frame of the aerial jumping part: that animation will have longer duration in case it's a wall jump.
The landing recovery has a special property which allows it to be canceled into certain actions. At the first landing frame, you can perform throws (including command throws), and on the second landing frame, you can start another jump, attack with a normal or special move, or block. Blocking not being until the second landing frame, as well as hitbox-hurtbox interactions having priority over throwbox-throw hurtbox is why sweeps work as anti airs in this game.
Things are different when jumping over your opponent, however. In that situation it's possible to walk back/forward, to jump again or to even block on the first landing frame! Strangely, if a throw is timed on the first landing frame of a jump that crosses over, a throwbox will never come out, even though that input will result in a normal coming out 2 frames later (like it normally would). Anyway, being able to block on the first landing frame can help a little bit on some safe jump crossup setups, or maybe in other situations as well if your character has a huge jump arc.
- Wall Jump: (In air near corner/wall, any direction away from the corner/wall)

| |
| Frame Count | 6 |
It should be noted, that like Claw, Chun has a command wall jump, you can actually do this during an air normals startup, active, or recovery frames. And you can do another normal after jumping off the wall. Likewise, you can air throw, then jump off the wall, and attack or air throw again. If you're quick enough, the wall jump itself can actually be cancelled into an air sbk, it retains the directional momentum of your original jump arc, say you jump backwards, and cancel the walljump to air sbk, you will still travel backwards.
This is useful for getting out of the corner, or to avoid attacks from the opponent. You can bounce off someone with a headstomp, and then jump off the wall if you're able to reach it.
The Basics
Anti-air
Chun does not have any one move (like a Shoryuken) that can be used as a general anti-air. She must use specific moves depending on what the opponent uses. Her useful anti-air moves are:
-jump straight up Short
-jump straight up Fierce
-jump straight up RH
-far or close st.Forward
-far st.Fierce
-far st.RH
-cr.Forward (make the opponent land on it)
Her absolute best anti-air is her super, which can be done so that the opponent is grounded and takes all 6 hits, followed by upkicks for massive damage. The timing differs depending on the speed of the opponent's jump. It is very difficult to do against Blanka and Claw, but it is easier on everyone else, especially against Ryu and Ken if they do air hurricane kick (because air hurricane kick has a lot of landing recovery).
For anti-air against a specific move or character, see the character breakdowns below.
--NKI 20:04, 8 May 2006 (CDT)
Matchup specific anti-airs
Vs Ryu
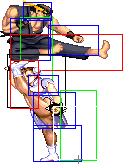
Ryu's most annoying aerial attack is his Diagonal Jumping Rh, because it has both good horizontal and vertical priority on top of a very good range.
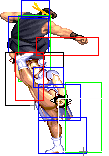
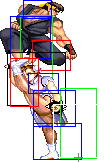
- Close Standing Forward:
 |
 |
|
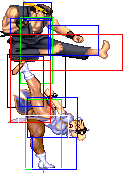
Her Close Standing Forward beat his Diagonal Jumping Rh clean, however there is two caveat to this. First one is obvious, you have to be close enough to get this version of Forward kick, sometime easier said than done. Second is, if Ryu jumped from close, instead of Rh he can do an air tatsu a little after his apex, not only evading your attack completely but hitting you in the back and knocking you down. For this move to be safe you have to use it only when Ryu is barely close enough to trigger your Close Standing Forward, any closer and I suggest to use another move instead: Close Standing Rh.
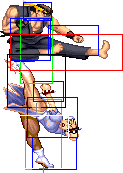
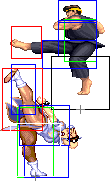
- Close Standing Rh:
 → →  |
 → →  |
|
A very useful move, it will annihilate any air tatsu that come close enough above you. It also trade with all his aerial attacks if timed right. Be careful of his Diagonal Jumping Short, its priority is surprinsgly good, you have to do it late enough so it don't beat your move clean.
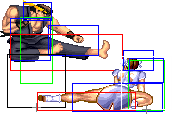
- Crouching Forward:
 → → 
|
If Ryu jump far enough to not reach your crouched stance with his longest range attack, your Crouching Forward will hit him on his landing frame. This move may have less range than Guile's, but yours come out faster, combined with your superior walk speed you can sometime walk forward a bit just to get in range while Ryu is still in the air.
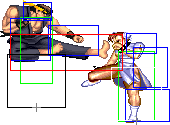
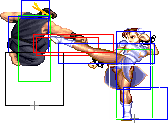
- Far Standing Forward:
 → → 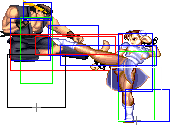 |
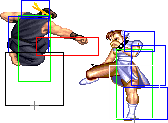 → → 
|
This is a trade anti air, use it only when Ryu jump from too far to reach your standing stance. Be sure to do it late enough so it don't get stuffed by his aerial attack.
- Far Standing Rh:
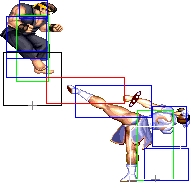 |
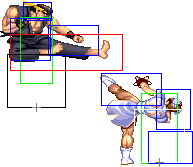 → → 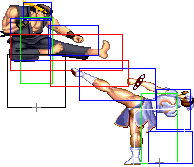 |
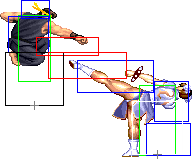
|
This move has to be used when Ryu jump from too close for both of your Crouching Forward and Far Standing Forward to have a chance to trade, but not close enough for your Close Stading Forward to activate. Ryu's butt is very exposed during his startup so chances are you going to hit that, if not it will hit as a trade if not done too early.
- Far Stading Jab:
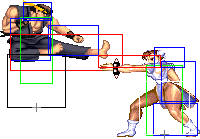
|
For when Ryu jump from far but too close to use Crouching Forward, your Far Stading Jab has a better horizontal priority than his Diagonal Jumping Rh so it will beat that clean. Useful in situations you really want a clean anti air, and not a trade. However if he jump with say Ferce instead, you are both going to whiff each other and he will land safely very close to you. So only use it when you are 100% sure he is going to jump with Rh.
- Cross down Close Standing Jab:
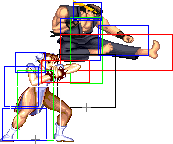
|
If Ryu jump from close enough to cross you up you can walk under him to evade his attack completely, then your Close Standing Jab hit him clean in the back on his way down. Note that this move do insane damage for such a fast attack.
- Note about Tenshou Kyaku:
This is chun's dedicated anti air so you may be tempted to use it, especially if you mastered the kara tensho technique. However Ryu can easily evade it if he go for an air tatsu instead of a regular attack, and do a nasty punish on you (3 hits of jump mp + 2 hits of Shinkuu if he got meter). It is a lot harder for him to avoid your tensho that way when you are cornered, making it more viable in this scenario.
There is a second way to use the tensho, the haya oki tensho (early rising tensho). It involve the use of her Rh tensho in Ryu's very early state of his jump, so the second active part meet him in the air before he do any attack. I'm not familiar enough with this to comment it any further, but I know top Japanese Chuns are.
- Note about Super:
It can be done so, if timed right, Ryu take all 6 hits grounded. Great! In theory... because it has to be done so early, Ryu can still evade the super if he went for a late air tatsu instead of a regular jump attack. And making you waste that super is every Ryu's wet dream.
Vs O.Ryu
Old Ryu is infamous for his Diagonal Jumping Rh, its horizontal priority is virtually infinite. It is an issue for a lot of characters, but not for Chun. This is because its vertical priority is actually abysmal, unlike Ryu his butt stay exposed the whole duration of the move. A weakness Chun can fully exploit from the ground. However because of this move he will dominate any aerial encounter with great ease.
- Far Standing Rh:
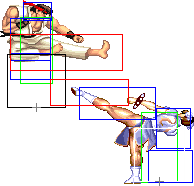 |
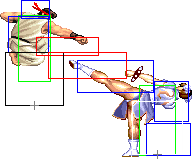 |
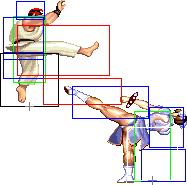
|
This move dominate all his aerial options, period. Be sure to be close enough to reach his butt. If he is too far you can use Far Standing Fierce or Crouching Rh instead for better reach.
- Far Standing Fierce:
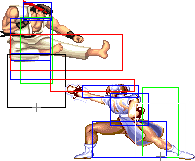 |
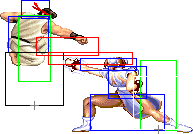 |
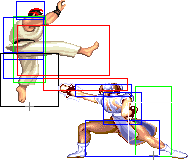
|
It is useful for its additional reach over Far Standing Rh. It also comes out faster for situations where Far Standing Rh would be too slow. O.Ryu can evade this move with a late air tatsu, he will land behind you and throw you for free. Not exactly a big deal as long as the throw don't kill you. It will often trade with his Diagonal Jumping Fierce and his Neutral Jumping Rh.
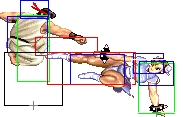
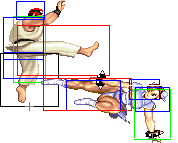
- Crouching Rh:
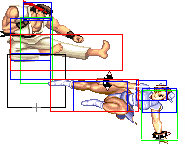 |
 |
|
Grants you an even greater range over Far Standing Fierce. O.Ryu can evade this with a late air tatsu as well. It will often trade with his Diagonal Jumping Fierce and his Neutral Jumping Rh.
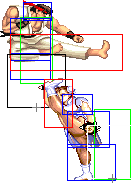
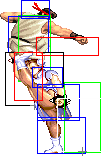
- Close Standing Forward:
 |
|
Her Close Standing Forward beat all his jump attacks clean, however there is two caveat to this. First one is obvious, you have to be close enough to get this version of Forward kick, sometime easier said than done. Second is, if Ryu jumped from close, instead of a normal attack he can do an air tatsu a little after his apex, not only evading your attack completely but hitting you in the back and knocking you down. For this move to be safe you have to use it only when Ryu is barely close enough to trigger your Close Standing Forward, any closer and i suggest to use another move instead: Close Standing Rh.
- Close Standing Rh:
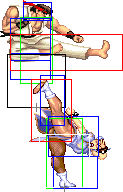 |
 → → 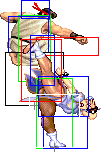 |
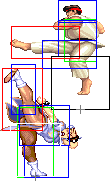
|
Unlike N.Ryu it can stuff his Diagonal Jump Rh clean, but I suggest to aim for a trade regardless, in case a Diagonal Jumping Fierce comes out instead.
- Far Standing Forward:
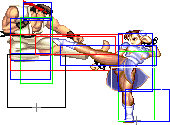
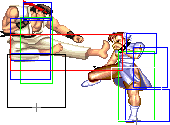 → → 
|
Despite O.Ryu Diagonal Jumping Rh gigantic horizontal priority, you can still exploit the transition of your Far Standing Forward from startup to active part to trade with his attack. Use it only when Ryu jump from too far to reach your standing stance. Be sure to do it late enough so it don't get stuffed by his aerial attack.
- Crouching Forward:
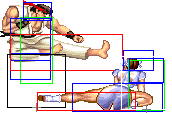 → → 
|
You have so many options against O.Ryu it is easy to forget about this one, but it is a great anti air as long as Ryu jump from too far to reach your crouched stance. This move may have less range than Guile's, but yours come out faster, combined with your superior walk speed you can sometime walk forward a bit just to get in range while Ryu is still in the air.
- Note about Tenshou Kyaku:
This is chun's dedicated anti air so you may be tempted to use it, especially if you mastered the kara tensho technique. However Ryu can easily evade it if he go for an air tatsu instead of a regular attack. It is a lot harder for him to avoid your tensho that way when you are cornered, making it more viable in this scenario.
There is a second way to use the tensho, the haya oki tensho (early rising tensho.) It involve the use of her Rh tensho in Ryu's very early state of his jump, so the second active part meet him in the air before he do any attack. I'm not familiar enough with this to comment it any further, but I know top Japanese Chuns are.
- Note about Super:
It can be done so, if timed right, Ryu take all 6 hits grounded. Great! In theory... because it has to be done so early, Ryu can still evade the super if he went for a late air tatsu instead of a regular jump attack. And making you waste that super is every Ryu's wet dream.
--Zagi
Ground Pokes/Footsies
Pokes
Chun's best poke is st.Strong. It can lock down characters with no good reversal, it has excellent range, and it beats a lot of moves cleanly. Very effective to rush down with st.Strongs mixed with throws.
st.Forward is also very effective to use against Shotos, done such that you are just outside of their cr.RH range. If they try to fireball, they will get hit cleanly.
Footsies
Her cr.Forward has good priority, and it's so fast it's practically unpunishable. She can also use her cr.RH to get the knock down, but cr.RH has a considerable amount of lag and should be used with caution.
--NKI 11:29, 9 May 2006 (CDT)
Super Move Usage
Stored Super
Chun is one of only two characters who can store her super. That is, you can input the [charge back, towards, back, towards] part of the command, then hold towards. The command will remain stored until you hit kick, at which point the super will come out. This is a technique that must be mastered to use Chun effectively.
Notes:
- It is still possible to keep your charge, even if you switch sides. You just need to switch which direction you're holding at the exact right time. This works whether you are the one doing the cross-up or you are the one being crossed-up.
- You can store the super motion even without meter. You can input b, f, b, f (hold), fill the remaining meter (with a fireball, lightning kicks, pokes, etc.) and then press a kick button to do the super.
- If you throw the opponent or get thrown (even if you stay on the same side), you will lose your charge. It is possible to keep your charge while throwing the opponent, but it is tricky. While holding towards with the super charged, hit Strong or Fierce to throw the opponent. Then you must quickly tap back, then return to towards and you will still have the super stored. If you simply held towards the whole time, you would lose your charge.
Using the Super Against Fireballs
Going through fireballs with Chun's super is entirely possible, but it is much harder than going through fireballs with Boxer's super, or Dic's super. The reason is because she has a very short window of invincibility, and after her invincibility her entire hit-box (where she is vulnerable) is behind her. That means that you have to activate the super JUST before the fireball hits you. Any earlier and you will not make it cleanly through.
Against fireball characters, if you have meter, whenever you do a fireball you should always double motion the super on top of it. In other words, you should do her fireball as [charge back, towards+punch, back, hold towards]. If the opponent jumps over your fireball, you can super them for free. If the opponent also threw a fireball to cancel out yours, you can super them for free. Else, walk up until you are just out of range of their longest normal and hold down towards. If they try any moves or try to jump, super. If they try to get fresh and walk towards you, st.Strong (while still holding towards and maintaining your charge).
--NKI 12:04, 9 May 2006 (CDT)
Advanced Strategy
Reversals
Upkicks - All three versions have invincibility at the beginning, but Short has the most. However, the Roundhouse version has the least start-up, just two frames. Use it if you want to prevent safe jumps that land right on top of you.
Spinning Bird Kick - Has more invincibility than upkicks, but it takes a long time to hit, so it's really more useful as a way to avoid the opponent's move, rather than to counter it.
Super - The only thing to watch out for is the opponent baiting your reversal super and jumping over it.
Avoiding Fireballs
Because she has to charge for her fireball, Chun has a problem against non-charge fireball characters. If you don't have time to charge, you have several options to try to avoid the fireballs:
Jump straight up head stomp - When Chun is doing her headstomp, her hitbox becomes thinner, so it's easier for her to jump over slow fireballs. The only downside to this is that you lose valuable charge time, because you need to do the headstomp on your way down, and the joystick needs to be straight down (down/back won't work).
D/F+RH - If you want to get over a fireball and gain a little bit of ground, you can use D/F+RH, but don't use it when you are too close, because it is easily punishable. Be sure to immediately start charge back after you hit RH so that you will have your charge when you land.
Spinning Bird Kick - Because it is invincible in the beginning, you can use SBK to go through fireballs, but it is very punishable and not recommended unless you are about to die from block damage.
Jump back air spinning bird kick - This should only be done in the corner, when your opponent is far enough away that they can not punish. (Air SBK has a lot of recovery when she lands.)
Jump straight up air spinning bird kick - This will give you slightly more meter than doing a fireball, but it is considerably harder, so it is not generally recommended.
Overhead Stomp
To do Chun's instant head stomp, jump at the opponent and immediately hit down+Forward kick. Because it's a jumping attack, it must be blocked high. It's too fast to see the stomp and react to it, so the opponent must guess. You are vulnerable as you're bouncing away, but keep in mind that you can do a move (say, j.Forward) on your way down. The overhead is especially good to use against people who like to reversal Dragon Punch, because her headstomp will beat DP clean.
Corner Awareness
Unfortunately for Chun, if she throws the opponent from point blank range into the corner and the opponent techs, the opponent recovers and lands so fast that Chun gets thrown for free. This is especially bad against Gief and Hawk, because they also get a free super on her.
Unless it will kill (or your opponent is O.Sagat), be sure to throw the opponent OUT of the corner. Also be aware that if you are in the corner charging back, then you go for a throw, you will end up getting a fireball, which might cost you. So be very careful when you're in the corner.
D/F+Roundhouse Shenanigans
Chun's D/F+RH is one of the craziest normals in the game. When done meaty enough, it will hit as a low move (must be duck-blocked), and it can be done as a completely safe meaty against several characters. If the opponent doesn't try to reverse, they will be forced to block it, but if they do reverse properly, they will still lose:
-Guile's Flash Kick will completely whiff (backwards)
-Ryu's DP will be blocked (backwards)
-Zangief's lariat will lose cleanly
-Deejay's upkicks will completely whiff (backwards)
As the opponent is getting up, she can whiff D/F+RH to get to the opposite side of any character, but if she immediately follows it up with a normal, it will be backwards (and will whiff), so it's not very useful.
The move will hit as a cross-up if done as a meaty from point blank range against certain characters. (Keep in mind that if done meaty enough, it is a low hit as well, so the opponent must block with down/towards.)
Which characters can Chun cross up?
Ryu: yes
Ken: yes
Honda: no
Chun: no
Blanka: no
Zangief: no
Guile: yes (see note)
Sim: no
Hawk: yes
Cammy: yes
Fei: yes
DeeJay: yes
Boxer: yes
Claw: no
Sagat: no
Dictator: no
Note: Chun can only cross-up Guile with her D/F+RH in very specific situations where Guile does not have a significant amount of pushback. She can not cross him up after an anti-air jump straight up+RH because Guile is falling away too fast, but she can do it after an air throw, or if a D/F+RH hits and pushes Guile towards Chun, etc.
--NKI 15:39, 20 June 2006 (CDT)
Also, for ALL opponents, immediately after a knockdown, the opponent flies away from you. You are able to jump over them and use a meaty d/f+rh and because of the direction they are travelling, you gain the extra few pixels needed to cross someone up if you jump over them and meaty in the direction they are travelling (if they are a character that normally cannot be crossed up). Unessential 14:34, 2 November 2013 (UTC)
Combos
Basic Combos
crouch Forward xx Kikoken
low start 2-in-1 poking combo
Jumping Forward, Forward Lightning Kicks
Basic one button spamming jumping combo ideal for comboing Lightning Kicks
Intermediate Combos
jumping Fierce , crouch Short xx Roundhouse Tenshou Kyaku
best jumping combo
Dizzy Combo
j.RH, st.Strong, st.Fierce
BnB for Stanting opponents
j.RH, st.Fierce xx Kikoken
Kikoken combo that will also frequently dizzy. If you have the opportunity to do a meaty, go for cr.Forward, cr.Fierce. That also will dizzy the majority of the time.
Advanced Combos
Jump Fierce, close Fierce XX Forward Lightning Kick
Most damaging BnB combo with Lightning Kicks
Jump fierce, close jab x1-2, standing short XX Thousand Burst Kick SC, Roundhouse Tenshokyaku
Most powerful combo after charge Super Bar
Standard Combos
I feel that if you don't have meter, the best combo to do is j.RH, st.Strong, cr.RH. The reason I like that combo the best is because it knocks down, you are charged, you can throw a meaty fireball, and you retain control of the round. If you do something else, like [j.RH, st.Fierce xx Fireball], you are left in an awkward position where both you and your opponent are at
If you have a full meter (or nearly a full meter) and you are charged, go for j.RH, st.Fierce xx super. With the super stored, it's really not all that hard to pull off: charge back, towards, back, towards, then jump towards, hit RH as late as possible, then st.Fierce~any kick button.
--NKI 15:39, 20 June 2006 (CDT)
Match-ups
Matchups classified with this diagram in mind. For the old characters I guessed the positions.
--Born2SPD
Serious Advantage Match-ups
Vs. Blanka:
- 7 - 3
Advantage/Disadvantage
Chun wins this match approximately 6/4. Her strength is in her turtling ability, but Blanka's jump is so quick and his normals are so good, it's pretty hard to keep him out the entire round.
Blanka's Game Plan
Blanka wants to get in and bite you, and he also doesn't mind trading with you on his way in, because he does more damage in general. Once he gets in, he can start some shenanigans with j.Short, and because Chun has to charge for her upkicks, it's hard for her to get out.
Chun has no way to get out of his ticks if they start with a cross-up j.Short, because her only reversals are charge moves: she's lost her horizontal charge because Blanka crossed her up, and she's lost her vertical charge because she had to stand up to block the j.Short.
If Chun duck-blocks a Blanka Ball (or if she gets hit by it while ducking), the only thing she can punish with is the super. However, if she is standing when she gets hit or blocks, she can retaliate with a walk-up st.Strong. (The Blanka Ball is usually not used much though, because Chun will be throwing a lot of fireballs.)
Chun's Game Plan
Chun wants to keep Blanka out with well-placed fireballs and cr.Forwards. You can't be sloppy or over-anxious with the fireballs, because Blanka can easily jump over your fireballs on reaction. With his quick jump and high-priority jumping attacks, you can only do a fireball when you are sure he will not jump (for example, when you know he will do a normal move). He will try to slide at you because it has good range and moves him forward. This is a good time to do a fireball, but make sure it's done early enough to hit him cleanly out of the slide.
While Chun has good normals, Blanka also has good normals, and better throw range. Chun can essentially create a wall with fireballs and jump straight up Short, and it can be hard for Blanka to get in. However, unlike most of her other matches, being in the corner actually helps Chun against Blanka, because then he can't cross her up there.
If you knock down Blanka, you should never go for a meaty (other than meaty fireball). Blanka's balls (both horizontal and vertical) hit on the first frame, so you can not do safe meaties against him. For the same reason, you also can not do safe jumps against him. If you try that, at best you will trade, meaning you will get knocked down, but Blanka won't be knocked down, and that puts you in a very bad position. Just do a meaty fireball when he's down. He has no choice but to block it.
Lightning legs will beat all of Blanka's ground attacks cleanly, but you must be very careful using it because Blanka's jump is so quick. Make sure you always charge D/B while doing lightning legs so that you can anti-air him if he jumps too late.
Anti-Air
If you're charged, you can use Short upkicks, but without a charge, Chun has a hard time against Blanka's jumping attacks. I would not recommend trying any of her standing normals, because at the very best they will trade, but he won't be knocked down. Jump straight up Short is quite good, and jump straight up RH is also good, but because his jump is so fast, you need to have equally fast reactions.
I prefer to simply make Blanka land on a fireball. You may trade with him, but at least you completely kill any momentum he may have been building. You can then follow up with a meaty fireball, followed by another fireball, and he really can't do anything about it. In this match, it's worth it to sacrifice damage for position advantage.
Of course the super is always the best option, but because Blanka's jump is so fast, it can be difficult to time. You must do the super VERY early--do it just past the peek of his jump, when he is starting to come down.
Added: Unessential 14:34, 2 November 2013 (UTC) There is one more option you can walk forward into blanka's jump. and sweep him as he lands. this has to be done almost directly below a blanka. I have read the information above, but what improved my matchup against Blanka drastically was discovering this anti air. I may trade, but it is a good alternative if you are not at the right angle for the other antiairs, and you don't have a charge. (ie, you've already blocked a jumping attack in the corner, and you don't have a charge.
Anti-Ball
Typically Blanka doesn't use the ball all that often in this match, but just in case it comes up...
A well-timed st.Strong will beat his horizontal ball, but it is better to do a fireball if you are charged. Getting the knock down is important, because you want to control the round.
If you are charged, you get a free super on Blanka whether you block or get hit by the ball. You won't get all 6 hits of the super, but it's still free damage.
Misc. Notes
-You always want to be charged so that you can anti-air him with something that knocks down.
-If you block Blanka's super, you get a free super on him (or a cr.RH, if you don't have meter).
-If he tries to hop at you, do [cr.Forward, cr.RH] for a two hit combo, then follow up with a meaty fireball, walk back a few steps, then throw another.
--NKI 11:31, 18 May 2006 (CDT)
Vs. E. Honda:
- 7.5 - 2.5
Advantage/Disadvantage
Honda's Game Plan Get in. do stuff. win.
Chun's Game Plan Keep honda out by throwing lots of fireballs. Watch out for when honda gets into buttslam range though. Once you see that happens simply jump back. If you're in the corner, push him forward and inch forward. or walljump. Heck, you can even stay in the corner and still fight this pretty damn well.
The start of this match just outside honda's buttslam range. Many new players don't realize this and will try an opening buttslam. That's why often neutral jump at the beginning. I can usually time it to beat an opening headbutt (unless the honda has the timing down) and I can throw the buttslam.
If you get your Lightning legs out first, they will beat out honda's HHS. If you do get into bad luck with honda getting in on you, it's just a guessing game to get out. If you're in the corner, hope he doesn't start an ochio loop. It's a guessing game between poking and footsies, and if honda's going to jump at you.
Keep in mind, if you predict a buttslam, you can neutral jump throw, just like at the beginning of the match.
There is much honda can do once he gets in, and everything needs a different answer. The goal is to keep him out, just like any other grappler. You can randomly jumpforward fierce at honda and it will beat mostly everything he has. But make sure you always blockstring to a safe distance. If you get a knockdown, same thing. or just keep your distance with a meaty fireball.
Anti-Air
Misc. Notes
Vs. M. Bison (dictator):
- 7 - 3
Advantage/Disadvantage
This matchup is chun advantage. However you're going to need knowledge about spacing and timing which you really only get with practice.
Once either character gains frame advantage, they are going to try their damndest to keep it and win the match. Dictator can go for a TOD combo while chun does not have one. The reason why this is chun's advantage though is because chun has many more options to get dictator to make that first block and keep frame advantage.
Watch out for dictator's throw, after you reversal, a good dictator can time a meaty SWEEP and CROSS UNDER. this is dictator's version of chun li's df/RH bullshit. Except he can't repeat it.
Unessential 14:34, 2 November 2013 (UTC)
Anti-Air st rh, st short, jumping neutral short, jumping neutral strong.
come to think of it almost jumping neutral anything.
Unessential 14:34, 2 November 2013 (UTC)
Misc. Notes
Vs. Zangief:
- 7.5 - 2.5
Advantage/Disadvantage
Chun wins this fight approximately 7/3. She can effectively keep Zangief out the entire round with fireballs. If Gief manages to get in once, Chun usually takes at least one SPD, but it is very difficult for Gief to close the gap in the first place.
Zangief's Game Plan
Gief has one objective in this match: to get in. If he can close the gap and start tick throwing, it's pretty hard for Chun to get him off her. Unfortunately for Gief, he doesn't really have an effective way to get in. He has to use really unreliable tactics like predicting a fireball and jumping over it, or psychic Green Hand to nullify a fireball. Of course he can try to lariat through fireballs, but that doesn't really get him anywhere. Unless the Chun player screws up somewhere, it's very difficult for Gief to do anything effective.
Chun's Game Plan
Chun's only objective is to keep Gief out. He is spending the whole round trying to get in for those grabs, so you don't want to do his job for him by closing the gap. It's extremely hard for him to get around Chun's fireballs and normals, so just stick to those. You should never jump at Gief. If you knock him down, do not go for the cross-up. Just do a meaty fireball. Worst case scenario is that he reversal lariats through it, but at least you still maintain the position advantage.
It's not exciting, but the way to win this match is to hold down/back and do cr.Forward a lot. When he's safely out of range, throwcenter a Jab fireball, and when he jumps, anti-air him. Make him block a fireball as he gets up, and repeat.
After knocking him down, you have the option of doing meaty D/F+RH, cr.Forward xx lightning legs. The advantage to this is that the D/F+RH is safe (even if he does reversal lariat, it will lose cleanly) and lightning legs do more block damage than a single fireball. The disadvantage is that if you mess up, you have lost your position advantage, and he is now right next to you. It's your choice if you want to go for it or not. It is safe if done correctly, but I tend to just do a meaty fireball instead.
Once you get meter, you can two-in-one motion the super over your fireball, walk up behind your fireball with the super stored, and wait to see what Gief does. If he tries to lariat through it or jump over it, super him. If he blocks it, walk back and repeat.
If you mess up somewhere along the line and he manages to get in on you, it can be hard to get him off you. Really your only option for reversing his ticks is upkicks, but you must be VERY careful with this move. If Gief knows it's coming and lets you whiff it, he can do the stomach crunch (jump straight up up+Fierce) for the instant dizzy (Japanese version only).
Also don't forget that if he is too close to you on a tick attempt (if he's within your throw range), you can reversal throw him for free. But make sure not to throw him into the corner though, because if he techs it he gets a free 360 (or even worse, 720)
Anti-Air
Her best anti-air is making him land on a fireball. If he's closer than 1/2 screen, you will most likely trade hits and you may even lose the damage trade by a little bit, but you get the extreme position advantage. He is knocked down, so you can take a step back to regain your distance, then throw a meaty Jab fireball for him to block as he gets up.
If you're really good at using the upkicks, you can use those as well, but when I play this match, I find it difficult to consistently use the upkicks as anti-air, and all Gief needs is for you to screw up once. I prefer to use fireballs because they are much more fail-safe.
If you don't have a charge, you can also use jump straight up RH or jump straight up Short.
Misc. Notes
-It is not safe to do a super against Gief. On reaction to your super, he can do kick lariat to beat it cleanly.
-If you're going to throw Gief, do not throw him into the corner. Always throw him away from the corner, because if he techs into the corner, you get thrown for free.
--NKI 13:13, 12 May 2006 (CDT)
- You CAN however react to a punch lariat with super. This is especially effective as a pocket tool against a gief After a fireball, you can bait a kick lariat and sweep, or if you notice the gief doesn't know to use a kick lariat to go through a fireball when you have super, you can wait till the fireball Overlaps gief, and start your super, your super will knock gief out of the lariat, the fireball will then hit gief (since he's no longer invincible) and then you can still combo upkicks after. This is not an instant kill, but by the time you have a super you most likely have gotten a few pokes on zangief, so you can think of it as one. --Unessential
Advantage Match-ups
Vs. Cammy:
- 6 - 4 (6.5-3.5 According to recent almagamation)Unessential 14:34, 2 November 2013 (UTC)
Advantage/Disadvantage Definitely chun li advantage here
Cammy's Game Plan Hope and pray that chun li doesn't know the matchup, and jump in over a fireball. Maybe a lightning legs if the chun is being predictable. If the chun isn't throwing Lightning legs, (but also not throwing fireballs) Cammy can get in with safe cannon drills too. but LL and good poking will stop that.
Chun's Game Plan Lightning Legs and jumping neutral short beats out pretty much anything cammy has. If not, try other jumping neutral normals. Cammy's hooligan should NEVER be landed on you if you watch out for it. If you're feeling confident you can use her regular pokes too and you'll out poke her without needing her to make the first move.
If you choose the lightning legs route (which I do since I tend to get lazy) always do lightning legs in short bursts. and don't get into a rhythm. Cammy can J. strong and get in. but honestly, jump a couple of times, (out of her cannon spike range) LL jump once, LL walk back Jump a random more amound of times LL. and you'll be ok.
If you ever do a LL for too long, cammy WILL be able to jump in, the same way she can jump over a fireball.
NEVER throw a fireball against cammy. That's the ONLY way Cammy can get in. I play both cammy and chun. and when I get cammy vs chun. Almost every chun I play I see them throw a fireball. Honestly, that's the only way cammy can get in. I tell people, or i swap places, and then they finally get the point. Don't throw a fireball, just keep cammy out, and play it lame. This match is free. (I personally disagree with 6-4, I think the advantage is closer to 7-3 but I'm not going to replace top player opinions on the top of this section with my own.).
What I am doing though is supplement the 6-4 with more recent information which is 6.5-3.5
Unessential 14:34, 2 November 2013 (UTC)
Anti-Air
Misc. Notes
Vs. Dee Jay:
- 6.5 - 3.5
Overview
Anti-Air
Misc. Notes
Vs. Dee Jay
Advantage/Disadvantage
This is a fairly even match where neither character has a clear advantage over the other. Chun has good rush down and a superior super, but DeeJay has superior turtling due to his excellent normals, and his fireball goes full screen.
DeeJay's Game Plan
DeeJay wants to turtle heavily in this match, using his excellent normals to nullify Chun's rush down attempts. cr.Forward is very good because it knocks down and recovers so quickly that it's hard for Chun to punish on reaction. It's not like a Shoto cr.RH which can easily be punished with walk-up throw. He can also continue to use fireballs relatively safely even when Chun is up close.
Chun's Game Plan
Chun can't really beat DeeJay in a fireball war because her fireball won't reach DeeJay from full screen, so she wants to rush him down. However, it is a good idea to throw fireballs with DeeJay until you have meter, then start your rush down. Chun's super is a lot better than DeeJays, and if you have your super stored, you can even counter his super on reaction.
After you get that meter, your next step is to close the gap. This usually is not a problem for Chun. You can do a j.Forward or j.Short from full screen over one of his fireballs, and there's not much he can do about it. At best he can trade, but then you've still closed the gap. Just make sure that you jump on reaction to one of his fireballs; otherwise, you'll eat upkicks.
When rushing down DeeJay, you'll want to use st.Strong a lot. If you get too predictable with the st.Strongs, he can use upkicks, so don't get sloppy. His upkicks will not hit your cr.Forward however, so you can do that safely. His ground normals (cr.Strong, cr.Forward, cr.Fierce) are all very good and will usually at least trade with yours, so you want to let him whiff and punish, either with st.Strong or walk-up throw. cr.RH is also good to use if you think he will fireball. Even if you trade, it's a good trade for you, because you get the knock down.
Anti-Air
Short Upkicks if you are charged, jump straight up RH if you're not charged, or super (if you have meter). You can also make him land on a Jab fireball, then follow up with meaty D/F+RH.
Misc. Notes
DeeJay has nothing to beat Chun's headstomp. Because of this, you can pull some shenanigans from about half screen (or a little bit closer). You can just blatantly jump at DeeJay, and when he tries to do upkicks, do the headstomp to beat it clean. After that happens, the opponent will most likely not do upkicks again, allowing you to do [whiff headstomp, throw]. The throw is free for Chun she whiffs the headstomp.
However, it should be stressed that this is nothing but shenanigans. It's good to use once in a while, but should not be relied on heavily.
D/F+RH can be used as a safe meaty against DeeJay. If he successfully reverses with upkicks, he will whiff backwards, and you can throw him as he lands.
I would almost never do Lightning Legs against DeeJay because his RH upkicks will beat it clean.
If he crosses you up with j.Forward, it is not blocked as a cross-up. You need to block it as if it weren't a cross-up. Your other option is to just Spinning Bird Kick out of there. If you mess up your Spinning Bird Kick, a good DeeJay will follow up the blocked cross-up with a cr.Jab, then either throw or do cr.Short xx Machine Gun Upper. ALWAYS just plan on teching the throw. If you stand up early to try to reversal throw, you could get hit by cr.Short xx Machine Gun Upper, that very well might dizzy you, and you could be done for the round. Teching the throw is the much better, safer option.
--NKI 10:53, 21 June 2006 (CDT)
Vs. Guile:
- 6 - 4
Advantage/Disadvantage
Chun has a slight advantage in this match because she can hang with Guile's turtling, but if she gets in, she can also harrass him badly with st.Strongs and cr.Forwards. Pretty much his only reliable option at that point is a very risky psychic Flash Kick. However, Guile can also rush down Chun. It is very hard for her to deal with his hop kick (towards or back + medium kick) mixed with cr.Jabs and Sonic Booms. (Yes, Guile can rush down with Sonic Booms, too.)
Guile's Game Plan
Guile really has two options. In my experience against Muteki, he usually plays turtle style, hoping to wear you down little by little until eventually you get frustrated and try to rush him down. At this point, Chun will generally do something silly, like jumping in anticipation of a Sonic Boom, but guessing incorrectly and eating a Flash Kick. Guile then goes for the ambiguous cross-up, and it all goes downhill from there.
Other Guile players like Nakano Guile will tend to rush down Chun. He will play a "fake turtle" game where you think he's going to just keep throwing Sonic Booms, but after a while he'll predict one of your fireballs, hit you with a high j.Forward, then begin rushing down with hop kicks, cr.Jabs, throws, and Sonic Booms. This is surprisingly hard for Chun to stop, because most of her usual options (lightning legs, st.Strong, cr.Forward) will get stuffed before the hitting frames.
Chun's Game Plan
Even though Chun can hang with Guile's turtling, she is more effective if she tries to rush him down with st.Strongs mixed with throws. Guile really has no good answer for this, as long as you don't get reckless (because he can Flash Kick you, of course, but that's risky for him to try).
Another reason why turtling isn't that effective against Guile is because the super is not very useful against him, so building meter isn't that important. Except from very close range, Guile can throw Sonic Booms fairly safely against Chun, even when she has meter.
So basically you want to close the gap, but you have to be patient in doing this. You can't just blatantly jump at him, however, from the right distance, you can jump at him pretty safely after he throws a Sonic Boom. If you're at the max range for her j.Forward, you can jump at Guile and he won't really be able to answer with anything, so he'll be forced to block. After he blocks the j.Forward, you want to walk in and make him guess between a throw or a low move (preferably cr.Forward). Whether he blocks your low move or techs your throw, continue to rush him down with st.Strongs. If he doesn't tech, go for meaty [cr.Forward, cr.Fierce].
Throughout the match, you should always be on the look-out for Guile's cr.Forward. This is the move Guile players like to poke with the most, but it has a good amount of lag afterwards. If you hang just outside of his cr.Forward range, you can punish Guile's whiffed cr.Forwards with a st.Strong or walk-up throw.
Anti-Air
From close: upkicks, close st.Forward, close st.Strong
From medium distance: upkicks, jump straight up Short or RH, far st.Forward
From far: far st.Forward, jump straight up Short RH, make him land on a cr.Forward
Misc. Notes
Definitely go for meaty D/F+RH if you get a clean knockdown. This is a very bad position for Guile to be in, especially if he's not familiar with Chun's D/F+RH shenanigans. For one thing, she can do a meaty D/F+RH safely such that even if Guile reverses with a Flash Kick or super, Chun will be able to block in time, but if Guile doesn't reverse, he'll be forced to block Chun's D/F+RH, and then she gets a guessing game. Also, Chun can do the D/F+RH has a cross-up against Guile, so he also has to know which way to block, which can be pretty hard. (If you do the D/F+RH from point-blank range, it will cross-up. Otherwise, it's not a cross-up.)
Also, you never want to jump at Guile unless you see the Sonic Boom. Even if you do correctly predict a Sonic Boom, you don't get anything for free because Chun's jump arc is too big, so don't take the risk of eating a Flash Kick. Only jump if you see the Sonic Boom.
--NKI 20:59, 18 June 2007 (UTC)
Vs. Ken:
- 6.5 - 3.5
Advantage/Disadvantage
Ken's Game Plan
Chun's Game Plan
Anti-Air
Misc. Notes
Vs. Sagat:
- 6.5 - 3.5
Fair Match-ups
Vs. Balrog (boxer):
- 5.5 - 4.5
Advantage/Disadvantage
This is a pretty even match that I feel is about 5/5 or possibly 5.5/4.5 in favor of Chun. For the most part Chun controls the match until Boxer gets meter, at which point Boxer then controls the match. After he uses the super, Chun once again controls the match. Chun has good tools to stop Boxer's rush down, but if she gets trapped in the corner, it can get ugly for her. No really dominating advantage for either character.
Boxer's Game Plan
Boxer wants to rush her down as he does to pretty much everyone except Gief. His problem is that Chun can stop his rush down pretty well. For that reason, a huge part of the winning strategy for Boxer is to trade. There are virtually no bad trades for Boxer in this match, as he just does more damage in general. His most useful trade is when she does a fireball; he can st.Fierce or high rush and do nearly double the damage she does.
Boxer's super also helps him a lot in this match, so many Boxer players will let Chun throw fireballs, doing either Short rushes or Jab shoulder charges between fireballs to build meter.
Chun's Game Plan
For the most part, Chun wants to turtle it up, because that's the best way to stop Boxer's rush down. She can use fireballs and cr.Forwards to keep him out. Lightning legs will beat practically everything he has, but watch out for the shoulder charge. If he does a jumping attack to hit you out of lightning legs, he's going to have to do it so high that you get a free throw on him when he lands.
The only time Chun wants to go on the offensive is when Boxer is knocked down. She gets a free safe jump on him, and it is quite easy to time because even his fastest shoulder charge (the Jab version) has a whopping 11 frames of start-up before it can hit. His super has 6 frames of non-hitting start-up, so you can still safe jump even when he has meter. Getting him to throw away his super on a safe jump is huge, because that super is what's stopping you from throwing fireballs, and fireballs are a big part of Chun's strategy in this match.
After doing a safe jump (I use j.Forward), you need to hold down/back for just a split second in case he did get the reversal, then go for the throw or [cr.Forward, cr.RH].
If Boxer gets meter, it's time to chill. You need to go into super turtle mode: stop throwing fireballs, stop whiffing cr.Forwards...just chill. You should only react to what he does. Most Boxer players are expecting you to chill, so it's at this time that you can sometimes surprise them with a blatant walk up throw, especially if one of you/both of you are low on life, but don't depend on this as a stable strategy. (Another good thing about walk up throw is that he can not catch you with the super while you are walking up--you can react and block in time.)
If Boxer throws you and goes for a meaty cr.Forward as you land, just throw him. (It doesn't matter if he crossed you up or not, you still get a free throw if he's within your throw range.) Upkicks are too risky if he blocks it, so be safe and go with the throw.
Anti-Air
From far:
-far st.Forward
-far st.RH
-make him land on a fireball (will probably trade with his jumping attack)
Personally I feel that making him land on a fireball is the best option. Even though you lose the damage trade, you are in an excellent position. He has been knocked down, and you can do a risk-free meaty D/F+RH, followed by guessing game: throw, or [cr.Forward, throw], or [cr.Forward, cr.RH].
From close:
-jump straight up Short
-jump straight up RH
-upkicks
-close st.Forward
Probably upkicks are the best bet, but if your reactions are quick enough, jump straight up RH is just as good. Jump straight up Short and close st.Forward will work decently, but you really want to get that knock down so that you can safe jump at him.
Anti-Shoulder-Charge
Because it's invincible, there's really nothing you can do about the shoulder charge as it's coming out. However, if he whiffs it from up close, you can do:
cr.Forward xx RH upkicks (good damage, knocks down)
if you're not charged: cr.Forward, cr.Fierce (high dizzy potential)
if you are charged: meaty cr.Forward as he lands, close st.Fierce xx Fierce fireball (almost certainly will dizzy)
If he whiffs from far away, you can do:
far st.Fierce, meaty fireball as he lands (decent damage)
jump straight up RH (knocks down)
walk up cr.RH (knocks down)
Of course if you have meter, just do the super so that he's grounded for all 6 hits.
Anti-Rush
Chun's cr.Forward and fireballs are her best weapons against his rushes. Her cr.Forward will also beat his st.Fierce in case he tries to trade with your fireballs. Every time you see him do a rush, do an option-selected cr.Forward. Time is such that if he did a low rush, you will block, but if he did a high rush (for the throw attempt), you will hit him. If it does hit, follow up with cr.RH for the two hit combo.
Lightning legs will also beat his low rush clean, but it will sometimes trade with his straight rush, so be careful.
Misc. Notes
-It is not safe to do the super to Boxer while he is just ducking. On reaction, Boxer can do shoulder charge to beat your super clean.
-Don't bother with cross-ups - they're not needed when you have the safe jump.
-You want to avoid trading with Boxer at all costs, unless you can knock him down. He just does too much damage.
--NKI 16:02, 15 May 2006 (CDT)
When in the corner and boxer has super, Try to tick him 2/3 times with cr forward to get him to about 3/4 screen. If you do this, He can't really use his super, because the 3rd hit will glitch and you get a free throw. I used to think this matchup was purely 5-5, but I think because I can negate his super 5.5 -4.5 is about right, maybe still closer to even.
Unessential 14:34, 2 November 2013 (UTC)
Vs. Chun-Li (self):
Vs. Dhalsim:
- 5 - 5
Advantage/Disadvantage
Honda's Game Plan
Chun's Game Plan
Anti-Air
Misc. Notes
Vs. O. Ken:
O.Ken compared to N.Ken its a slightly fair matchup, the lack of Special Kicks its a better close option for Chun Li, but his invincible Shoryuken its a riskful air to air plan.
Chun Li still have a better ground gameplan because Hadoken spam can be ruined with a Triangle Jump ,also keep him away with Lightning Kicks its a good corner trap along with crouching Roundhouse
Vs. T. Hawk:
- 5.5 - 4.5
Advantage/Disadvantage
Hawk's Game Plan
Chun's Game Plan
Anti-Air
Misc. Notes
Disadvantage Match-ups
Vs. Fei Long:
- 4 - 6
Advantage/Disadvantage
Fei's Game Plan
Chun's Game Plan
Anti-Air
Misc. Notes
Although it looks infinite, Fei can only do guaranteed [st.Fierce xx Chicken Wing] three times. Because he's slowly getting pushed back a tiny bit each rotation. After the third Chicken Wing, if he tries to go for another st.Fierce, you can actually throw him. After the third Chicken Wing, it's a guessing game between Flame Kick (if he thinks you'll try to throw), or take a step forward, then start the [st.Fierce xx Chicken Wing] for another three reps. (Each rep is doing good block damage, mind you.)
I said that there are a few things Chun can do once she's stuck in that trap. Her options are:
- Upkicks: There is a crazy property of the Chicken Wing where you can actually stand block while holding D/B. You have to stand block the first hit of the Chicken Wing, then immediately hold D/B. Even though you're holding D/B, Chun will stand block the next hit of the Chicken Wing (which is necessary, because it's an overhead and can't be duck blocked). This allows you enough time to charge upkicks by the time the next Chicken Wing comes around. The problem with this is that even though the upkicks will beat Chicken Wing cleanly, sometimes it just goes straight through Fei, he lands, then you fall helplessly into [st.Fierce xx Rekka Ken x3].
- Jump straight up RH: This will usually just trade (at least it gets him off you), but it is extremely hard to time, and if you time it wrong, you get juggled by 3 hits of Chicken Wing, then he gets to start the trap on you again as you get up.
- Far st.RH: This will actually beat Chicken Wing cleanly. The problem is that it is quite hard to do (seemingly random), and if you mess up, you eat [3 hits of Chicken Wing, st.Fierce xx Rekka Ken x3], which is about 50%-60% damage and probably dizzy and probably peace out...HELLA not worth the risk.
- Walk forward to go under him: This only works if he is doing the RH version of Chicken Wing. A good Fei Will do the Forward (medium) version so that you can't walk under it. This is why (as Tama said) he can only do it three times. You can do the RH version infinitely, but she can walk under at any time. Again, if you try to walk under him and he does the Forward (medium) version, you'll eat the above combo, probably be dizzied, and probably lose the round.
- Spinning Bird Kick: Because it's invincible, you can use SBK to make his Chicken Wing whiff. The problem is that because he recovers instantly from the Chicken Wing, he can simply cr.Jab you out of the SBK, then start the trap again.
I usually just try to reverse throw. A lot of times the Fei player won't get the timing perfect on the st.Fierce, so you can throw him. This is not guaranteed (Fei can do the st.Fierce for free if he times it right), but it works a lot of times. It's actually not all bad if you get hit by a Flame Kick while trying to reverse throw, because then the Fei player gets the idea "Oh, he tries to reverse throw...I can catch him with Flame Kick", and he'll try to do that every once in a while, which creates an opening for Chun if you block it.
--NKI
Vs. Ryu:
- 4 - 6
Advantage/Disadvantage
Ryu wins this fight approximately 6/4. Chun can effectively lock him down if she is controlling the match, but if she gets stuck in a fireball trap, it can be very difficult to get out.
Ryu's Game Plan
Ryu's fireball is much better than Chun's (he doesn't have to charge for it, and it will go full screen), so he basically just wants to fireball her to death. If he can zone her with fireballs and push her back into the corner, his most effective range is a little bit more than half screen away with Chun in the corner. At that distance, she can't react to a fireball by jumping over it because that's easily countered with a DP, and she can't keep up with his fireballs because she has no time to charge. Because she's in the corner, jumping straight up over a fireball (especially a Fierce fireball) doesn't really give her a whole lot of advantage. Her best option is just to jump back over a fireball (so that she's charged), then either do air Spinning Bird Kick as she lands or throw a fireball to build meter. Her super is the only really effective way to get out of that situation.
If Ryu can keep her zoned with fireballs at that range, it is a fairly easy match for him.
While his super is very good, Ryu getting meter is not a huge turning point in the match like it is for some of his other matches (Sim, O.Sagat, etc), especially if Chun has meter. If Chun has meter, Ryu should be very weary about using his super.
Chun's Game Plan
Chun's ideal range in this match is just outside of Ryu's cr.RH range. She has two big advantages from that range.
The first advantage is when you have meter, because her super nullifies pretty much everything Ryu has. Even if he has meter, you can react to his super and counter with yours (assuming you have it stored already). So once you have meter, store the super and stay just barely out of range of his cr.RH. Hold down/towards, and react to whatever he does. From that range, a lot of people will try to either do a regular fireball, the super, or air hurricane kick back (or towards). All of those are punishable by super. If he does an air hurricane kick over your head, make sure you switch your charge direction, walk towards just a bit, then catch him when he lands.
Even if you don't have meter, from that range she can completely zone Ryu using st.Forward and st.Strong. You can safely whiff st.Forwards because you are outside of his footsies range, but if he tries a fireball or a hurricane kick, he gets beat cleanly. His only options are to psychic DP (which is very risky), or to try to fireball in-between your cr.Forwards (very difficult).
If he whiffs a cr.Forward or cr.RH, walk up and throw.
After you're in his face and you've stuffed several fireball attempts, and all of his normals are whiffing and getting punished by throws, he will start to hesitate, and that's when you just go in for the blatant throw out of nowhere. If he start wising up to the walk-up throw, and he tries to stop you with a normal, use your st.Strong to beat his normal.
If you're not inside the ideal range and you're getting bombarded with fireballs, Chun can punish his fireballs from full screen using a j.Forward. A lot of Ryu players try to reversal with a DP or another fireball, both of which will lose cleanly to lightning legs. The only thing Ryu can do to stop you from jumping in from that range is if he does a rush punch (towards+Fierce) to get closer, then he can DP you.
Anti-Air
Against Ryu, her best anti-air (aside from the super) is jump straight up RH. Upkicks are pretty much worthless because Ryu can just do an air hurricane kick to beat upkicks clean. In the worst case scenario (he trades an air hurricane kick with your jump straight up RH), you both get knocked down, so he can't continue the pressure.
After you hit him with out of the air with jump straight up RH, you should follow it up with something: [meaty cr.Forward, cr.Fierce] or max range lightning legs (100% safe unless he has meter).
If you have meter, always do the super as anti-air. It is not too hard to time it such that Ryu is grounded for all 6 hits. If he does an air hurricane kick, it is extremely easy to time.
Anti-Fireball
Far st.Forward and far st.Strong are both good at stuffing fireballs. Far st.Fierce can also be used from much further away, but it has considerable lag, so use it only if you are certain he will do a fireball. And of course you can super through the fireball if you have meter.
If you are stuck in the corner, you can do jump back Spinning Bird Kick over fireballs to build meter. Be careful though, because if he see's this coming, he can deley his fireball and make you land on it.
Anti-Hurricane-Kick
If the hurricane kick is just starting up, far st.Forward is her best counter. If he's already spinning and coming towards you, st.Short will beat it cleanly. If he's already passed over your head and he's spinning away from you, you can catch him with a far st.Fierce, far st.Strong, or super (just one hit). Lightning legs will usually beat hurricane kick cleanly.
After he has passed over you and is spinning away from you, be careful when using normals to counter his hurricane kicks. If his spinning leg is facing you, you will trade or lose cleanly. If his spinning leg is facing away from you, you will beat him cleanly. If you're low enough on life where a hurricane kick will kill you, it might not be a good idea to try to hit him.
Misc. Notes
-If you have the super stored, don't be afraid of Ryu's super. On reaction, you can super through his super.
-Meaty instant head stomp for the kill is good against Ryu because all of his DPs lose cleanly to head stomp.
--NKI 16:22, 10 May 2006 (CDT)
Vs. O. Sagat:
Advantage/Disadvantage
O.Sagat's Game Plan
Chun's Game Plan
Anti-Air
Misc. Notes
Vs. O. T. Hawk:
Old T.Hawk have better normals than New one and also better Typhoon Traps , Kikoken isn't useful due to Condor Dive, try to have an air to air battle to see if he is a Rising Hawk or Condor Dive spammer, Tensho Kyaku its a great anti air or punish the Condor Dive with crouch Roundhouse, keep him away its the key to win.
Vs. Vega (claw):
- 4 - 6
Advantage/Disadvantage
Claw's Game Plan
Chun's Game Plan
Turtle it up. Chun controls that match on the ground because lightning legs beat all of Claw's normals, and upkicks beat his jump-ins. He has to take it to the air, so it becomes a guessing game between wall dive, punch wall dive, and wall dive fake-out. Chun has an answer for all three, but you have to guess right. If he does real wall dive, just do jump back medium kick. (Or if he tries to do real wall dive off of your wall, just air throw him before he gets to the wall.) If he does punch wall dive or wall dive fake-out, just fireball him.
Anti-Air
Misc. Notes
--NKI
Serious Disadvantage Match-ups
None!
