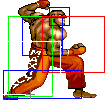
Introduction
Picking Old Dee Jay
To select O.Dee Jay, choose Dee Jay and then press ↓ ↓ ↑ ↑ Jab or Fierce, pressing Short simultaneously with the punch button for the alternate color.
| Normal | Secondary |
 |

|
--Born2SPD
Strengths & Weaknesses
Strengths
- Insane priority on a lot of normals, not much most characters can do to challenge them.
- Some normals with 1 frame recovery like crouch jab and close mk, can lead to 50/50.
- Good anti air options.
- Good combo ability, and can do a ton of damage and stun.
- Fireball has fast startup, and is a useful zoning tool in general.
- Thin hurtbox, making him harder to combo.
Weakness
- Most normals have poor reach.
- Unreliable reversals. Mgu has poor range, and is often unsafe on grounded opponents.
- Struggles in fireball wars vs other fireballers, his only reliable way around them is to jump.
- Long startup on his jump, making fireball pressure even harder to deal with.
New & Old Versions Comparison
Here is the list of differences:
- Obvious stuff: O.Dee Jay can not tech throws, does not have the Jackknife Maximum (upkicks) and Super;
- O.Dee Jay has a slower pre-jump animation by 2 frames;
- O.Dee Jay has some differences in some of his normals:
- Crouching Jab has better priority downward;
- Crouching Strong can be special canceled;
- Far Standing Short has better priority;
- Far Standing Forward second hit has better priority;
- Close Standing Roundhouse has a much fatter hitbox but it has a little less vertical priority as a anti air;
- Diagonal Jumping Strong animates like N.Dee Jay's Diagonal Jumping Fierce with a fatter hitbox but with worse air to ground priority, it also does less stun;
- Diagonal Jumping Fierce animates like N.Dee Jay's Diagonal Jumping Strong, it also does more stun;
- Diagonal Jumping Forward has better air to air priority but significantly worse crossup properties;
- Neutral Jumping Roundhouse has a fatter hitbox but worse priority;
- Diagonal Jumping Roundhouse becomes active 1 frame later, but has an additional 4 frame hitbox while his leg is pointed upward, so it has more active frames;
- O.Dee Jay's Max Outs / Air Slashers have a 3 frame worse recovery, this is bad;
- O.Dee Jay's Rolling Sobats do more stun on the first hit;
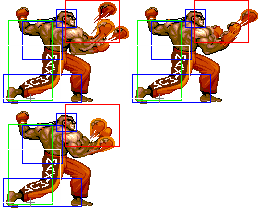
- O.Dee Jay's Machine Gun Upper does less damage overall (i.e. the second hit does a lot less damage, and the third uses a lesser random damage table), but has anti aerial properties in its startup, and lacks a hurtbox at his center which allows him to dodge some faster or meaty fireballs;
O.Dee Jay is a waste of time... his go-to crossup and anti air moves are much worse, and he does not receive anything back... Only an MGU that can evade meaty projectiles... And he even has worse Max Outs... Not worthy.
Moves Analysis
Disclaimer: To better understand the diagrams, read this.
Normal Moves
Ground Normals
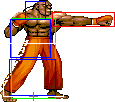
- Close Standing Jab: (Base max activation range: 42)
| Damage | 4[0] |  |
 |

|
| Stun | 0~5 | |||
| Stun Timer | 40 | |||
| Chain Cancel | Yes | |||
| Special Cancel | Yes* | |||
| Frame Advantage | +8 | |||
| Frame Count | 3 | 4 | 1 | |
| Simplified | 1 + 3 | 4 | 1 | |
Decent for pressure sometimes as it can be rapid fired, and has only 1 frame of recovery, making it quite safe.
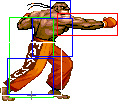
- Far Standing Jab:
| Damage | 4[0] |  |
 |

|
| Stun | 0~5 | |||
| Stun Timer | 40 | |||
| Chain Cancel | Yes | |||
| Special Cancel | Yes | |||
| Frame Advantage | +5 | |||
| Frame Count | 4 | 4 | 4 | |
| Simplified | 1 + 4 | 4 | 4 | |
Can be useful in some cases to beat moves by mashing it, such as Honda headbutts, Blanka balls, scissor kicks from dictator etc.
- Crouching Jab:
| Damage | 4[0] |  |
 |

|
| Stun | 0~5 | |||
| Stun Timer | 40 | |||
| Chain Cancel | Yes | |||
| Special Cancel | Yes | |||
| Frame Advantage | +9 | |||
| Frame Count | 2 | 3 | 1 | |
| Simplified | 1 + 2 | 3 | 1 | |
Has very very good recovery, allowing for easy combos. Also good to mash for stopping advancing attacks like Honda headbutt and Blanka ball. Old Deejay has a slightly fatter hitbox on this move.
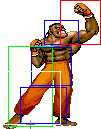
- Close/Far Standing Strong:
| Damage | 22[0] |  |
 |
 |

|
| Stun | 5~11 | ||||
| Stun Timer | 60 | ||||
| Chain Cancel | No | ||||
| Special Cancel | Yes / No | ||||
| Frame Advantage | +9 / +12 | ||||
| Frame Count | 3 | 3 | 5 | 1 | |
| Simplified | 1 + 3 | 8 | 1 | ||
Nice walking anti-air. Especially considering you don't have to worry about it coming out as a close or far normal.
- Crouching Strong:
| Damage | 22[0] |  |
 |
 |

|
| Stun | 5~11 | ||||
| Stun Timer | 60 | ||||
| Chain Cancel | No | ||||
| Special Cancel | Yes* | ||||
| Frame Advantage | +8 | ||||
| Frame Count | 2 | 3 | 6 | 4 | |
| Simplified | 1 + 5 | 6 | 4 | ||
Very nice hitbox which makes it good to stick out and catch limbs with. One nice advantage for old Deejay, is that he can cancel this attack.
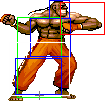
- Close Standing Fierce: (Base max activation range: 40)
| Damage | 28[1] + 4[1] |  |
 |
 |
 |
 |

|
| Stun | 10~16 + 1~7 | ||||||
| Stun Timer | 80 + 70 | ||||||
| Chain Cancel | No | ||||||
| Special Cancel | No | ||||||
| Frame Advantage | +6 / +12(+11) | ||||||
| Frame Count | 3 | 3 | 4 | 2 | 5 | 5 | |
| Simplified | 1 + 6 | 4 | 2 | 5 | 5 | ||
Usually the first hit will combo into the second. Does decent damage and dizzy if both hits connect, but in general this move wants to be avoided due to how slow it is, and DJ has better ways of dealing damage.
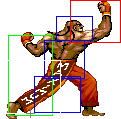
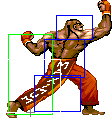
- Far Standing Fierce:
| Damage | 28[1] |  |
 |
 |
 |
 |
 |
 |

|
| Stun | 10~16 | ||||||||
| Stun Timer | 80 | ||||||||
| Chain Cancel | No | ||||||||
| Special Cancel | No | ||||||||
| Frame Advantage | +5 / +9 | ||||||||
| Frame Count | 2 | 2 | 2 | 4 | 5 | 3 | 4 | 1 | |
| Simplified | 1 + 6 | 9 | 8 | ||||||
This uses the same animation as a max-out fireball, so it doubles as a fake fireball. Very useful.
- Crouching Fierce:
| Damage | 28[1] |  |
 |
 |
 |

|
| Stun | 10~16 | |||||
| Stun Timer | 80 | |||||
| Chain Cancel | No | |||||
| Special Cancel | Yes* / No | |||||
| Frame Advantage | +4 / +7 | |||||
| Frame Count | 2 | 2 | 3 | 9 | 6 | |
| Simplified | 1 + 4 | 12 | 6 | |||
Nice move to halt certain advancing moves like Balrog's low rush. Some players like to use this move to cancel into Machine Gun Upper.
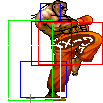
- Close Standing Short: (Base max activation range: 24)
| Damage | 4[0] |  |
 |

|
| Stun | 0~5 | |||
| Stun Timer | 40 | |||
| Chain Cancel | Yes | |||
| Special Cancel | Yes | |||
| Frame Advantage | +8 | |||
| Frame Count | 3 | 4 | 1 | |
| Simplified | 1 + 3 | 4 | 1 | |
Decent tick, cancels into itself and cr lk for mixups/combos. Good move as a meaty since it has only 1 frame of recovery.
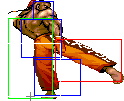
- Far Standing Short:
| Damage | 4[0] |  |
 |

|
| Stun | 0~5 | |||
| Stun Timer | 40 | |||
| Chain Cancel | Yes | |||
| Special Cancel | Yes* | |||
| Frame Advantage | +6 | |||
| Frame Count | 4 | 4 | 3 | |
| Simplified | 1 + 4 | 4 | 3 | |
This move usually has to be blocked low, good for ending combos that include crouching short, and ok for ticks. Old Deejay has better priority on this attack, making it an effective counter poke.
- Crouching Short:
| Damage | 4[0] |  |
 |

|
| Stun | 0~5 | |||
| Stun Timer | 40 | |||
| Chain Cancel | Yes | |||
| Special Cancel | Yes* | |||
| Frame Advantage | +4 | |||
| Frame Count | 4 | 4 | 5 | |
| Simplified | 1 + 4 | 4 | 5 | |
Decent range and priority, but crouch strong and forward are usually better for counters. This is a good move to use after a crossup vs opponents mashing throw/reversal, hit them low and go into a combo.
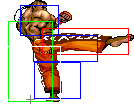
- Close Standing Forward: (Base max activation range: 16)
| Damage | 24[0] |  |
 |
 |
 |

|
| Stun | 5~11 | |||||
| Stun Timer | 60 | |||||
| Chain Cancel | No | |||||
| Special Cancel | No | |||||
| Frame Advantage | +11 | |||||
| Frame Count | 2 | 2 | 2 | 6 | 1 | |
| Simplified | 1 + 6 | 6 | 1 | |||
Very low recovery, which makes it a good move for surprise tick throws.
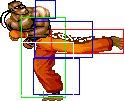
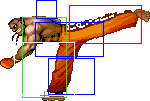
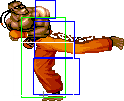
- Far Standing Forward:
| Damage | 24[0] + 4[0] |  |
 |
 |
 |
 |

|
| Stun | 5~11 + 2~8 | ||||||
| Stun Timer | 60 + 60 | ||||||
| Chain Cancel | No | ||||||
| Special Cancel | No | ||||||
| Frame Advantage | +0 / +3(+2) | ||||||
| Frame Count | 3 | 3 | 3 | 8 | 3 | 4 | |
| Simplified | 1 + 6 | 3 | 8 | 7 | |||
Old Deejay has better priority on the second hit, making it a good anti air, usually he has better options though, you also need time to get it out.
- Crouching Forward:
| Damage | 22[0] |  |
 |
 |
 |

|
| Stun | 5~11 | |||||
| Stun Timer | 130 | |||||
| Chain Cancel | No | |||||
| Special Cancel | No | |||||
| Frame Advantage | +6 | |||||
| Frame Count | 3 | 3 | 6 | 3 | 3 | |
| Simplified | 1 + 6 | 6 | 6 | |||
One of the rare non-Roundhouse sweeps. Excellent hitbox. Use this in instances where Deejay's sweep might trade or lose outright. It makes for an excellent anti-air sweep and decent meaty attack.
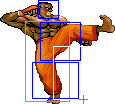
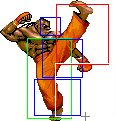
- Close Standing Roundhouse: (Base max activation range: 8)
| Damage | 30[1] |  |
 |
 |
 |
 |

|
| Stun | 10~16 / 1~7 | ||||||
| Stun Timer | 80 / 70 | ||||||
| Chain Cancel | No | ||||||
| Special Cancel | Yes / No | ||||||
| Frame Advantage | +3 / +9 | ||||||
| Frame Count | 3 | 4 | 2 | 6 | 4 | 3 | |
| Simplified | 1 + 3 | 4 | 2 | 6 | 7 | ||
The strict activation range makes this move difficult to utilize. Quite fast to come out, if they are right above you, and you have time, this can be decent.
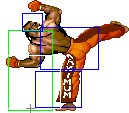
- Far Standing Roundhouse:
| Damage | 30[1] |  |
 |
 |
 |
 |
 |

|
| Stun | 10~16 | |||||||
| Stun Timer | 80 | |||||||
| Chain Cancel | No | |||||||
| Special Cancel | No | |||||||
| Frame Advantage | +4 | |||||||
| Frame Count | 3 | 3 | 3 | 5 | 4 | 4 | 5 | |
| Simplified | 1 + 9 | 5 | 13 | |||||
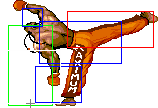
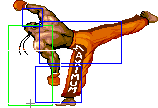
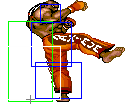
Excellent poke. Hit's mid against most of the cast so you can use it to bludgeon people whether they are crouching or not.
- Crouching Roundhouse:
| Damage | 30[1] |  |
 |
 |
 |

|
| Stun | 5~11 / 10~16 | |||||
| Stun Timer | 130 / 80 | |||||
| Chain Cancel | No | |||||
| Special Cancel | No | |||||
| Frame Advantage | +1 / +5 | |||||
| Frame Count | 4 | 4 | 4 | 2 | 15 | |
| Simplified | 1 + 8 | 6 | 15 | |||
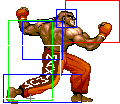
Deejay's slide sweep. Probably the worst slide sweep in the game but it still has its uses. Notice how the last active hitbox angles up vertically.
Aerial Normals
- Neutral/Diagonal Jumping Jab:
| Damage | 12[0] |  |
|
| Stun | 1~7(-2) | ||
| Stun Timer | 40 | ||
| Frame Count | 2 | ∞ | |
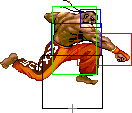
Big fat hitbox. Some characters (like Honda) can't do much of anything against it. Also useful to trade or beat other characters who have strong aerials like Chun-Li.
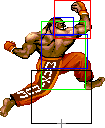
- Neutral Jumping Strong:
| Damage | 22[0] |  |
 |
 |
 |
 |

|
| Stun | 5~11 | ||||||
| Stun Timer | 50(+10) | ||||||
| Frame Count | 3 | 4 | 14 | 5 | 4 | ∞ | |
| Simplified | 3 | 18 | ∞ | ||||
This, and diagonal jump fierce, are good for dodging fireballs, as it removes the lower part of DJ's hurtbox.
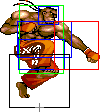
- Diagonal Jumping Strong:
| Damage | 22[0] | 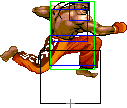 |
 |
 |
 |
 |

|
| Stun | 5~11 | ||||||
| Stun Timer | 50(+10) | ||||||
| Frame Count | 3 | 4 | 14 | 5 | 4 | ∞ | |
| Simplified | 7 | 14 | ∞ | ||||
Decent forwards priority, can be ok as an air to air, but otherwise it's outclassed by other air normals.
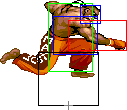
- Neutral Jumping Fierce:
| Damage | 28[0] |  |
 |
 |
 |
 |
 |

|
| Stun | 11~17(-1) | |||||||
| Stun Timer | 60(+20) | |||||||
| Frame Count | 2 | 3 | 6 | 8 | 5 | 4 | ∞ | |
| Simplified | 5 | 6 | ∞ | |||||
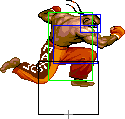
Similar to diagonal jump fierce, this is useful for neutral jumping over fireballs as it makes his hurtbox smaller vertically.
- Diagonal Jumping Fierce:
| Damage | 28[1] |  |
 |
 |
 |
 |
 |

|
| Stun | 11~17(-1) | |||||||
| Stun Timer | 60(+20) | |||||||
| Frame Count | 2 | 4 | 4 | 8 | 5 | 4 | ∞ | |
| Simplified | 6 | 12 | ∞ | |||||
Can be useful to dodge fireballs as it removes the lower half of his hurtbox.
- Neutral Jumping Short:
| Damage | 20[0] |  |
|
| Stun | 1~7(-2) | ||
| Stun Timer | 40 | ||
| Frame Count | 2 | ∞ | |
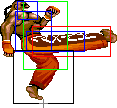
Stays active the whole jump, decent priority, jump jab is usually preferred though.
- Diagonal Jumping Short:
| Damage | 20[0] | 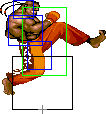 |

|
| Stun | 1~7(-2) | ||
| Stun Timer | 40 | ||
| Frame Count | 2 | ∞ | |
Not very good as a jump in, but ok for air to air in some cases. Can be used vs walldives for instance.
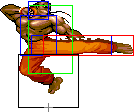
- Neutral Jumping Forward:
| Damage | 24[0] |  |
 |
 |
 |
 |
 |

|
| Stun | 5~11 | |||||||
| Stun Timer | 50(+10) | |||||||
| Frame Count | 2 | 4 | 14 | 5 | 5 | 4 | ∞ | |
| Simplified | 6 | 14 | ∞ | |||||
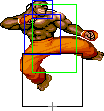
Has good forwards range, but otherwise this move is nothing special.
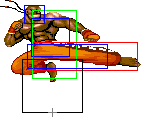
- Diagonal Jumping Forward:
| Damage | 24[0] |  |
 |
 |
 |
 |
 |
 |

|
| Stun | 5~11 | ||||||||
| Stun Timer | 50(+10) | ||||||||
| Frame Count | 2 | 4 | 14 | 5 | 4 | 4 | 4 | ∞ | |
| Simplified | 6 | 14 | ∞ | ||||||
Nerfed heavily in the crossup department compared to N.Deejay. The forward priority is better, but this does not compensate enough, practice the spacing to use it effectively as a crossup.
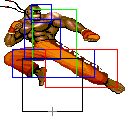
- Neutral Jumping Roundhouse:
| Damage | 28[1] |  |
 |
 |
 |
 |
 |

|
| Stun | 11~17(-1) | |||||||
| Stun Timer | 60(+20) | |||||||
| Frame Count | 3 | 4 | 10 | 6 | 5 | 4 | ∞ | |
| Simplified | 7 | 10 | ∞ | |||||
Can be decent as a defensive attack, to protect yourself from anti air sweeps etc.
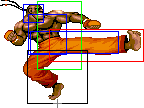
- Diagonal Jumping Roundhouse:
| Damage | 30[1] |  |
 |
 |
 |
 |
 |
 |

|
| Stun | 11~17(-1) | ||||||||
| Stun Timer | 60(+20) | ||||||||
| Frame Count | 2 | 4 | 4 | 8 | 4 | 4 | 4 | ∞ | |
| Simplified | 6 | 12 | ∞ | ||||||
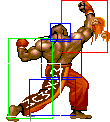
Excellent horizontal hitbox. Similar to Guile's jumping RH. Allows you to stuff nearly anything air-to-air if you stick it out early enough. Also includes an upwards part at the start as Old Deejay, usually this just means you have to wait longer for the long range part to come out.
Command Normals
- Knee Shot: (Jump diagonally, ↙/↓/↘ + Short)
| Damage | 12[0] |  |
 |

|
| Stun | 1~7(-2) | |||
| Stun Timer | 40 | |||
| Frame Count | 2 | 40 | ∞ | |
Can be used as an ambiguous crossup.
Throws
Dee Jay can throw using Strong, Fierce, Forward and Roundhouse. The direction of the joystick determines the direction the enemy gets thrown at. All his throws have the same range and do 32 points of damage (plus two more if behind in rounds).
- Normal Throws Throwboxes:
| Damage | 32 |  |
 |

| |
| Stun | 7~13 | ||||
| Stun Timer | 100 | ||||
| Range | (from axis) | 48 | |||
| (from throwable box) | 18 | ||||
- Funky Shout Throw: (←/↖/↗/→ + Strong/Fierce)
Seems to have better recovery than kick throw, might be preferred in situations where you want to stay close.
- Monkey Flip: (←/↖/↗/→ + Forward/Roundhouse)
They end up further away than punch throw, especially if not teched, this may be favoured if you want them away from you.
Special Moves
- Max Out / Air Slasher: (Charge ←, → P)
Detailed Input: (Charge ←/↙/↖ for at least 61f, [7~14f] → [10/9/7f] Jab/Strong/Fierce. It is needed to wait at least 1 frame after leaving the charge direction to enter with the P button)
- Startup:
 |
 |

| |
| Frame Count | 3 | 2 | 2 |
| Simplified | 7 | ||
- Active:
- Jab Version:
| Damage | 17[1] |  |
 |
 |
|
| Stun | 3~9 | ||||
| Stun Timer | 90 | ||||
| Frame Count | 1 | 3 | 10 | 1... | |
| Simplified | 37 | ||||
- Strong Version:
| Damage | 18[1] |  |
 |
 |
|
| Stun | 3~9 | ||||
| Stun Timer | 90 | ||||
| Frame Count | 1 | 2 | 9 | 1... | |
| Simplified | 37 | ||||
- Fierce Version:
| Damage | 20[1] |  |
 |
 |
|
| Stun | 3~9 | ||||
| Stun Timer | 90 | ||||
| Frame Count | 1 | 1 | 6 | 1... | |
| Simplified | 37 | ||||
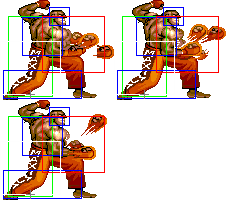
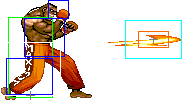
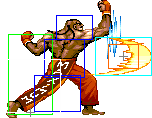
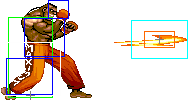
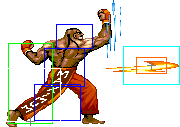
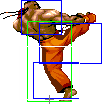
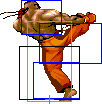
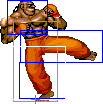
Dee Jay's Projectile. During the first active frames it has a quite fat hitbox, but some frames after it becomes slimmer (allowing Blanka to slide under it). Jab Version's hitbox stays bigger for 14 frames, Strong for 12 and Fierce for 8. Punch strength also determines the speed and damage. O.Dee Jay have 3 frames of additional recovery on this move.
- Double Rolling Sobat: (Charge ←, → K)
Detailed Input: (Charge ←/↙/↖ for at least 61f, [7~14f] → [10/9/7f] Short/Forward/Roundhouse. It is needed to wait at least 1 frame after leaving the charge direction to enter with the K button)
- Short Version:
| Damage | 30[2] / 28[2] | 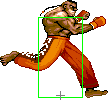 |
 |
 |
 |
 |
 |
|
| Stun | 9~15 | |||||||
| Stun Timer | 100 | |||||||
| Frame Advantage | -14 / -10 | |||||||
| Frame Count | 4 | 7 | 3 | 1 | 3 | 2 | 4 | |
| Simplified | 14 | 10 | ||||||
 |
 |
 |
 |
 |
 |

| |
| Frame Count | 1 | 3 | 4 | 3 | 6 | 5 | 4 |
| Simplified | 26 | ||||||
- Forward/Roundhouse Versions:
 |
 |
 |
 |

| |
| Frame Count (Forward) | 1 | 1 | 4 | 4 | 3 |
| Simplified (Forward) | 13 | ||||
| Frame Count (Rh) | 1 | 1 | 4 | 4 | 3 |
| Simplified (Rh) | 13 | ||||
 |
 |
 |
 |
 |

| |
| Frame Count (Forward) | 2 | 3 | 1 | 9 | 7 | 9 |
| Simplified (Forward) | 15 | 16 | ||||
| Frame Count (Rh) | 2 | 3 | 1 | 9 | 9 | 9 |
| Simplified (Rh) | 15 | 18 | ||||
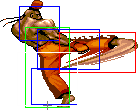
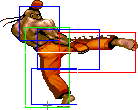
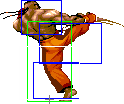
Short version hits once, Forward and Roundhouse versions hit twice.
- Machine Gun Upper: (Charge ↓, ↑ P. Press P repeatedly)
Detailed Input: (Charge ↓/↙/↘ for 61f, [7~14f] ↑/↖/↗ [10/9/7/4f] Jab/Strong/Fierce/any P if you are at a jumpable state. It is needed to wait at least 1 frame after leaving the charge direction to enter with the P button. The mash part requires a P input every 2f? to combo)
- Full mashing:
- Without/Failed mashing:
O.Dee Jay's only proper reversal. Can be used to avoid meaty projectiles on wakeup and to anti air. Proper technique is required to get the full four hits of the move to combo. Piano tap all three punches until you see the third hit connect, and then STOP.
Misc Animations
Jump Animations
- Neutral Jump:
 |
 |
 |
 |
 |
 |
 |
 |
 |

| |
| Frame Count | 3 | 1 | 1 | 6 | 8 | 10 | 8 | 12 | 1 | 7* |
| Simplified | 4 | 1 | 44 | 1 | 7* | |||||
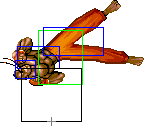
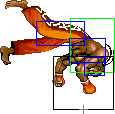
- Back Jump:
 |
 |
 |
 |
 |
 |
 |
 |
 |
 |

| |
| Frame Count | 3 | 1 | 1 | 6 | 6 | 6 | 6 | 6 | 15 | 1 | 7* |
| Simplified | 4 | 1 | 45 | 1 | 7* | ||||||
- Forward Jump:
 |
 |
 |
 |
 |
 |
 |
 |
 |
 |

| |
| Frame Count | 3 | 1 | 1 | 6 | 6 | 6 | 6 | 6 | 13 | 1 | 7* |
| Simplified | 4 | 1 | 43 | 1 | 7* | ||||||
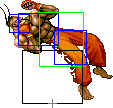
O.DeeJay's prejump animation is one of the slowest on the game, unlike N.DeeJay's that was buffed on ST by 2 frames, so unlike N.DeeJay, that has a considerably fast prejump animation, N.Deejay's prejump is slow. This for the most part is a disadvantage.
The landing recovery has a special property which allows it to be canceled into certain actions. At the first landing frame, you can perform throws (including command throws), and on the second landing frame, you can start another jump, attack with a normal or special move, or block. Blocking not being until the second landing frame, as well as hitbox-hurtbox interactions having priority over throwbox-throw hurtbox is why sweeps work as anti airs in this game.
Things are different when jumping over your opponent, however. In that situation it's possible to walk back/forward, to jump again or to even block on the first landing frame! Strangely, if a throw is timed on the first landing frame of a jump that crosses over, a throwbox will never come out, even though that input will result in a normal coming out 2 frames later (like it normally would). Anyway, being able to block on the first landing frame can help a little bit on some safe jump crossup setups, or maybe in other situations as well if your character has a huge jump arc.
The Basics
Much weaker than his new version, he still has great normals, but the lack of upkicks, and a really bad crossup make it harder to deal damage. To make matters worse, his fireball has a whole 3 extra frames of recovery, so zoning is also less effective. He has some nice buffs on a few normals, but none are game changing, same for his mgu hurtbox on the early part. You basically want to play a lot like New DJ, just your tools are less effective.


