Introduction
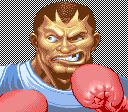
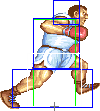
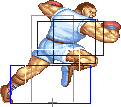
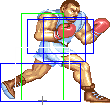
Picking Old Balrog
To select O.Balrog, choose Balrog and then press → ← ← → Jab or Fierce, pressing Short simultaneously with the punch button for the alternate color.
| Normal | Secondary |
 |

|
--Born2SPD
Strenghts And Weaknesses
Strengths
- Fast walk speed.
- His dash striaght is difficult for opposition to deal with, especially if the Balrog player has good reflexes.
- Fully invincible reversal on startup (headbutt).
- MP throw has excellent range and can set up some hellacious throw loops.
- Excellent set of normals can deal with nearly every situation without relying on a special.
- Amazing rushdown tools.
Weaknesses
- Headbutt has very bad startup, which makes it incredibly easy to safejump.
- He can be fairly easily abused via okizeme (wake up games) by some characters.
- In addition to being vulnerable to safejump pressure, he also cannot tech throws.
- His MP and HP throws have different ranges. Since the HP one has such bad range, he can really only safely use the MP throw to mash out a counter-throw.
New & Old Versions Comparison
Here is the list of differences:
- Obvious stuff: O.Balrog can not tech throws, does not have the Low Straight Rush, Low Upper Rush and Super;
- O.Balrog's Head Bomber (his grab) usually does more hits, but if the opponent actually mashes to escape it will not make much difference;
- O.Balrog's Neutral Jumping Fierce can not be controlled;
- O.Balrog's Straight Rush hits crouching opponents, and the Jab version knocks down, but the Fierce version doesn't;
- O.Balrog's Upper Rush requires 2 frames of additional charging to come out;
O.Balrog is a very well balanced character that can compete with pretty much everyone on the cast (excluding maybe Zangief). The main reason to consider O.Balrog is that his Dashing Straight Punch can hit mid against the entire cast AND is faster than a low rush from N.Balrog. This can make dealing with fireball chuckers slightly more tolerable because it's easier to punish and trade (to your advantage). With that considered though, it isn't worth losing N.Balrog's low rush and super so this is a very unused character.
Moves Analysis
Disclaimer: To better understand the diagrams, read this.
Normal Moves
Ground Normals
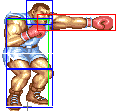
- Close/Far Standing Jab:
| Damage | 4[1] |  |
 |

|
| Stun | 0~5 | |||
| Stun Timer | 40 | |||
| Chain Cancel | Yes | |||
| Special Cancel | Yes | |||
| Frame Advantage | +4 | |||
| Frame Count | 3 | 4 | 5 | |
| Simplified | 1 + 3 | 4 | 5 | |
Useful to cancel into super / rushes. Also good to stop some stuff (Honda's headbutts for example).
- Crouching Jab:
| Damage | 4[1] |  |
 |

|
| Stun | 0~5 | |||
| Stun Timer | 40 | |||
| Chain Cancel | Yes | |||
| Special Cancel | Yes | |||
| Frame Advantage | +5 | |||
| Frame Count | 2 | 4 | 4 | |
| Simplified | 1 + 2 | 4 | 4 | |
It's very fast and has the repeating property (something low short doesn't), but it has a different hit box. I really don't use low short much, only low jab for ticking and combos.
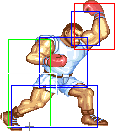
- Close Standing Strong: (Base max activation range: 41)
| Damage | 24[1] |  |
 |

|
| Stun | 5~11 | |||
| Stun Timer | 60 | |||
| Chain Cancel | No | |||
| Special Cancel | No | |||
| Frame Advantage | +7 | |||
| Frame Count | 5 | 4 | 7 | |
| Simplified | 1 + 5 | 4 | 7 | |
Acceptable anti air, but cr hp is often preferred. Can catch opponents trying to jump away when going for a throw, similar to far mp.
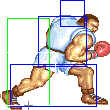
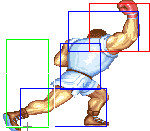
- Far Standing Strong:
| Damage | 24[1] |  |
 |
 |
 |

|
| Stun | 5~11 | |||||
| Stun Timer | 60 | |||||
| Chain Cancel | No | |||||
| Special Cancel | No | |||||
| Frame Advantage | +7 | |||||
| Frame Count | 3 | 3 | 4 | 3 | 4 | |
| Simplified | 1 + 6 | 4 | 7 | |||
Second best anti-air move. Has more range than cr.HP.
- Crouching Strong:
| Damage | 24[1] |  |
 |
 |
 |

|
| Stun | 5~11 | |||||
| Stun Timer | 60 | |||||
| Chain Cancel | No | |||||
| Special Cancel | Yes* | |||||
| Frame Advantage | +7 | |||||
| Frame Count | 2 | 2 | 4 | 3 | 4 | |
| Simplified | 1 + 4 | 4 | 7 | |||
This is his best ground attack, despite not hitting low. The entire arm is safe and cannot be hit, but can hit the enemy (it's a completely red hitbox, no blue). Can cancel into rushes and link into Super.
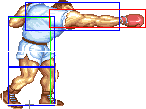
- Close Standing Fierce: (Base max activation range: 31)
| Damage | 30[2] |  |
 |
 |
 |

|
| Stun | 10~16 | |||||
| Stun Timer | 80 | |||||
| Chain Cancel | No | |||||
| Special Cancel | No | |||||
| Frame Advantage | +1 | |||||
| Frame Count | 5 | 3 | 6 | 9 | 6 | |
| Simplified | 1 + 8 | 6 | 15 | |||
A pretty ordinary straight punch. It's a relatively slow move, but one wouldn't use it much, since he has better options up close.
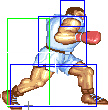
- Far Standing Fierce:
| Damage | 30[2] |  |
 |
 |
 |

|
| Stun | 10~16 | |||||
| Stun Timer | 80 | |||||
| Chain Cancel | No | |||||
| Special Cancel | No | |||||
| Frame Advantage | +1 | |||||
| Frame Count | 5 | 3 | 6 | 9 | 6 | |
| Simplified | 1 + 8 | 6 | 15 | |||
Great poke to use at max range. It CAN'T hit the following opponents when they're crouching: Ryu, Blanka, Guile, Ken, Chun Li, Cammy and Dictator.
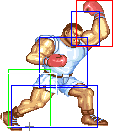
- Crouching Fierce:
| Damage | 30[2] |  |
 |
 |
 |

|
| Stun | 10~16 | |||||
| Stun Timer | 80 | |||||
| Chain Cancel | No | |||||
| Special Cancel | No | |||||
| Frame Advantage | -1 / +1 | |||||
| Frame Count | 5 | 2 | 4 | 11 | 6 | |
| Simplified | 1 + 5 | 6 | 17 | |||
Best anti-air non-special. Hits early and late, unlike most moves in game.
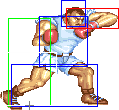
- Close/Far Standing Short:
| Damage | 4[1] |  |
 |

|
| Stun | 0~5 | |||
| Stun Timer | 40 | |||
| Chain Cancel | No | |||
| Special Cancel | Yes | |||
| Frame Advantage | +4 | |||
| Frame Count | 3 | 4 | 5 | |
| Simplified | 1 + 3 | 4 | 5 | |
Elbow attack with no notable properties. It is overshadowed by Jab in almost every situation.
- Crouching Short:
| Damage | 4[1] |  |
 |

|
| Stun | 0~5 | |||
| Stun Timer | 40 | |||
| Chain Cancel | No | |||
| Special Cancel | Yes | |||
| Frame Advantage | +5 | |||
| Frame Count | 2 | 4 | 4 | |
| Simplified | 1 + 2 | 4 | 4 | |
This is a crouching jab attack that hits low. It can be used to stuff some slide attacks, but you will find yourself using crouching Forward kick instead, most of the time.
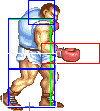
- Close Standing Forward: (Base max activation range: 31)
| Damage | 26[1] |  |
 |

|
| Stun | 5~11 | |||
| Stun Timer | 60 | |||
| Chain Cancel | No | |||
| Special Cancel | Yes* | |||
| Frame Advantage | +7 | |||
| Frame Count | 4 | 4 | 7 | |
| Simplified | 1 + 4 | 4 | 7 | |
Body punch. This could be used as a tick against characters that might hop over his better moves, such as crouching Strong, Forward and Jab.
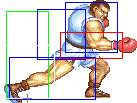
- Far Standing Forward:
| Damage | 26[1] | 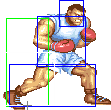 |
 |

|
| Stun | 5~11 | |||
| Stun Timer | 60 | |||
| Chain Cancel | No | |||
| Special Cancel | No | |||
| Frame Advantage | +7 | |||
| Frame Count | 5 | 4 | 7 | |
| Simplified | 1 + 5 | 4 | 7 | |
A punch to the body. It can be used in block strings and when you predict a move that is vulnerable during its start-up, but you shouldn't try footsies with this move, since the priority is not very good.
- Crouching Forward:
| Damage | 26[1] |  |
 |
 |

|
| Stun | 5~11 | ||||
| Stun Timer | 60 | ||||
| Chain Cancel | No | ||||
| Special Cancel | No | ||||
| Frame Advantage | +8 | ||||
| Frame Count | 2 | 3 | 6 | 4 | |
| Simplified | 1 + 5 | 6 | 4 | ||
Catches some moves that go under Crouching Strong (like Vega's slide). Links into cr.Strong and the Super. Your move of choice to tick / combo in throw mixups. Quick recovery and great for hitting limbs in footsies (like Guile's d. Forward).
- Close Standing Roundhouse: (Base max activation range: 41)
| Damage | 32[2] |  |
 |

|
| Stun | 10~16 | |||
| Stun Timer | 80 | |||
| Chain Cancel | No | |||
| Special Cancel | No | |||
| Frame Advantage | +1 | |||
| Frame Count | 6 | 6 | 15 | |
| Simplified | 1 + 6 | 6 | 15 | |
A punch to the body. Nothing interesting.
- Far Standing Roundhouse:
| Damage | 32[2] |  |
 |
 |
 |

|
| Stun | 10~16 | |||||
| Stun Timer | 80 | |||||
| Chain Cancel | No | |||||
| Special Cancel | No | |||||
| Frame Advantage | +1 | |||||
| Frame Count | 5 | 3 | 6 | 9 | 6 | |
| Simplified | 1 + 8 | 6 | 15 | |||
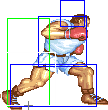
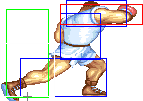
Hook punch to the face. It does slightly more damage than Fierce, but it has less range. It is useful in the same manner as far Forward kick, with the advantage of doing more damage and dizzy, at the cost of a longer recovery.
- Crouching Roundhouse:
| Damage | 32[2] |  |
 |
 |
 |

|
| Stun | 5~11 | |||||
| Stun Timer | 130 | |||||
| Chain Cancel | No | |||||
| Special Cancel | No | |||||
| Frame Advantage | -2 | |||||
| Frame Count | 4 | 4 | 6 | 5 | 13 | |
| Simplified | 1 + 8 | 6 | 18 | |||
Best horizontal range out of his ducking moves and knocks down. Useful for footsies when a crouching Forward won't reach. Long recovery so be careful.
Aerial Normals
- Neutral Jumping Jab:
| Damage | 16[1] |  |
 |
 |

|
| Stun | 1~7(-2) | ||||
| Stun Timer | 40 | ||||
| Frame Count | 2 | 32 | 6 | ∞ | |
| Simplified | 2 | 32 | ∞ | ||
Same as Neutral Jumping Short.
- Diagonal Jumping Jab:
| Damage | 16[1] |  |
 |
 |
 |
 |

|
| Stun | 1~7(-2) | ||||||
| Stun Timer | 40 | ||||||
| Frame Count | 1 | 2 | 30 | 3 | 3 | ∞ | |
| Simplified | 3 | 30 | ∞ | ||||
Lasts long with a slightly higher hitbox than the Jumping Strong but shitty priority.
- Neutral Jumping Strong:
| Damage | 22[1] |  |
 |
 |
 |
 |

|
| Stun | 5~11 | ||||||
| Stun Timer | 50(+10) | ||||||
| Frame Count | 2 | 4 | 14 | 4 | 6 | ∞ | |
| Simplified | 6 | 14 | ∞ | ||||
Similar to nj hp but with worse priority and reach.
- Diagonal Jumping Strong:
| Damage | 22[1] |  |
 |
 |
 |
 |

|
| Stun | 5~11 | ||||||
| Stun Timer | 50(+10) | ||||||
| Frame Count | 1 | 3 | 15 | 3 | 3 | ∞ | |
| Simplified | 4 | 15 | ∞ | ||||
Good horizontal range on this makes it useful for hitting fireballers when a jumping Roundhouse/Fierce won't reach.
- Neutral Jumping Fierce:
| Damage | 28[1] |  |
 |
 |
 |
 |

|
| Stun | 3~9 | ||||||
| Stun Timer | 40 | ||||||
| Frame Count | 3 | 5 | 10 | 5 | 6 | ∞ | |
| Simplified | 8 | 10 | ∞ | ||||
Only N.Balrog can control this move in air.
- Diagonal Jumping Fierce:
| Damage | 28[1] |  |
 |
 |
 |

|
| Stun | 3~9 | |||||
| Stun Timer | 40 | |||||
| Frame Count | 5 | 4 | 12 | 6 | ∞ | |
| Simplified | 9 | 12 | ∞ | |||
Best air to ground priority available. Can crossup some characters.
- Neutral/Diagonal Jumping Short:
| Damage | 16[1] |  |
 |
 |

|
| Stun | 1~7(-2) | ||||
| Stun Timer | 40 | ||||
| Frame Count | 2 | 32 | 6 | ∞ | |
| Simplified | 2 | 32 | ∞ | ||
Good jump-in for getting in close to start Boxer's combos and mixup strings since it doesn't push the opponent back too far. Also can be used as an instant overhead.
- Neutral/Diagonal Jumping Forward:
| Damage | 22[1] |  |
 |
 |

|
| Stun | 5~11 | ||||
| Stun Timer | 50(+10) | ||||
| Frame Count | 4 | 14 | 6 | ∞ | |
| Simplified | 4 | 14 | ∞ | ||
The slower speed makes it harder to use as an overhead usually. But this is still decent since it has the same priority, but with better damage.
- Neutral Jumping Roundhouse:
| Damage | 28[1] |  |
 |
 |
 |

|
| Stun | 3~9 | |||||
| Stun Timer | 40 | |||||
| Frame Count | 4 | 4 | 11 | 5 | ∞ | |
| Simplified | 8 | 11 | ∞ | |||
Slightly better priority as air to air than the Diagonal version.
- Diagonal Jumping Roundhouse:
| Damage | 28[1] |  |
 |
 |
 |

|
| Stun | 3~9 | |||||
| Stun Timer | 40 | |||||
| Frame Count | 5 | 4 | 12 | 6 | ∞ | |
| Simplified | 9 | 12 | ∞ | |||
Same as Diagonal Jumping Fierce.
--Graham, Shag, Tataki and Janus Gemini
Throws
To grab your opponent, hold towards or back and press Strong or Fierce punch. Boxer will hold the opponent in place for a few seconds and repeatedly headbutt them.
The first hit of the grab deals about 19.5% damage. Subsequent hits add almost 3% more each. If Boxer wiggles the joystick and/or mashes buttons while the grab is taking place, it will extend the duration. Similarly, his opponent may do the same to reduce the grab's duration. Sometimes people playing charge characters will elect to do this only for a moment before opting to charge during the grab's animation instead.
Weirdly, the Strong grab has more range than the Fierce grab even though they seem identical. You should favor using the Strong grab in situations where range is an issue.
Its known that O.Balrog have a higher default quantity of hits, which sounds great on paper but unless that the opponent does not mashes it will not be of much difference.
- Head Bomber: (←/↖/↑/↗/→ + Strong/ or ←/↖/↗/→ + Fierce)
| Damage | 28 + 4*n | 
| |
| Set amount of hits | 12 | ||
| Holds do no stun | |||
| Range | (from axis) | ||
| (from throwable box) | |||
NOTE: Balrog's grabs can only be activated when in Close Standing Strong/Fierce activation range (which also explains why Strong grab has more range), this means that Balrog is the only character in ST (this is not true for HSF2 - the CPS1 versions of ChunLi and Zangief are also like that) that has an activation range on his throw/grab(i.e. like close normals). That throw range values/image above represents how his throw box actually is, but Balrog can't activate his grab from that max range because of the Close Normal range restriction, which will vary by what character your opponent is using. On top of that, different characters have different throwablebox sizes, which as a result made Balrog grab to have a "variable" range by matchups: on some matchups his grabs have a long range(Blanka, E.Honda), on others it has a very small range(Dhalsim, Zangief).
See the chart below for his exact throw range against all characters. The Range Advantage field is in comparison with the character Normal throw, not his Command throw, if he have any.
| Strong / Fierce | RY | KE | EH | CH | BL | ZA | GU | DH | TH | CA | FE | DJ | BX | CL | SG | DI | |
| Range | (from axis) | 51 / 41 | 51 / 41 | 64 / 58¹ | 51 / 41 | 63 / 53 | 41 / 31 | 50 / 40 | 40 / 30 | 51 / 41 | 51 / 41 | 51 / 41 | 52 / 42 | 53 / 43 | 52 / 42 | 52 / 42 | 52 / 42 |
| (from throwable box) | 24 / 14 | 24 / 14 | 37 / 31¹ | 24 / 14 | 36 / 26 | 14 / 4 | 23 / 13 | 13 / 3 | 24 / 14 | 24 / 14 | 24 / 14 | 25 / 15 | 26 / 16 | 24 / 14 | 24 / 14 | 25 / 15 | |
| Range Advantage | +5 / -5 | +5 / -5 | +1 / -5¹ | +1 / -9 | +2 / -8 | -10 / -20 | +5 / -5 | -11 / -21 | +11 / +1 | +7 / -3 | +13 / +3 | +7 / -3 | +5 / -5 | +9 / -1 | +1 / -9 | ||
| Max dist. between axes | 80 / 70 | 80 / 70 | 93² / 86¹ | 76 / 66 | 93 / 83 | 86 / 76 | 80 / 70 | 80 / 70 | 86 / 76 | 76 / 66 | 80 / 70 | 82 / 72 | 80 / 70 | 80 / 70 | 84 / 74 | 80 / 70 | |
¹ Fierce has 10 pixels less range than Strong, minus against E.Honda where its only 6 pixels less.
² His throwbox is activated out of range, but its only possible by 1 pixel.
--Born2SPD
Special Moves
- Straight Rush: (Charge ←, → P)
Detailed Input: (Charge ←/↙/↖ for at least 70f, [7~14f] → [11/9/7f] Jab/Strong/Fierce. It is needed to wait at least 1 frame after leaving the charge direction to enter with the P button)
The main (only?) reason anyone considers picking O. Rog. Comes out fast. Unlike N.Balrog's version of this move, it does not whiff against crouching characters. On the other hand the Fierce version does not knocks down but Jab does.
LP version is useful as a mid-range poke/punisher and has better priority than the st. FP, good for stuffing or trading with fireballs. Use the MP version from full screen to trade with fireballs. FP version is usually only used for going the distance on a retreating opponent.
Due to its range, the LP version is a good punisher for whiffed Shoryukens and such. It can get to an opponent faster than N.Balrog's low rush.
- Upper Rush: (Charge ←, → K)
Detailed Input: (Charge ←/↙/↖ for at least 62f, [7~14f] → [11/9/7f] Short/Forward/Roundhouse. It is needed to wait at least 1 frame after leaving the charge direction to enter with the K button)
Good anti-air. Whiffs on crouching characters. HK version is good for hitting people jumping backwards, especially at the beginning of the round.
- Turn Around Punch a.k.a. TAP: (Charge 3P or 3K for at least a half second, then release)
Detailed Input: (Charge requirements: One = 30f, Two = 120f, Three = 240f, Four = 480f, Five = 960f, Six = 1440f, Seven = 1920f and Final = 2400f)
| Damage |  |
 |
 |
 |
 |
 |
 |
 |

| |||
| One | 28[0] | Two | 34[10] | |||||||||
| Three | 34[11] | Four | 34[12] | |||||||||
| Five | 34[13] | Six | 34[14] | |||||||||
| Seven | 34[15] | Final | 34[16] | |||||||||
| Frame Count | 4 | 4 | 4 | 7 | 2 | 2 | 2 | 2 | 12 | |||
| Simplified | 27 | 12 | ||||||||||
NOTE: attack levels 2~7 and Final don't do random damage, as can be seen here the random damage tables 10~16 have 100% likelihood of adding a specific value on the damage formula ([34 + that 'random' value]*char_scaling*low_energy_scaling).
- Recovery:
| Stun | 9~15 |  |

|
| Stun Timer | 100 | ||
| Frame Advantage | +0 | ||
| Frame Count | 6 | 4 | |
| Simplified | 10 | ||
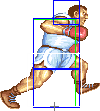
Attacks that increase in strength and speed over time, making them hard to predict. They also have great hit properties able to hit nicely and on crouching opponents like his straight rush. Lastly, they can be used without being 'charged' like a rush punch or headbutt. --Graham
There is no difference move wise but you want to use the 3K version so you have access to his punch moves: st.FP, cr.MP, throw, rush punches and buffalo headbutt. --Shag
The Turn-Around Punch has eight levels, 1~7 and Final. The longer you hold the buttons, the higher the level you'll get. You can combo a cr.Strong into a rush punch after a 4+ meaty TAP.
It's possible to charge two TAP's at once, one with the PPP and the other with KKK. -- Janus Gemini
- Buffalo Headbutt: (Charge ↓, ↑ P)
Detailed Input: (Charge ↓/↙/↘ for at least 66f, [7~14f] ↑/↖/↗ [11/9/7/2f] Jab/Strong/Fierce/any P if you are at a jumpable state. It is needed to wait at least 1 frame after leaving the charge direction to enter with the P button)
Anti-air special. Its active frames come in quite late for a reversal, making safe-jumps easier to do against Balrog. Useful to avoid some fireballs (don't use against Sim since he can Standing Roundhouse you on reaction), set up grabs (whiff it so you land just in front of your opponent), get out of Vega's walldive shenanigans, stuff things after a blocked rush / etc.
Note that it can be made safe on block, just make sure it will hit near the last attacking frames. You can then try to grab the opponent.
You can keep your charge (to do rushes as you land) if you do it with up/back instead of up or up/forward.
Jab: This version comes out the quickest (11 startup frames), travels the least, and has the best priority. It cleanly beats N. Ryu's and N. Ken's Shoryukens, and even Claw's Flipkicks if timed right, so it can be very deadly in throw mixups. Probably his most abusable move.
Strong: This version has the worst priority and will not reliably go through fireballs. I only use it when trying to stuff pokes and things from the appropriate distance.
Fierce: This version travels the farthest but comes out the slowest (15 startup frames). Slightly worse priority than the LP version. You can use this in conjunction with the Knockdown Rush Uppercut to travel across the screen while keeping charge. For example, an advanced tactic against fireballers is to do a LK Knockdown Rushdown Punch just before they release their projectile, and then use the FP Headbutt to travel through the projectile and hit them during their recovery.
Misc Animations
Jump Animations
- Neutral/Back/Forward Jump:
Boxer has a considerably fast prejump. He also has a very low jump arc, and this can be good and bad, deppending on the situation.
The landing recovery has a special property which allows it to be canceled into certain actions. At the first landing frame, you can perform throws (including command throws), and on the second landing frame, you can start another jump, attack with a normal or special move, or block. Blocking not being until the second landing frame, as well as hitbox-hurtbox interactions having priority over throwbox-throw hurtbox is why sweeps work as anti airs in this game.
Things are different when jumping over your opponent, however. In that situation it's possible to walk back/forward, to jump again or to even block on the first landing frame! Strangely, if a throw is timed on the first landing frame of a jump that crosses over, a throwbox will never come out, even though that input will result in a normal coming out 2 frames later (like it normally would). Anyway, being able to block on the first landing frame can help a little bit on some safe jump crossup setups, or maybe in other situations as well if your character has a huge jump arc.
The Basics
Old Boxer has the same normals as New Boxer, so his abilities in that regard are still the same (generally this is pretty good). He still has access to the same combos (just substitute jab dash straight instead of low rush) and frame traps. Since he lacks low rush, and low upper rush, you'll want to make use of his other specials in their place (when applicable), his dash straight will not whiff on crouchers like New Boxer, and the jab ones knocks down on hit instead of fierce, so it's a great pressure tool, comes out fast, and usually trades in your favour. Old Boxer has less tools overall, and usually needs to take more risks, but with the exception of the Zangief matchup, he still does well, and can get wins vs the rest of the cast.
Advanced Strategy
Match-ups
Serious Disadvantage Match-ups
Vs. Zangief:
- 0.5 - 9.5
I'm seriously not exagerrating these numbers, I believe this is genuinely the worst match in the entire game. Since you lack low rush, lariats are hell to deal with, while it's true that your sweep can beat them, the spacing needed for this to work is really precise, he can move during lariats, so it's massively unlikely you will land it, most cases you lose or trade.
Other than that it plays out pretty similar to as New Boxer vs Gief, just the lack of low rush severely limits your options. If he gets a knockdown you basically lose. You can't do anything decent from a distance since your dash punches lose to lariats, and you can't get close or you die.
