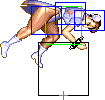
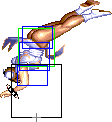
ReckyDaGuy (talk | contribs) No edit summary |
ReckyDaGuy (talk | contribs) No edit summary |
||
| Line 191: | Line 191: | ||
==== <span class="invisible-header">clhp</span> ==== | ==== <span class="invisible-header">clhp</span> ==== | ||
{{MoveData | {{MoveData | ||
| name = | | name = Standing Fierce | ||
| input = 5HP / | | input = 5HP / {{hp}} | ||
| subtitle = | | subtitle = Heavy Punch | ||
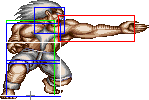
| image = | | image = Blanka_stclfrc3_stfarfrc3.png | ||
| imageSize = | | imageSize = 134x97px | ||
| caption = | | caption = | ||
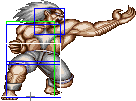
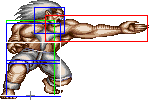
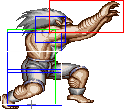
| image2 = Blanka_stclfrc4_stfarfrc4.png | |||
| imageSize2 = 101x119px | |||
| caption2 = | |||
| data = | | data = | ||
{{AttackData-SSF2T | {{AttackData-SSF2T | ||
|damage = | |damage =26[1] | ||
|dizzy= 10~16 | |dizzy= 10~16 | ||
|dizzytime= 80 | |dizzytime= 80 | ||
|cancel = | |cancel = None | ||
|guard = Mid | |guard = Mid | ||
|startup= | |startup= 7 | ||
|active= | |active= 7 (4/3) | ||
|recovery= | |recovery= 18 | ||
|total = | |total = 32 | ||
|frameAdv = - | |frameAdv = -3/+1 | ||
|actrange = | |actrange = N/A | ||
|meter = 5/4 | |meter = 5/4 | ||
|description= A | |description= A two handed upwards claw swipe. | ||
*Can | *Can be used as an anti-air and anti cross-up from up close. | ||
*You can also use this as a meaty for massive frame advantage, or for setting up frame traps. Otherwise, this move is pretty unsafe. | *You can also use this as a meaty for massive frame advantage, or for setting up frame traps. Otherwise, this move is pretty unsafe. | ||
* | *Also does good damage and stun. Try using this after a close Strong. | ||
}} | }} | ||
}} | }} | ||
<span class="mw-customtoggle- | <span class="mw-customtoggle-hp" style="color: cyan">'''Click to toggle detailed hitbox data.'''</span> | ||
<div class="mw-collapsible mw-collapsed" id="mw-customcollapsible- | <div class="mw-collapsible mw-collapsed" id="mw-customcollapsible-hp"> | ||
{{STDiagramHeader}} | {{STDiagramHeader}} | ||
{{STDiagramCell|}} |{{STDiagramImageCell| 1 | | {{STDiagramCell|}} |{{STDiagramImageCell| 1 | Blanka_stcljab1&7_stfarjab1&7_stclstrng4_stfarstrng1&6_stclfrc1&7_stfarfrc1&7_stclshrt11_stfarshrt1&7_stclfrwrd11_stfarfrwrd1&7_stclrh1&9_stfarrh1&9.png}} |{{STDiagramImageCell| 1 | Blanka_stclfrc2&6_stfarfrc2&6.png}} |{{STDiagramImageCell| 1 | Blanka_stclfrc3_stfarfrc3.png}} |{{STDiagramImageCell| 1 | Blanka_stclfrc4_stfarfrc4.png}} |{{STDiagramImageCell| 1 | Blanka_stclfrc5_stfarfrc5.png}} |{{STDiagramImageCell| 1 | Blanka_stclfrc2&6_stfarfrc2&6.png}} |{{STDiagramImageCell| 1 | Blanka_stcljab1&7_stfarjab1&7_stclstrng4_stfarstrng1&6_stclfrc1&7_stfarfrc1&7_stclshrt11_stfarshrt1&7_stclfrwrd11_stfarfrwrd1&7_stclrh1&9_stfarrh1&9.png}} | ||
|- | |- | ||
{{STDiagramCell| Frame Count}} |{{STDiagramCell| 1 + 3}} |{{STDiagramCell| | {{STDiagramCell| Frame Count}} |{{STDiagramCell| 1 + 3}} |{{STDiagramCell| 3}} |{{STDiagramCell| 4}} |{{STDiagramCell| 3}} |{{STDiagramCell|10}} |{{STDiagramCell| 7}} |{{STDiagramCell| 1}} | ||
|- | |- | ||
{{STDiagramCell| Simplified}} |{{ | {{STDiagramCell| Simplified}} |{{STDiagramCellColSpan|2| 7}} |{{STDiagramCellColSpan|2| 7}} |{{STDiagramCellColSpan|3| 18}} | ||
|} | |} | ||
</div> | </div> | ||
| Line 277: | Line 242: | ||
| input = 5LK / cl.{{lk}} | | input = 5LK / cl.{{lk}} | ||
| subtitle = Close Light Kick | | subtitle = Close Light Kick | ||
| image = | | image = Blanka_stclshrt6.png | ||
| imageSize = | | imageSize = 98x125px | ||
| caption = | | caption = | ||
| data = | | data = | ||
{{AttackData-SSF2T | {{AttackData-SSF2T | ||
|damage = | |damage = 14[0] | ||
|dizzy= 0~5 | |dizzy= 0~5 | ||
|dizzytime= 40 | |dizzytime= 40 | ||
|cancel = | |cancel = None | ||
|guard = Mid | |guard = Mid | ||
|startup= | |startup= 14 | ||
|active= | |active= 4 | ||
|recovery= | |recovery= 13 | ||
|total = | |total = 31 | ||
|frameAdv = | |frameAdv = -4 | ||
|actrange = 0- | |actrange = 0-43 | ||
|meter = 2/1 | |meter = 2/1 | ||
|description= | |description= Blanka jumps in the air and knees his opponent. | ||
* | *This move is awful. | ||
}} | }} | ||
}} | }} | ||
| Line 302: | Line 266: | ||
<span class="mw-customtoggle-cllk" style="color: cyan">'''Click to toggle detailed hitbox data.'''</span> | <span class="mw-customtoggle-cllk" style="color: cyan">'''Click to toggle detailed hitbox data.'''</span> | ||
<div class="mw-collapsible mw-collapsed" id="mw-customcollapsible-cllk"> | <div class="mw-collapsible mw-collapsed" id="mw-customcollapsible-cllk"> | ||
*'''Startup/Active''': | |||
{{STDiagramHeader}} | {{STDiagramHeader}} | ||
{{STDiagramCell|}} |{{STDiagramImageCell| 1 | | {{STDiagramCell|}} |{{STDiagramImageCell| 1 | Blanka_stclshrt1_stclfrwrd1.png}} |{{STDiagramImageCell| 1 | Blanka_stclshrt2_stclfrwrd2.png}} |{{STDiagramImageCell| 1 | Blanka_stclshrt3&9_stclfrwrd3&9.png}} |{{STDiagramImageCell| 1 | Blanka_stclshrt4&8_stclfrwrd4&8.png}} |{{STDiagramImageCell| 1 | Blanka_stclshrt5&7_stclfrwrd7.png}} |{{STDiagramImageCell| 1 | Blanka_stclshrt6.png}} | ||
|- | |- | ||
{{STDiagramCell| Frame Count}} |{{STDiagramCell| 1 + | {{STDiagramCell| Frame Count}} |{{STDiagramCell| 1 + 3}} |{{STDiagramCell| 3}} |{{STDiagramCell| 3}} |{{STDiagramCell| 2}} |{{STDiagramCell| 2}} |{{STDiagramCell| 4}} | ||
|- | |- | ||
{{STDiagramCell| Simplified}} |{{STDiagramCellColSpan | | {{STDiagramCell| Simplified}} |{{STDiagramCellColSpan | 5 | 14}} |{{STDiagramCell| 4}} | ||
|} | |} | ||
*'''Recovery''': | |||
{{STDiagramHeader}} | |||
{{STDiagramCell|}} |{{STDiagramImageCell| 1 | Blanka_stclshrt5&7_stclfrwrd7.png}} |{{STDiagramImageCell| 1 | Blanka_stclshrt4&8_stclfrwrd4&8.png}} |{{STDiagramImageCell| 1 | Blanka_stclshrt3&9_stclfrwrd3&9.png}} |{{STDiagramImageCell| 1 | Blanka_stclshrt10_stclfrwrd10_stclrh8_stfarrh8.png}} |{{STDiagramImageCell| 1 | Blanka_stcljab1&7_stfarjab1&7_stclstrng4_stfarstrng1&6_stclfrc1&7_stfarfrc1&7_stclshrt11_stfarshrt1&7_stclfrwrd11_stfarfrwrd1&7_stclrh1&9_stfarrh1&9.png}} | |||
|- | |||
{{STDiagramCell| Frame Count}} |{{STDiagramCell| 3}} |{{STDiagramCell| 3}} |{{STDiagramCell| 3}} |{{STDiagramCell| 3}} |{{STDiagramCell| 1}} | |||
|- | |||
{{STDiagramCell| Simplified}} |{{STDiagramCellColSpan | 5 | 13}} | |||
|} | |||
</div> | </div> | ||
| Line 318: | Line 293: | ||
| input = 5LK / fr.{{lk}} | | input = 5LK / fr.{{lk}} | ||
| subtitle = Far Light Kick | | subtitle = Far Light Kick | ||
| image = | | image = Blanka_stfarshrt4.png | ||
| imageSize = | | imageSize = 137x94px | ||
| caption = | | caption = | ||
| data = | | data = | ||
{{AttackData-SSF2T | {{AttackData-SSF2T | ||
|damage = | |damage = 14[0] | ||
|dizzy= 0~5 | |dizzy= 0~5 | ||
|dizzytime= 40 | |dizzytime= 40 | ||
| Line 329: | Line 304: | ||
|guard = Mid | |guard = Mid | ||
|startup= 7 | |startup= 7 | ||
|active= | |active= 4 | ||
|recovery= | |recovery= 7 | ||
|total = | |total = 18 | ||
|frameAdv = + | |frameAdv = +2 | ||
|actrange = | |actrange = 44+ | ||
|meter = 2/1 | |meter = 2/1 | ||
|description= A | |description= A spear kick with good range and incredible priority. | ||
*Blanka's only realistic ground defense against Honda's Hundred Hand Slaps besides trading with electricity. | |||
* | |||
}} | }} | ||
}} | }} | ||
| Line 346: | Line 319: | ||
{{STDiagramHeader}} | {{STDiagramHeader}} | ||
{{STDiagramCell|}} |{{STDiagramImageCell| 1 | | {{STDiagramCell|}} |{{STDiagramImageCell| 1 | Blanka_stcljab1&7_stfarjab1&7_stclstrng4_stfarstrng1&6_stclfrc1&7_stfarfrc1&7_stclshrt11_stfarshrt1&7_stclfrwrd11_stfarfrwrd1&7_stclrh1&9_stfarrh1&9.png}} |{{STDiagramImageCell| 1 |Blanka_stfarshrt2&6.png}} |{{STDiagramImageCell| 1 | Blanka_stfarshrt3&5.png}} |{{STDiagramImageCell| 1 | Blanka_stfarshrt4.png}} |{{STDiagramImageCell| 1 | Blanka_stfarshrt3&5.png}} |{{STDiagramImageCell| 1 |Blanka_stfarshrt2&6.png}} |{{STDiagramImageCell| 1 | Blanka_stcljab1&7_stfarjab1&7_stclstrng4_stfarstrng1&6_stclfrc1&7_stfarfrc1&7_stclshrt11_stfarshrt1&7_stclfrwrd11_stfarfrwrd1&7_stclrh1&9_stfarrh1&9.png}} | ||
|- | |- | ||
{{STDiagramCell| Frame Count}} |{{STDiagramCell| 1 + | {{STDiagramCell| Frame Count}} |{{STDiagramCell| 1 + 2}} |{{STDiagramCell| 2}} |{{STDiagramCell| 2}} |{{STDiagramCell| 4}} |{{STDiagramCell| 3}} |{{STDiagramCell| 3}} |{{STDiagramCell| 1}} | ||
|- | |- | ||
{{STDiagramCell| Simplified}} |{{STDiagramCellColSpan | | {{STDiagramCell| Simplified}} |{{STDiagramCellColSpan | 3 | 7}} |{{STDiagramCell| 4}} |{{STDiagramCellColSpan | 3 | 7}} | ||
|} | |} | ||
| Line 361: | Line 334: | ||
| input = 5MK / cl.{{mk}} | | input = 5MK / cl.{{mk}} | ||
| subtitle = Close Medium Kick | | subtitle = Close Medium Kick | ||
| image = | | image = Blanka_stclfrwrd5.png | ||
| imageSize = | | imageSize = 101x125px | ||
| caption = First | | caption = First hit | ||
| image2 = | | image2 = Blanka_stclfrwrd6.png | ||
| imageSize2 = | | imageSize2 = 110x125px | ||
| caption2 = Second | | caption2 = Second hit | ||
| data = | | data = | ||
{{AttackData-SSF2T | {{AttackData-SSF2T | ||
|damage = | |damage = 22[0] x 2 | ||
|dizzy= 5~11 | |dizzy= 5~11 x 2 | ||
|dizzytime= 60 | |dizzytime= 60 x 2 | ||
|cancel = | |cancel = None | ||
|guard = Mid | |guard = Mid | ||
|startup= | |startup= 12 | ||
|active= | |active= 6 (2 + 4) | ||
|recovery= | |recovery= 13 | ||
|total = | |total = 31 | ||
|frameAdv = +1 / + | |frameAdv = +1/+1(0) | ||
|actrange = 0- | |actrange = 0-46 | ||
|meter = 4/3 | |meter = 4/3 x 2 | ||
|description= A | |description= A double-hitting knee attack. | ||
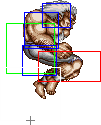
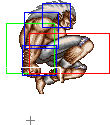
* | *Much better than close Short, but still not as good as Headbutt. | ||
}} | }} | ||
}} | }} | ||
| Line 389: | Line 361: | ||
<span class="mw-customtoggle-clmk" style="color: cyan">'''Click to toggle detailed hitbox data.'''</span> | <span class="mw-customtoggle-clmk" style="color: cyan">'''Click to toggle detailed hitbox data.'''</span> | ||
<div class="mw-collapsible mw-collapsed" id="mw-customcollapsible-clmk"> | <div class="mw-collapsible mw-collapsed" id="mw-customcollapsible-clmk"> | ||
*'''Startup/Active''': | |||
{{STDiagramHeader}} | |||
{{STDiagramCell|}} |{{STDiagramImageCell| 1 | Blanka_stclshrt1_stclfrwrd1.png}} |{{STDiagramImageCell| 1 | Blanka_stclshrt2_stclfrwrd2.png}} |{{STDiagramImageCell| 1 | Blanka_stclshrt3&9_stclfrwrd3&9.png}} |{{STDiagramImageCell| 1 | Blanka_stclshrt4&8_stclfrwrd4&8.png}} |{{STDiagramImageCell| 1 | Blanka_stclfrwrd5.png}} |{{STDiagramImageCell| 1 | Blanka_stclfrwrd6.png}} | |||
|- | |||
{{STDiagramCell| Frame Count}} |{{STDiagramCell| 1 + 3}} |{{STDiagramCell| 3}} |{{STDiagramCell| 3}} |{{STDiagramCell| 2}} |{{STDiagramCell| 2}} |{{STDiagramCell| 4}} | |||
|- | |||
{{STDiagramCell| Simplified}} |{{STDiagramCellColSpan | 4 | 12}} |{{STDiagramCell| 2}} |{{STDiagramCell| 4}} | |||
|} | |||
*'''Recovery''': | |||
{{STDiagramHeader}} | {{STDiagramHeader}} | ||
{{STDiagramCell|}} |{{STDiagramImageCell| 1 | | {{STDiagramCell|}} |{{STDiagramImageCell| 1 | Blanka_stclshrt5&7_stclfrwrd7.png}} |{{STDiagramImageCell| 1 | Blanka_stclshrt4&8_stclfrwrd4&8.png}} |{{STDiagramImageCell| 1 | Blanka_stclshrt3&9_stclfrwrd3&9.png}} |{{STDiagramImageCell| 1 | Blanka_stclshrt10_stclfrwrd10_stclrh8_stfarrh8.png}} |{{STDiagramImageCell| 1 | Blanka_stcljab1&7_stfarjab1&7_stclstrng4_stfarstrng1&6_stclfrc1&7_stfarfrc1&7_stclshrt11_stfarshrt1&7_stclfrwrd11_stfarfrwrd1&7_stclrh1&9_stfarrh1&9.png}} | ||
|- | |- | ||
{{STDiagramCell| Frame Count}} |{{STDiagramCell| | {{STDiagramCell| Frame Count}} |{{STDiagramCell| 3}} |{{STDiagramCell| 3}} |{{STDiagramCell| 3}} |{{STDiagramCell| 3}} |{{STDiagramCell| 1}} | ||
|- | |- | ||
{{STDiagramCell| Simplified}} |{{STDiagramCellColSpan | | {{STDiagramCell| Simplified}} |{{STDiagramCellColSpan | 5 | 13}} | ||
|} | |} | ||
| Line 405: | Line 389: | ||
| input = 5MK / fr.{{mk}} | | input = 5MK / fr.{{mk}} | ||
| subtitle = Far Medium Kick | | subtitle = Far Medium Kick | ||
| image = | | image = Blanka_stfarfrwrd4.png | ||
| imageSize = | | imageSize = 146x95px | ||
| caption = | | caption = | ||
| data = | | data = | ||
{{AttackData-SSF2T | {{AttackData-SSF2T | ||
|damage = | |damage = 22[0] | ||
|dizzy= 5~11 | |dizzy= 5~11 | ||
|dizzytime= 60 | |dizzytime= 60 | ||
| Line 416: | Line 400: | ||
|guard = Mid | |guard = Mid | ||
|startup= 7 | |startup= 7 | ||
|active= | |active= 4 | ||
|recovery= | |recovery= 7 | ||
|total = | |total = 18 | ||
|frameAdv = + | |frameAdv = +7 | ||
|actrange = | |actrange = 47+ | ||
|meter = 4/3 | |meter = 4/3 | ||
|description= A kick | |description= A more acrobatic kick. | ||
* | *Can be used as a trade anti-air, but its generally not as good as far Strong. | ||
}} | }} | ||
}} | }} | ||
| Line 432: | Line 415: | ||
{{STDiagramHeader}} | {{STDiagramHeader}} | ||
{{STDiagramCell|}} |{{STDiagramImageCell| 1 | | {{STDiagramCell|}} |{{STDiagramImageCell| 1 | Blanka_stcljab1&7_stfarjab1&7_stclstrng4_stfarstrng1&6_stclfrc1&7_stfarfrc1&7_stclshrt11_stfarshrt1&7_stclfrwrd11_stfarfrwrd1&7_stclrh1&9_stfarrh1&9.png}} |{{STDiagramImageCell| 1 |Blanka_stfarfrwrd2&6.png}} |{{STDiagramImageCell| 1 | Blanka_stfarfrwrd3&5.png}} |{{STDiagramImageCell| 1 | Blanka_stfarfrwrd4.png}} |{{STDiagramImageCell| 1 | Blanka_stfarfrwrd3&5.png}} |{{STDiagramImageCell| 1 |Blanka_stfarfrwrd2&6.png}} |{{STDiagramImageCell| 1 | Blanka_stcljab1&7_stfarjab1&7_stclstrng4_stfarstrng1&6_stclfrc1&7_stfarfrc1&7_stclshrt11_stfarshrt1&7_stclfrwrd11_stfarfrwrd1&7_stclrh1&9_stfarrh1&9.png}} | ||
|- | |- | ||
{{STDiagramCell| Frame Count}} |{{STDiagramCell| 1 + | {{STDiagramCell| Frame Count}} |{{STDiagramCell| 1 + 2}} |{{STDiagramCell| 2}} |{{STDiagramCell| 2}} |{{STDiagramCell| 4}} |{{STDiagramCell| 3}} |{{STDiagramCell| 3}} |{{STDiagramCell| 1}} | ||
|- | |- | ||
{{STDiagramCell| Simplified}} |{{STDiagramCellColSpan | | {{STDiagramCell| Simplified}} |{{STDiagramCellColSpan | 3 | 7}} |{{STDiagramCell| 4}} |{{STDiagramCellColSpan | 3 | 7}} | ||
|} | |} | ||
| Line 444: | Line 427: | ||
==== <span class="invisible-header">clhk</span> ==== | ==== <span class="invisible-header">clhk</span> ==== | ||
{{MoveData | {{MoveData | ||
| name = | | name = Standing Roundhouse | ||
| input = 5HK / {{hk}} | | input = 5HK / {{hk}} | ||
| subtitle = | | subtitle = Standing Heavy Kick | ||
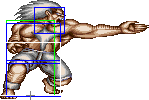
| image = | | image = Blanka_stclrh3_stfarrh3.png | ||
| imageSize = | | imageSize = 163x105px | ||
| caption = | | caption = | ||
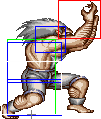
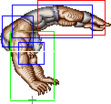
| image2 = Blanka_stclrh4_stfarrh4.png | |||
| imageSize2 = 111x114px | |||
| caption2 = | |||
| data = | | data = | ||
{{AttackData-SSF2T | {{AttackData-SSF2T | ||
| Line 457: | Line 443: | ||
|cancel = None | |cancel = None | ||
|guard = Mid | |guard = Mid | ||
|startup = | |startup = 7 | ||
|active = 6 | |active = 11 (6/5) | ||
|recovery= 21 | |recovery= 21 | ||
|total = | |total = 39 | ||
|frameAdv = - | |frameAdv = -10/-4 | ||
|actrange = | |actrange = N/A | ||
|meter = 5/4 | |meter = 5/4 | ||
|description= | |description= Blanka does a cool flip. | ||
* | *Useful as an anti-air and anti crossup. | ||
*Can also be used after close Strong for combos. | |||
}} | }} | ||
}} | }} | ||
<span class="mw-customtoggle- | <span class="mw-customtoggle-hk" style="color: cyan">'''Click to toggle detailed hitbox data.'''</span> | ||
<div class="mw-collapsible mw-collapsed" id="mw-customcollapsible- | <div class="mw-collapsible mw-collapsed" id="mw-customcollapsible-hk"> | ||
*'''Startup/Active''': | |||
{{STDiagramHeader}} | {{STDiagramHeader}} | ||
{{STDiagramCell|}} |{{STDiagramImageCell| 1 | | {{STDiagramCell|}} |{{STDiagramImageCell| 1 | Blanka_stcljab1&7_stfarjab1&7_stclstrng4_stfarstrng1&6_stclfrc1&7_stfarfrc1&7_stclshrt11_stfarshrt1&7_stclfrwrd11_stfarfrwrd1&7_stclrh1&9_stfarrh1&9.png}} |{{STDiagramImageCell| 1 | Blanka_stclrh2_stfarrh2.png}} |{{STDiagramImageCell| 1 | Blanka_stclrh3_stfarrh3.png}} |{{STDiagramImageCell| 1 | Blanka_stclrh4_stfarrh4.png}} | ||
|- | |- | ||
{{STDiagramCell| Frame Count}} |{{STDiagramCell| 1 + | {{STDiagramCell| Frame Count}} |{{STDiagramCell| 1 + 3}} |{{STDiagramCell| 3}} |{{STDiagramCell| 6}} |{{STDiagramCell|5}} | ||
|- | |- | ||
{{STDiagramCell| Simplified}} |{{STDiagramCellColSpan | | {{STDiagramCell| Simplified}} |{{STDiagramCellColSpan | 2 | 7}} |{{STDiagramCellColSpan|2| 11}} | ||
|} | |} | ||
*'''Recovery''': | |||
{{STDiagramHeader}} | {{STDiagramHeader}} | ||
{{STDiagramCell|}} |{{STDiagramImageCell| 1 | | {{STDiagramCell|}} |{{STDiagramImageCell| 1 | Blanka_stclrh5_stfarrh5.png}} |{{STDiagramImageCell| 1 | Blanka_stclrh6_stfarrh6.png}} |{{STDiagramImageCell| 1 | Blanka_stclrh7_stfarrh7.png}} |{{STDiagramImageCell| 1 | Blanka_stclshrt10_stclfrwrd10_stclrh8_stfarrh8.png}} |{{STDiagramImageCell| 1 | Blanka_stcljab1&7_stfarjab1&7_stclstrng4_stfarstrng1&6_stclfrc1&7_stfarfrc1&7_stclshrt11_stfarshrt1&7_stclfrwrd11_stfarfrwrd1&7_stclrh1&9_stfarrh1&9.png}} | ||
|- | |- | ||
{{STDiagramCell| Frame Count}} |{{STDiagramCell| | {{STDiagramCell| Frame Count}} |{{STDiagramCell| 5}} |{{STDiagramCell| 5}} |{{STDiagramCell| 5}} |{{STDiagramCell| 5}} |{{STDiagramCell| 1}} | ||
|- | |- | ||
{{STDiagramCell| Simplified}} |{{STDiagramCellColSpan | | {{STDiagramCell| Simplified}} |{{STDiagramCellColSpan | 5 | 21}} | ||
|} | |} | ||
</div> | |||
===Crouching Normals=== | ===Crouching Normals=== | ||
Revision as of 00:15, 5 April 2023
Normal Moves
Disclaimer: To better understand the diagrams, read this.
Standing Normals
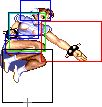
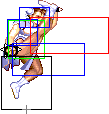
cl.lp
| Damage | Dizzy | Dizzy Time | Cancel | Guard | Act. Range |
|---|---|---|---|---|---|
| 14[0] | 0~5 | 40 | Special, Super | Mid | 0-40 |
| Startup | Active | Recovery | Total | Frame Adv. | Meter |
| 5 | 2 | 9 | 16 | +2 | 2/1 |
|
Blanka slaps his opponent.
| |||||
Click to toggle detailed hitbox data.
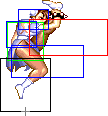
frlp
| Damage | Dizzy | Dizzy Time | Cancel | Guard | Act. Range |
|---|---|---|---|---|---|
| 14[0] | 0~5 | 40 | Special, Super | Mid | 22+ |
| Startup | Active | Recovery | Total | Frame Adv. | Meter |
| 5 | 3 | 11 | 29 | -1 | 2/1 |
|
Another slap, now left handed.
| |||||
Click to toggle detailed hitbox data.
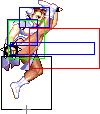
cl.mp
| Damage | Dizzy | Dizzy Time | Cancel | Guard | Act. Range |
|---|---|---|---|---|---|
| 20[0] | 5~11 | 60 | Special, Super | Mid | 0-40 |
| Startup | Active | Recovery | Total | Frame Adv. | Meter |
| 3 | 4 | 3 | 10 | +11 | 4/3 |
|
A quick stab.
| |||||
Click to toggle detailed hitbox data.
frmp
| Damage | Dizzy | Dizzy Time | Cancel | Guard | Act. Range |
|---|---|---|---|---|---|
| 20[0] | 5~11 | 60 | Special, Super | Mid | 41+ |
| Startup | Active | Recovery | Total | Frame Adv. | Meter |
| 6 | 2 | 7 | 15 | +9 | 4/3 |
|
A downwards swipe anti-air.
| |||||
Click to toggle detailed hitbox data.
clhp
| Damage | Dizzy | Dizzy Time | Cancel | Guard | Act. Range |
|---|---|---|---|---|---|
| 26[1] | 10~16 | 80 | None | Mid | N/A |
| Startup | Active | Recovery | Total | Frame Adv. | Meter |
| 7 | 7 (4/3) | 18 | 32 | -3/+1 | 5/4 |
|
A two handed upwards claw swipe.
| |||||
Click to toggle detailed hitbox data.
cllk
| Damage | Dizzy | Dizzy Time | Cancel | Guard | Act. Range |
|---|---|---|---|---|---|
| 14[0] | 0~5 | 40 | None | Mid | 0-43 |
| Startup | Active | Recovery | Total | Frame Adv. | Meter |
| 14 | 4 | 13 | 31 | -4 | 2/1 |
|
Blanka jumps in the air and knees his opponent.
| |||||
Click to toggle detailed hitbox data.
- Startup/Active:
 |
 |
 |
 |
 |

| |
| Frame Count | 1 + 3 | 3 | 3 | 2 | 2 | 4 |
| Simplified | 14 | 4 | ||||
- Recovery:
 |
 |
 |
 |

| |
| Frame Count | 3 | 3 | 3 | 3 | 1 |
| Simplified | 13 | ||||
frlk
| Damage | Dizzy | Dizzy Time | Cancel | Guard | Act. Range |
|---|---|---|---|---|---|
| 14[0] | 0~5 | 40 | None | Mid | 44+ |
| Startup | Active | Recovery | Total | Frame Adv. | Meter |
| 7 | 4 | 7 | 18 | +2 | 2/1 |
|
A spear kick with good range and incredible priority.
| |||||
Click to toggle detailed hitbox data.
clmk
| Damage | Dizzy | Dizzy Time | Cancel | Guard | Act. Range |
|---|---|---|---|---|---|
| 22[0] x 2 | 5~11 x 2 | 60 x 2 | None | Mid | 0-46 |
| Startup | Active | Recovery | Total | Frame Adv. | Meter |
| 12 | 6 (2 + 4) | 13 | 31 | +1/+1(0) | 4/3 x 2 |
|
A double-hitting knee attack.
| |||||
Click to toggle detailed hitbox data.
- Startup/Active:
 |
 |
 |
 |
 |
| |
| Frame Count | 1 + 3 | 3 | 3 | 2 | 2 | 4 |
| Simplified | 12 | 2 | 4 | |||
- Recovery:
 |
 |
 |
 |

| |
| Frame Count | 3 | 3 | 3 | 3 | 1 |
| Simplified | 13 | ||||
frmk
| Damage | Dizzy | Dizzy Time | Cancel | Guard | Act. Range |
|---|---|---|---|---|---|
| 22[0] | 5~11 | 60 | None | Mid | 47+ |
| Startup | Active | Recovery | Total | Frame Adv. | Meter |
| 7 | 4 | 7 | 18 | +7 | 4/3 |
|
A more acrobatic kick.
| |||||
Click to toggle detailed hitbox data.
clhk
| Damage | Dizzy | Dizzy Time | Cancel | Guard | Act. Range |
|---|---|---|---|---|---|
| 28[1] | 10~16 | 80 | None | Mid | N/A |
| Startup | Active | Recovery | Total | Frame Adv. | Meter |
| 7 | 11 (6/5) | 21 | 39 | -10/-4 | 5/4 |
|
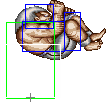
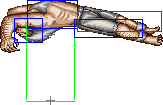
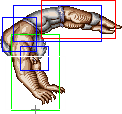
Blanka does a cool flip.
| |||||
Click to toggle detailed hitbox data.
- Startup/Active:
 |
 |
 |
| |
| Frame Count | 1 + 3 | 3 | 6 | 5 |
| Simplified | 7 | 11 | ||
- Recovery:
 |
 |
 |
 |

| |
| Frame Count | 5 | 5 | 5 | 5 | 1 |
| Simplified | 21 | ||||
Crouching Normals
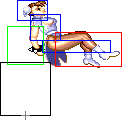
crlp
| Damage | Dizzy | Dizzy Time | Cancel | Guard | Act. Range |
|---|---|---|---|---|---|
| 4[1] | 0~5 | 40 | Special, Super | Mid | N/A |
| Startup | Active | Recovery | Total | Frame Adv. | Meter |
| 4 | 4 | 5 | 13 | +4 | 2/1 |
|
A short punch.
| |||||
Click to toggle detailed hitbox data.
crmp
| Damage | Dizzy | Dizzy Time | Cancel | Guard | Act. Range |
|---|---|---|---|---|---|
| 18[1] | 5~11 | 60 | Special, Super | Mid | N/A |
| Startup | Active | Recovery | Total | Frame Adv. | Meter |
| 5 | 4 | 5 | 14 | +9 | 4/3 |
|
Far Standing Strong but crouching.
| |||||
Click to toggle detailed hitbox data.
crhp
| Damage | Dizzy | Dizzy Time | Cancel | Guard | Act. Range |
|---|---|---|---|---|---|
| 22[2] | 10~16 | 80 | None | Mid | N/A |
| Startup | Active | Recovery | Total | Frame Adv. | Meter |
| 7 | 6 | 19 | 32 | -3 | 5/4 |
|
Crouching MP but bigger.
| |||||
Click to toggle detailed hitbox data.</span>
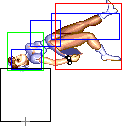
crlk
| Damage | Dizzy | Dizzy Time | Cancel | Guard | Act. Range |
|---|---|---|---|---|---|
| 14[0] | 0~5 | 40 | Special, Super | Low | N/A |
| Startup | Active | Recovery | Total | Frame Adv. | Meter |
| 5 | 4 | 5 | 14 | +4 | 2/1 |
|
A low split kick.
| |||||
Click to toggle detailed hitbox data.
frmk
| Damage | Dizzy | Dizzy Time | Cancel | Guard | Act. Range |
|---|---|---|---|---|---|
| 18[1] | 5~11 | 60 | Special, Super | Low | N/A |
| Startup | Active | Recovery | Total | Frame Adv. | Meter |
| 5 | 5 | 4 | 14 | +9 | 4/3 |
|
Easily one of the best pokes in the game.
| |||||
Click to toggle detailed hitbox data.
crhk
| Damage | Dizzy | Dizzy Time | Cancel | Guard | Act. Range |
|---|---|---|---|---|---|
| 22[2] | 5~11 | 130 | None | Low | N/A |
| Startup | Active | Recovery | Total | Frame Adv. | Meter |
| 7 | 6 | 19 | 32 | -3/Down | 5/4 |
|
Chun's sweep.
| |||||
Click to toggle detailed hitbox data.
Jumping Normals
njlp
| Damage | Dizzy | Dizzy Time | Cancel | Guard | Act. Range |
|---|---|---|---|---|---|
| 18[2] | 1~7(-2) | 40 | None | High | N/A |
| Startup | Active | Recovery | Total | Frame Adv. | Meter |
| 8 | ∞ | N/A | 8+∞ | Dependent | 2/1 |
|
A jumping chop.
| |||||
Click to toggle detailed hitbox data.
djlp
| Damage | Dizzy | Dizzy Time | Cancel | Guard | Act. Range |
|---|---|---|---|---|---|
| 16[2] | 1~7(-2) | 40 | None | High | N/A |
| Startup | Active | Recovery | Total | Frame Adv. | Meter |
| 6 | ∞ | N/A | 6+∞ | Dependent | 2/1 |
|
Like the neutral jump version except it's a punch with worse priority.
| |||||
Click to toggle detailed hitbox data.
njmp
| Damage | Dizzy | Dizzy Time | Cancel | Guard | Act. Range |
|---|---|---|---|---|---|
| 22[2] | 5~11 | 50(+10) | None | High | N/A |
| Startup | Active | Recovery | Total | Frame Adv. | Meter |
| 8 | 16 | ∞ | 24+∞ | Dependent | 4/3 |
|
Another chop.
| |||||
Click to toggle detailed hitbox data.
djmp
| Damage | Dizzy | Dizzy Time | Cancel | Guard | Act. Range |
|---|---|---|---|---|---|
| 20[2] | 5~11 | 50(+10) | None | High | - |
| Startup | Active | Recovery | Total | Frame Adv. | Meter |
| 6 | 8 | ∞ | 14+∞ | Dependent | 4/3 |
|
Another punch.
| |||||
Click to toggle detailed hitbox data.
njhp
| Damage | Dizzy | Dizzy Time | Cancel | Guard | Act. Range |
|---|---|---|---|---|---|
| 26[2] | 11~17(-1) | 60(+20) | None | High | N/A |
| Startup | Active | Recovery | Total | Frame Adv. | Meter |
| 8 | 8 | ∞ | 16+∞ | Dependent | 5/4 |
|
Yet another chop.
| |||||
Click to toggle detailed hitbox data.
djhp
| Damage | Dizzy | Dizzy Time | Cancel | Guard | Act. Range |
|---|---|---|---|---|---|
| 24[2] | 11~17(-1) | 60(+20) | None | High | N/A |
| Startup | Active | Recovery | Total | Frame Adv. | Meter |
| 6 | 8 | ∞ | 14+∞ | Dependent | 5/4 |
|
Yet another punch.
| |||||
Click to toggle detailed hitbox data.
njlk
| Damage | Dizzy | Dizzy Time | Cancel | Guard | Act. Range |
|---|---|---|---|---|---|
| 18[2] | 1~7(-2) | 40 | None | High | N/A |
| Startup | Active | Recovery | Total | Frame Adv. | Meter |
| 6 | ∞ | N/A | 6+∞ | Dependent | 2/1 |
|
A jumping split kick. Don't think too hard about how the hitbox works.
| |||||
Click to toggle detailed hitbox data.
djlk
| Damage | Dizzy | Dizzy Time | Cancel | Guard | Act. Range |
|---|---|---|---|---|---|
| 20[2] | 1~7(-2) | 40 | None | High | N/A |
| Startup | Active | Recovery | Total | Frame Adv. | Meter |
| 6 | ∞ | N/A | 6+∞ | Dependent | 2/1 |
|
A confident jumping kick.
| |||||
Click to toggle detailed hitbox data.
njmk
| Damage | Dizzy | Dizzy Time | Cancel | Guard | Act. Range |
|---|---|---|---|---|---|
| 22[2] | 5~11 | 50(+10) | None | High | N/A |
| Startup | Active | Recovery | Total | Frame Adv. | Meter |
| 6 | 10 | ∞ | 16+∞ | Dependent | 4/3 |
|
Another split kick. Don't think too hard about how the hurtbox works.
| |||||
Click to toggle detailed hitbox data.
djmk
| Damage | Dizzy | Dizzy Time | Cancel | Guard | Act. Range |
|---|---|---|---|---|---|
| 20[2] | 5~11 | 50(+10) | None | High | N/A |
| Startup | Active | Recovery | Total | Frame Adv. | Meter |
| 6 | 16 | ∞ | 22+∞ | Dependent | 4/3 |
|
A stronger version of diagonal LK.
| |||||
Click to toggle detailed hitbox data.
njhk
| Damage | Dizzy | Dizzy Time | Cancel | Guard | Act. Range |
|---|---|---|---|---|---|
| 26[2] | 10~16 | 80 | Special | Mid | N/A |
| Startup | Active | Recovery | Total | Frame Adv. | Meter |
| 3 | 13 (5/4/4) | ∞ | 16+∞ | Dependent Hard Down |
5/4 |
|
Essentially a jumping version of Chun's 3MK command normal.
| |||||
Click to toggle detailed hitbox data.
djhk
| Damage | Dizzy | Dizzy Time | Cancel | Guard | Act. Range |
|---|---|---|---|---|---|
| 24[2] | 11~17(-1) | 60(+20) | None | High | N/A |
| Startup | Active | Recovery | Total | Frame Adv. | Meter |
| 6 | 16 | ∞ | 22+∞ | Dependent | 5/4 |
|
Chun does 2 split kicks in a row. They don't combo.
| |||||
Click to toggle detailed hitbox data.
Command Normals
Sankaku Tobi (Wall Jump)
- The jumping animation is 6 frames long.
- Useful for getting out of the corner or avoiding attacks.
- The jump can be performed during an air normal. You can also do an air attack after wall jumping. You can bounce off someone with her air 2MK normal, then walljump afterwards. You can even air throw, walljump, then attack or air throw again.
- If you're quick enough, you can cancel the jump itself into a Spinning Bird Kick, retaining the directional momentum of your original jump arc.
Click to toggle detailed hitbox data.
Rear Spin Kick
| Damage | Dizzy | Dizzy Time | Cancel | Guard | Act. Range |
|---|---|---|---|---|---|
| 22[0] | 0~5 | 40 | None | Mid | 0-11 |
| Startup | Active | Recovery | Total | Frame Adv. | Meter |
| 7 | 9 (5/4) | 43 | 59 | -39 Down (Second Hitbox) |
2/1 |
|
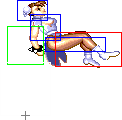
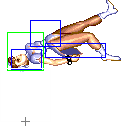
Chun-Li does a jump off the opponent (or thin air) into a flip.
| |||||
Click to toggle detailed hitbox data.
Kyakukyakuraku
| Damage | Dizzy | Dizzy Time | Cancel | Guard | Act. Range |
|---|---|---|---|---|---|
| 20[0] | 10~16 | 80 | None | Mid/Low | N/A |
| Startup | Active | Recovery | Total | Frame Adv. | Meter |
| 37 | 14 | 0 | 51 | - | 5/4 |
|
Chun-Li flips over her opponent and lands on top with a knee strike.
| |||||
Click to toggle detailed hitbox data.
Yosokyakus
| Damage | Dizzy | Dizzy Time | Cancel | Guard | Act. Range |
|---|---|---|---|---|---|
| 20[0] | 2~8 | 60 | Special | High | N/A |
| Startup | Active | Recovery | Total | Frame Adv. | Meter |
| 3 | 16 | ∞ | 19+∞ | Dependent | 4/3 |
|
Chun-Li stomps on her opponent midair.
| |||||
Click to toggle detailed hitbox data.
Throws
Chun-Li can throw with ![]() and
and ![]() . She also has an air throw, performed with the same buttons.
. She also has an air throw, performed with the same buttons.
| Damage | Dizzy | Dizzy Time | Cancel | Guard | Act. Range |
|---|---|---|---|---|---|
| 38 (MP) 32 (HP) |
7~13 | 100 | None | Grab | 48 (from axis) 23 (from throwable box) |
| Startup | Active | Recovery | Total | Frame Adv. | Meter |
| 1 | 1 | Dependent | 2 | N/A | - |
|
Chun-Li's throw.
| |||||
| Damage | Dizzy | Dizzy Time | Cancel | Guard | Act. Range |
|---|---|---|---|---|---|
| 34 | 7~13 | 100 | None | Grab | 58 (from axis) 33 (from throwable box) |
| Startup | Active | Recovery | Total | Frame Adv. | Meter |
| 1 | 1 | Dependent | 2 | N/A | - |
|
Same sprite and basic function as Chun's grounded throw.
| |||||
Click to toggle throwbox data.
--Raisin (March 12, 2007), some info courtesy T.Akiba
Special Moves
Kikoken
| Damage | Dizzy | Dizzy Time | Cancel | Guard | Act. Range | |
|---|---|---|---|---|---|---|
| 17[1] | 5~11 | 90 | None | Mid | N/A | |
| Startup | Active | Recovery | Total | Frame Adv. | Meter | |
| 5 | 75 | 42* | 47 | Dependent | 5 | |
|
| ||||||
| Damage | Dizzy | Dizzy Time | Cancel | Guard | Act. Range | |
| 18[1] | 7~13 | 90 | None | Mid | N/A | |
| Startup | Active | Recovery | Total | Frame Adv. | Meter | |
| 5 | 45 | 40* | 45 | Dependent | 5 | |
|
| ||||||
| Damage | Dizzy | Dizzy Time | Cancel | Guard | Act. Range | |
| 20[1] | 7~13 | 90 | None | Mid | N/A | |
| Startup | Active | Recovery | Total | Frame Adv. | Meter | |
| 5 | 31 | 38* | 43 | Dependent | 5 | |
|
Chun-Li puts her back into a fireball.
| ||||||
Click to toggle detailed hitbox data.
- Startup:
 |
 |
 |
 |

| |
| Frame Count | 1 | 1 | 1 | 1 | 1 |
| Simplified | 5 | ||||
- Active
- Jab Version:
 |
 |
 |
 |
 |

| |
| Frame Count | 1 | 1 | 1 | 1 | 1 | 1... |
| Simplified | 42 | |||||
- Strong Version:
 |
 |
 |
 |
 |

| |
| Frame Count | 1 | 1 | 1 | 1 | 1 | 1... |
| Simplified | 40 | |||||
- Fierce Version:
 |
 |
 |
 |
 |

| |
| Frame Count | 1 | 1 | 1 | 1 | 1 | 1... |
| Simplified | 38 | |||||
- Total Distance Traveled:
| Jab: 222 pixels after 75 frames | Strong: 176 pixels after 45 frames | Fierce: 150 pixels after 31 frames |
 |
 |

|
Hyakuretsukyaku
Click to toggle detailed hitbox data.
- Startup:
 |

| |
| Frame Count (Short) | 1 | 3 |
| Simplified (Short) | 4 | |
| Frame Count (Forward) | 3 | 4 |
| Simplified (Forward) | 7 | |
| Frame Count (Rh) | 4 | 6 |
| Simplified (Rh) | 10 | |
- Active:
 |
 |
 |

| |
| Frame Count (Short) | 4 | 4 | 4 | 4 |
| Frame Count (Forward) | 2 | 2 | 2 | 2 |
| Frame Count (Rh) | 1 | 1 | 1 | 1 |
 |
 |
 |

| |
| Frame Count (Short) | 4 | 4 | 4 | 4 |
| Frame Count (Forward) | 2 | 2 | 2 | 2 |
| Frame Count (Rh) | 1 | 1 | 1 | 1 |
NOTE: The diagram shown refers to one complete cycle of the Lightning Legs animation. The minimal durations for each are as follows:
- The LK version will make a full cycle once, then will stop at frame 3 of the third cell. (35 frames in total)
- The MK version will make a full cycle once, then will stop at frame 1 of the 7th cell. (29 frames in total)
- The HK version will make 2 full cycles, then stop at the 6th cell. (22 frames in total)
- Recovery:
 |

| |
| Frame Count (Short) | 2 | 2 |
| Simplified (Short) | 4 | |
| Frame Count (Forward) | 4 | 4 |
| Simplified (Forward) | 8 | |
| Frame Count (Rh) | 6 | 6 |
| Simplified (Rh) | 12 | |
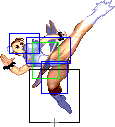
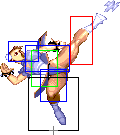
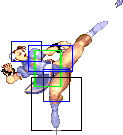
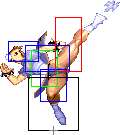
Tenshokyaku
Click to toggle detailed hitbox data.
- Short Version:
 |
 |
 |
 |
 |
 |
 |
 |
 |
| |
| Frame Count | 6 | 4 | 1 | 1 | 2 | 4 | 2 | 2 | 2 | 2 |
| Simplified | 6 | 4 | 4 | 4 | 8 | |||||
 |
 |
 |
 |
 |

| |
| Frame Count | 4 | 3 | 3 | 3 | 24 | 4 |
| Simplified | 4 | 37 | ||||
- Forward Version
 |
 |
 |
 |
 |
 |
 |
 |
 |

| |
| Frame Count | 4 | 4 | 1 | 1 | 2 | 4 | 2 | 2 | 2 | 2 |
| Simplified | 4 | 4 | 4 | 4 | 8 | |||||
 |
 |
 |
 |
 |
| |
| Frame Count | 4 | 2 | 2 | 2 | 2 | 4 |
| Simplified | 4 | 8 | 4 | |||
 |
 |
 |
 |

| |
| Frame Count | 2 | 2 | 3 | 21 | 6 |
| Simplified | 34 | ||||
- Roundhouse Version:
 |
 |
 |
 |
 |
 |
 |
 |
 |

| ||
| Frame Count | 4 | 2 | 2 | 2 | 2 | 4 | 2 | 2 | 2 | 2 | 4 |
| Simplified | 2 | 2 | 4 | 4 | 8 | 4 | |||||
 |
 |
 |
 |
 |
 |
 |
 |

| |
| Frame Count | 2 | 2 | 2 | 2 | 4 | 2 | 2 | 2 | 2 |
| Simplified | 8 | 4 | 8 | ||||||
 |
 |
 |
 |
 |

| |
| Frame Count | 4 | 3 | 3 | 3 | 7 | 7 |
| Simplified | 4 | 23 | ||||
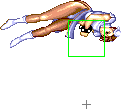
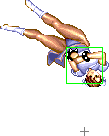
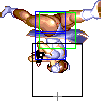
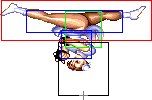
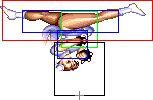
Spinning Bird Kick
| Damage | Dizzy | Dizzy Time | Cancel | Guard | Act. Range | |
|---|---|---|---|---|---|---|
| 14[1] / 12[1] | 7~13 | 90 | None | Mid | N/A | |
| Startup | Active | Recovery | Total | Frame Adv. | Meter | |
| 32* | 2(3)1(5)2(11)2* | 21 | 79 | Dependent | 8 | |
| ||||||
| Damage | Dizzy | Dizzy Time | Cancel | Guard | Act. Range | |
| 16[1] / 14[1] | 7~13 | 90 | None | Mid | N/A | |
| Startup | Active | Recovery | Total | Frame Adv. | Meter | |
| 34* | 3(5)1(3)1(3)1(4)2(8)4* | 23 | 92 | Dependent | 8 | |
| ||||||
| Damage | Dizzy | Dizzy Time | Cancel | Guard | Act. Range | |
| 18[1] / 16[1] | 7~13 | 90 | None | Mid | N/A | |
| Startup | Active | Recovery | Total | Frame Adv. | Meter | |
| 36* | 3(7)2(3)1(3)1(3)1(3)1(3)1(4)1(7)3* | 31* | 114 | Dependent | 8 | |
| ||||||
Click to toggle detailed hitbox data.
Startup:
 |
 |
 |
 |
 |
 |

| ||
| Frame Count | 1 | 4 | 3 | 2 | 3 | 4 | 4 | 2 |
| Simplified | 23 | |||||||
Active/Recovery:
- Short Version
 |
 |
 |
 |
 |
 |
 |
| |
| Frame Count | 4 | 3 | 2 | 2 | 1 | 1 | 1 | 1 |
| Simplified | 15 | |||||||
 |
 |
 |
 |
 |
 |
 |

| |
| Frame Count | 2 | 1 | 2 | 2 | 3 | 4 | 4 | 2 |
| Simplified | 20 | |||||||
 |
 |
 |
 |
 |
 |

| |
| Frame Count | 2 | 3 | 2 | 2 | 3 | 3 | 6 |
| Simplified | 21 | ||||||
- Forward Version
 |
 |
 |
 |
 |
 |
 |

| |
| Frame Count | 4 | 4 | 3 | 3 | 2 | 2 | 1 | 1 |
| Simplified | 4 | 16 | ||||||
 |
 |
 |
 |
 |
 |
 |

| |
| Frame Count | 1 | 1 | 1 | 1 | 1 | 1 | 1 | 1 |
| Simplified | 1 | 7 | ||||||
 |
 |
 |
 |
 |
 |
 |

| |
| Frame Count | 2 | 1 | 1 | 2 | 2 | 3 | 3 | 4 |
| Simplified | 2 | 16 | ||||||

| |
| Frame Count | 2 |
 |
 |
 |
 |
 |
 |

| |
| Frame Count | 2 | 3 | 2 | 2 | 3 | 3 | 6 |
| Simplified | 21 | ||||||
- Roundhouse Version
 |
 |
 |
 |
 |
 |
 |

| |
| Frame Count | 5 | 4 | 4 | 3 | 3 | 2 | 2 | 2 |
| 2 | 25 | |||||||
 |
 |
 |
 |
 |
 |
 |

| |
| Frame Count | 1 | 1 | 1 | 1 | 1 | 1 | 1 | 1 |
| Simplified | 8 | |||||||
 |
 |
 |
 |
 |
 |
 |

| |
| Frame Count | 1 | 1 | 1 | 1 | 1 | 1 | 1 | 1 |
| Simplified | 8 | |||||||
 |
 |
 |
 |
 |
 |
 |

| |
| Frame Count | 1 | 1 | 1 | 1 | 1 | 2 | 1 | 1 |
| Simplified | 9 | |||||||
 |
 |
 |
 |
 |

| |
| Frame Count | 2 | 2 | 3 | 3 | 3 | 3 |
| Simplified | 16 | |||||
 |
 |
 |
 |
 |
 |

| ||
| Frame Count | 2 | 3 | 2 | 2 | 3 | 3 | 4 | 6 |
| Simplified | 25 | |||||||
Aerial Spinning Bird Kick
| Damage | Dizzy | Dizzy Time | Cancel | Guard | Act. Range | |
|---|---|---|---|---|---|---|
| 12[1] | 7~13 | 90 | None | High | N/A | |
| Startup | Active | Recovery | Total | Frame Adv. | Meter | |
| 24* | 3(9)2* | ∞ | 38+∞ | Dependent | 8 | |
|
| ||||||
| Damage | Dizzy | Dizzy Time | Cancel | Guard | Act. Range | |
| 12[1] | 7~13 | 90 | None | High | N/A | |
| Startup | Active | Recovery | Total | Frame Adv. | Meter | |
| 24* | 3(9)2* | ∞ | 38+∞ | Dependent | 8 | |
|
| ||||||
| Damage | Dizzy | Dizzy Time | Cancel | Guard | Act. Range | |
| 12[1] | 7~13 | 90 | None | High | N/A | |
| Startup | Active | Recovery | Total | Frame Adv. | Meter | |
| 21* | 2(6)2* | ∞ | 31+∞ | Dependent | 8 | |
|
The Spinning Bird Kick but in the air.
| ||||||
Click to toggle detailed hitbox data.
Startup:
 |
 |
 |
 |

| |
| Frame Count | 2 | 4 | 3 | 2 | 4 |
| Simplified | 15 | ||||
Active/Recovery:
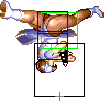 |
 |
 |
 |
 |
 |
 |

| |
| Frame Count (Short) | 3 | 3 | 3 | 3 | 3 | 3 | 3 | 2 |
| Simplified (Short) | 3 | 20 | ||||||
| Frame Count (Forward) | 3 | 3 | 3 | 3 | 3 | 3 | 3 | 2 |
| Simplified (Forward) | 3 | 20 | ||||||
| Frame Count (Rh) | 2 | 2 | 2 | 2 | 2 | 2 | 2 | 2 |
| Simplified (Rh) | 2 | 14 | ||||||
 |
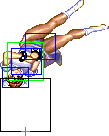 |
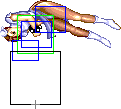 |
 |

| |
| Frame Count | 3 | 2 | 3 | 3 | ∞ |
| Simplified | ∞ | ||||
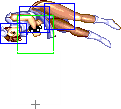
- Landing, partial: (When Chun lands before the last hitting frame)
 |
 |
 |
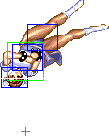 |
 |
 |
 |

| |
| Frame Count | 3 | 3 | 2 | 2 | 3 | 3 | 4 | 5 |
| Simplified | 25 | |||||||
- Landing, complete: (When Chun lands after the last hitting frame)
 |
 |

| |
| Frame Count | 2 | 5 | 3 |
| Simplified | 10 | ||
Super Combo
| Damage | Dizzy | Dizzy Time | Cancel | Guard | Act. Range |
|---|---|---|---|---|---|
| 16[0] x 6 | 0~4 x 6 | 20 x 6 | None | Mid | N/A |
| Startup | Active | Recovery | Total | Frame Adv. | Meter |
| 10 | 4(9)6(6)1(1)1(1)1(1)1 | 15 | 57 | +9/Hard Down | - |
|
Chun-Li goes full power with a non-stop barrage of kicks. Often considered one of if not the best Super Combo in the game.
| |||||
Click to toggle detailed hitbox data.
- Invincible part:
 |
 |
 |
 |
 |

| |
| Frame Count | 1 + [18] + 1 | 2 | 2 | 2 | 2 | 4 |
| Simplified | 10 | 4 | ||||
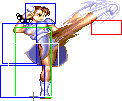
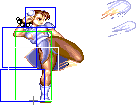
- Non-invincible part:
 |
 |
 |
 |
 |

| |
| Frame Count | 1 | 2 | 2 | 2 | 2 | 6 |
| Simplified | 9 | 6 | ||||
 |
 |
 |
 |
 |

| |
| Frame Count | 3 | 3 | 1 | 1 | 1 | 1 |
| Simplified | 6 | 1 | 1 | 1 | 1 | |
 |
 |
 |
 |
 |

| |
| Frame Count | 1 | 1 | 1 | 1 | 6 | 7 |
| Simplified | 1 | 1 | 1 | 14 | ||
Misc Animations
Jump Animations
- Neutral Jump:
 |
 |
 |
 |
 |
 |
 |
 |
 |
 |

| |
| Frame Count | 2 | 1 | 12 | 5 | 4 | 8 | 4 | 5 | 7 | 1 | 7* |
| Simplified | 2 | 1 | 45 | 1 | 7* | ||||||
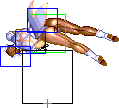
- Back Jump:
 |
 |
 |
 |
 |
 |
 |
 |
 |
 |
 |
 |

| |
| Frame Count | 2 | 1 | 10 | 6 | 5 | 4 | 3 | 4 | 5 | 6 | 3 | 1 | 7* |
| Simplified | 2 | 1 | 46 | 1 | 7* | ||||||||
- Forward Jump:
 |
 |
 |
 |
 |
 |
 |
 |
 |
 |
 |
 |

| |
| Frame Count | 2 | 1 | 10 | 6 | 5 | 4 | 3 | 4 | 5 | 6 | 1+ | 1 | 7* |
| Simplified | 2 | 1 | 44+ | 1 | 7* | ||||||||
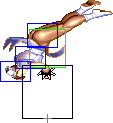
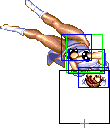
Chun has a considerably fast prejump. In contrast, she has a huge jump arc that's easy to react to. This is especially true against characters with DP moves; Ryu for instance can punish her with his DP most of the time.
Chun-Li, just like Claw, has the ability to do wall jumps. That's why the Forward Jump has a '+' on the final frame of the aerial jumping part: that animation will have longer duration in case it's a wall jump.
The landing recovery has a special property which allows it to be canceled into certain actions. At the first landing frame, you can perform throws (including command throws), and on the second landing frame, you can start another jump, attack with a normal or special move, or block. Blocking not being until the second landing frame, as well as hitbox-hurtbox interactions having priority over throwbox-throw hurtbox is why sweeps work as anti airs in this game.
Things are different when jumping over your opponent, however. In that situation it's possible to walk back/forward, to jump again or to even block on the first landing frame! Strangely, if a throw is timed on the first landing frame of a jump that crosses over, a throwbox will never come out, even though that input will result in a normal coming out 2 frames later (like it normally would). Anyway, being able to block on the first landing frame can help a little bit on some safe jump crossup setups, or maybe in other situations as well if your character has a huge jump arc.
